When you click on links to various merchants on this site and make a purchase, this can result in this site earning a commission. Affiliate programs and affiliations include, but are not limited to, the eBay Partner Network.
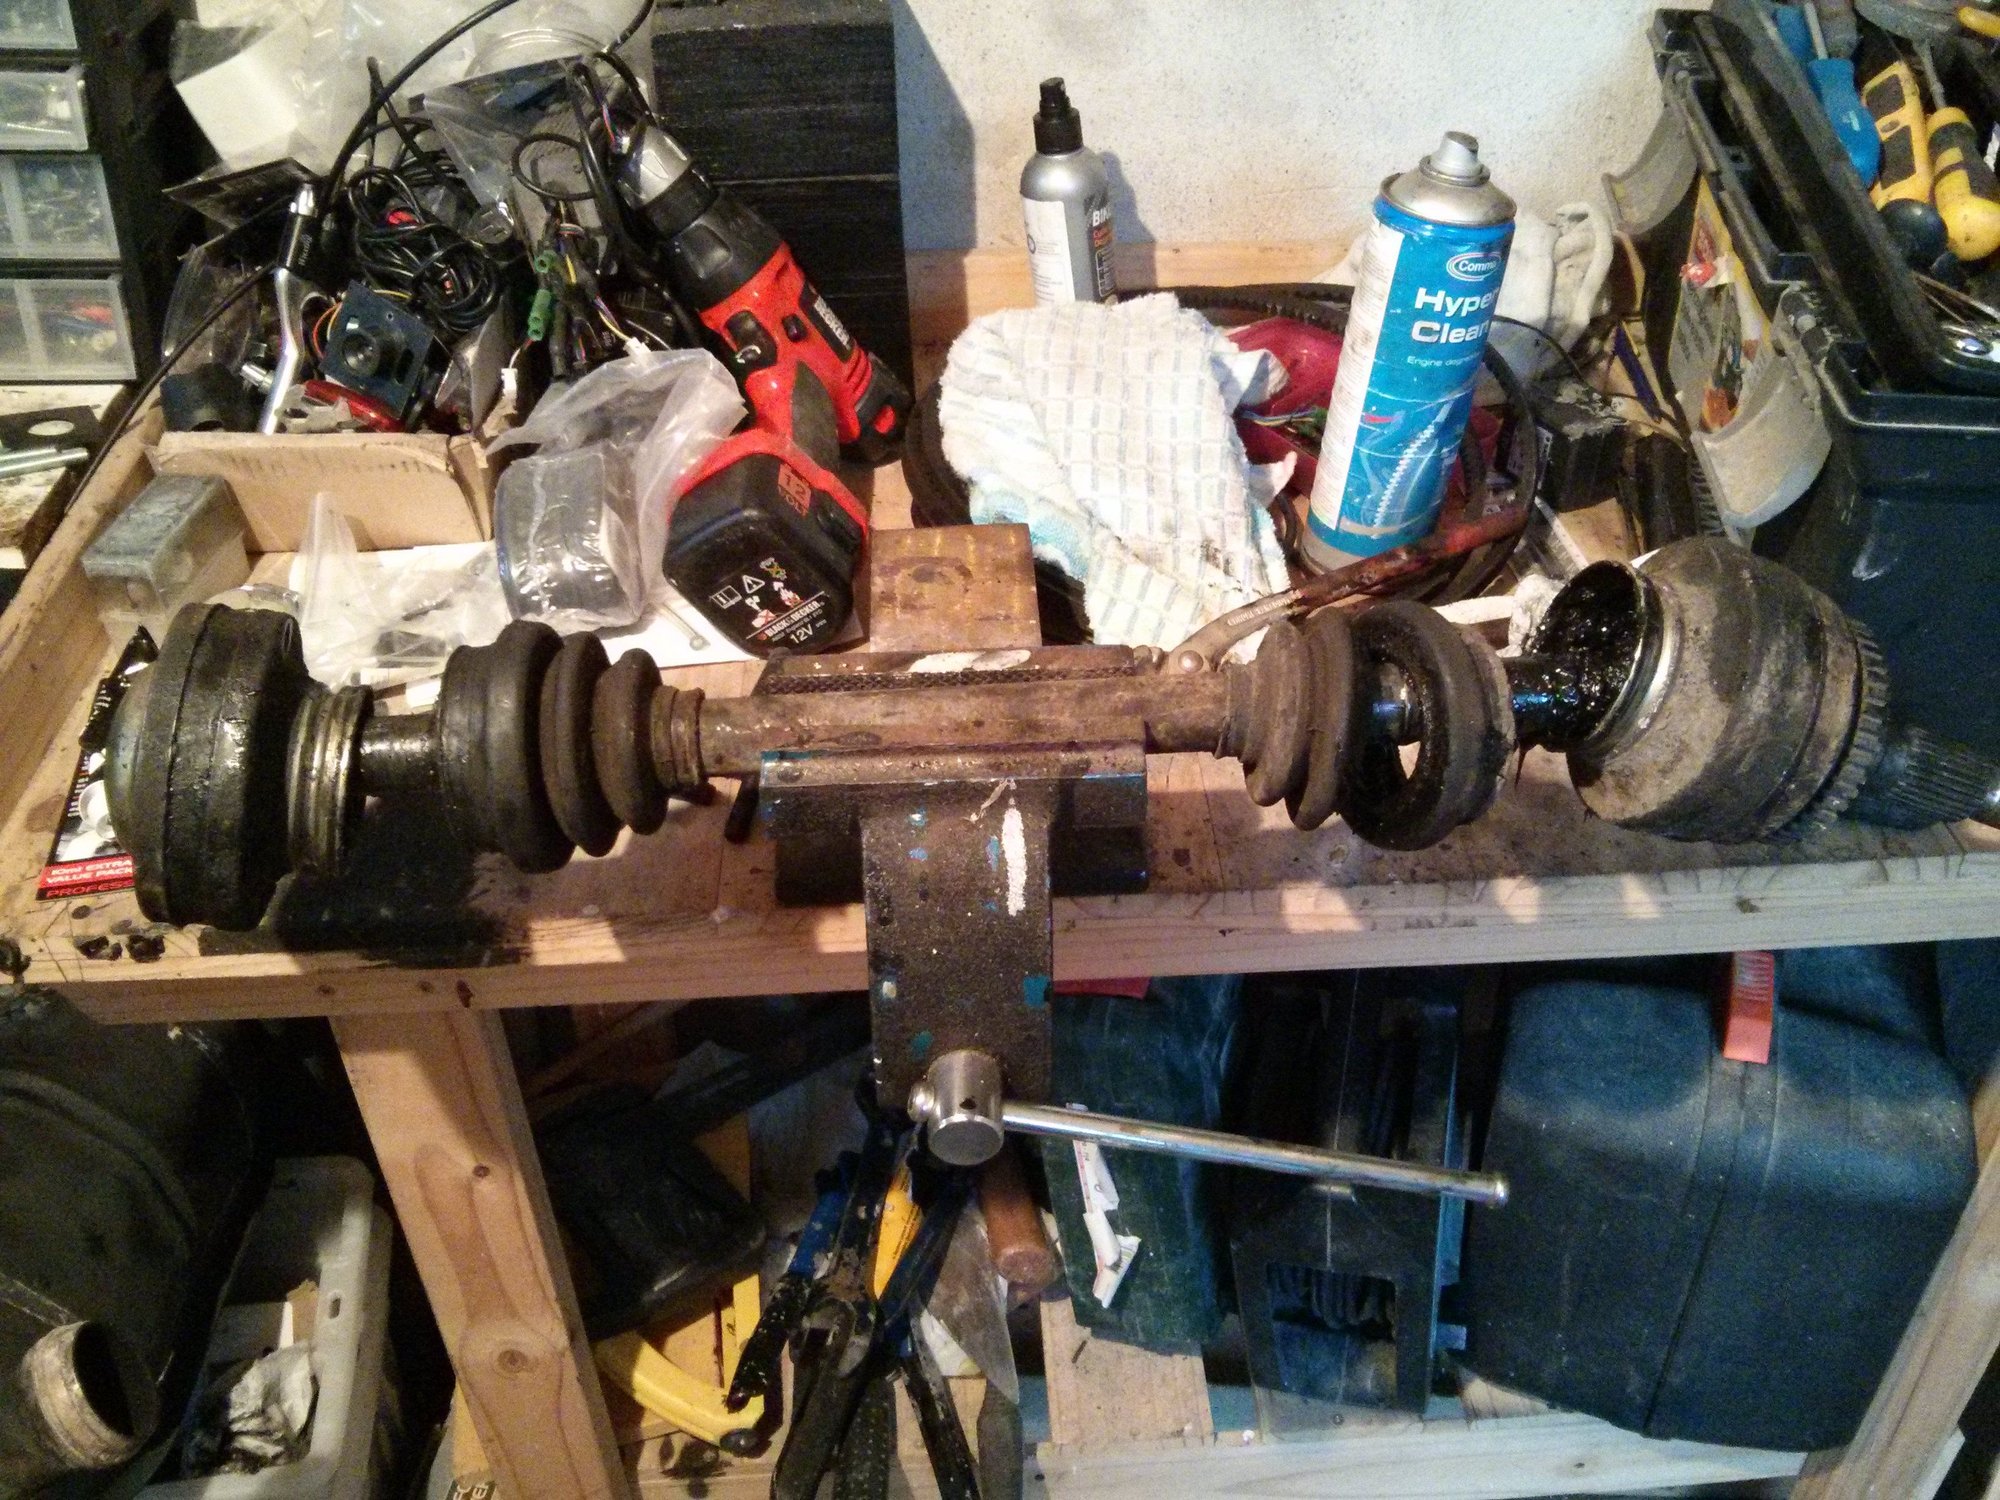
I'm trying to change my cv boot and read Dwayne's writeup and researched the forum and thought I had it figured, but my diff end looks different and seems to be a preassembled enclosure that means I can't get access to the joint at either end. I don't want to force it apart if it's not supposed to separate.
Dwayne's one had a gasket and no cap on the end like mine?
Please don't tell me I have a version that isn't serviceable ;-)
the sheet metal cap comes off so you can access the circlip....pay attention to the orientation of the inner and outer cv segments and which side goes to the inside of the shaft..
before you take it apart you should read the WSM as it details how and whys the parts fit together.
NOTE if you dont follow the guidance you can assemble the CV joint in such a way as to have it bind when its under load,
this can cause vibration and or total failure of the joint.
Based on the pictures you might consider just replacing both half shafts with fresh units some careful shopping may show you the way
Otherwise with the 3rd man employed,
use a hammer and screwdriver to tap the edges of the cap off ,
dont tap too hard as grease will go flying,
clean the shaft,
so when you slide the new boot onto the end CV joint it stays clean
Everything looked good with no significant wear, I cleaned everything and have new grease in the wheel end with a new boot. Reassembling the transmission joint and understand how to put it together based on the WSM and Dwayne, but neither mention if the cage needs to be orientated in a certain way. It has a larger inner lip on one side, does it matter which way this faces.
Everything looked good with no significant wear, I cleaned everything and have new grease in the wheel end with a new boot. Reassembling the transmission joint and understand how to put it together based on the WSM and Dwayne, but neither mention if the cage needs to be orientated in a certain way. It has a larger inner lip on one side, does it matter which way this faces.
Cheers,
Gary
Gary,
The joint has to go back the way it came out - I think Stan clearly articulated this in his post to you. You might take a look at the thread I did on this last year at:
Whether or not this will help you remains to be seen.
The problem I had was that I could not reconcile clearly between the faces as I saw them and what it showed in the WSM so I was uber careful to ensure the hub went back on the same way it came off.
If you cannot resolve this then I am not sure what to recommend for you as it becomes a 50/50 crap shoot. Get it wrong and the joint may fail quickly [or so I understand].
I may have some photos that could possibly help that I did not post at the time. I will take a look in that regard.
Got it all done, sorry if I came across as if I hadn't done my homework. The centre cage does have two different profiles on either edge which isn't easy to take note of before its removed.
Got it all done, sorry if I came across as if I hadn't done my homework. The centre cage does have two different profiles on either edge which isn't easy to take note of before its removed.
Gary,
Does your shaft have something different to mine [S4/GTS type]? I note the inner clamp on the gearbox flange end has what looks to be a strange bump on it with the clamp in what looks to be a strange location. On mine either end looked the same.
I had the same questions regarding cage orientation. Thread here.
Greg suggests it really doesn't matter which way it goes in post 11.
I came to the conclusion that the larger bevel should be on the inside to give the shaft the max clearance, if it doesn't matter thend I can stop over thinking it.
Does your shaft have something different to mine [S4/GTS type]? I note the inner clamp on the gearbox flange end has what looks to be a strange bump on it with the clamp in what looks to be a strange location. On mine either end looked the same.
Presumably you are doing both sides?
Rgds
Fred
The boot kit for the outer came with the car and I got the inner from another source, the outer boot has an extra bulge after the clamp position for some reason. I thought about cutting it off but figured if there's enough clearance once installed I'll just leave it.
I will do the other side shortly, just needed to get the failed boot replaced this weekend as it failed an inspection.

 04-22-2016, 05:21 PM