When you click on links to various merchants on this site and make a purchase, this can result in this site earning a commission. Affiliate programs and affiliations include, but are not limited to, the eBay Partner Network.
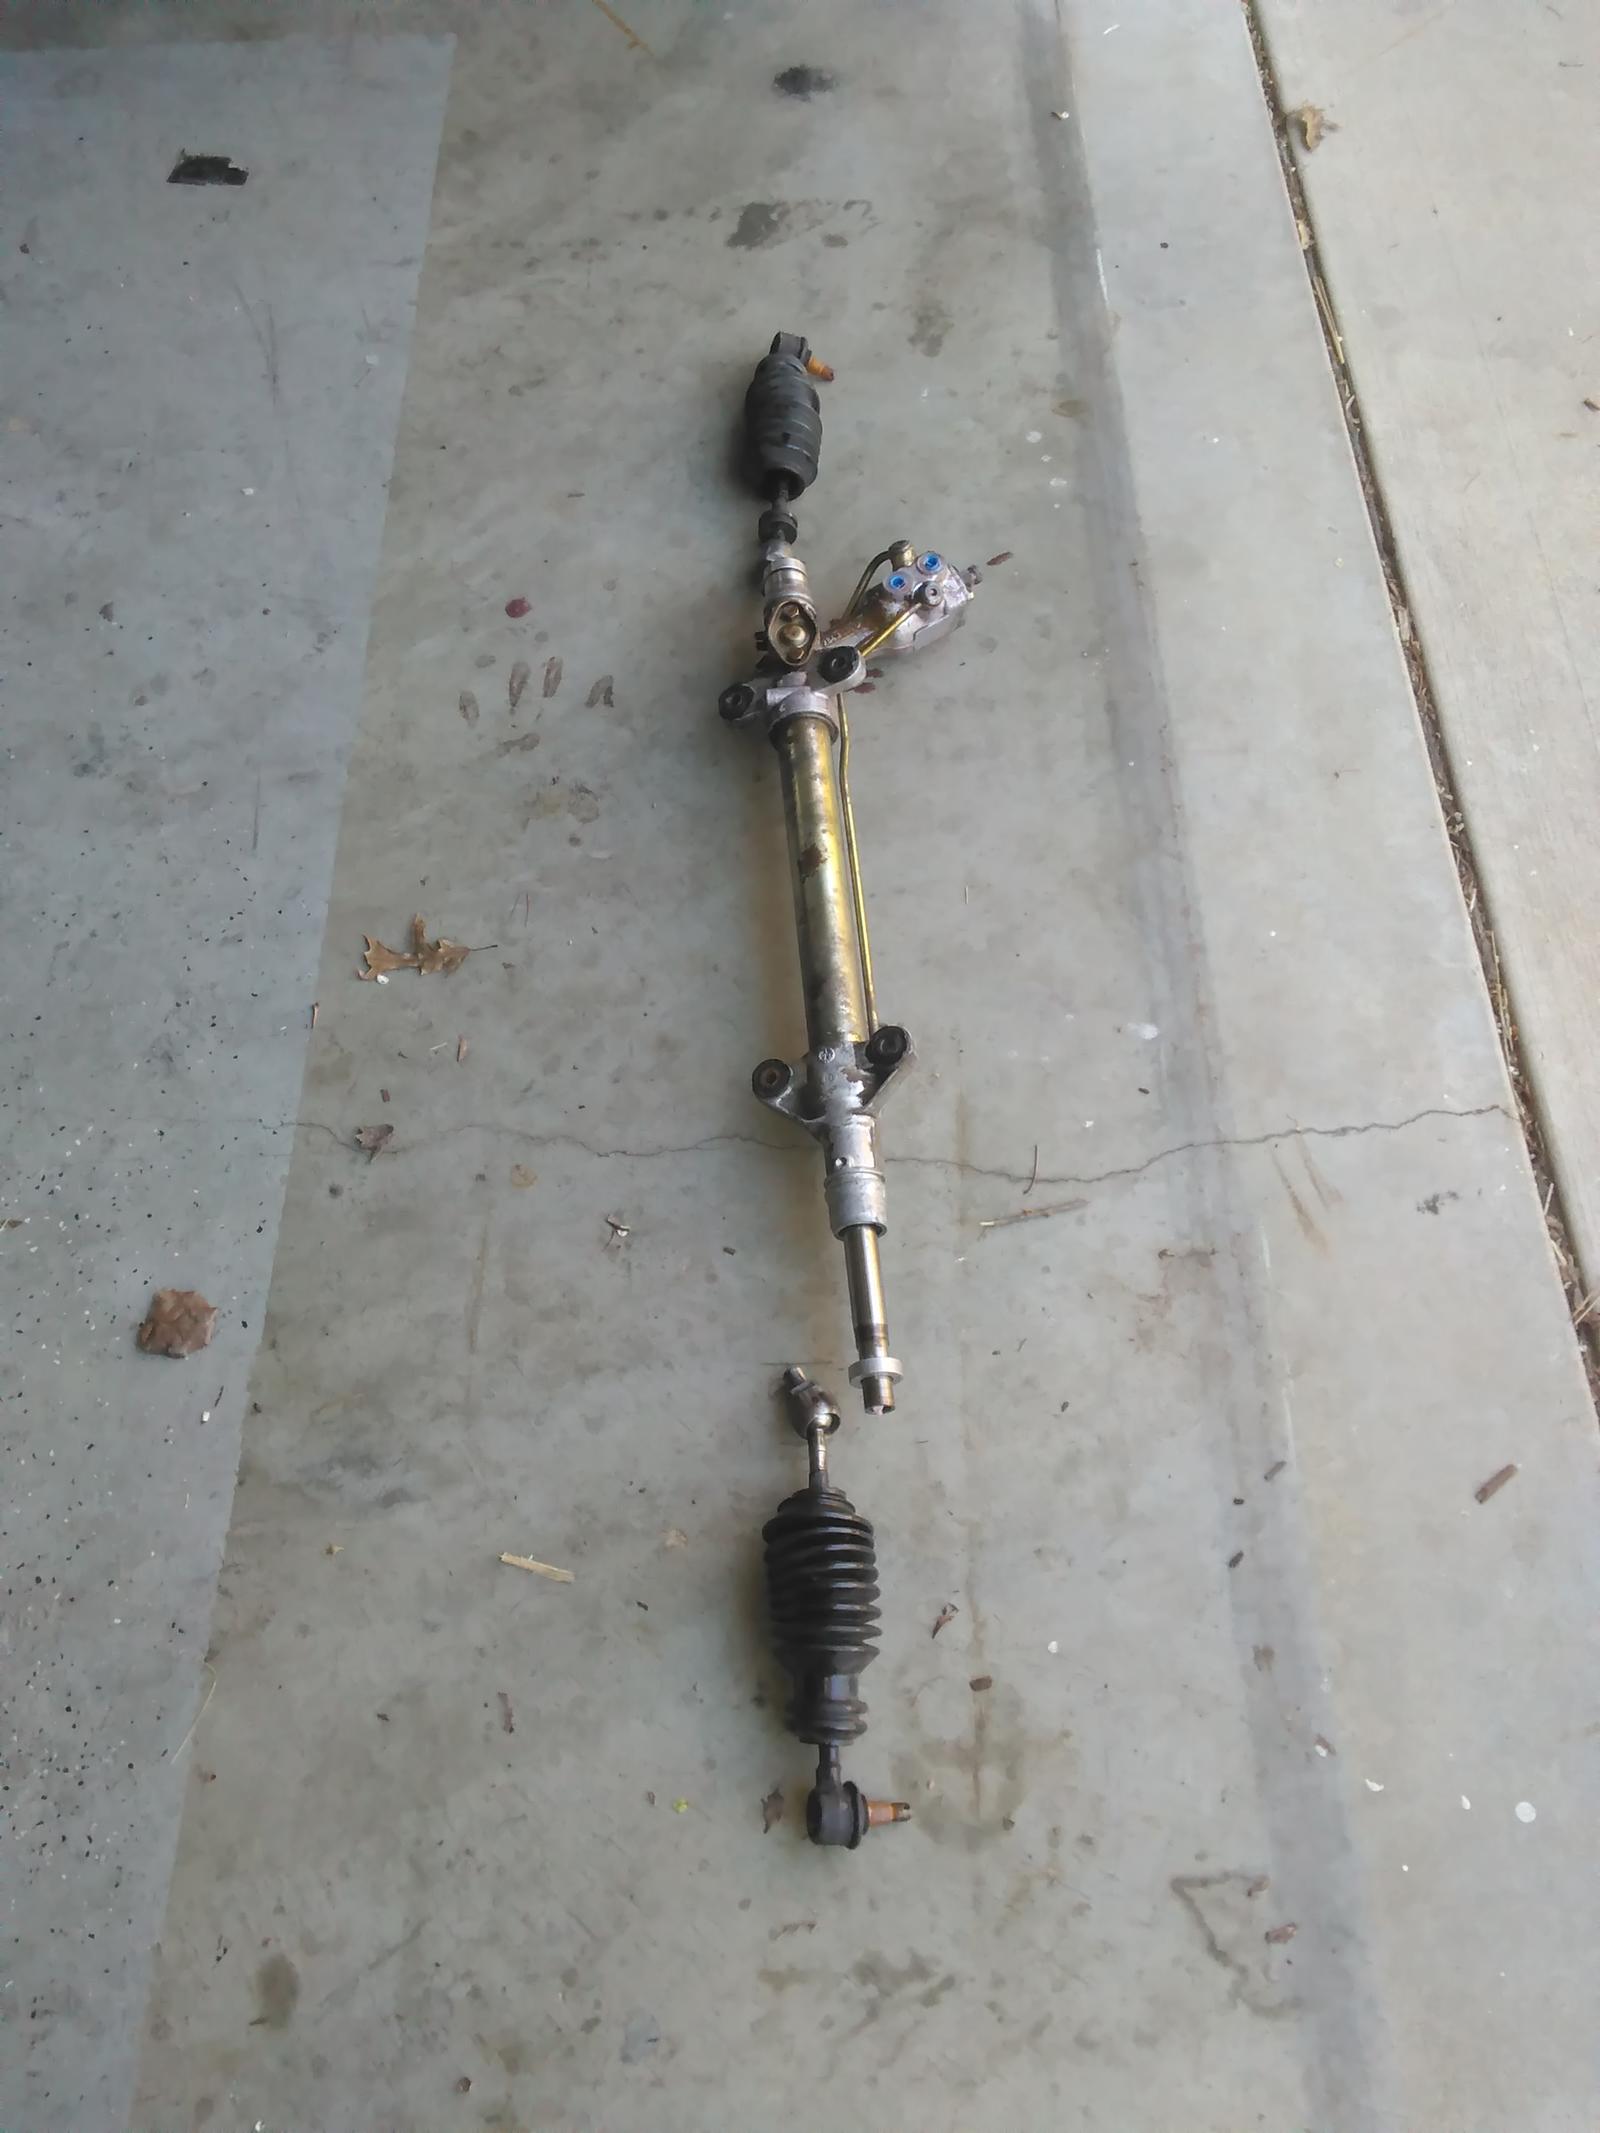
So I've been putting this one off for awhile. But, at some point I wanted to strip down and rebuild a rack. Mostly to learn how the system works, but also to be able to say I did one. I will be appreciative of any and all feedback as I muck through this one.
I found a spare rack, in reasonably good shape, off an 87. My intention is to rebuild the spare and then swap it with the current one on the 86.5. I also ordered the rebuild kit from Roger. In an old thread I remember him saying the kit was heavy on gaskets and light on directions Seems accurate so far.
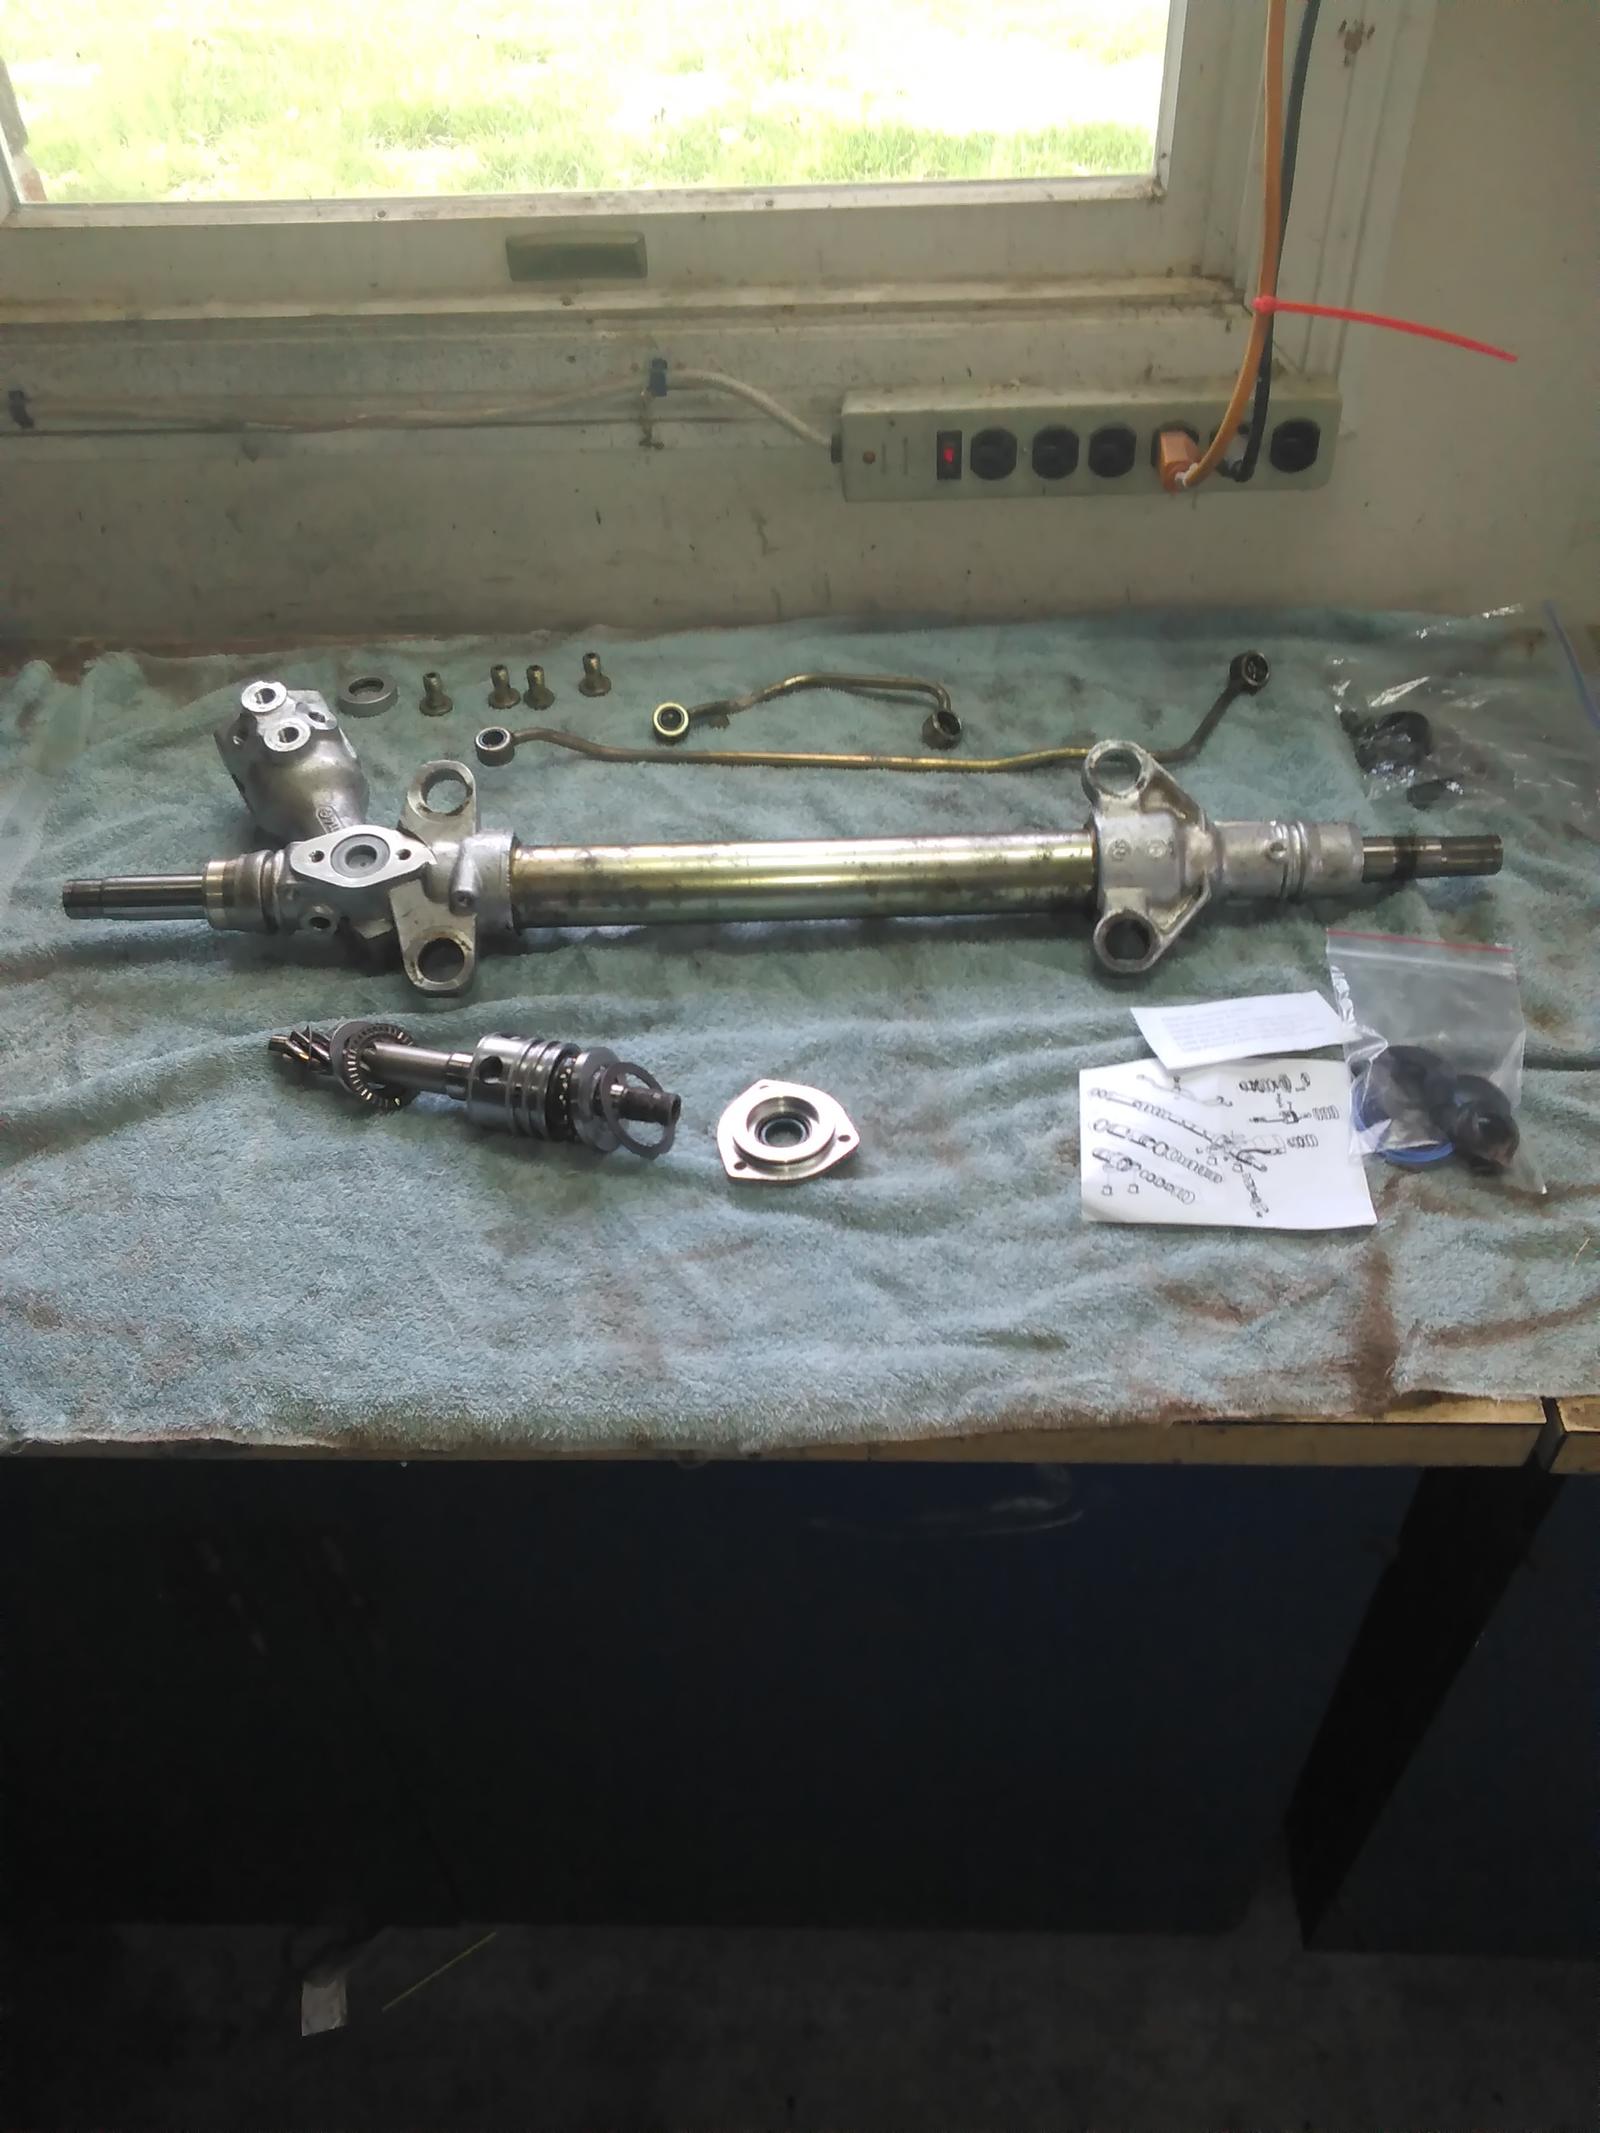
I guess my first question for the collective is what's is the easiest way to dismantle the rest without crumpling something. Is there a spanner wrench to get the aluminum rack ends off the central tube? Or should I use a punch until it gives? Also, in the forth picture, how does one get that "cup" out that sits inside the pinion housing that was under the spring? Or is it necessary to do so?
Old threads weren't real specific on the dismantle side of things.
For the ends, there's the right tool and there's using a punch. Search should find how-to's and posts.
Check everything carefully before reassembly. Move the rod to both ends (or out) to check for corrosion.
FWIW - You're probably doing this right as a trial. I tried it and had repeated issues before resolving it was something best done by getting a box delivered.
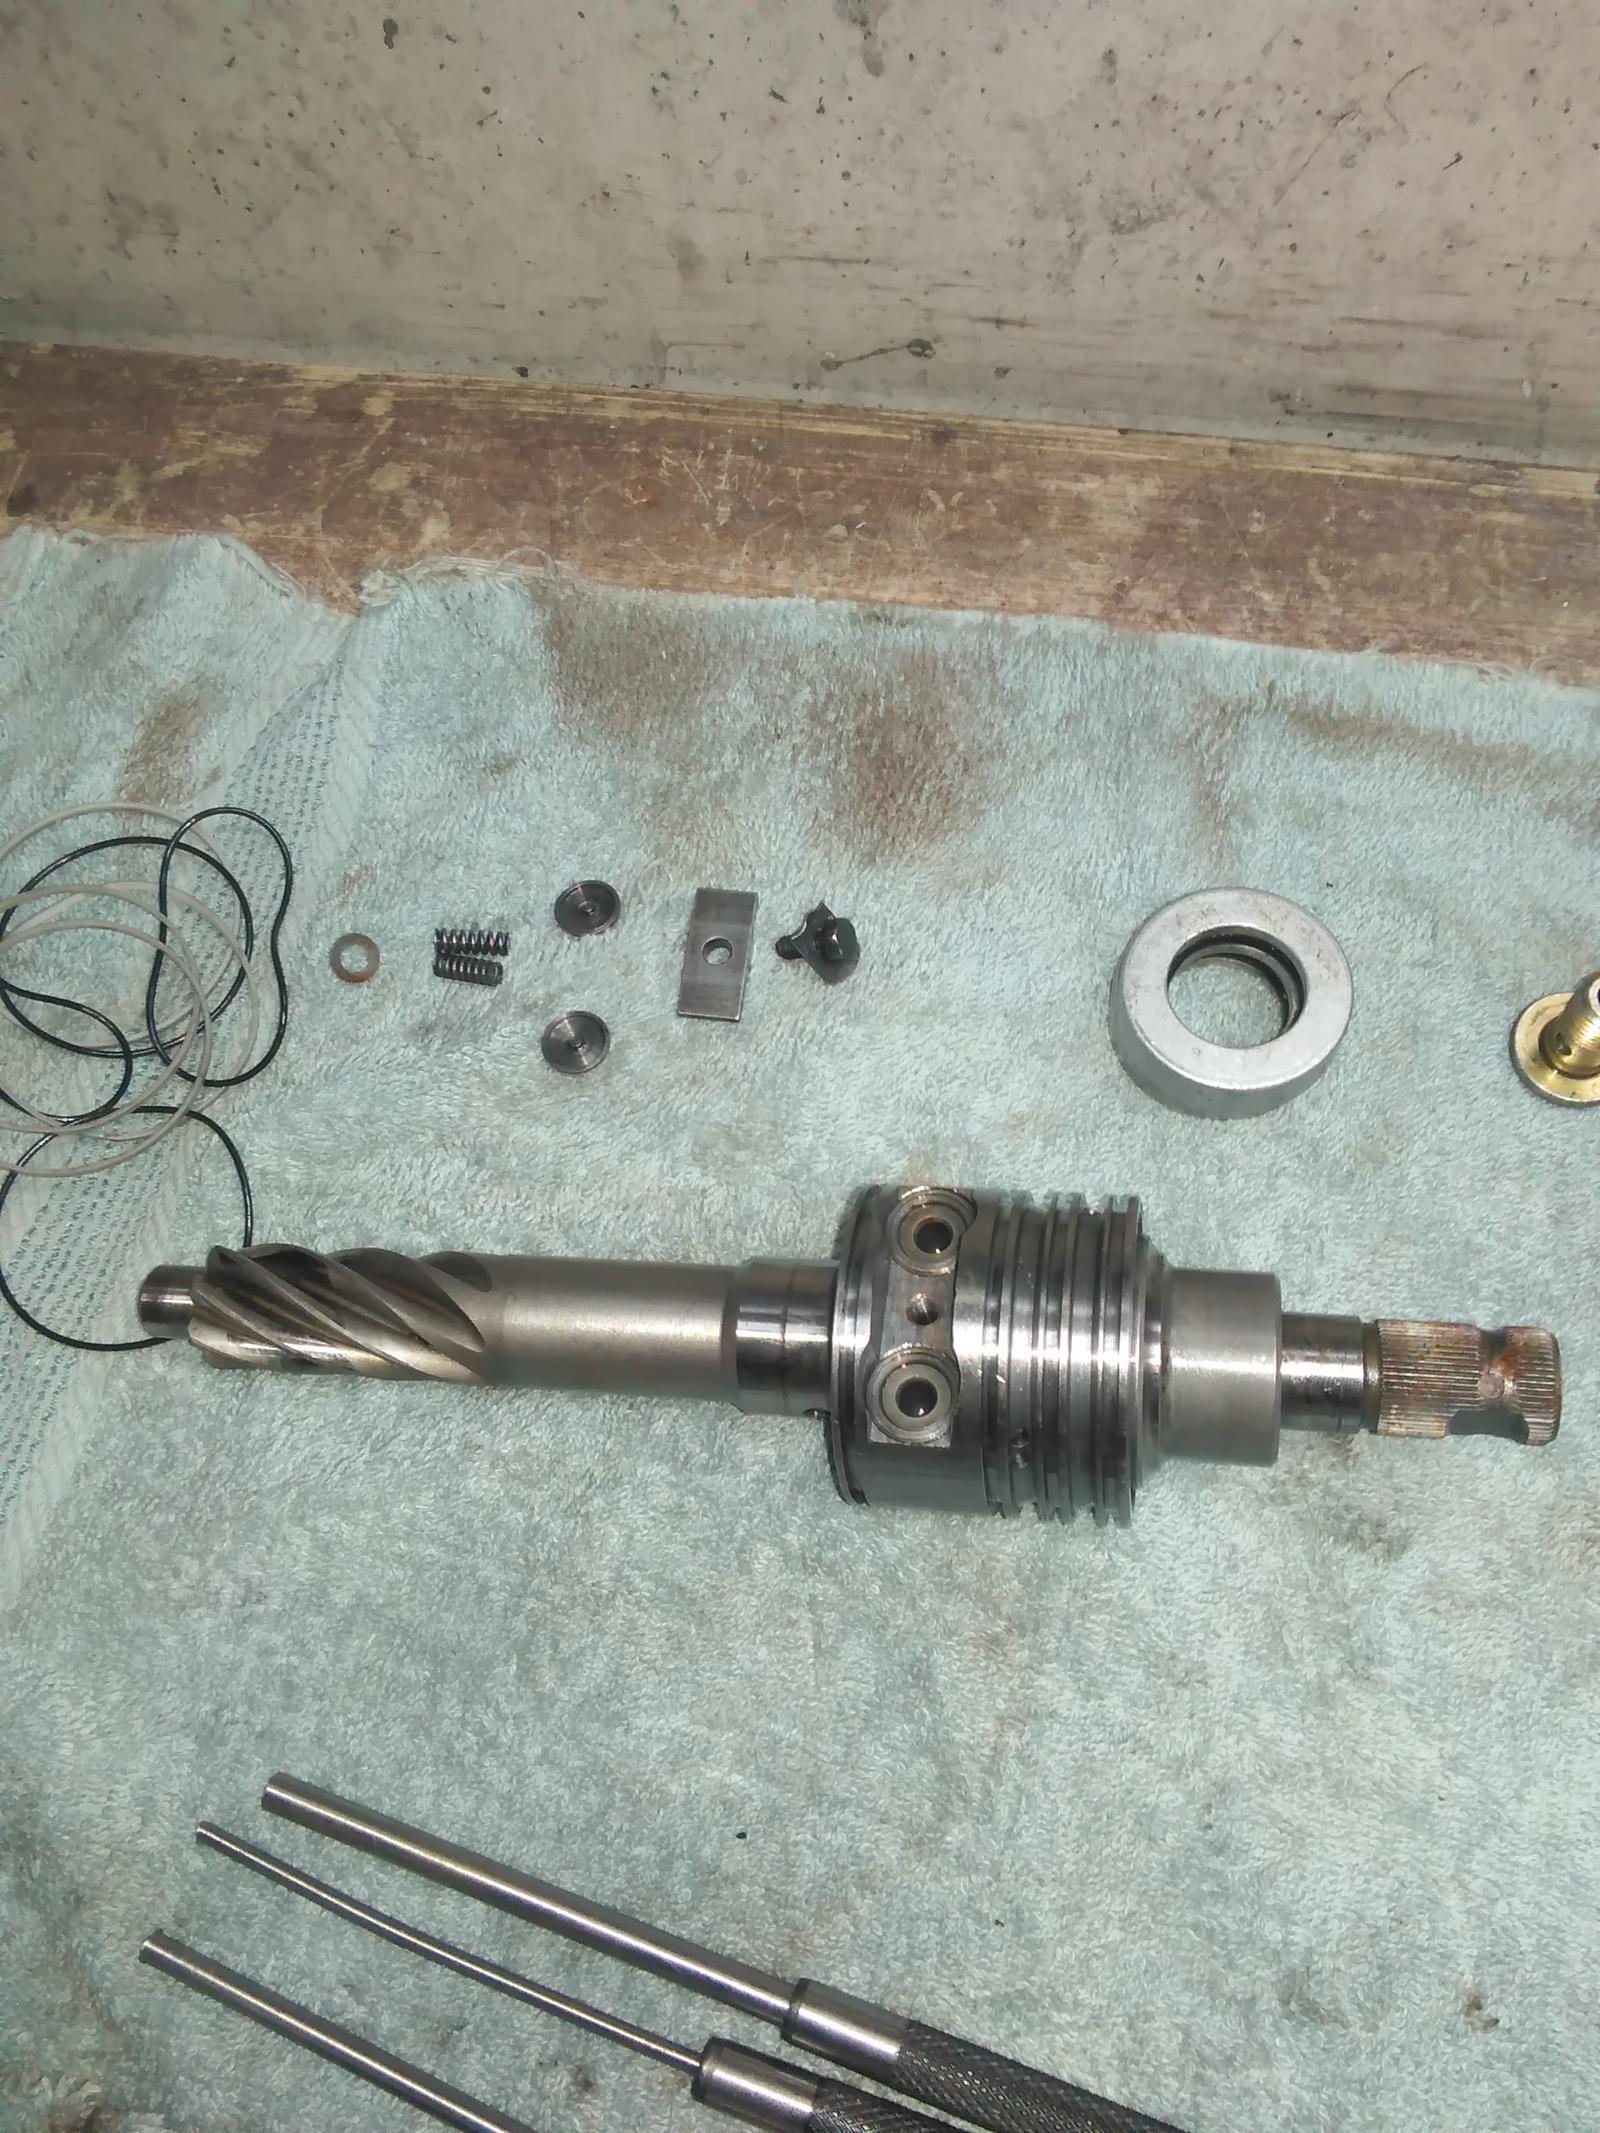
The spool valve rarely has any problems and is very sensitive to dirt, so I would start by re-assembling that before you forget where the parts go.
You have a camera, take pictures at each step of disassembly, and save them for the reassembly. Digital film is cheap, you might need them. The 944 rack is similar and there are some disassembly threads around, try Googling "944 rack disassembly".
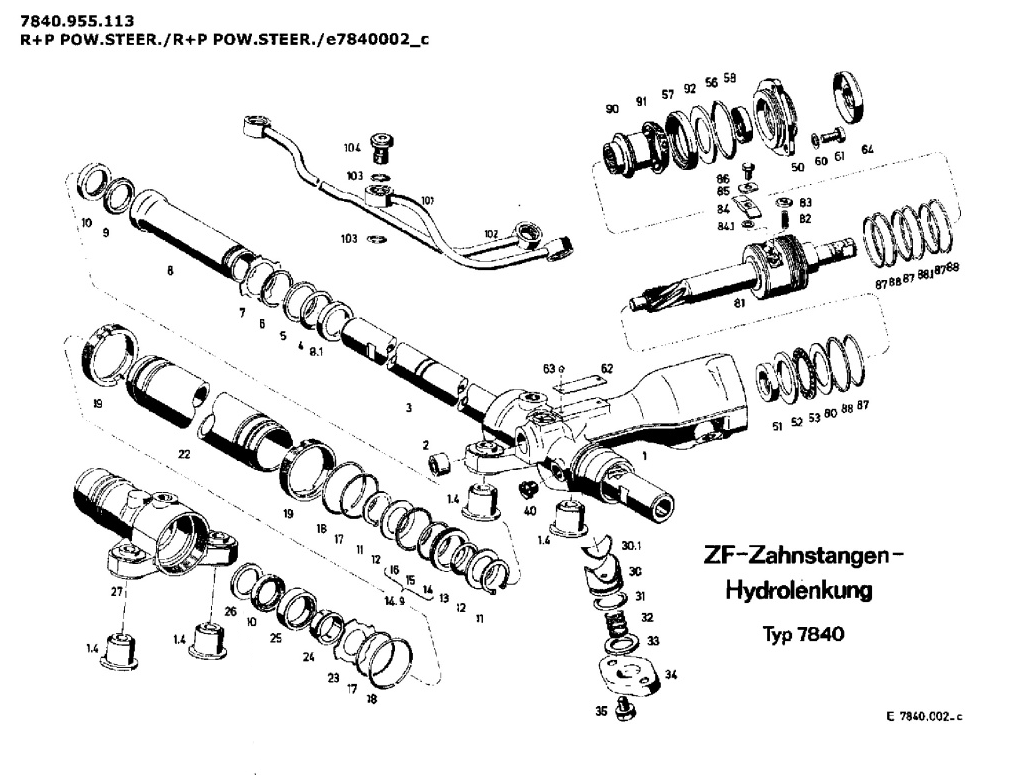
The diagram below has been posted before, and may help. The critical items in my view are the two internal bushings, #24 and 30.1. Neither are included in most of the kits available here in the states, but are included in kits from Europe. If your kit does not include those bushings then I would get back with your vendor, or look for a European source.
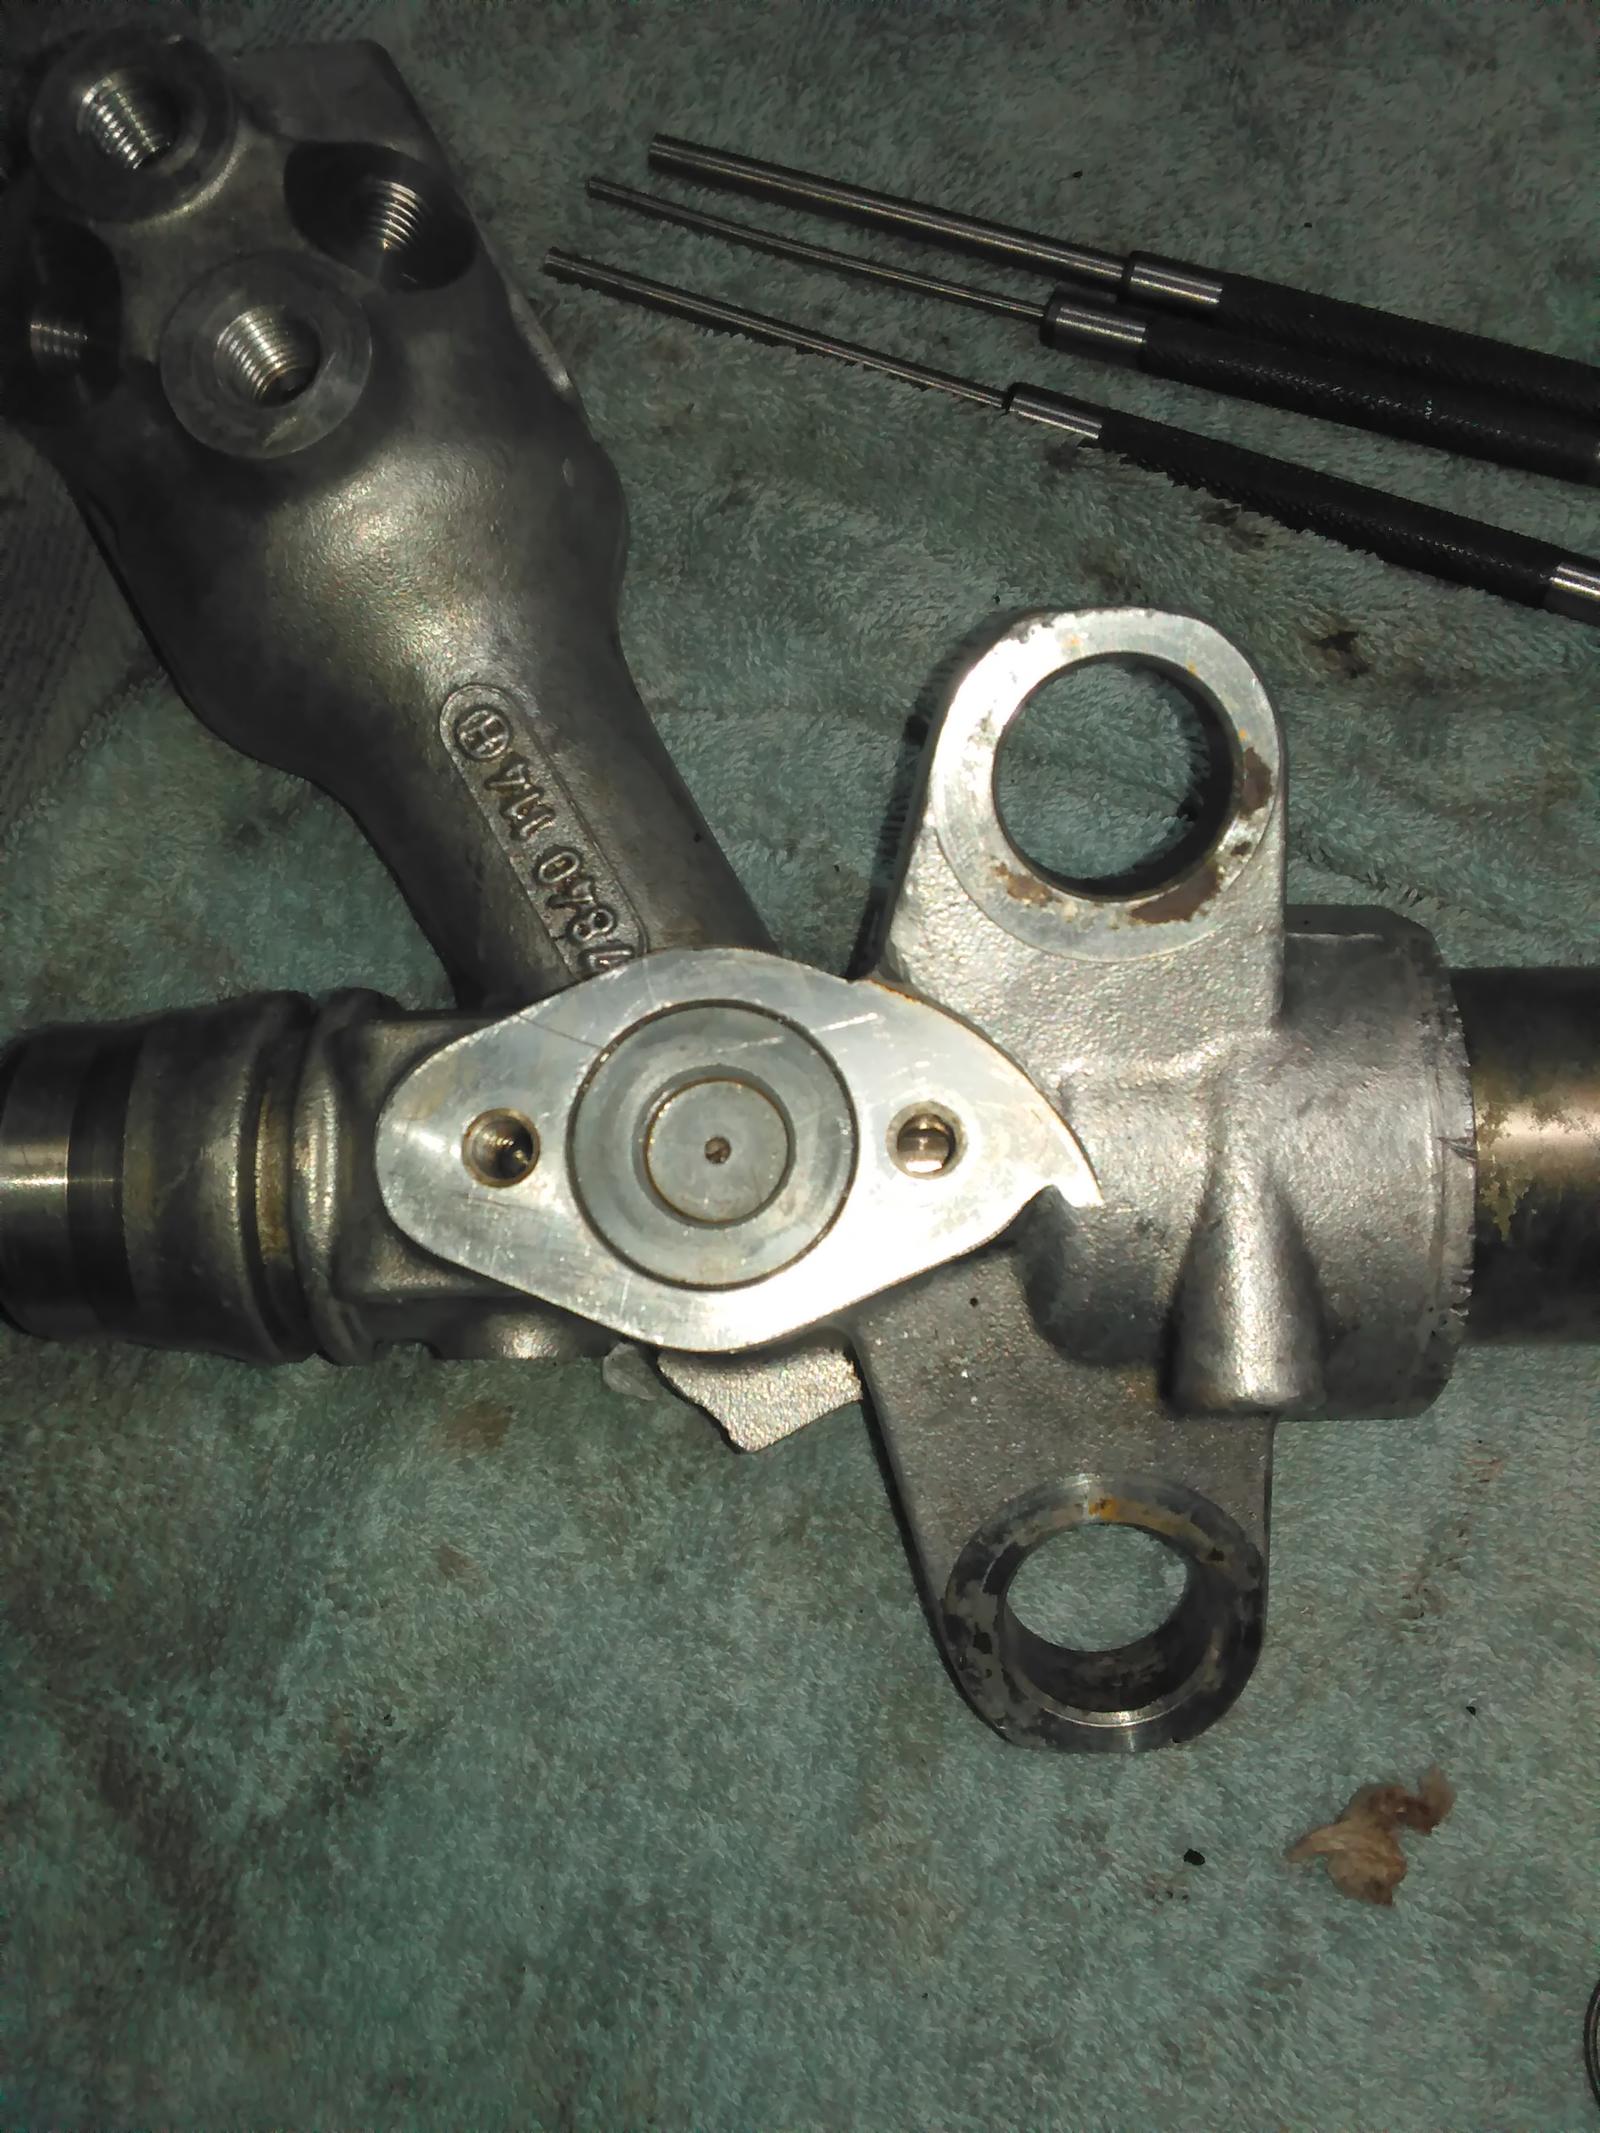
Bushing #24 is the passenger-side plastic bushing, which fits inside the steel bushing 25. #24 is a wear item, if worn it should be replaced. It is a simple part and could be fabricated from e.g. Delrin with a small lathe.
Part# 30.1 is a plastic "saddle" which, in conjunction with piston 30, spacer 33 and the rack and pinion teeth, forms the driver-side bushing. This part is critical to set the rack-pinion engagement and minimize free play on the driver's side.
As saddle 30.1 wears the gear mesh gets sloppy and the rack rod starts wobbling around, which causes the seals to leak and the steering to get vague. Replacement of saddle 30.1 is one option, another is to use a thicker spacer for part# 33. I believe that spacer 33 was factory-selected depending on production tolerances, and can also be selected to compensate for wear of the saddle 30.1. That's what I do, machine thicker spacers out of aluminum on my little toy lathe to set the clearance from spacer 33 to cap 34 to 0.1mm (0.004"). I would hope that is what the rebuilders do also, but I have seen some where the spacer 33 was just whacked with a center-punch to tighten it up... which doesn't last of course.
Steering is a critical component, and there are mistakes that can be easily made which will cause the steering to bind up. This is unlikely but would be a bad thing. So do your own research, compare notes here, and work carefully. Cleanliness is also critical, especially for that spool valve. And assemble that screw (86) to the proper torque with red Loctite, having that come loose would be one of the bad things.
One of my "12 steps" is not to post after midnight, but I must say this thread may be one of the most intuitive that I have read.
Hope it doesn't end up as a envelope full of rack parts on flea bay .
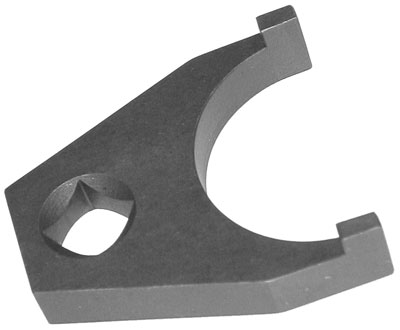
I shoulda mentioned to inspect the white, circular bushings that are on the ends of the rack. That's part #24 above. These creep and allow the rod to move radially. This results in the big end of the tie rod moving fore/aft and wheels moving excessively.
I understand that real ZF kits contain the parts but aftermarket kits don't. Right or wrong?
Thanks Jim and Glen, and Otis.
I got the spanner on order. It's all out there in front of the world now, so I gotta do it right.
I bagged and tagged to eliminate dirt. Many pics taken. I did watch the 944 rack video the other day. It's kinda reminds me a little malformed limb, next to our flagship, lol.
Ok, when the time comes: all seals and rings with Dextron III ATF. Then pinion/rack gear gets grease?
Make sure you clock the rack when you reinstall the pinion. I put my pinion in and was surprised how difficult the rack was to remove, remembered that I had not clocked it checked it and I was about 90 off, put it in clocked and it was much smoother.
I can't figure out why that should be the case, but it was my observation. There are many comments about the different efforts required for rebuilt racks, some of it may be clocking.
Thanks Jim and Glen, and Otis.
I got the spanner on order. It's all out there in front of the world now, so I gotta do it right.
I bagged and tagged to eliminate dirt. Many pics taken. I did watch the 944 rack video the other day. It's kinda reminds me a little malformed limb, next to our flagship, lol.
Ok, when the time comes: all seals and rings with Dextron III ATF. Then pinion/rack gear gets grease?
Use special grease for automatic transmission assembly....way better than just ATF. Summit Racing has it under part number AT-201.
And not just any grease for the rack and pinion gears. They live a very high pressure life and the incorrect grease will ruin them. Use factory Optimal high pressure grease...part number 000.043.024.00.
Careful when re-assembling the cups on the spool valve....they are a bit tough to get exactly in the proper position...and are ruined with the smallest nick or scratch. The shims are very critical, they stick on the spool valve and on the plate. Make absolute sure you have them all and none get lost in the cleaning process.
I bought one of the Sir Tools BMW spanners some time ago. It did not quite fit around the central tube. I had to relieve the throat a bit in order to get it to fit properly, but it worked well after that.
There was some uncertainty about torque: I could not find a specification and don't remember what I used... the breakaway torque was pretty high as I recall.
FWIW, I clamped the assembly onto the table of my milling machine for disassembly and assembly as I did not want to put vise jaw marks on the end castings and it was easier to keep the mounting flanges lined up for the final tightening.
The rebuild seems fine so far - at least it has not started leaking... yet...
GL with the rebuild.
I did mine a last month or so..Not hard. How do you eat an elephant???
Just keep everything clean and go slow with pix along the way..
I had hear that in spite of best procedures, that it was reported to be about a 50% success rate.
Mine has only been bench tested, but no leaks..
The Bump stop o rings are not included in any kit that I have seen and the part number was unknown..I specked them out and ordered off ebay..They look to be an exact match..
Here are the dimensions and the source.
Take your time have a beer.
.
Tell ya what, send me you address and I will mail you a couple tomorrow.
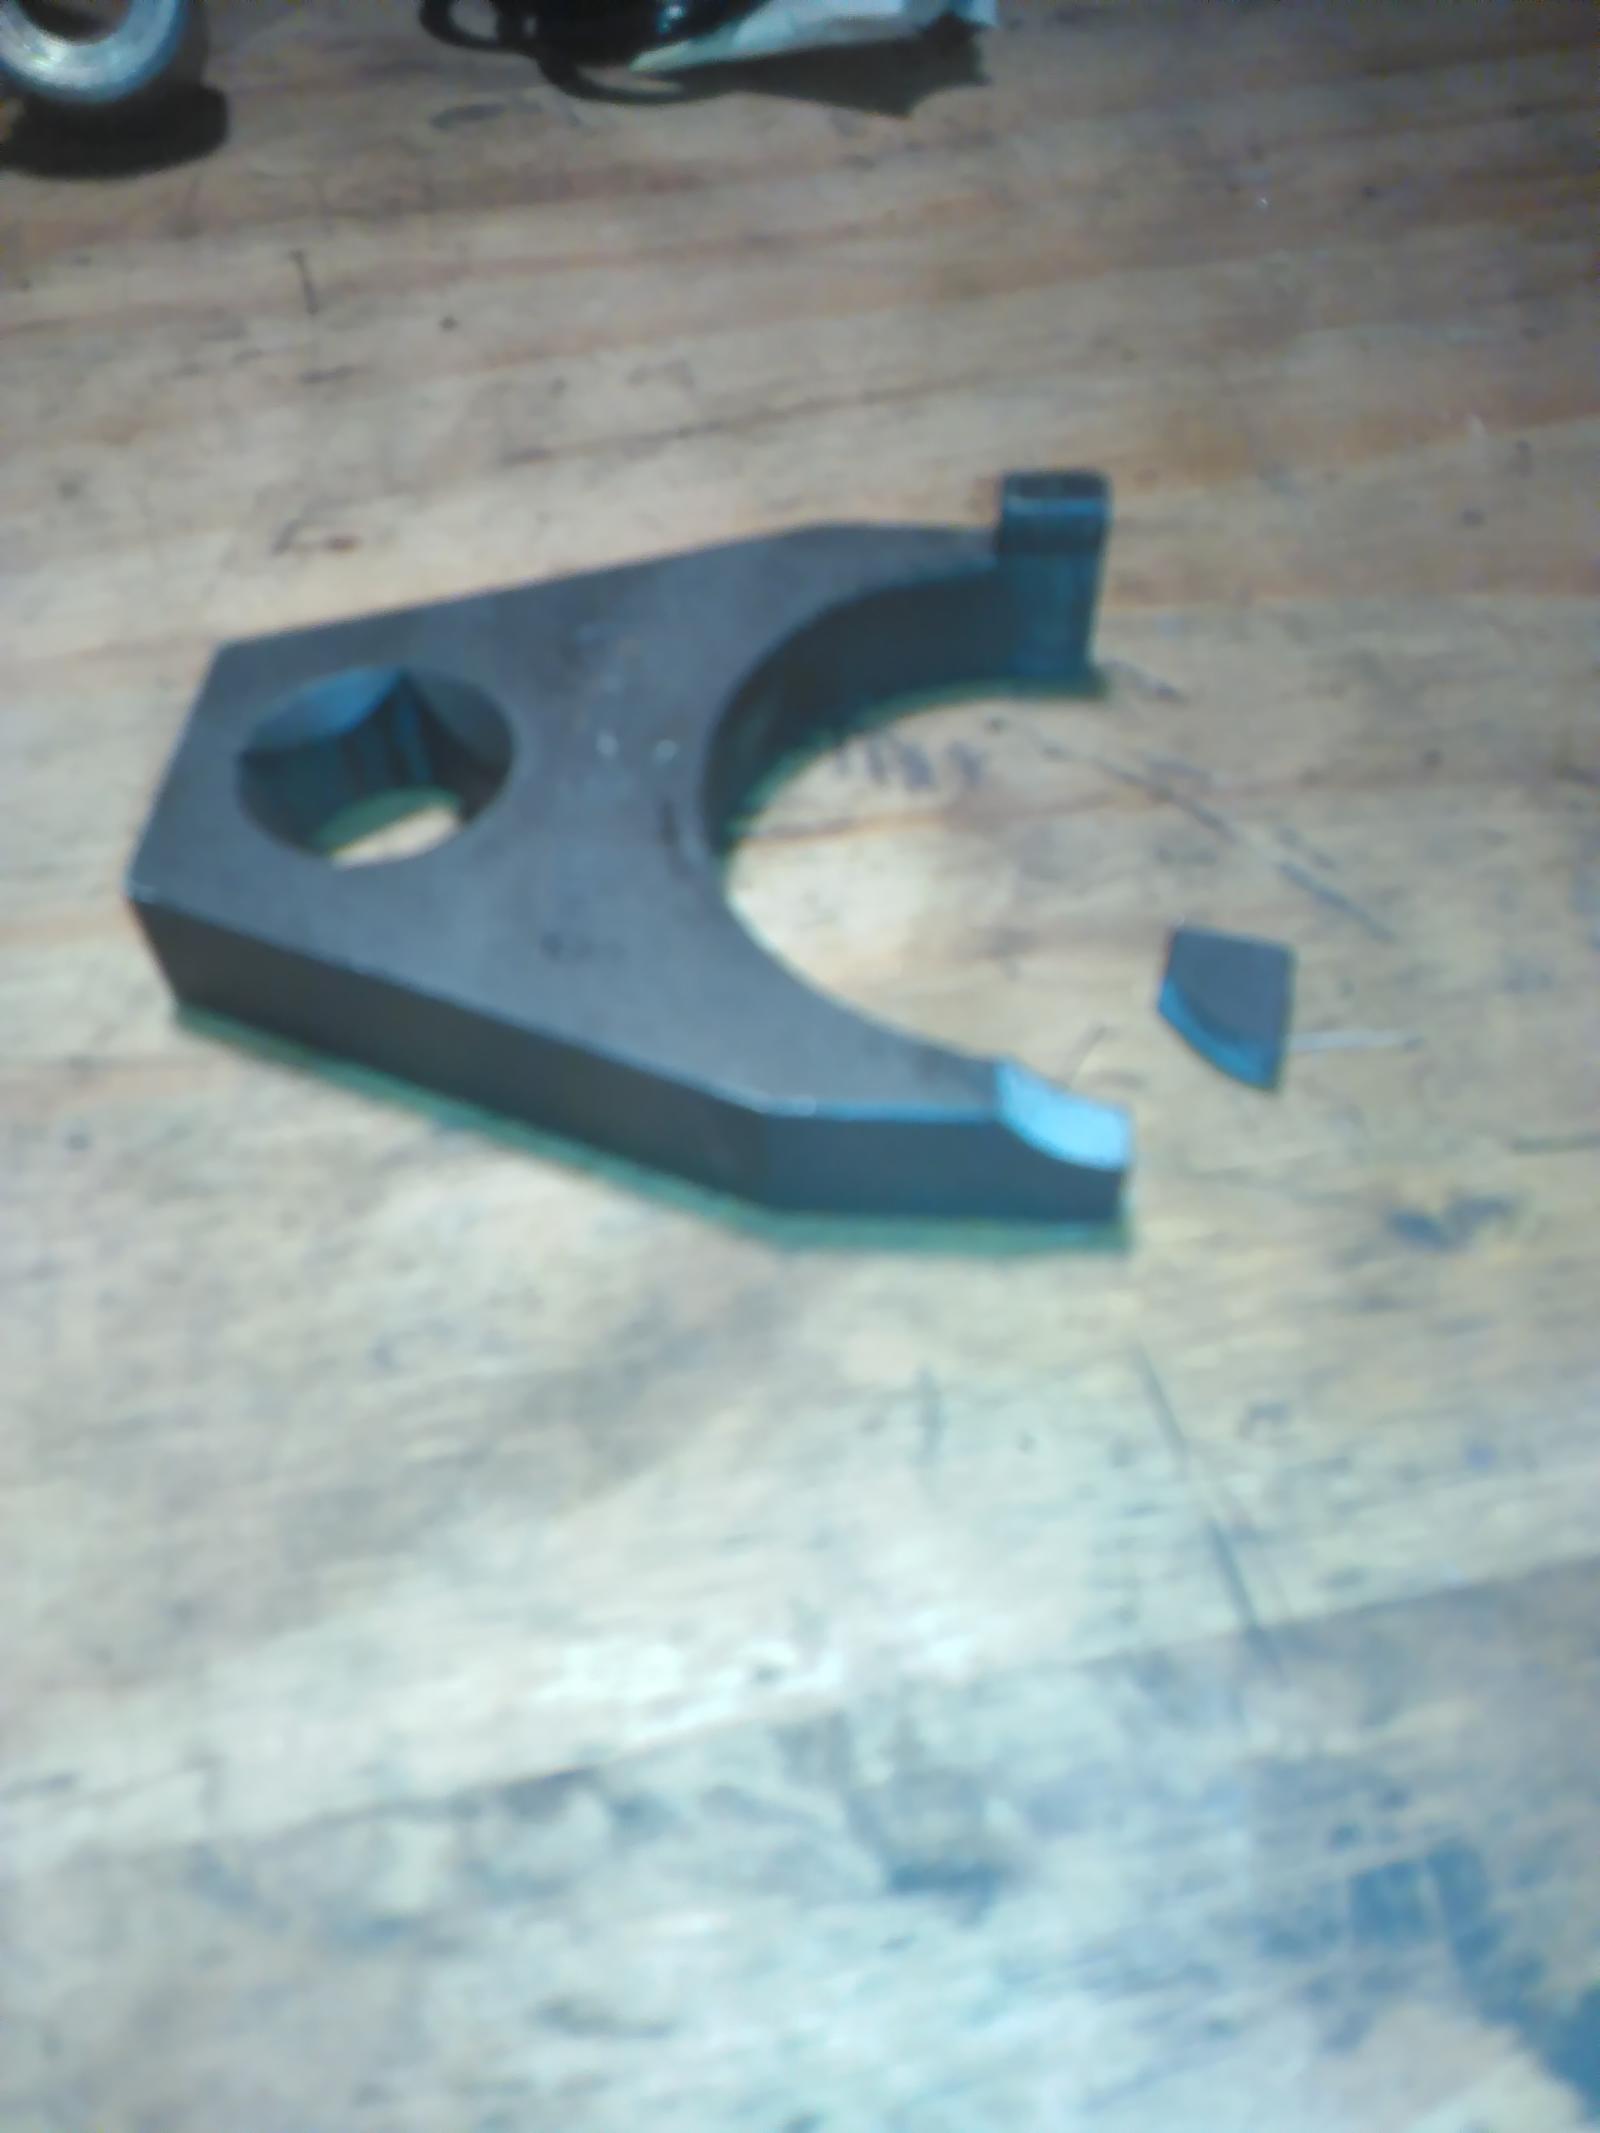
Got my 50 buck spanner (with standard shipping) from Pelican today. Got out in the garage and it broke within 30 seconds. I'd like to think I'm this strong but, wtf.
This was by hand with an 18 inch breaker bar.
I guess we will see what the Pelican boys say. Supposedly, there is no returns allowed on tools.
On a more positive note I have new bump stop O-rings from John, thank you sir.


 04-08-2016, 11:08 PM

 Seems accurate so far.