When you click on links to various merchants on this site and make a purchase, this can result in this site earning a commission. Affiliate programs and affiliations include, but are not limited to, the eBay Partner Network.
I have a serious fuel leaking problem between the In tank fuel filter and (probably) the In tank fuel filter sealing ring.
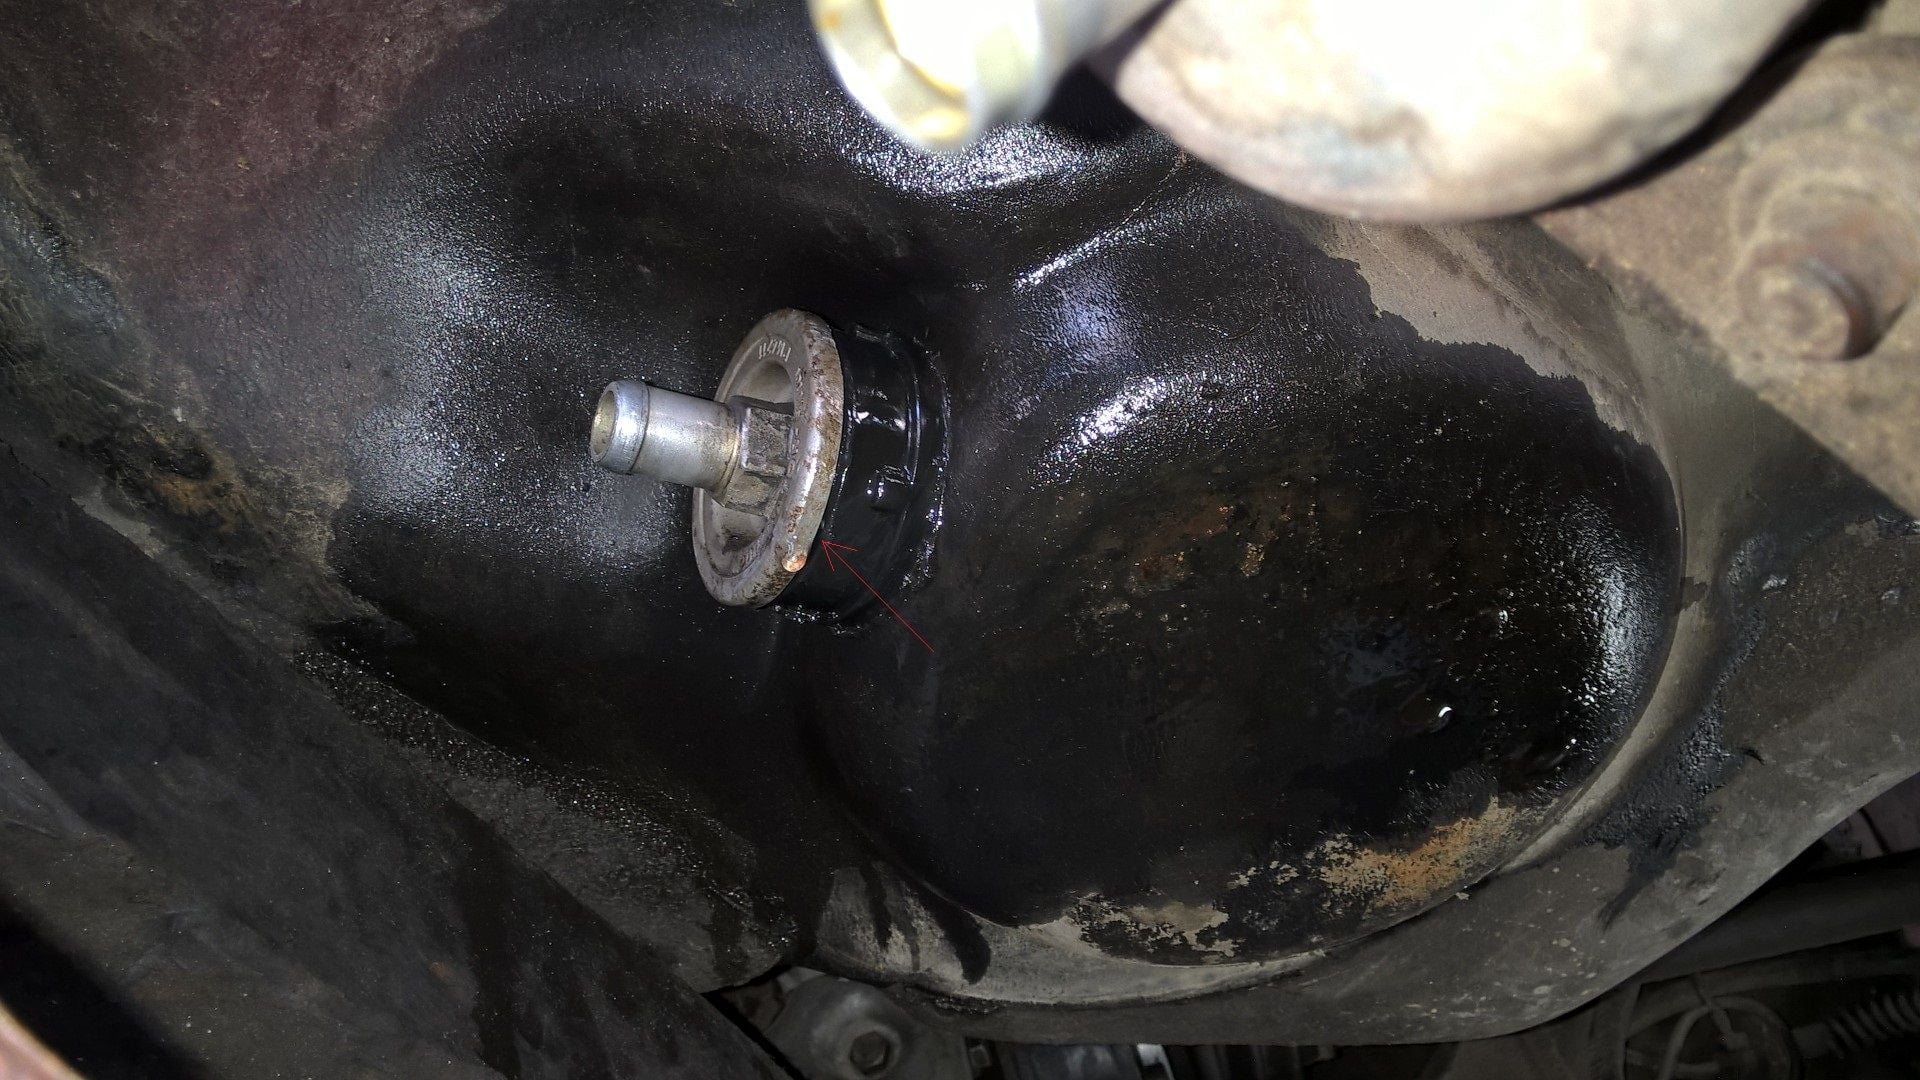
At first it looked simple since there was no cracks in the tank and the leak was clearly from that area - see picture.
However, when I tried to open the In tank fuel filter it refused to open and when it finally did, it seems that the thread was destroyed because the In tank fuel filter is just spinning without going out
As far as I know, inside the tank, there is a metal ring with a thread on which the In tank fuel filter fits.
What probably had happened is that that ring has disconnected from the plastic and now spinning freely with the In tank fuel filter without any way to pull it out.
I am really frustrated and I would really like to hear your advise on this.
I could think of several options:
1. Pull it out by force (or by heating the plastic fuel tank) then to create the same metal ring with a new thread and put it back to the tank. This doesnt seems as a good solution since who know what will happen when I use some force to pull it out and I have no idea how to "glue" it back in.
2. Put a small o ring between the In tank fuel filter and the fuel tank (see red arrow). This will be the "replacement" In tank fuel filter sealing ring. Then, I will take a rubber hose that is ressistant to fuel and using 2 narrow bands, put it on the In tank fuel filter metal ring and the fuel tank hose. So basically it will cover the gap between the In tank fuel filter and the fuel tank hose and the o ring.
BTDT. Stripped the threaded insert out of the plastic. Being in somewhat of a hurry to get mobile again, I covered the exterior with PC11 gas proof epoxy, and it worked fine for several years, never leaked a drop. I later replaced the tank with a newer one that was clean, and fitted a new in tank filter with some anti seize on the thread, and used minimal torque to tighten it - only just enough to stop it leaking.
Later I pulled the threaded insert out of the old tank to see what was involved. I gave the tank to another guy with the same problem, and he refitted the threaded ring by cleaning up the damaged area, coating with PC11, and pulling the ring into place from the inside with some wire, and this fixed the problem completely.
jp 83 Euro S AT 56k
Unfortunately another quirk of the 928 design. Quite possible someone inserted the filter too tight, seized threads-whatever. When undoing the filter the stiction puts up too much resistance and the undoing torque overcomes the little plastic nodes that lock the ring in place which as I understand is a push fit.
If you remove the tank you may be able to force the ring out and then do something with it to secure it in place. There are sealants that can resist petroleum and if you are able to reinsert with a sealant then the periphery of the boss can be secured with a Jubilee clip to compress the assembly. Nothing to be lost in trying providing it does not leak like a sieve and catch fire.
I think there are some threads about how to go about this in more detail.
Thanks Fred! I am just worried about how to force the ring out without harming the plastic around it. It would be best to heat the area but this will probably cause the plastic to loose the original round shape so placing the ring back will be difficult...hope I will find a solution.
Thanks Fred! I am just worried about how to force the ring out without harming the plastic around it. It would be best to heat the area but this will probably cause the plastic to loose the original round shape so placing the ring back will be difficult...hope I will find a solution.
Once the ring has spun in-situ I doubt you can do any more damage than has been done already given it is unusable until some kind of credible fix has been achieved.
If the ring is spinning then there is no sensible way I can think of to break that stiction but maybe others know better. If my supposition is correct then the only way forward would be to rig something that permits you to apply sufficient axial force to pull the assembly out of the tank boss.
Remember someone built this tank and could only insert the ring from one of two directions-logically from the outside but possible through the level gauge hatch? Maybe heat is used to soften the plastic during insertion?
Spin the filter with a good 1/2" impact and a socket. The fast acceleration usually separates the two.
The tank is originally cast around the insert. The insert is not glued in afterwards.
I've never repaired one. The liability/moral issues from it leaking in someone's garage and catching fire while a family sleeps is too huge to even contemplate.
I've installed lots of used tanks, however the supply has gotten amazingly low and the condition continues to deteriorate as more years pass. I now keep new tanks in inventory. Expensive, but allows me to sleep without worry.
Without doubt Greg has the wisest solution if the piggy bank allows. I suppose nowadays a new tank will be the wrong side of $1k and if one can last 30 years arguably a reasonable investment.
Not sure I would want to attempt a repair of this kind but if I did, the first thing I would be looking for would be a compound that provides good adhesive characteristics, good sealing characteristics, good chemical resistance properties when exposed to gasoline and good thermal resistance characteristics- i.e. the ability to resist differential expansion and vibrations. On top of that I would contact the makers technical department, explain what I wanted to do and get their take on whether they think their product is up to it.
I dare say there will be a number of "suitable products" on the market but if NASA can stick tiles on the Space Shuttle in the 70's I would expect today's more advanced technology to have something suitable for the application.
With all adhesive techniques cleanliness/appropriate surface preparation is all important to success and you must not contaminate the joint with inappropriate solvents- again the manufacturer should be able to advise you on this.
Finally, the joint must be designed to give optimal chances of success- a tight push fit may seem the best way to secure such but it also reduces the thickness of the contact surfaces and may not allow optimal joint strength. I would also try to introduce a grub screw or two to help resist shear.
Some years ago I did quite a bit of work with a USA company that makes very high pressure GRE piping systems for the oil industry. The oil and gas we were going to produce had a lot of nasties in it and normal carbon steel piping systems had no chance and the only metal system that would resist corrosion was Inconel 625 which at the time was about 13 times more expensive than high strength carbon steels [such steels are not cheap to start with]. This piping system relied on adhesives to join it/seal it- to this day not 1 joint has failed in the systems we started installing 20 years ago.
Trust the above food for thought/discussion/development.
Greg and Fred - thank you very much for your advice!
I am not from the US so shipping costs along with the fuel tank costs will be very high. Saying that, I totally agree that safety comes first so if I see that there is no choice, I will defiantly try to find a new one.
Thanks guys!
For those of us following along, is it practical advice to use a hose clamp/jubilee clip around th fitting boss before even attempting to remove the strainer fitting? I haven't taken one apart yet, so looking to those who have gone this way before me.
For those of us following along, is it practical advice to use a hose clamp/jubilee clip around th fitting boss before even attempting to remove the strainer fitting? I haven't taken one apart yet, so looking to those who have gone this way before me.
Bob,
The jubilee clip is a pre-empt to stop this problem from happening in the first place- once it has happened I suppose it is a measure that could be applied as a secondary aid in the recovery procedure but I would think has no role to play in the immediate recovery given the seal has been broken already.
I want to pre-emptively replace my in-tank hose before it fails [assuming it has not done so already] but before I pull the assembly I intend to apply a jubilee clip in this manner. This approach is intended to help keep the tank material dimples cast into the lands in the seal ring thus helping to prevent rotation- a good idea I believe as long as it does not distort the boss and open up a leak path. Common sense when tightening will be the order of the day I suspect. Perhaps it should be seen as reinforcing or constraining the boss rather than compressing it.
I had this same failure on my 85. I used JB Waterweld (specifically says it is for fuel tanks) to epoxy the insert back into the tank. My approach was similar to what was stated above but here is some additional detail on what I did.
My insert had not spun completely loose but was leaking. In order to fully clean the inside of the tank color and the outside of the insert to ensure the best bond possible, I pulled the insert the rest of the way out. To do this I threaded the filter in until just before seating and used it wiggle and work the insert free form the tank.
Once the insert was out I used a Dermal and wire brush to fully remove and corrosion and debris from the outside of the insert and likewise used it to clean and burnish the inside of the tank.
As the sealing face of the tank was no longer flush I needed to establish a new surface for the strainer seal to seat against. Here was my approach; I conveniently had a large Teflon (JB WW will not adhere to Teflon) washer which I enlarged the ID of till it fit over the treads on the filter (this was just used as tooling to form the flat surface). Another option would be to use something that does adhere and leave it in place. I then wrapped the thread of the filter with Teflon tape to ensure I wouldn’t accidently bond the filter in. I installed the Teflon washer and threaded the insert onto the filter leaving about an 1/8” gap to the washer for the lip of the tank to seat into.
With the filter/insert assembly ready to go back in, I prepped the JB WW and applied it to the inside of the tank, as well as a thin layer to the insert and face of the Teflon washer. I applied to both surfaces to ensure that there was full contact with the epoxy.
I then inserted the assembly until the lip of the tank fit into the gap between the insert and the Teflon washer. Once positioned I but a couple wraps of stainless safety wire around the tank and tensioned them up to ensure the tank was held tight to the insert and to help eliminate any separation of the surfaces.
Now with the epoxy still wet and the safety wire installed I added a layer of the JB WW around the outside of the lip of the fuel tank and over the safety wire. This then formed a continuous surface of epoxy from the insert to the outside of the tank encapsulating the collar of the tank on the ID and OD.
I then let it cure as specified. Once cured I backed the filter out and removed the Teflon washer which formed the smooth mating surface on the tank outlet and removed the Teflon tape from the filter. I installed a fresh seal on the filter and reinstalled it.


 07-19-2015, 06:04 AM