When you click on links to various merchants on this site and make a purchase, this can result in this site earning a commission. Affiliate programs and affiliations include, but are not limited to, the eBay Partner Network.
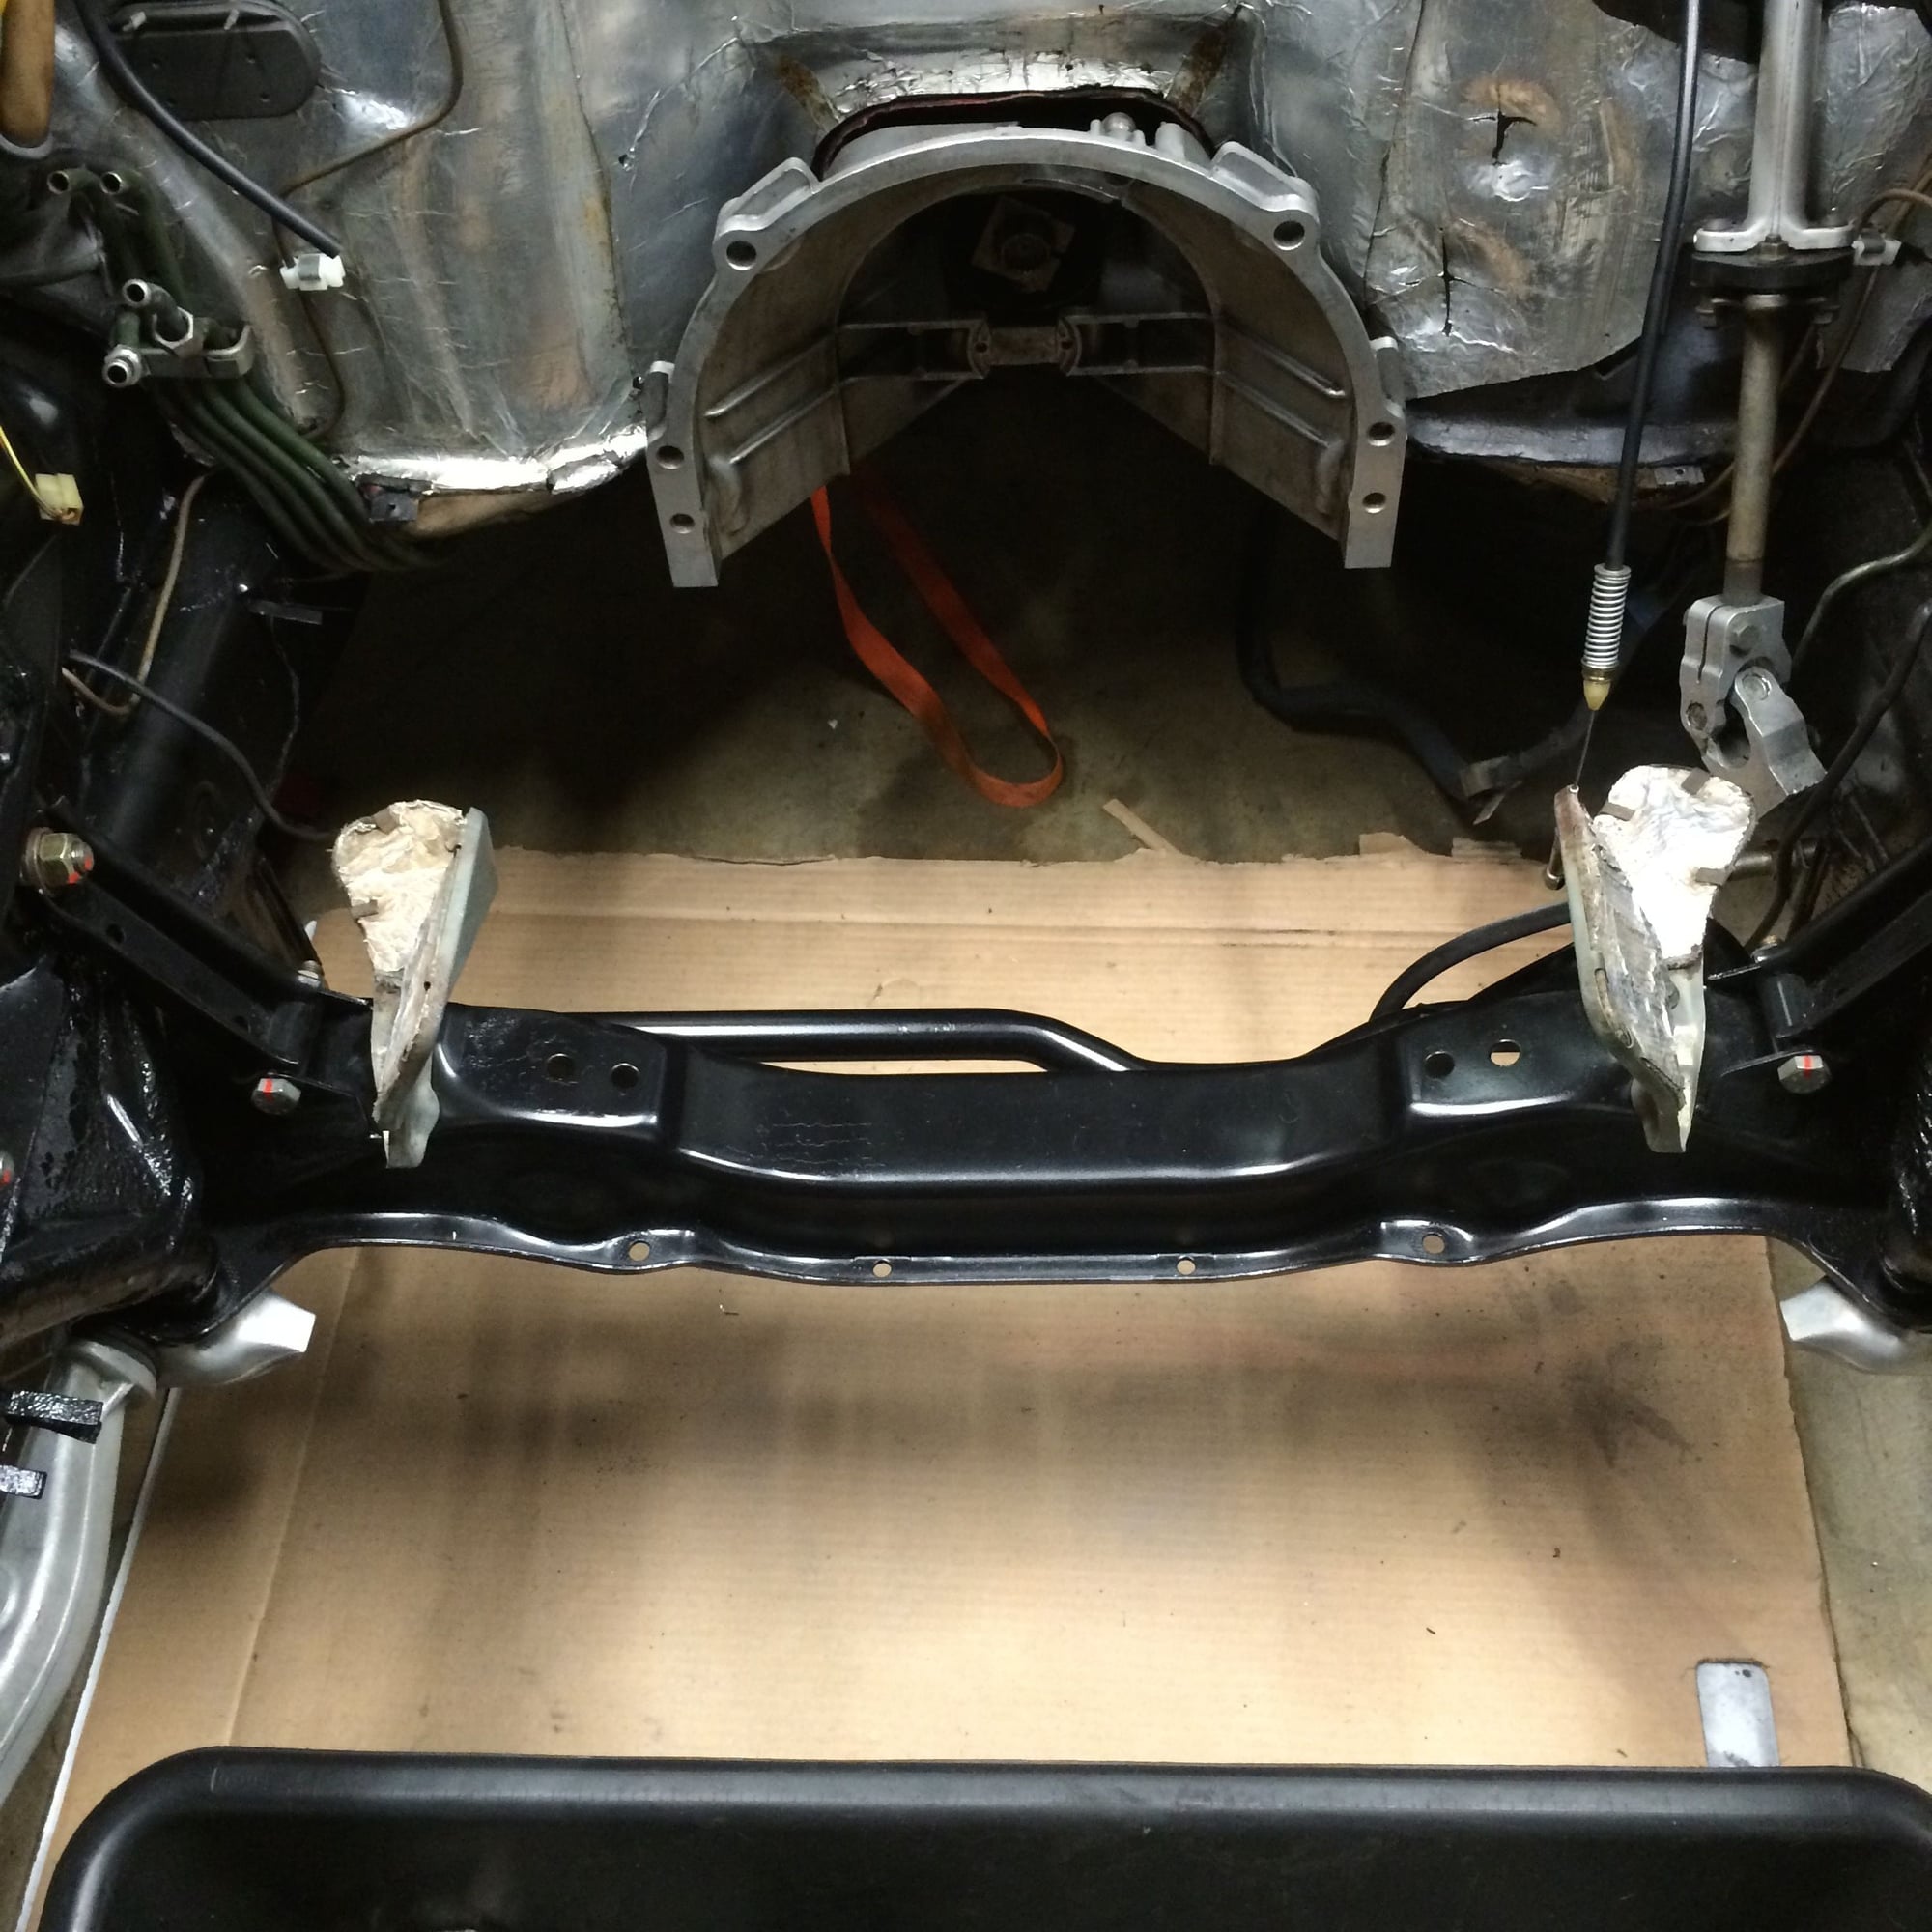
The bolts at the rear end of the front suspension lower control arms shouldn't be torqued at all until the car's on the ground, then they get torqued to 88 ft lbs.
I don't recall ever hearing about people having an issue stripping the frame insert for those bolts at 88. Certainly worth blowing all the schmutz out of the threads and using a little silver optimoly or Wurth HHK on the bolts, tho.
Be aware that when you use any antisieze on a bolt, the torque should be reduced. Some say 10-20%. I use 10%. This is because reducing the friction of the threads allows for a greater degree of rotation with the same amount of torque. One of the reasons that head bolts are done by degrees of rotation.
The bolts at the rear end of the front suspension lower control arms shouldn't be torqued at all until the car's on the ground, then they get torqued to 88 ft lbs. Good discussion here: https://rennlist.com/forums/928-foru...lt-torque.html I don't recall ever hearing about people having an issue stripping the frame insert for those bolts at 88. Certainly worth blowing all the schmutz out of the threads and using a little silver optimoly or Wurth HHK on the bolts, tho.
Good thread rob thanks. I'll loosen and then re torque after its down on the ramps
Josh - Rob is correct about the control arm cap bolts. The control arms need to settle (specifically, the rear bushings that are clamped in position) in so leave the cap bolts less than an 1/8th of an inch loose and drive the car a short distance and then tighten them to 88 ft-lbs while on it's wheels. I recall I had to experiment with techniques, doing it all by feel with only my arms under the car.
Last edited by Captain_Slow; 02-20-2015 at 09:34 AM.
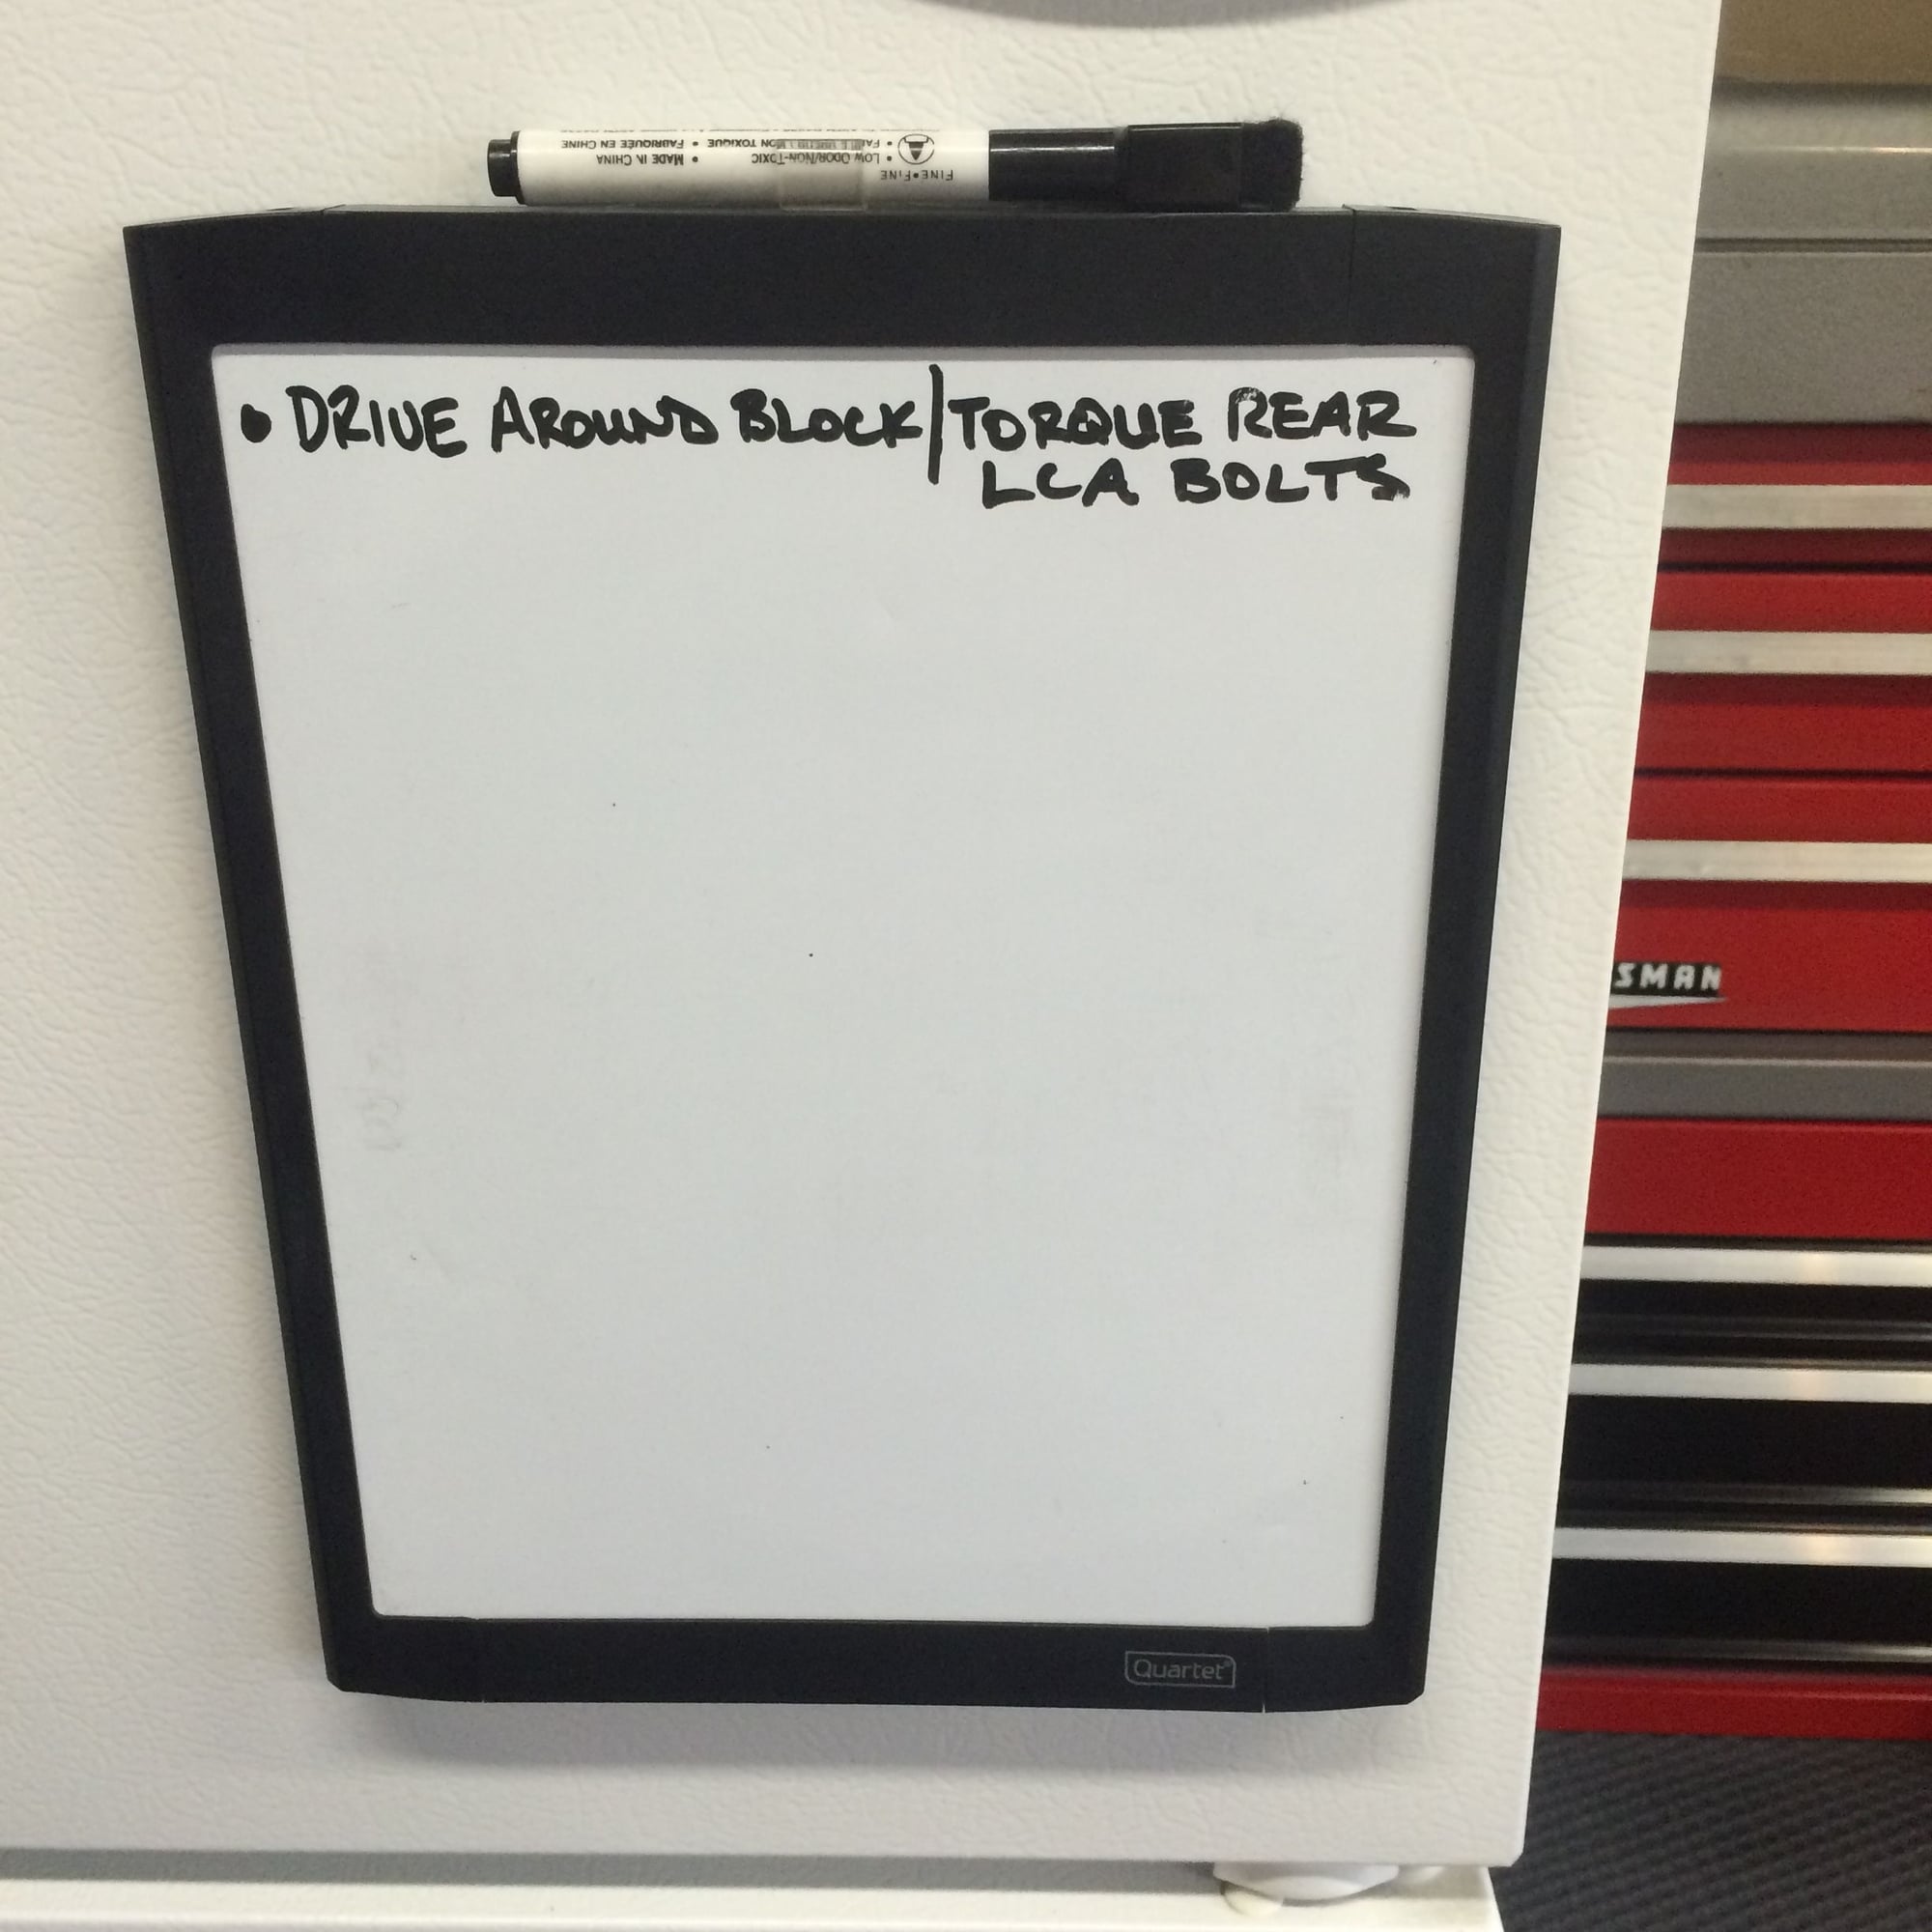
I had some free time before work this morning so I loosened rear LCA bolts and made a note to self
Installed heat shields
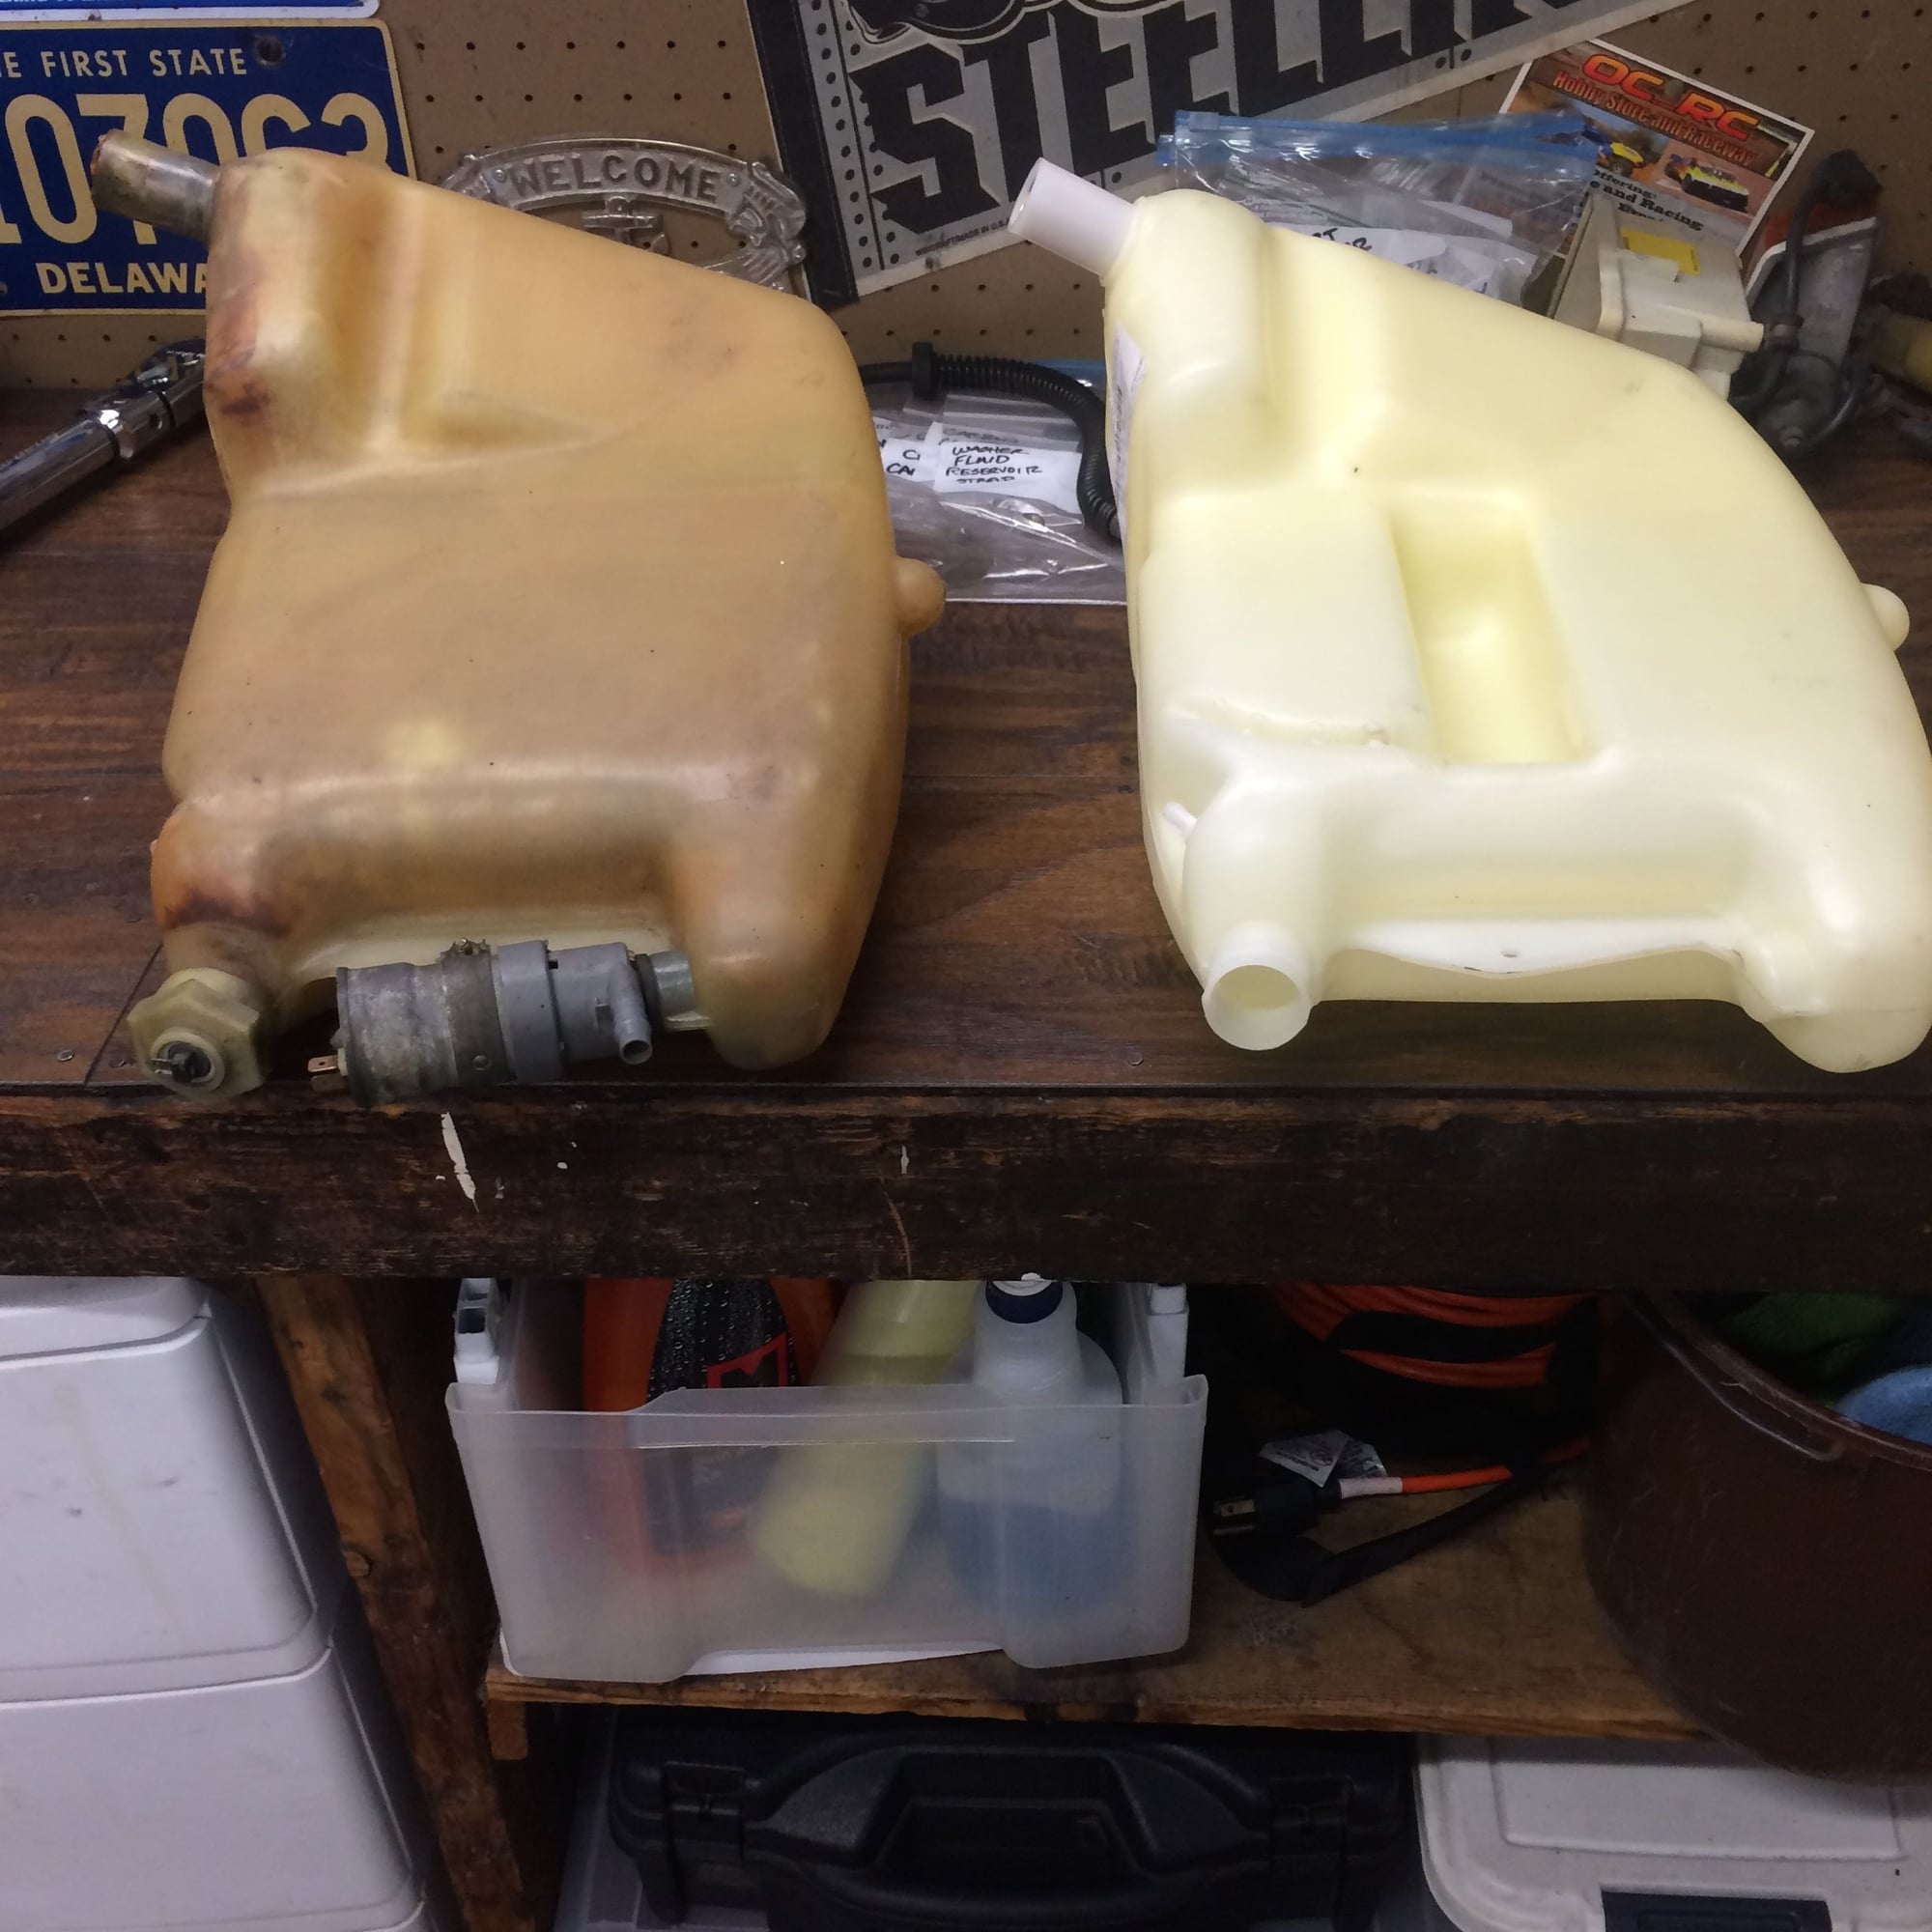
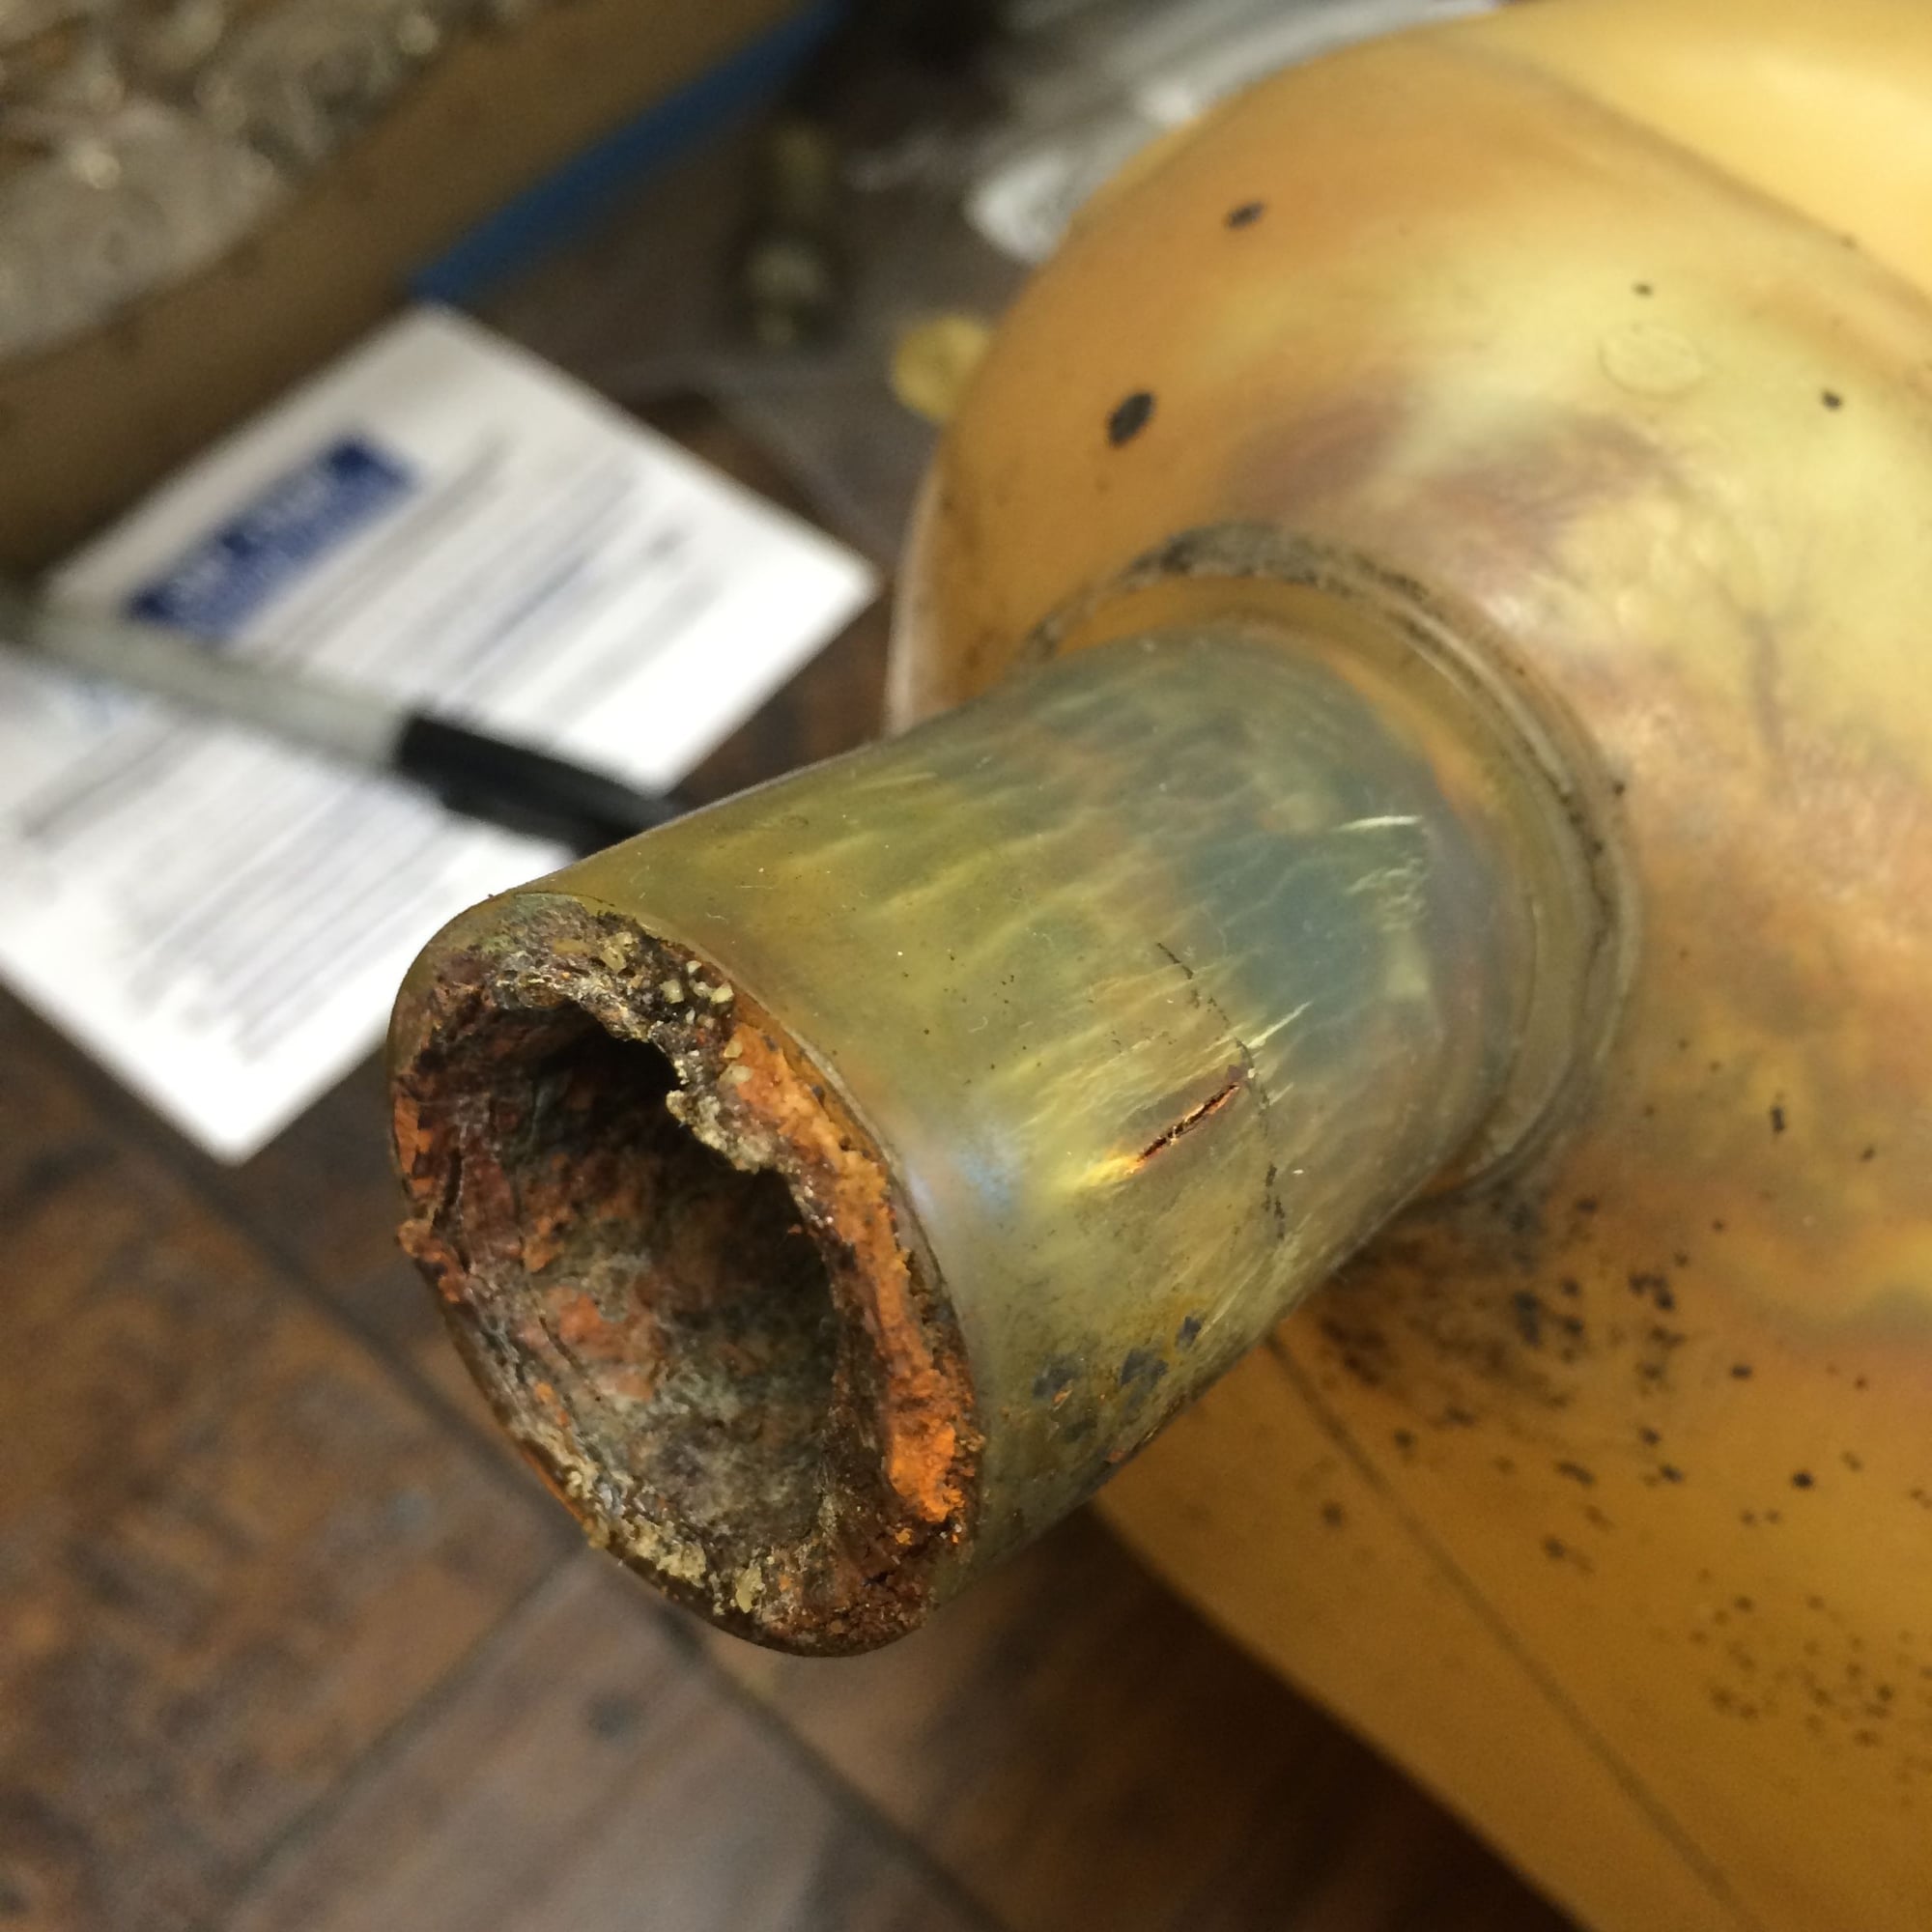
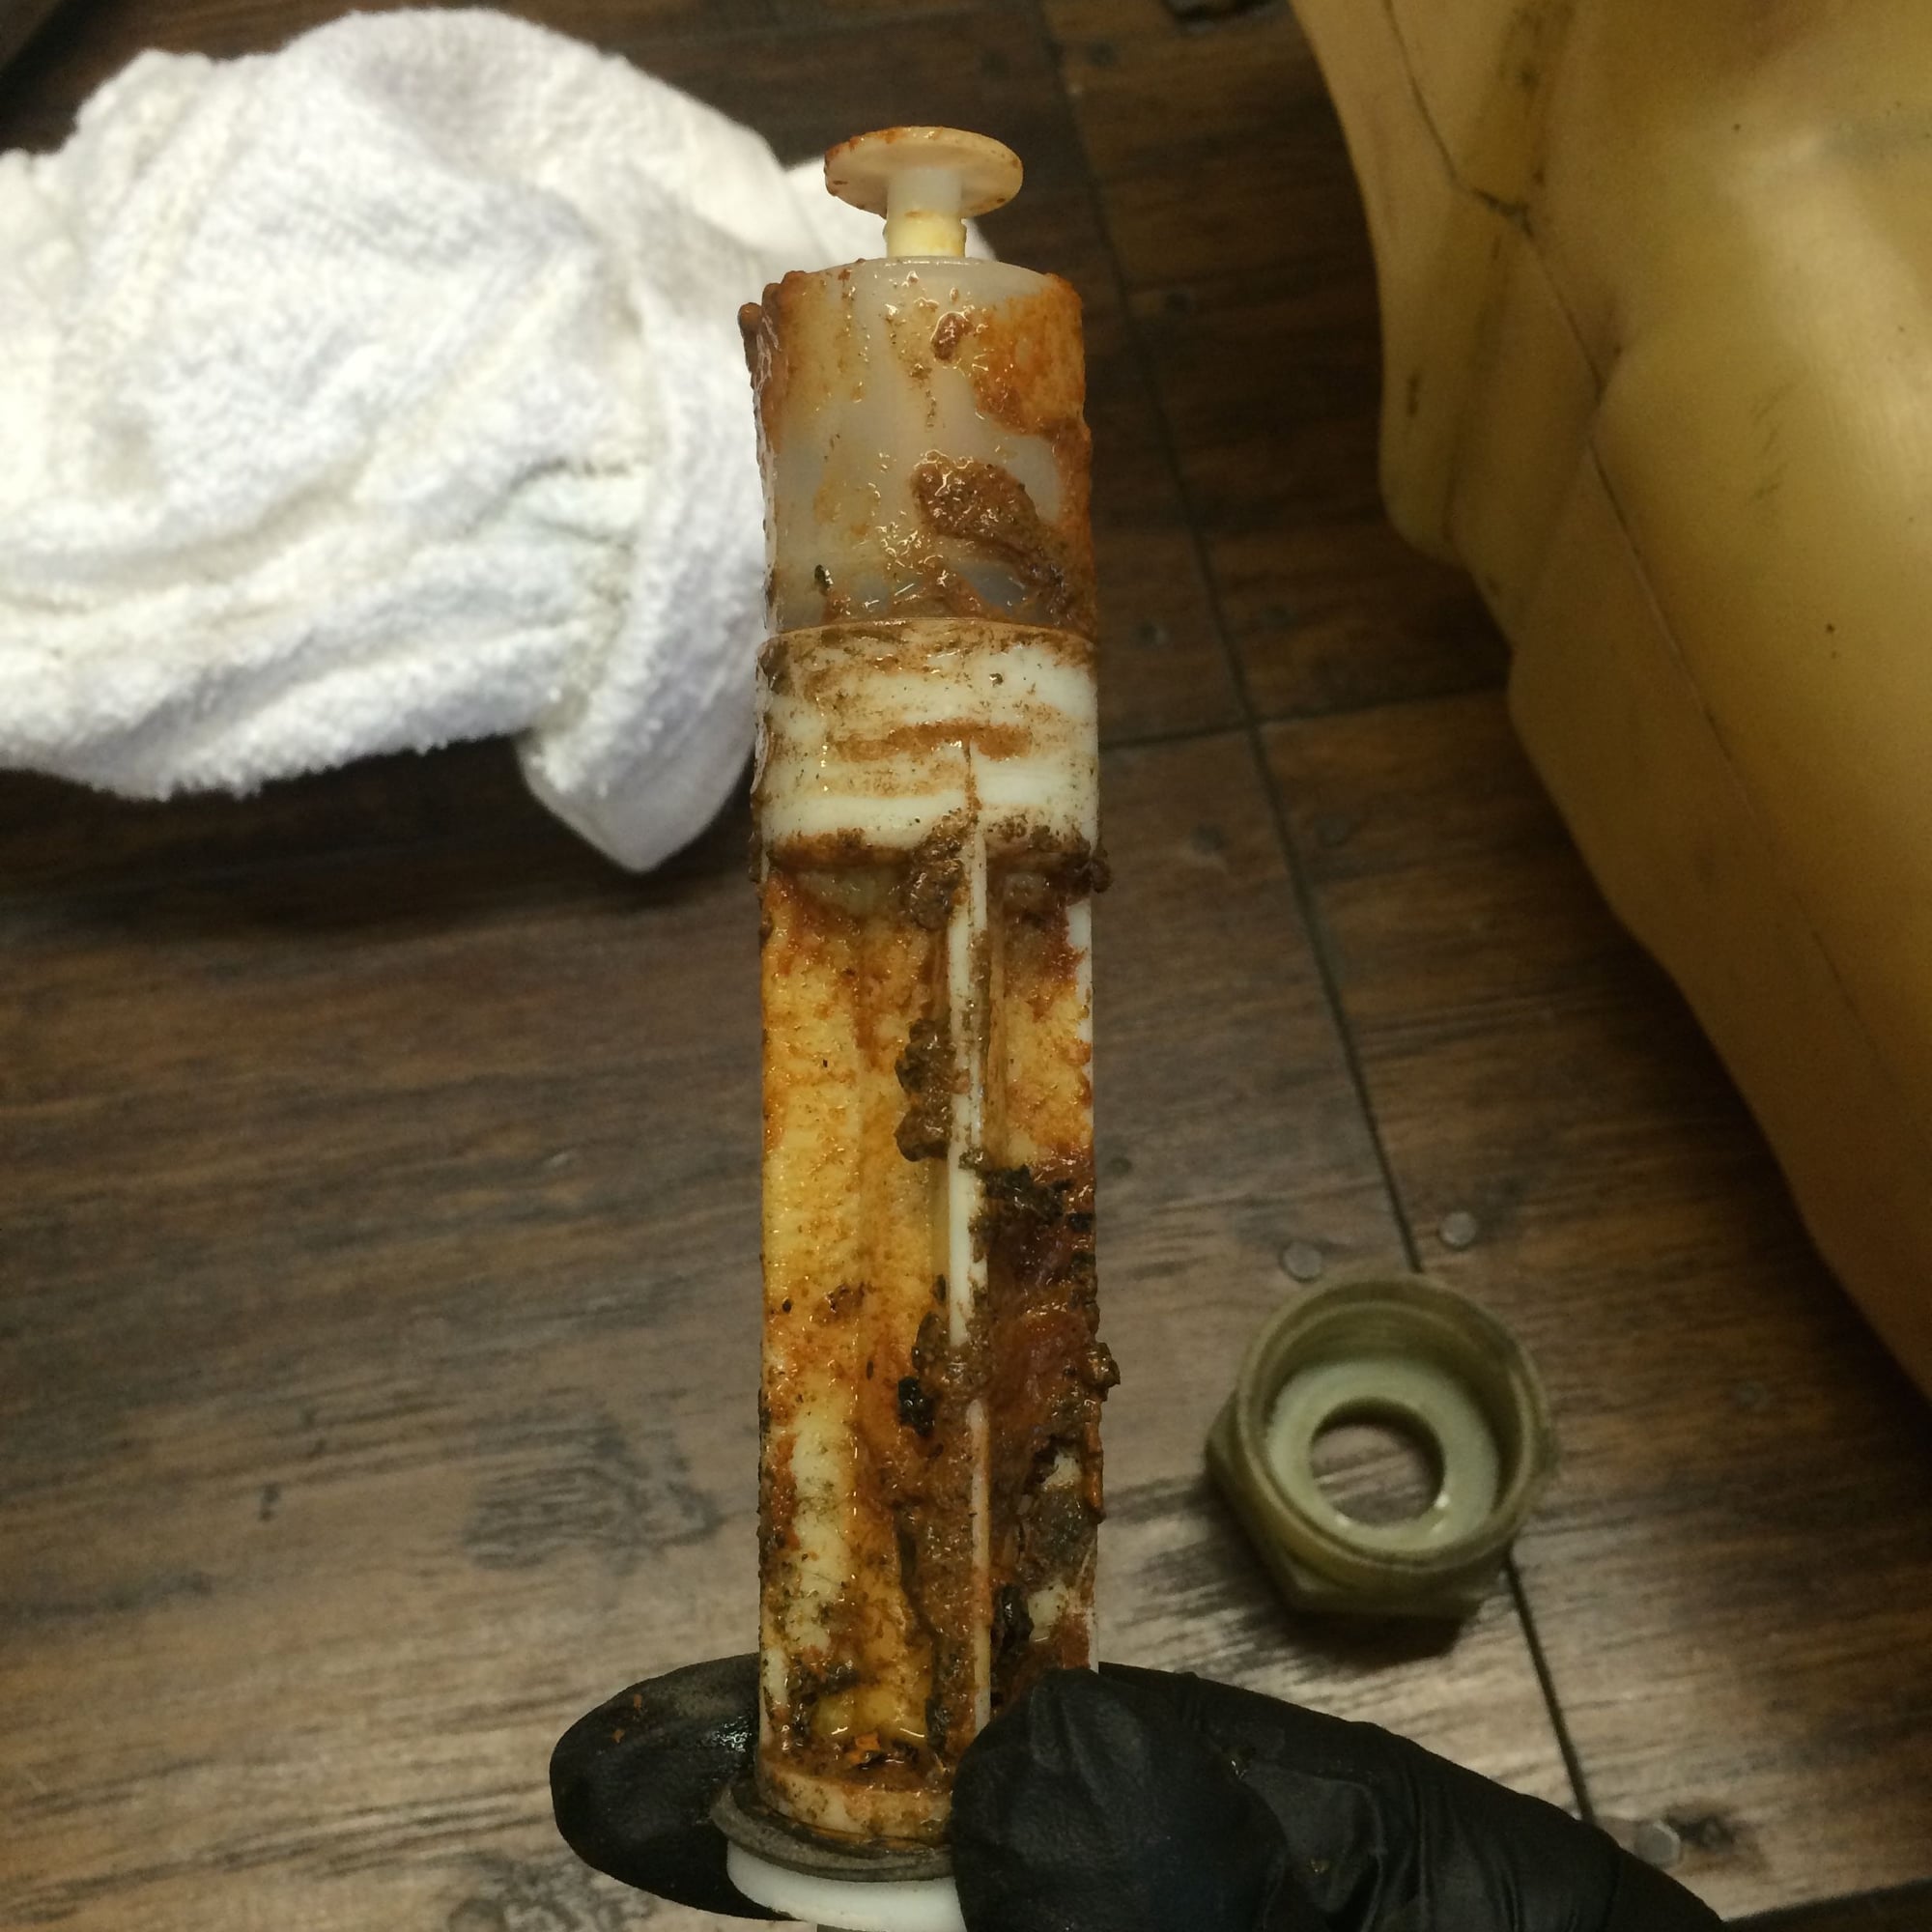
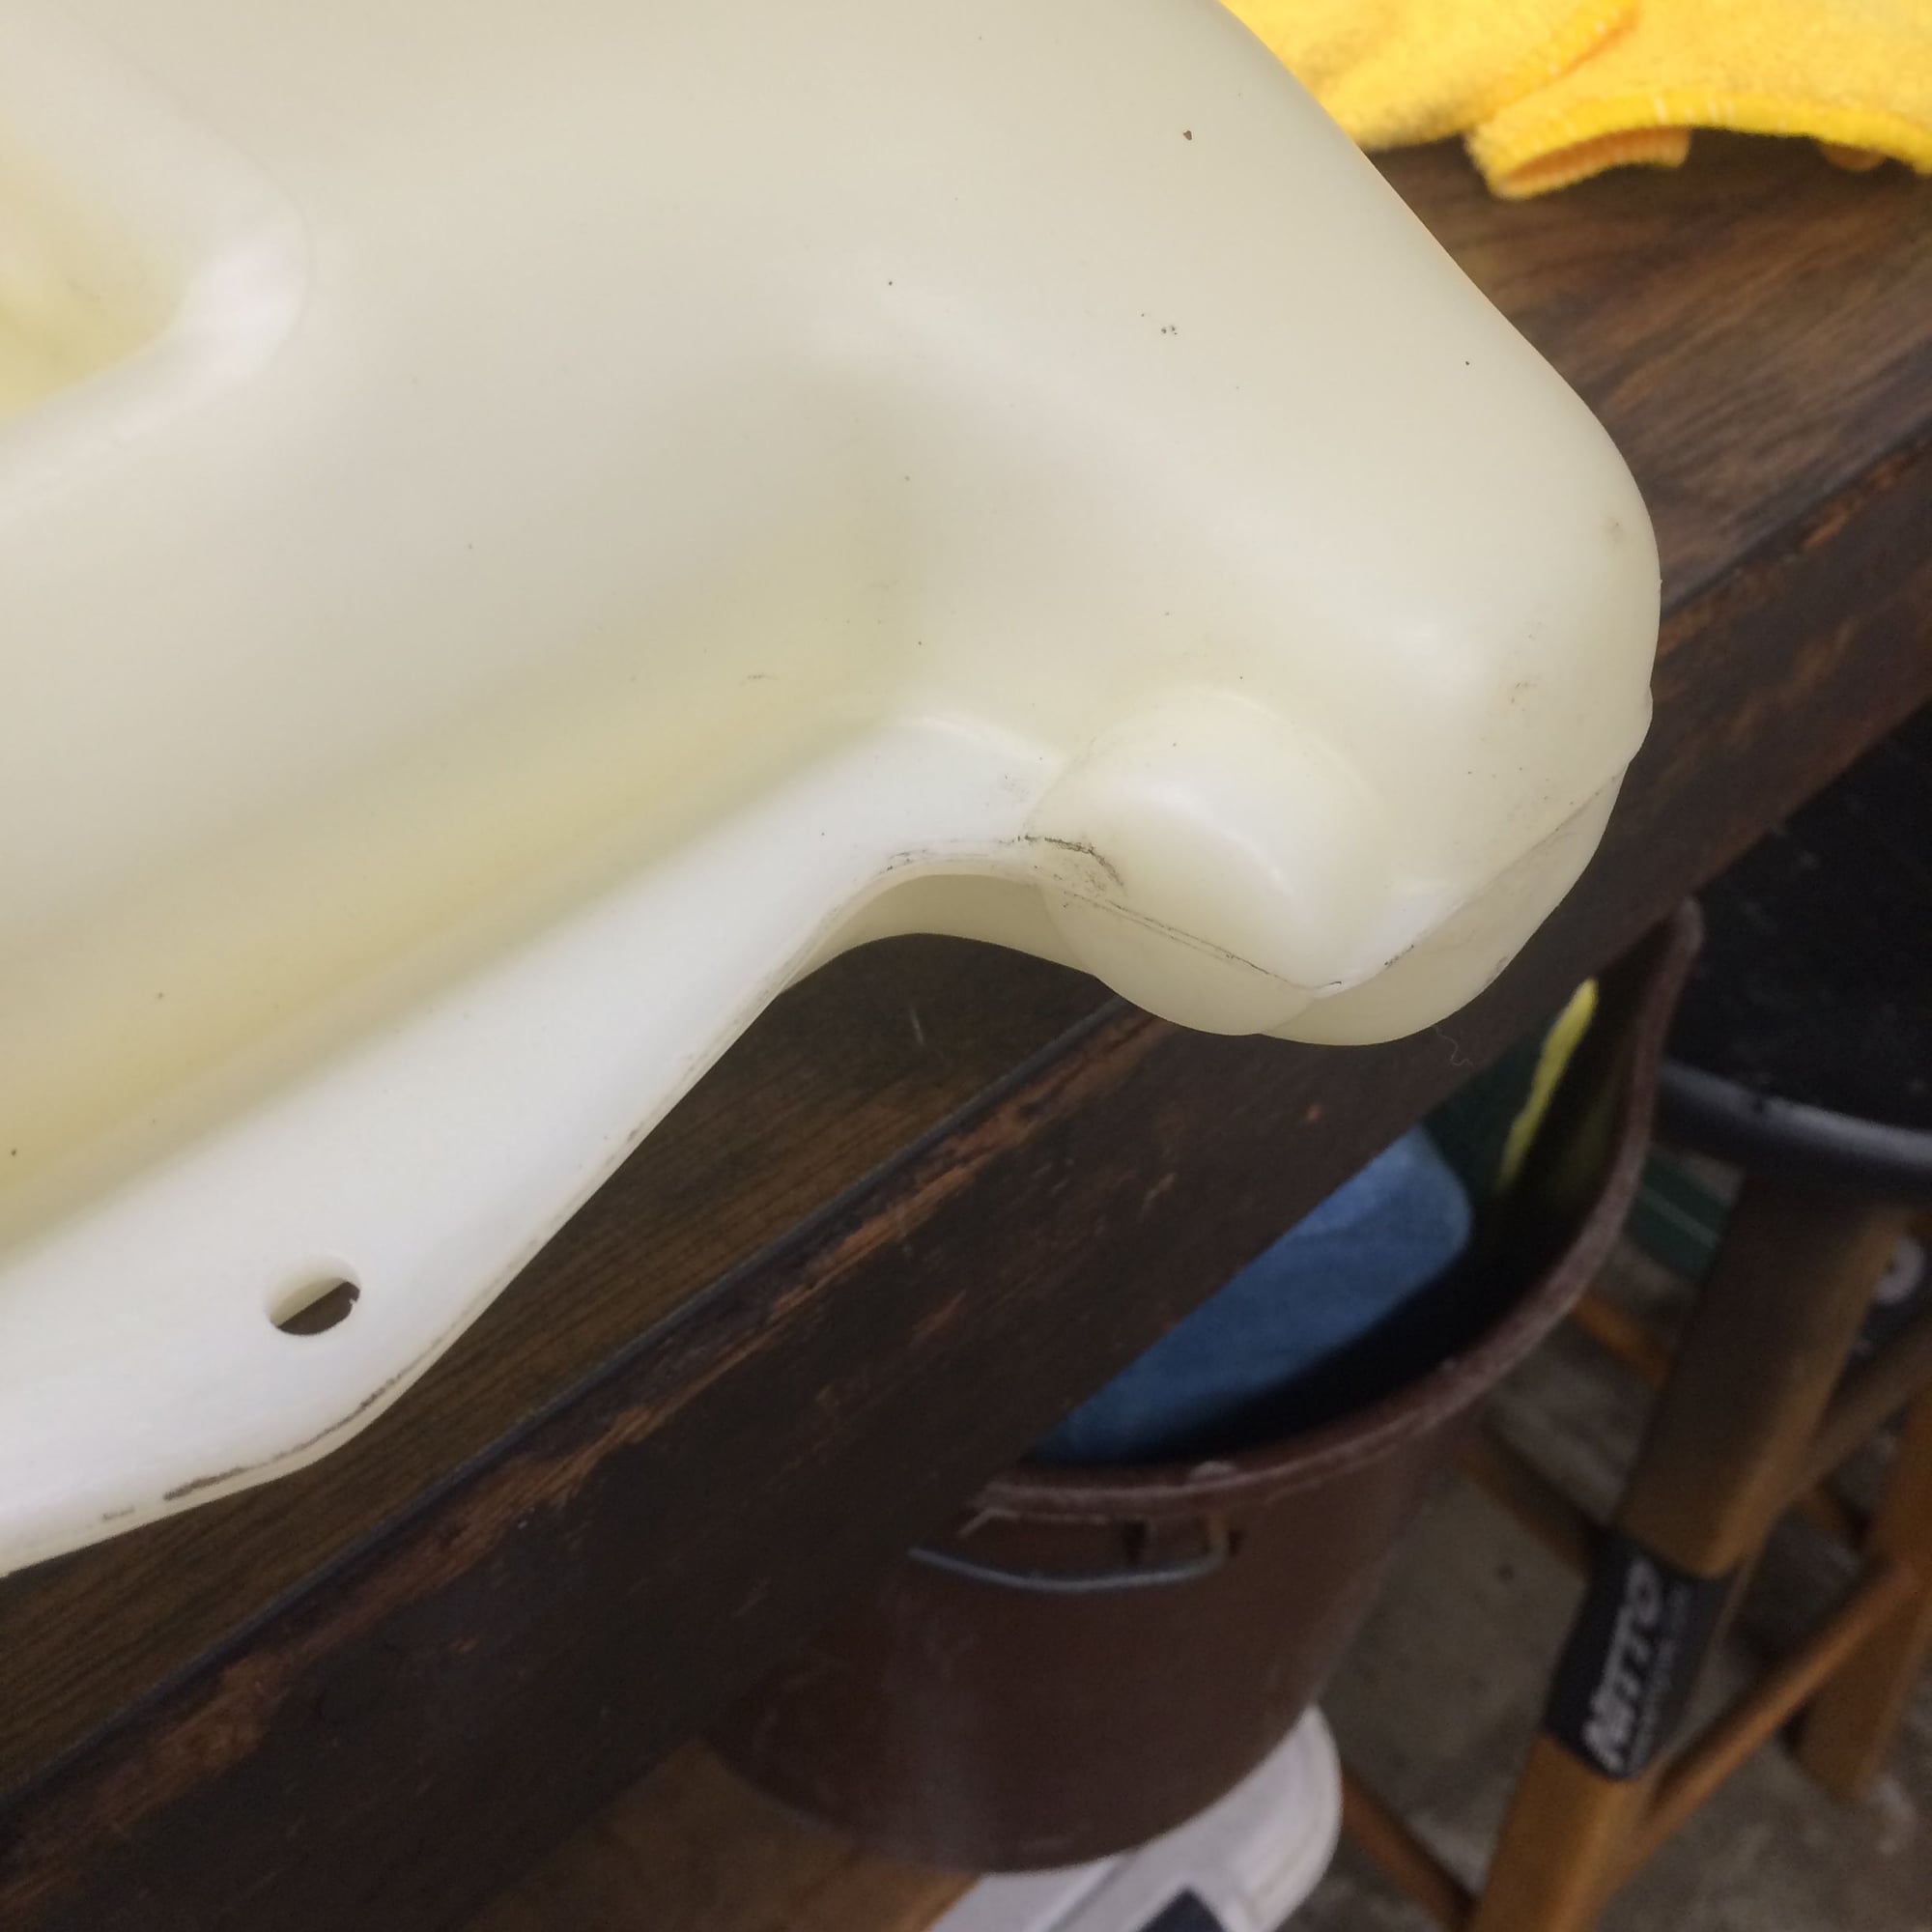
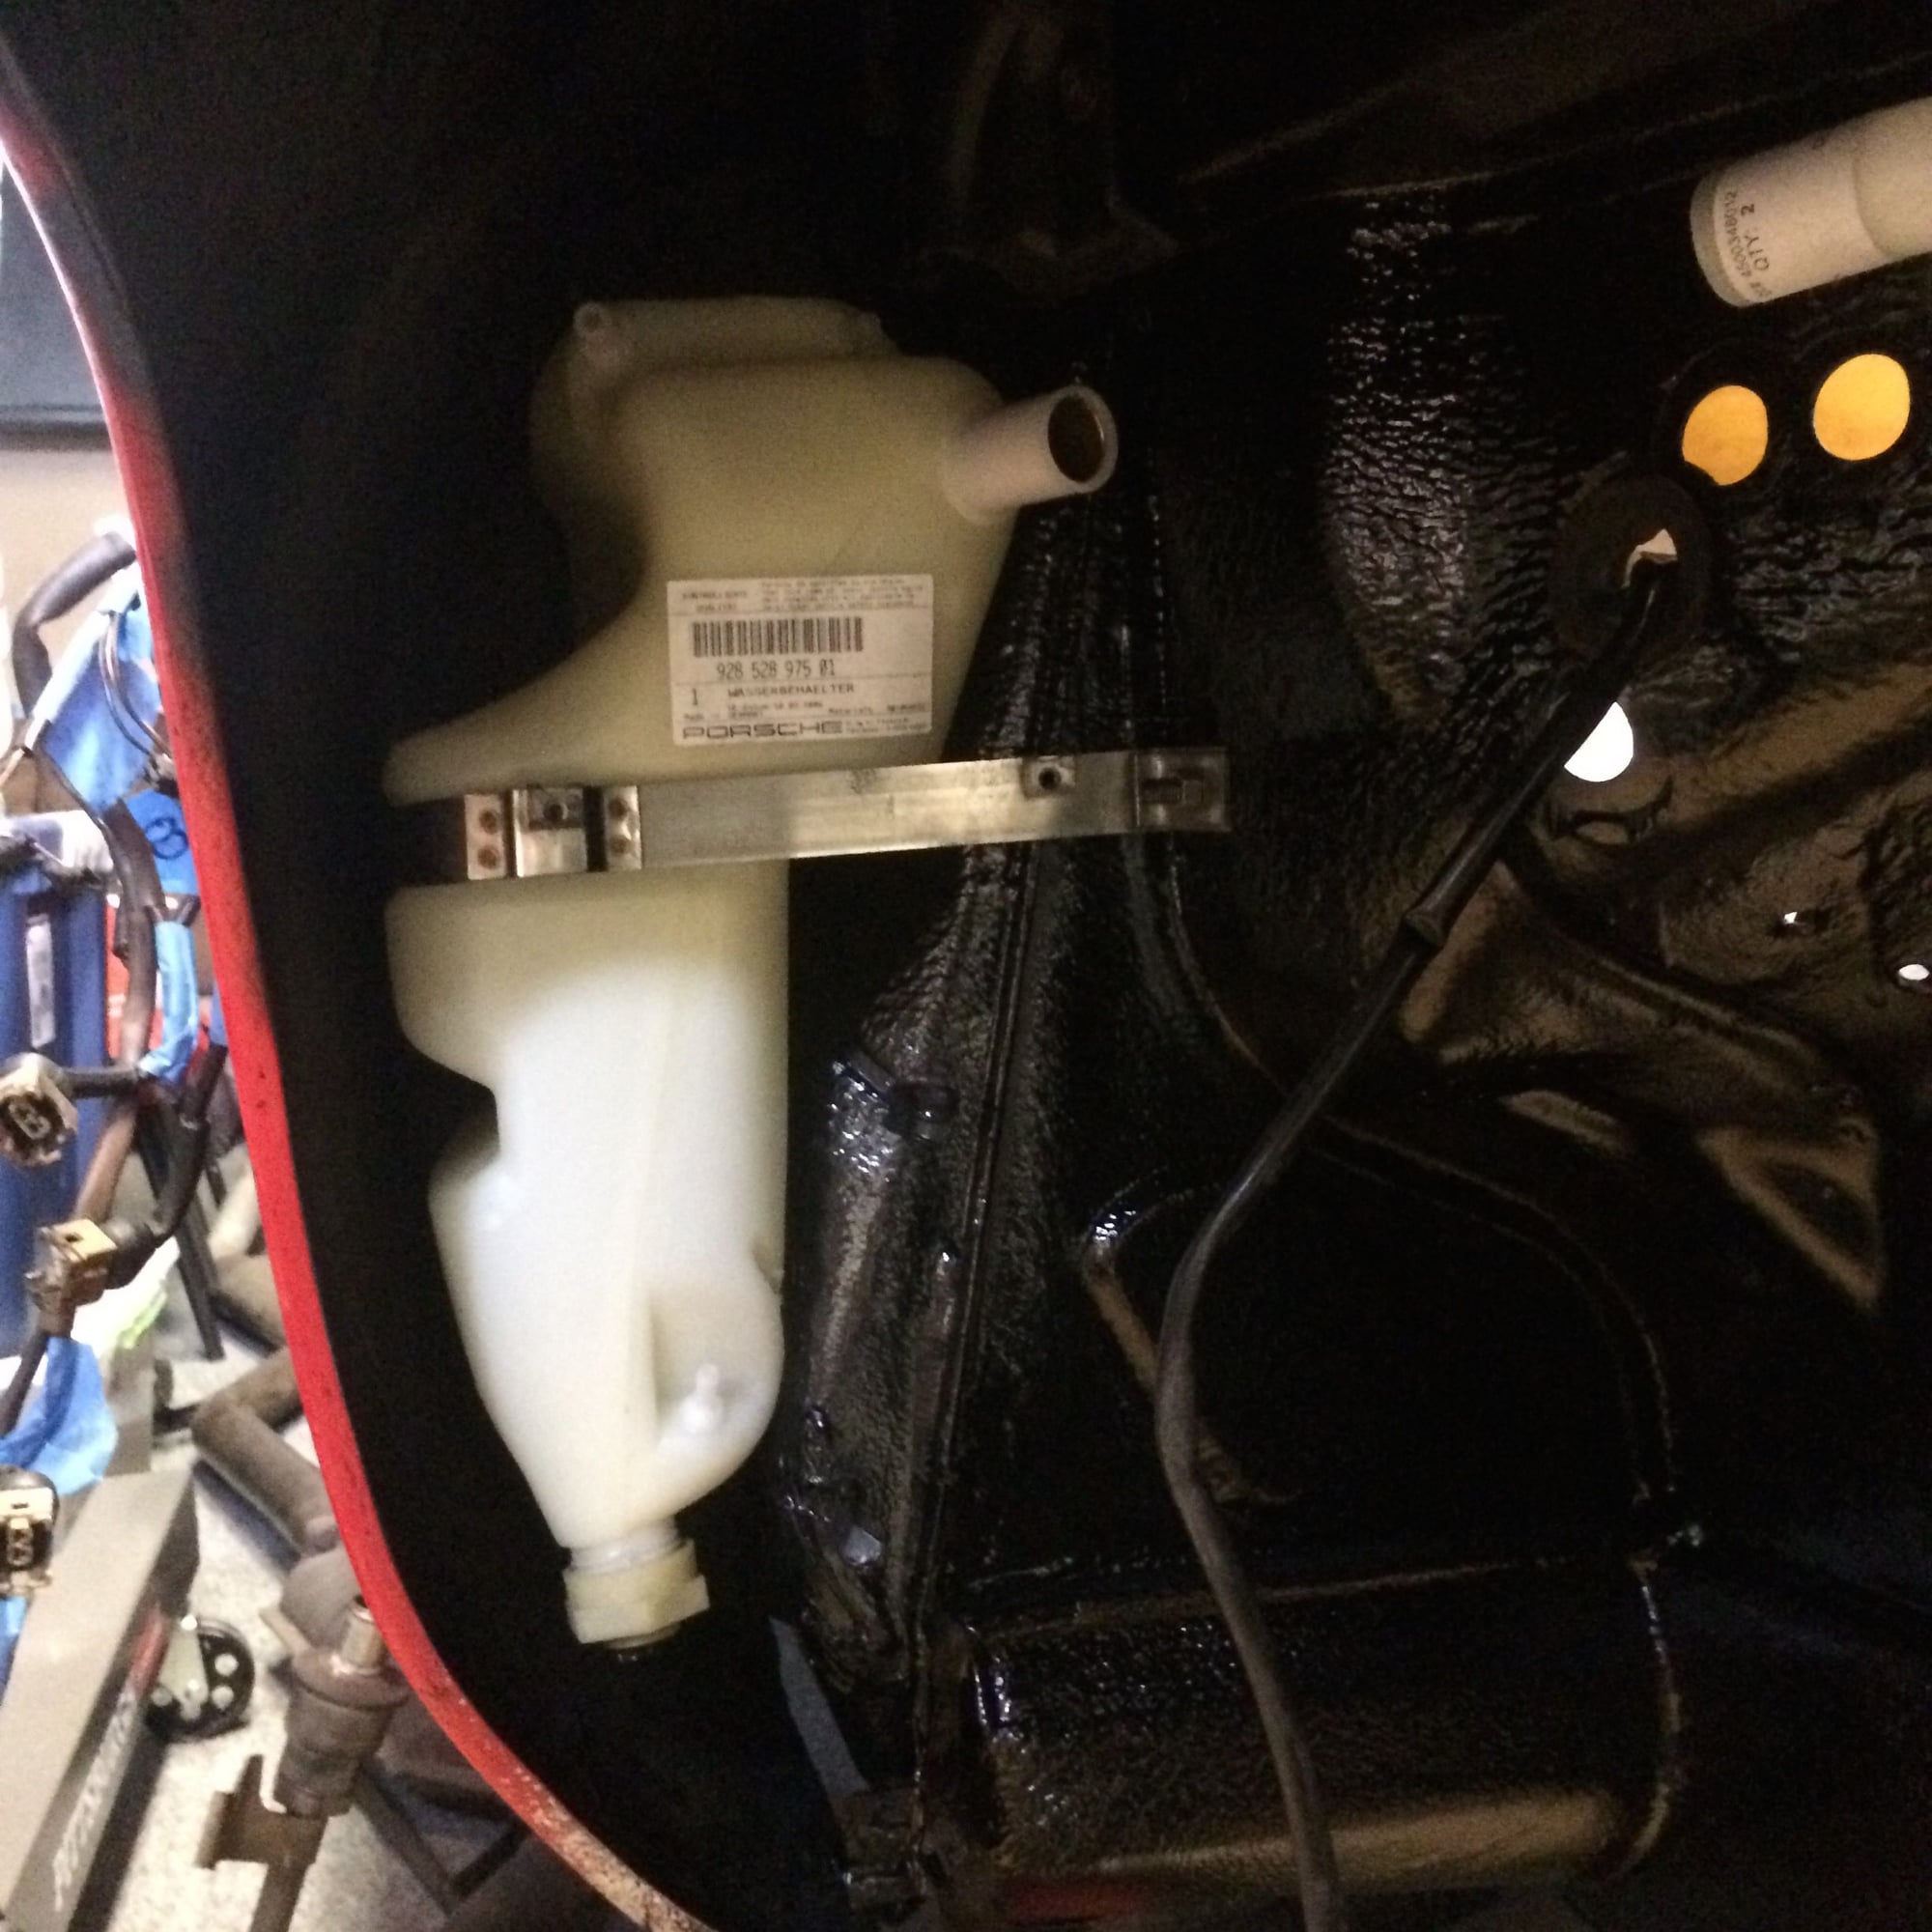
and new washer tank. Old tank was leaking and was very corroded at the upper hose fitting which caused stress cracks.
Removed, cleaned, deoxited and installed level float in new tank
The new tank is not tapped for the lower pump, which, from what I can tell is used for the headlight washer system. I plan to delete the headlight washer system because I found melted wires under the dash pod from the button and going into the loom. I eliminated the relay for the system and cleaned up the melted wires so they wouldn't cause any trouble and I plan on installing an onboard charger in place of the headlight washer reservoir. So Im hoping to not have to tap the new tank. Just can't tell from WSM (very little info in chapter 92) or from PET if this pump is dedicated to headlights, or shared with windshield squirters too. Have to do some thread searching later on to figure this one out.
Common wisdom on the filler neck for the washer fluid is to stick it in boiling water for a minute or so to loosen up the steel tube insert, so it doesn't rust out. I guess one could consider doing the same thing for the washer fluid reservoir.
Just be careful not to overtorque the hose clamp on its filler hose- 1-2 ft lbs max. It's not like an undertorqued washer fluid hose, at the top of the tank, is going to lead to catastrophic washer failure, in a state where your wipers are going to die of sunburn before they ever get used...


 02-20-2015, 01:25 AM