When you click on links to various merchants on this site and make a purchase, this can result in this site earning a commission. Affiliate programs and affiliations include, but are not limited to, the eBay Partner Network.
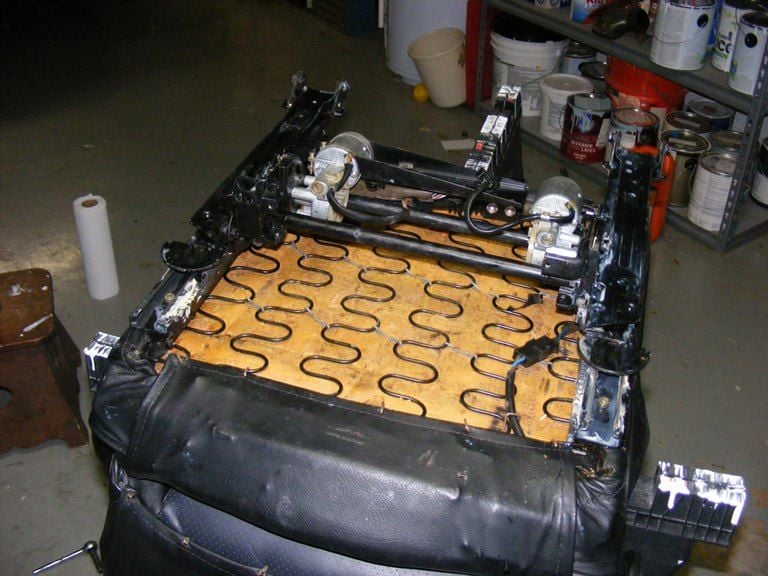
While the doors were drying I decided to pull the passenger seat and address the issue of slow moving power seats. The seat was easy to remove and upon flipping it over I knew I was going to have some fun. I first removed the motor for the seat forward/backward and I could barely move the seat rail so I knew the issue had to be frozen gears and slides. At this point I just bulled everything apart and addressed each hinge and gear one at a time. The top and bottom mechanism was essentially frozen so a few shots of PB Blaster and repetitive movement got is free. I ended up cleaning everything with brake cleaner and then lubricating with an assortment of black lithium grease, white lithium grease, and spray lithium grease. I checked both motors and cleaned out the gears underneath the white plastic cover and then re greased. I did not deal with the incline motor since that motor seamed to work ok and it appeared to be a PIA. Unfortunately, the passenger's side seat doesn't recline so I will have to address it at some point. I will put the seat back tomorrow and report its operation.
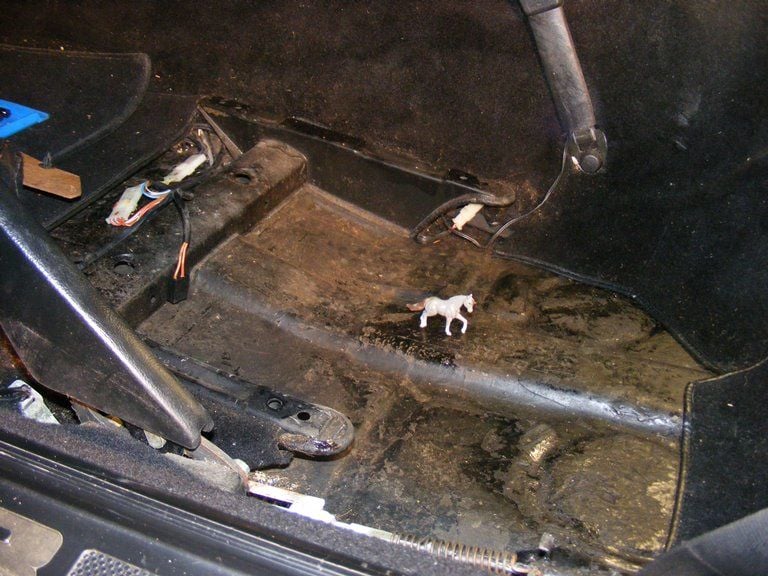
With any project you uncover something interesting and mine was a horse under the driver's seat, which will be the cars official mascot.
Unfortunately, the passenger's side seat doesn't recline so I will have to address it at some point.
Have you tried spraying De-Oxit on the switch? I cleared up a driver's side front/back problem that way. Before tearing apart the seat I'd (literally) give it a shot
Have you tried spraying De-Oxit on the switch? I cleared up a driver's side front/back problem that way. Before tearing apart the seat I'd (literally) give it a shot
The issues on the driver's side and passenger's side (minus recline switch) are not switch related and the issue is sluggish movement of the seats. On the passenger side recline I don't seem to get any signal to the motor so I will definitely look at the switch and take your recommendation.
If I look at the pics should I assume I have to push the brushes in on both sides to pull the rotor out?
No, they should slide right off the commutator. You may have to wiggle the plastic portion a bit, that holds the brushes, since it is a snug fit. But, it should come out.
The only time you need to hold the brushes back, is on assembly. Just apply gentle pressure on one side of the brush holder (plastic housing) while holding the brush back on that side, then apply pressure on the other side while holding back the brush.
On a side note...
One question about your door repair. Are you going to mount the new speaker in the same spot as you made the repair? If so, I think I would have cut the hole in the wood section before attaching it to the door panel. Might be easier that way. If not...disregard my comments.
Keep up the good work, it's been very interesting so far.
The issues on the driver's side and passenger's side (minus recline switch) are not switch related and the issue is sluggish movement of the seats. On the passenger side recline I don't seem to get any signal to the motor so I will definitely look at the switch and take your recommendation.
On my 85, the "no recline" problem was due to a broken wire (copper part broken inside the insulation). The wire harness was zip tied to the springs on the bottom of the cushion very tightly. That had caused the broken wire.
I was able to stick sewing needles through the insulation where the wires disappear up into the seat back, apply power and get the recline motor to run. Then I just worked my way down the wires until I found the break.
The recline motor is buried in the headrest of the seat back.
One question about your door repair. Are you going to mount the new speaker in the same spot as you made the repair? If so, I think I would have cut the hole in the wood section before attaching it to the door panel. Might be easier that way. If not...disregard my comments.
I did cut the hole for the 4" speaker prior to bonding to the panel. However, I returned the 4" speaker and went to a 5.5" two-way Kicker speaker. As a result I had to recut the hole with the wood bonded to the panel, but using a wood scroll bit on the jig saw was no issue. Below is a pic of the new 5.5" Kicker mounted to the panel.
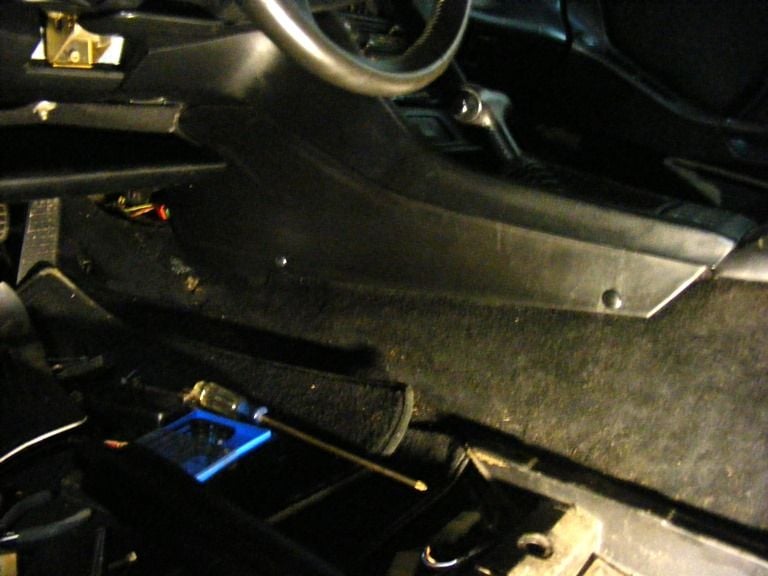
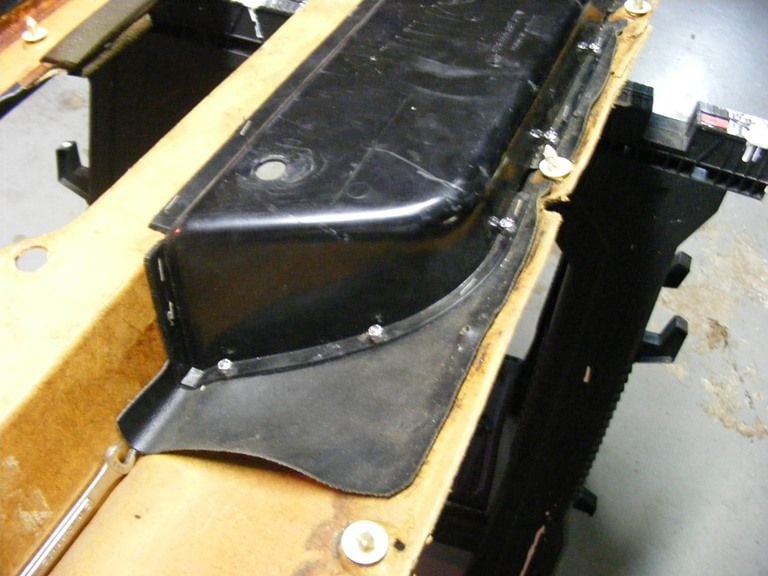
I was able to reinstall the seat today and it works great, especially the up/down that was previously crawling. Prior to putting back the seat I decided to recover the small panel below the center console that was covered with carpet. The panel had 5-6 drywall screws holding it in place and generally looked like crap. Since the lower part of the door panels also had crappy carpet I purchased black vinyl to recover the doors as part of the restoration and figured I might as well cover the small panels below the center console. Sorry for the crappy pic, but the front is secured with a trim screw and the rear is held with a plastic fastener I purchased from Autozone.
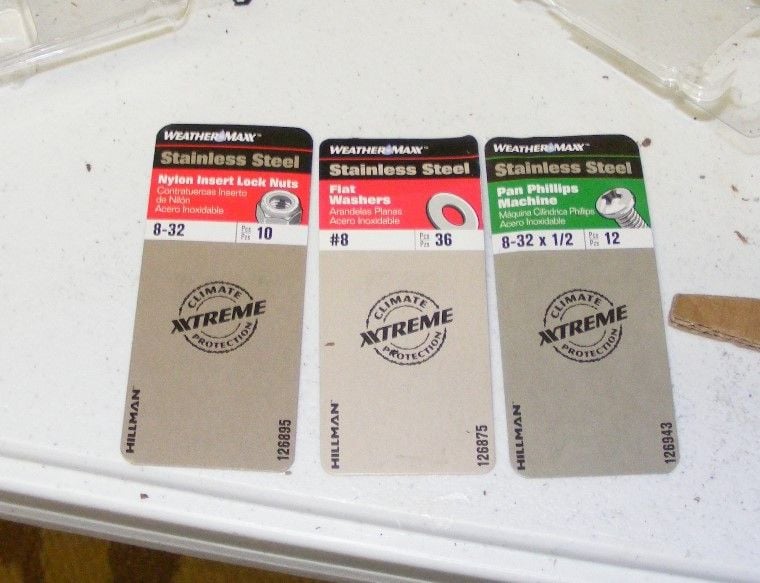
I then focused on the plastic tray attached to the door panel with staples. Mine was literally falling of on the bottom so stuff would fall out because of the gap. I decided to bolt the tray to the door panel using 8-32 nuts and bolts. I did put the door panel on the door to verify the nuts did not hit the door, which they did not so this is a good mod to strengthen the panel. Below are pictures of the results as well as the hardware used.
My plan for tomorrow is to recover the door panel and install the new vapor barrier. I did get some parts in the mail today that include the plastic gear for the odometer, new power steering lines, and the plastic catch for the rear deck lid.
I decided to switch gears today and focused on replacing the power steering hoses. Like much of what I am doing a simple task turns into a 3 day event. I ended up removing the reservoir and mounting bracket to clean off the gunk from years of buildup.
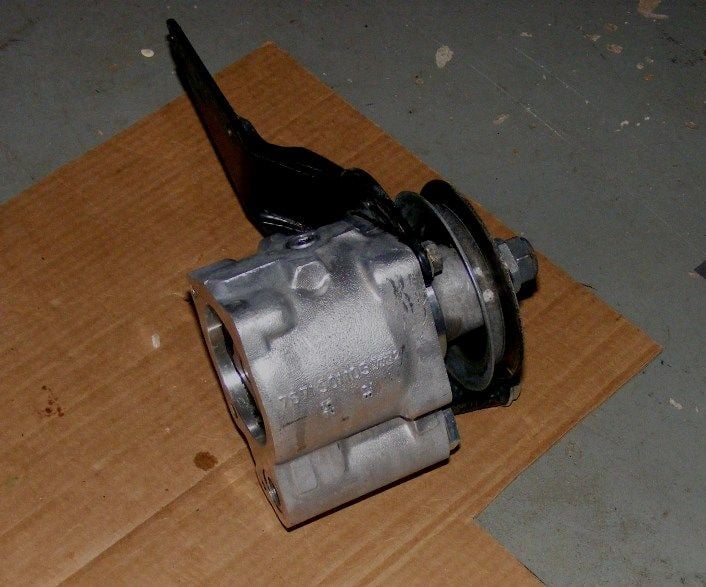
I was unable to break free the high pressure line to the back of the pump so I ended up removing the pump with hose. Once it was removed I literally had to cut the line with a metal saw and then use a socket to break it free. I then spent some time cleaning all the gunk off the pump and bracket.
Since the pump is out I might as well remove the alternator and go have it checked out since it shares some common mounting bolts. The previous owner reported the warning light would go on if you ran the lights and fan so he suspected the alternator was not producing sufficient voltage under heavy load. Anyway, no pics to share, but I continue to make progress.
Since the pump is out I might as well remove the alternator and go have it checked out since it shares some common mounting bolts. The previous owner reported the warning light would go on if you ran the lights and fan so he suspected the alternator was not producing sufficient voltage under heavy load. Anyway, no pics to share, but I continue to make progress.
Suggestion: you can re-build that alternator for not a lot of money. there are two bearings that need to be removed and pressed back in, the stator needs to be balanced by a competent machine shop, and it's good as new. Be careful while disassembling the alternator to make sure you have the plastic standoffs located correctly during re-assembly; I screwed it up and burned the primary ignition harness between the 14 pin lug next to the battery jump point and the starter because I accidentally grounded the alternator case to the positive side of the alternator (I put one of the 13 odd plastic standoffs in on the wrong side. I had a 50/50 chance)
A couple of bearings will run about $30. Spinning and balancing the stator another $30. When I did it, a Bosch rebuild was over $700 but now days you can get them for around $200 so it might not be worth it, but if you don't burn up the primary wiring (which for me involved the use of a halon fire extinguisher) you could save a few bucks?
^
I removed the alternator and it is a Bosch AL 109X, which is a 75amp alternator. I had it tested today and everything was good except it said stator voltage was bad. We could not get the tester to work when connecting the white wire (doesn't exist on my car) to the tab so we were unsure how to interpret the results. The alternator works on the car, but when you add a bunch of load the red light comes on. Since the alternator is easy to get on and off I will reinstall for now and check actual voltage under load and go from there.
I spent about 30 minutes cleaning the power steering pump and the brackets for the pump and alternator because they had a lot of buildup and grim. Once it was clean I installed the shiny power steering pump back into the car.
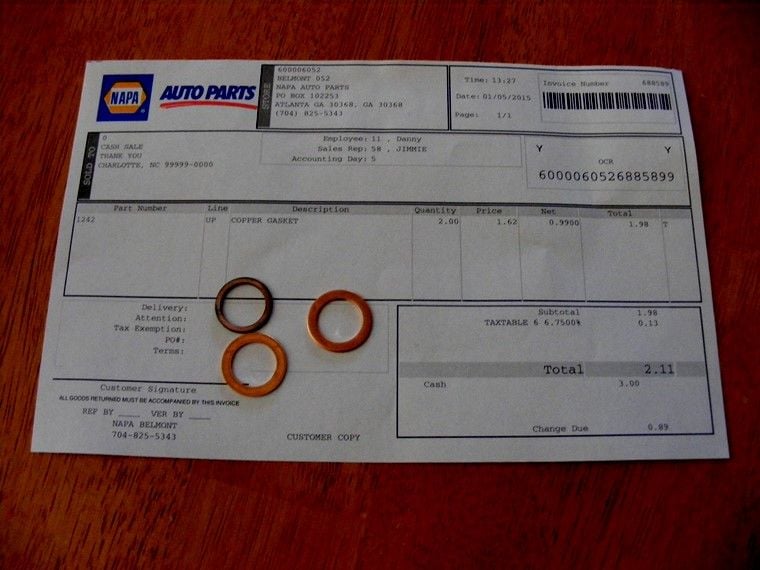
I did not want to reuse the copper crush washers for the new high pressure power steering line so I found some replacements at Napa. They are slighter larger on the OD, but the ID was correct and only $0.99 per.
So the pump is installed and ready to go so only need to hook up the alternator and move on to the next project.
I was able to take the alternator to an alternator shop today and have it properly tested. It tested good and was able to deliver ~77amps @ ~12.1volts, which is right on based on its 75amp rating. However, knowing the alternator is a weak link on this car I decided to wonder around the shop and was provided some potential higher output options for use on my car. I settled on a 140amp readily available unit, but they did not have one to sell so I purchased it from my local Autozone.
I have already test fit the unit on the car and will be able to make it physically work and have also purchased the connector. However, the stock metric pivot bolt is ~0.305" OD and the ID of the alternator is ~0.400" ID. I ordered some stainless tube material that will arrive tomorrow and will take up the slack due to the larger hole on the 140amp unit. Looking at the shaft speed on the unit as a function of amperage and using my estimated 2.3x pulley ratio I should have no issue using this alternator at idle.
I will provide more detail once the swap is complete and verified to work properly.
Did you keep the old alternator? It could be the bearings are bad and your belt was slipping. You can rebuild those alternators pretty easily with a basic bench, press out the old bearings, press in the new ones, take the stator to a shop and have it balanced and put it back together. I rebuilt mine back in 87 and it lasted another 30K miles until it needed another rebuild. The bearings were the weak link on the old Bosch alternators, it's a heavy stator and if it's just a little out of balance it will eat the bearings.
Back then the Bosch re-built units were going for around $900, now you can get them for under $200 so maybe it wouldn't be worth it to you, but the bearings were only about $30 bucks in 87 so it was a pretty clear choice at the time.
EDIT: Oops. Sorry for the redundancy, forgot I'd already replied to this.
I did cut the hole for the 4" speaker prior to bonding to the panel...
I notice you have the same battleship gray acrylic floor paint, complete with tire peel off I have in mine! I've put 8 coats on it over 15 years and it still lifts off under hot tires.
I notice you have the same battleship gray acrylic floor paint, complete with tire peel off I have in mine! I've put 8 coats on it over 15 years and it still lifts off under hot tires.
It came with the house, but if I ever decide to redo the garage floor I will go with something different.
Unfortunately, when I reinstalled the headliner to the sunroof it was enough to affect its ability to close. I decided to pull it back apart and pull the cables completely out of the track. It is fair to say the cables were covered in a hardened grease and the driver's side was difficult to remove due to buildup.

 01-02-2015, 09:45 PM