Sunroof Seal Installation
#1
Nordschleife Master
Thread Starter
Has anyone ever installed the front section of the sunroof seal without removing the sunroof?
I ask because I just did it and it was ridiculously easy.
I don't use the sunroof so as long as it doesn't leak more than it's supposed to I don't care about anything else. Am I missing something?
I ask because I just did it and it was ridiculously easy.
I don't use the sunroof so as long as it doesn't leak more than it's supposed to I don't care about anything else. Am I missing something?
#2
Team Owner
usually to replace the sunroof seals, ( there are two of them),
you would remove the roof panel ,
you dont want to stretch the seal when its installed as the sun will shrink it,
and then the ends will start to have gaps.
Also there is a drip tray on the rear edge of the roof and this should also be replaced as its usually cracked especially in the dark colored cars
#4
Team Owner
there is a black plastic tray bolted to the rear edge of the sliding portion of the sunroof ,
dark colored cars have issues with this part as the sun makes the roof very hot,
and after years of this heating the tray will warp and crack,
this will let water go into the center of the roof possibly damaging the headliner.
dark colored cars have issues with this part as the sun makes the roof very hot,
and after years of this heating the tray will warp and crack,
this will let water go into the center of the roof possibly damaging the headliner.
#5
Rennlist Member
I have never managed to remove the seals with the sun roof in place let alone install them with the sun roof in place. I applaud you for pulling it off. How were you able to get the front seal fitted to the sides of the sun roof with it in place?
#7
Nordschleife Master
Thread Starter
Trending Topics
#8
Nordschleife Master
Thread Starter
I opened the roof just a crack, coated the groove and the seal with dish soap, grabbed the end of the seal with some hemostats and pulled it into place on each side, then trimmed the ends until the front section would go in. After that I closed the roof and fixed a couple of places where it looked out of place by pulling or pushing it into place.
I will never open the sunroof so as long as it's there I'm satisfied.
#9
Mine had to be removed and stretched considerably or it wouldn't even close. I have heard each car is different, some get stretched, some not.
But holly **** I have no idea how you manger to change that seal while in the car. How did you get the last few inches where the front seal wraps around the rear of the sunroof? That seems an impossible task.
?
But holly **** I have no idea how you manger to change that seal while in the car. How did you get the last few inches where the front seal wraps around the rear of the sunroof? That seems an impossible task.
?
#10
Nordschleife Master
Thread Starter
The only tools I used were a pair of small hemostats with curved jaws and a pocket knife. I was very careful not to let the ends go while I trimmed them. It really wasn't hard at all. Maybe it's just my roof.
#11
Putting mine back together and aligning the panel was my pain. If not aligned correctly you can scuff the panel. Just saying.
My cars first owner polished the original fuzz right off the gasket.
My cars first owner polished the original fuzz right off the gasket.
#12
I used new gaskets after te car was painted. I could not force it in place if I wanted. Had to trim the longer seal down and stretch. Still is a bugger. Maybe the paint got on to thick, I don't know. Makes me hate the sun roof, because if I use it it won't seal without trouble. Going to play with it more this winter, get it in place and perfect then disconnect the motor and leave it for ever.
#13
Rennlist Member
I'll add my approach I came upon today.
After determining the middle of the seal and warming it in the sun for 15 minutes.
1. Apply a bar of soap the the sunroof edge.
2. Press seal into the gap.
3. Stand back and smile at how easy it was.
Kevin
After determining the middle of the seal and warming it in the sun for 15 minutes.
1. Apply a bar of soap the the sunroof edge.
2. Press seal into the gap.
3. Stand back and smile at how easy it was.
Kevin
#14
Addict
Lifetime Rennlist
Member
Lifetime Rennlist
Member
Now.....how long should the aft straight piece of seal be?
i figured to the start of the turn as shown? I cant find my reference pic when i took the old one off...
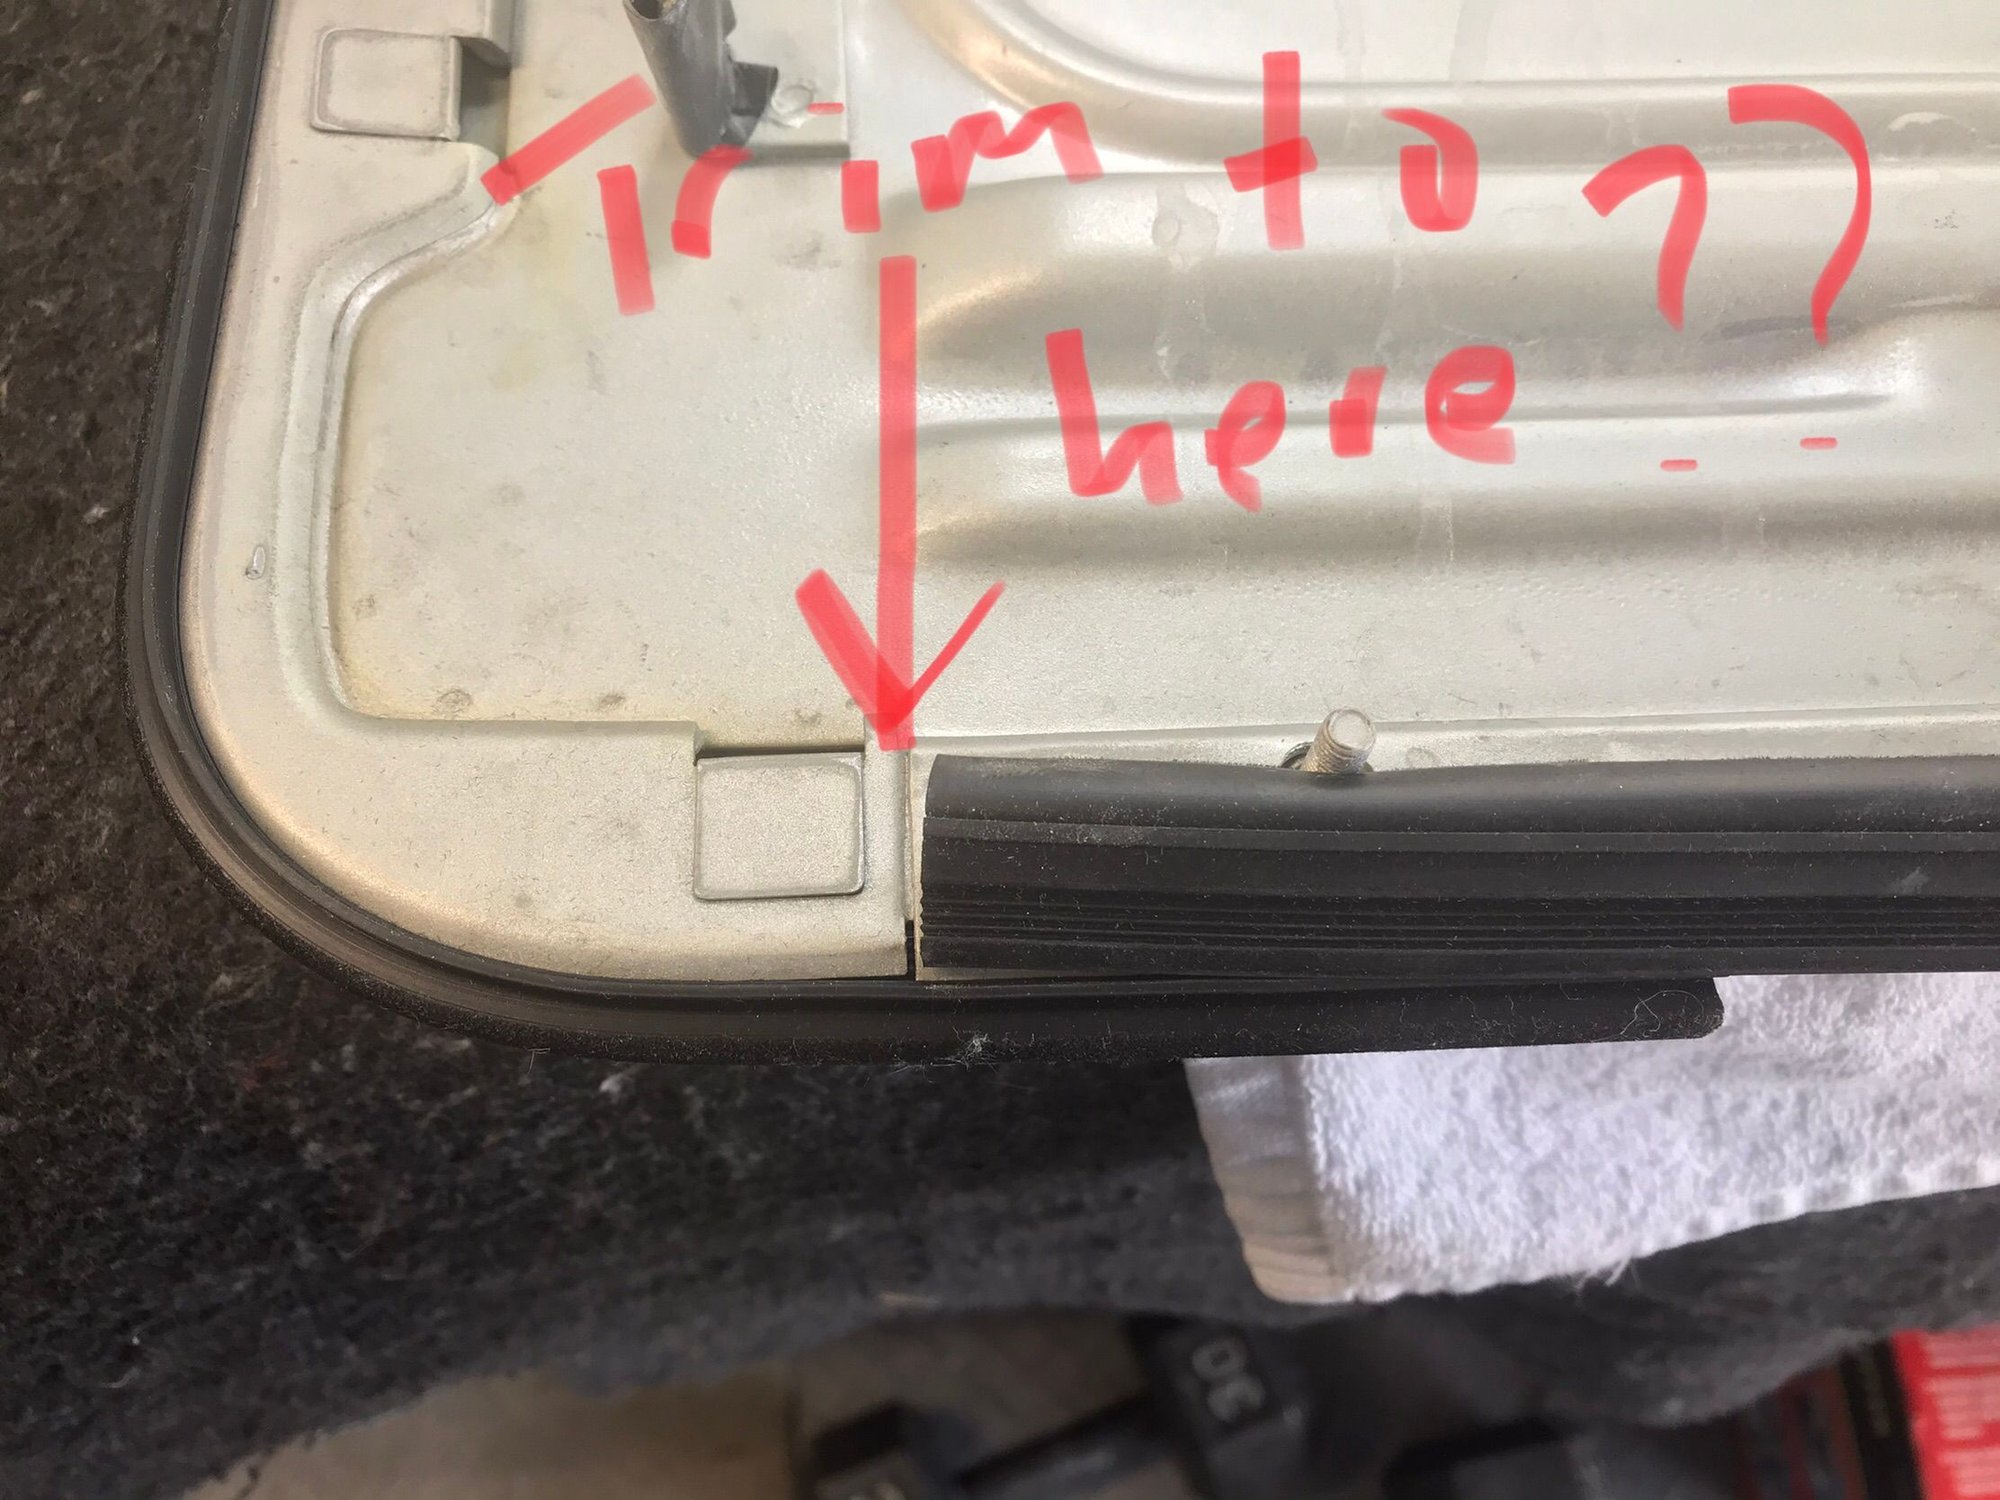
Aft seal trimmed to here ????

Plenty of seal to trim away...
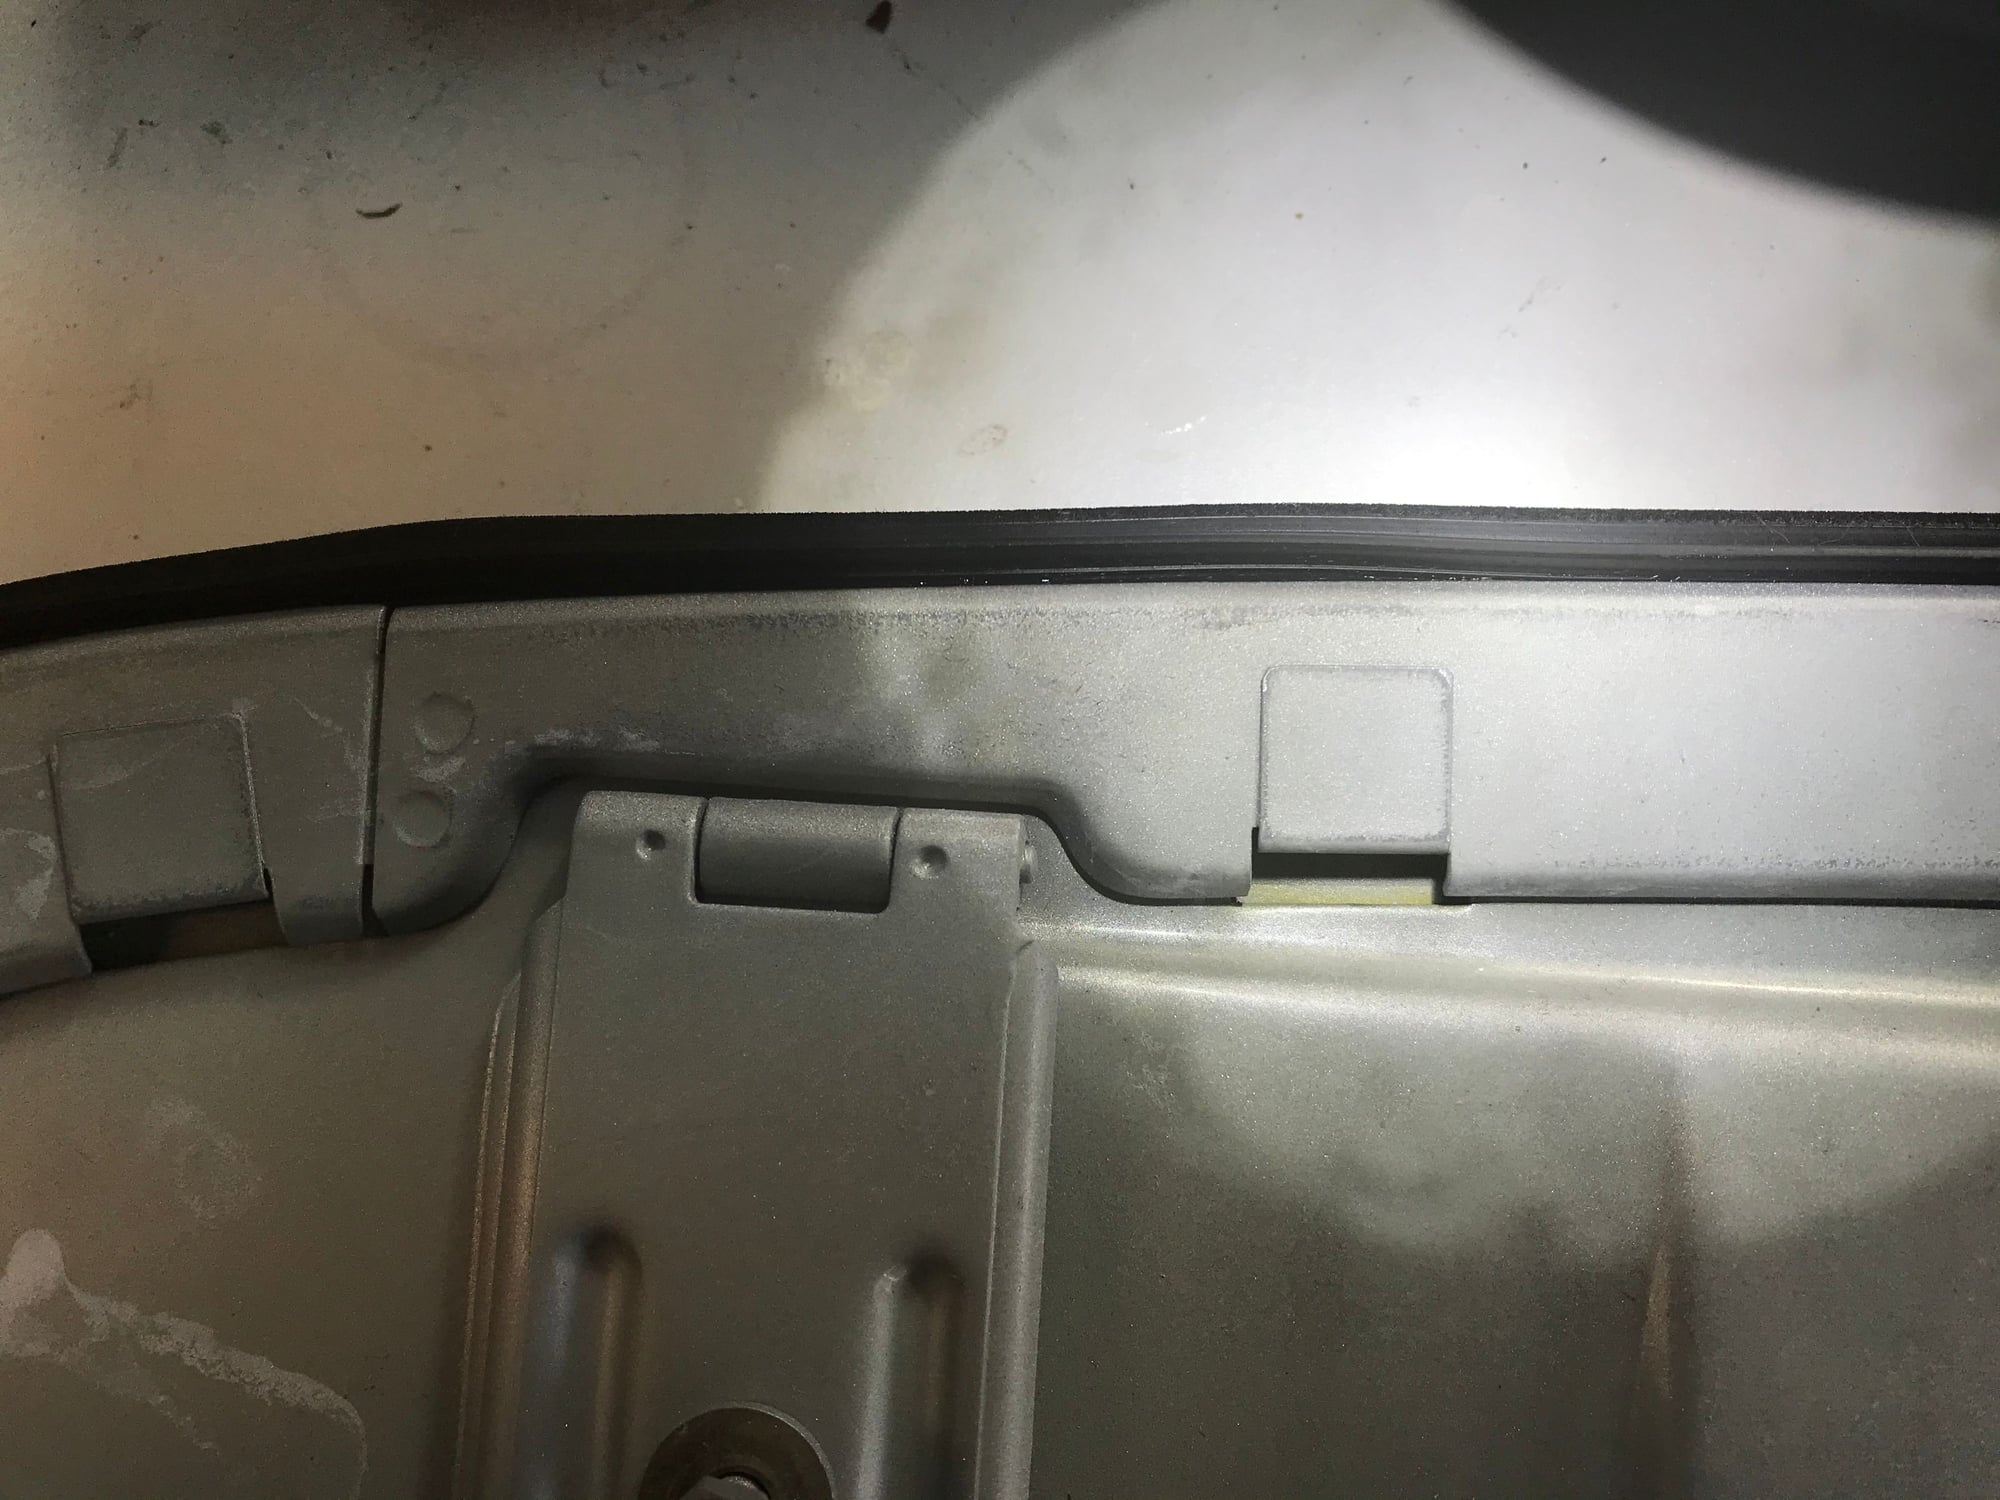
Flip the panel over and make sure it is fully seated..
Not fully seated...here above..
Soapy water. Start at the mid point of the seal and the panel push it in.....try not to stretch it as you do.


