Gap in sunroof.....how to adjust?
 06-15-2011 | 05:45 PM
#1
Thread Starter
Drifting
Joined: Dec 2001
Posts: 2,362
Likes: 8
From: Sackville, Nova Scotia
1989 S4
I have a water leak in the front drivers-side. It has been raining heavily here and when I am driving and put on the brakes, water will pour out of the headliner (close to the windshield) onto my lap.
If I put my fingers up in the gap between the windshield and the liner, I can feel water - it is limited to the drivers side.
Sunroof drains work in the front - still have to check the rears.
Did a search on sunroof adjustment - saw how to get to the adjuster screws, but my problem doesn't appear to be the sunroof sitting too high or low, it appears the sunroof is too far forward?
Here are pics of the front corners of the sunroof when closed.....
Passenger side...

Drivers side...

The front has a nice tight seal.
Now, pics of the rear when the sunroof is closed....
Passenger side...

Drivers side...

It's hard to tell from those pics, but you can see a gap with your eye - you could probably fit a pop cycle stick in the gap. The gap is larger on the drivers side (could be why the leak only happens on that side?).
Now, I assume that even with the sunroof drains working properly, this much of a gap is allowing enough water in that it is pooling up, yes?
If I adjust the rear higher, the gap will still be there. It appears the entire sunroof needs to move backwards a tad - is there an adjustment for this?
I have a water leak in the front drivers-side. It has been raining heavily here and when I am driving and put on the brakes, water will pour out of the headliner (close to the windshield) onto my lap.
If I put my fingers up in the gap between the windshield and the liner, I can feel water - it is limited to the drivers side.
Sunroof drains work in the front - still have to check the rears.
Did a search on sunroof adjustment - saw how to get to the adjuster screws, but my problem doesn't appear to be the sunroof sitting too high or low, it appears the sunroof is too far forward?
Here are pics of the front corners of the sunroof when closed.....
Passenger side...
Drivers side...
The front has a nice tight seal.
Now, pics of the rear when the sunroof is closed....
Passenger side...
Drivers side...
It's hard to tell from those pics, but you can see a gap with your eye - you could probably fit a pop cycle stick in the gap. The gap is larger on the drivers side (could be why the leak only happens on that side?).
Now, I assume that even with the sunroof drains working properly, this much of a gap is allowing enough water in that it is pooling up, yes?
If I adjust the rear higher, the gap will still be there. It appears the entire sunroof needs to move backwards a tad - is there an adjustment for this?
06-16-2011 | 01:22 PM
#2
Rennlist Member
Joined: Oct 2005
Posts: 5,194
Likes: 1,350
From: Gatineau, Qu�bec, Canada
06-16-2011 | 03:44 PM
#3
Thread Starter
Drifting
Joined: Dec 2001
Posts: 2,362
Likes: 8
From: Sackville, Nova Scotia
Thanks  - bookmarked that page in my "Porsche folder".
Went out last night thinking "hey, the roof appears to be too far forward - I'll just tap the switch and bring it back a tad". As soon as I hit the switch, the roof started to lower in the rear as it went backwards.
I obviously have to raise the rear of the sunroof a bit.....and I know how to adjust that. Hopefully it fits snug.
- bookmarked that page in my "Porsche folder".Went out last night thinking "hey, the roof appears to be too far forward - I'll just tap the switch and bring it back a tad". As soon as I hit the switch, the roof started to lower in the rear as it went backwards.
I obviously have to raise the rear of the sunroof a bit.....and I know how to adjust that. Hopefully it fits snug.
06-16-2011 | 05:12 PM
#5
Team Owner
Joined: May 2004
Posts: 28,637
Likes: 2,665
From: Philly PA
Ok since your having problems with the roof here is how to fix it..
first you need to tape a piece of the plastic to the the center of the roof panel the clear plastic that you find on the magazines at the DR office is a good thing or a piece of manila folder this will prevent the roof panel from getting scratched while you figure out the adjustments
\ open the roof about 3 to 4 inches try with the switch,
if thats not working then try to twist the black rubber connector at the motor .
Once this is done then look at the front of the roof there are 3 screws that hold the inner liner to the roof,
with a long phillips unscrew these about 2 turns and leave the screws in the roof.
Then pull down on the front of the liner this should disengage the liner from the roof.
Then carefully slide the liner forward,
you will have to open the roof a bit more .
NOTE there are 3 spring fingers at the rear of the roof these hold the liner from bouncing, it is common for the fingers to catch on the inside of the liner and prevent it from being slid forwards,
NOTE also there are 3 felt pads that are on the liner side,
these slide on the inside of the roof so the rear of the liner needs to be pushed up a few MM to avoid ripping the felt pads off when its close to coming out of the opening of the roof.
Once you have the liner out
Get some WD40 and spray the side roof tracks and then wipe them off remove as much of the dirt as possible then close the roof .
NOTE the spring fingers will also spring down when the roof is closed.
You can push the springs on either side to ride on the roof interior you will have to hold the center spring up when you open the roof or it will get bent when the roof opens.
Now with the roof closed there are 4 attaching points to the roof.
The front bar has 2, 8mm bolts at each end with a height screw visible through the bar these screws will need to be blue loctited .
Important these screws dont get tightened up evenly,
they just get run till they are snug,
the loctite will hold them in place,
you also want to count the number of turns of each screw,
so you can install them in the same place.
These front screws will give a tilt to the front bar as well as raise or lower each front corner of the roof, if the 8mm bolts are too tight then it will cause a bind in the front track guides on the bar edges this will cause the roof to bind and possibly get stuck , so you may have to experiment some till you reach a happy medium.
To raise or lower the front corners of the roof loosen the screws on that side then you can turn the flat head screw visible through the bar to raise or lower the roof edge, ( you shouldnt have to adjust these however)
Now to the part that probably causing your problem.
With the roof closed there are 2 transition blocks on the rear of the roof
these are held in with 8mm bolts these screws also need to be locktited into place,
with the roof closed and the roof level with the car roof the bars should be flat or parallel to the track,
With the screws loose you can see how the bars will move to raise and lower the roof, if you press on the inside of the roof panel.
With the roof closed tighten up these transition blocks with the loctite put on the 8mm bolts
and also tighten the phillips screw that holds keyway,
and the 2 flat blade screws on each block .
Make sure the roof panel is flush with the roof,
if its too high then it will scratch the roof better to be a bit low while testing,
try closing the roof tighter while twisting the rubber connection.
Now you want to see if the transmission cables are even,
with the roof switch open the roof and verify that both of the transition blocks move at the same time,
if one side is moving before the other then close the roof and remove the roof transmission,
2, 8mm nuts with a screwdriver pry the cable for the side thats not even till it is,
NOTE you shouldnt have to do this adjustment unless the transition block may have a broken finger where it connects to the transition blocks on the roof panel)
If you find one of the cables is damaged thet you will need to source a new cable 928INTL has them
Once the cables are even replace the transmission slide it back into the rubber connection point .
Test your work by opening and closing the roof,
work slowly so you dont scratch he roof panel,
if the fit is close then you can pull up on the roof panel of the car to give a few more MM of clearance ,
( do this with the roof just open and the rear edge dropped down,)
also be very careful with the center spring this will have to be held up while you open the roof,
it can damage the car roof liner if you forget to hold it up.
Once your roof is level then lubricate the roof rails with some white lith spray grease,
work the roof open and closed a few times see if the roof is smooth,
if not you may have to go back and readjust the front bar so it is also parallel with the roof tracks.
Once all is working open the roof about 5 inches and slide in the liner from the outside of the car fit in the roof, being careful of the felt pads and the spring fingers .
slide the front attach point under the washers on the screws then push the liner up to the roof panel then tighten the screws ,
close the roof and see if you need to adjust liner for a better fit once the roof is closed.
Test your work the roof should open and close smoothly
__________________
06-16-2011 | 09:32 PM
#6
Pro
Joined: Dec 2010
Posts: 700
Likes: 2
From: Palgrave, Ontario, Canada
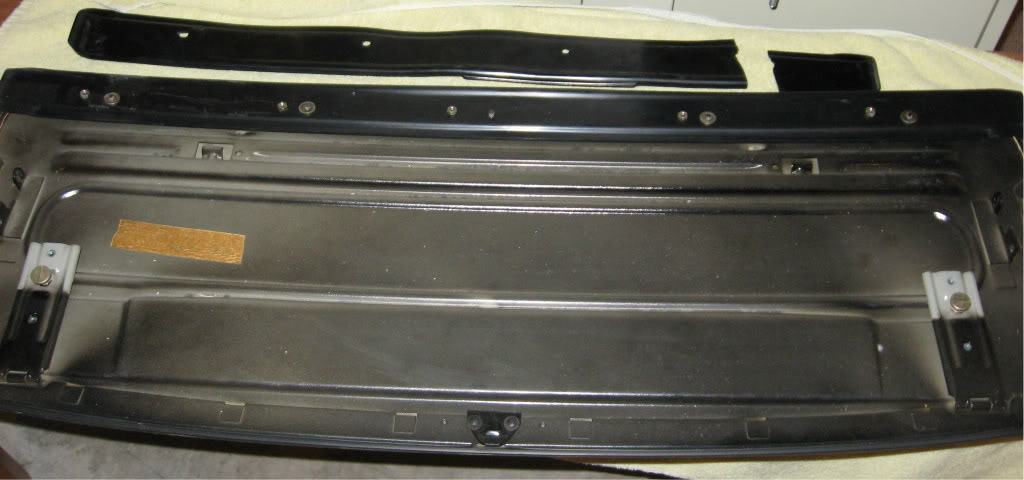
It is worth noting that the seal is not designed to stop all water entering. Some will always enter and be directed to the drains. However, in the rear there is something equivalent to an eaves trough (called a sunroof drip tray 928 564 167 41) that catches the incoming water at the rear and directs it to the two rear side drains. However, in my '88 this was both distorted and cracked - which meant it did not work. So while the instructions above can help you align the sunroof as it should be they won't fix a broken tray. I have pics if you need them. Once you access the underside of the roof panel it will be obvious if you need a new tray once the roof is fully forward.
06-17-2011 | 11:05 AM
#7
Thread Starter
Drifting
Joined: Dec 2001
Posts: 2,362
Likes: 8
From: Sackville, Nova Scotia
When you say underside of the roof panel, do you mean he inside of the sunroof once the black cover is removed by taking out the three recessed screws at the front of the sunroof?
Trending Topics
06-17-2011 | 08:31 PM
#8
Pro
Joined: Dec 2010
Posts: 700
Likes: 2
From: Palgrave, Ontario, Canada