
Single fuel regulator
 03-31-2011, 07:54 PM
#1
Rennlist Member
Thread Starter
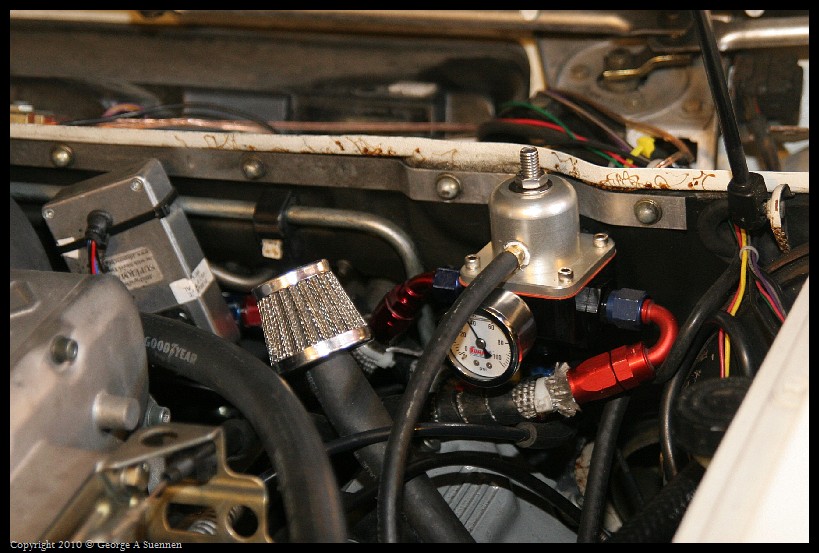
In an attempt to simplify the EFI system and eliminate some of the clutter around engine, I`m thinking about combining both regulators.
My 83S 4.7 16V appears to have two regulators at rear of engine and a single dampner at front. Fuel flows from pump, thru front dampner, out to both fuel rails and back to two regulators, where it then flows back to tank. Pressure is actually adjusted buy return line flow.
My question is : Can I install a single adjustable fuel pressure regulator in place of the two rear regulators? If so, Has anyone done it and what regulator did you use and how did it effect performance?
 03-31-2011, 08:47 PM
#4
Rennlist Member
yes, we did this with scots car and it seemed to work well. the reason it was done was to only have to buy, one regulator that was adjustable.
what we did was just pinch off the return line opening of the driver side regulator. then, put the return line hose over that. now, fuel cannot return through that opening now. if it leakes a little, the fuel goes where it should anyway. the adjustable regulator now controls the flow back to the tank, and regulates pressure.. I susposse, you could just connect the line going in and out of the fuel regulator ,and cap the return line. doing it my way, doesnt require anything but a vice grip to crush the return line. a little grinder to make the crushed line round to fit in to the return line.
what we did was just pinch off the return line opening of the driver side regulator. then, put the return line hose over that. now, fuel cannot return through that opening now. if it leakes a little, the fuel goes where it should anyway. the adjustable regulator now controls the flow back to the tank, and regulates pressure.. I susposse, you could just connect the line going in and out of the fuel regulator ,and cap the return line. doing it my way, doesnt require anything but a vice grip to crush the return line. a little grinder to make the crushed line round to fit in to the return line.
In an attempt to simplify the EFI system and eliminate some of the clutter around engine, I`m thinking about combining both regulators.
My 83S 4.7 16V appears to have two regulators at rear of engine and a single dampner at front. Fuel flows from pump, thru front dampner, out to both fuel rails and back to two regulators, where it then flows back to tank. Pressure is actually adjusted buy return line flow.
My question is : Can I install a single adjustable fuel pressure regulator in place of the two rear regulators? If so, Has anyone done it and what regulator did you use and how did it effect performance?
My 83S 4.7 16V appears to have two regulators at rear of engine and a single dampner at front. Fuel flows from pump, thru front dampner, out to both fuel rails and back to two regulators, where it then flows back to tank. Pressure is actually adjusted buy return line flow.
My question is : Can I install a single adjustable fuel pressure regulator in place of the two rear regulators? If so, Has anyone done it and what regulator did you use and how did it effect performance?
03-31-2011, 08:50 PM
#5
Rennlist Member
we did it only to richen the fuel mixture for the euro mods (all) and 5 liter bottomend. with no mods, you might get a gas guzzler on your hands! It might be difficult to get the fuel mixture back to normal for cruise and full throttle without a lot of tuning. even at full lean, the RRFR will richen the mixture up about 15%
04-01-2011, 02:13 AM
#7
Addict
Rennlist Member
Rennlist Member
I did that on my 90. I use a Weldon A2040, which replaced an Aeromotive 13109, which
replaced an Aeromotive 13105 and 2 dampners, which replaced a Vortech SFMU, which replaced
the stock regulator.
replaced an Aeromotive 13105 and 2 dampners, which replaced a Vortech SFMU, which replaced
the stock regulator.
Trending Topics
04-01-2011, 05:14 AM
#8
I'm planning to do the same as Mark did, however this time by making a stock FPR item adjustable as described at the bottom right of this web page: http://www.ricdidonato.com/Downtime/mods.html
04-01-2011, 06:23 PM
#9
Instructor
Join Date: Apr 2009
Location: Sydney Australia
Posts: 157
Likes: 0
Received 0 Likes
on
0 Posts
I'm planning to do the same as Mark did, however this time by making a stock FPR item adjustable as described at the bottom right of this web page: http://www.ricdidonato.com/Downtime/mods.html
http://cgi.ebay.com/ebaymotors/Unive...item3f08aac0c5
04-04-2011, 09:11 AM
#10
When you add the costs for custom made fuel lines, Yes, I think it's worth the effort. Just like Mark sayd: close one off, make the other one adjustable. By doing this, it will cost time and some little bolts and a plate of aluminium. The fuel lines can than stay as they are.
05-24-2011, 11:39 AM
#11
After months of doing other stuff, I found some time (and machines at my work) to make my own adjustable fuel pressure regulator.
First, I put the regulator in a lathe and cut the top part of:
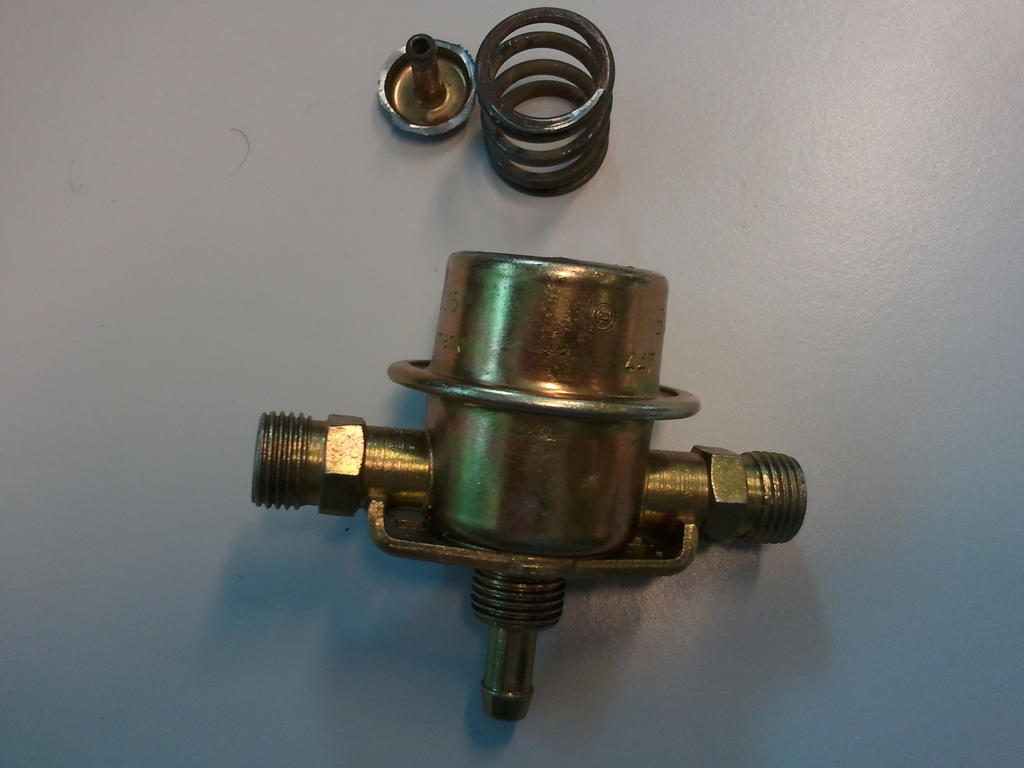
Then, I made a cap for the spring so a bolt would push it further in or release it more. The extra thickness of the cap was grinded away from the length of the spring. Also, I made a new lid of alluminium:
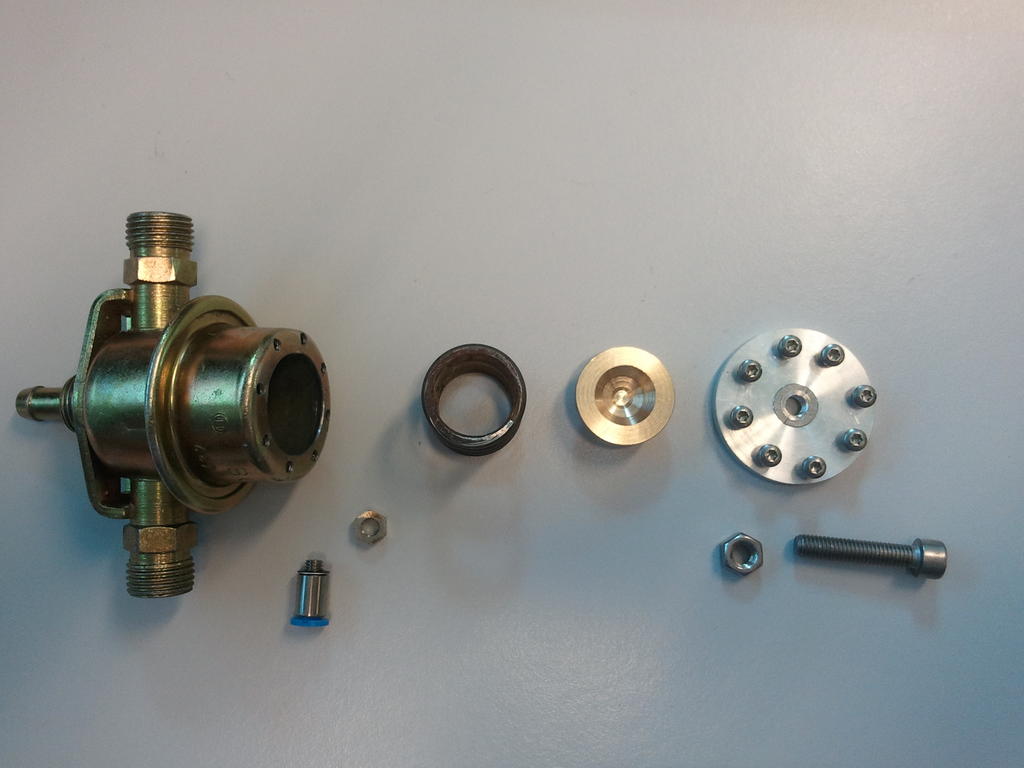
At the bottom, there's a small glossy cylinder, actually a Festo high pressure coupling for the vacuum to be connected.
It all bolted together like this, with some sealant between body and lid:
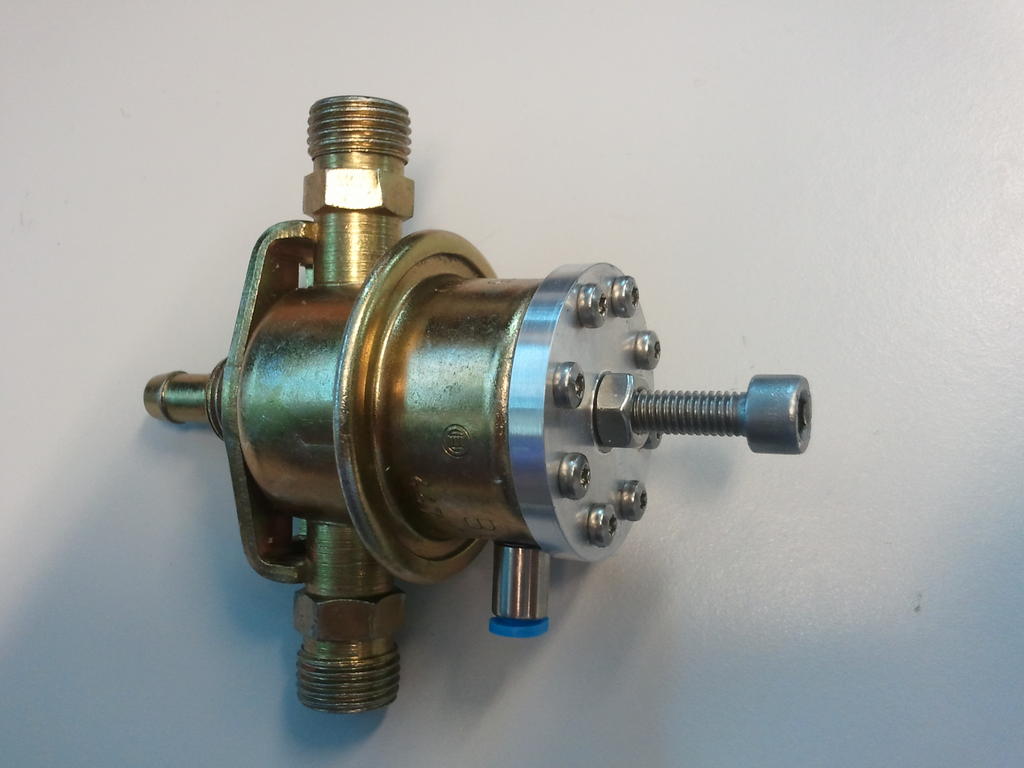
The second stock regulator is redundant now, so I made a tube to replace it. This reduces risks of extra leakage, but keeps the original, reliable fuel tubes.
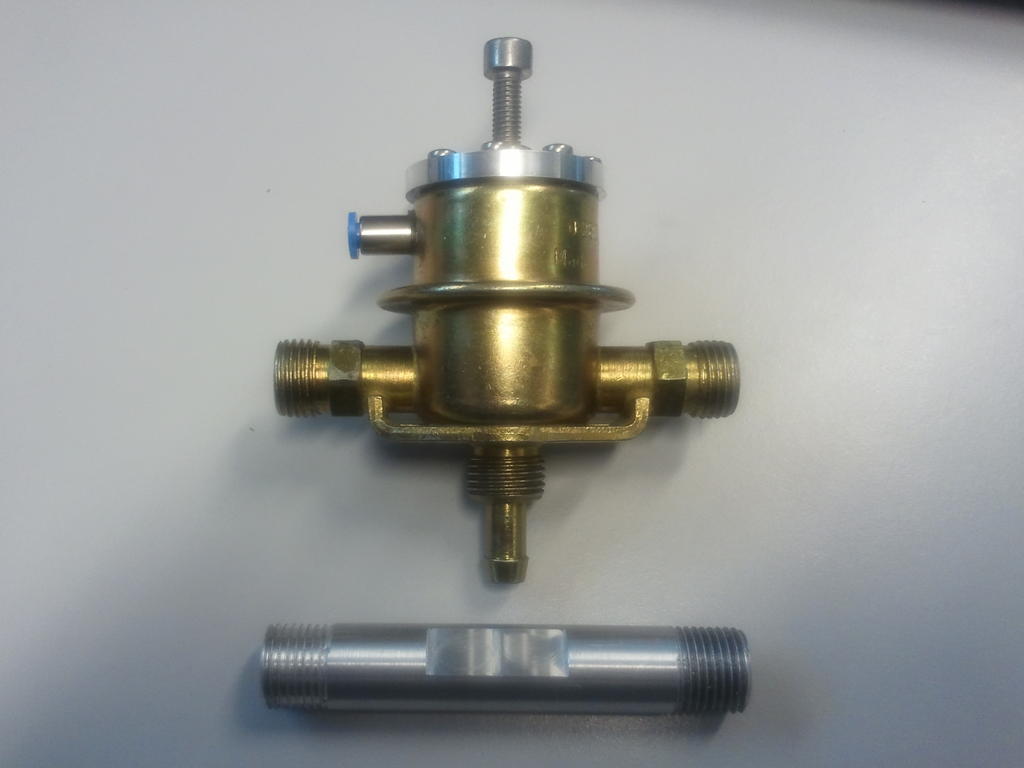
This setup keeps most of the original parts and saves me a lot of money, not only on the regulator (not the most expensive part in itself), but even more on hoses and connectors.
First, I put the regulator in a lathe and cut the top part of:
Then, I made a cap for the spring so a bolt would push it further in or release it more. The extra thickness of the cap was grinded away from the length of the spring. Also, I made a new lid of alluminium:
At the bottom, there's a small glossy cylinder, actually a Festo high pressure coupling for the vacuum to be connected.
It all bolted together like this, with some sealant between body and lid:
The second stock regulator is redundant now, so I made a tube to replace it. This reduces risks of extra leakage, but keeps the original, reliable fuel tubes.
This setup keeps most of the original parts and saves me a lot of money, not only on the regulator (not the most expensive part in itself), but even more on hoses and connectors.