

Iris gets driver's seat new leather by Paul Champagne
 12-05-2010, 01:23 AM
#1
Three Wheelin'
Thread Starter
Join Date: Sep 2007
Location: Ridgecrest, California
Posts: 1,363
Likes: 0
Received 149 Likes
on
33 Posts
Today I re-installed the driver's seat in Iris after a recover performed by Paul. This is the first job I've sent to Paul and I'm VERY impressed with his workmanship and couldn't be happier with the result. I thought I'd post a few pics before the repair and after the seat was re-installed.
Here's both the driver's seat (left) and passenger seat (right) before the repair. You can see the discoloration on the driver's seat.
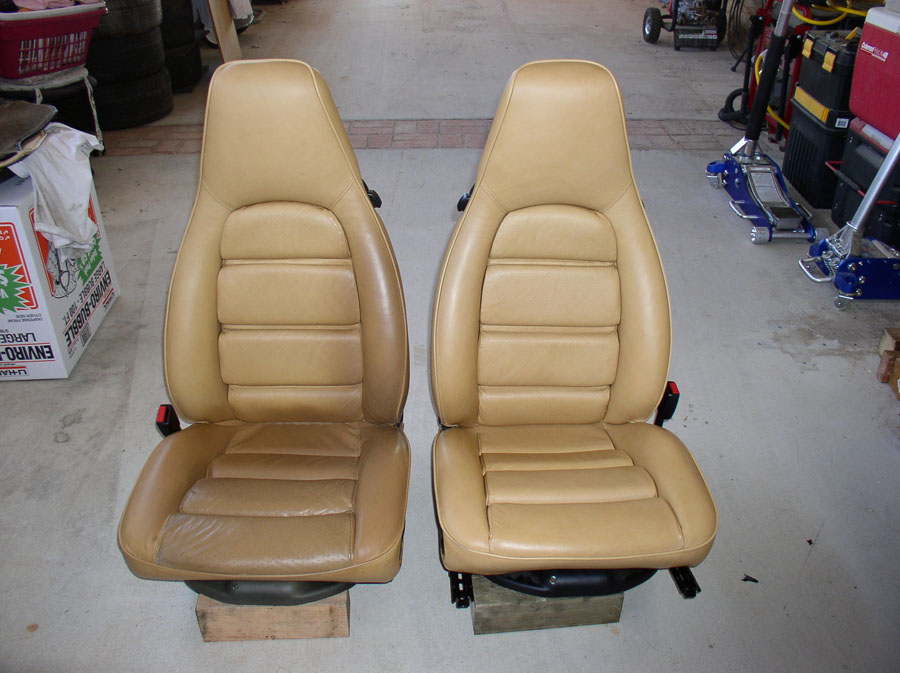
Here's a close up on the driver's seat. The forward two seat bottom panels were repaired previously by the original owner and the material didn't even feel like leather - more like vinyl and the holes were noticeably larger than the rest of the seat.
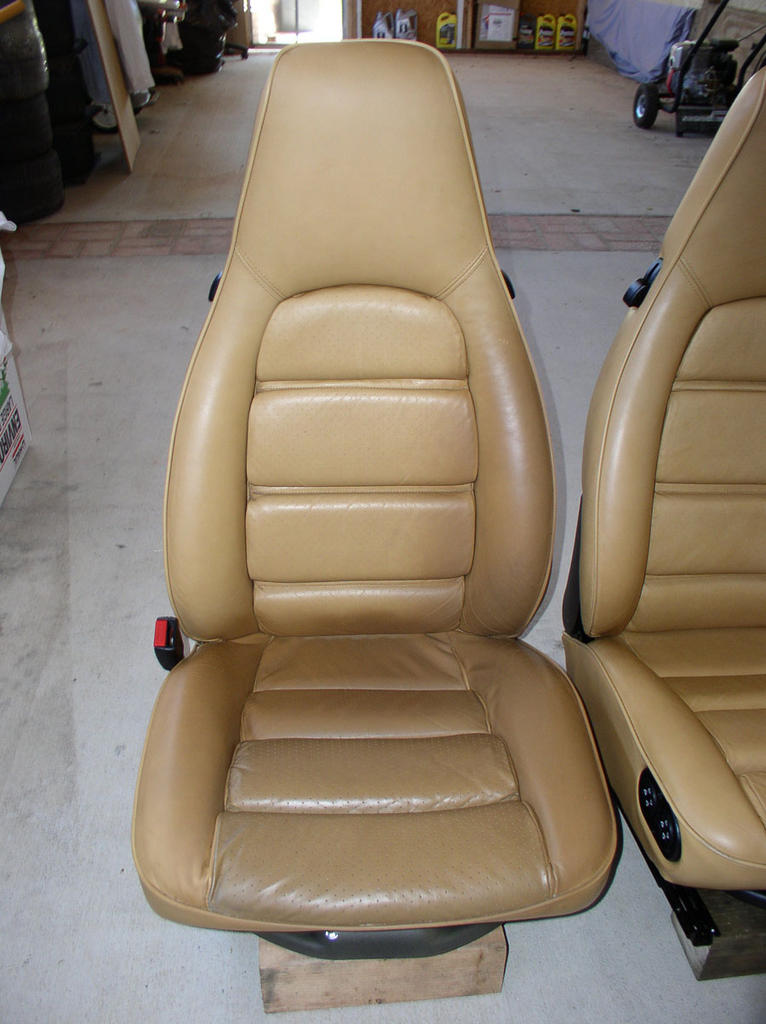
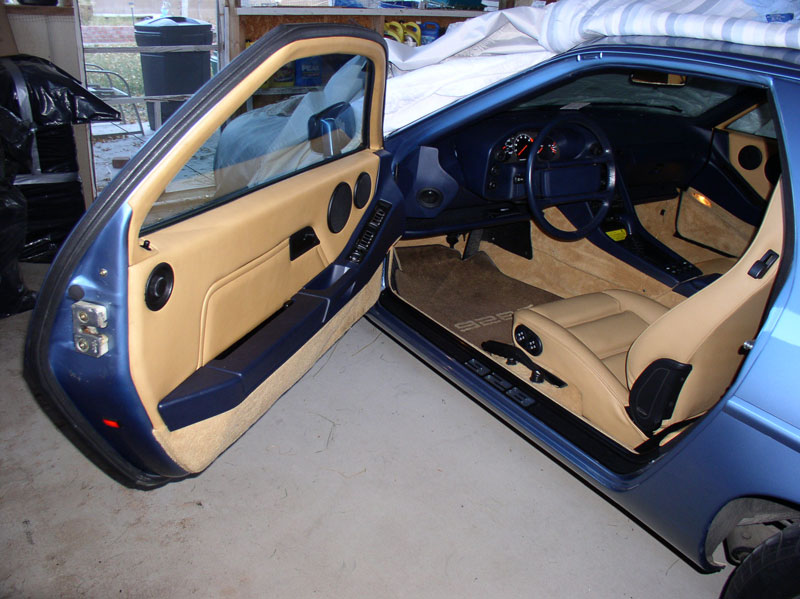
I asked Paul if he could restore the seat so it looked factory original in style, color and texture. He said yes and I shipped him the seat. I got the seat back last weekend and installed it today. Here are some pics of the result....
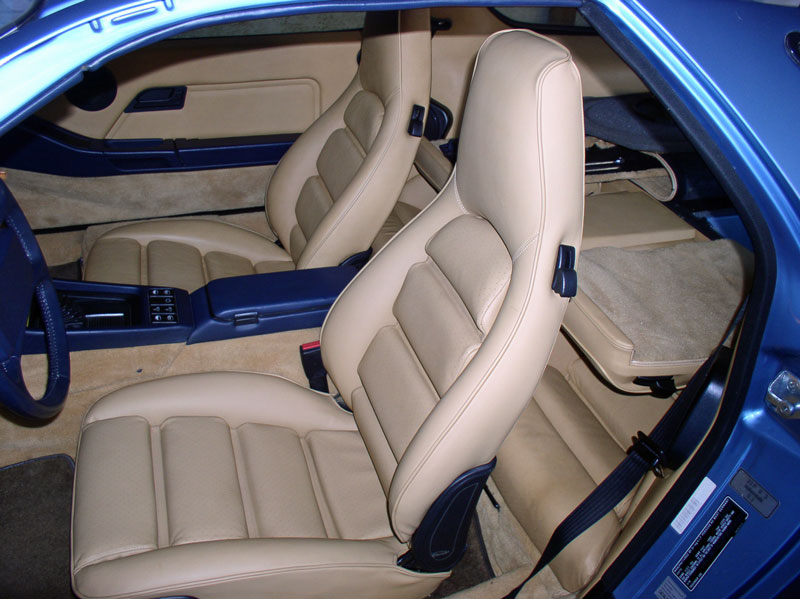
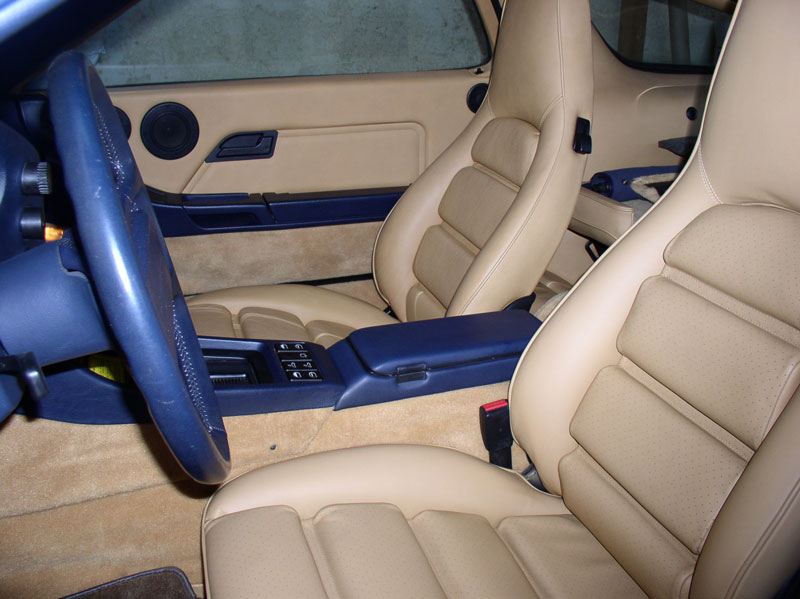
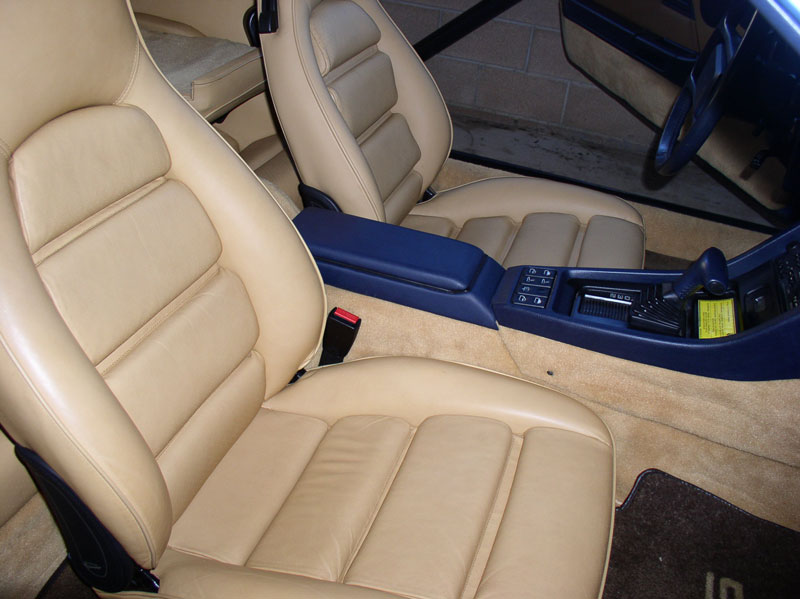
I'm so thankful we have a resource like Paul! THANKS for doing such a great job on this seat!
Here's both the driver's seat (left) and passenger seat (right) before the repair. You can see the discoloration on the driver's seat.
Here's a close up on the driver's seat. The forward two seat bottom panels were repaired previously by the original owner and the material didn't even feel like leather - more like vinyl and the holes were noticeably larger than the rest of the seat.
I asked Paul if he could restore the seat so it looked factory original in style, color and texture. He said yes and I shipped him the seat. I got the seat back last weekend and installed it today. Here are some pics of the result....
I'm so thankful we have a resource like Paul! THANKS for doing such a great job on this seat!
 12-05-2010, 01:43 AM
#2
Chronic Tool Dropper
Lifetime Rennlist
Member
Lifetime Rennlist
Member

I can see that I need to start gathering my lunch money and, in parallel, increase my billing rate for consulting. My seats look much more like Dwayne's "before" pictures when they should be closer to the "after" images.
Mine's a DD. Do mere mortals like myself stand a chance of installing covers correctly?
Mine's a DD. Do mere mortals like myself stand a chance of installing covers correctly?
 12-05-2010, 11:44 AM
#4
Three Wheelin'
I can see that I need to start gathering my lunch money and, in parallel, increase my billing rate for consulting. My seats look much more like Dwayne's "before" pictures when they should be closer to the "after" images.
Mine's a DD. Do mere mortals like myself stand a chance of installing covers correctly?
Mine's a DD. Do mere mortals like myself stand a chance of installing covers correctly?
 12-05-2010, 12:25 PM
#6
Rennlist Member
Beautiful Dwayne. I'm thinking of sending my seats to Paul to bolster the bottom seat pleats, which are glued from what I understand, and Paul has a fix for that so that they don't ultimately "blow out" and flatten. How did you ship the seats to Paul and what was the approximate shipping cost?
12-05-2010, 12:51 PM
#7
Rennlist Member
Dwayne............thats an excellent example of the 928; beautiful work Paul.
Ed.......I share your logistics concern and have spoken with Paul, I'll send a PM with details.
Ed.......I share your logistics concern and have spoken with Paul, I'll send a PM with details.
Trending Topics
 12-05-2010, 09:30 PM
#10
Burning Brakes
Dwayne,
I have been waiting for another OUTSTANDING DIY pictorial from you. Any chance that you would do another one?
Thanks again for your great work as always.
Steve
I have been waiting for another OUTSTANDING DIY pictorial from you. Any chance that you would do another one?
Thanks again for your great work as always.
Steve
12-05-2010, 09:35 PM
#11
Three Wheelin'
Thread Starter
Join Date: Sep 2007
Location: Ridgecrest, California
Posts: 1,363
Likes: 0
Received 149 Likes
on
33 Posts
Beautiful Dwayne. I'm thinking of sending my seats to Paul to bolster the bottom seat pleats, which are glued from what I understand, and Paul has a fix for that so that they don't ultimately "blow out" and flatten. How did you ship the seats to Paul and what was the approximate shipping cost?
Paul recommended a Wardrobe "Shorty" box available at moving stores such as U-Haul. One seat fits nicely in this box. My shipping weight for one seat was 65.4 pounds and cost $152.92 to ship from CA to TX using FedEx.
I only needed to restore the driver's seat. However, Paul's prices are available on his website for his products. I would recommend e-mailing Paul or calling him if you have special requirements for your restoration. He's great to work with! Here's the link:
http://www.designpaulchampagne.com/PorscheOrder.html
12-05-2010, 09:38 PM
#12
Three Wheelin'
Thread Starter
Join Date: Sep 2007
Location: Ridgecrest, California
Posts: 1,363
Likes: 0
Received 149 Likes
on
33 Posts
Why, YES! As a matter of fact I'm working on a massive write up for TT bearing and TC bearing replacement. I hope to be fnished with it next weekend and will start the upload to this forum.
12-05-2010, 09:40 PM
#13
Rennlist Member
Looks great, Dwayne! Excellent work by Paul as usual.
I was particularly pleased to finally see an example of Paul's work performed to mimic the factory appearance. I'm a purist, and if I ever engage him to do work on mine I'll ask for the same look. I'm happy he offers this option.
I was particularly pleased to finally see an example of Paul's work performed to mimic the factory appearance. I'm a purist, and if I ever engage him to do work on mine I'll ask for the same look. I'm happy he offers this option.
12-05-2010, 11:52 PM
#14
Rennlist Member
Thanks Dwayne. That price isn't too bad. My ship cost would probably be about the same, altho my seat won't weigh as much - no power switches, etc.