project time!
 04-21-2010, 09:54 PM
#1
Drifting
Thread Starter
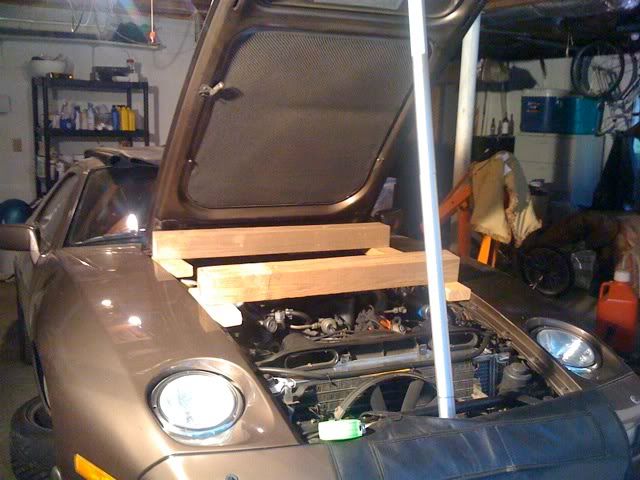
I finally got the motivation to stop driving and get into the garage. Couple hours later and I'm ready to lift the engine. Tomorrow evening I'll pick up the eye bolts and put together the Andrew special 4x4 engine lift (already have the wood), and get the cross member out. I'm taking it a bit at a time, figure everything will take me a couple weeks to complete (yeah and my wife says double it at least). So to light a fire under my ***, here's what's going on.
Motor mounts (obviously)
Ignition switch
Rich condition when engine gets hot
Starter issues
a/c temp sensor
Intake refresh
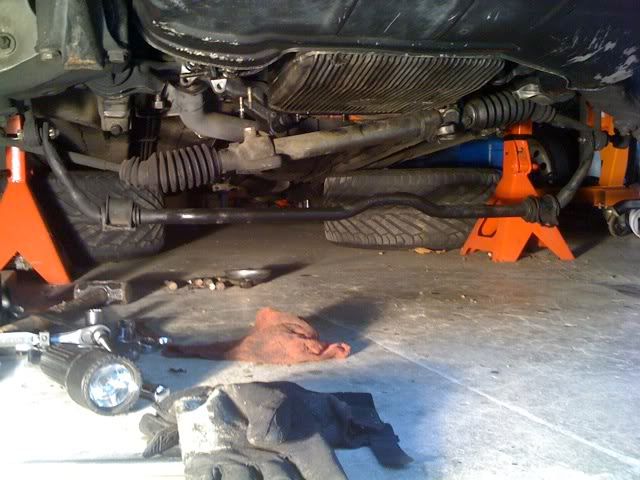
Clearly I don't have Dwayne's concours skills, but I will be cleaning things up as I go. Honestly aside from a little oil and dirt on the swaybar and rack, the underside ain't that bad.
Motor mounts (obviously)
Ignition switch
Rich condition when engine gets hot
Starter issues
a/c temp sensor
Intake refresh
Clearly I don't have Dwayne's concours skills, but I will be cleaning things up as I go. Honestly aside from a little oil and dirt on the swaybar and rack, the underside ain't that bad.
 04-22-2010, 10:38 AM
#6
Drifting
Thread Starter
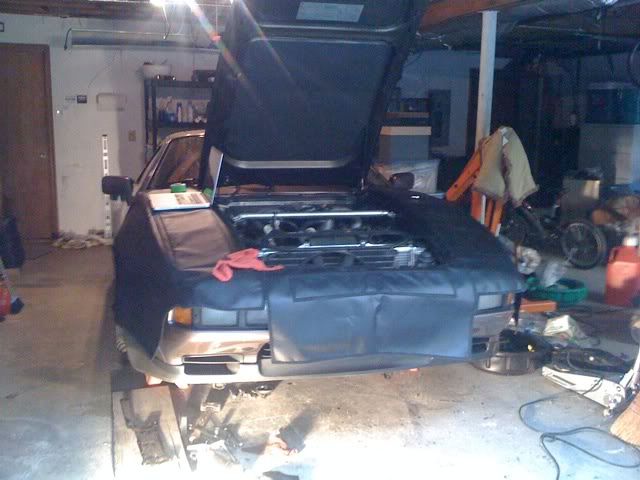
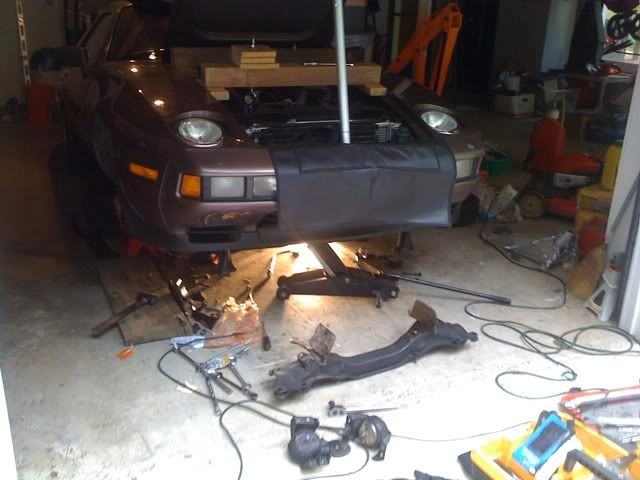
My shoulders are stiff this morning, ain't as young as I used to be. But so far it's not a bad job, just a bunch of bolts. I didn't have any trouble getting a wrench on the 4 big rack bolts, just used a 17mm box on top and a socket down below. Lots of posts here about this job being hard, dirty, many hours...but I don't think it's that bad. Notice the laptop on the fender, open to Dwayne's motor mount page.  Back at it again tonight!
Back at it again tonight!
04-22-2010, 11:02 AM
#7
Three Wheelin'
If you enjoy "just a bunch of bolts", wait to you get to the oil pan. It will be shear bliss!
If you clean things up while you're at it you could be the next Rob Edwards!

If you clean things up while you're at it you could be the next Rob Edwards!
Trending Topics
04-22-2010, 11:13 AM
#8
Drifting
I’m having flash backs from about six years ago when I did this project. Other than maybe an oil change or two back in college, I had never worked on a car before taking on this.
It really wasn’t difficult, it did take me some time, and it was very dirty. Turns out my car had a leaky power steering hose and had been like that for years (thanks PO).
Anyhow it’s not too bad, the hardest part was lining up the horizontal bolt holes with one hand and a screw driver while trying to insert with the other. Some determination and swearing helped… that and a lot of Gojo.
Good luck and don’t forget to beat yourself on the chest a few time after your done.
04-26-2010, 09:21 PM
#9
Drifting
Thread Starter
Family time intervened at the end of last week, sick on Saturday and then family time again on Sunday. A guy can't get some decent garage time these days. But I managed to get most of the A-Lift built this evening only to discover the eye bolts I bought won't work. Crap. I'll find the right ones tomorrow.
05-01-2010, 12:25 PM
#10
Drifting
Thread Starter
Cross member is out! Damn I'm tired now. The upper cross member bolts really weren't bad at all, managed to get wrenches on the without a problem. Now I just need an impact to get the motor mount upper nut off. I'll have this part of the project done today, hopefully couple more things too.
05-01-2010, 03:16 PM
#13
Chronic Tool Dropper
Lifetime Rennlist
Member
Lifetime Rennlist
Member

Use the floor jack to push the crossmember back into place. Easier than wrestling with it, the tools and te bolts with only two hands.
Ditto on the oil sump on replacement. Just use the jack to holt it all in place while you get a few of the bolts/nuts on. Use a few wire ties to hold the gasket in place while you place the sump. Ratchet part on the outside of the sump. Cut the ties once more of the bolts are in, but before you pull up on the bolts.
DON'T LEAVE ANYTHING IN THE SUMP! Rags, paper towels, gloves, nothing. Be sure to recover the rag you tied to the crank to manage the oil dribblies too.
A piece of all-terrain rug under there will help with the old-age pains.
And have fun!
05-01-2010, 03:28 PM
#14
Drifting
Thread Starter
After a trip to the dump I'm diving back in now, hope to have it back together in the next couple hours. Yeah it's just a bunch of bolts...but tiring bolts. Good suggestions on the zip ties, I'll do that as I put the new gasket in. And my motor mounts are fine considering I bought them more than a year ago, but I did check them to be sure.
05-01-2010, 07:12 PM
#15
Drifting
Thread Starter
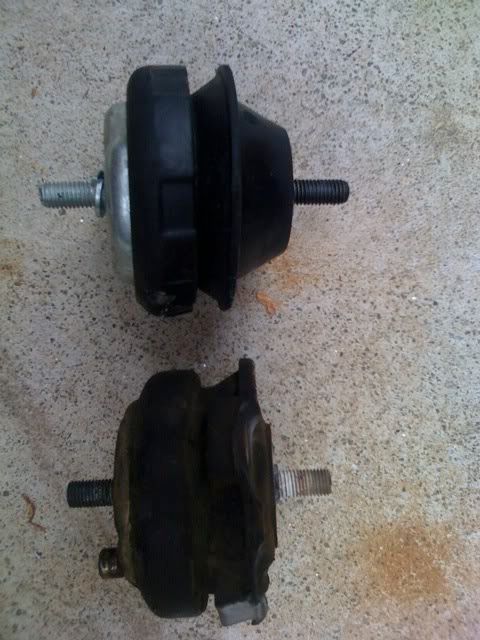
Pan done, new motor mounts in, cross member is bolted back in. Nothing is torqued yet and the steering rack and sway bar are still hanging, but my knees can't take any more today. The most shocking thing about this whole project is just how many bolts I've found that were hand tight or downright loose. And not just the pan bolts (but plenty of those were loose too), but motor mounts, steering rack, lots. And with as many of the oil pan bolts loose as it had, I can't believe it didn't leak a drop...but it didn't. Obligatory old mount vs. new mount pic. Yeah the old ones were toast.