
Repainting My Turbo 16V
 04-04-2010, 12:16 AM
#46
Man of many SIGs
Rennlist Member
Rennlist Member
Thread Starter


 08-01-2010, 12:27 AM
#48
Man of many SIGs
Rennlist Member
Rennlist Member
Thread Starter
OK, more progress pics. The last pics I posted were after the base coat ( color) was laid down as well as a coat of clear. Well folks, that coat of clear was wet sanded w/ 1500 grit and then a couple more coats of clear were sprayed. This series of pictures shows work that was done today. There was plenty of wet sanding, this time with 1500 and 3000 grit. then polishing compound is used with a buffer. Tomorrow we will be finishing the buffing and begin reassembly.
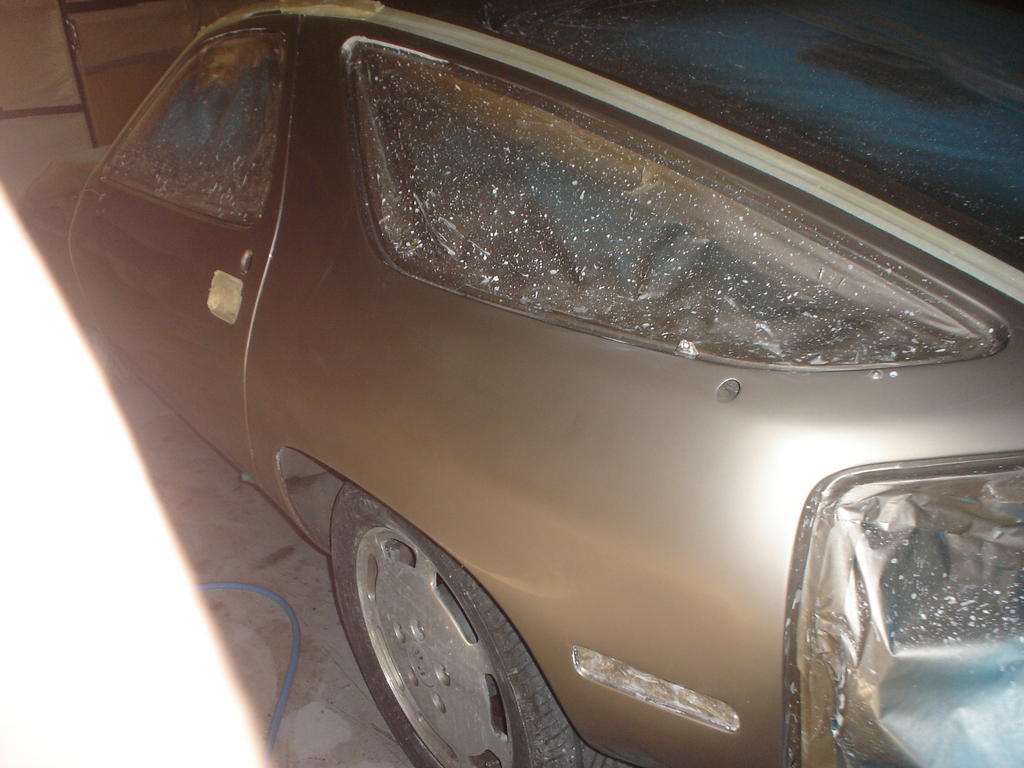
This first picture shows what the rear quarter looks like after you take it to task with some 3000 grit wet paper.
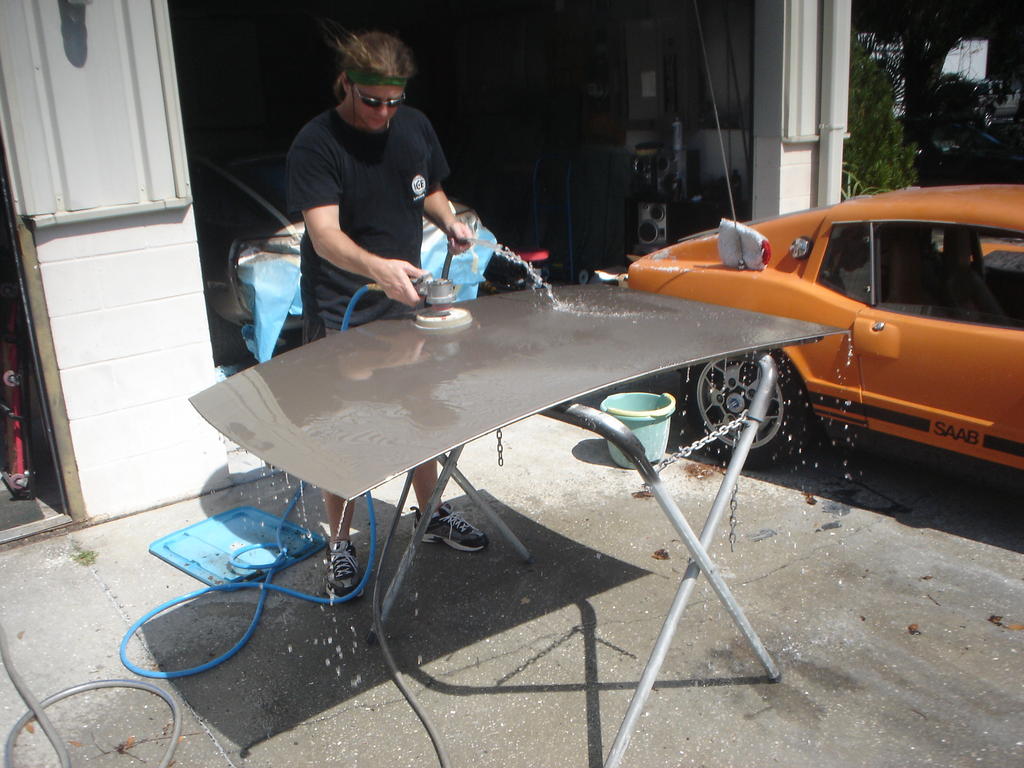
This is me lightly DA'ing the hood with some 3000. I actually put the hose down and used two hands after this pic was taken. I had already blocked it with 1500 by hand. For those that havent seen it. 3000 grit paper is like notebook paper. Theres not alot of cutting done with it. Its just used to take out the orange peal from the clear.
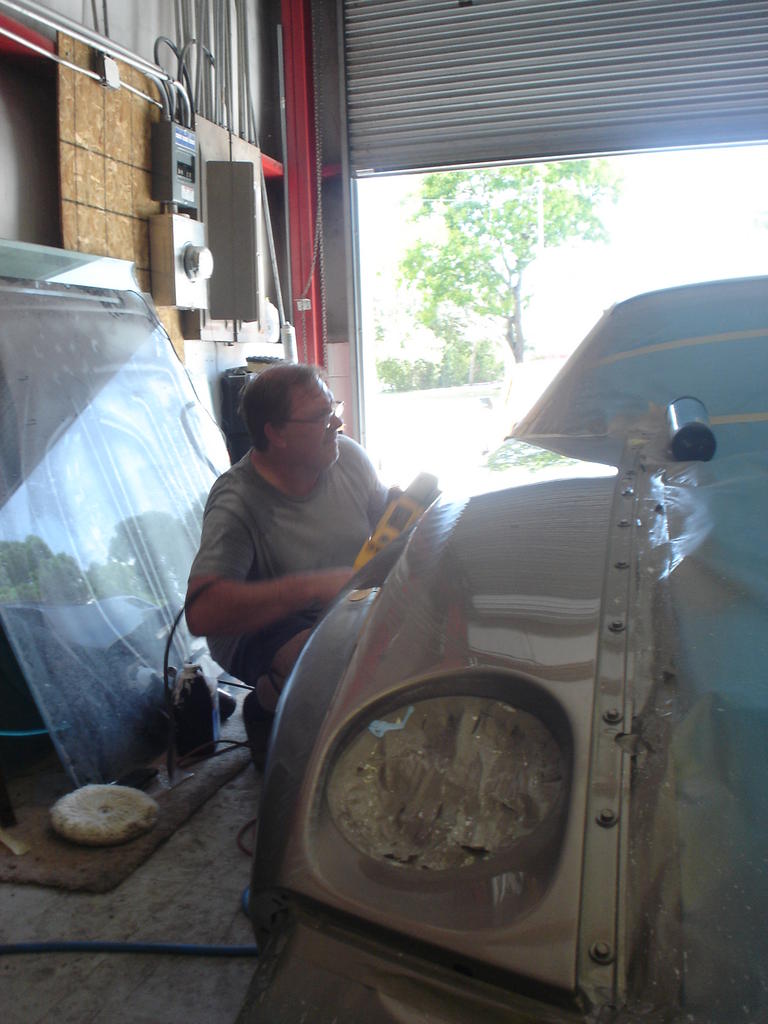
This next pic shows Mark Kuhn using some polishing compound and a buffer on the front passenger fender.
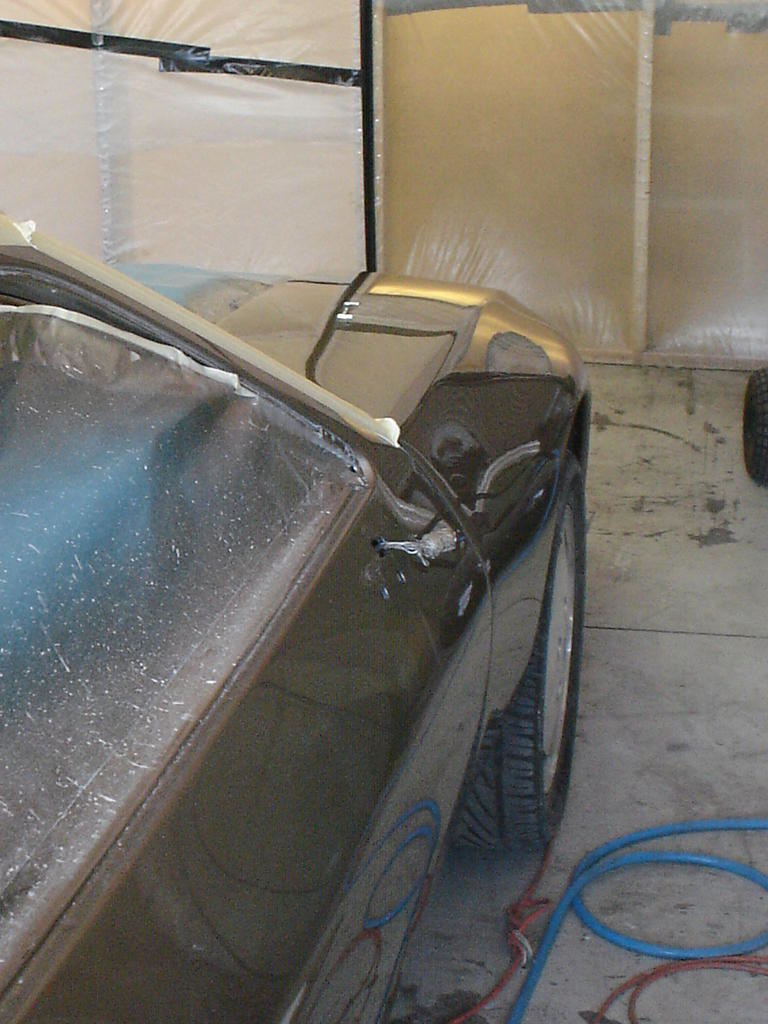
Here is that same fender after he was finished with it. It's hard to see just how awesome it is in this picture because it is reflecting everything around it.
This first picture shows what the rear quarter looks like after you take it to task with some 3000 grit wet paper.
This is me lightly DA'ing the hood with some 3000. I actually put the hose down and used two hands after this pic was taken. I had already blocked it with 1500 by hand. For those that havent seen it. 3000 grit paper is like notebook paper. Theres not alot of cutting done with it. Its just used to take out the orange peal from the clear.
This next pic shows Mark Kuhn using some polishing compound and a buffer on the front passenger fender.
Here is that same fender after he was finished with it. It's hard to see just how awesome it is in this picture because it is reflecting everything around it.
Last edited by Fabio421; 08-01-2010 at 09:24 PM.
08-01-2010, 01:18 AM
#50
Fabio, looking good, big job isn't it! I have done two complete inside out jobs, just makes me tired thinking about it. What brand of paint did you use?
Also what is this portrait service you have? I can't draw to save my life and would like to some how draw my new side skirts and diffuser. How to get those thoughts out of my head to to some one else is not quite clear to me yet. What is a ballpark cost?
Greg
Also what is this portrait service you have? I can't draw to save my life and would like to some how draw my new side skirts and diffuser. How to get those thoughts out of my head to to some one else is not quite clear to me yet. What is a ballpark cost?
Greg
08-01-2010, 02:54 AM
#52
Not the sharpest tool in the shed
Rennlist Member
Rennlist Member
Looks great Fabio. The shot down the sider towards the front post MK polishing is really amazing. Looking forward to seeing pics of it all together.
08-01-2010, 12:38 PM
#54
Rennlist Member
Join Date: May 2009
Location: Woodstock Ga.
Posts: 1,482
Likes: 0
Received 0 Likes
on
0 Posts
Fabio She is stunning. A ton of work for sure and the fruits of your labor will be worth it. I wish I had the patience, time and money to do it properly like you have done, but mine looks a lot better than it did!!
You must be itching to take her for a drive. If you are ever in the Atlanta area you have a place to stay. That is if you don't mind a 5 and 3 yr old staring at you. They already know how to flirt!
A ton of work for sure and the fruits of your labor will be worth it. I wish I had the patience, time and money to do it properly like you have done, but mine looks a lot better than it did!!You must be itching to take her for a drive. If you are ever in the Atlanta area you have a place to stay. That is if you don't mind a 5 and 3 yr old staring at you. They already know how to flirt!
Last edited by Iwanna928; 08-01-2010 at 10:37 PM.
09-13-2010, 02:07 AM
#56
Man of many SIGs
Rennlist Member
Rennlist Member
Thread Starter
Thanks for the kind words everyone. I needed to hear that to keep me motivated. It is coming along, slowly but surely.The passenger side is finished. The drivers side needs a cut and buff still. Mainly because the door has to be repainted. I nicked the paint in a tiny spot while installing the window seal and trim. Those little bastards took half a day to install all by themselves. The front bumper cover still needs to be blocked and polished. It's easier/better to do it when on the car because it's kind flimsy when not bolted up to the fenders, grill and spoiler. Although we will have to tape off the gap seals. The hood is coming back off to be repainted because I burned through the paint in a small spot on the very front drivers corner while blocking it. Here are todays progress pics.
09-13-2010, 02:25 AM
#57
Rennlist Member
I learned enough in this thread, to wanna take up the next community college course for body work. 
How many total hours..would you say...you have in this project at THIS point in time?
How many total hours..would you say...you have in this project at THIS point in time?
 09-13-2010, 03:29 AM
#59
Man of many SIGs
Rennlist Member
Rennlist Member
Thread Starter
Thanks Henrich
