
Poly A-Arm Bushing musings
 10-09-2009, 08:49 PM
#1
Rennlist Member
Thread Starter
Getting ready to install a set of urethane bushings this weekend. I tried this once and had some technical difficulties of my own making so I got another set of bushings (thanks Roger) and am going to have at it again. In looking at the installation instructions from Carl's site (thanks for the resource Carl) and all of the posts with photos here on the list, the common orientation is to insert both bushings into the arms from the outside toward the center. When you look at the orientation of the OEM bushings they are both installed from the front of the car toward the rear.
Has anyone done this with the poly bushings? It seems to me that it would make getting the bushings installed much easier since the square flange on the poly bushing is only 0.250" as compared to the nearly 0.50" of the tapered side. I wonder if it would maintain closer to the same relationship between the pivot shaft mounting bolts and the ball joint. In the photos of OEM arms it appears to me that the shoulder of the pivot shaft on the trailing side of the arm is only about 0.250" plus the thickness of the washer from the eye of the arm.
Anybody have distance measurements from the large pivot shaft washer on the trailing side of the a-arm to the eye of the arm? I'll try and post some photos later of what I am talking about.
Mike
 10-10-2009, 01:25 PM
#2
Rennlist Member
Mike - What problem did you have the first time you did this? It was about 6 years ago when I did mine--I don't recall any problems. I greased them up and pressed them in with a vice... I bought mine from 928 Spec.
Last edited by NoVector; 09-09-2018 at 12:47 AM.
10-10-2009, 08:39 PM
#3
Rennlist Member
Thread Starter
When I first tried to assemble the new bushings I got as far as getting the second bushing in and could not get it to seat. I tried everything short of a press. It was as if the total length of the bushings was too great for the available space between the eyes of the arm. After much frustration and looking at pics of other folks installs I realized that I had also got the pivot shaft in reversed. In getting the bushings back out I ruined one, hence the new set of bushings.
What I am curious about is shown in the pics below.
First, the usual orientation of the new bushings.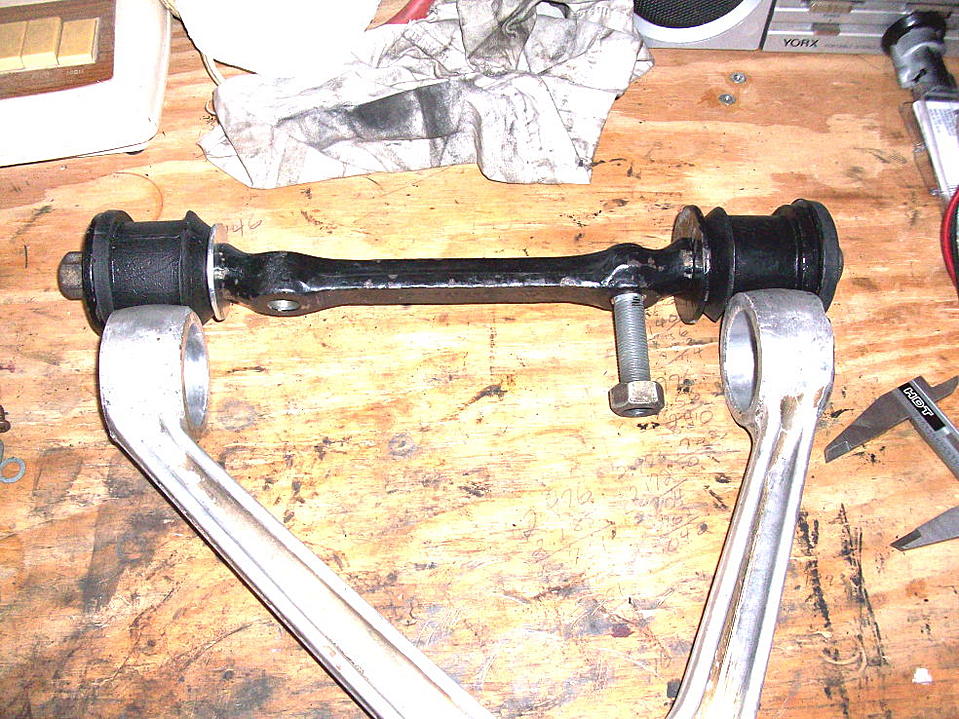
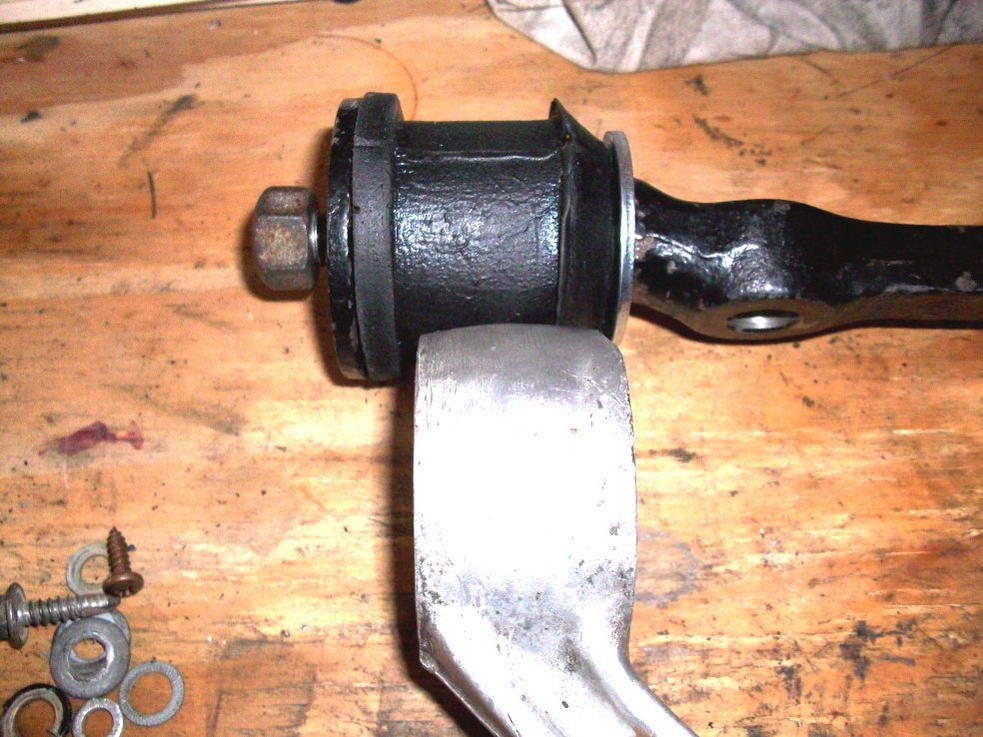
With the bushings in the standard orientation, what would be the second bushing installed is positioned as shown below.
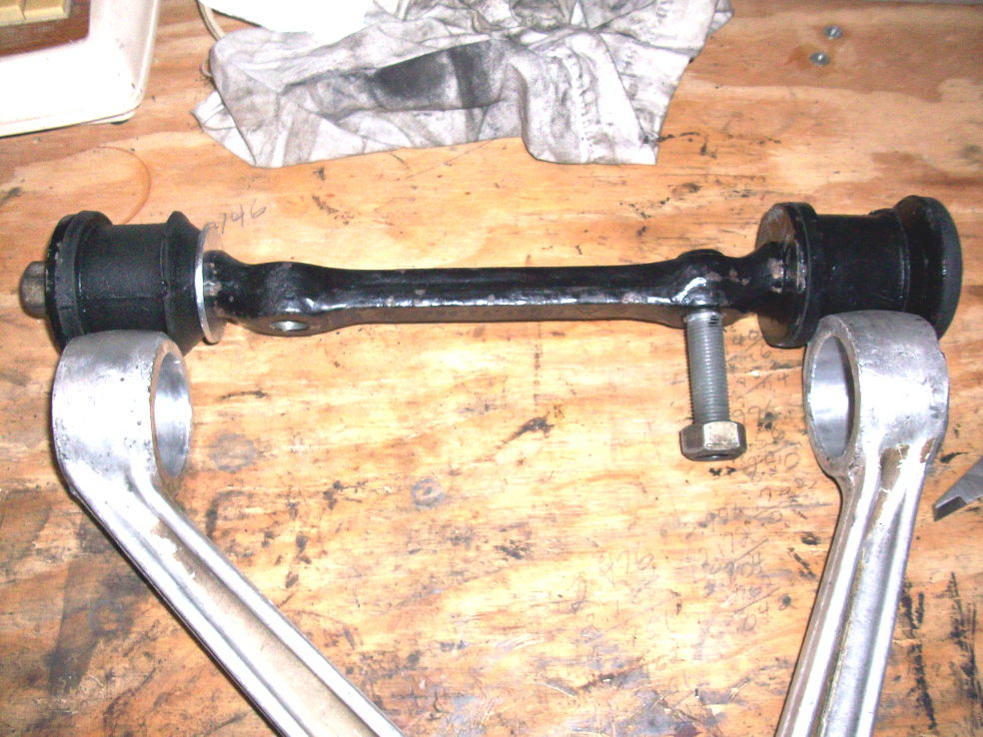
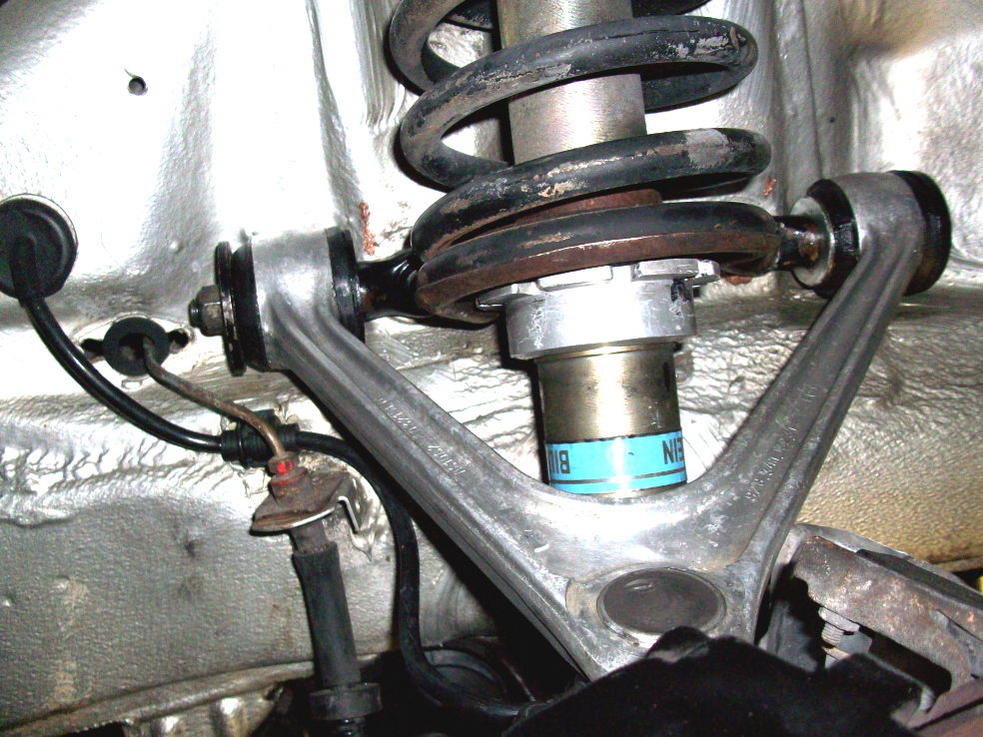
Here is how I perceive the OEM bushings appear to be installed, both from the same direction.
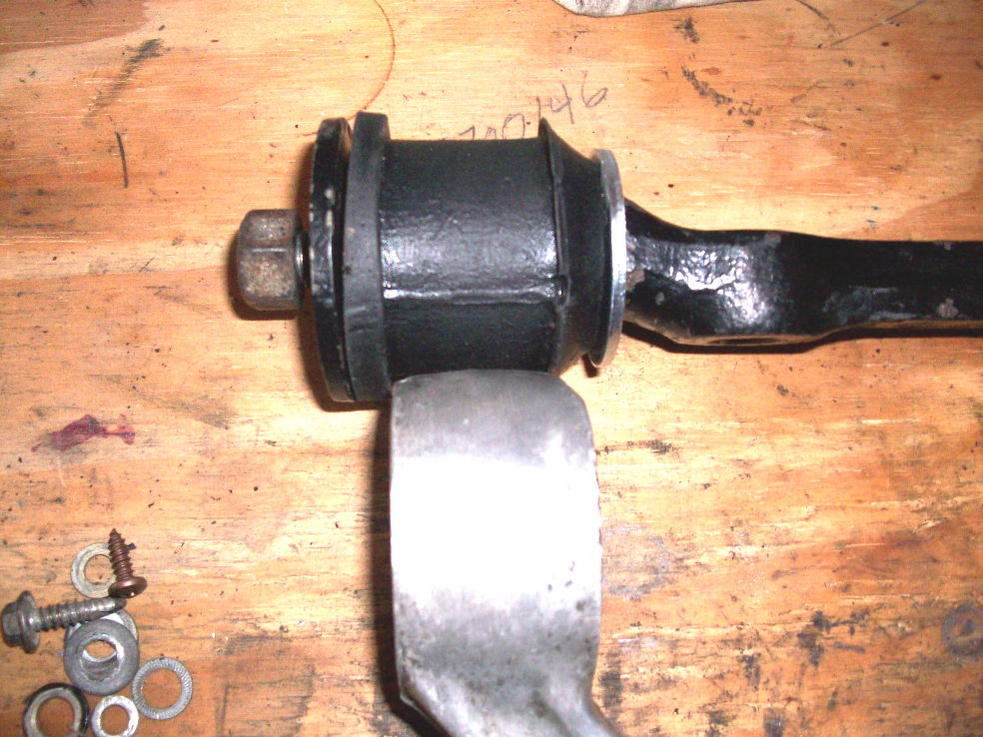
Here is a shot of the relative position of the second bushing when using the OEM-style installation.
I don't see how the change in orientation of the bushings would have any effect on their integrity or life. If anything I think trying to use a press to get the second bushing to seat using the usual orientation would cause the ends of the arm to spread slightly, changing geometry a little. Who knows if it would be enough to cause a problem.
Thoughts?
Mike
What I am curious about is shown in the pics below.
First, the usual orientation of the new bushings.
With the bushings in the standard orientation, what would be the second bushing installed is positioned as shown below.
Here is how I perceive the OEM bushings appear to be installed, both from the same direction.
Here is a shot of the relative position of the second bushing when using the OEM-style installation.
I don't see how the change in orientation of the bushings would have any effect on their integrity or life. If anything I think trying to use a press to get the second bushing to seat using the usual orientation would cause the ends of the arm to spread slightly, changing geometry a little. Who knows if it would be enough to cause a problem.
Thoughts?
Mike
10-10-2009, 09:39 PM
#4
Rennlist Member
Mike -
You may be right with the direction you have them in--I went back and looked at the pictures and below are two of the "before" pictures. Although mine were pretty rotted and in bad shape, it does look like they were originally in the same direction as you have to have yours to fit. I need to immediately go change mine
Make sure you grease them up good--otherwise, you may get the poly bushing squeek! / Bruce
Last edited by NoVector; 09-09-2018 at 12:47 AM.
10-10-2009, 11:45 PM
#5
Rennlist Member
Thread Starter
That is the only way I see them going in without spreading the eyes apart via a press. I need to get some good bushing grease before I install them . Since no one around here carries it I guess I'll order some.
I may not get them in until next weekend as I have spent the day doing some much needed maintenance to my wifes Odyssey. Today was valve adjustment and tomorrow will be TB/WP.
More to come...
Mike
I may not get them in until next weekend as I have spent the day doing some much needed maintenance to my wifes Odyssey. Today was valve adjustment and tomorrow will be TB/WP.
More to come...
Mike
10-11-2009, 11:58 AM
#7
Captain Obvious
Super User
Super User
Why not just use off the shelf wheelbearing grease?
Drilling holes into the bushing eyelets will weaken them so I woudln't put grease fittings in there.
Drilling holes into the bushing eyelets will weaken them so I woudln't put grease fittings in there.
Trending Topics
10-14-2009, 07:58 AM
#8
Rennlist Member
Thread Starter
Sorry for the late replies. My schedule gets a little crazy sometimes.
I thought about adding zerks, but have only ever heard about it being done on steel suspension parts as part of a urethane bushing retrofit. Plus, most of the posts here about the UCA bushings make no mention of adding grease fittings. If so many here are running them without re-greasng and having good results I don't know if there is any benefit.
I was thinking I needed a purpose-made grease for the polyurethane. Most of the products i have seen advertised are PTFE non-hardening waterproof products. I thought regular grease would deteriorate the poly? If regular chassis grease is safe for the polyurethane then I won't bother with ordering grease. What is the consensus on regular chassis grease vs the bushing lubes?
Mike
10-14-2009, 05:25 PM
#9
Nordschleife Master
Did any of you guys replace the ball joint when doing this? or just the bushings?
The ball joint looks like a PITA to do, last i saw directions for that it involved drilling out the old one or something.
The ball joint looks like a PITA to do, last i saw directions for that it involved drilling out the old one or something.
10-14-2009, 09:14 PM
#10
Captain Obvious
Super User
Super User
Is there still a replacement upper ball joint available? Remember a few years ago someone started offering them on and exchange basis but haven't heard much about it lately.
10-14-2009, 09:32 PM
#11
Nordschleife Master
I think Carl has something, it looked like a bit of a shade tree kinda job though honestly.
Although I do have to give many kudos to carl for all the instructional data on his site. I downloaded most all of it and will check it out. Wether i buy any of it or not, it looks like a great little orgy of 928 tech information.
Thumbs up Carl!

Although I do have to give many kudos to carl for all the instructional data on his site. I downloaded most all of it and will check it out. Wether i buy any of it or not, it looks like a great little orgy of 928 tech information.
Thumbs up Carl!
10-14-2009, 11:12 PM
#12
Rennlist Member
Thread Starter
Carl still lists the ball joint rebuild kit for the OB A-Arms. No luck for S4's though. Your choices are buy new for $$$$, buy rebuilt for $$$, buy steel aftermarket from Carl for $$, or roll the dice on used for ?????.
Mike
Mike
10-17-2009, 09:24 PM
#13
Rennlist Member
Thread Starter
I installed the poly bushings in the same orientation as the factory units and installed the arms on the car today. The bushings went in quite snug as expected but there was sufficient room to actually get them installed. As I was cleaning them up before installing them on the car I noticed that there was the cracked remains of some kind of sealant on the tops of the ball joints. The stuff chipped off pretty easy so I replaced it with some of Greg Browns' super epoxy water pump impeller machining damaged block repair spacer retaining compound. Should prevent any water from working it's way into the tops of the joints where the top cap was sealed down. One more task off the list. Now to find someone local to corner balance and align.
Mike
Mike
10-18-2009, 08:03 AM
#14
Nordschleife Master
I installed the poly bushings in the same orientation as the factory units and installed the arms on the car today. The bushings went in quite snug as expected but there was sufficient room to actually get them installed. As I was cleaning them up before installing them on the car I noticed that there was the cracked remains of some kind of sealant on the tops of the ball joints. The stuff chipped off pretty easy so I replaced it with some of Greg Browns' super epoxy water pump impeller machining damaged block repair spacer retaining compound. Should prevent any water from working it's way into the tops of the joints where the top cap was sealed down. One more task off the list. Now to find someone local to corner balance and align.
Mike
Attachment 393059
Mike
Attachment 393059