
S4 Caliper refinish and re-build: What to (and what not to) do:

 11-29-2009, 03:10 AM
#32
Archive Gatekeeper
Rennlist Member
Rennlist Member
Thread Starter
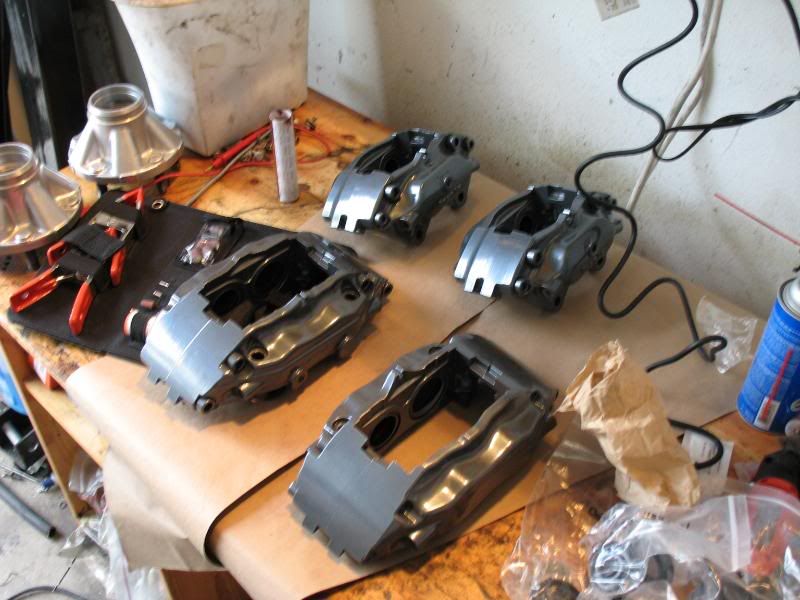
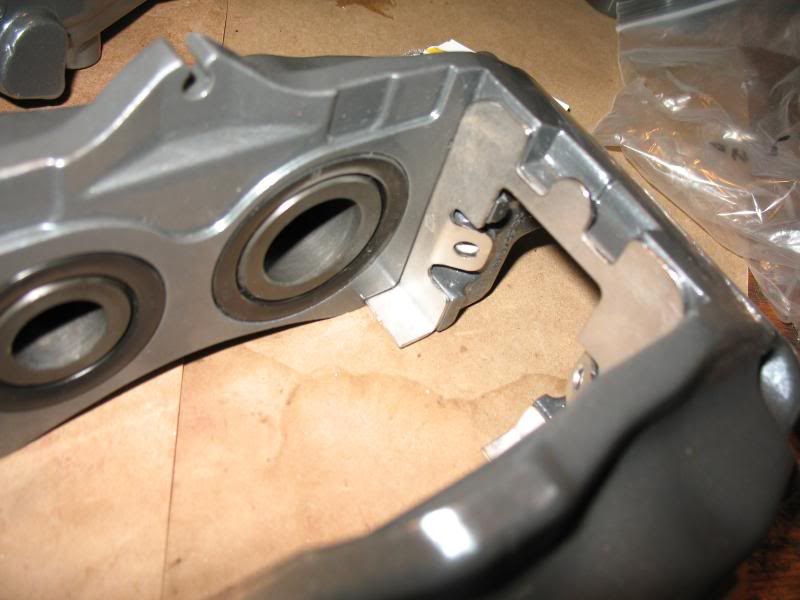
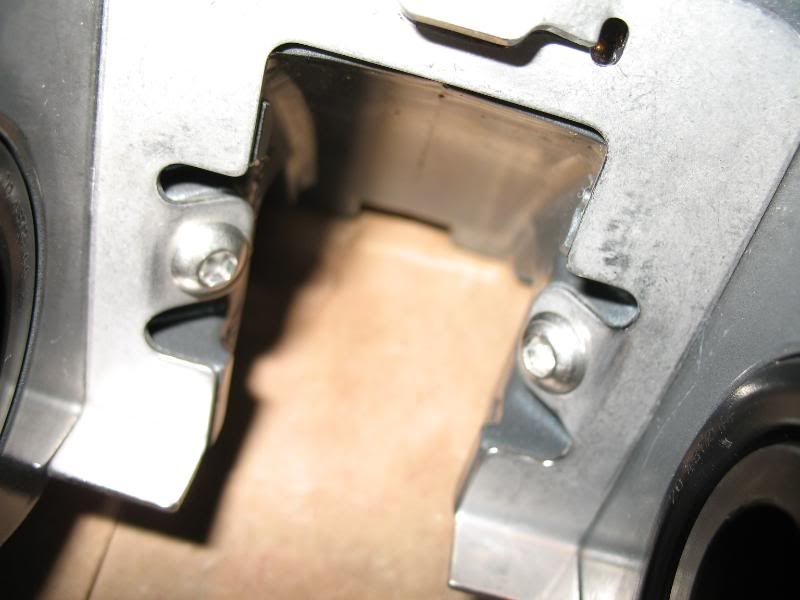
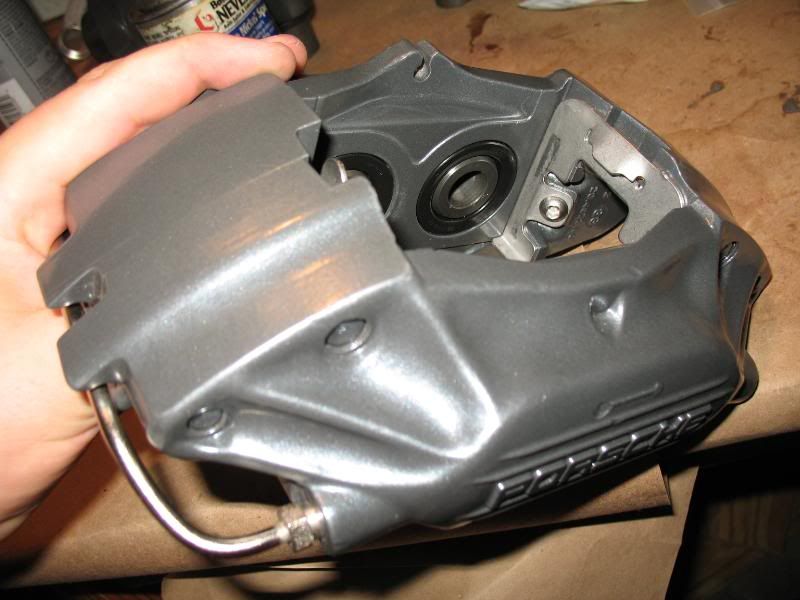
When at first you don't succeed, try try again. I pulled the calipers off the GTS, stripped them, rebuilt the fronts (the front dust seals were in really bad shape, while the rears look fine), and taped them up today in order to paint. You'll note the guide plates are still in there - I bought a quartet of new ones but simply cannot get the old ones out without risking stripping that damn 4mm socket cap screw. So the old ones are staying for now. They cleaned up nicely in the bead blaster, anyhoo.
This time I'm going with gloss black hi-temp paint, some PORSCHE decals from xenonmods (NLA, BTW- they got a cease 'n desist from Porsche...), and clear over that. Will see how it goes....
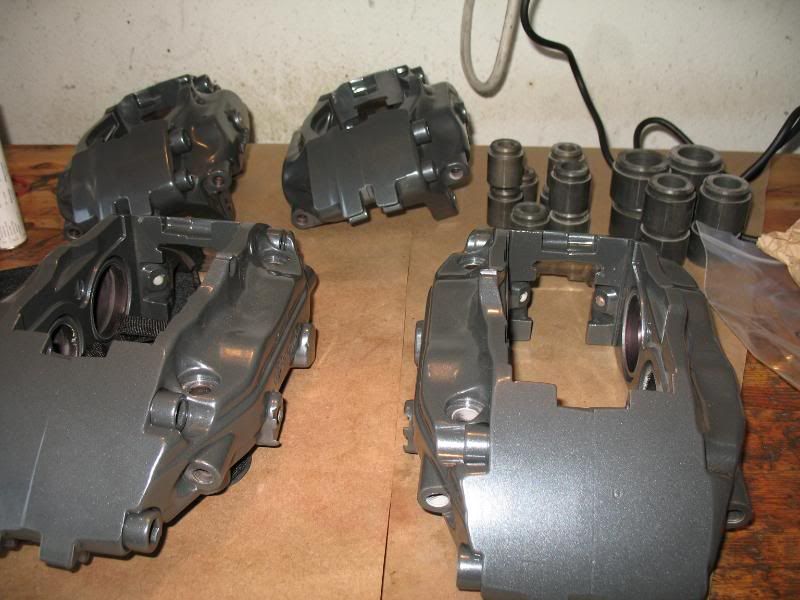
The surfaces look mottled but are smooth. Assuming it was the factory finish, the caliper had a clear coat of some sort over black gloss paint/coating of some sort, all of which is on top of anodizing that wore off in some areas. The PORSCHE lettering is painted on underneath this clear coat, on top of the black glossy stuff. It was a major PITA to strip. The clear bubbled off reasonably easily but the black gloss stuff is tenacious. I ended up going through about $20 worth of the little Dremel abrasive buffs (dremel # 511E) to get the black out of all the nooks and crannies. I'm beginning to see why people just buy new calipers......

This time I'm going with gloss black hi-temp paint, some PORSCHE decals from xenonmods (NLA, BTW- they got a cease 'n desist from Porsche...), and clear over that. Will see how it goes....
The surfaces look mottled but are smooth. Assuming it was the factory finish, the caliper had a clear coat of some sort over black gloss paint/coating of some sort, all of which is on top of anodizing that wore off in some areas. The PORSCHE lettering is painted on underneath this clear coat, on top of the black glossy stuff. It was a major PITA to strip. The clear bubbled off reasonably easily but the black gloss stuff is tenacious. I ended up going through about $20 worth of the little Dremel abrasive buffs (dremel # 511E) to get the black out of all the nooks and crannies. I'm beginning to see why people just buy new calipers......
 11-29-2009, 03:21 AM
#33
Addict
Rennlist Member
Rennlist Member
Join Date: Oct 2003
Location: Gone. On the Open Road
Posts: 16,489
Received 1,636 Likes
on
1,067 Posts
11-29-2009, 03:32 AM
#34
Archive Gatekeeper
Rennlist Member
Rennlist Member
Thread Starter
Dave-
What temp am I shooting for on Jen's cuisinart? I ASSume it won't hurt the new seals?

What temp am I shooting for on Jen's cuisinart? I ASSume it won't hurt the new seals?
11-29-2009, 10:19 AM
#35
Addict
Rennlist Member
Rennlist Member
Join Date: Oct 2003
Location: Gone. On the Open Road
Posts: 16,489
Received 1,636 Likes
on
1,067 Posts
I didn't have no fancy high-tech closed-loop temperature control system like you. I just used my heat gun and by the time the caliper was too hot to handle with bare hands the screws were turning out. So, I'd guess that was ~200°F.
And no, it didn't hurt my old original-equipment seals. So, your new ones should be fine.
11-29-2009, 01:56 PM
#36
Rennlist Member
Rob, those screws can be a bugger but the one screw on mine that the head stripped on, came right off with a little persuasion. I went to a machinist who told me there was nothing for it but to split the caliper, and I talked him into TIG welding a washer to the bolt head then a nut to the washer, and it came right out. Since you already have the seal in that might not be practical, but I just thought I'd let you know there are options...
BTW I had a feeling I shouldn't have showed you my calipers.
BTW I had a feeling I shouldn't have showed you my calipers.
11-29-2009, 02:32 PM
#37
Rennlist Member
I had the exact same experience. Bought the new plates and bolts, never used them.
11-29-2009, 02:34 PM
#38
Rennlist Member
The surfaces look mottled but are smooth. Assuming it was the factory finish, the caliper had a clear coat of some sort over black gloss paint/coating of some sort, all of which is on top of anodizing that wore off in some areas. <snip>... The clear bubbled off reasonably easily but the black gloss stuff is tenacious. I ended up going through about $20 worth of the little Dremel abrasive buffs (dremel # 511E) to get the black out of all the nooks and crannies. I'm beginning to see why people just buy new calipers......
Oh, that explains a lot.
I ran the Dremel over them a number of times and did some sanding and called it good. They came out great and are holding up nicely.
11-29-2009, 10:32 PM
#41

Rob - those cap screws are mighty irritating. But to get them out, you must get a few wood chipper type tools - the ones you would mortise a door with when you put a new lock plate in. And then you simply position the caliper so you can bang on that (I can't think of the word for the tool - I was painting silver this weekend and I have obviously lost some vocabulary) - with a hammer - into the circumference of the caliper button heads. They eventually turn. It takes time. It took me about 2 days. But I got them out - and I replated the spring plates.
11-30-2009, 05:36 PM
#42
Rennlist Member
Here's the plates with some misc parts I cleaned up and clear coated for the hell of it.

I used the cold chisel hammering the head to back it out method.
11-30-2009, 05:42 PM
#43
Archive Gatekeeper
Rennlist Member
Rennlist Member
Thread Starter
Good idea on clearing the pad retainer springs. I shoulda gotten them nickel plated along with the rotors but didn't have the calipers disassembled in time. I'll try the heat trick first ,tonight, and report back.
11-30-2009, 08:35 PM
#44
Chronic Tool Dropper
Lifetime Rennlist
Member
Lifetime Rennlist
Member

Ed's method always works, but it isn't always the prettiest way to get the job done. Makes a button-head Allen screw into a round-head slotted machine screw. With a booger'd slot.
12-01-2009, 12:59 AM
#45
Rennlist Member
I had tried repeated soaking with PB Blaster, then heat, tapping, etc, but no go, so resorted to the hammer.