

Door Speaker Installation

Thread Starter
Pro
Joined: Jun 2008
Posts: 695
Likes: 2
From: Qu�bec, Qu�bec, Canada
So... When I manage to plug back my new radio to the existing wiring of the car, only 1 speaker worked... And sadly, I hate how that speaker sounded.
30 years old speakers...
Anyway, I decided to change those speaker. I set my eyes of 4 pioneer speakers.
For the doors :
2 x 5" 1/4, 3 Way, 200 Watts (35 RMS)

( I wanted 6" 4 Way, but they wouldn't fit )
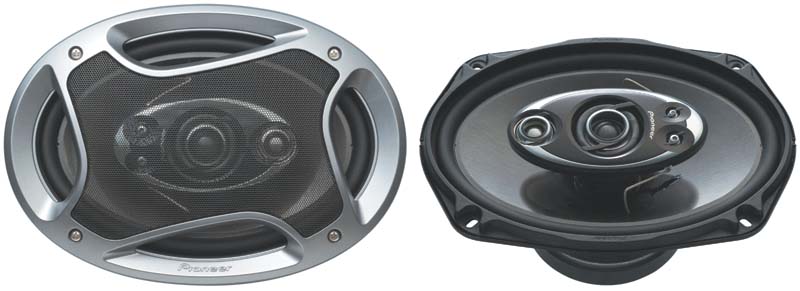
For the back :
2 x 6"/9", 5 Way, 460 Watts (80 RMS)
I actually searched a lot, because I wanted great speaker with great look... But also look that will match what I plan for the inside/outside of the car.
Now, before I took those picture, I had already mounted one speaker on the passenger door :

I didn't want to take picture of horrible failure... if it would happen.
So, I had that door remaining :

First, pop the locking **** with a knife.

Under it there is a 8mm bolt.

One you removed the bolt and the ****, the frame can easily be removed by unscrewing it, like if it was a big bolt. There is 2 groves inside you can use to rotate it. I found that cables pryer to fit perfectly.

Next you remove the door handle frame. A single screw under it keep the whole thing.

The frame follow easily when you pull the handle. No need to remove the handle at all.

You can then remove the insert panel. Just gently pull, and the pins should pop out.
[img]https://img93.imageshack.us/img93/1889/speaker9mi4.jpg/img]
Pop out the mirrors control. A simple knife make it easy. There isn't anything particular holding it in place.

OMG! Guess why my electric mirrors weren't working? Guess the PO never connect them back! Try to remember what cable connect to where. As for me, I can only ask what connect where... As I have no idea.
Next, remove the openning arm panel (the huh?). Whatever... Image work better.

There is 4 screws, 2 on each side.

There's 5 bolt holding the arm assembly. All are 11mm bolt.

Simple screwdriver for the trop 3. Remember the position of each one, as they have different lenght.

Angle tool for the bottom 2.

Now it's important to not pull anything... A 6th bolt is hidding! Gently pull back the air port.

Here you are sucker! Easier to unscrew with the screwdriver.

Next remove the little screw holding the plate under the air port. It holds the cover plate for the flexible cables cover.

Now you're ready to remove the big plastic assembly!

The only thing holding the whole door plate in place are a douzen of pins. Simply pull back one at a time. The whole plate will come out. Remove all the cables that connect to it... Like the speakers cables and the mirrors controls.
The old speaker is hold in place by 4 7mm bolt :

I also removed the old vinyl. For now my door will remain naked... But I plan to buy new leather pieces at the 928 leather shop. I also place to change my insert part for leather too. Black with silver threading on top with silver with black thread as insert.
The passenger vinyl was glued in place... But the driver's one was only hold by 2 stapples. o.O

Using the tamplate that come with the speakers box, I lightly painted where I needed to drill the holes. The speakers are hold in place by 4 screws, so I made the holes for those too.


Some dust after, a perfect hole! (somehow)

Fitting test for the new speaker :

Screwed, perfect. Rock solid.

The problem here is, this speaker need 2" of back clearance. Which the door doesn't provide AT ALL. The old speaker had its magnet inside the cone. While it makes a speaker slim, it also change the sound.

Ok... So I called my good friend, The Grinder!

Now... not for the light heart. I was horribly afraid to screw things up. Happy I didn't. I think...

New high grade speaker cable :

And here's the result! Amazing sound and look in a little box!
I know it look horrible without the vinyl. But my imagination can see the leather soon to be installed.

Hope it helps someone!
30 years old speakers...
Anyway, I decided to change those speaker. I set my eyes of 4 pioneer speakers.
For the doors :
2 x 5" 1/4, 3 Way, 200 Watts (35 RMS)
( I wanted 6" 4 Way, but they wouldn't fit )
For the back :
2 x 6"/9", 5 Way, 460 Watts (80 RMS)
I actually searched a lot, because I wanted great speaker with great look... But also look that will match what I plan for the inside/outside of the car.
Now, before I took those picture, I had already mounted one speaker on the passenger door :
I didn't want to take picture of horrible failure... if it would happen.
So, I had that door remaining :
First, pop the locking **** with a knife.
Under it there is a 8mm bolt.
One you removed the bolt and the ****, the frame can easily be removed by unscrewing it, like if it was a big bolt. There is 2 groves inside you can use to rotate it. I found that cables pryer to fit perfectly.
Next you remove the door handle frame. A single screw under it keep the whole thing.
The frame follow easily when you pull the handle. No need to remove the handle at all.
You can then remove the insert panel. Just gently pull, and the pins should pop out.
[img]https://img93.imageshack.us/img93/1889/speaker9mi4.jpg/img]
Pop out the mirrors control. A simple knife make it easy. There isn't anything particular holding it in place.
OMG! Guess why my electric mirrors weren't working? Guess the PO never connect them back! Try to remember what cable connect to where. As for me, I can only ask what connect where... As I have no idea.
Next, remove the openning arm panel (the huh?). Whatever... Image work better.
There is 4 screws, 2 on each side.
There's 5 bolt holding the arm assembly. All are 11mm bolt.
Simple screwdriver for the trop 3. Remember the position of each one, as they have different lenght.
Angle tool for the bottom 2.
Now it's important to not pull anything... A 6th bolt is hidding! Gently pull back the air port.
Here you are sucker! Easier to unscrew with the screwdriver.
Next remove the little screw holding the plate under the air port. It holds the cover plate for the flexible cables cover.
Now you're ready to remove the big plastic assembly!
The only thing holding the whole door plate in place are a douzen of pins. Simply pull back one at a time. The whole plate will come out. Remove all the cables that connect to it... Like the speakers cables and the mirrors controls.
The old speaker is hold in place by 4 7mm bolt :
I also removed the old vinyl. For now my door will remain naked... But I plan to buy new leather pieces at the 928 leather shop. I also place to change my insert part for leather too. Black with silver threading on top with silver with black thread as insert.
The passenger vinyl was glued in place... But the driver's one was only hold by 2 stapples. o.O
Using the tamplate that come with the speakers box, I lightly painted where I needed to drill the holes. The speakers are hold in place by 4 screws, so I made the holes for those too.
Some dust after, a perfect hole! (somehow)
Fitting test for the new speaker :
Screwed, perfect.
Rock solid.The problem here is, this speaker need 2" of back clearance. Which the door doesn't provide AT ALL. The old speaker had its magnet inside the cone. While it makes a speaker slim, it also change the sound.
Ok... So I called my good friend, The Grinder!
Now... not for the light heart. I was horribly afraid to screw things up. Happy I didn't. I think...
New high grade speaker cable :
And here's the result! Amazing sound and look in a little box!
I know it look horrible without the vinyl. But my imagination can see the leather soon to be installed.
Hope it helps someone!
Last edited by LightStriker; Oct 8, 2008 at 10:23 PM.
928 OB-Wan
Rennlist Member
Rennlist Member
Joined: Apr 2004
Posts: 4,999
Likes: 2
From: Zebulon, NC
man that's brutal... it would have been easier to just use a set of later door panels and put some blaupunkt overdrives or similar in, if you cut the old trim ring off you can even maintain stock look
Thread Starter
Pro
Joined: Jun 2008
Posts: 695
Likes: 2
From: Qu�bec, Qu�bec, Canada
Well, I plan to redo the whole interior with silver and black leather.
(And the exterior too)
I think those speaker have the look I want to match everything else. Just doesn't look like it now... The vinyl suck and everything look tired.
Aside, I have 2 door panel that are virtually in good shape. Even when the 5" 1/4 speakers put in them. Would be weird to go buy others.

Trending Topics
Man of many SIGs
Rennlist Member
Rennlist Member

Joined: May 2005
Posts: 8,724
Likes: 12
From: Florida, USA
This is the type of thing that makes babies cry.
 If you wanted more depth you could have molded in a thicker area around the speakers. This is what I did with the panels from my widebody. They were hacked up by the previous owners and were unuseable in that condition. I built it up and molded it in with body putty so that I could mount a larger, deeper speaker in that spot. I'm still not sure if this is the final version but it seems to look OK so far. We'll see what it looks like after its covered in black ultra-suede.
Last edited by Fabio421; Jan 22, 2013 at 07:50 PM.
Thread Starter
Pro
Joined: Jun 2008
Posts: 695
Likes: 2
From: Qu�bec, Qu�bec, Canada
It's a nice job you got there.
But I didn't want to change the outter shape of the door panel.
People here react like if it was a mess or something. What's wrong? I can't see the problem.
But I didn't want to change the outter shape of the door panel.
People here react like if it was a mess or something. What's wrong? I can't see the problem.
Man of many SIGs
Rennlist Member
Rennlist Member
Joined: May 2005
Posts: 8,724
Likes: 12
From: Florida, USA
It was when you vut out a big hunk 'O' door that got people cringing. It's your car, cut it up however you like.
Think of it as friendly razzing from the neighbors. 

Drifting
Joined: Jun 2006
Posts: 2,708
Likes: 77
From: Indianapolis Area
Pictured below is another idea you might consider to cover things up and for others thinking about doing a similar mod.
Cut out a couple concentric curves on 3/4" MDF, router the edges and wrap in vinyl or leather. Simple, quick and easy with decent results and no need to modify door frame.
I like you choice of colors!
Cut out a couple concentric curves on 3/4" MDF, router the edges and wrap in vinyl or leather. Simple, quick and easy with decent results and no need to modify door frame.
I like you choice of colors!

Thread Starter
Pro
Joined: Jun 2008
Posts: 695
Likes: 2
From: Qu�bec, Qu�bec, Canada
Pictured below is another idea you might consider to cover things up and for others thinking about doing a similar mod.
Cut out a couple concentric curves on 3/4" MDF, router the edges and wrap in vinyl or leather. Simple, quick and easy with decent results and no need to modify door frame.
I like you choice of colors!
Cut out a couple concentric curves on 3/4" MDF, router the edges and wrap in vinyl or leather. Simple, quick and easy with decent results and no need to modify door frame.
I like you choice of colors!

You changed my mind on the carpet... I NEED silver carpet.
Pro
Joined: Nov 2006
Posts: 544
Likes: 0
What's with all the hole just forward of your speaker's. Not attractive.
Respectfully, I dig your concept but cutting a hole in your door frame to fit speakers was......

Kurt, that is sweet!! That's how I'm doing mine.
Last edited by Angel84-928; Oct 9, 2008 at 02:12 PM.