
Engine Refurbish - Boost Prep
 02-18-2008, 01:42 PM
#1
Rennlist Member
Thread Starter
Join Date: Jun 2006
Location: Vancouver, Canada
Posts: 165
Likes: 0
Received 0 Likes
on
0 Posts
I started this thread to let people now what I'm doing in case I need some help on issues as I go along.
I bought the car two years ago. It's an 89S4 ROW, A/T I bought from a guy who imported it from Japan with no history. It currently only has 40k kms and is in pretty good shape. Although it has low kms it's still going on 19 years old. I've done a fair bit of work to date. Eihbach/bilstein, 18" wheels, Stero etc. but my last major goal is to add some boost this summer. However before I get there I wanted to make sure the engine was in top shape first. I started writing down things I needed to do and when I finished my list I thought it might be easier just to pull the engine to do all the work. I'll keep you posted on what I'm doing as I move along.
I read the WSM about removing the engine and followed every step from 1 to 49, pages 10-12 to 10-20. I figured the factory did it so many times they must have come up with the best method. It was relatively easy, it just took some time. I worked through these steps in a couple of evenings.
Last sunday morning Colin (aka Lizard931) came over to my place to lend a hand as he's pulled 4 maybe 5 engines now and I thought I could use his expertise. Everything was unhooked and ready to go but as soon as we got started, the hoist didn't work? Not enough fluid in the unit. After spending about 45 minutes fixing the hoist we were ready to go.
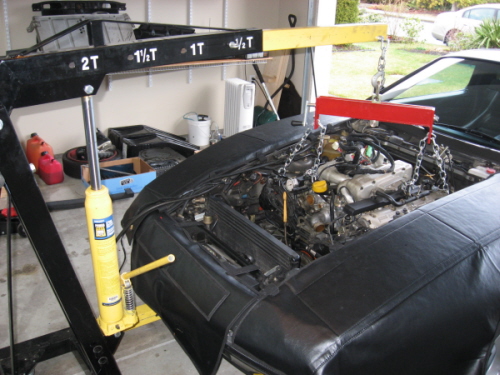
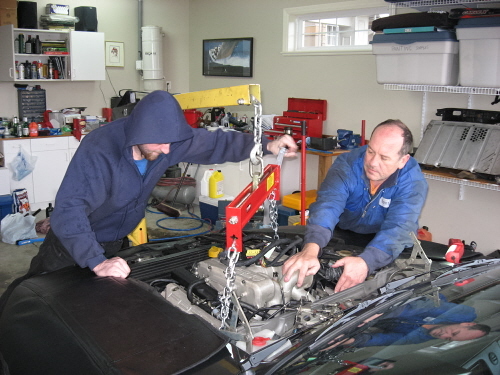
I looked at the time stamp on the pics and we had the engine out in 15 minutes. We were having a little trouble at first seperating from the bell housing but the WSM says to tilt the engine forward first so we put a floor jack under the starter motor first putting a little upward pressure which tilted the engine forward then as we lifted it came right out with the help of my neighbor Ron manning the hoist with Colin and I wiggling it out.
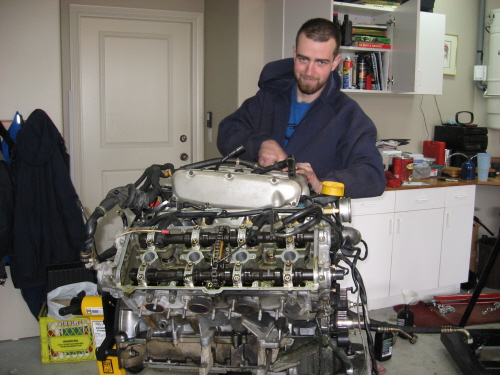
Once the engine was out we had a pic with our big catch! A 600 pounder!
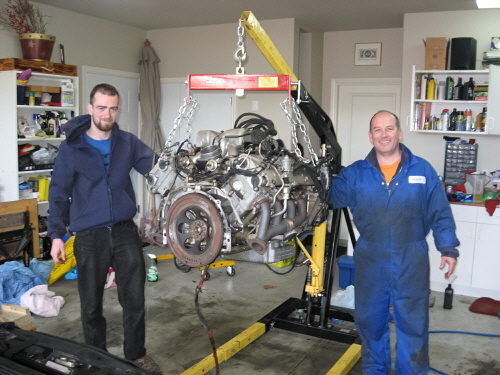
My wife gave me the groovy jump suit for Xmas. How do you like the printing on the back! My neighbor Ron is our apprentice. He thinks we're nuts pulling this thing out. He was having so much fun we gave him a wrench and he stayed all day helping out.
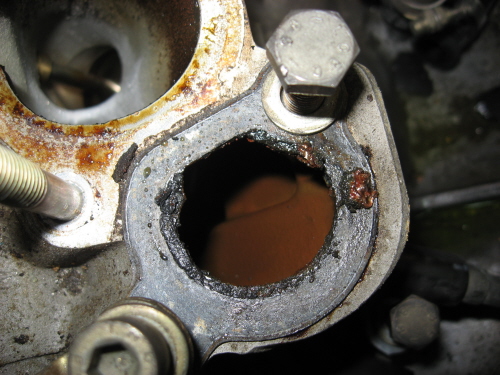
A quick look around showed that the frost plugs on the end of each cylinder head had been leaking. I couldn't figure out where it was coming from with the engine in the car.
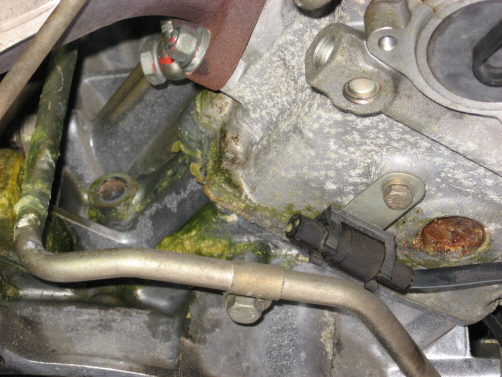
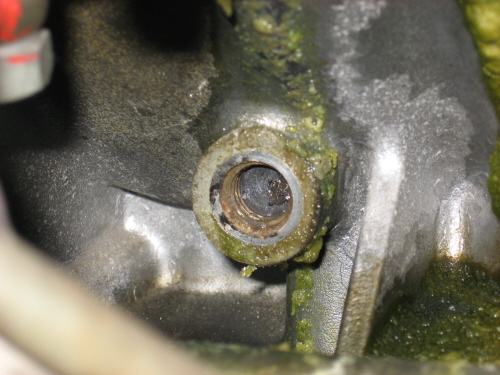
When we pulled the coolant plugs from the side of the block nothing came out? The opening was plugged solid. If you look closely you can see the result of a PO or mechanic adding stop leak to the block. Cheaper than pulling the engine to replace the frost plugs properly I guess. Don't use stop leak!
The engine tear down begins!
I wanted to get this post going as I'm sure I will have many questions as I progress. My goal is to get it down to the block but not as far as splitting the crankcase and begin working my way back up.
It looks like I can only post so many pics at a time so I'll have to move on to the next post.
Comments, suggestions, etc. are welcome but I thought it would be fun to post a diary of my new project! I've bagged and tagged almost everyting that I've taken off but I'm sure I'll need some help from you guys putting it back together....
Having fun so far!
Brent
I bought the car two years ago. It's an 89S4 ROW, A/T I bought from a guy who imported it from Japan with no history. It currently only has 40k kms and is in pretty good shape. Although it has low kms it's still going on 19 years old. I've done a fair bit of work to date. Eihbach/bilstein, 18" wheels, Stero etc. but my last major goal is to add some boost this summer. However before I get there I wanted to make sure the engine was in top shape first. I started writing down things I needed to do and when I finished my list I thought it might be easier just to pull the engine to do all the work. I'll keep you posted on what I'm doing as I move along.
I read the WSM about removing the engine and followed every step from 1 to 49, pages 10-12 to 10-20. I figured the factory did it so many times they must have come up with the best method. It was relatively easy, it just took some time. I worked through these steps in a couple of evenings.
Last sunday morning Colin (aka Lizard931) came over to my place to lend a hand as he's pulled 4 maybe 5 engines now and I thought I could use his expertise. Everything was unhooked and ready to go but as soon as we got started, the hoist didn't work? Not enough fluid in the unit. After spending about 45 minutes fixing the hoist we were ready to go.
I looked at the time stamp on the pics and we had the engine out in 15 minutes. We were having a little trouble at first seperating from the bell housing but the WSM says to tilt the engine forward first so we put a floor jack under the starter motor first putting a little upward pressure which tilted the engine forward then as we lifted it came right out with the help of my neighbor Ron manning the hoist with Colin and I wiggling it out.
Once the engine was out we had a pic with our big catch! A 600 pounder!
My wife gave me the groovy jump suit for Xmas. How do you like the printing on the back! My neighbor Ron is our apprentice. He thinks we're nuts pulling this thing out. He was having so much fun we gave him a wrench and he stayed all day helping out.
A quick look around showed that the frost plugs on the end of each cylinder head had been leaking. I couldn't figure out where it was coming from with the engine in the car.
When we pulled the coolant plugs from the side of the block nothing came out? The opening was plugged solid. If you look closely you can see the result of a PO or mechanic adding stop leak to the block. Cheaper than pulling the engine to replace the frost plugs properly I guess. Don't use stop leak!
The engine tear down begins!
I wanted to get this post going as I'm sure I will have many questions as I progress. My goal is to get it down to the block but not as far as splitting the crankcase and begin working my way back up.
It looks like I can only post so many pics at a time so I'll have to move on to the next post.
Comments, suggestions, etc. are welcome but I thought it would be fun to post a diary of my new project! I've bagged and tagged almost everyting that I've taken off but I'm sure I'll need some help from you guys putting it back together....
Having fun so far!
Brent
 02-18-2008, 01:50 PM
#2

Awesome! Now strip her down!
 sorry brendan, I know that wont happen to this car.
02-18-2008, 02:18 PM
sorry brendan, I know that wont happen to this car.
02-18-2008, 02:18 PM
#4
Rennlist Member
Thread Starter
Join Date: Jun 2006
Location: Vancouver, Canada
Posts: 165
Likes: 0
Received 0 Likes
on
0 Posts
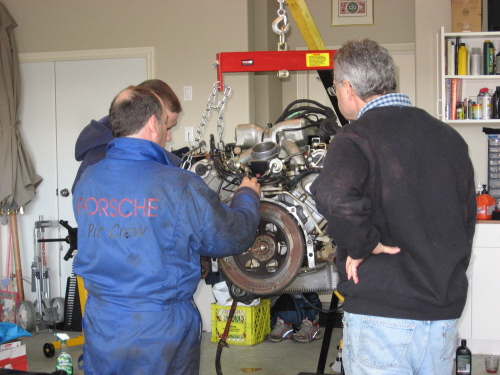
Now that we got it on the stand the three of us started taking things apart.
You can see the residue in the cooling system from the dreaded stop leak!
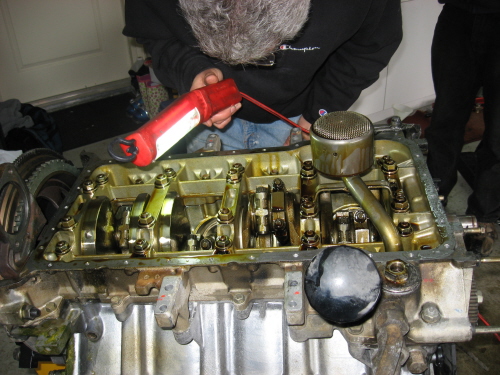
Now we're humming along getting the valve covers off. how can you tell Colin loves this stuff!
More coolant crap at the rear access ports.
My neighbor Ron was fascinated by all this. He didn't want to go home.
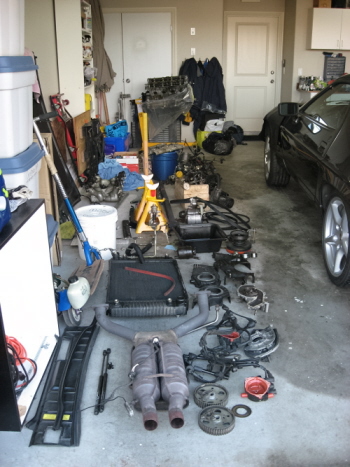
This is the work we got done from the time we began the engine pull at 10am to this point by 2pm. Four hours to get this much done, I was impressed with me and my helpers!
Time to start organizing the mess. I had some shelving where I eventually put all the parts according to their groups but I laid everything out first. It's now 4pm after cleaning up. Name these parts? Not now, time for a beer!
My next post I'll have some pics of the camshafts and heads coming out!
Brent
You can see the residue in the cooling system from the dreaded stop leak!
Now we're humming along getting the valve covers off. how can you tell Colin loves this stuff!
More coolant crap at the rear access ports.
My neighbor Ron was fascinated by all this. He didn't want to go home.
This is the work we got done from the time we began the engine pull at 10am to this point by 2pm. Four hours to get this much done, I was impressed with me and my helpers!
Time to start organizing the mess. I had some shelving where I eventually put all the parts according to their groups but I laid everything out first. It's now 4pm after cleaning up. Name these parts? Not now, time for a beer!
My next post I'll have some pics of the camshafts and heads coming out!
Brent
02-18-2008, 02:25 PM
#5
Nordschleife Master
Very cool
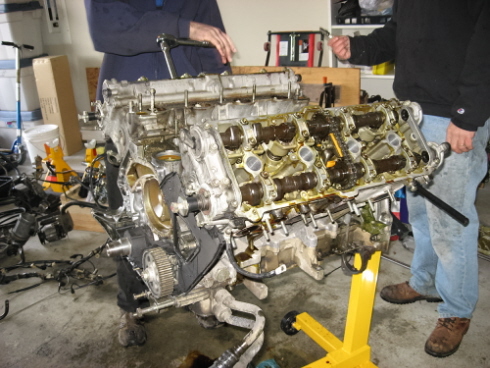
From the looks of what youve found so far i think its a good idea to go through the engine. That leak looked like a real mess.
By the leak there in the pic i can tell thats the drivers side head but what is that pipe for that goes under the headers? Is that some type of air injection system that goes directly into each header pipe? That is not on my US car.
02-18-2008, 02:40 PM
#6
Rennlist Member
Thread Starter
Join Date: Jun 2006
Location: Vancouver, Canada
Posts: 165
Likes: 0
Received 0 Likes
on
0 Posts
You are correct. The pipe running below the header is the air injection system. There are two types. One blows air into the Cat and the other blows it directly into the exhaust port. This is the one I have. As I mentioned, my car is a ROW version which would be different than a US model. Check your PET Catalog up to MY 91 and you'll see both versions.
I'm going to be removing my air injection system altogether and plug the holes with the appropriate bolts. The current ones holding the pipe in place look like banjo bolts but not sure on the size?
I'm going to be removing my air injection system altogether and plug the holes with the appropriate bolts. The current ones holding the pipe in place look like banjo bolts but not sure on the size?

Trending Topics
02-18-2008, 03:04 PM
#8
Rennlist Member
cool pics. Ive done this a bunch of times on the older buggers, but not the S4. how was it pulling the harness out of the firewall? Im thinking with mine, being a race car, there is not much under the dash, so its easy toget to stuff underthere, like pushing the wiring out the hole.
any thoughs about disconnecting things while the engine was in the car and leave the harness in?
There was some debate on which was easier.
mk
any thoughs about disconnecting things while the engine was in the car and leave the harness in?
There was some debate on which was easier.
mk
02-18-2008, 03:24 PM
#10
Nordschleife Master
cool pics. Ive done this a bunch of times on the older buggers, but not the S4. how was it pulling the harness out of the firewall? Im thinking with mine, being a race car, there is not much under the dash, so its easy toget to stuff underthere, like pushing the wiring out the hole.
any thoughs about disconnecting things while the engine was in the car and leave the harness in?
There was some debate on which was easier.
mk
any thoughs about disconnecting things while the engine was in the car and leave the harness in?
There was some debate on which was easier.
mk
I am a big advocate for leaving the harness in as are some others.
02-18-2008, 04:13 PM
#11
 02-18-2008, 05:07 PM
#12
Rennlist Member
Thread Starter
Join Date: Jun 2006
Location: Vancouver, Canada
Posts: 165
Likes: 0
Received 0 Likes
on
0 Posts
Jim,
Thx for the part # I'll make a note and give you guys a call. I find it pretty hard up here to find a lot of these metric bolts.
Mark,
The WSM says to feed the harness through the firewall as you're lifting the engine. However, the night I was finishing disconnecting everything Colin came by to help with the last few things. While I was under the car disconnecting the starter, alternator, ps hose by the time I surfaced, about 20 minutes, Colin had already pulled the whole harness out and it was sitting on the manifold! You might want to ask Colin how he did it as I wasn't watching but I think it's much easier to pull the engine with the harness hooked up to the engine side.
02-18-2008, 05:37 PM
#13
Rennlist Member
Thread Starter
Join Date: Jun 2006
Location: Vancouver, Canada
Posts: 165
Likes: 0
Received 0 Likes
on
0 Posts
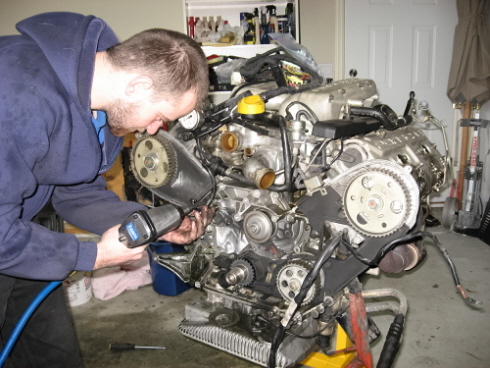
Here's what we did with the camshafts. Before we pulled them off we painted the sprocket and chain in the installed position so we don't need the fancy camshaft tool to reinstall. Notice the silver paint. I'll be keeping them in the boxes until they are ready to go back in.

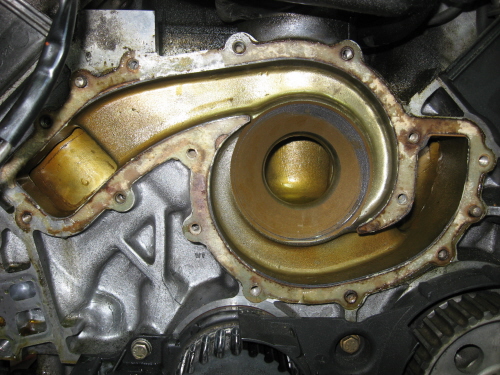
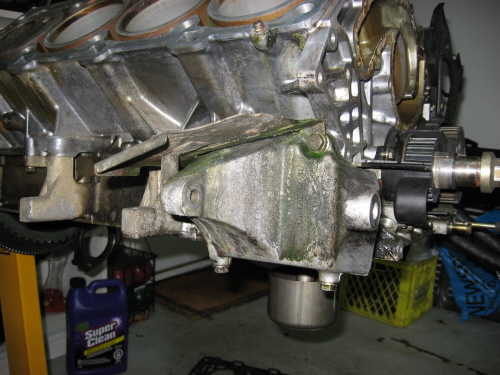
Here's the dirty block with some green coolant that was coming down from the 1-4 cylinder head front frost plug.
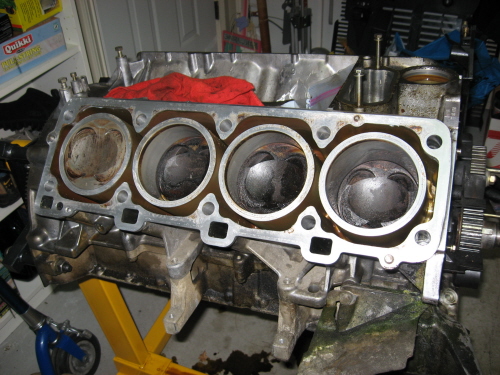
The top of the pistons had some nice carbon deposits but they were pretty soft and could easily be scraped with a screwdriver. Any ideas on how to clean and buff these up? Note that before I pulled the engine I did a compression and leakdown test to see how things were. The compression readings were close to 185psi all around and the leakdown numbers were from 3-8% in all cylinders. so I think the rings and valves are in pretty good shape.
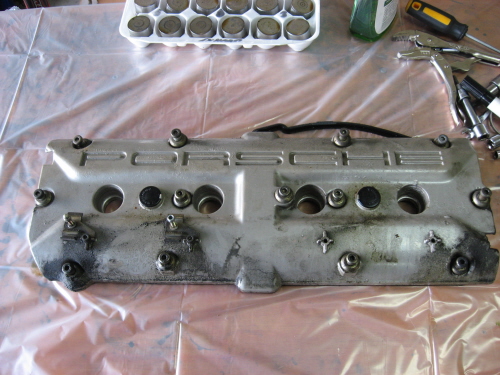
The valve covers are pretty greasy. I'm planning on powdercoating the intake and valve covers wrinkle black with red lettering. Looks pretty cool! You can see in the background my great organizational method for the hydraulic lifters. Egg cartons! Labelled according to which cylinder head, cylinder and which ones are intake and exhaust valve. Should make it easy to put them back where they belong.
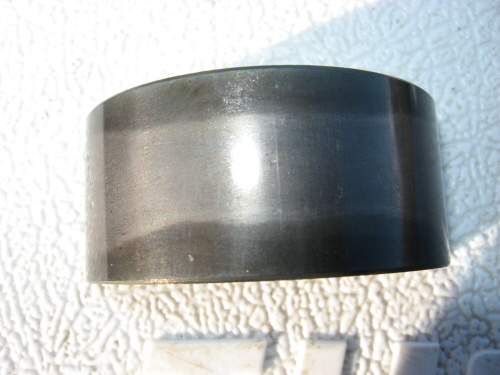
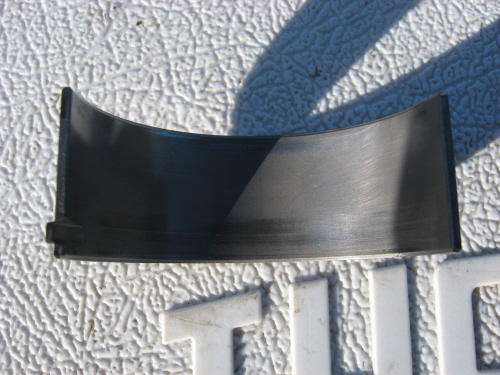
I removed the 2/6 bearings to see what shape they were in. The pics show the inside and outside. Looks to be a little wear. I took some plastigauge and the radial play measured 0.038mm. Seems about in the middle of the wear limit. I'm thinking that now that I've gone this far I may as well replace the conrod bearings.
Gotta go. heading off to get a quote on having the intake and valve covers stripped.
More later.
Here's the dirty block with some green coolant that was coming down from the 1-4 cylinder head front frost plug.
The top of the pistons had some nice carbon deposits but they were pretty soft and could easily be scraped with a screwdriver. Any ideas on how to clean and buff these up? Note that before I pulled the engine I did a compression and leakdown test to see how things were. The compression readings were close to 185psi all around and the leakdown numbers were from 3-8% in all cylinders. so I think the rings and valves are in pretty good shape.
The valve covers are pretty greasy. I'm planning on powdercoating the intake and valve covers wrinkle black with red lettering. Looks pretty cool! You can see in the background my great organizational method for the hydraulic lifters. Egg cartons! Labelled according to which cylinder head, cylinder and which ones are intake and exhaust valve. Should make it easy to put them back where they belong.
I removed the 2/6 bearings to see what shape they were in. The pics show the inside and outside. Looks to be a little wear. I took some plastigauge and the radial play measured 0.038mm. Seems about in the middle of the wear limit. I'm thinking that now that I've gone this far I may as well replace the conrod bearings.
Gotta go. heading off to get a quote on having the intake and valve covers stripped.
More later.
02-18-2008, 06:00 PM
#15
Rennlist Member
Join Date: Oct 2005
Location: Gatineau, Qu�bec, Canada
Posts: 5,178
Received 1,318 Likes
on
499 Posts
Keep posting some nice pictures and good info on what your dooing like you did.
It's always interesting to see that kind of work.
Keep on the good work and good luck.
It's always interesting to see that kind of work.
Keep on the good work and good luck.