

15 minute instrument pod removal update and instrument light bulbs for an OK price
 09-30-2009, 02:54 PM
#76
Shameful Thread Killer
Rennlist Member
Rennlist Member
I've resurected this thread because I want to know if I can get the part number for some of the bulbs that don't appear in the text.
I have an 86, and the PRND32 bulbs are on the right side of the display. I know that these are solder in bulbs of about 1 watt, but it would really help if some knows a vendor number before I have the pod apart.
I also would like to redo the instrument cluster lamps with incandescent ones that are either red, or have the red cover. I can get stock white bulbs, but would need the little red covers.
Please don't bother with the advice on LED replacement, as I already have that info, I would like the PN for the PRND32 bulb, and the red cover for the instrument cluster illumination bulb. Thanks.
 09-30-2009, 05:47 PM
#78
Team Owner
if your going to take the time to remove the instruments to get to the bulbs i would suggest that all of the bulbs be replaced although park and drive usually see the most use
09-30-2009, 08:39 PM
#79
Under the Lift
Lifetime Rennlist
Member
Lifetime Rennlist
Member
09-30-2009, 10:24 PM
#80
Team Owner
Yes I replaced all of the ones in the Yellow car and that was the only one that i have done or rather have had to do.
Once I saw the amount of time it took to get to the bulbs i got all of them at Radio Shack.
The soldering took all of 10 minutes
Once I saw the amount of time it took to get to the bulbs i got all of them at Radio Shack.
The soldering took all of 10 minutes
07-13-2010, 12:53 PM
#81
Rennlist Member
It took me five minutes to get the one feaking bulb out of the plastic body and ready for de-soldering. So, I called 928 Specialists. They are $2.25 ea. + shipping. PN 999 631 027 90. MDmetric has Flosser bulbs (449103) for $1.48 ea, but a $50 minimum. That explains the price from our 928 suppliers.
07-13-2010, 01:04 PM
#82
Basic Sponsor
Rennlist
Site Sponsor
Rennlist
Site Sponsor
The bulb with holder sells here for $1.25.
Why take the bulb out of the holder?
Read the thread now I know why 8>)
Bulb only sells for $0.75
Steve,
If the bulb is for your GTS you need the bulb and holder and no soldering required.
Roger
Why take the bulb out of the holder?
Read the thread now I know why 8>)
Bulb only sells for $0.75
Steve,
If the bulb is for your GTS you need the bulb and holder and no soldering required.
Roger
__________________

Does it have the "Do It Yourself" manual transmission, or the superior "Fully Equipped by Porsche" Automatic Transmission? George Layton March 2014
928 Owners are ".....a secret sect of quietly assured Porsche pragmatists who in near anonymity appreciate the prodigious, easy going prowess of the 928."
Does it have the "Do It Yourself" manual transmission, or the superior "Fully Equipped by Porsche" Automatic Transmission?
George Layton March 2014928 Owners are ".....a secret sect of quietly assured Porsche pragmatists who in near anonymity appreciate the prodigious, easy going prowess of the 928."
07-13-2010, 03:22 PM
#83
Intermediate

Join Date: Jun 2004
Location: Kiruna, Sweden
Posts: 40
Likes: 0
Received 0 Likes
on
0 Posts
Light bulb equivalents to the ones Schocki have reported:
16 of B8,4d/BX8,4d, 12V/1.2W
===================
Bosch 1 987 302 243 (1.2W)
Hella 8GA 007 997-171 (1.1W)
Hella 8GA 007 997-121 (1.2W)
Hella 8GA 007 997-131 (1.3W)
Hella 8GA 007 997-141 (1.5W)
Lucas LLB286THO (1.12W)
Lucas LLB286THB (1.2W)
Lucas LLB286THBL (1.2W)
Lucas LLB286THBE (1.5W)
Osram 2473MFX6 / 4050300170886 (1.1W)
Osram 2351MFX6 / 4050300170824 (1.2W)
Osram 2431MFX6 / 4050300638416 (1.3W)
Osram 2452MFX6 / 4050300170862 (1.5W)
Philips �
Sylvania �
~�0.96
4 of W2W/W2,1x9,5d, 12V/2W
====================
Bosch 1 987 302 223
Hella �
Lucas LLB297
Osram 2820 / 4050300170138
Philips �
Sylvania -
~�0.40
12-30-2011, 02:09 PM
#86
Addict
Rennlist Member
Rennlist Member
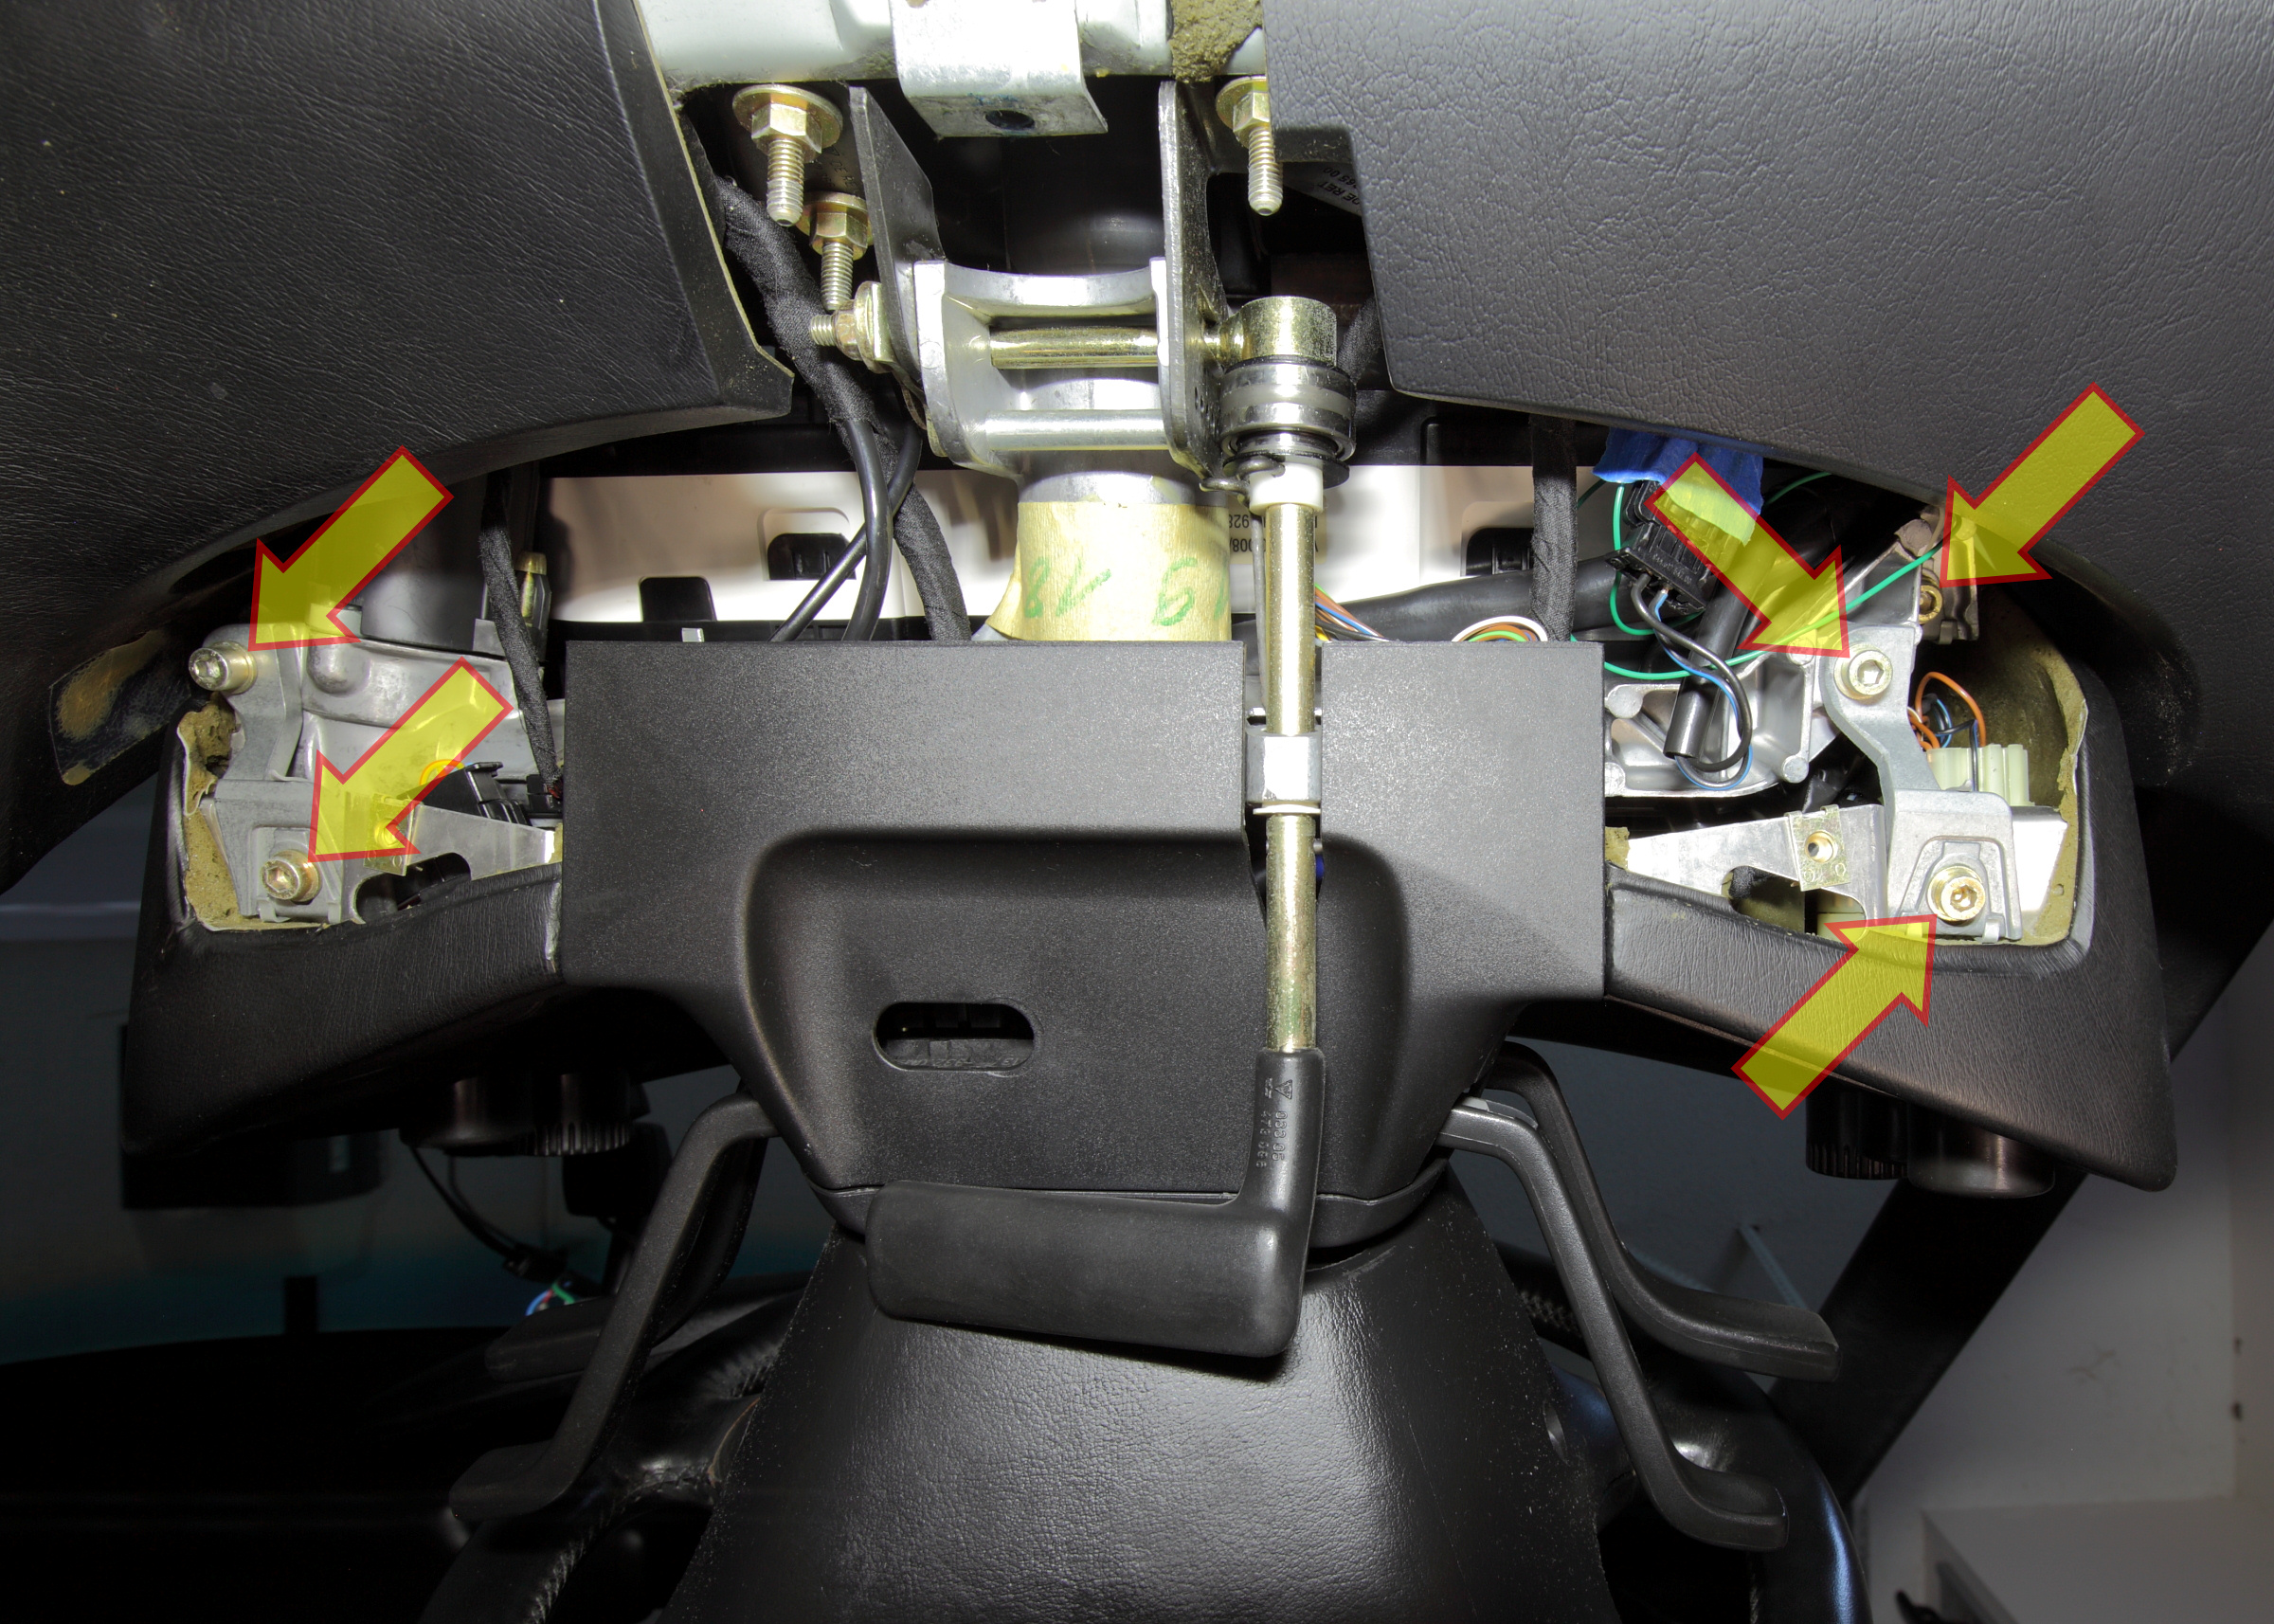
Since I take the easiest of procedures and make them hard, I'd like to add one step to Shocki's most excellent instructions. After removing the knee bolster and the two metal brackets held by the 4 allen bolts, turns out there's a FIFTH allen bolt. It's on the left side, and runs up through the 2 rubber isolating donuts that sit in a U-shaped channel on the cluster and hold its left side.
 12-30-2011, 02:14 PM
#87
Under the Lift
Lifetime Rennlist
Member
Lifetime Rennlist
Member
Yeah, I thought there were 5. Even with all the bolts out, I never succeeded in getting the pod out with the steering wheel still in place.
12-30-2011, 02:44 PM
#88
Addict
Rennlist Member
Rennlist Member
This procedure really does deserve the "Bill Ball stamp of approval".


 04-21-2013, 05:05 PM
#90
Burning Brakes
Thanks for the great instructions. Did mine this afternoon and took about 20 minutes. Could not ask for better instructions.
Harvey
Harvey