When you click on links to various merchants on this site and make a purchase, this can result in this site earning a commission. Affiliate programs and affiliations include, but are not limited to, the eBay Partner Network.
I was having some serious problems with my shifter. There was WAY too much play in it and at one point it popped off the cup and my shifter went into business for itself. The short term solution was to pull up the shift boot and play with it until I could get it into gear and nurse it home.
The intermediate solution was to put a hose clamp around the TT and shifter linkage to keep it down on the cup, even though the bushing was shot.
The fix was either to replace the entire forward shift ball cup, or to replace the bushing. Both of which required removal of the existing shift ball cup and measuring how many threads you had on, and then get the new one (or the old one with the new bushing) back in exactly the same place.
I figured there had to be a better way, and here is what I did.
I ordered the bushing from 928 specialists : 911.424.223.03 ($4.67).
EDIT- Matt, and Jon point out that the part I got is not the correct part number- read on.
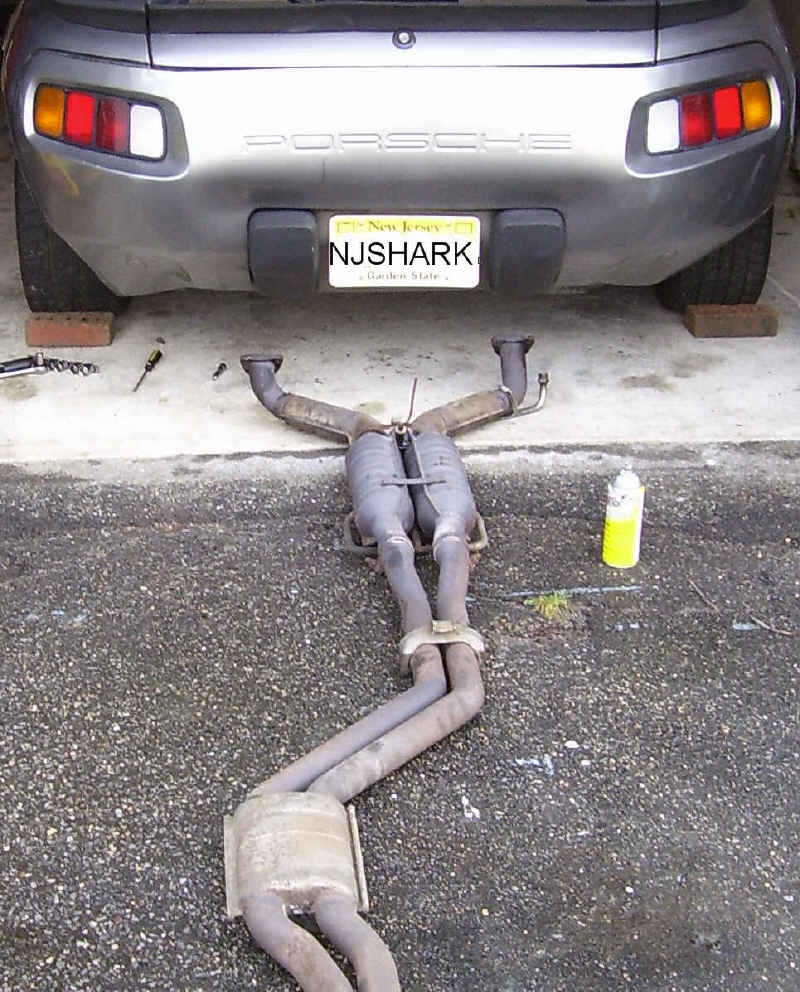
Then I removed the exhaust system.
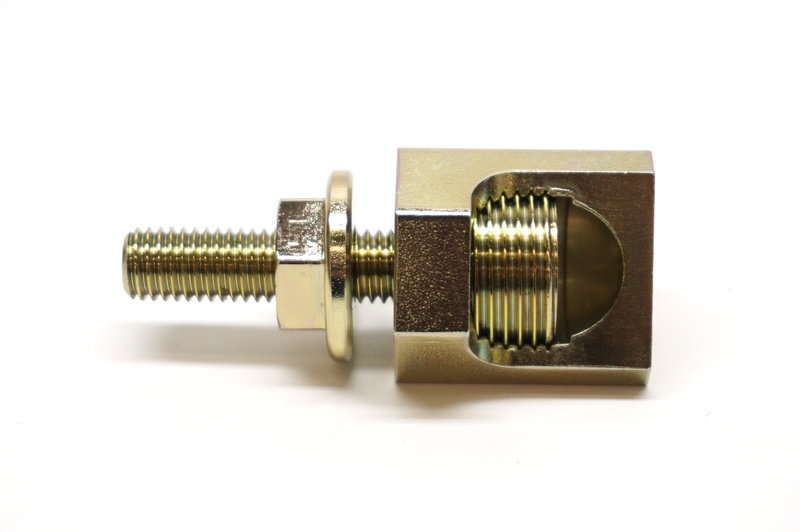
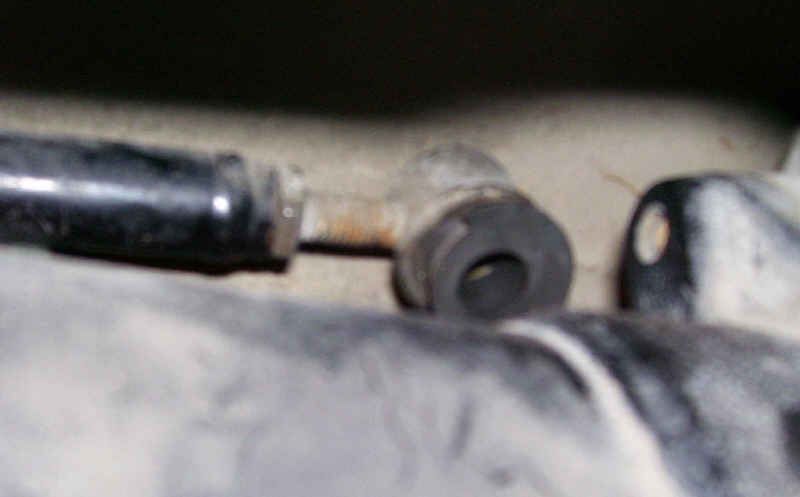
Then I had a look at the old one, as you can see, there was nothing holding the ball in the cup. I was able to pry the old, fossilised plastic bushing remains out with a flat blade screwdriver.
Then I took a look at the new bushing. It's just too large to fit in there with the shift ball cup in the car.
EDIT- The correct ball cup, which is about $14. (p/n 928.116.145.03) fits without the following modifications-
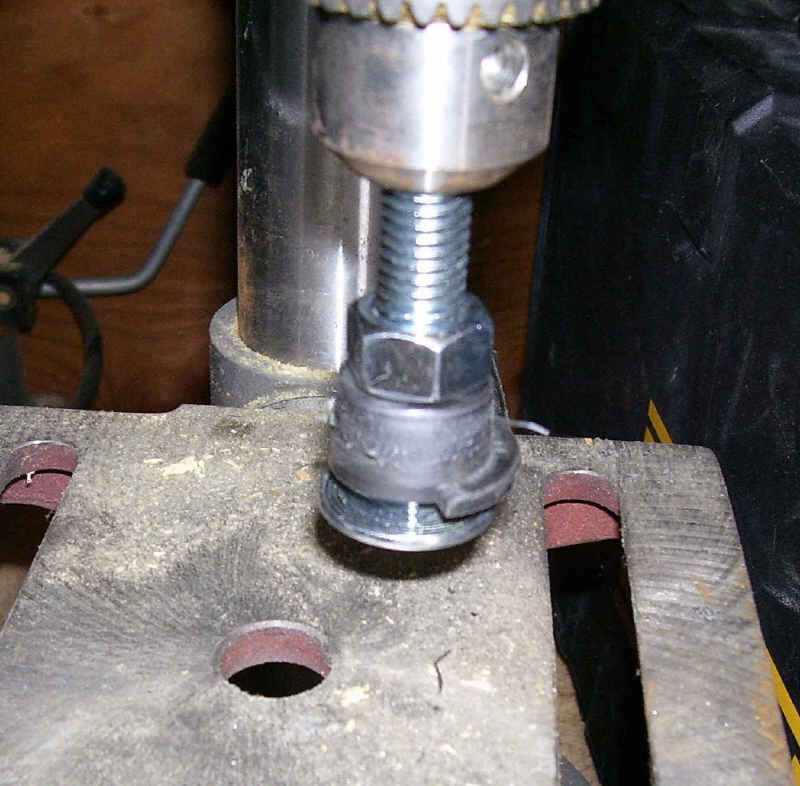
Since the part was only $5 and I had a replacement assembly in case I screwed it up, I decided to machine the bushing.
I put it on a 1/2 inch bolt with a nut on it and chucked it up in my drill press.
Then I just turned it down to the size I had measured the old cup opening (13/16"). I had to remove almost 1/8" of material, but I just used a few emory boards, holding them against the bushing as it turned and eventually it turned down to the size I wanted.
Then I put the bushing in the freezer for 10 minutes (long enough to shrink it a little, but not long enough to make it brittle) and had a beer.
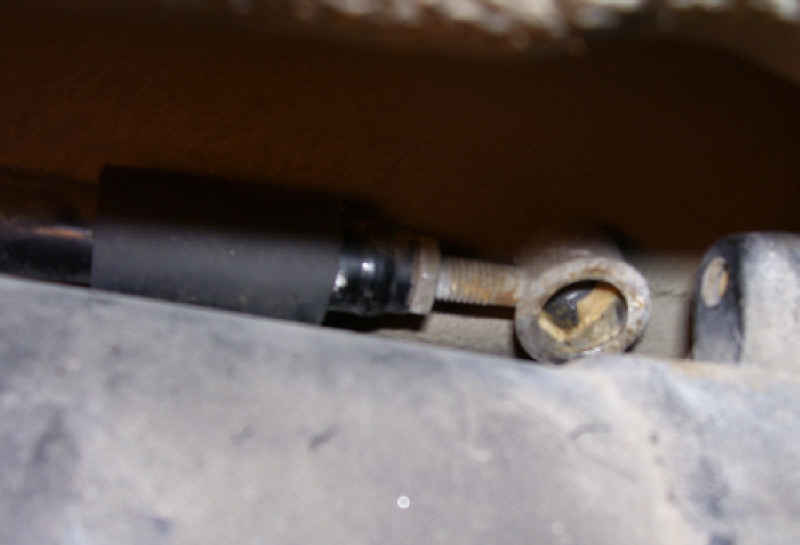
It was a tight fit, but now I was able to press it into the cup in situ. (sorry this shot is blurry)
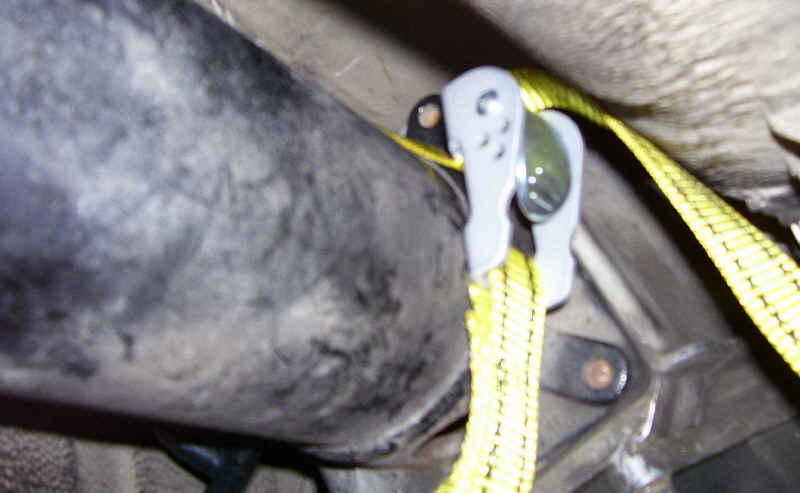
Next I put a small 1" cargo strap over the cup and around the TT.
All I had to do at this point was use a pry bar under the strap (against the TT) and with some pulling, I felt it ease down onto the ball.
Install 6" hose clamp as backup, replace exhaust system and drive!
I used to have almost 3" of play from front to back without pulling it out of gear. Now it's about 1/2". I drove it and what a difference!
EDIT- The fact that this is a rubber bushing means there's not as much side-to-side play as there should be (in neutral it sits between 2nd and 3rd and you have to push or pull a little to move it over, rather than just rock it, but it's not bad.)
Anybody want to buy a new shift ball socket? Cheap.
I have read that you can get a replacement bushing for the front, no one had the exact part # so I opted to just get a new one. I have the rear on my to do list �911 424 223 03� Sort of scary when it pops off and you have a dead stick
Did mine too, last year. I used a Stanley Wonderbar for leverage to "press" the ball into the cap. Then installed a 6" hose clamp- fairly loosely around the tube &front arm@ the FLAT spot to prevent it from ever popping loose again._ A condition I believe is caused by flattened MM's. The motor falls too low- ultimately disconnecting the ball joint. I did my MM's shortly thereafter
on the race car, i just cut a square hole with a dremmel where the inspection plug is (below where you civilians have a radio and Hvac stuff) reached down, unscrewed the old one, screwed on the new one and used a hose clamp and an electric screwdriver to seat the new ball socket.
that's the easy way!
Jon, I couldn't find the part number for that one anywhere in the threads, now I see that 928 Specialists has it listed, but under clutch parts on their website, not where the shift ball cup is. I should get in the habit of calling instead of just ordering online.
Anyway, clearly it's not worth it to machine a rubber piece when the right one is less than 10 bucks more. So forget the machining part. However, I'm glad the right part number is now in this thread in case anyone needs it in the future. As far as the technique, I had read that the cup had to come out even for the plastic bushing, so I thought this was a better way, but maybe that wasn't the case either.
FYI- as an update, it turns out the rubber bushing makes a difference in shifting. There is much less play from front to back (as you would expect) but it also limits the side-to-side quite a bit. It might be more than some would like, since you really have to pull to get it into 1/R, but it seems like the shift from 1-2 is straight up and the 2-3 appears almost straight down again. It's the slightest push from 3-4 and then really smooth from 4-5. None of this was intentional of course, but I like the effect. If anyone is interested, I'll be at SITM and if the interior is presentable you can check it out.
If it doesn't loosen up a little I may have to use 2 hands to go into 1/R before too long, but for now, I think I like it nice and tight. It's really very smooth, almost like it's got a cushion where none was before.
Mike,
You might want to try loosening the locknut on the ball cup to see if the R/1 gate improves: if so, it may be locked down a bit off center.
BTW, I found my locknut loose at one point. That never had any effect on shifting tightness for the shift cup stayed more or less stationary as the shift rod rotates ~1/8 turn on the threads. I left it that way for a while, thinking that it may prolongue the life of the plastic cup.
That may be an option for you if the left to right gates are too tight.
You got me on that one. That does seem easier.
this was a better way, but maybe that wasn't the case either.
Yeah, If you dont mind hacking up your car to do repairs. Remember this is the guy that was okay with just a few metal bits of cam gear in his oil pan....
not sure I understand what is meant by "centre box" ( I have cats) but I did mine a few weeks ago and all I did was drop the exhaust at the manifolds and support the rest of the exhaust midway, so it does not put undo strain on the rear mounting points. gave me plenty of room to fix the ball cup. good luck

 01-06-2007, 10:05 PM


")