
PRND32 soldered bulbs replacement
 12-17-2006, 08:29 PM
#1
Inventor
Rennlist Member
Rennlist Member
Thread Starter
(CASIS shift up bulb too.)
The brightness is the same as the old bulbs. There was another RS#, but IIRC, they were for 20ma bulbs, which are dimmer.
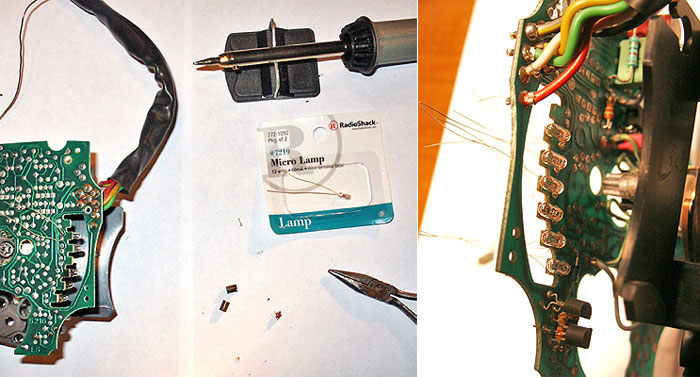
Radio Shack #7219, 272-1092, 2 per pack $1.50
The bulbs were mislabeled on the shelf as 'flashing'. They have the same specs as below.
The brightness is the same as the old bulbs. There was another RS#, but IIRC, they were for 20ma bulbs, which are dimmer.
Radio Shack #7219, 272-1092, 2 per pack $1.50
The bulbs were mislabeled on the shelf as 'flashing'. They have the same specs as below.
Originally Posted by John Speake
The bulbs I used were T1 3mm dia 12v 60mA, wire ended.
 12-17-2006, 10:21 PM
#2
Rennlist Member

Believe that is what I used a few years ago for my 'D' light on tach ken. The only thing I noticed is that it does not brighten up with lights on as the original did.
12-18-2006, 03:09 AM
#3
Inventor
Rennlist Member
Rennlist Member
Thread Starter
These bulbs are the same brightness as the old. Full bright with the key on, parking/headlights off, and dimmed with the parking/headlights on. Much nicer than the old 'dirty' bulbs, and non-working [D] bulb.
It was pretty easy to replace. Heat one wire at a time per bulb with a small tip soldering iron, and work the bulb off of the board. The holes should be open when the bulb is removed, so it is just a matter of stringing the new bulb wires through, leaving about 3mm between the bulb and board, bending over the wires to hold it in place, and soldering the holes closed. After all the bulbs were on, I cut away the excess wire. Bend the bulbs 90� and adjust to mimic the old bulbs.
Note: the Nichols Tips part number was 25ma - # 272-1141A.