When you click on links to various merchants on this site and make a purchase, this can result in this site earning a commission. Affiliate programs and affiliations include, but are not limited to, the eBay Partner Network.
This design would only work on the 2.1-2.8L HPS/Kenne Bell Superchargers. If you are looking for alternative inlets for the Eaton based superchargers, you may want to look through the Magnuson or Harrop catalogs. Regards Hans
I am sending out the oil filler plates to the machine shop tomorrow. I will order a couple extra, but if anyone needs one, send me a PM.
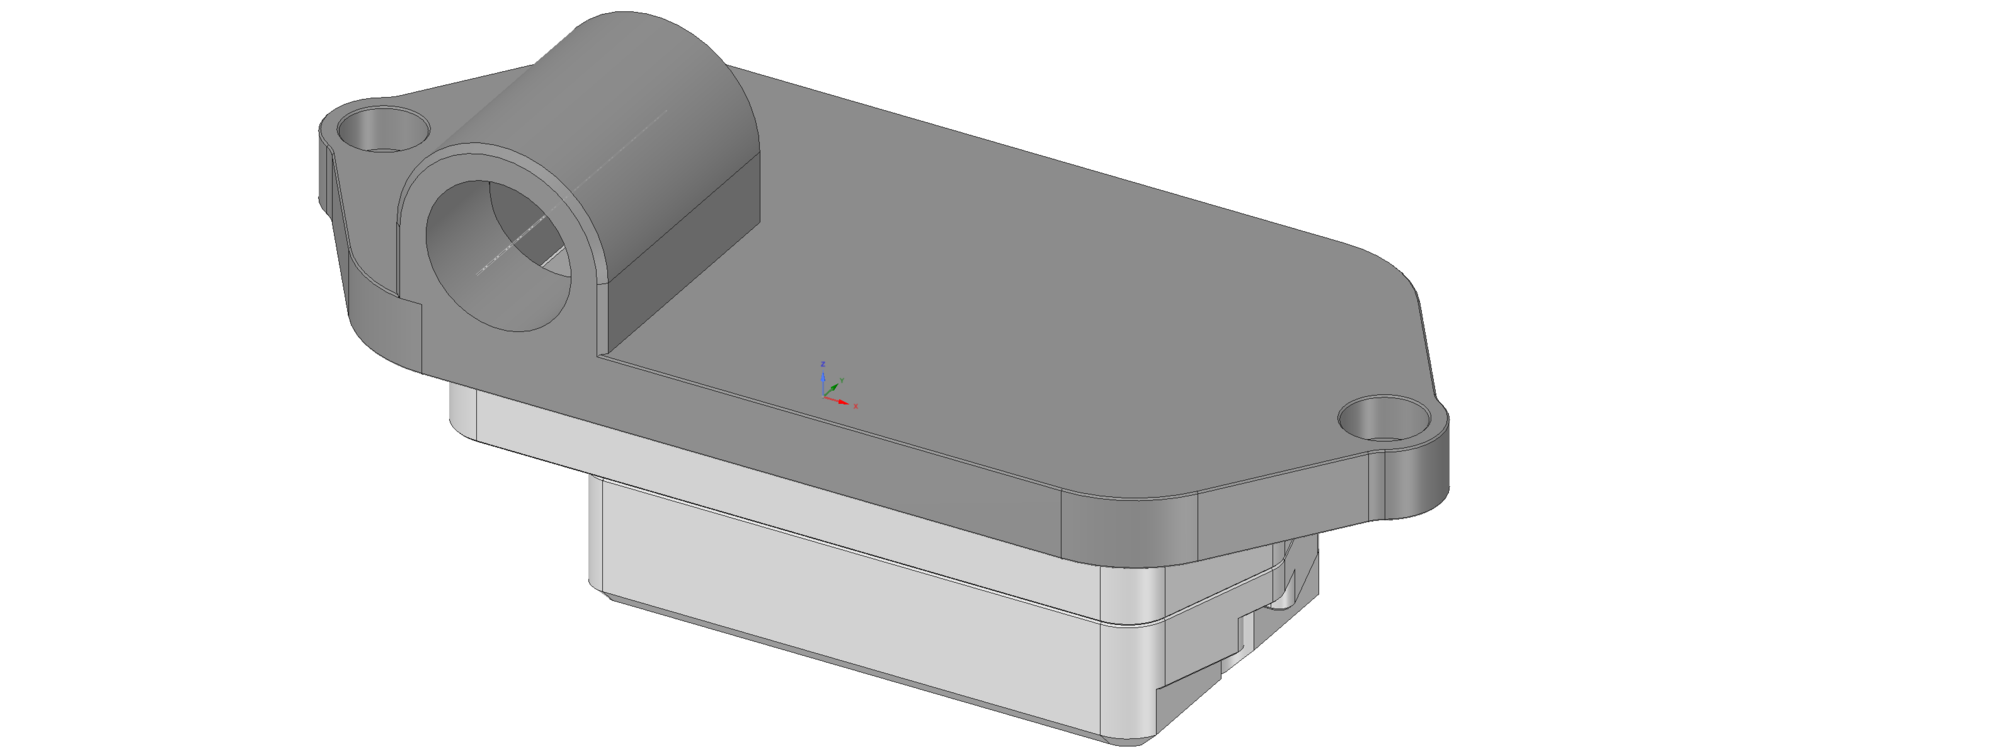
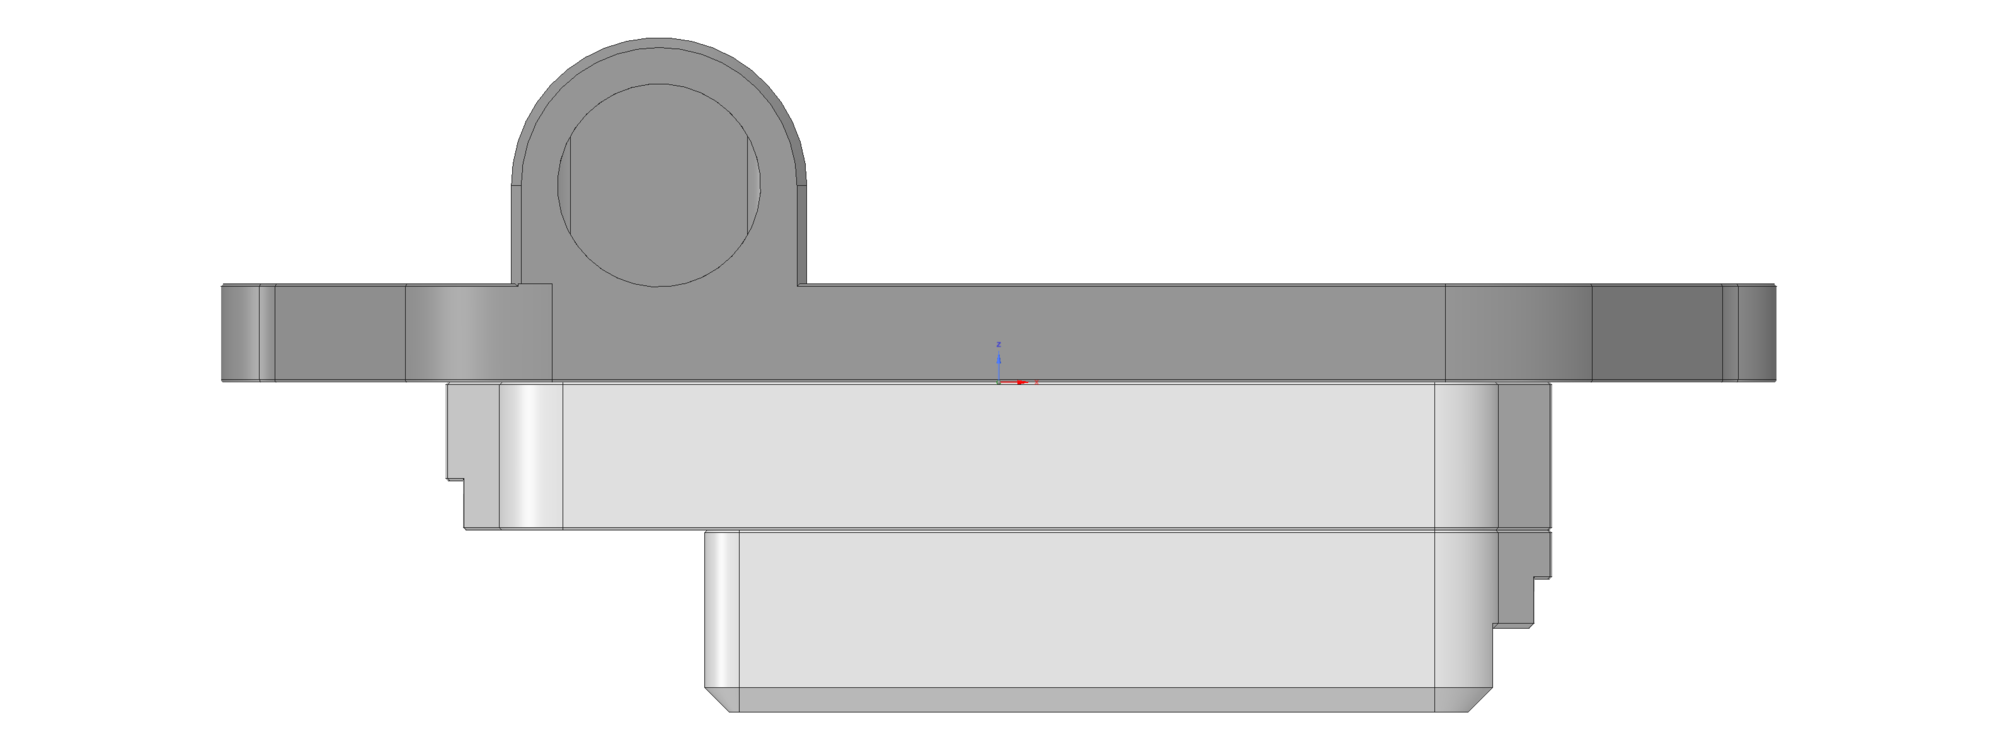
They are ultra-low profile, so handy for installing in a tight space. The fitting will be tapped for -10ORB. The outlet is centered perfectly for clearing the waterbridge legs, and comes right out under the expansion tank hose. I recommend using the Jiffy-Tite Pro-compact Series60 fitting with this, so you have a full swivel and quick-connect, but all -10ORB fittings will work.
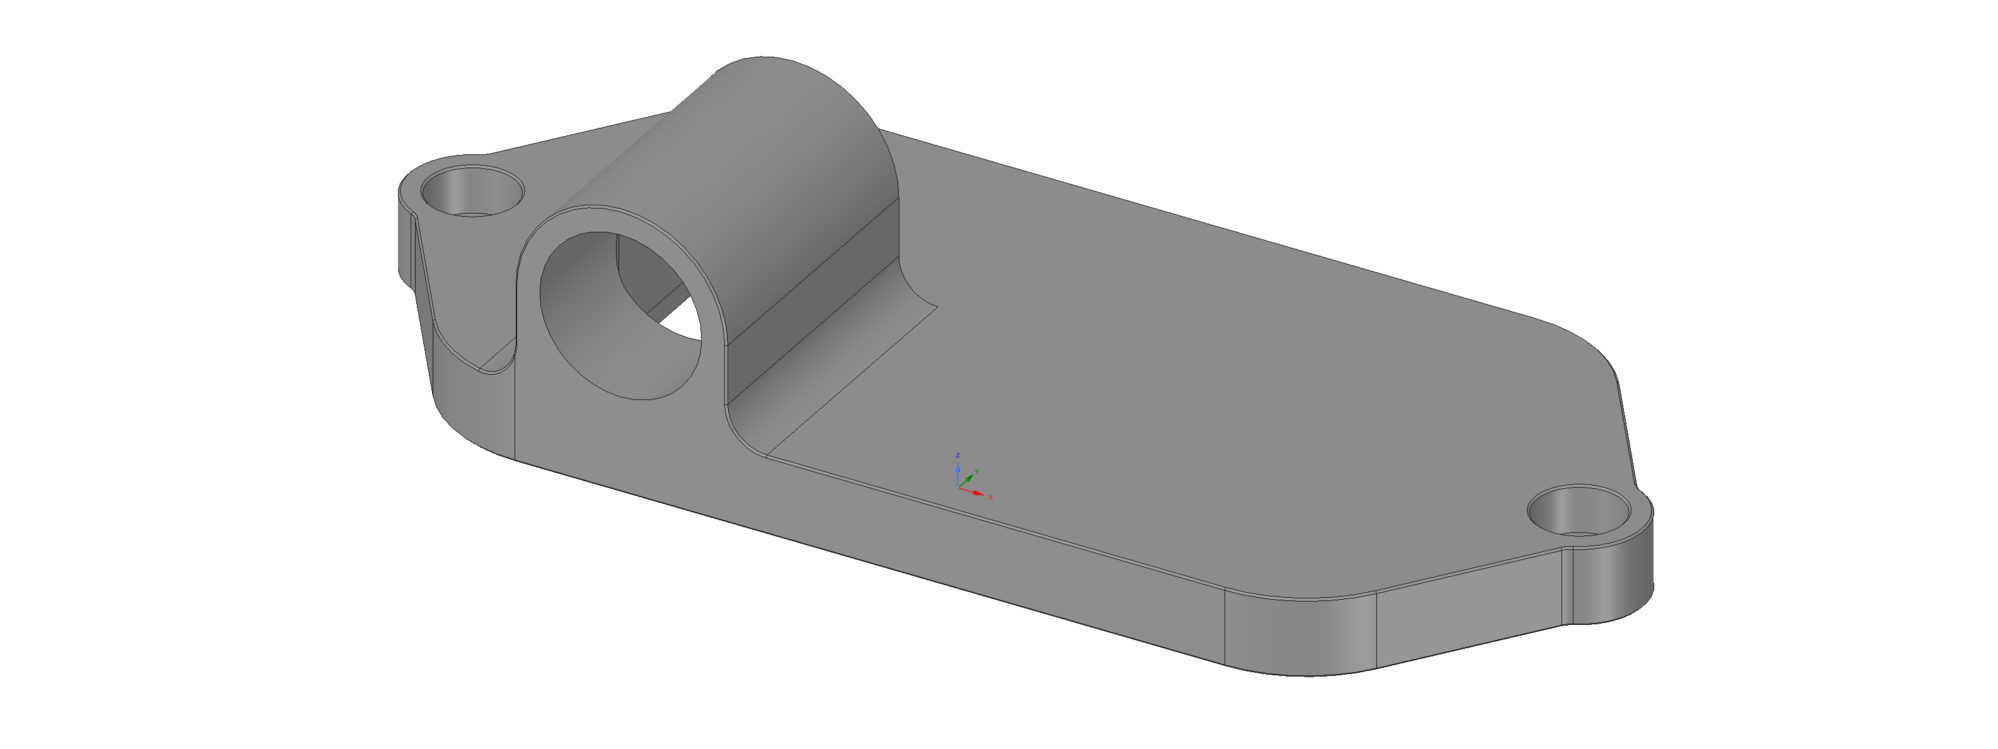
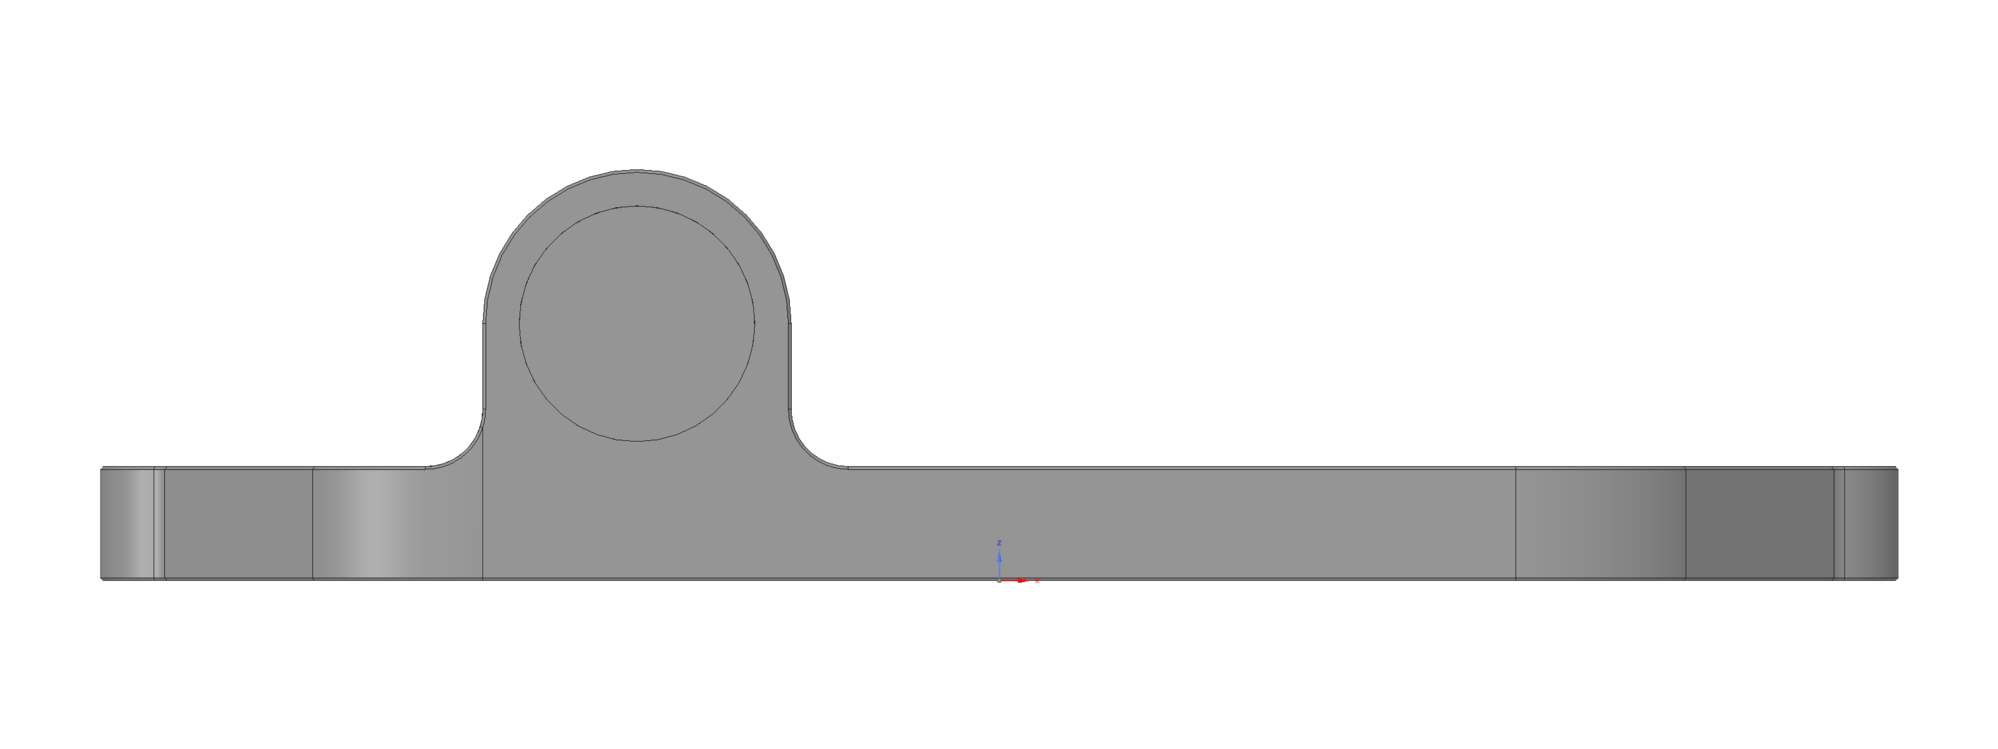
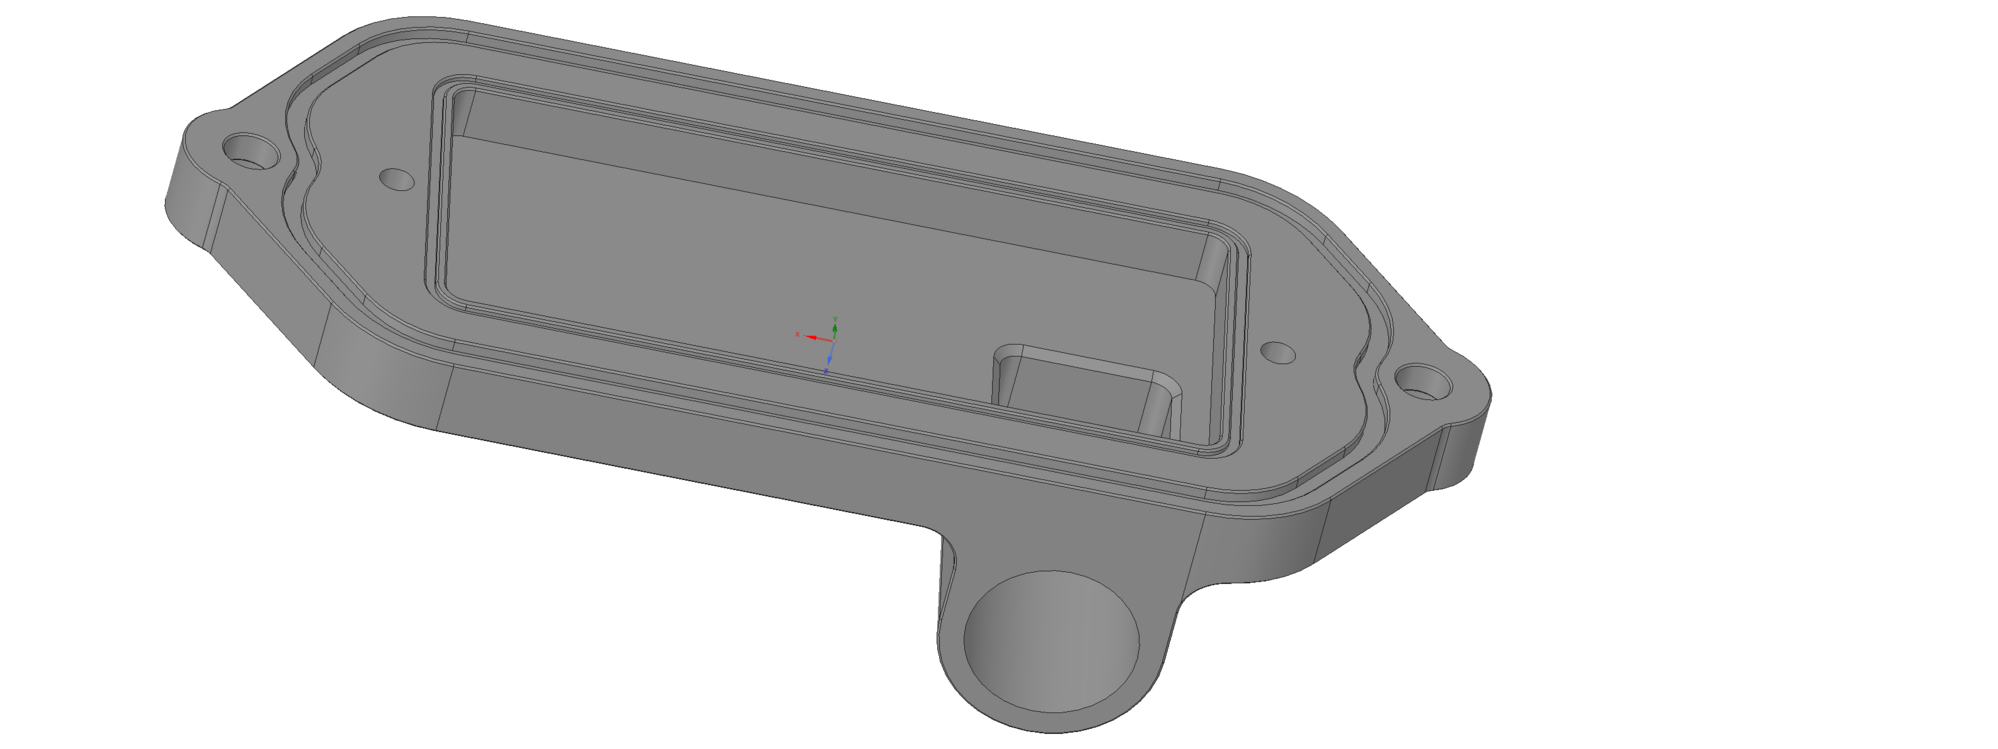
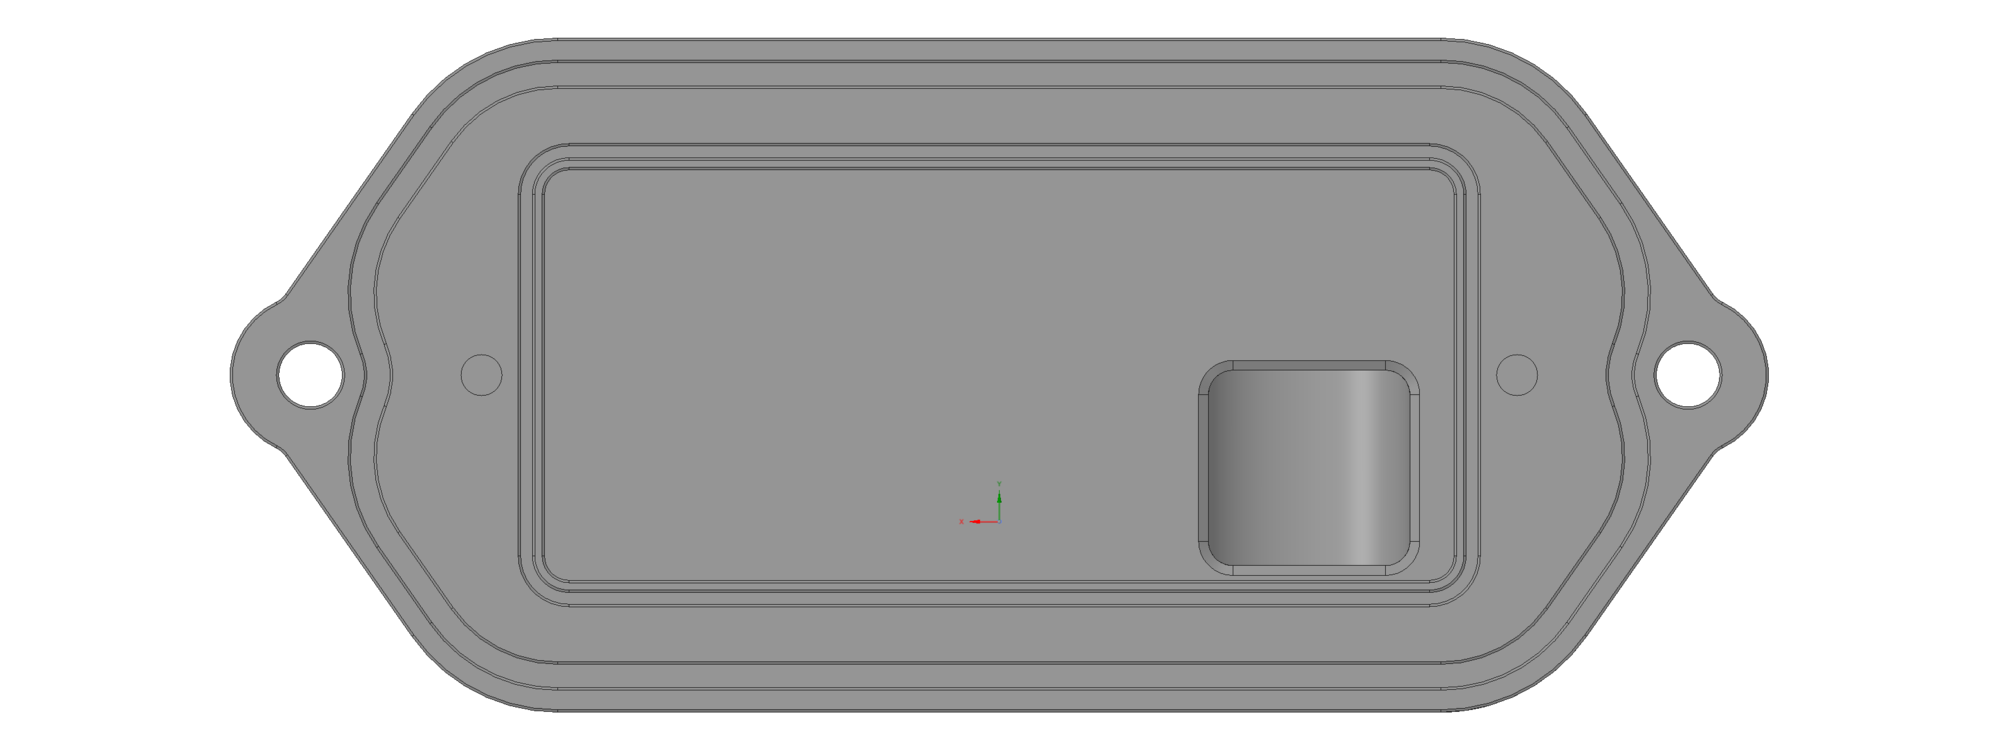
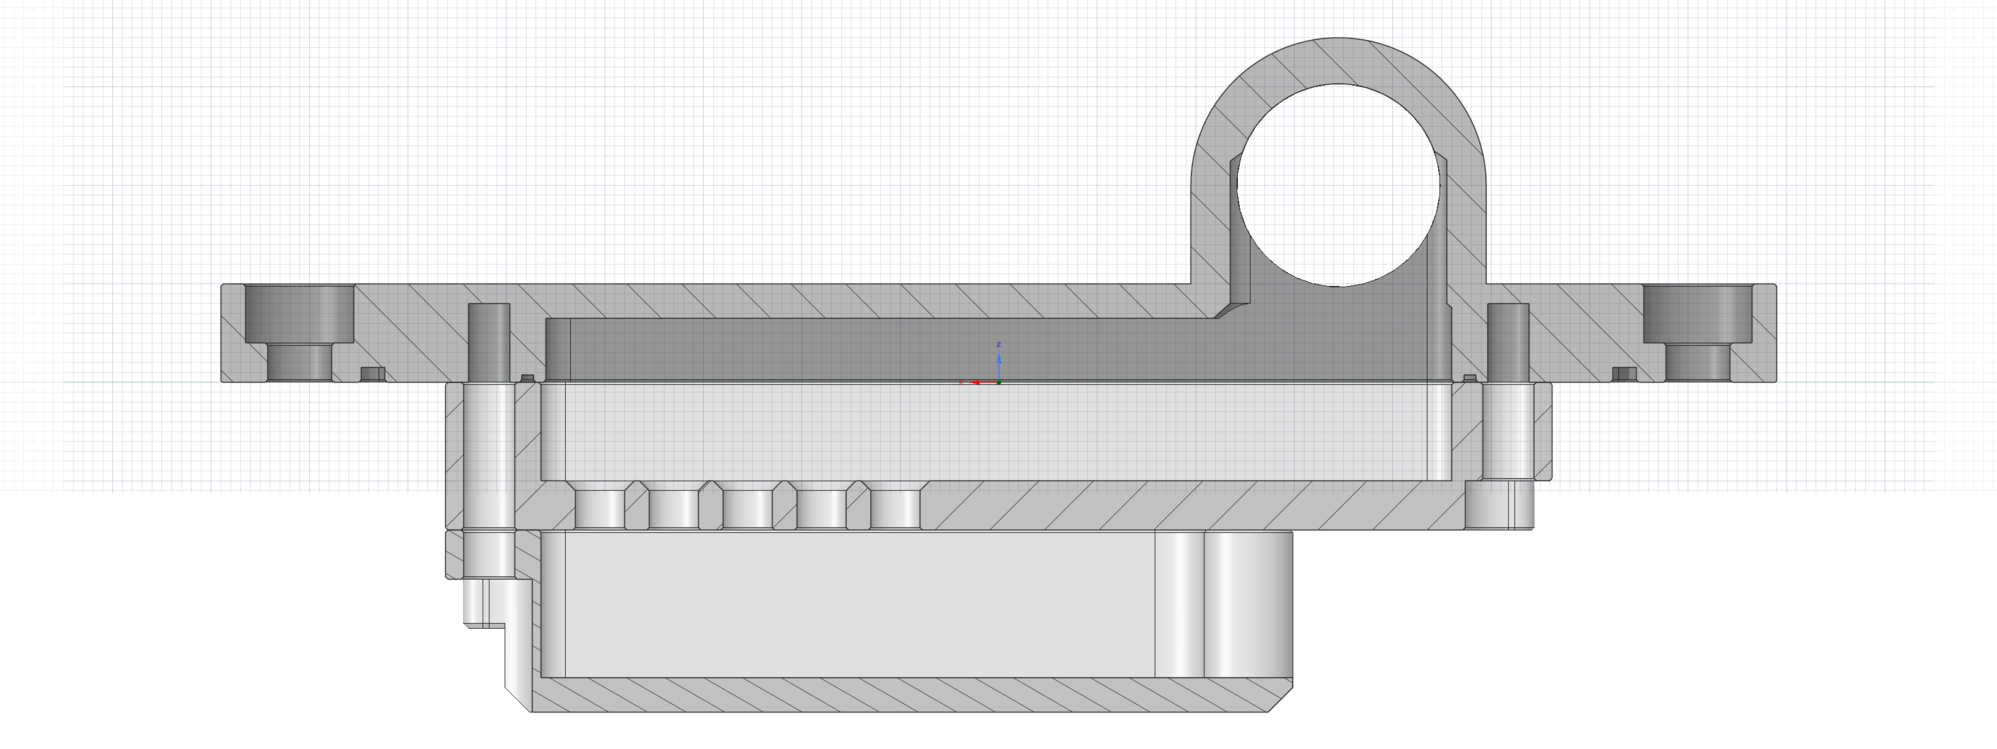
The bottom has an o-ring grove for the block, but also has a secondary o-ring for sealing any custom baffle arrangement or louver plate that you wish to use. Tapped M5 holes can be used to suspend the baffle internally, or it can be sandwiched in the block chimney. The center of the plate has been milled out for increased flow with just the stock louver plate if desired.
This is the perfect plate for those who want a custom oil-filler or a suction point for a crankcase evacuation system. I will be having custom locking/sealing dipsticks made to complement this part for those running vacuum pumps. The dipstick tubes will seal better in the block for less leaking under vacuum, and will be wider to allow for filling through the dipstick tube with a funnel as well.
Like most things with this projects: tweak, tweak, tweak....
I have tweaked the oil filler/vent part again, and optimized it further for machining. I also redesigned the baffle system for machining and to try and make it a universal component.
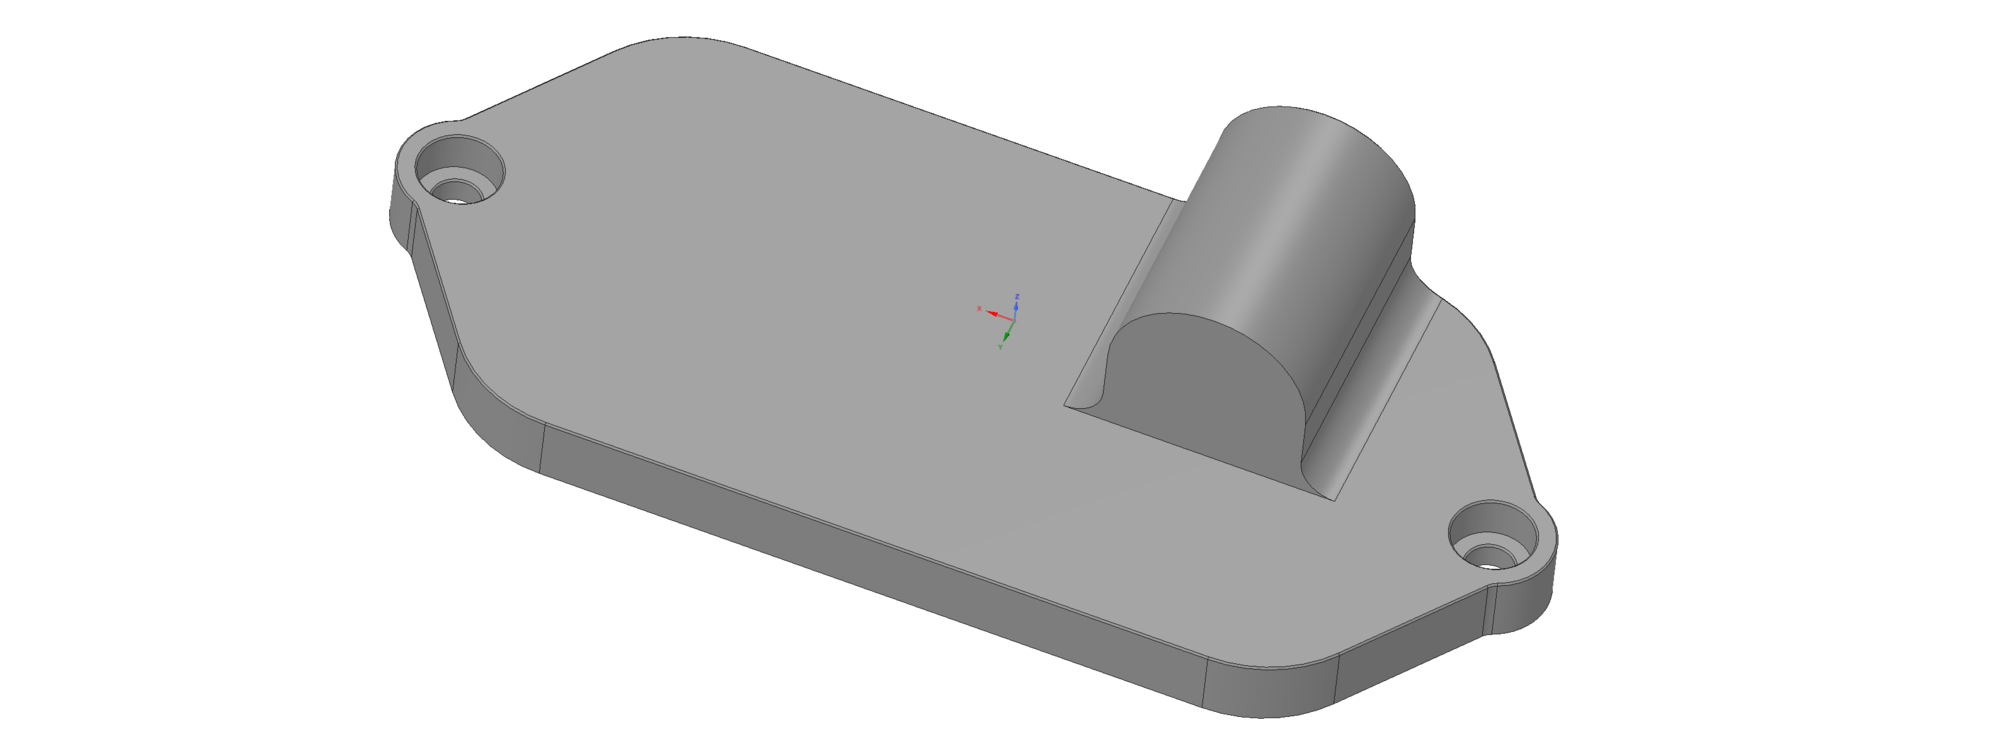
It only breathes from high up on the passenger side, as far away from the crank as possible. The broad flat lower should reject most of the splash. It fits very close to the driver side of the chimney, and both the front and back walls (less than 1.5mm clearance on those sides) again to help control the oil.
There is no linear passage at all for the windage. It must pass through an "S" pattern and through a matrix of 5mm holes. These are deburred underneath, but have a full 1mm chamfer on top, promoting the drainback of any oil in the the baffle, but stalling out any below the matrix. For those that would want to still use this as the primary oil-filling device, there is little impediment to the return (it will take longer than the stock fill, but not by much.
I am making spares if anyone needs a set for their projects.
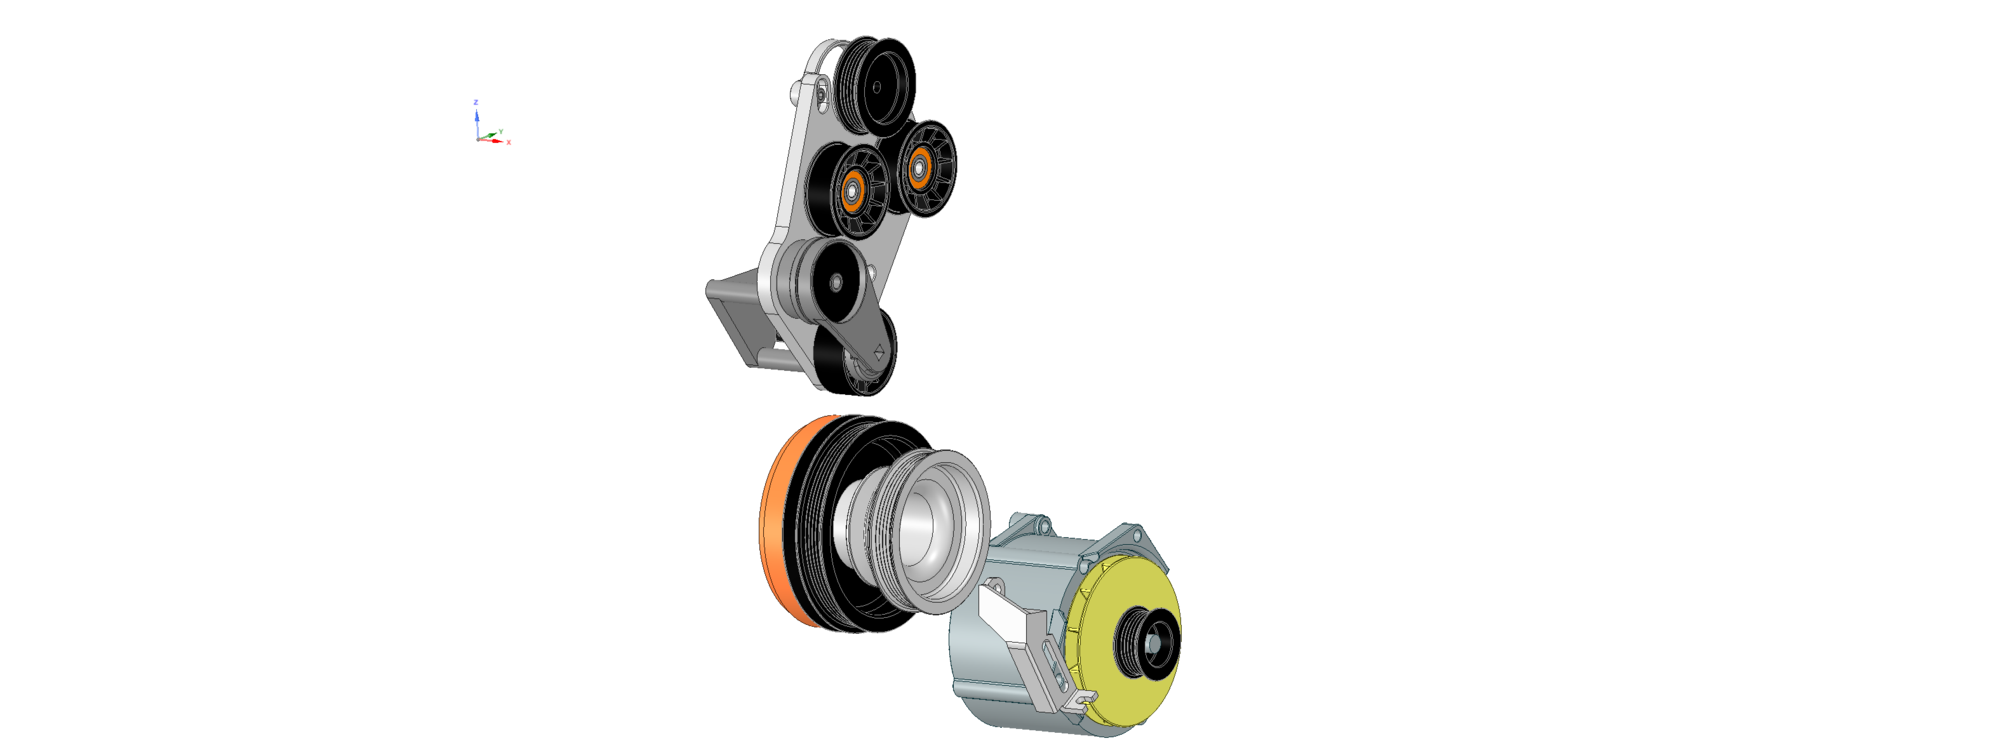
I am hoping the tensioner goes in for machining this weekend as well. That has been completely redesigned and in testing now. I went to a previous, much simpler single-idler design with a custom crank pulley so I could get the dedicated belt drive for the supercharger. I will post some renderings once I have it completely vetted.
Short answer is yes, it is certainly possible. Only cost-effective way to add them would be a 3D printed intermediate plate. If this is something you wanted, contact me and we can work out that custom part on a time and materials basis. The entire lower baffle assembly is modular, so the filler/breather top portion can be fitted with any custom lower piece, as long as its footprint seals against the upper o-ring.
I will gladly share this geometry for anyone wishing to develop their own lower as well.
Like most things with this projects: tweak, tweak, tweak....
The Oil filler is one of the harder pieces. Super tough to get right and yet allow enough room for CC pressure to escape effectively.
I'm still using my original that DR and Tony made up for me which has 2 ports (although I only use one for a vent). The 2nd port serves as my oil fill port. It sounds like it's not needed, but it really helps keep the design user-friendly. If you can fit it in, I think you will also find it useful. Btw, it can be smaller in diameter if it's only for oil-fill...
I totally agree, it is a more challenging part than it looks to be. The outlet on this one is a bit smaller at -10 because it is being used with a vacuum pump in my application. The hose fitting exits right between the passenger head and the coolant return. The outlet could be used for both fill and scavenge if the connection to the breather system was easy to get at. I am using all JT PC fittings, so tool-less connections. I originally planned to fill from this fitting as well, but I am having new dipsticks and tubes made, and will fill from that location instead.
I do have plenty of variations on the oil filler, including a 1" push-on hose fitting, so can make that version if anyone needs that. Its just a bit more expensive to machine.
First, I still have two unclaimed manifolds. If anyone is interested in being an early adopter I am making the first run of kits available at a very good deal. PM me for information.
Onto the updates. I have many different pulley and tensioner designs. Selecting a final version to move forward with the last set of fit testing was a difficult decision, but ultimately decided with this version to finalize. It uses the new Dayco Mopar tensioner that comes on the hemi engines, and has been known to work in supercharged applications. I will upgrade the pulley on the tensioner to a billet idler, the same as the two supercharger idlers.
The pulley system has been redesigned so I can re-use the factory crank pulley for driving the power steering pump and the alternator. I also have an upgraded crank pulley (as shown in the renderings) that moves the two v-belt drives farther forward. This allows for the installation of a vacuum pump and still run the stock PS belt with a simple spacer behind the stock PS pulley.
The ideal supercharger pulley for this lower drive is 2.75" which should give plenty of wrap. There is room to install upto a 3.25" pulley if we need to detune the system some.
I am having some test parts cut, and then after fit testing, we will be ready to order tensioner plates and pulleys.
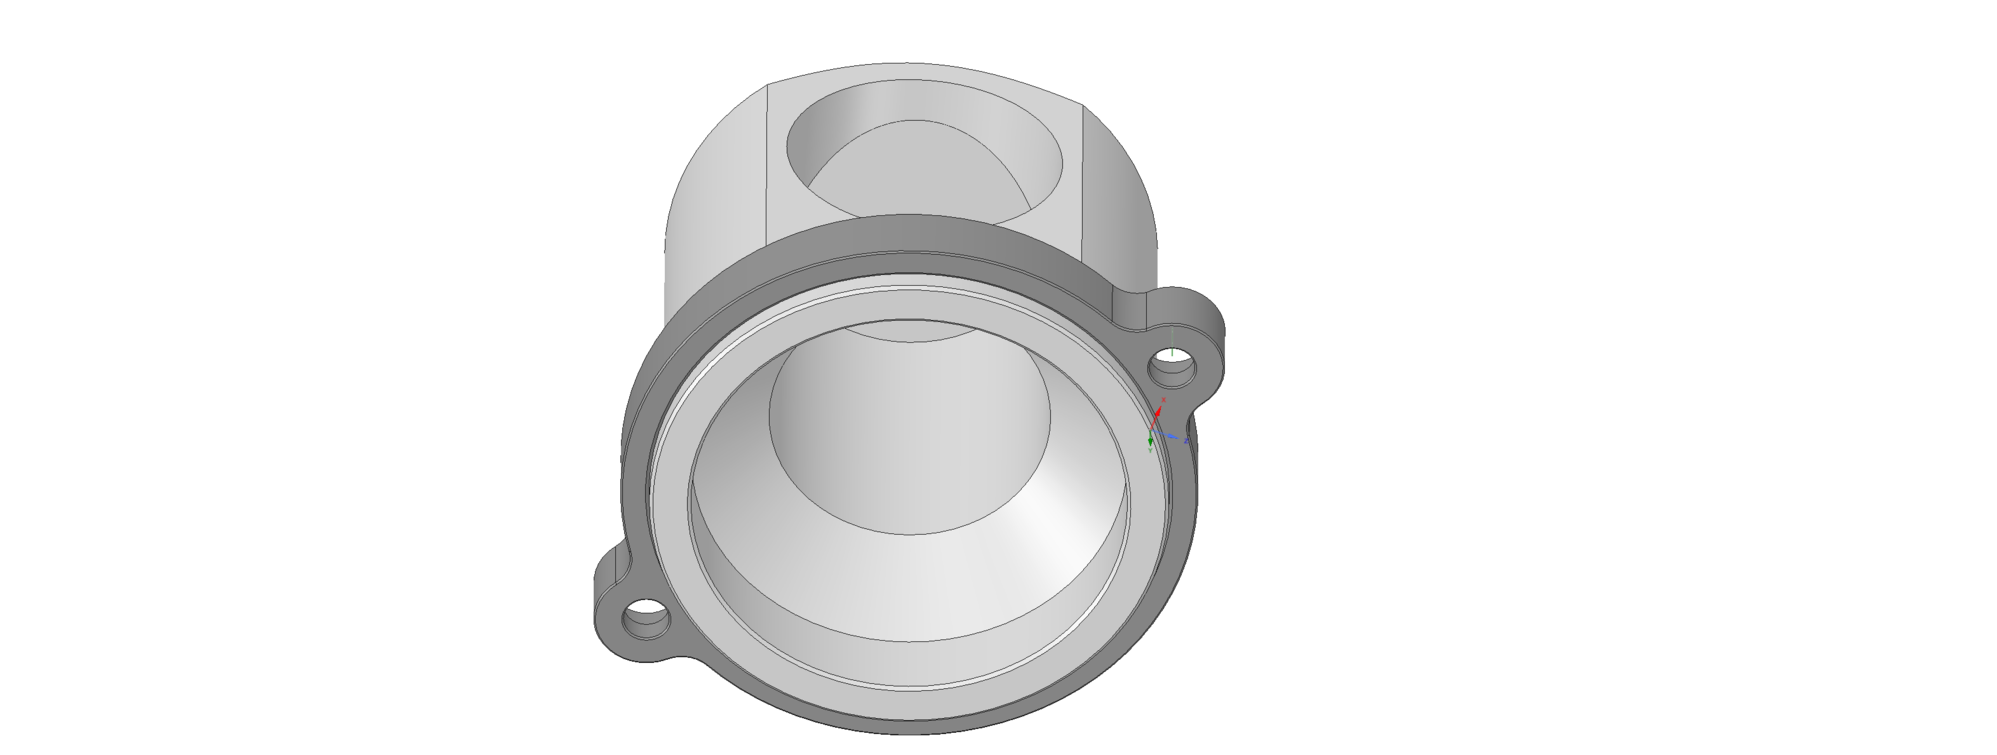
Anyone who ran one of the first generation keel kit knows the factory thermostat housing and lower heater hose get in the way. So, to fit the dual idler bracket, I whipped up a design for a swivel thermostat housing with a -20ORB fitting. I can get an off-the-shelf -20ORB to 1.75" hose fitting so I can use a stock hose with the first 60mm removed.
I am printing a test part tonight to double check everything works tomorrow.
For those following along, we have had a "significant" design change this past week.
I did a complete redesign of the tensioner system and the drive pulley. This new version only uses a single idler. It is a small diameter, but it spins less than it is rated for in our application. The bracket is smaller, and simpler, and we get plenty of beltwrap.
I have printed and tested the bracket. It fits great. The files are going out for bid later this week.
Last major component is the throttle/inlet assembly which I am working on now.
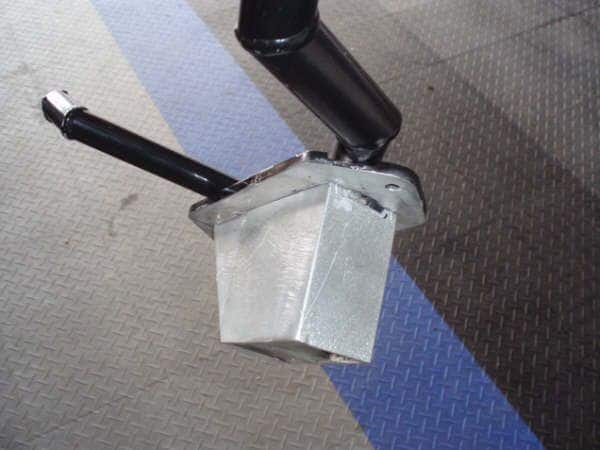
Well, 12 years after the SC install on Rocket, I finally swapped the small H/E that came with the Andy Keel kit to an 04 Cobra H/E. Not as intrusive as I thought. I just needed to reposition the AT Cooler

 01-01-2017, 04:00 PM