
Lighted Door Sill Insignia?
 08-09-2005, 07:41 PM
#16
Addict
Lifetime Rennlist
Member
Lifetime Rennlist
Member
Thread Starter
Thanks, Alan. Can you provide a bit more detail on how you routed the wires? Did you hook them up to the passenger footwell light like Schocki did?
 08-09-2005, 08:08 PM
#17
Electron Wrangler
Lifetime Rennlist
Member
Lifetime Rennlist
Member
Randy,
Yes pretty much the same. I did it direct on central electric, but its the same 2 wires - I had actually already routed them to both those locations for my keyless entry so it was actually very easy for me.
Incidentally its not what you'd think. Its a switched ground (via the door pins) and a permanent 12v from the battery so you need both of these to feed the inverters.
However the hatch pull gets +12v permament on one side (red). On the passenger side the amp has permanent 12v (you need to fuse these - the inverter has this), so you have half of it already where you need it...
Alternative: The hatch release switch has 12v across it when its not pulled AND the door is open - the way it works is that the ground to the hatch motor initiator winding is switched by the interior lights to ground when the doors are open - if the hatch pull completes the circuit on the other side of the motor to +12 the motor is initiated and becomes self sustaining for one whole cycle.
I'm pretty sure that the inverter consumption is so small that it will still run well (it doesn't need full 12v) in series with the motor winding (and the motor won't move). Worth a try since its all right there (maybe also there on the other side too for some years - but not yours Randy!).
The only downside is that the sill ligthts will go out when you pull the hatch release...
On the passenger side you can just route the switched ground back direct from the CE panel or the light above it (the Brown with White stripe)...
Alan
08-09-2005, 08:43 PM
#18
Addict
Lifetime Rennlist
Member
Lifetime Rennlist
Member
Thread Starter
Hmm, maybe I'm missing something, but it sounds like it might be easiest to just run wires from both sills to the footwell light connector.
Maybe even easier would to wire each sill to the adjacent door light?
Maybe even easier would to wire each sill to the adjacent door light?
08-09-2005, 09:34 PM
#19
Three Wheelin'
08-09-2005, 10:00 PM
#21
Cottage Industry Sponsor
Lifetime Rennlist
Member
Lifetime Rennlist
Member

...and when you guys have the door sill illumination in blue, you'll want the rest of the dash in the same color. Have you seen this? http://www.jageng.com/928LED.htm
There is also an option for those who don't want to go through the installation of the door sill illumination:
There is also an option for those who don't want to go through the installation of the door sill illumination:
08-09-2005, 10:38 PM
#22
Supercharged
Rennlist Member
Rennlist Member
Join Date: May 2002
Location: Back in Michigan - Full time!
Posts: 18,925
Likes: 0
Received 60 Likes
on
34 Posts
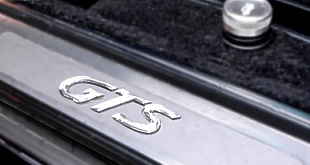
I've shot the guy at Lumiline (ebay) an email. I measured the "928" logo and it looks like to be safe we'd want to have it 1.75' x 10.5". I've asked him if he can suppluy this size. I'll what I can find out and also if there is a group buy possibility. Does anyone know if there are any larger sill logos out there?
08-09-2005, 10:55 PM
#23
Gluteus Maximus
Rennlist Member
Rennlist Member
Join Date: Nov 2004
Posts: 6,365
Likes: 0
Received 0 Likes
on
0 Posts
Originally Posted by Andrew Olson
I've shot the guy at Lumiline (ebay) an email. I measured the "928" logo and it looks like to be safe we'd want to have it 1.75' x 10.5". I've asked him if he can suppluy this size. I'll what I can find out and also if there is a group buy possibility. Does anyone know if there are any larger sill logos out there?
 (Visions of the Spinal Tap scene where the Stonehinge model was made in inches instead of feet).
08-09-2005, 11:02 PM
(Visions of the Spinal Tap scene where the Stonehinge model was made in inches instead of feet).
08-09-2005, 11:02 PM
#24
Electron Wrangler
Lifetime Rennlist
Member
Lifetime Rennlist
Member
Andrew,
That is a very good price and will be easily big enough for a gts logo. As you say you'd definitely need bigger for the 928 logo, and overlapping them isn't a real option The sore spot is still doing the connection - there is no room under the sill plate - so unless you excavate an area on the underside there is no space for the connector unless it is virtually flat. Just soldering very thin wires is probably the best way - worked for me. You need very thin wires so it can route under the plate & make it over the door threshold part still under the cover - a tight snap fit. You can get very very thin PTFE covered stranded wire - thats what I used - virtually dissapears - takes no space
Randy - the hatch attach is actually far the easist to do (although odd I grant you), maybe try it first by detaching the switch connector. The CE connections are not at all hard to run - easy across under the dash and through the console - no dissasembly required once CE is open. The door seems easy but its a lot of work and your new wire gets flexed by the door opening/closing and isn't in a loom... I'd avoid that hassle - much less work to cable tie everything neatly from CE. Easier still on the passenger side...
If I hadn't already changed my hatch pull wiring connections for the keyless entry I'd try out my own suggestion on that one - its a new idea, but don't see why it wouldn't work. No wires at all to route is always nice... if it works.
Alan
08-09-2005, 11:19 PM
#25
Electron Wrangler
Lifetime Rennlist
Member
Lifetime Rennlist
Member
Andrew - here you go - they do - not clear if you can slice this into say 3-4 pieces each with its own connector - seems a bit like there may just be one connector...? BIG EL panel from Lumi-Line Also this has an AC adpter/inverter that's not needed - probably a big part of the $40
Alan
Alan
Last edited by Alan; 08-10-2005 at 12:18 AM.
08-10-2005, 01:10 PM
#26
Supercharged
Rennlist Member
Rennlist Member
Join Date: May 2002
Location: Back in Michigan - Full time!
Posts: 18,925
Likes: 0
Received 60 Likes
on
34 Posts
Well here's the response I got...
So went to re-measure. The "928" on my sill is exactly 1 3/8 inches ( ) by exactly 10 inches. If you're really careful, his 1.5 inch tape might just fit the bill. For the price, i think it's worth a try. Off to ebay...
Andy, Thanks for letting me know about the referral. Unfortunately I can not accomodate your requirement - I have some that are 4" wide but on 7.75" long.
Sorry, Bob
Sorry, Bob
) by exactly 10 inches. If you're really careful, his 1.5 inch tape might just fit the bill. For the price, i think it's worth a try. Off to ebay...
08-10-2005, 08:07 PM
#28
Addict
Lifetime Rennlist
Member
Lifetime Rennlist
Member
Thread Starter
I sent Bob at Lumi Line an email asking what colour the strip is when not illuminated.
Salmon pink!
Argh - it's never easy...
Salmon pink!
Argh - it's never easy...
08-10-2005, 08:22 PM
#29
Rennlist Member
But it's never NOT illuminated when the door is open 
they will only show their non-illuminated color in bright sunlight....


they will only show their non-illuminated color in bright sunlight....
Last edited by Schocki; 08-10-2005 at 08:40 PM.