

Powder coat and replating
 09-09-2004, 12:27 AM
#1
Addict
Lifetime Rennlist
Member
Lifetime Rennlist
Member
Thread Starter
Wrinkle, matte finish in "robin red" and "black".
I like the wrinkle finish as it hides almost allof the imperfections in the surface of the castings. In all the parts came out great, Im very happy. There are a few spots where imperfections in the powder coating finish can be seen, but they are very minor in the big picture of it all. If it were a smooth gloss finish they would REALLYstick out. I can live with the end result i have.
close up
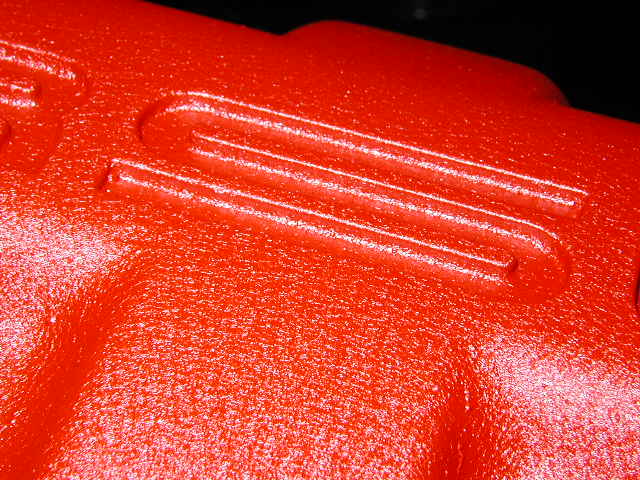
one of the covers. This is a more realistic view of the shade of red.

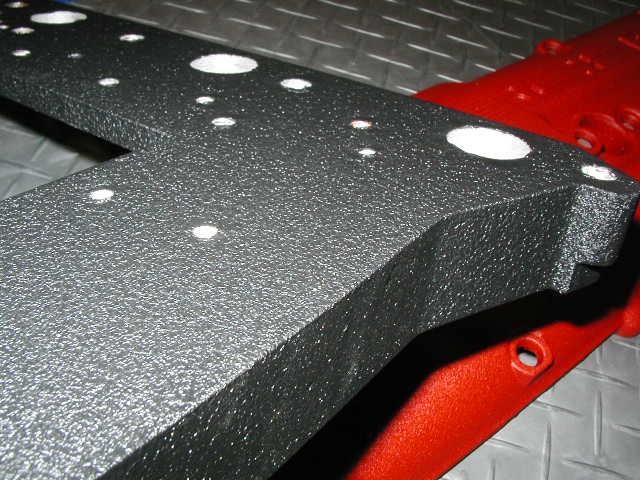
the manifold. All of the holes were all masked off.
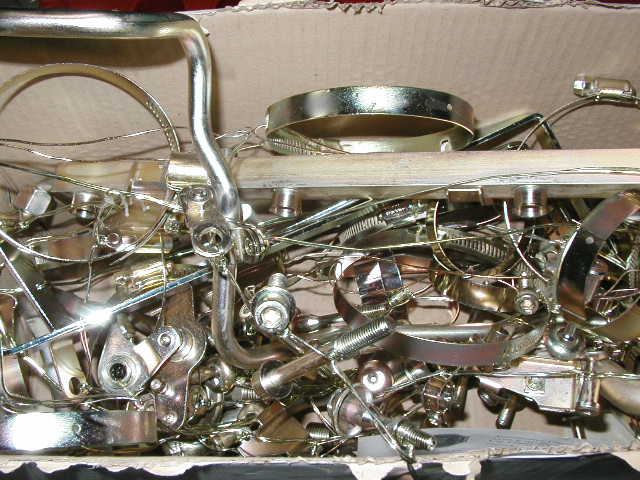
My favorite!! A POT O' GOLD!...yellow zinc at least The parts came out good. some better than others but none the less a VAST improvement. They didnt turn out as "goldish" as the ones Chris Ford has on his site.
http://www.928s4.com/
Nothing like a shiny new looking stock hose clamp and valve cover bolts.
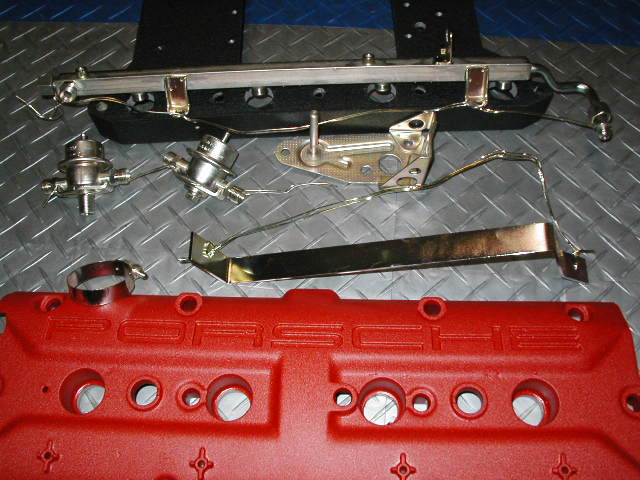
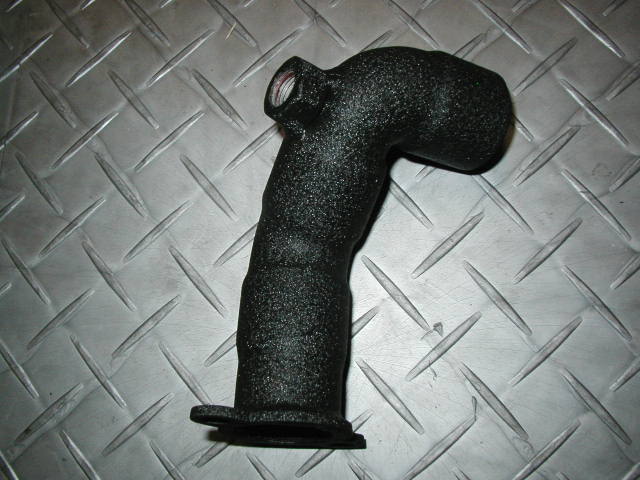
A bypass pipe for the autorotor that Andy sent as part of his kit. I took the extra time to sand and grind down welds. All of his parts are really set off by a powder coating!
i had the regulators done also, along with some brackets i had made for my tranny cooler.

Now, to start putting it all together!!
The old covers on the car now will come off and i will refinish them in the next week or so . They will be either wrinkle black or grey...not sure yet. Depending on when they get done im not sure which color i will end up using..the RED (above) or the black or grey yet to be done.
Input on the letter colors? Im leaning to white, with the red, dunno?
The other covers...Red letters on a grey finish(match my seats) or grey letters on a black. ,

I like the wrinkle finish as it hides almost allof the imperfections in the surface of the castings. In all the parts came out great, Im very happy. There are a few spots where imperfections in the powder coating finish can be seen, but they are very minor in the big picture of it all. If it were a smooth gloss finish they would REALLYstick out. I can live with the end result i have.
close up
one of the covers. This is a more realistic view of the shade of red.
the manifold. All of the holes were all masked off.
My favorite!! A POT O' GOLD!...yellow zinc at least
The parts came out good. some better than others but none the less a VAST improvement. They didnt turn out as "goldish" as the ones Chris Ford has on his site.http://www.928s4.com/
Nothing like a shiny new looking stock hose clamp and valve cover bolts.
A bypass pipe for the autorotor that Andy sent as part of his kit. I took the extra time to sand and grind down welds. All of his parts are really set off by a powder coating!
i had the regulators done also, along with some brackets i had made for my tranny cooler.
Now, to start putting it all together!!
The old covers on the car now will come off and i will refinish them in the next week or so . They will be either wrinkle black or grey...not sure yet. Depending on when they get done im not sure which color i will end up using..the RED (above) or the black or grey yet to be done.
Input on the letter colors? Im leaning to white, with the red, dunno?
The other covers...Red letters on a grey finish(match my seats) or grey letters on a black. ,
Last edited by Tony; 09-09-2004 at 01:12 AM.
 09-09-2004, 02:15 AM
#4
Rennlist Member

Tony, that looks terrific! For the letters, how about a gold metallic to match nearby hardware? Or perhaps clean the red out of the letters and buff them to a shine with a dremel? You could cover minor irregularities with a very fine line of black around the edge.
09-09-2004, 03:37 AM
#7
Advanced
Join Date: Jul 2004
Location: mid Michigan
Posts: 83
Likes: 0
Received 0 Likes
on
0 Posts
looks great,,is that the hot coat powder coating stuff?..the one you can bake in an electric oven?i saw kens intake that he did at p2p and it didnt come out to good,,uneven finish,,bubbles,,ect,,how much was the setup and wherd you get it?
Trending Topics
09-09-2004, 09:59 AM
#10
Addict
Rennlist Member
Rennlist Member
Tony,
Those covers look awesome! Who did them and how long did it take? I plan on refinishing mine this winter in red as well. Good luck on your project-looks great so far.
Jim R
Those covers look awesome! Who did them and how long did it take? I plan on refinishing mine this winter in red as well. Good luck on your project-looks great so far.
Jim R
09-09-2004, 12:46 PM
#12
Addict
Lifetime Rennlist
Member
Lifetime Rennlist
Member
Thread Starter
Thanks for the input guys.
Its neat to see some of the different options in colors that people choose. As far as my own personal taste, i went on a limb going with red but having seen Vipers and Ferraris with a similar look under the hood, i was OK with it. I think this one is a first as far as using a wrinkle finnish?
Durability and the whole process??? Got me!?!?
I just took them to a shop here in vegas that does everything from slot machines to swinging gates to automobile frames and wheels. You can ask all the questions you want but in reality the folks behind the counter are going to tell you what you WANT to hear. The test will be in a year and how they look then. As i said, there are some small imperfections in the coating on the valve covers..very minor. A couple in my manifold in out of sight places but the rest of my parts came out flawless(intake tubes,,rear plenum..brackets etc etc)
140 bucks for them all...2 valve covers, 1 SC manifold, a couple of adapter plates, snout support (BTW Andy, I will need the top half for the Autorotor) 1 rear plenum, 1 bracket, 4 pieces of tubing, some other stuff and a yellow oil cap
Ill snap some more pics today as i lay them out in the garage.
The plating was 160, i had 117"parts". i took them in "as is" off the car. They came out "as new" (well pretty close as the plating isnt 100% perfect either) This is not a CONCOURS car that i have so im not that critical of things. I do have my limits though. All my parts are fine. Scary thing is, each time i go out to the car and work on it, i find another bracket or bolt that would "look good" refinished.
"OK...just step away from the car, sir"
I havent touched the underside of the car..alternator brackets..bolts ets etc. You could really go nuts(no pun) if you wanted! Iv only gone partially crazy with it. Its cool though, ive never done this to a car before or presented with an opportunity to do it. In this whole journey of "simply bolting on a blower" i have found numerous shops and people that can do jobs for me in the future.
This is an unsolicited comment below...
Id like to mention also that.... you CAN just bolt up one of Andys kits to the car..
If i had left well enough alone, i can see that its actually a very easy process. Like anything there is installation involved but as you can see i chose to do a lot more than just bolt it on, hence the time it has taken me. Time that i vastly underestimated when combined with other commitments at home and work. Heck i have a 4" hole in my firewall for my intake pluming and i no longer have the stock washer tank...ive added a bigger tranny cooler...pulled the front cooling flaps out etc etc. You get the idea.. Lots of things and lots of added time. You start one project and it leads to another..hence the pics above!!
I just want to make that clear to folks that are looking at Andys kit not to be worried by the installation process. Ive gone to great lengths to make mine a little more unique and to try a few things for "the cause" ....thats all and thats just the way I am.
As for this smart **** comment you got me?? thankfully i have many pictures of 928 engines in various stages of construction or tear dowm. That nice black and white picture of an S4 crate motor in the last issue of EXCELLENCE is taped to the cabinet by my car
Other than that, finger tighten nuts first, dont over torque and if it isnt going in STOP and find out why. Ive learned that lesson the hard way long ago.!
Its neat to see some of the different options in colors that people choose. As far as my own personal taste, i went on a limb going with red but having seen Vipers and Ferraris with a similar look under the hood, i was OK with it. I think this one is a first as far as using a wrinkle finnish?
Durability and the whole process??? Got me!?!?
I just took them to a shop here in vegas that does everything from slot machines to swinging gates to automobile frames and wheels. You can ask all the questions you want but in reality the folks behind the counter are going to tell you what you WANT to hear. The test will be in a year and how they look then. As i said, there are some small imperfections in the coating on the valve covers..very minor. A couple in my manifold in out of sight places but the rest of my parts came out flawless(intake tubes,,rear plenum..brackets etc etc)
140 bucks for them all...2 valve covers, 1 SC manifold, a couple of adapter plates, snout support (BTW Andy, I will need the top half for the Autorotor) 1 rear plenum, 1 bracket, 4 pieces of tubing, some other stuff and a yellow oil cap
Ill snap some more pics today as i lay them out in the garage.
The plating was 160, i had 117"parts". i took them in "as is" off the car. They came out "as new" (well pretty close as the plating isnt 100% perfect either) This is not a CONCOURS car that i have so im not that critical of things. I do have my limits though. All my parts are fine. Scary thing is, each time i go out to the car and work on it, i find another bracket or bolt that would "look good" refinished.
"OK...just step away from the car, sir"
I havent touched the underside of the car..alternator brackets..bolts ets etc. You could really go nuts(no pun) if you wanted! Iv only gone partially crazy with it.
Its cool though, ive never done this to a car before or presented with an opportunity to do it. In this whole journey of "simply bolting on a blower" i have found numerous shops and people that can do jobs for me in the future.This is an unsolicited comment below...
Id like to mention also that.... you CAN just bolt up one of Andys kits to the car..
If i had left well enough alone, i can see that its actually a very easy process. Like anything there is installation involved but as you can see i chose to do a lot more than just bolt it on, hence the time it has taken me. Time that i vastly underestimated when combined with other commitments at home and work. Heck i have a 4" hole in my firewall for my intake pluming and i no longer have the stock washer tank...ive added a bigger tranny cooler...pulled the front cooling flaps out etc etc. You get the idea.. Lots of things and lots of added time. You start one project and it leads to another..hence the pics above!!
I just want to make that clear to folks that are looking at Andys kit not to be worried by the installation process. Ive gone to great lengths to make mine a little more unique and to try a few things for "the cause" ....thats all and thats just the way I am.
As for this smart **** comment
Looks great.....but how the hell are you going to remember where all of those bolts go?
Other than that, finger tighten nuts first, dont over torque and if it isnt going in STOP and find out why. Ive learned that lesson the hard way long ago.!
09-09-2004, 01:01 PM
#13
Addict
Rennlist Member
Rennlist Member
HeyTony...That looks very cool. I want to see it when it is all back together . When are you going to invite us back up for the next Fremont street 
. When are you going to invite us back up for the next Fremont street
09-09-2004, 03:54 PM
#14
Drifting
Join Date: Jul 2002
Location: Los Angeles, CA
Posts: 3,348
Likes: 0
Received 0 Likes
on
0 Posts
I really think the wrinkle looks good.
If you are going to do the other set of valve covers, I would suggest matching them to the Autorotor,
and going with wrinkle black. I think the red looks fine, but I think unless you add some more red
color in the engine compartment, the Autorotor is going to look out of place and alone, and the
valve covers will also look like they do not fit in. When I have seen other autorotor installs,
they tend to look like they are bolted on, not a part of the engine. They do not look stock
at all. But if you want it all to look stock, I suggest matching the color of the valve covers,
with the color of the Autorotor. Then it will all look like it is supposed to be in there...
09-09-2004, 04:43 PM
#15
928 Engine Re-Re-Rebuild Specialist
Rennlist Member
Rennlist Member
Originally Posted by Tony
you got me?? thankfully i have many pictures of 928 engines in various stages of construction or tear dowm. That nice black and white picture of an S4 crate motor in the last issue of EXCELLENCE is taped to the cabinet by my car
Other than that, finger tighten nuts first, dont over torque and if it isnt going in STOP and find out why. Ive learned that lesson the hard way long ago.!