When you click on links to various merchants on this site and make a purchase, this can result in this site earning a commission. Affiliate programs and affiliations include, but are not limited to, the eBay Partner Network.
No docs? No instructions? No video tutorials? GB should chime in and support his products and provide some customer service. I just saw him active on other thread moments ago.
Kevin:
The line you have will utilize a banjo bolt at the master, instead of an adaptor and a 90 degree end, like Rob Edwards has pictured.
Same routing, however....down at an angle, from the master.
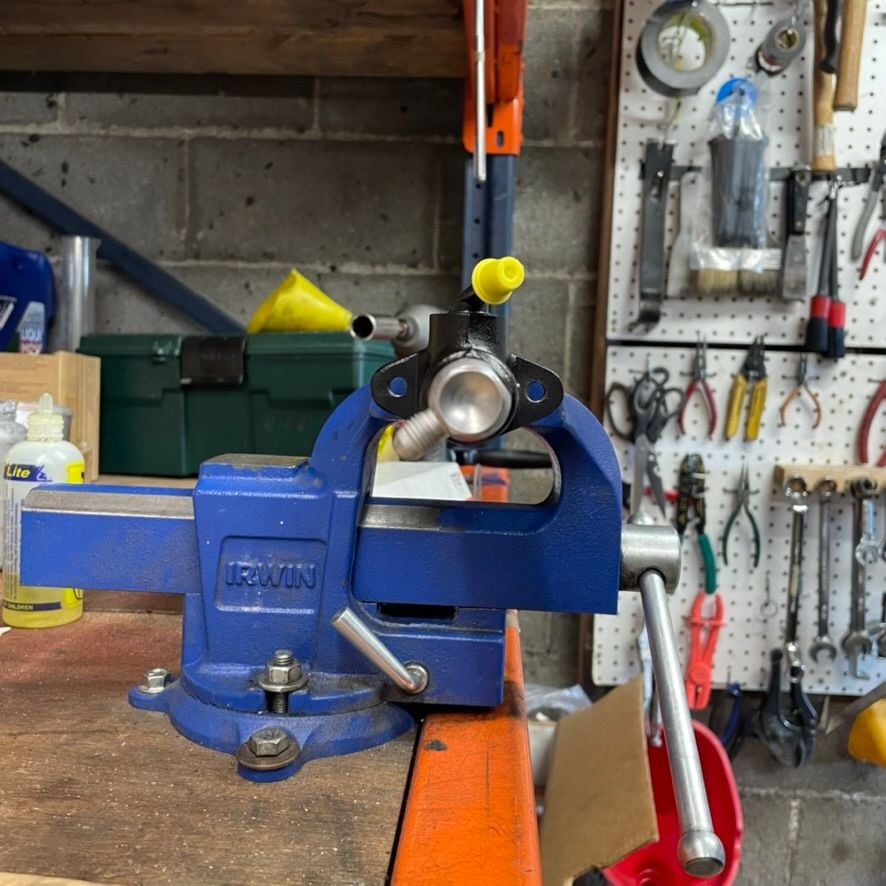
Attach the line at the master first, since the other end of the line (at the slave) can be rotated in any clocking direction required.
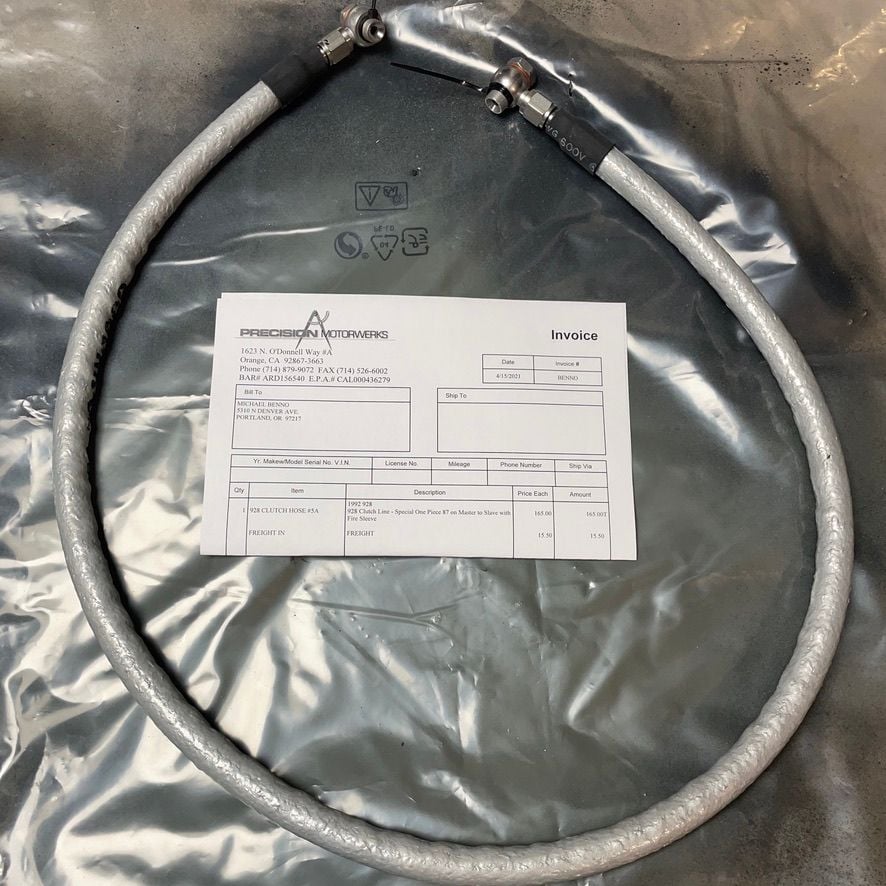
That line is made for replacement of a damaged stock line that goes to the clutch master, with a one piece line that runs all the way to the slave cylinder.
This line is also used commonly, for re-routing on cars with aftermarket exhaust, where the stock line gets too close.
All of my custom lines are designed to be re-routed around the front of the starter (running with the main batter cable and 14 pin loom), not between the starter and the oil pan, like the stock line does.
On a stock, late model car, you can run that one piece line from clutch master along the stock routing of the original line and then continue around the front of the starter and then back to the clutch slave. This allows easy removal and lowering of the clutch slave, for bleeding purposes and ease of service.
On a car with headers or other aftermarket pieces, because my line is flexible, you can route it slightly differently, to dodge extremely hot exhaust pieces.
Hope this helps!
If it is still confusing, I can certainly take a couple of pictures of installations, from cars currently in my shop.
Kevin:
The line you have will utilize a banjo bolt at the master, instead of an adaptor and a 90 degree end, like Rob Edwards has pictured.
Same routing, however....down at an angle, from the master.
Attach the line at the master first, since the other end of the line (at the slave) can be rotated in any clocking direction required.
That line is made for replacement of a damaged stock line that goes to the clutch master, with a one piece line that runs all the way to the slave cylinder.
This line is also used commonly, for re-routing on cars with aftermarket exhaust, where the stock line gets too close.
All of my custom lines are designed to be re-routed around the front of the starter (running with the main batter cable and 14 pin loom), not between the starter and the oil pan, like the stock line does.
On a stock, late model car, you can run that one piece line from clutch master along the stock routing of the original line and then continue around the front of the starter and then back to the clutch slave. This allows easy removal and lowering of the clutch slave, for bleeding purposes and ease of service.
On a car with headers or other aftermarket pieces, because my line is flexible, you can route it slightly differently, to dodge extremely hot exhaust pieces.
Hope this helps!
If it is still confusing, I can certainly take a couple of pictures of installations, from cars currently in my shop.
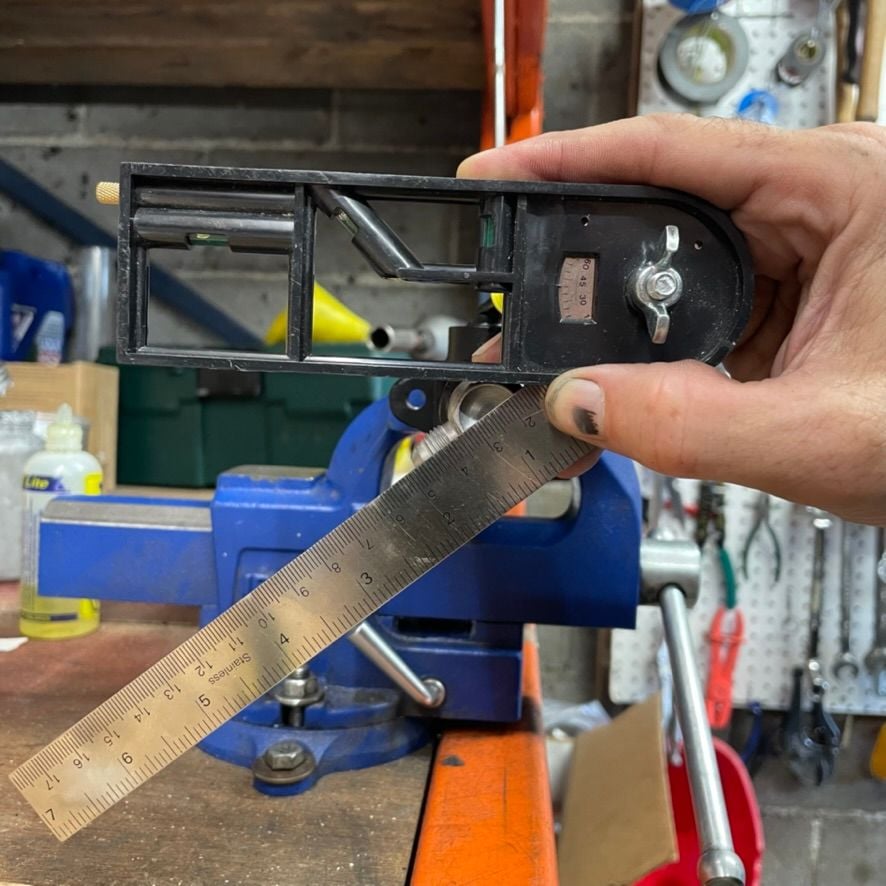
Hey Kevin, I used the same line to connect the Master the the slave. Here was the clocking I was able to copy from my S4 5spd car. It was about 45-degrees. Is this helpful?
The clocking for the line to the slave is about 45-degrees Also notice the clocking of the supply port
Great!
Because this is more of a "free form" clutch line and can vary from installation to installation, I have never made specific instructions, for this line.
My apologies.
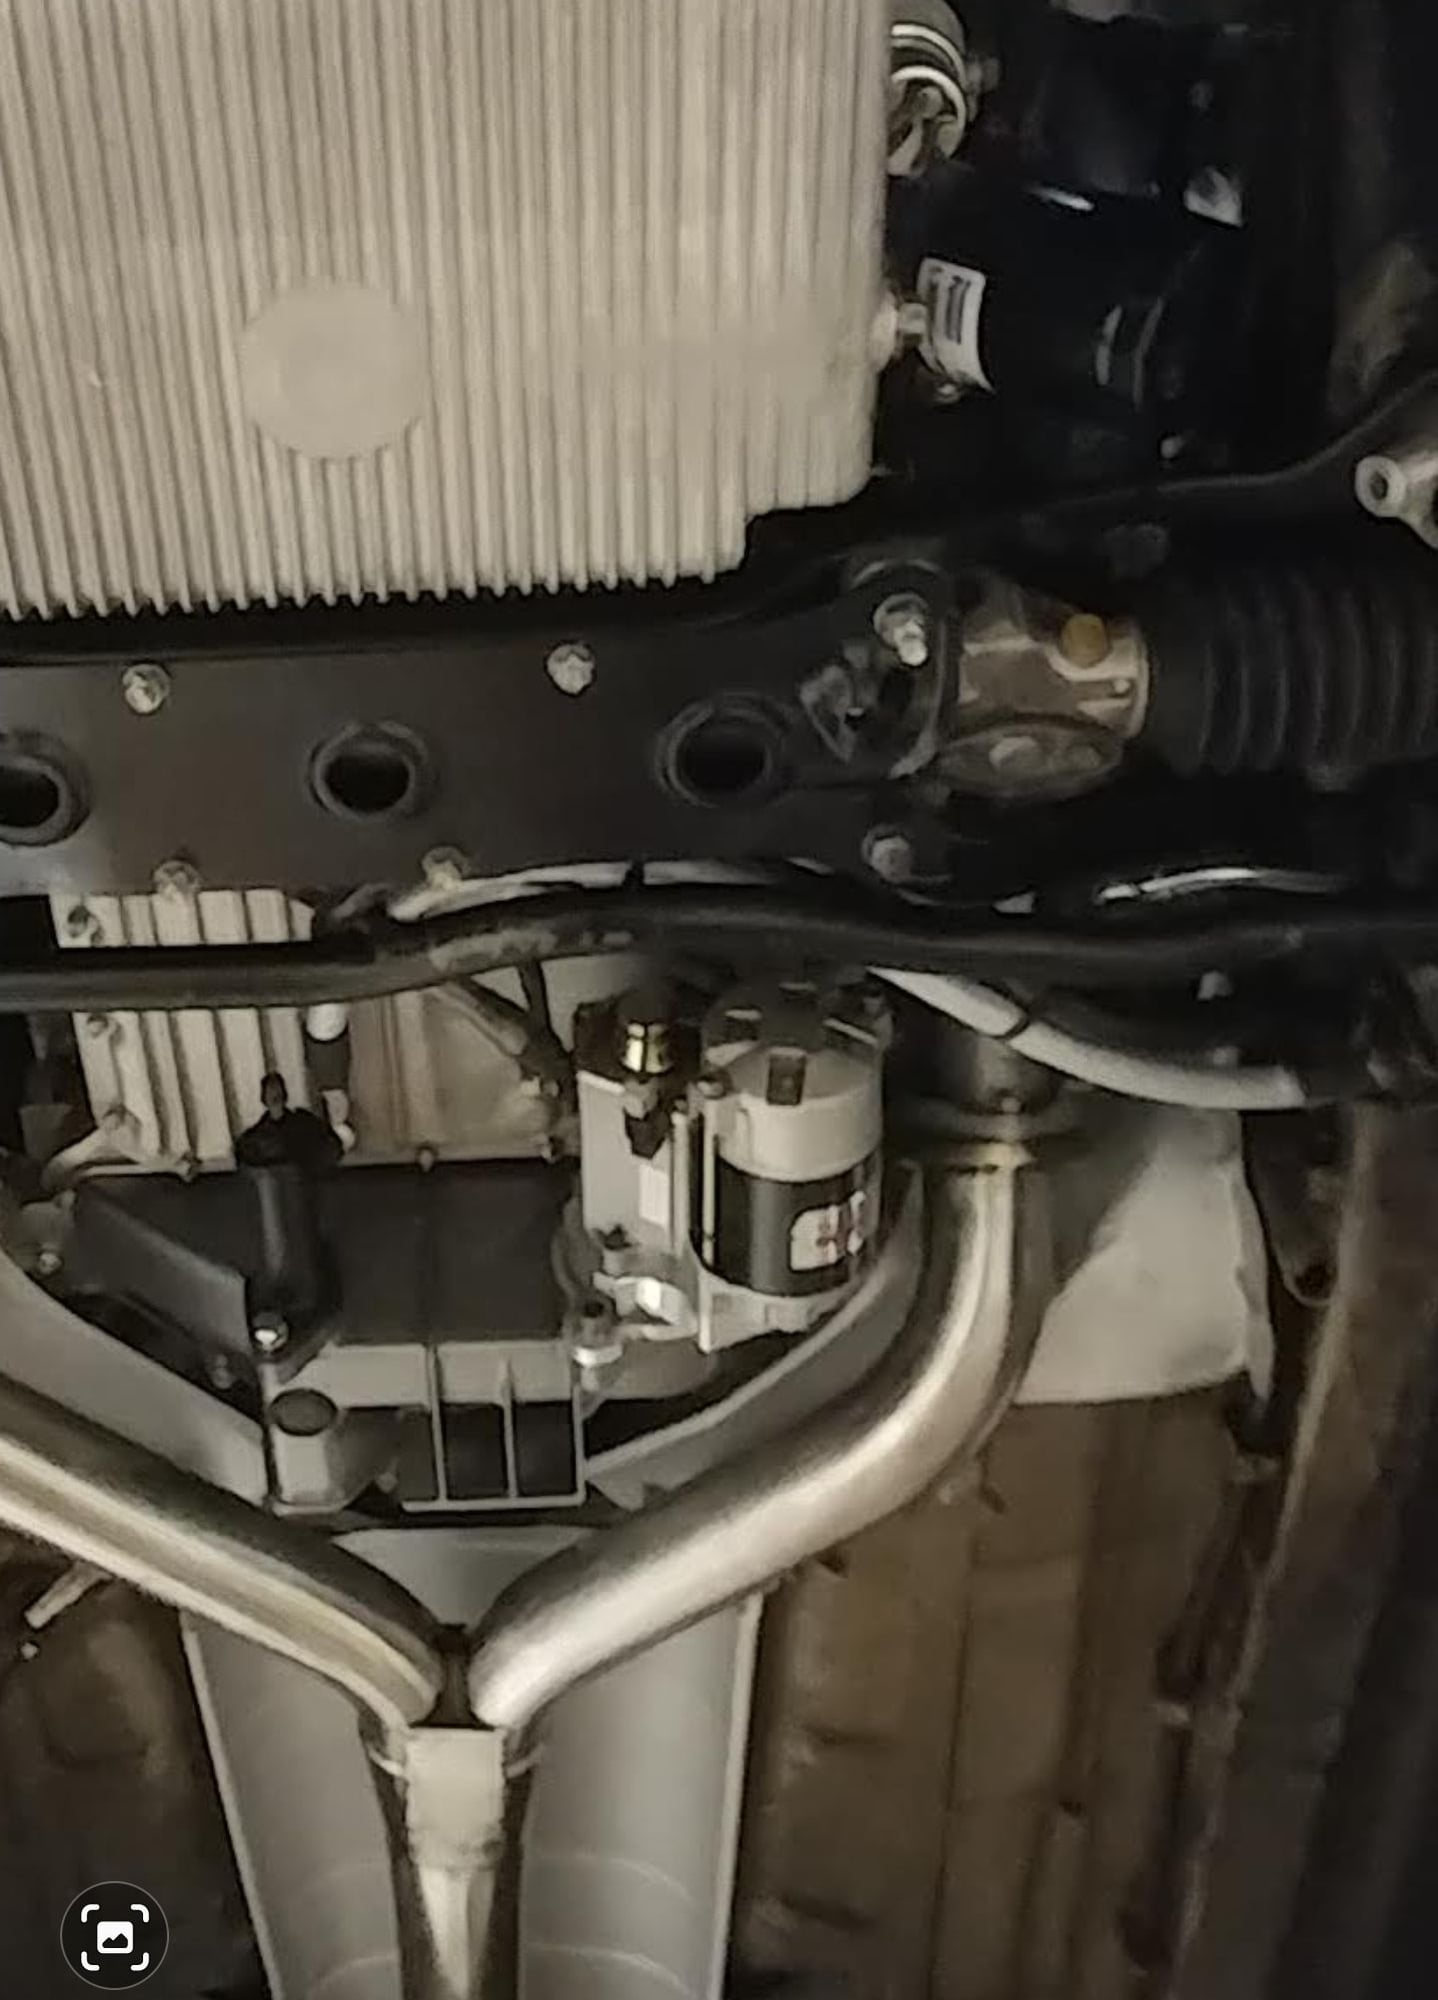
Mine is run like this and has been fine. It's a Godsend when having to remove the slave or lower bell housing, which I've had to do a few times since installation.
Mine is run like this and has been fine. It's a Godsend when having to remove the slave or lower bell housing, which I've had to do a few times since installation.
Good picture of routing my line around the starter and to the clutch slave.
Thanks for posting this!
I made my first "non stock routing" clutch line to be able to eliminate the stock solid steel line, which goes between the starter and the oil pan, mostly for use with engines that had/have oil pan spacers.
Being able to easily remove the clutch slave without opening the hydraulic system or removing the starter was an unforseen bonus, which made my line desirable for all manual 928's.
The "trifecta" of using my line to make bleeding the clutch hydraulic system super simple came from Mr. Merlin....I was clueless about this benefit, for years.
The one piece line, from master to slave, came about as a result of people requesting a replacement for rusted/damaged steel lines, but has become very popular for many people.
(Super clean appearance, eliminates three stock lines/hose, with two less places to leak.)
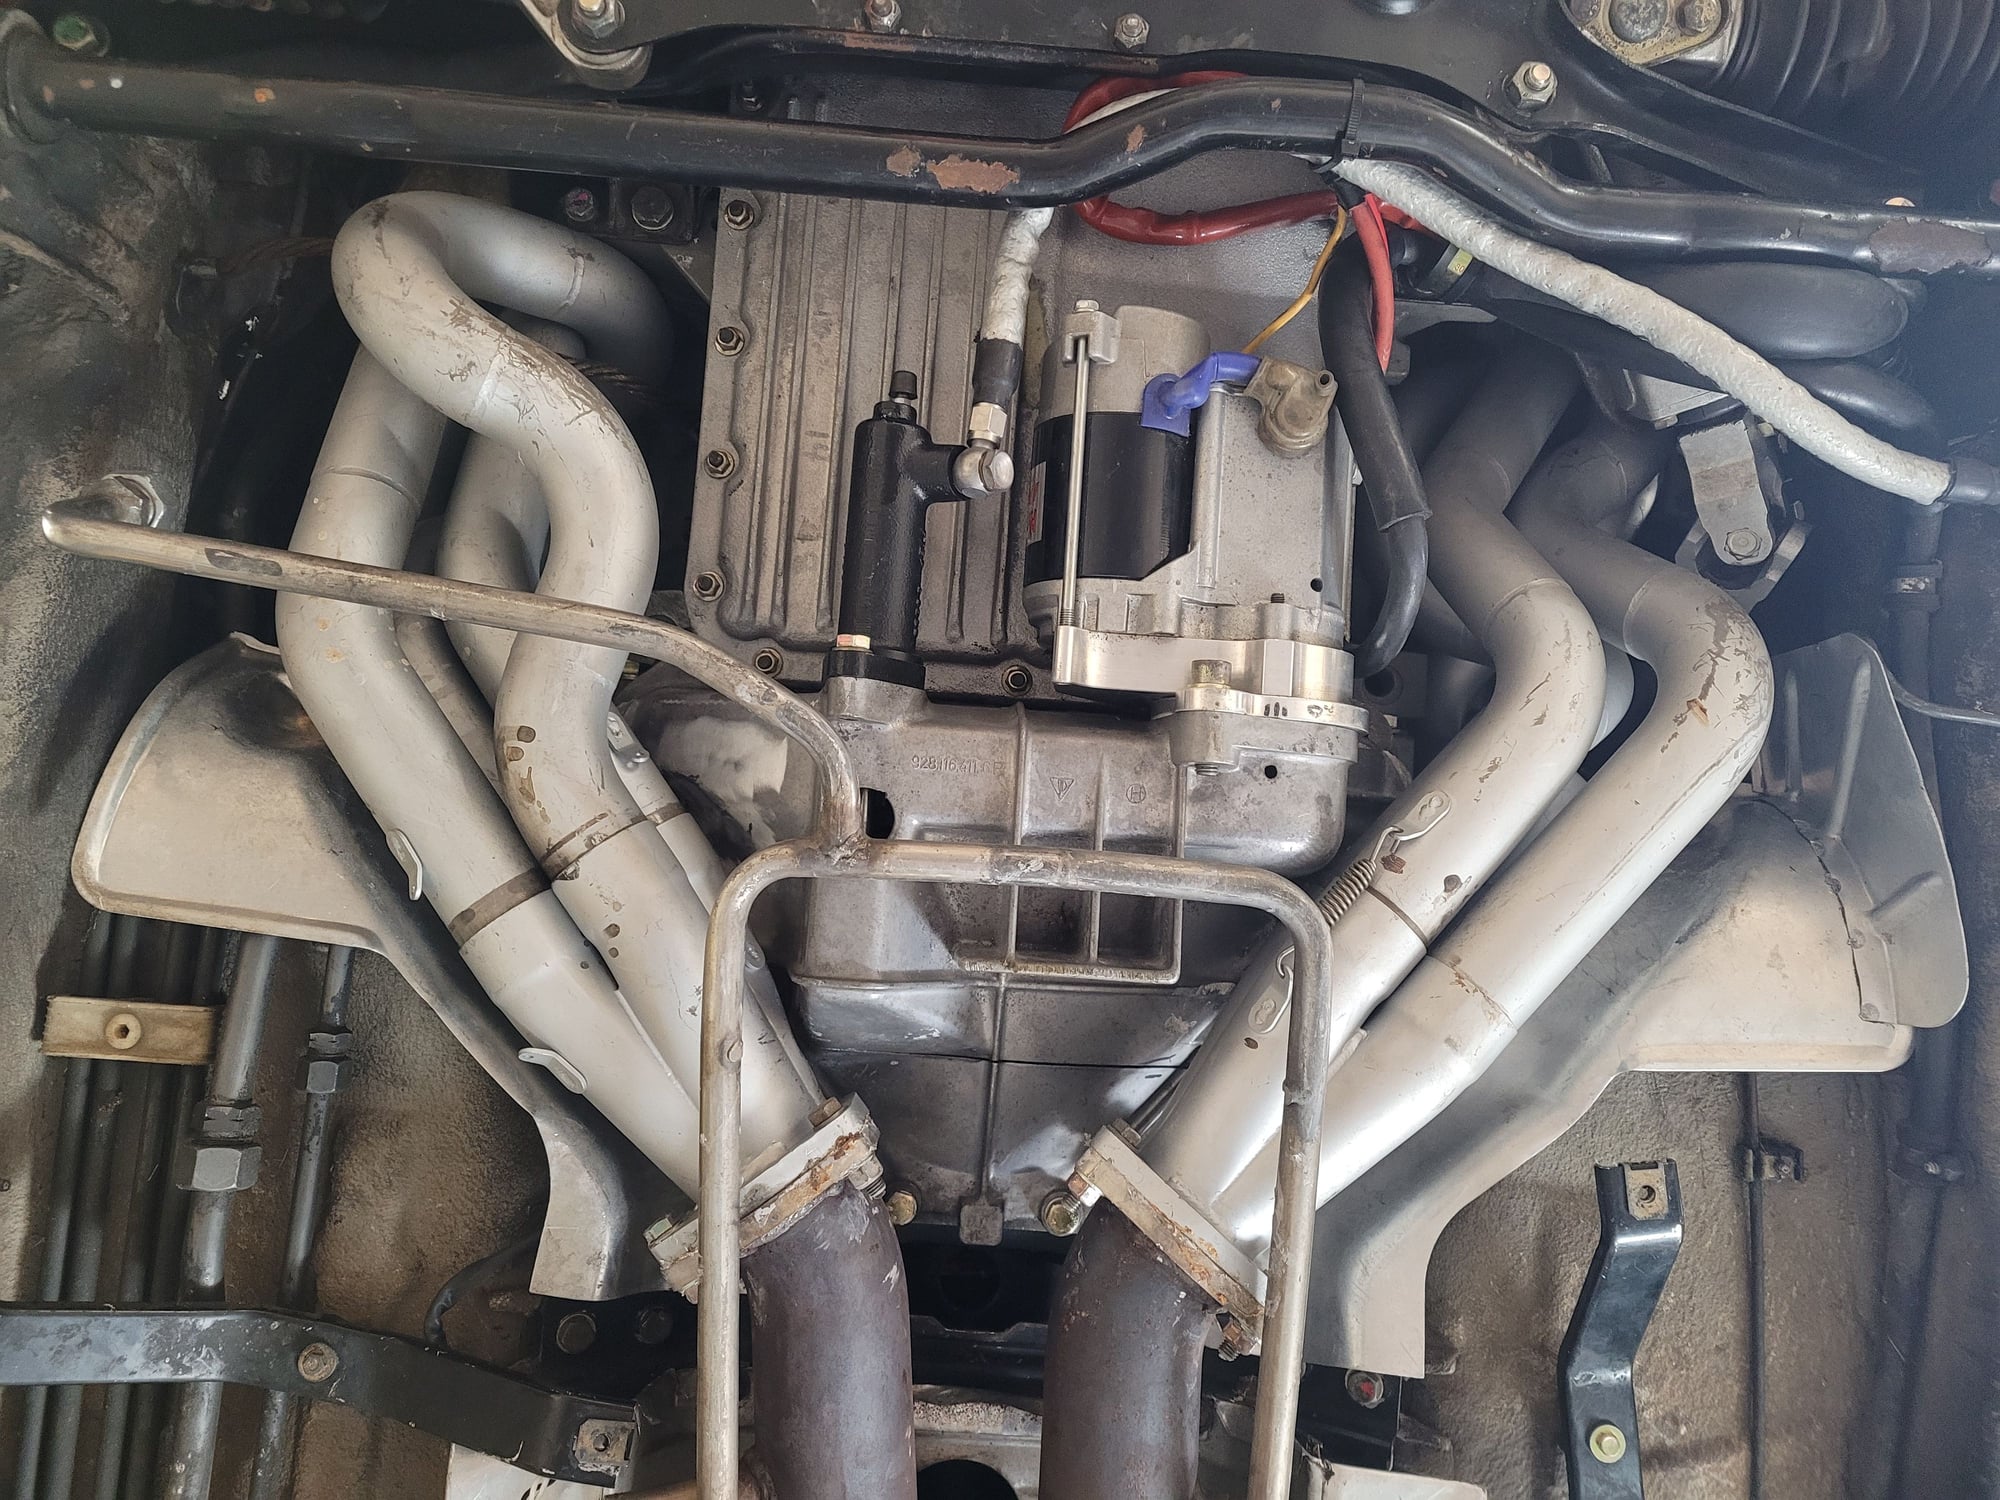
Here's my routing on my stroker. Not as pretty as Pete's but I did clock the starter closer to the engine's centerline.
While some may consider the following to be technical advice (which I'm no.longer doing), I consider this post to be about one of my products:
Because the sway bar is constantly rotating as the suspension travels up and down, I do not attach anything to it (seems to be able to rub holes through things at an alarming rate.)
I'd rrather see you secure that clutch line to the battery cable/14 pin loom, which are kept off the sway bar by that clamp on the lower crossmember and the connection at the starter motor.

 02-03-2023, 10:38 AM