When you click on links to various merchants on this site and make a purchase, this can result in this site earning a commission. Affiliate programs and affiliations include, but are not limited to, the eBay Partner Network.
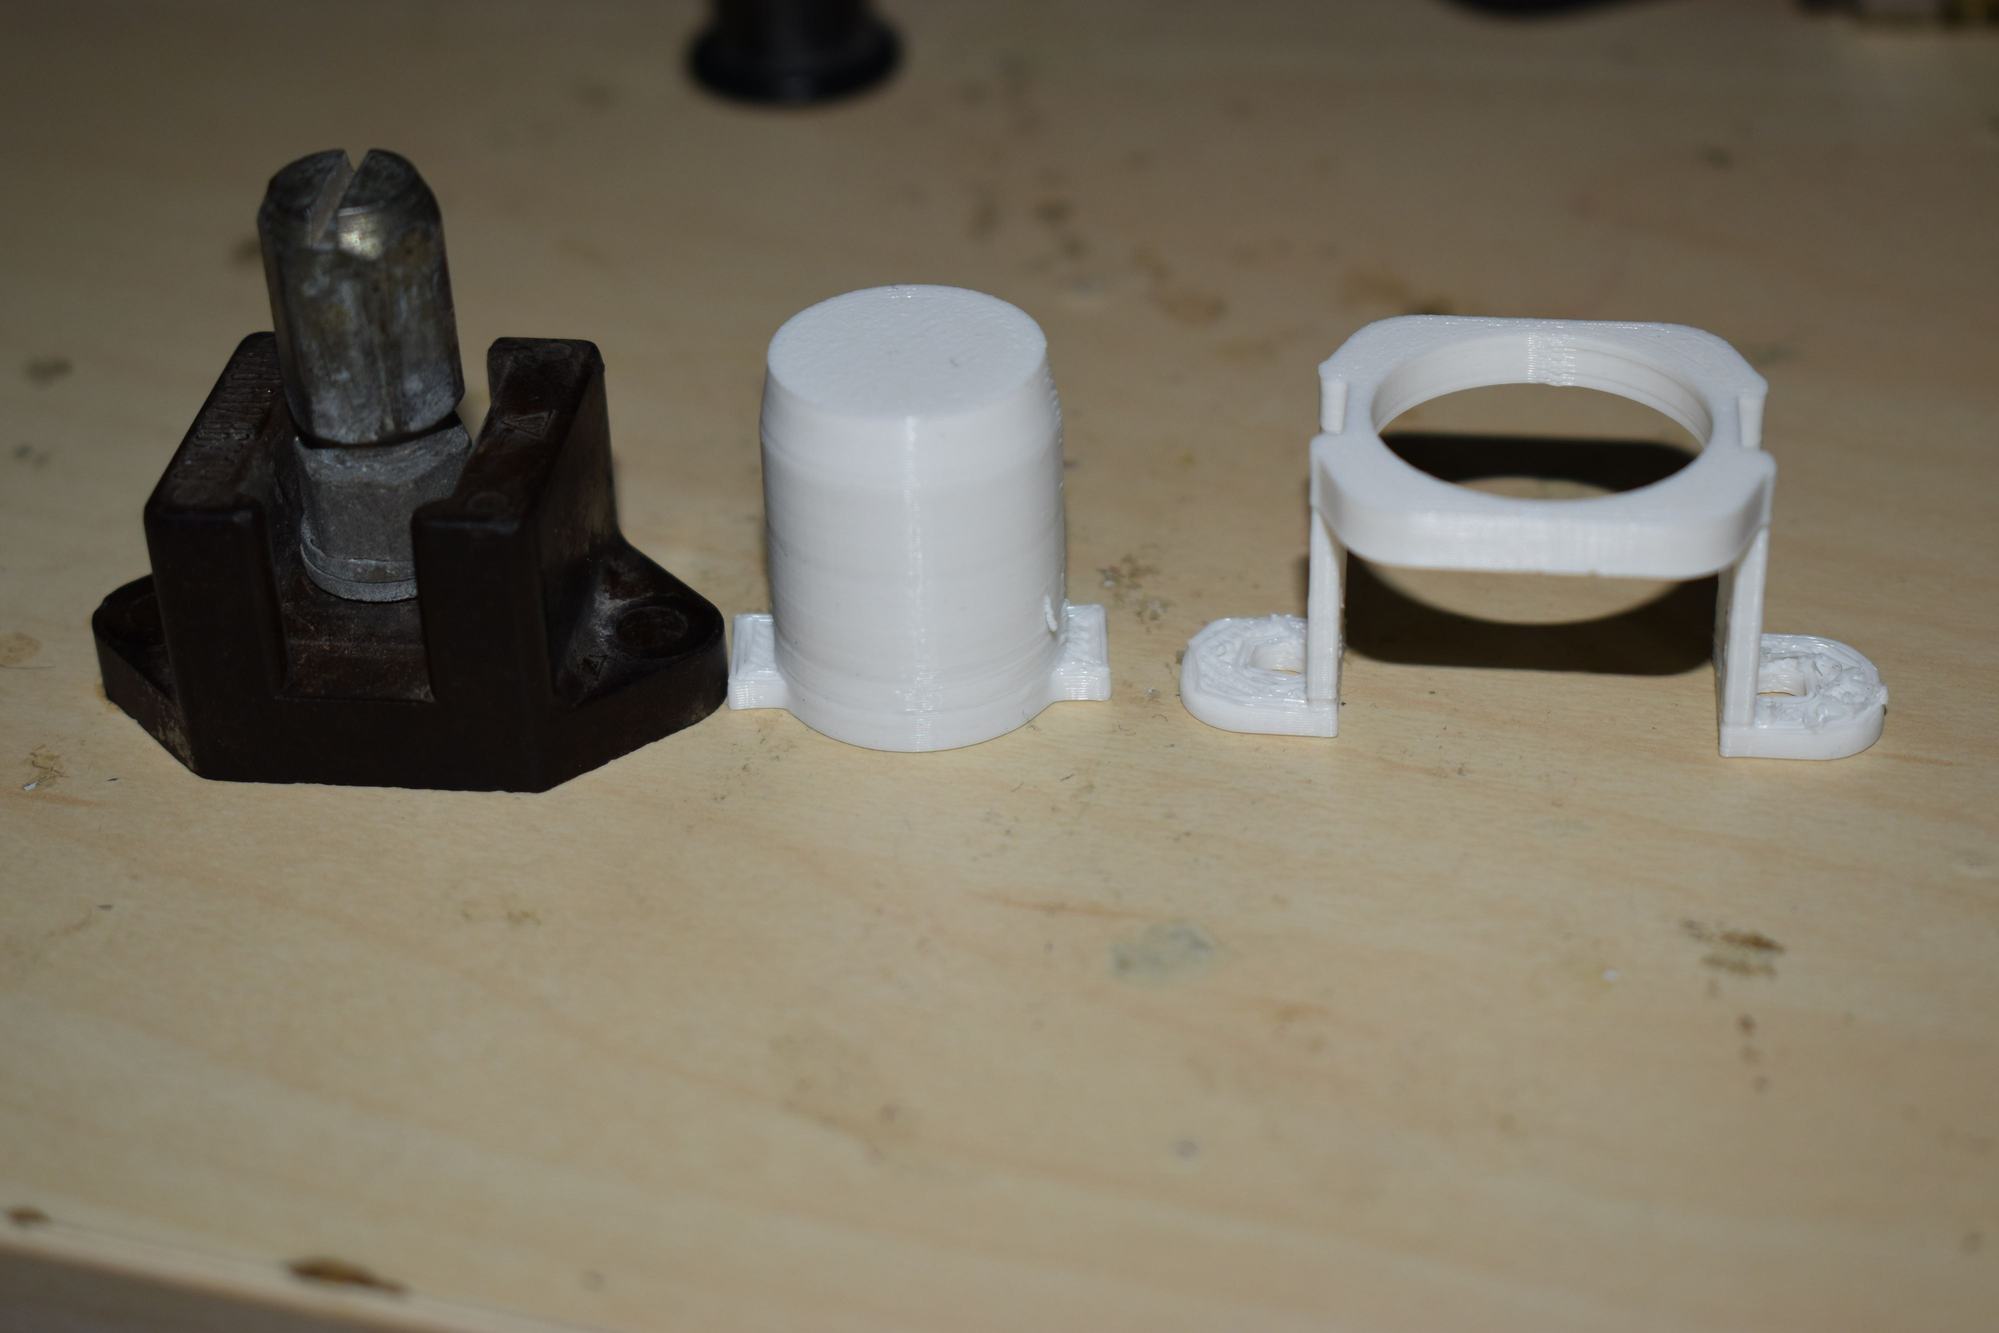
In taking apart all of my ground points I noticed extreme corrosion near the 12V Hot post on the passenger front of the vehicle by the 14 pin connector.
In trying to remove the black plastic cover from the hot post I ended up cracking it with a pair of pliers, it now just falls off.
Damage Done.
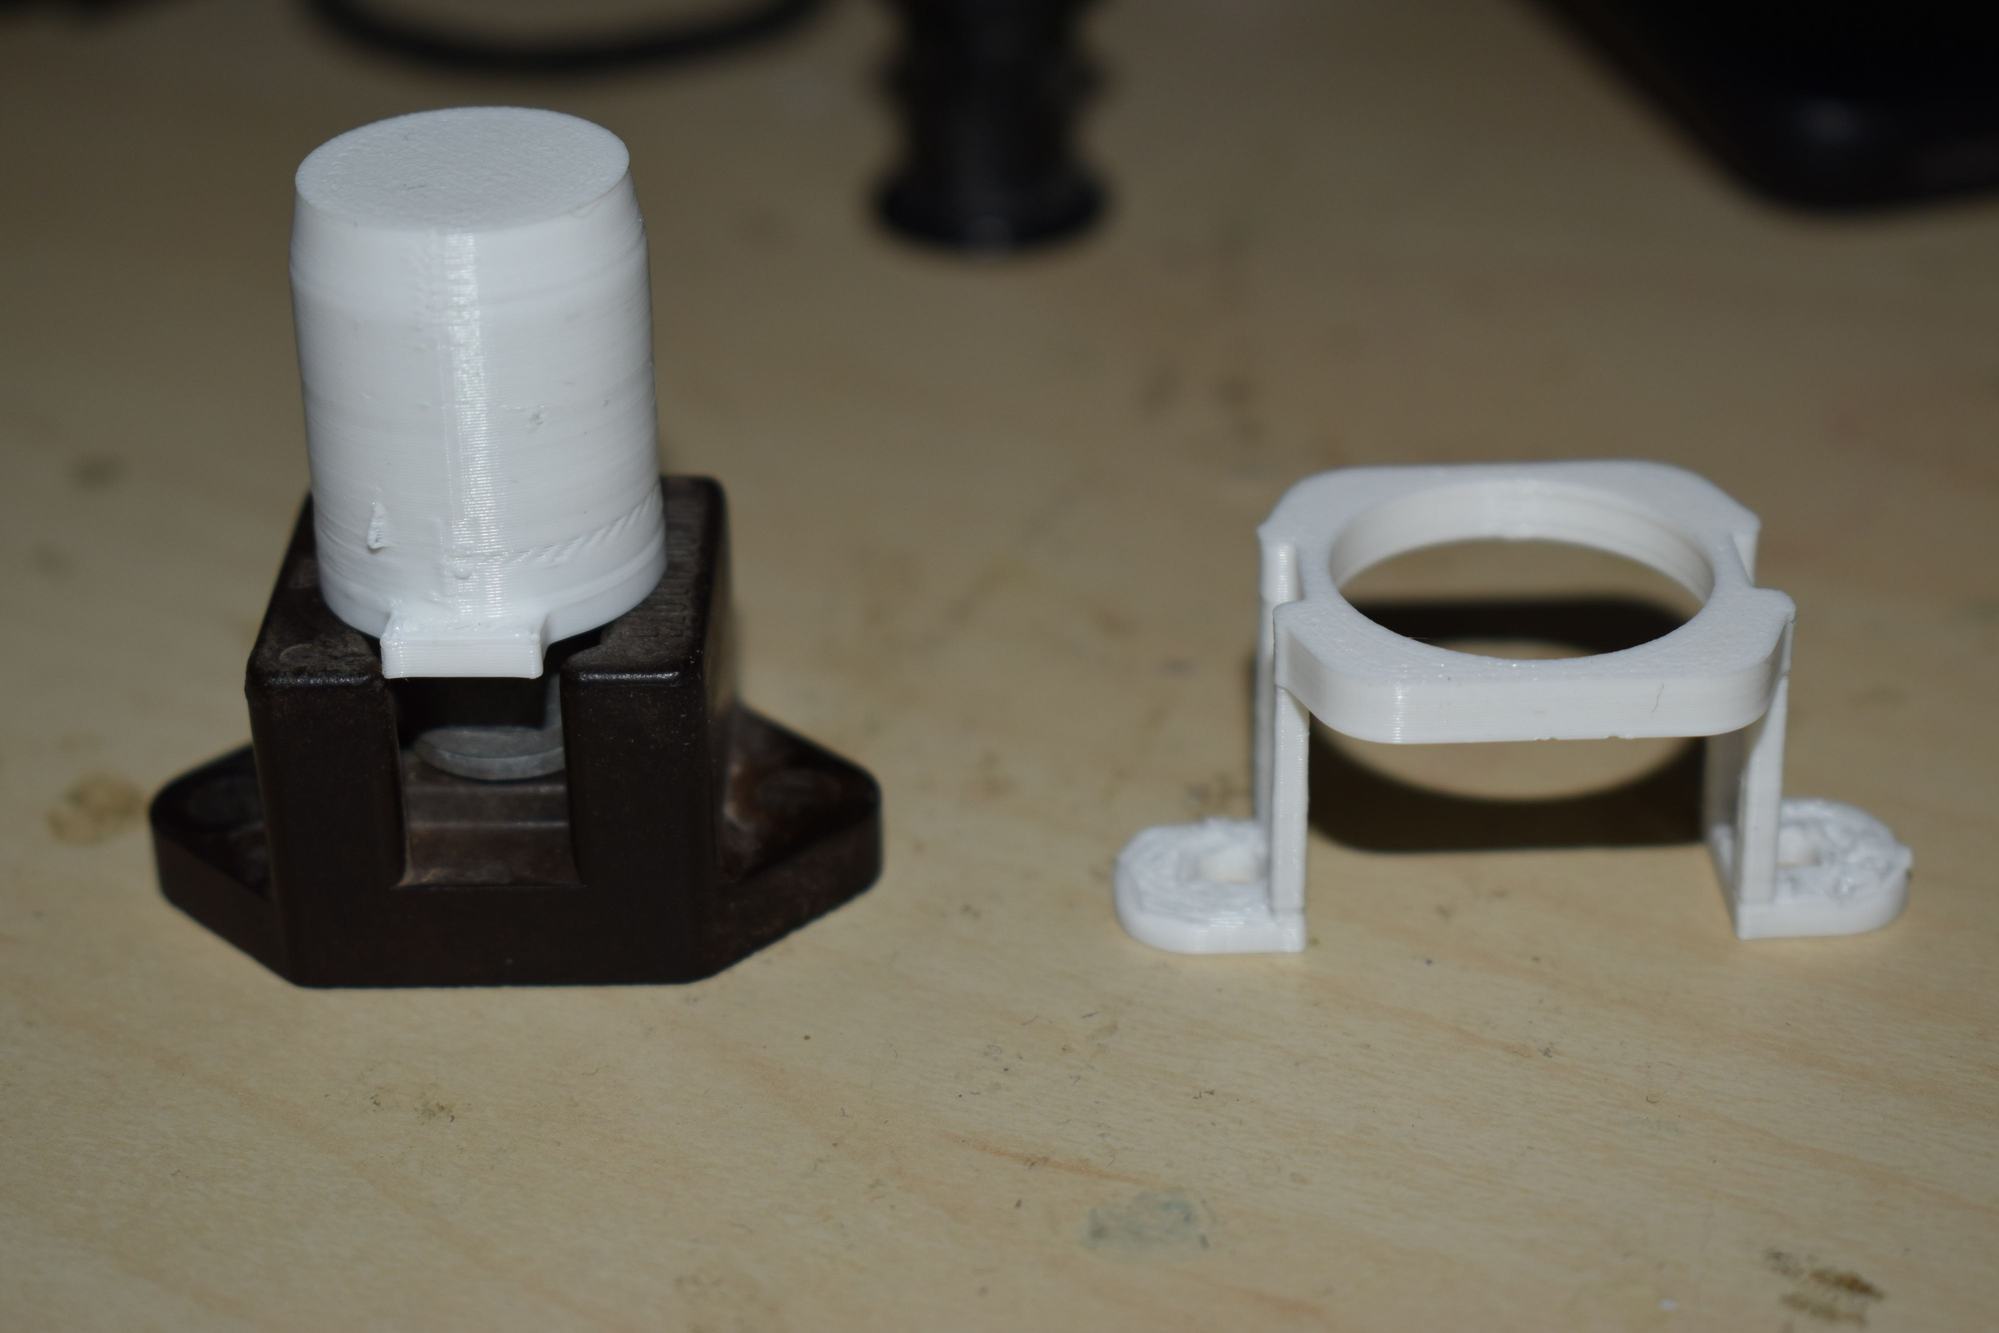
I Decided to put my CAD skills to use and draft up a replacement part that will both fit a bit better, but also have a collar that uses the mounting screws for the hot post assembly to lock itself in so the cap will not be able to vibrate itself free. A day of design and a few failed prints later and I've got a decent little cover I'd say! Two Piece Assembly. Hot post cover locked into place. Collar set on top ready to be screwed in securing the hot post cover wings in place until removed.
Files are here for anyone who would like to print this themselves!
This is PLA, for fitment testing, and most likely cannot withstand the temperatures inside the engine bay for very long and will OFT need to be replaced. I would recommend printing it in ABS if you have the setup for it, or PETG if your setup is not conducive to venting ABS properly.
Last edited by MrDonutLlama; 06-20-2022 at 07:37 PM.
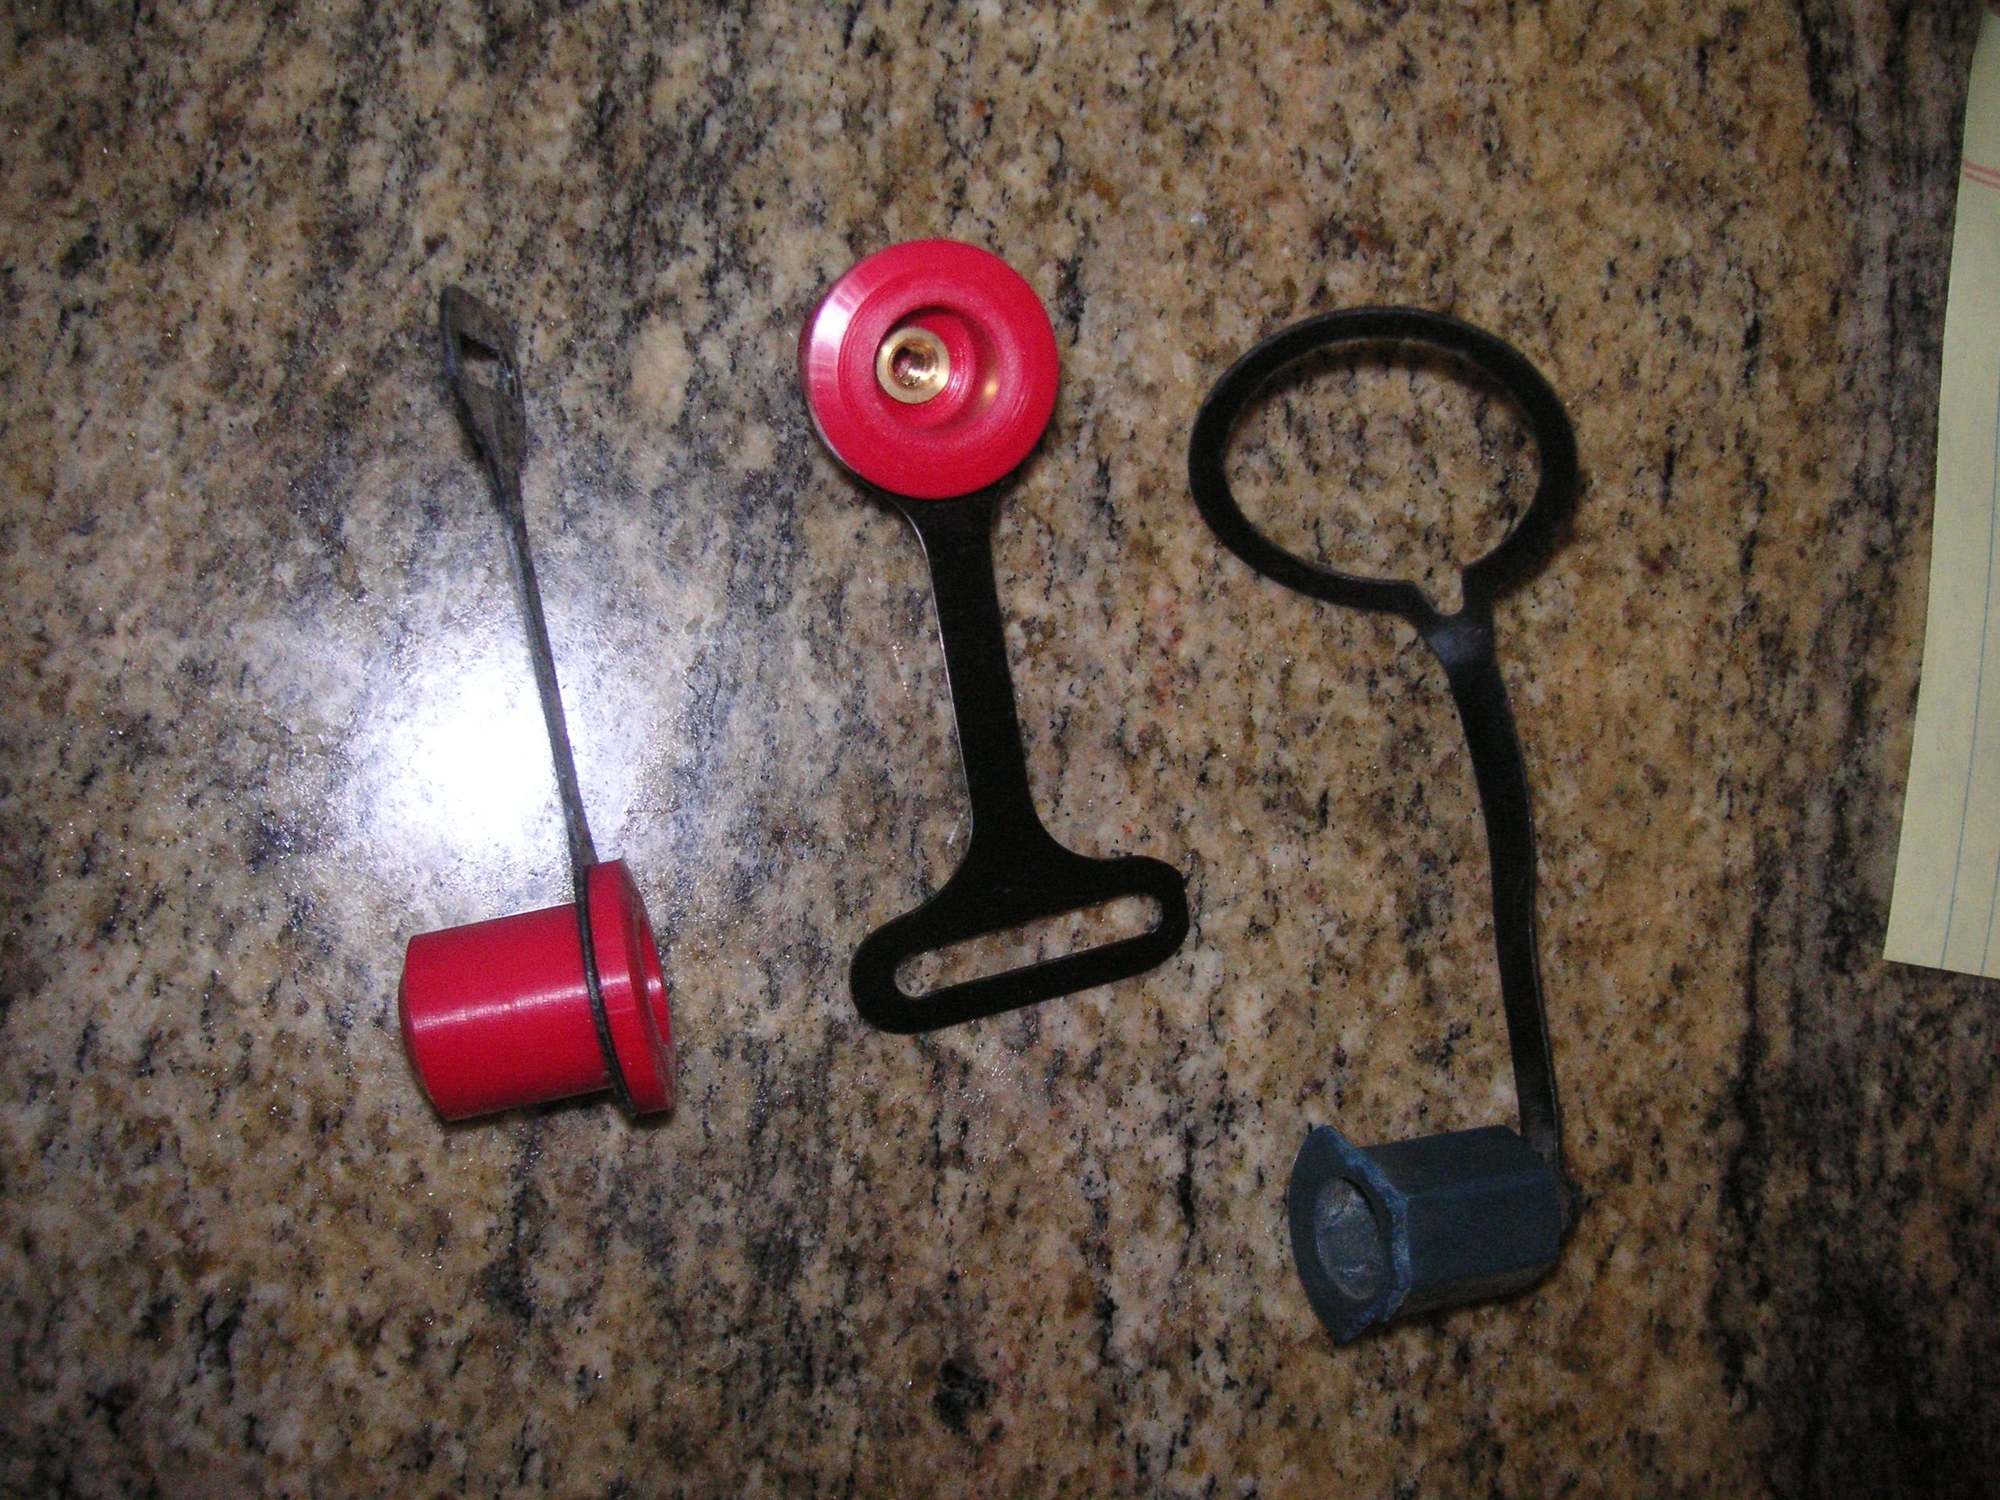
The early jump posts have a cap that is just press on as with your's. The later ones have a screw stud stuck in the end for the cap to be screwed on. I'm not sure which year the change came.
When I redesigned the Jump Post Covers I also made some new caps with a metal thread insert inside them to screw onto the post. I changed the lanyard a little also to be more purpose intended. Here is a picture of a couple of mine with an original for comparison.
How do you get the cap off when you need access to the Jump Post?
It's as easy as taking out the two screws that hold on that locking collar and then it just slides off like its butter
Granted, it does add about a minute of extra work, but for a little extra security that it isn't falling off and leaving that post open I'm all about it.
And interesting, mine actually had the lanyard tucked away under it but I wasn't sure at all what that piece was! I like the threaded insert and definitely wish mine had a thread on the top side for that.
@Jerry Feather : I was under the, perhaps, mistaken impression that your part would not work for the hot connection on the driver's side. Those covers also tend to go missing and are NLA. I really like this solution for that part, though I think that modifying the round bit might be in order to get complete protection.
[QUOTE I like the threaded insert and definitely wish mine had a thread on the top side for that. QUOTE]
Contact Mark A at 928 International. I bought a few of the later posts with the screw stud in them from him some time ago for my project. The screw post is fully replacable for the early ones.
Or, simply drill and tap a hole in yours and put your own stud in it. I don't recall what the thread is but that should not be too hard to find out.
Last edited by Jerry Feather; 06-21-2022 at 05:13 PM.
@Jerry Feather : I was under the, perhaps, mistaken impression that your part would not work for the hot connection on the driver's side. Those covers also tend to go missing and are NLA. I really like this solution for that part, though I think that modifying the round bit might be in order to get complete protection.
What is the hot connection on the drivers side? What covers go missing? What is modifying the round bit? We really need to be speaking the same language, don't we?
Driver's side hot connection = ABS power supply wire, the cover is captive on the wire and by the time you're at that point in a timing belt R&R, you're too tired to remember to re-install the cover, so they get lost a lot.
I can modify that file tonight when I get off work to just be a flat cover for the other side as well with the smaller post for the ABS. Look out for another post tomorrow too because my 14 pin connector is kinda shot so I'm designing a new inline connector housing and rewiring that up so I can just be shrink wrap and ziptied along side the wiring loom. I have a feeling my 3D printer and this car are going to get well acquainted, would it be bad form for me to make a master post to collect and list all the different files i end up with?


 06-20-2022, 07:26 PM