When you click on links to various merchants on this site and make a purchase, this can result in this site earning a commission. Affiliate programs and affiliations include, but are not limited to, the eBay Partner Network.
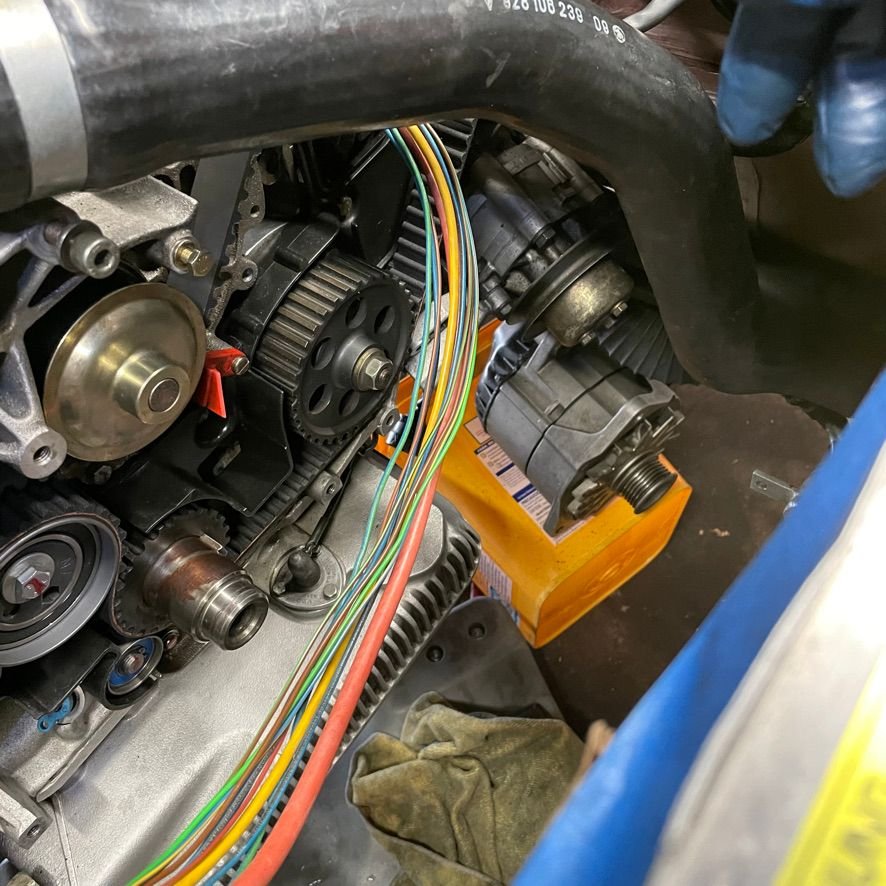
The oil pump gear you have looks to be aluminum the updated part is steel if you put the steel part in then you remove the spacer that’s behind your aluminum gear when you’re stringing the belt if you’re using top dead center as your starting point on the crankshaft then you’re going to use a wrench to turn the cams 30 or 32 mm and start with the belt on the driver side cam and then finish with the passenger side cam turn the cams as necessary so that they’re lined up when the belt goes on you may need two people to do this
Hi Stan, thanks for spotting the oil pump gear. I am unfamiliar with this recommended update. Can you elaborate on the the update, why is done and the benefits of making this move? I want to make sure I do the repair correctly, but I am also eager to get the car back on the road.
FYI, the crank is at 45-BTDC.
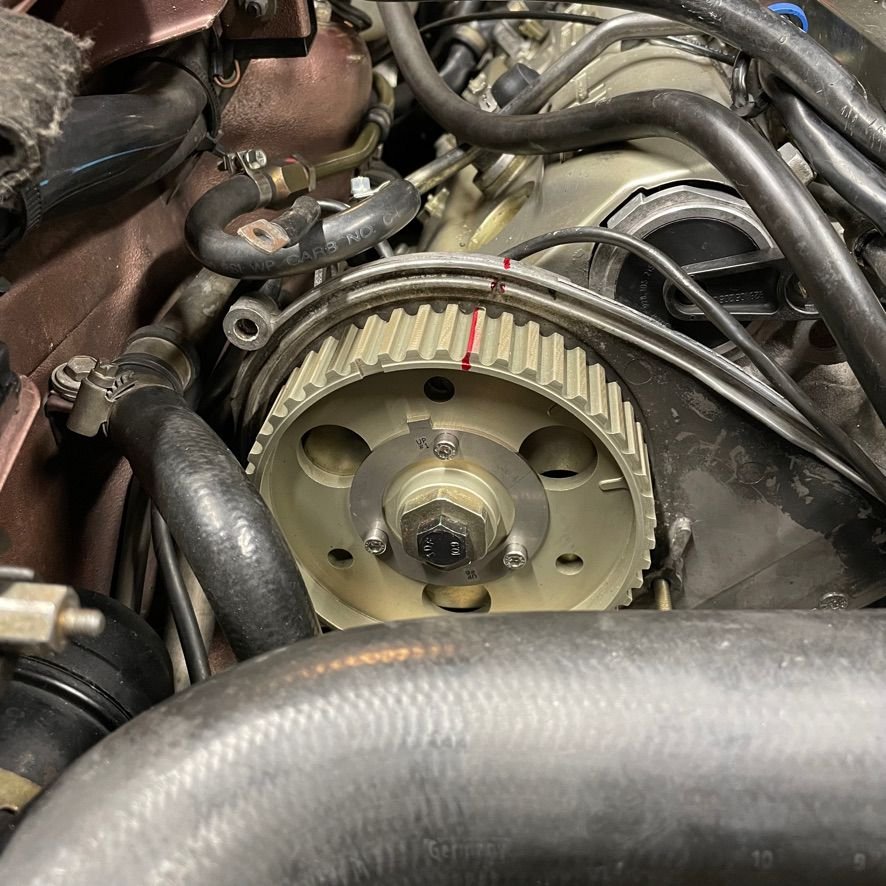
edit, I went back out and took a look at the oil pump cog and put a magnet to it and it is definitely steel. You can see in these additional photos that there is rust on the Face of the cog. There also seems to be a steel belt that is pressed into the outer cog surface.
Can I assume this is the updated steel oil pump cog?
Last edited by Michael Benno; 10-09-2021 at 06:45 PM.
sorry I was looking at the gear on my phone when I first saw the post.
After rechecking the picture on my computer,
its clear you have a steel oil pump gear.
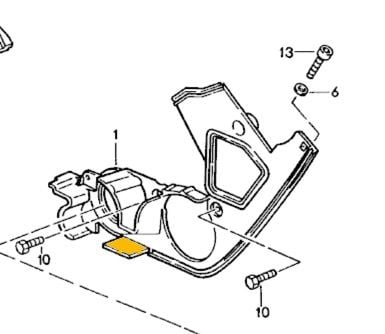
I think I might have a hypothesis of what caused the the timing to be off by nearly a full tooth. The clues came in the from of broken plastic pieces I removed when from inside the lower cover. I noticed the a guide tongue on the lower inside belt cover had broken off.
My thought is that the timing belt was improperly strung and routed below this tongue which required more belt to work around it. When the plastic tongue broke that slack caused the shift. What do you think of my hypothesis?
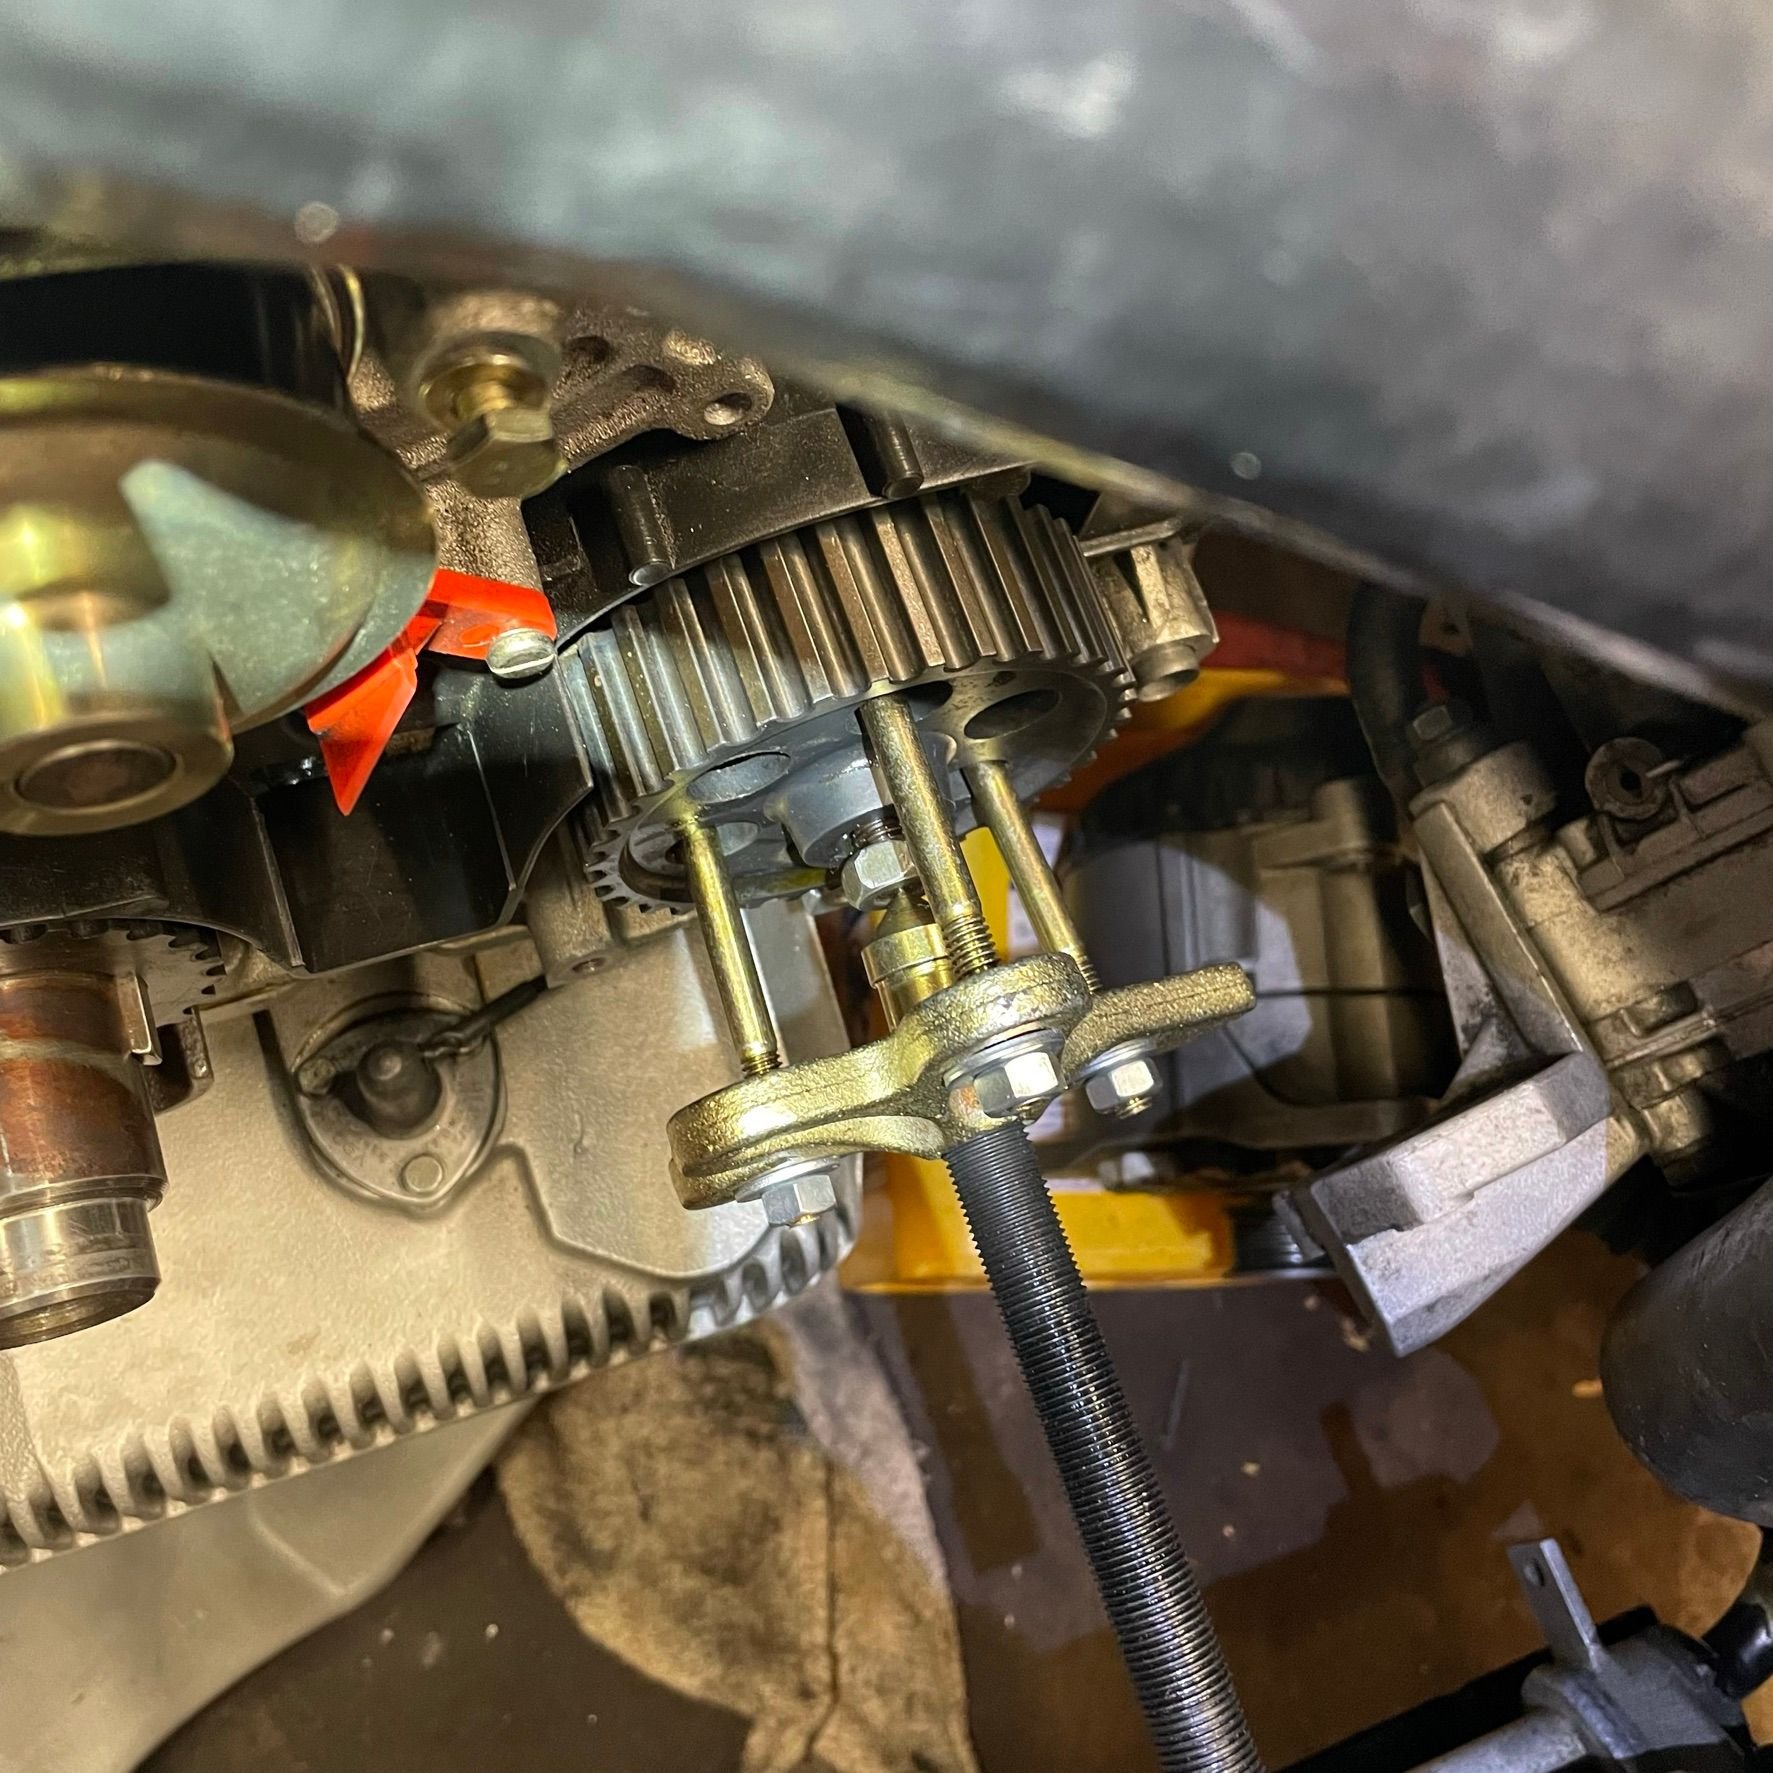
More importantly, would you recommend replacing the rear cover? If so, how the hell do you remove the crank cog?
More importantly, would you recommend replacing the rear cover? If so, how the hell do you remove the crank cog?
Possibly it was 'upgraded' to a dual pulley at some point in the car's life and this piece was removed?
Puller with thin claws. Hopefully the sprocket was installed with anti-seize (note the damper hub needs liberal amounts of this on when reinstalling). You cannot avoid deforming the rear guide washer a little. It needs to be fixed after.
I'm thinking I won't replace the inside cover at this time, unless someone can give me a compelling argument for that missing piece of plastic. It doesn't' appear to have a critical functionality other than a dust cover. So why bother pulling the crank gear if it's not needed. Both the crank thrust washers are in perfect condition so I do not see a need, unless you all convince me otherwise. As for the removing the oil pump cog to check to see if the 1"mm space is there/or not. That seams easy enough to check since I am in here.
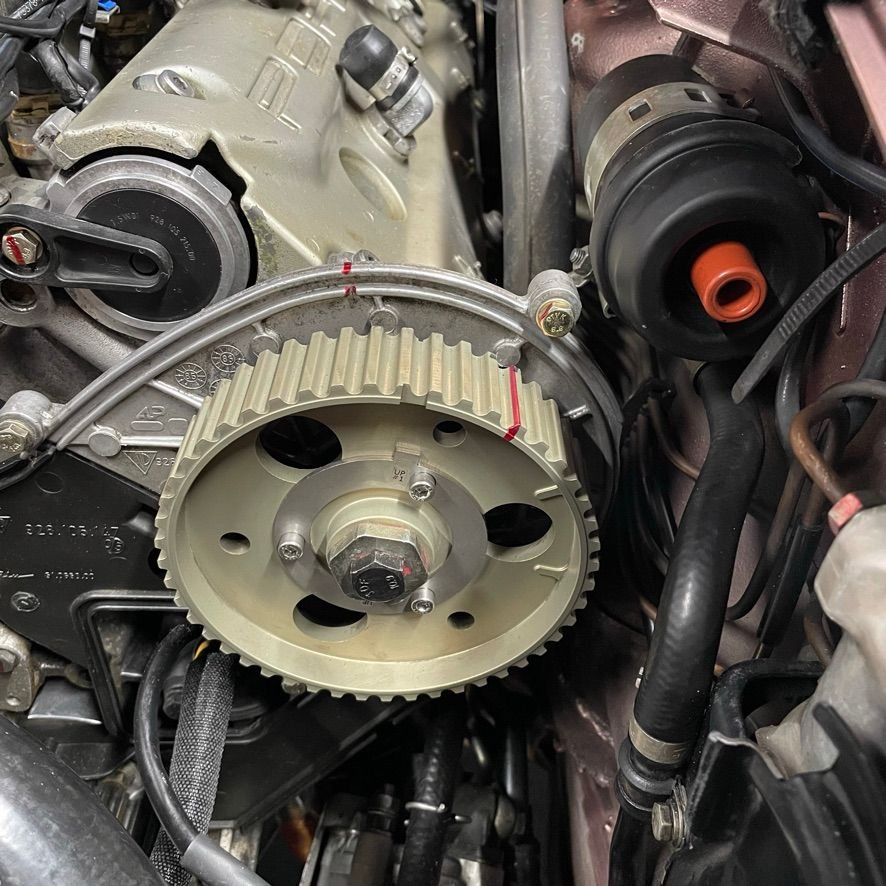
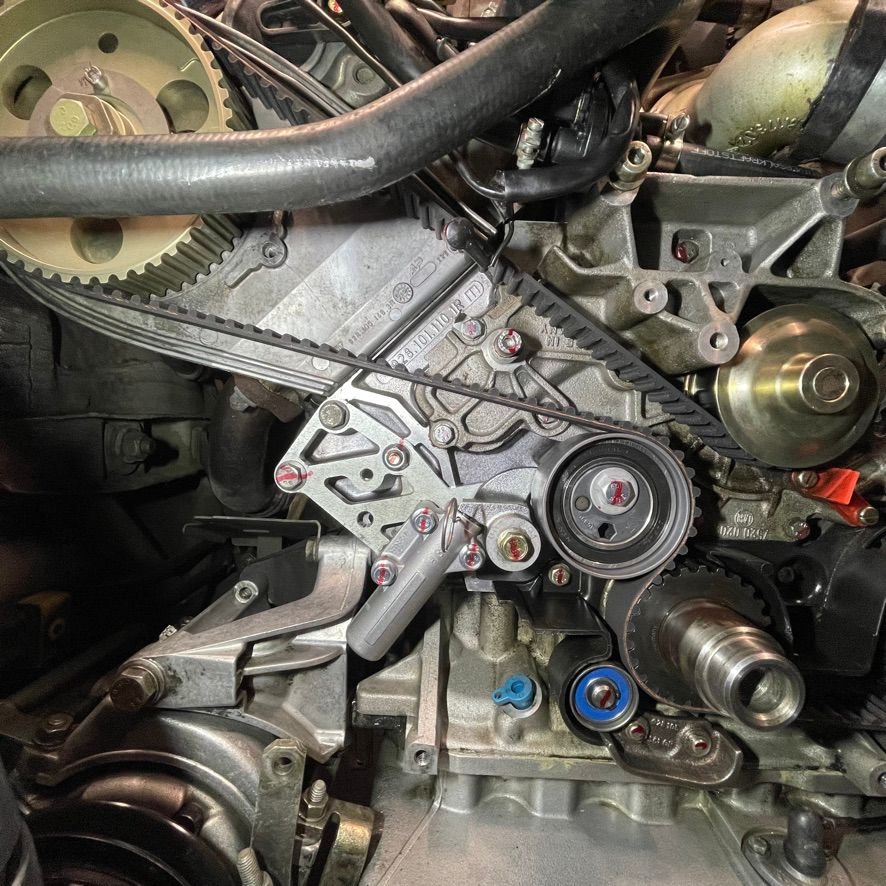
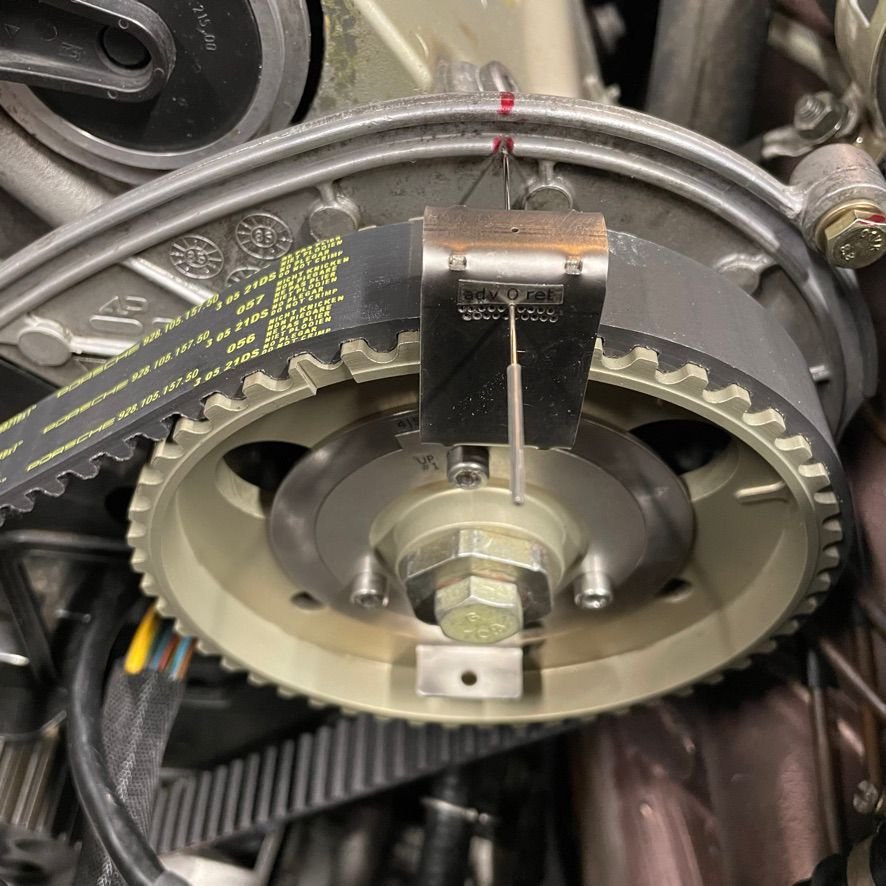
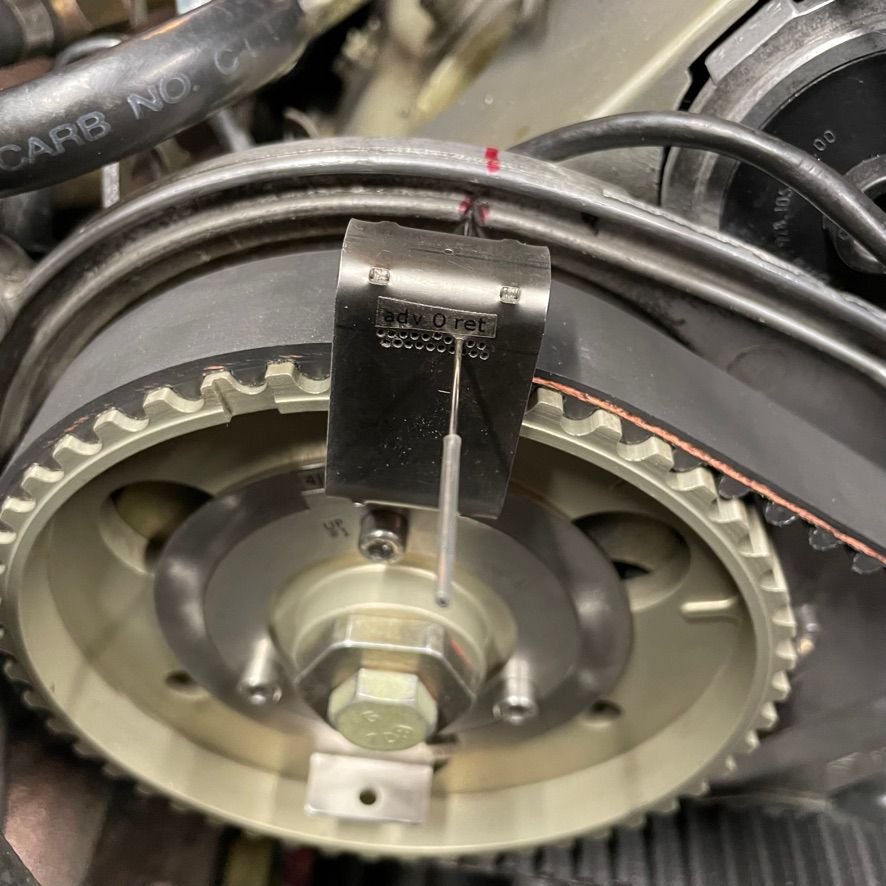
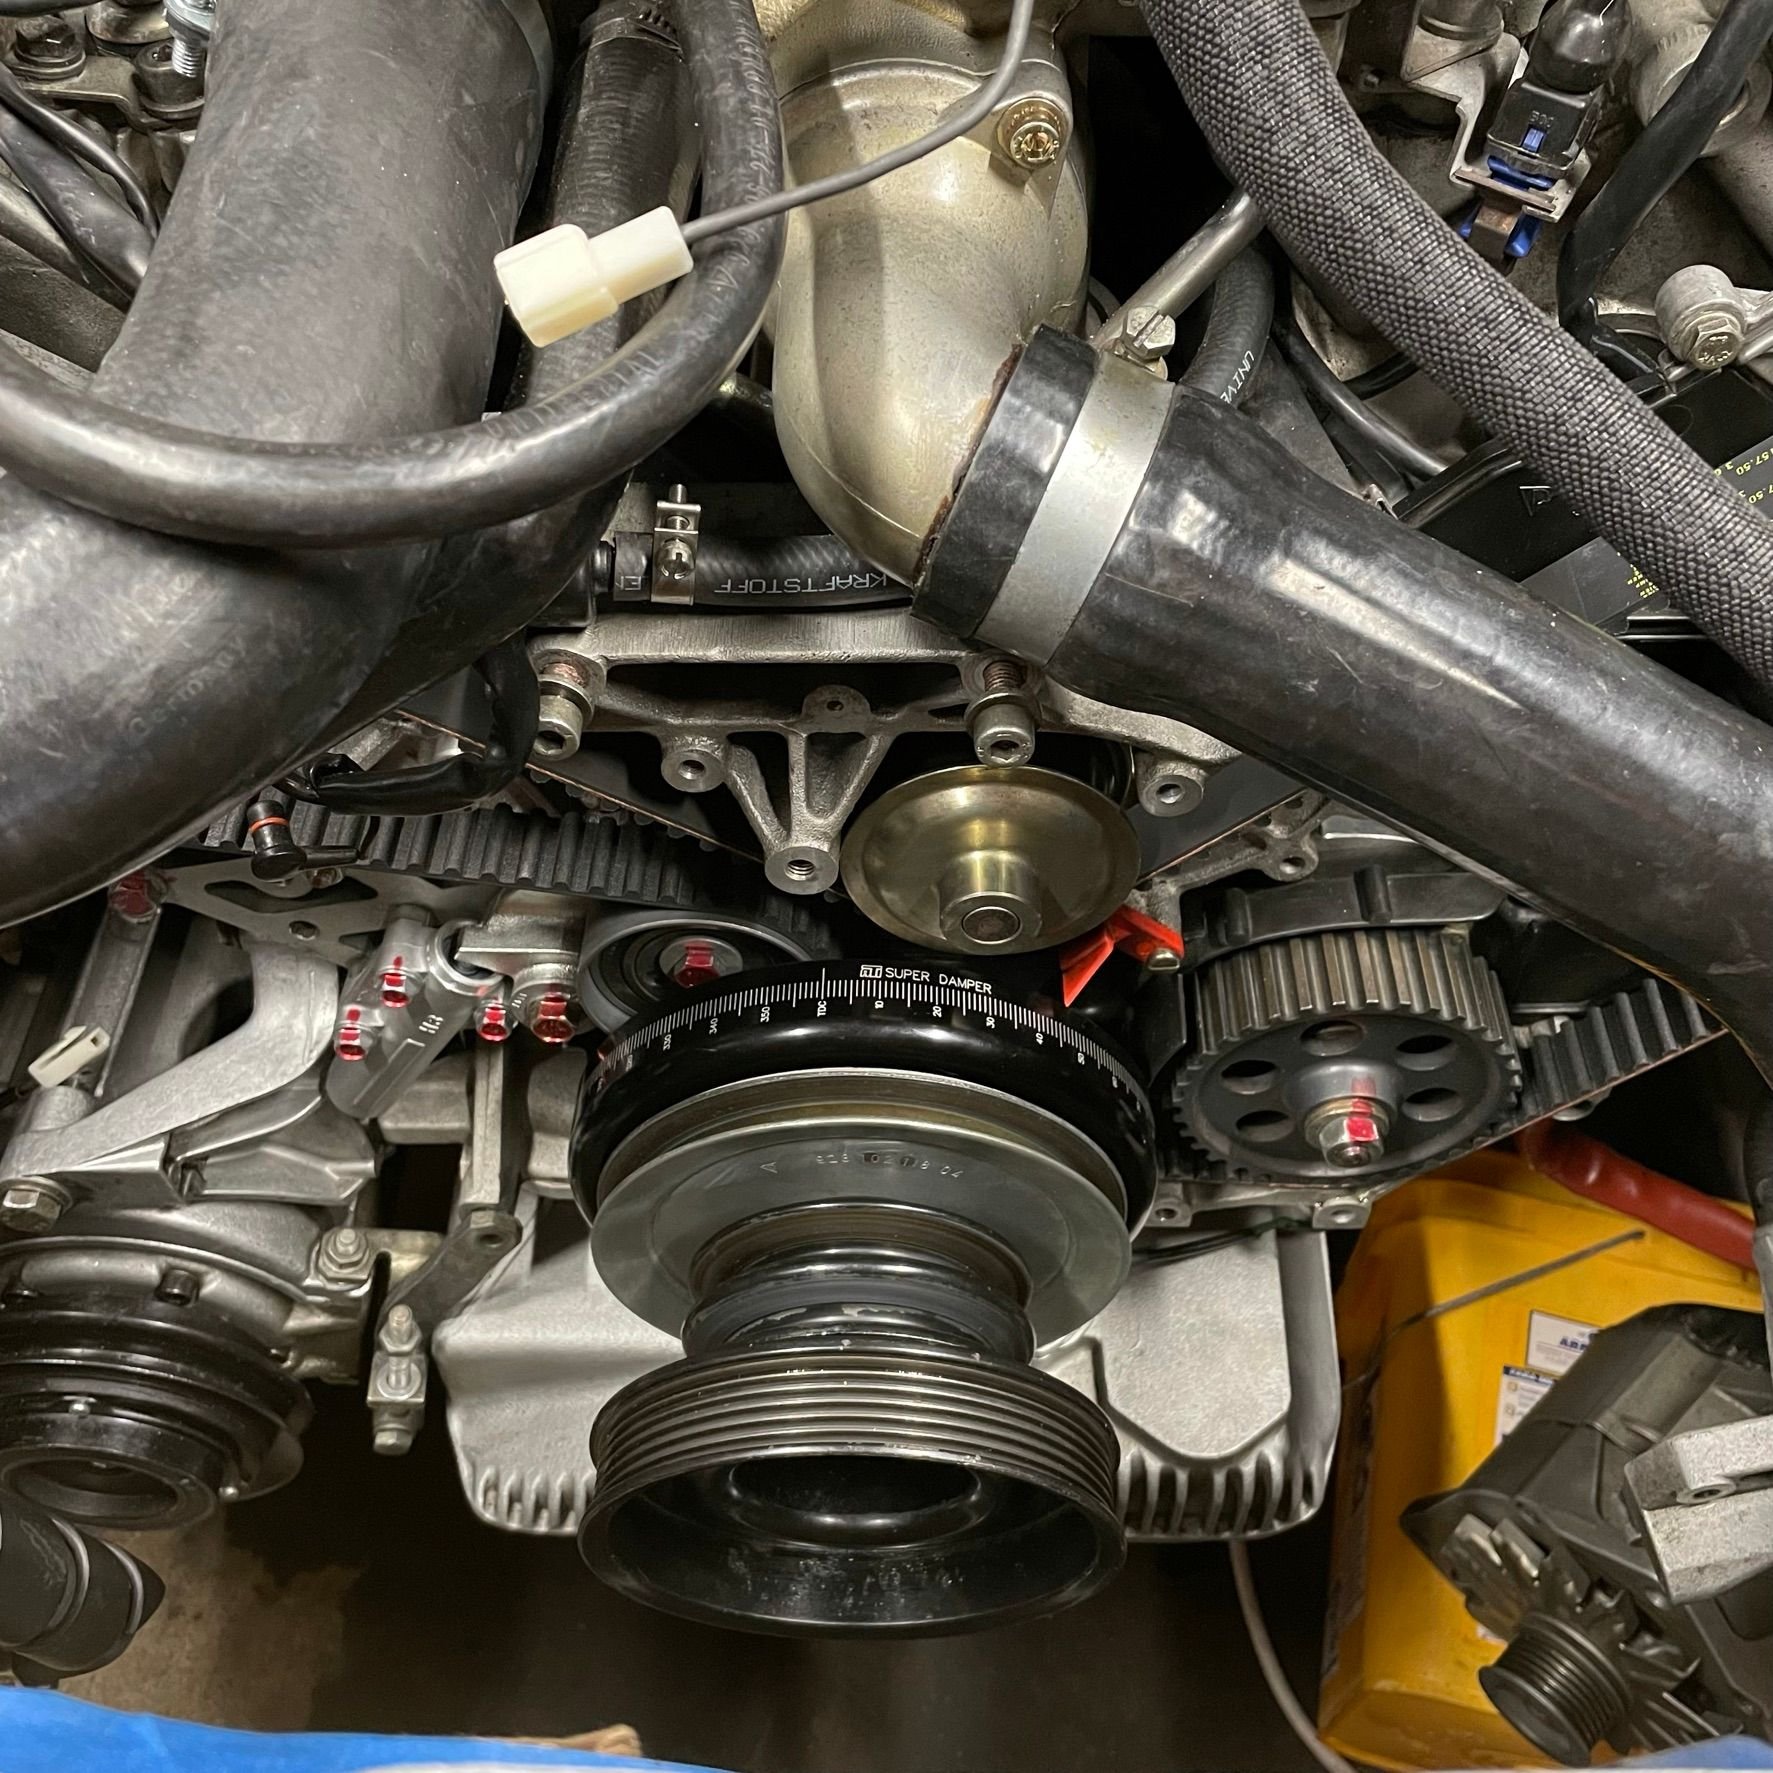
Today I spent figuring out how to install the timing belt and get the cam timing all set up correctly. I am thankful for all the excellent resources out there on this topic. I was having a bit of a challenge since my cam timing was off to begin with and there were no marks on the cams. Fortunately I found a few resources that suggested to mark the cogs: 3-teeth from the TDC. Red Sharpie to the rescue! I marked up the cogs to help me with belt installation.
Once I had the cams gears market, I set them to my desired cam timing. Based on the EXK tuning work @PorKen and I have done on our S4's, we found degrees of retard to be best on the passenger side and 0-degrees of retard/advance on the driver side. Not sure if this hold true for the GTS but so it will be another datapoint to experiment with.
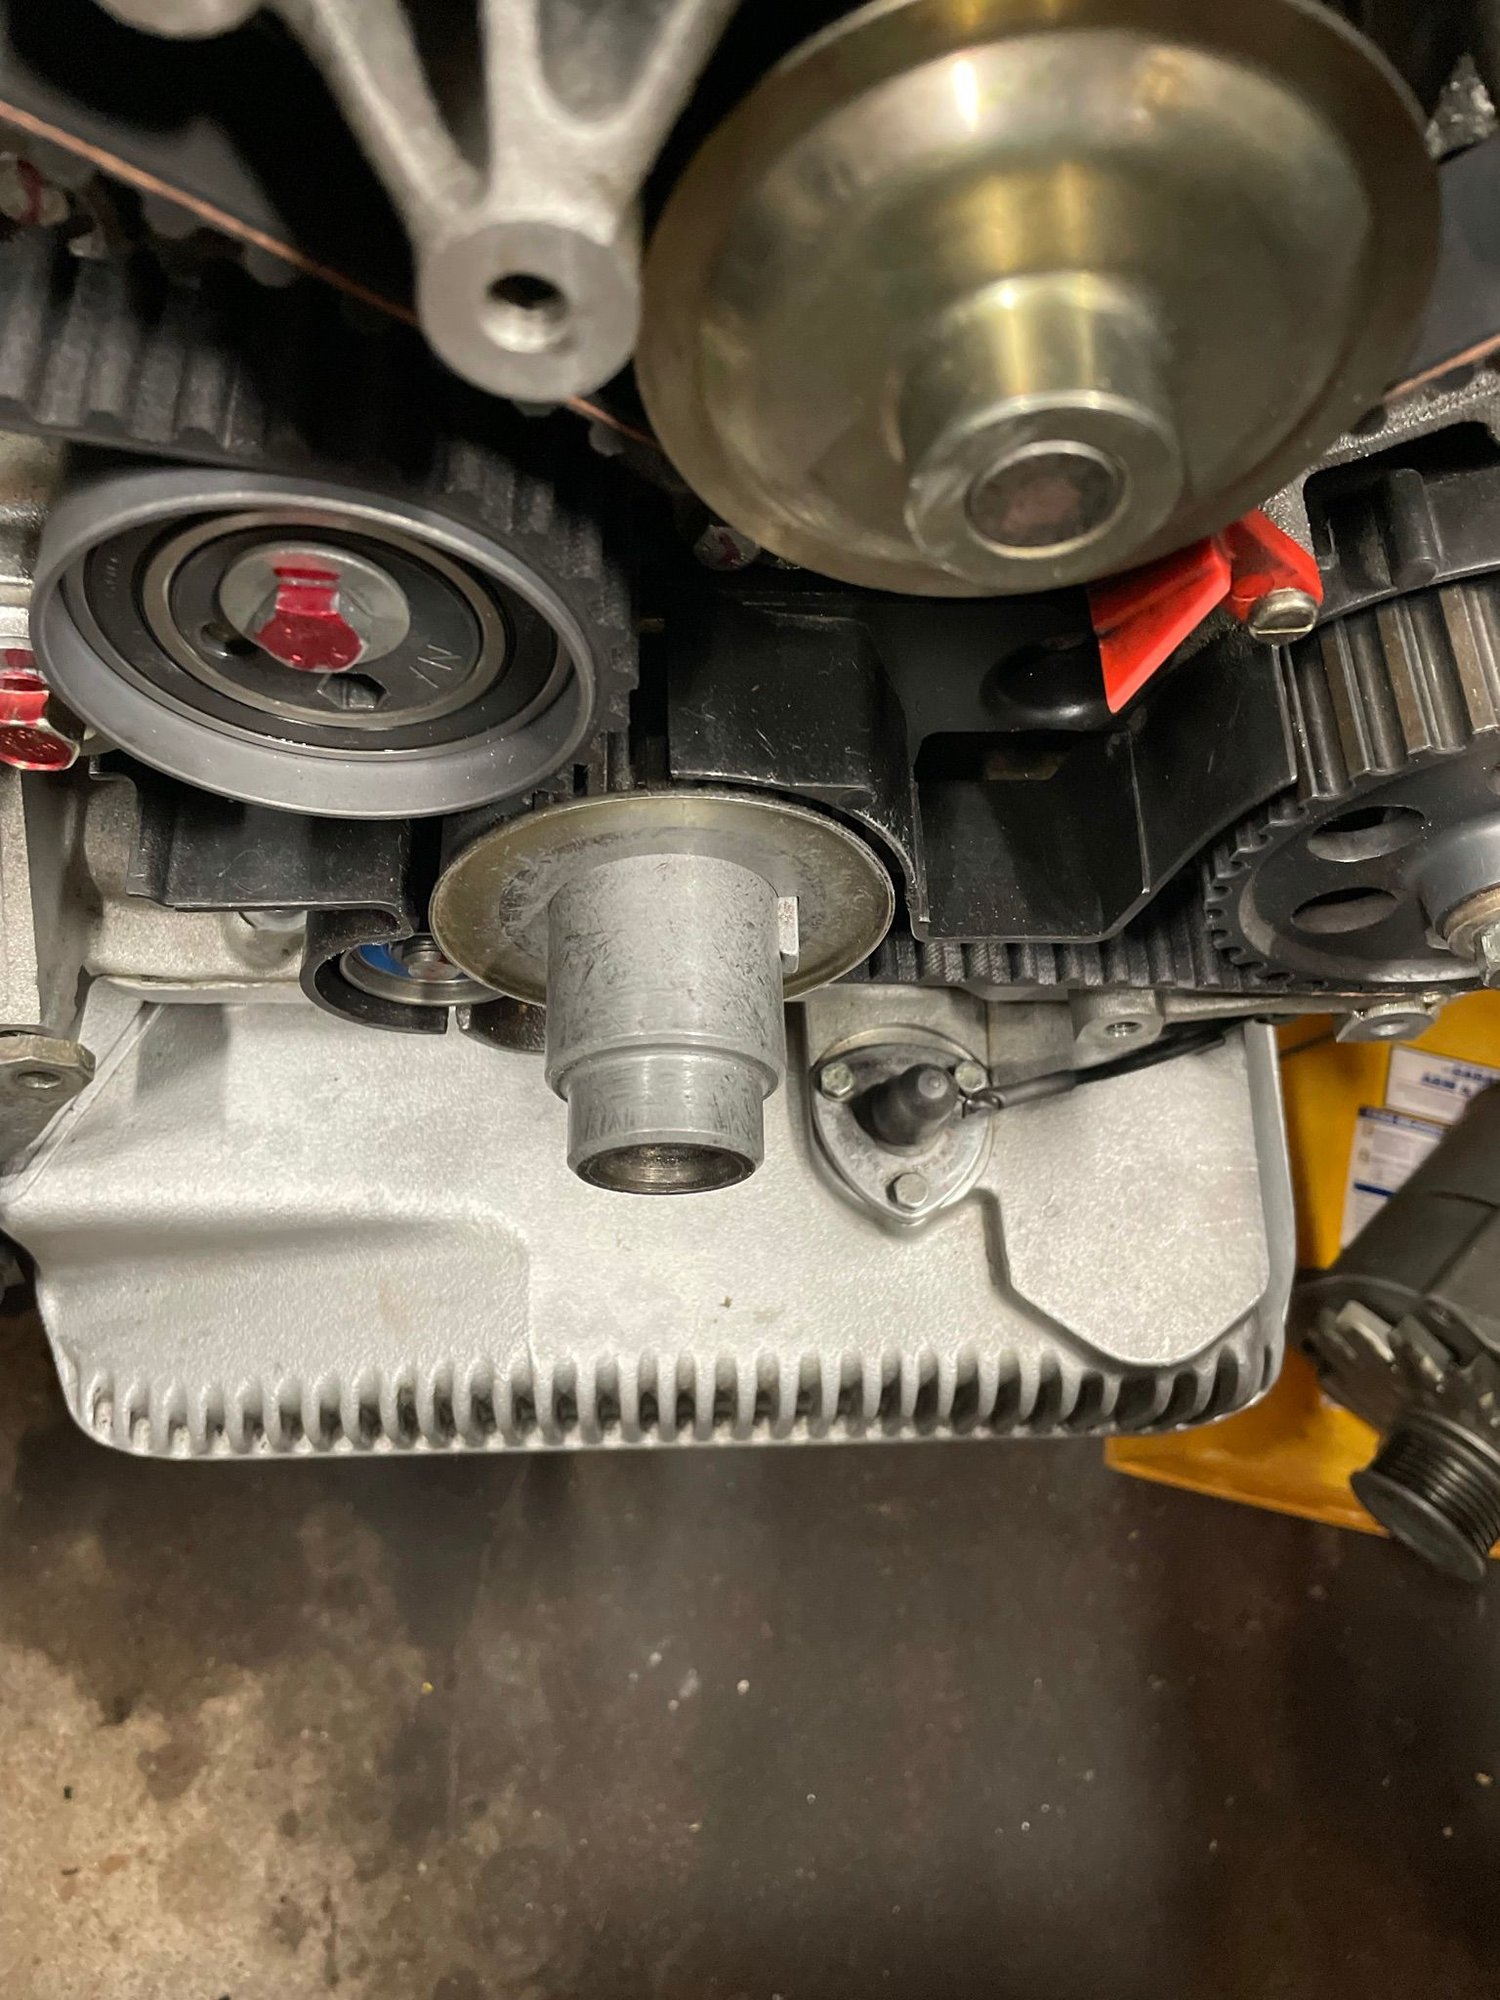
I proceeded with installing the new belt and It's really a snap to get the belt in.
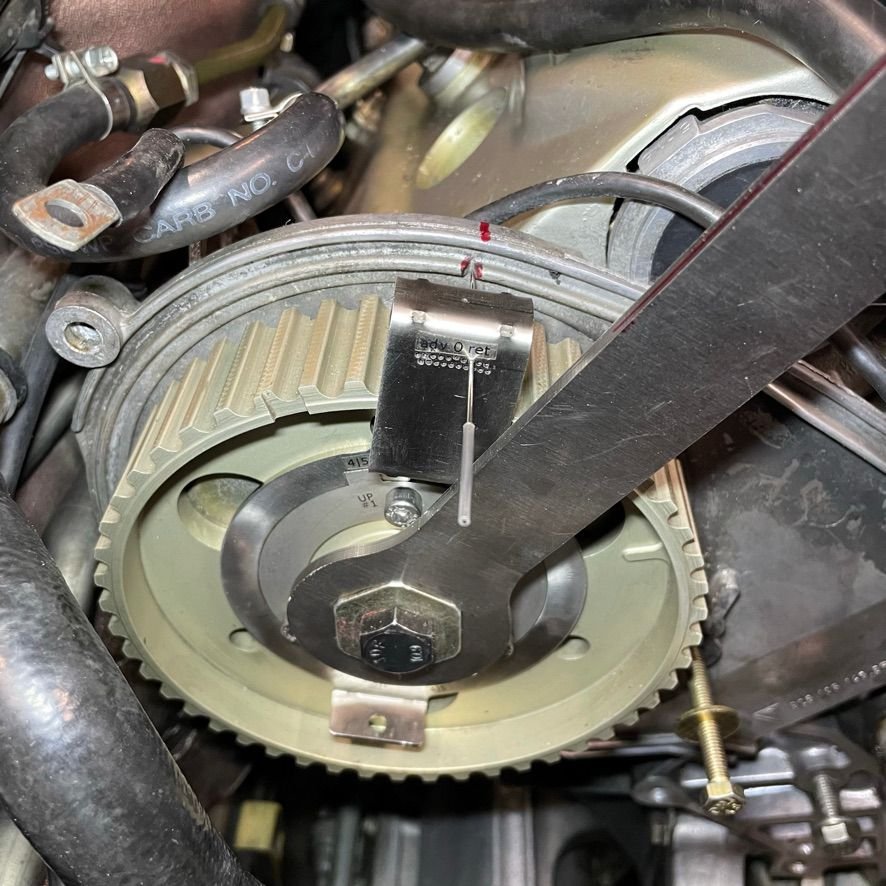
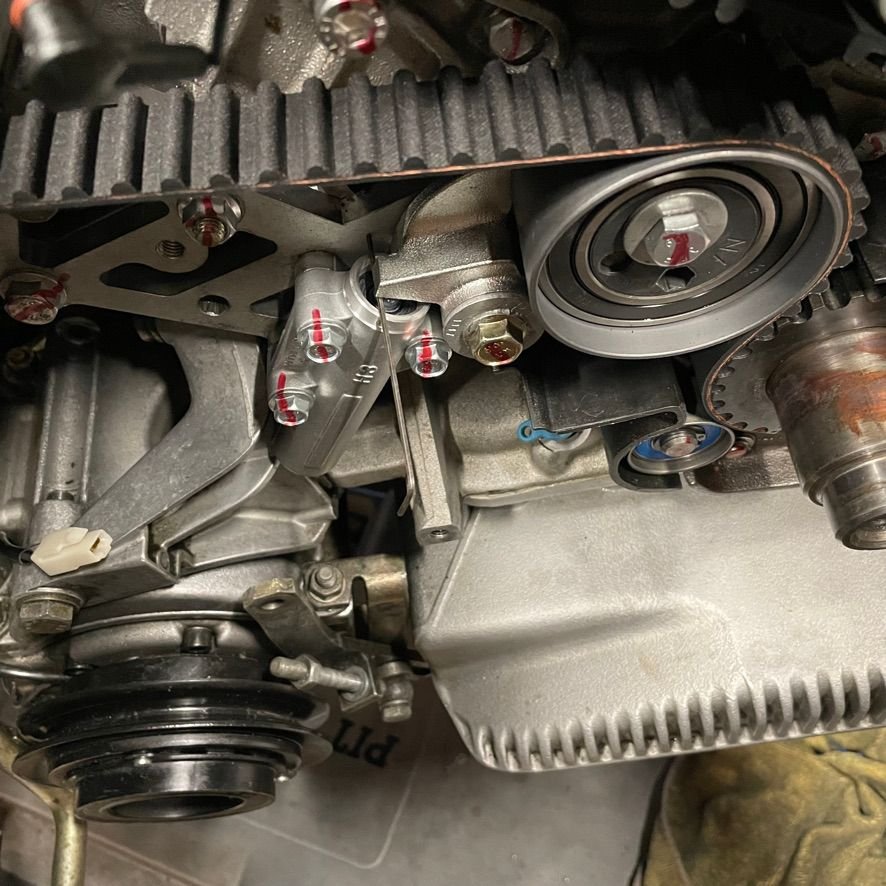
I pre-loaded the tension roller with the specified 11 ft/lb of torque.
This picture showing Allen wrench measuring the tension piston extension of 2mm (specifications is 1mm - 7mm cold for a new belt)
Once I had the belt in and tensioned, I decided to re-set the cam timing to my specification. Everything went pretty smoothly
So I am feeling pretty comfortable now with moving forward and putting the balancer on the car to doing the final cranking/adjusting and re-assembly. I understand I need to turn the motor over with the starter to really get the belt to settle in. Does it make sense to do a few hand cranks first?
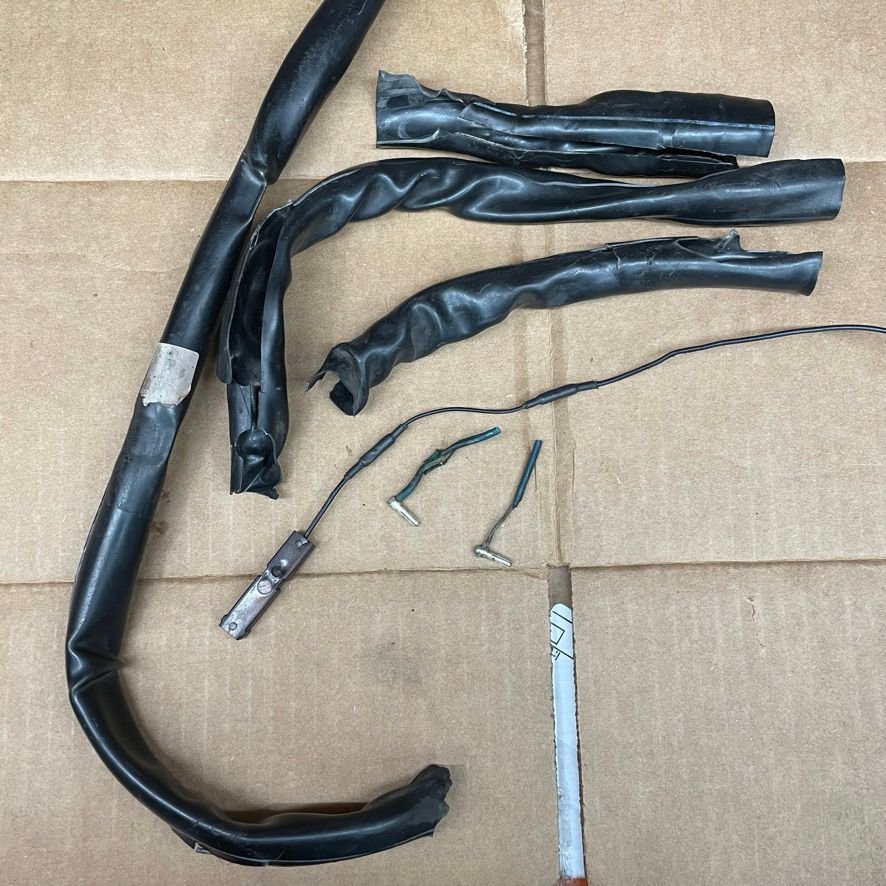
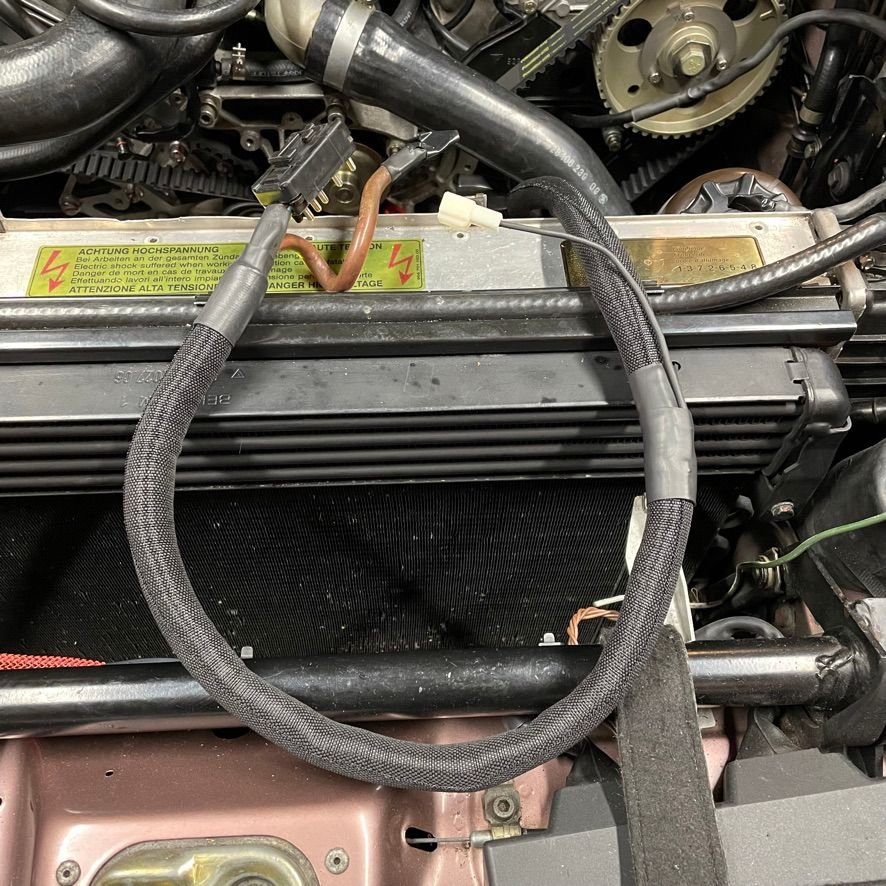
Unrelated, my OCD got the better of me today and I decided to spend some time on the FOE harness. Several of the wires had rotting insulation at the 14-pin terminal and the housing on the harness was severely hard and inflexible. I decided to strip the housing and re-warp using some Flexo F6 Woven Wrap. It's really nice stuff and makes the harness a lot easier to work with. As for the rotten insulation, I soldered/sliced in new leads. I had a salvaged harness from my '88 and was able to scavenge good sections of wire matching the same colors and sizes. here are some of the nasty bits I removed with good sections of wire that were soldered together.
Last edited by Michael Benno; 10-11-2021 at 04:04 PM.
Michael, Is there a specific reason you set the 1/4 bank at minus 4 degrees retard? As I recall the timing on bank 1/4 should be minus 2 degrees with a used belt and zero with a new [unstretched] belt.
[EDIT] Fred you are correct, the initial setting should be -2 | 0 with a new belt. I will update.
Hi Fred, Ken and I have done a lot of testing with varying timing cam timing during the development of @PorKenEZKs self tuning chip. We found cam timing of -4|0 to have the most even distribution of cylinder performance based on advance potential and knock management. If irecall correctly, he hypothesized that the heads actually grow more than 2-degrees when hot based on the observed data. Ken can certainly explain it better than. I can, I just needed to remember the setting 🙂
All that testing was on the 5.0 S4 motors, we don’t have any data for the 5.4 motor, so I figured we’d give it a try so we can collect some data. I’m not recommending this as setup for others, just something I’m doing for this car. It can be changed -2 if needed.
Last edited by Michael Benno; 10-11-2021 at 01:48 PM.
Hi Fred, Ken and I have done a lot of testing with varying timing cam timing during the development of @PorKenEZKs self tuning chip. We found cam timing of -4|0 to have the most even distribution of cylinder performance based on advance potential and knock management. If irecall correctly, he hypothesized that the heads actually grow more than 2-degrees when hot based on the observed data. Ken can certainly explain it better than. I can, I just needed to remember the setting 🙂
All that testing was on the 5.0 S4 motors, we don’t have any data for the 5.4 motor, so I figured we’d give it a try so we can collect some data. I’m not recommending this as setup for others, just something I’m doing for this car. It can be changed -2 if needed.
Fair enough- good to know these things.
Just remember there is a correction for a new belt as well. If the minus 4 was for a used belt you might have to correct that to minus 2 for new belt to allow for the inevitable initial stretch unless it is a racing belt that effectively does not stretch [or so we are told].
I doubt that plastic bit at the bottom had anything to do with the error factor your found- just not enough slack in the system if my motor is representative. That being said I do not know what the equivalet impact is using a PKT that I suppose may conceivably leave the belt "slacker" than the stock tensioner when "parked".
Is there a specific reason you set the 1/4 bank at minus 4 degrees retard? As I recall the timing on bank 1/4 should be minus 2 degrees with a used belt and zero with a new [unstretched] belt.
Hi Fred, Ken informed me that you are correct, the initial setting should be -2 | 0, as you pointed out, when a new belt installed. Run it for a bit and then fuss with experimentation like -4 | 0. I'll go back and re-adjust. Thanks again for the call ou
Last edited by Michael Benno; 10-11-2021 at 01:50 PM.
The cores in your engine loom look in decent condition. Suggest you check the condition of the 16mm cables at the alternator and the starter motor. It has what I refer to as signs of "cable cancer" with the colour looking the way it does. If nothing else get a couple of layers of heat shrink over that hot post end of the cable where it is brown but should be bright red - the insulation will probably be good for nothing. If you flex the cable does it look pliable or does it show signs of cracking? Remember that cable is permanently live and if it grounds you get an instant welding machine in the engine bay capable of passing over 1000 amps which at 12 volts amounts to 12kW+ of energy surprising as it may seem.
Carl had a 928 in his garage where one of the two smaller 10mm2 cables leaving the hot post grounded against the bulkhead burning a hole in the steel and burning down half the car - fortunately it did not burn down his garage but it made a right mess- that or the fire brigade did!
Note the experimental -4 | 0 cold setting FEELS stronger but has not been dyno verified. It mostly SOUNDS more harmonious.
Originally Posted by FredR
Just remember there is a correction for a new belt as well. If the minus 4 was for a used belt you might have to correct that to minus 2 for new belt to allow for the inevitable initial stretch unless it is a racing belt that effectively does not stretch [or so we are told].
I found that generally non-racing belts stretch to make about -2 retard. Best to check the reading after 2K miles. Racing belts do stretch a little, possibly one degree, but it takes a much longer time to show.
Note all the 32V engines I've measured*, S3-GTS, where the cam timing had never been touched (paint marks unbroken and matching) have shown -2 | 0 with a used belt. The WSM dial indicator spec does not specify used or new but equals -2 | 0 on the 32V'r** with a used belt on a cold engine. On a hot engine the 32V'r measures 0 | 0, but this is never as hot as the engine is when running.
* Except for one early '85, but note the WSM was updated in late '85 to make it more clear how the dial indicator measurement should be performed
** With the V2 32V'r, which most people have, (the V1 looks different) the 'zero' hole is retarded -2 so that both sides are 'zero' when hot (actual WSM spec, 0 | +2)
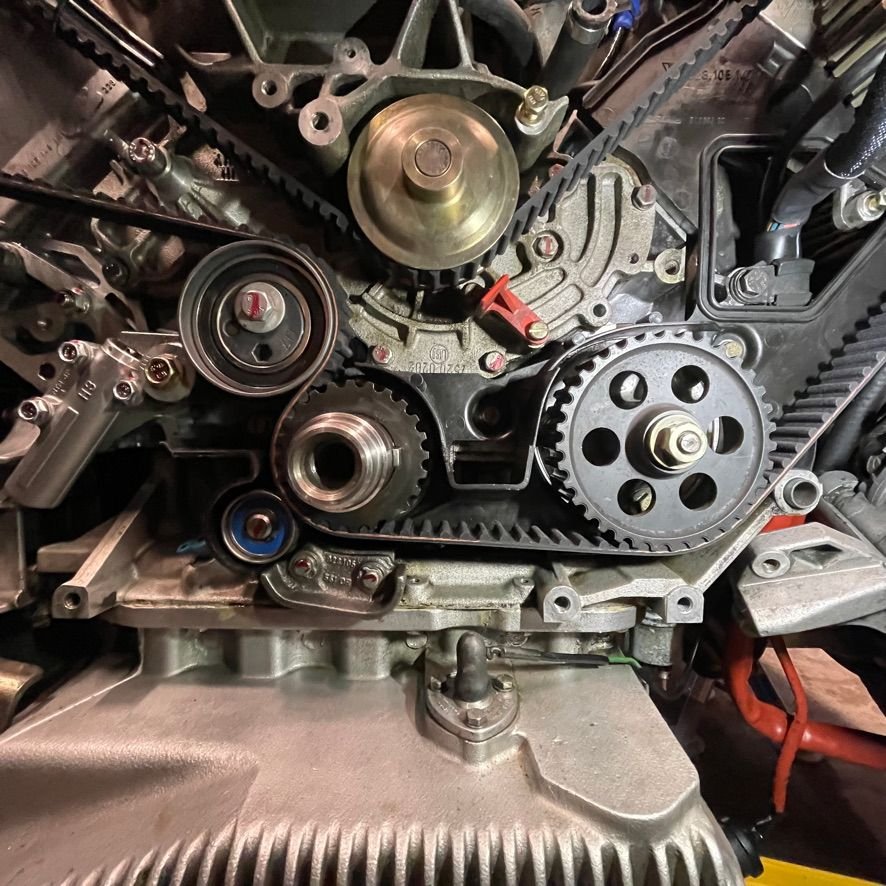
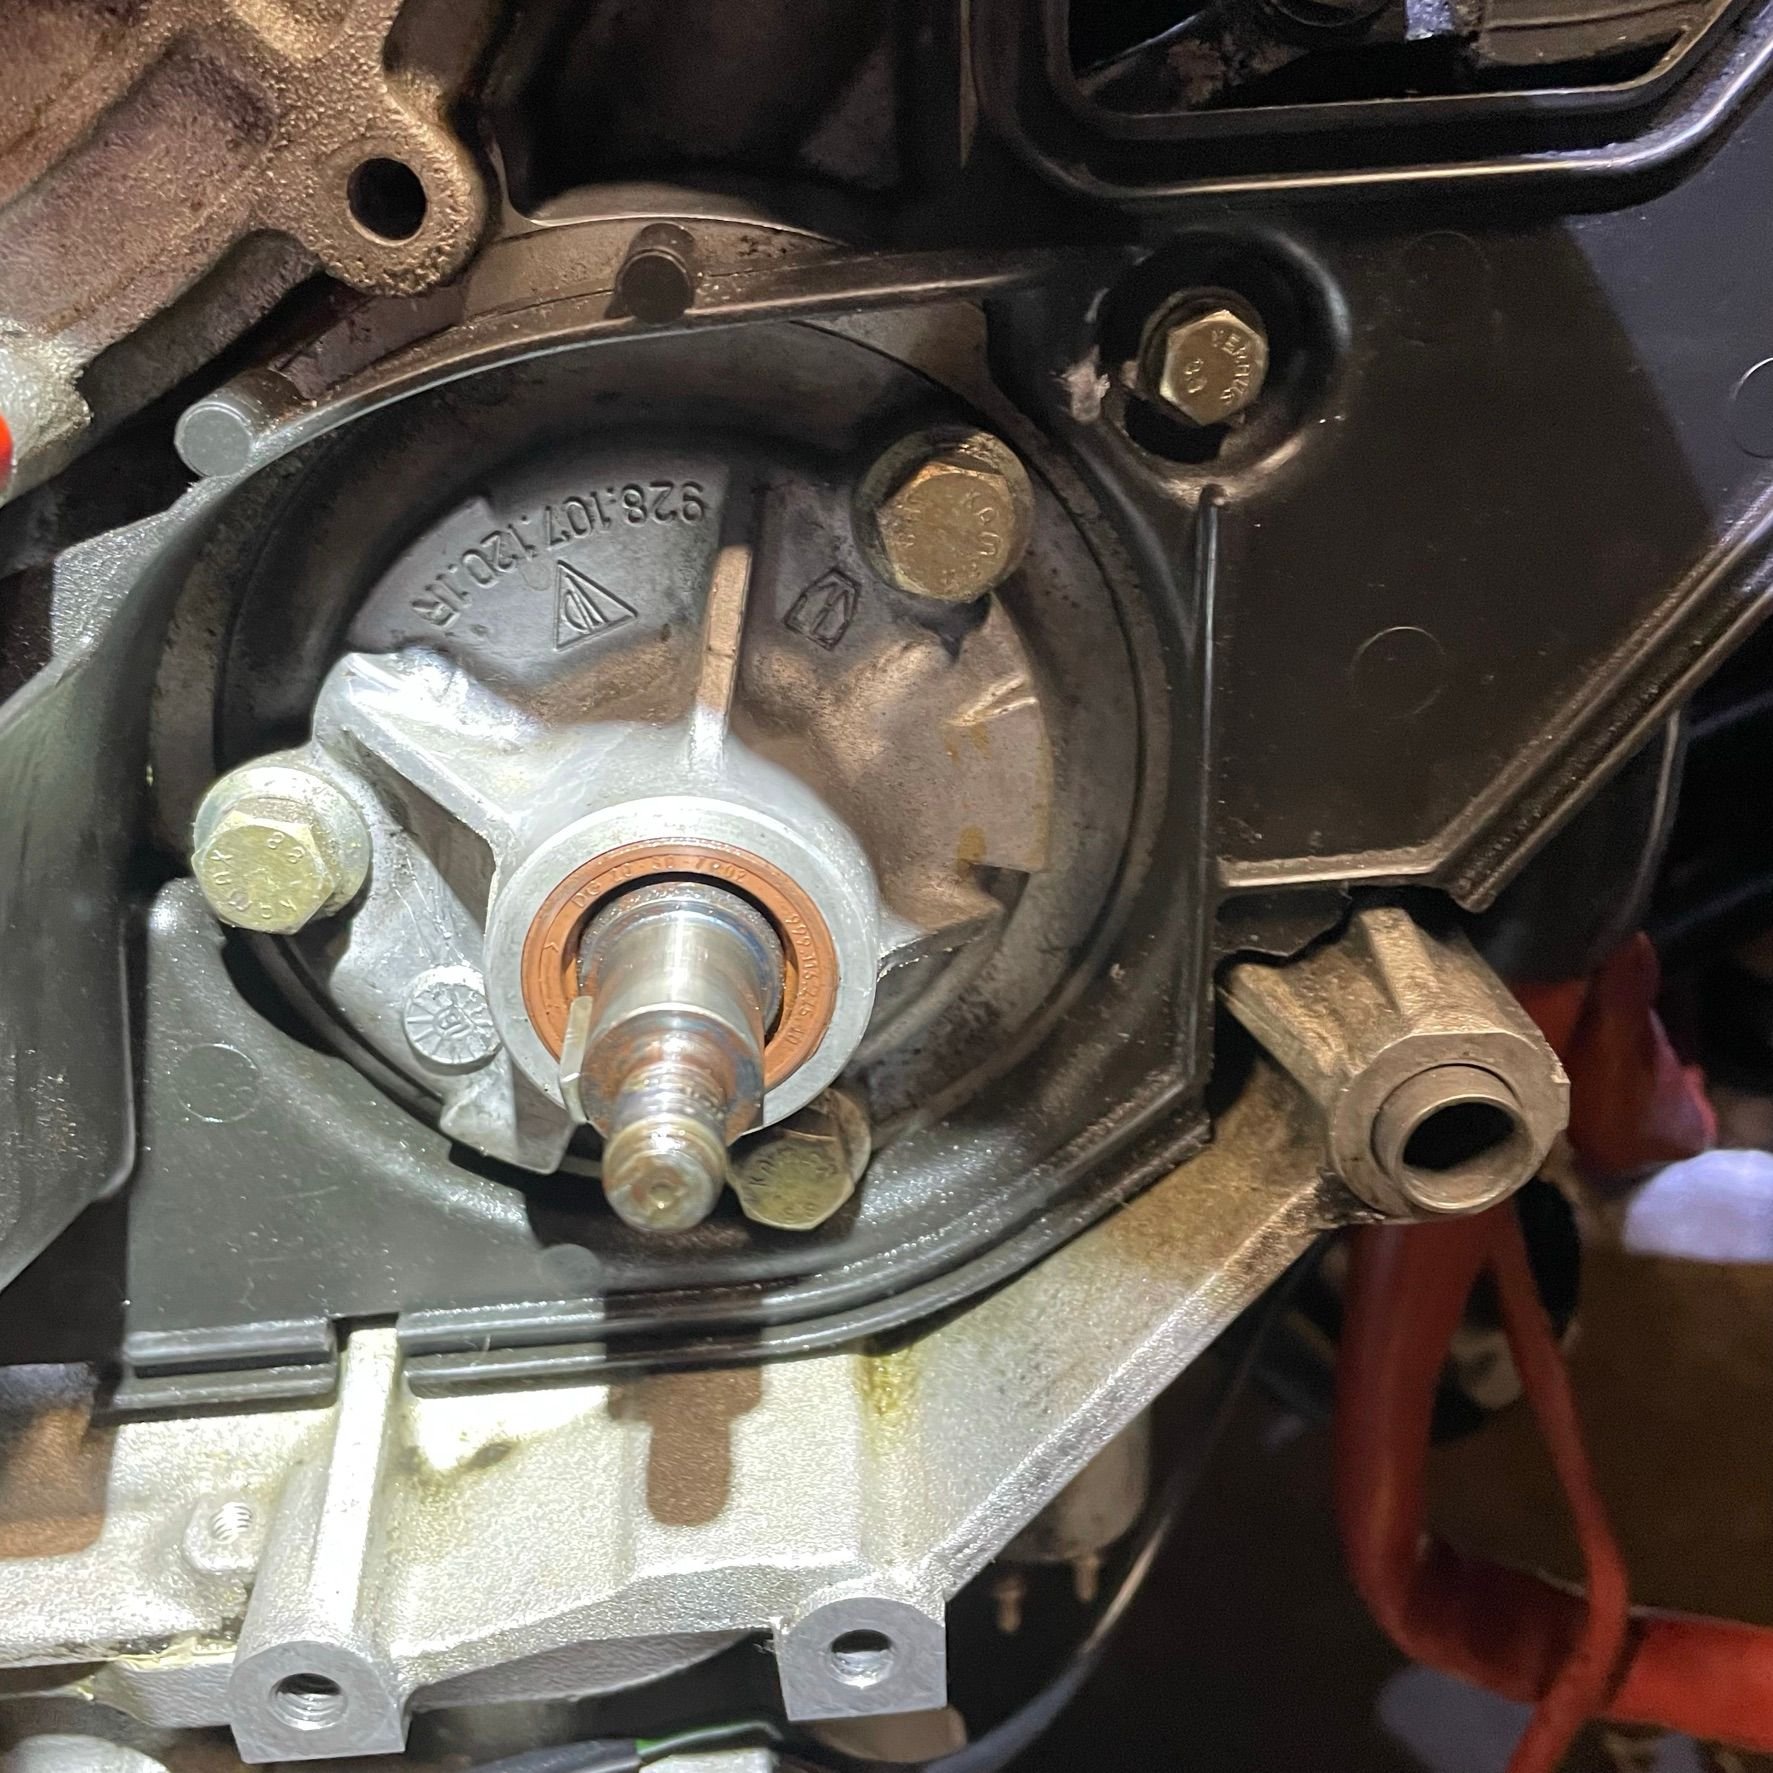
Based on several recommendations, I decided to pull the steel oil pump drive gear to verify the 1mm spacer used for the alloy drive gear was removed. As luck would have it, no spacer present.
After restringing the timing belt I set the cam timing to -2 | 0 per FredR�s recommendation.
My next objective is to get the engine back together enough to crank it over with he starter to help settle belt and re-adjust the timing. I�m guessing to to that I need to have the damper on and that should be enough. Is that a correct assumption or do I need the accessories back on?
I proceeded to install the damper. Greg Brown helped me identify this was one of his early iterations when it was installed in 2008. I used the heating trick to get the damper adapter to slide on the crank without drama.
so what�s next remove the lock and crank it over a bunch and then re-check the timing?
Today was a good day. I�ve been picking away at this project for a few weeks now slowly putting all the parts back together and today I was able to get it it back to a point where I could start the car and verify everything was operational. it�s been a big project and lots of work was done:
replaced timing belt and tensioner
new plugs and wires
new cooling fans and rebuilt final stage controller
repaired FOE harness and fan harness
New hoses for vacuum pump system
SS brake-lines
Here is the moment of truth with everything back together
I was glad to see everything seemed to start up and work properly. Fellow list member Tom D stopped by with his awesome 1993 5spd and helped with some final tests which was much appreciated.
I ran the car up to operating temp and verified the fans were kicking on appropriately and did so I buttoned everything up and lowered her back down in preparation for a shakedown drive. Hopefully tomorrow!
I�m eager to see if correcting the timing makes a big difference.

 10-09-2021, 12:17 PM