When you click on links to various merchants on this site and make a purchase, this can result in this site earning a commission. Affiliate programs and affiliations include, but are not limited to, the eBay Partner Network.
Love your raw enthusiasm and blind appreciation for a tattered old Porsche 928, no matter what it�s horrid condition might be! Trying to be respectful and nice, so I�ll just say that I don�t understand why people do this to themselves. SMH
This car has been so neglected, it literally needs everything. Do you have any concept of what that may cost?
Go slowly with this �project�, and feel free to abandon it out of better monetary sense ASAP.
Switched the power windows relay with my horn relay to check if it worked. Power windows are working! Got those rolled up.
Going to order a **** ton of relays and fuses and just replace the whole lot of them all.
Took out sparkplugs to check them out, pretty gunked up, took some sandpaper and a toothbrush and cleaned those up, currently on 4/8 and taking a lunch break.
Going to be getting into the timing belt and the water pump soon, but taking care of what I can before i start breaking stuff down to that point.
All in all she's going well, honestly hope to have her up and running within maybe 2 months or so, I'm pretty hopeful with the way stuff is springing back to life as i switch out fuses and relays.
the best bet is to pull the CE panel (fuse panel) and work on it on the kitchen table. It is very quick and easy to do, just be very careful when unplugging each plug along the bottom row - there is a little slide in the center of the panel and you slide the lever to unlock the plugs. Carefully pull them out one by one (they may be brittle). Once the panel is out, in the footwell, you'll see the brown wires attached to the firewall - these are ground wires - remove the bolts holding them and clean them to nice and shiney and put back. On the panel itself, remove every fuse and relay- clean everything with steel wool (or new fuses as you said) and use DeOxit in every slot for fuses an relays. Do not mess with the back of the panel no matter how tempting it might be - it is a snake pit of wires.
Once it is all cleaned up, clean the plugs real well with DeOxit too, then put it back in. Also then clean the surface points for every other ground that you can get to - there is a big cable from the block to the engine bay on the lower passenger side, and of course, the ground strap on the back from the battery to the hatch area - clean to shiney, and deOxit. For the connections in the engine bay and that are exposed to the elements, use dielectric grease on the connection AFTER it is cleaned and put back together - many people do not know that dielectric grease is actually non-conductive, but it does protect.
At some point, you'll pull the pod - not a bad job once you figure out the alignment of the 2 bolts that hold it on - be very careful and see how they are aligned as you remove it, otherwise it is a byotch to get back on later. Anyway, pull the pod and gently clean every contact and plug there too, including the blades on all switches. Again, the magic elexir Deoxit is your friend when reassembling. There are ground connections back there too.
Also the rear hatch has a couple of wires and grounds - for the speedometer, and other things. Clean those wire ends very well.
Once you do all of this - about a weekend of work, and essentially free other than your time and some Deoxit (and whatever relays and fuses you buy), you'll be amazed at what wakes up, no matter how bad the car looks.
Great advice my man thank you!! I'm gunna be pulling the CE panel as soon as the fuses get here, I'm a bit stalled waiting on those as well as waiting on a day where i have the time to go pick up the air filter tubes, Also appreciate the link the writeups looks great!!!
As soon as i make some more progress i'll post it up here
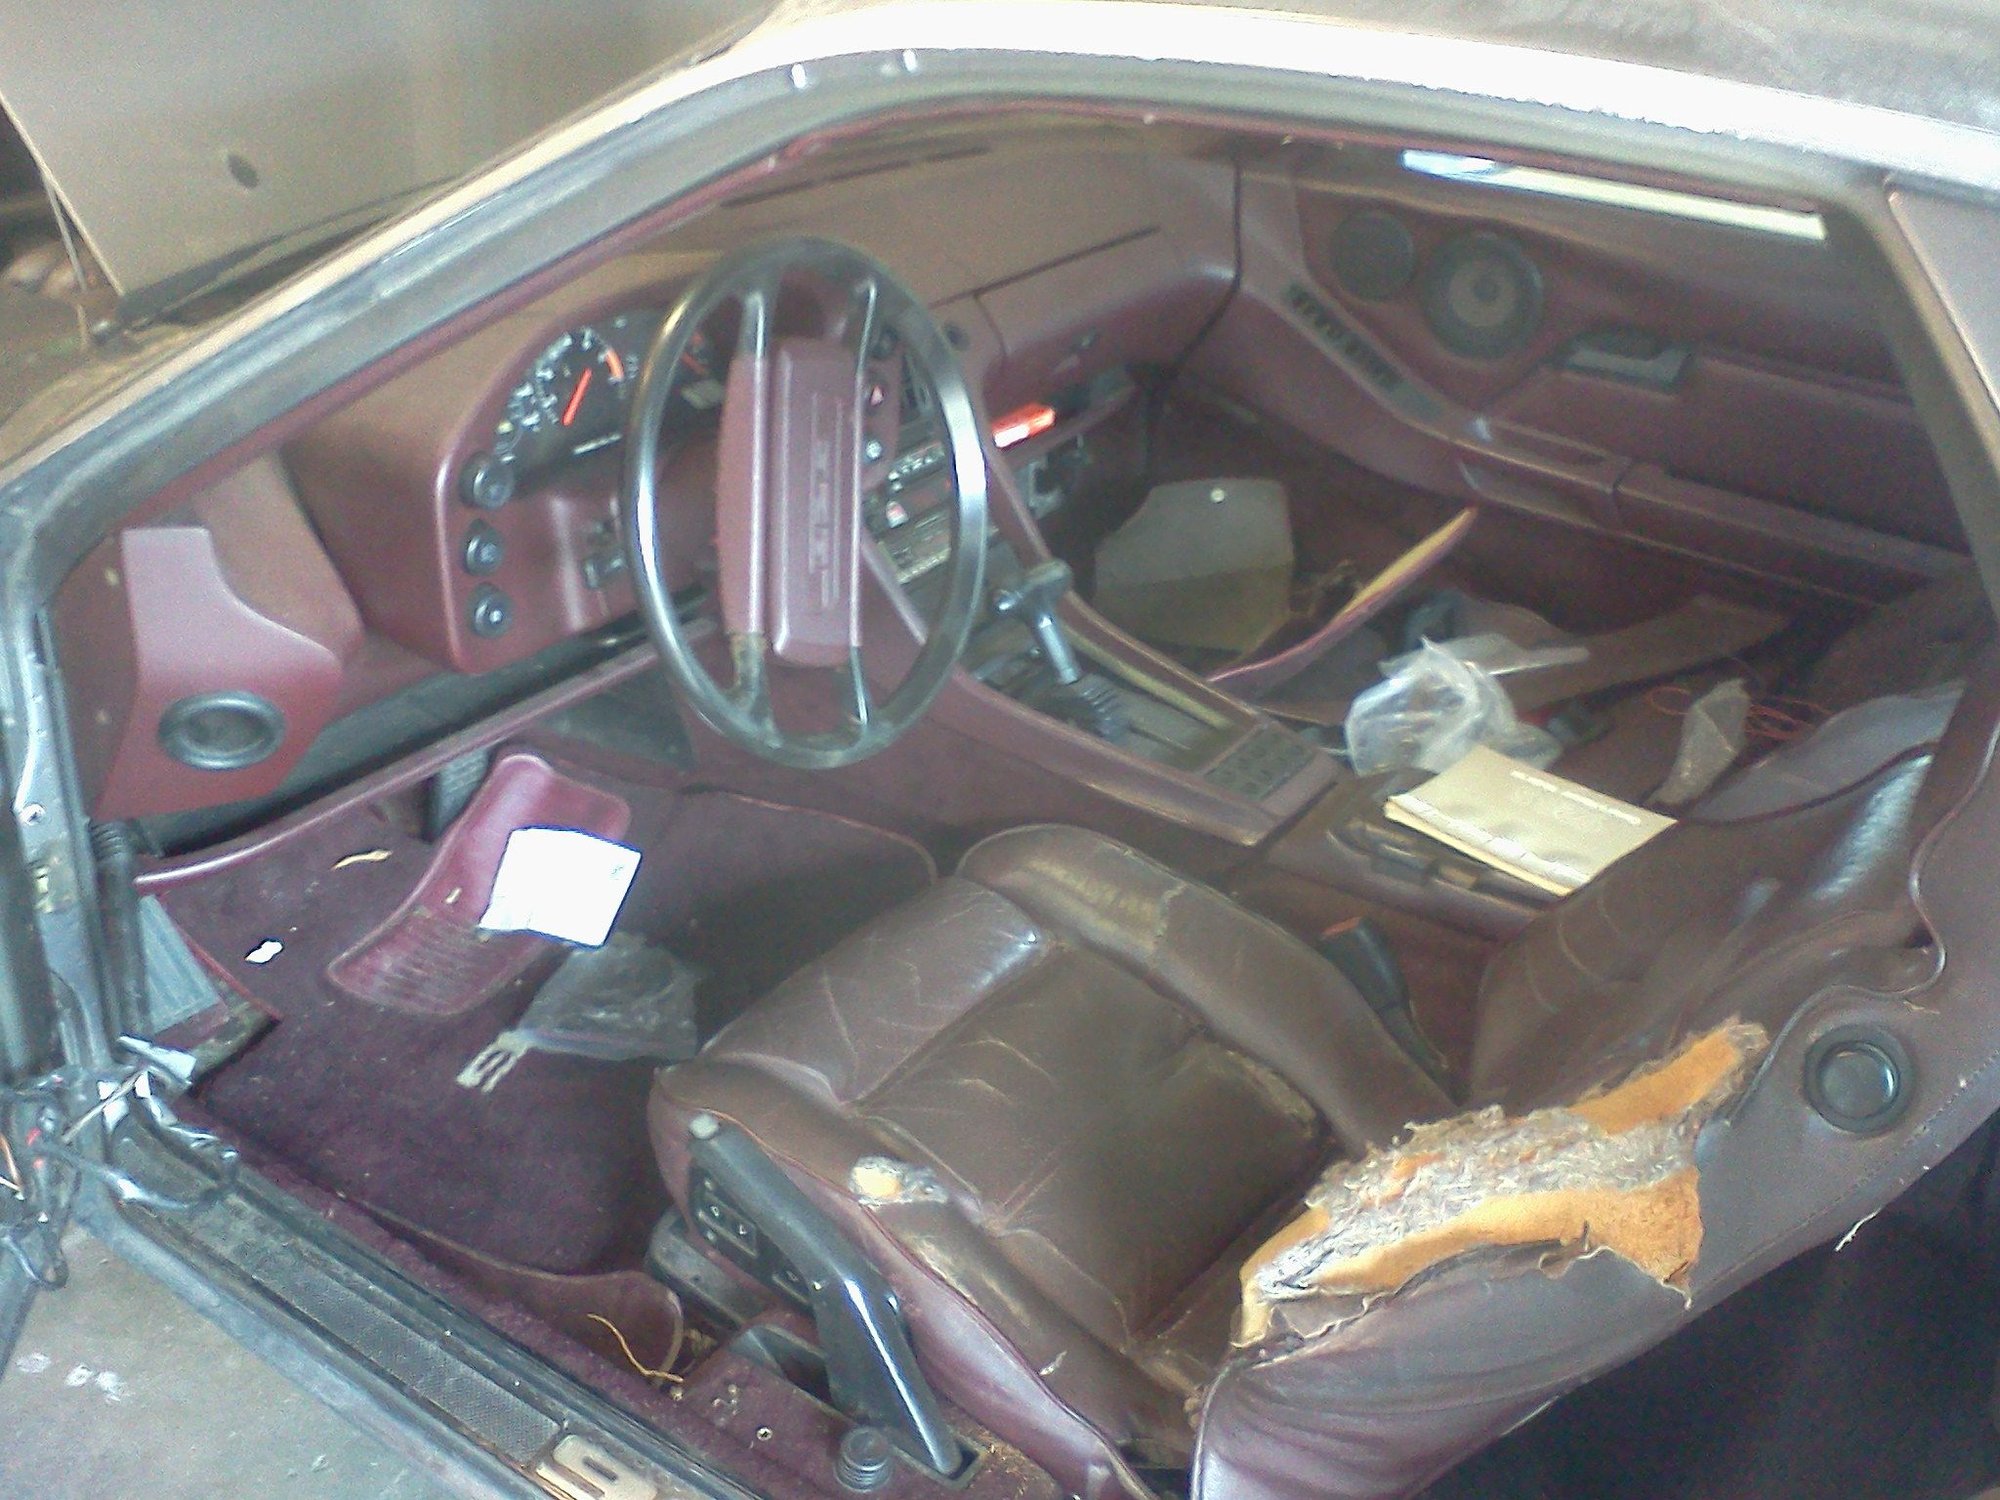
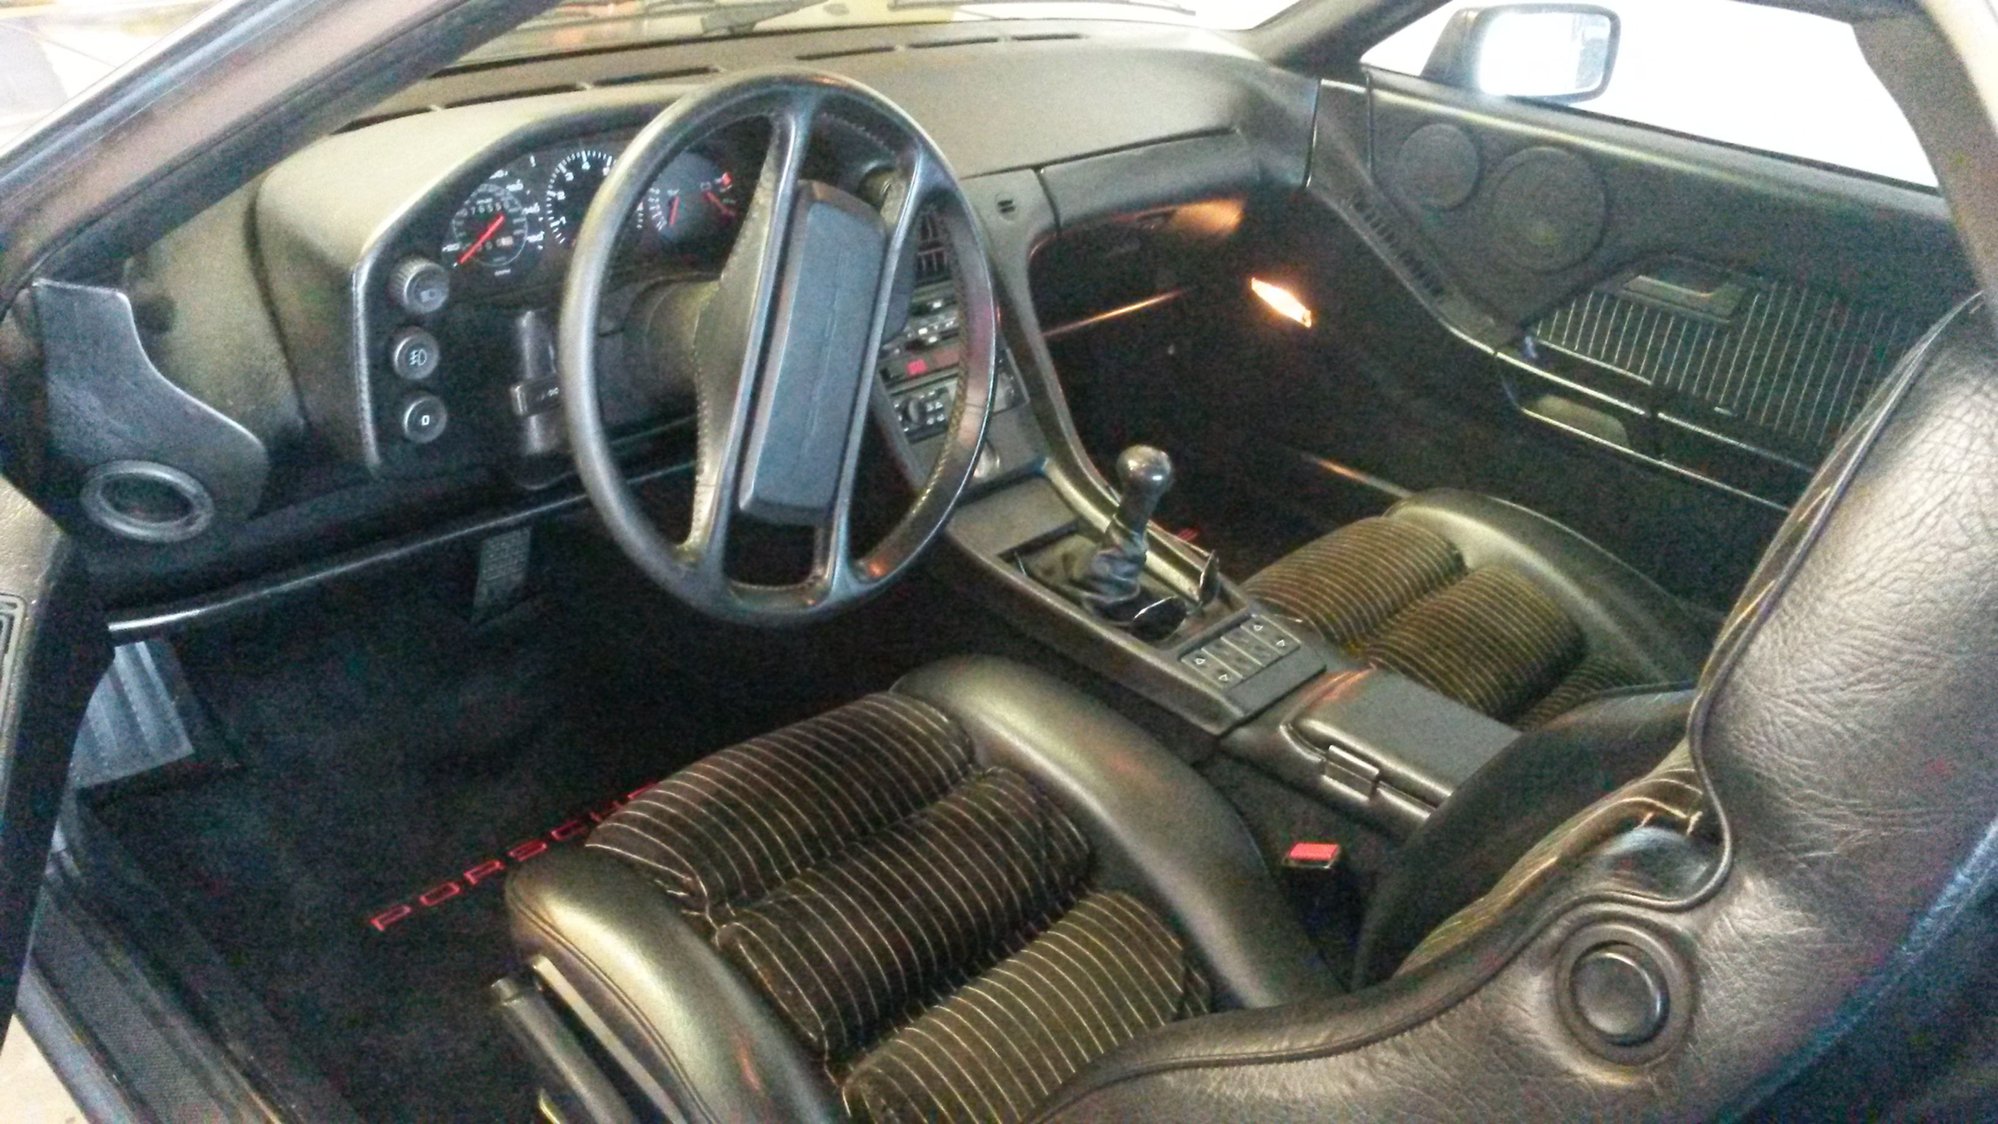
welcome to the club - this car is totally fixable - going to take time (lots of it) and perseverance - here's a pic of mine when i started on it around 2011 and one today - been driving it 6 years now - good luck
Update: Life threw me off my game for about a year, but finally able to get back out and get cracking on this bad boy.
Current Project Goals for this next week:
CE Panel Refresh
Ground Point Refresh (2/13 Finished)
Wanted to get some pictures of what I'm cleaning up but started to get rained on right at the end of working, so pictures will be along tonight or tomorrow!
Rain stopped up, gave me enough time to get out, get my pictures, and clean off a third point!
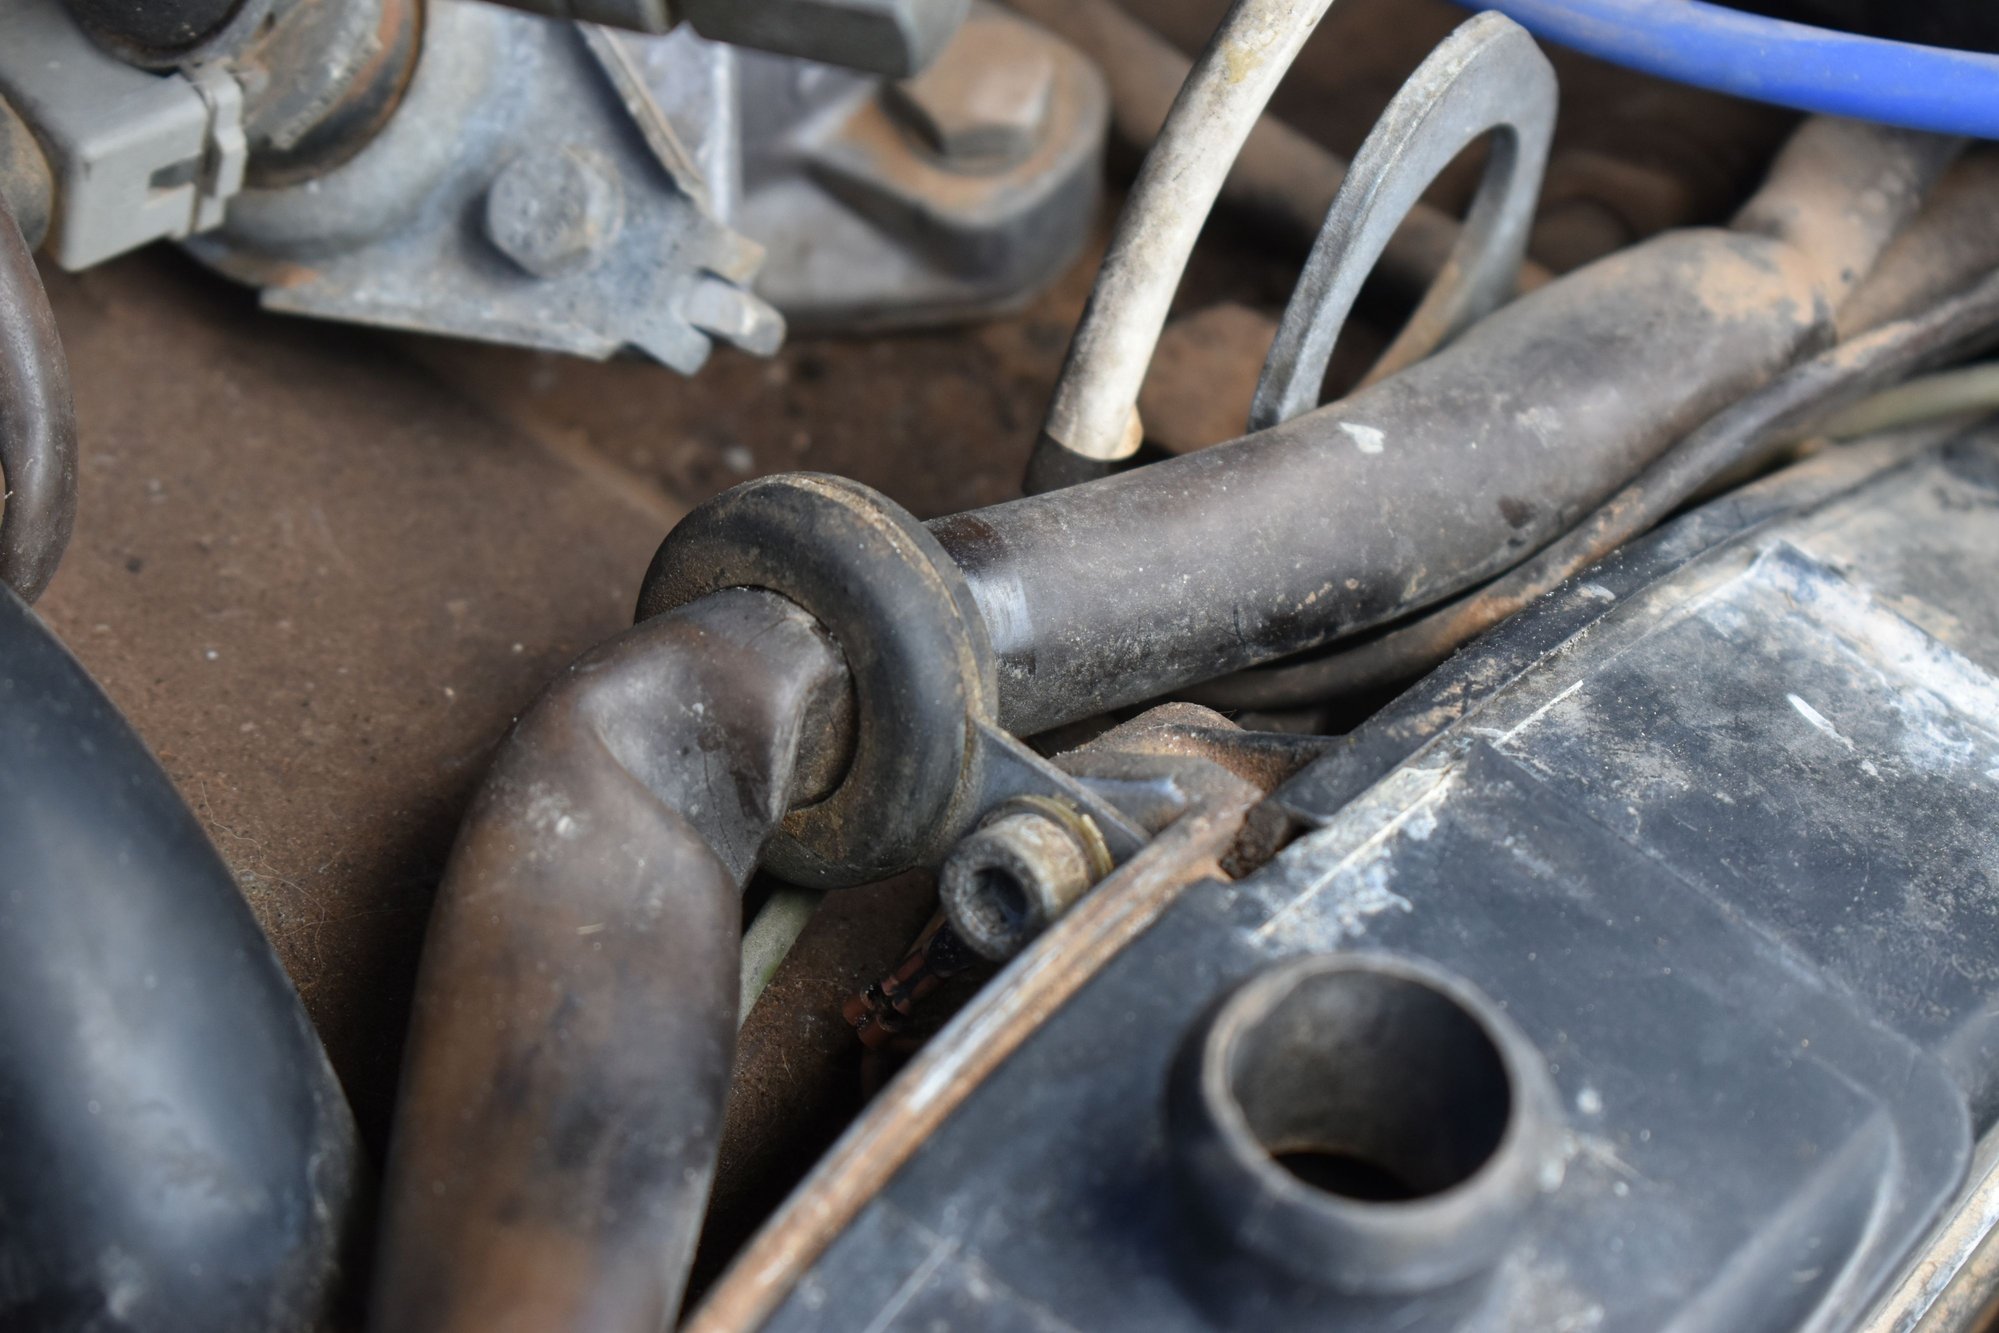
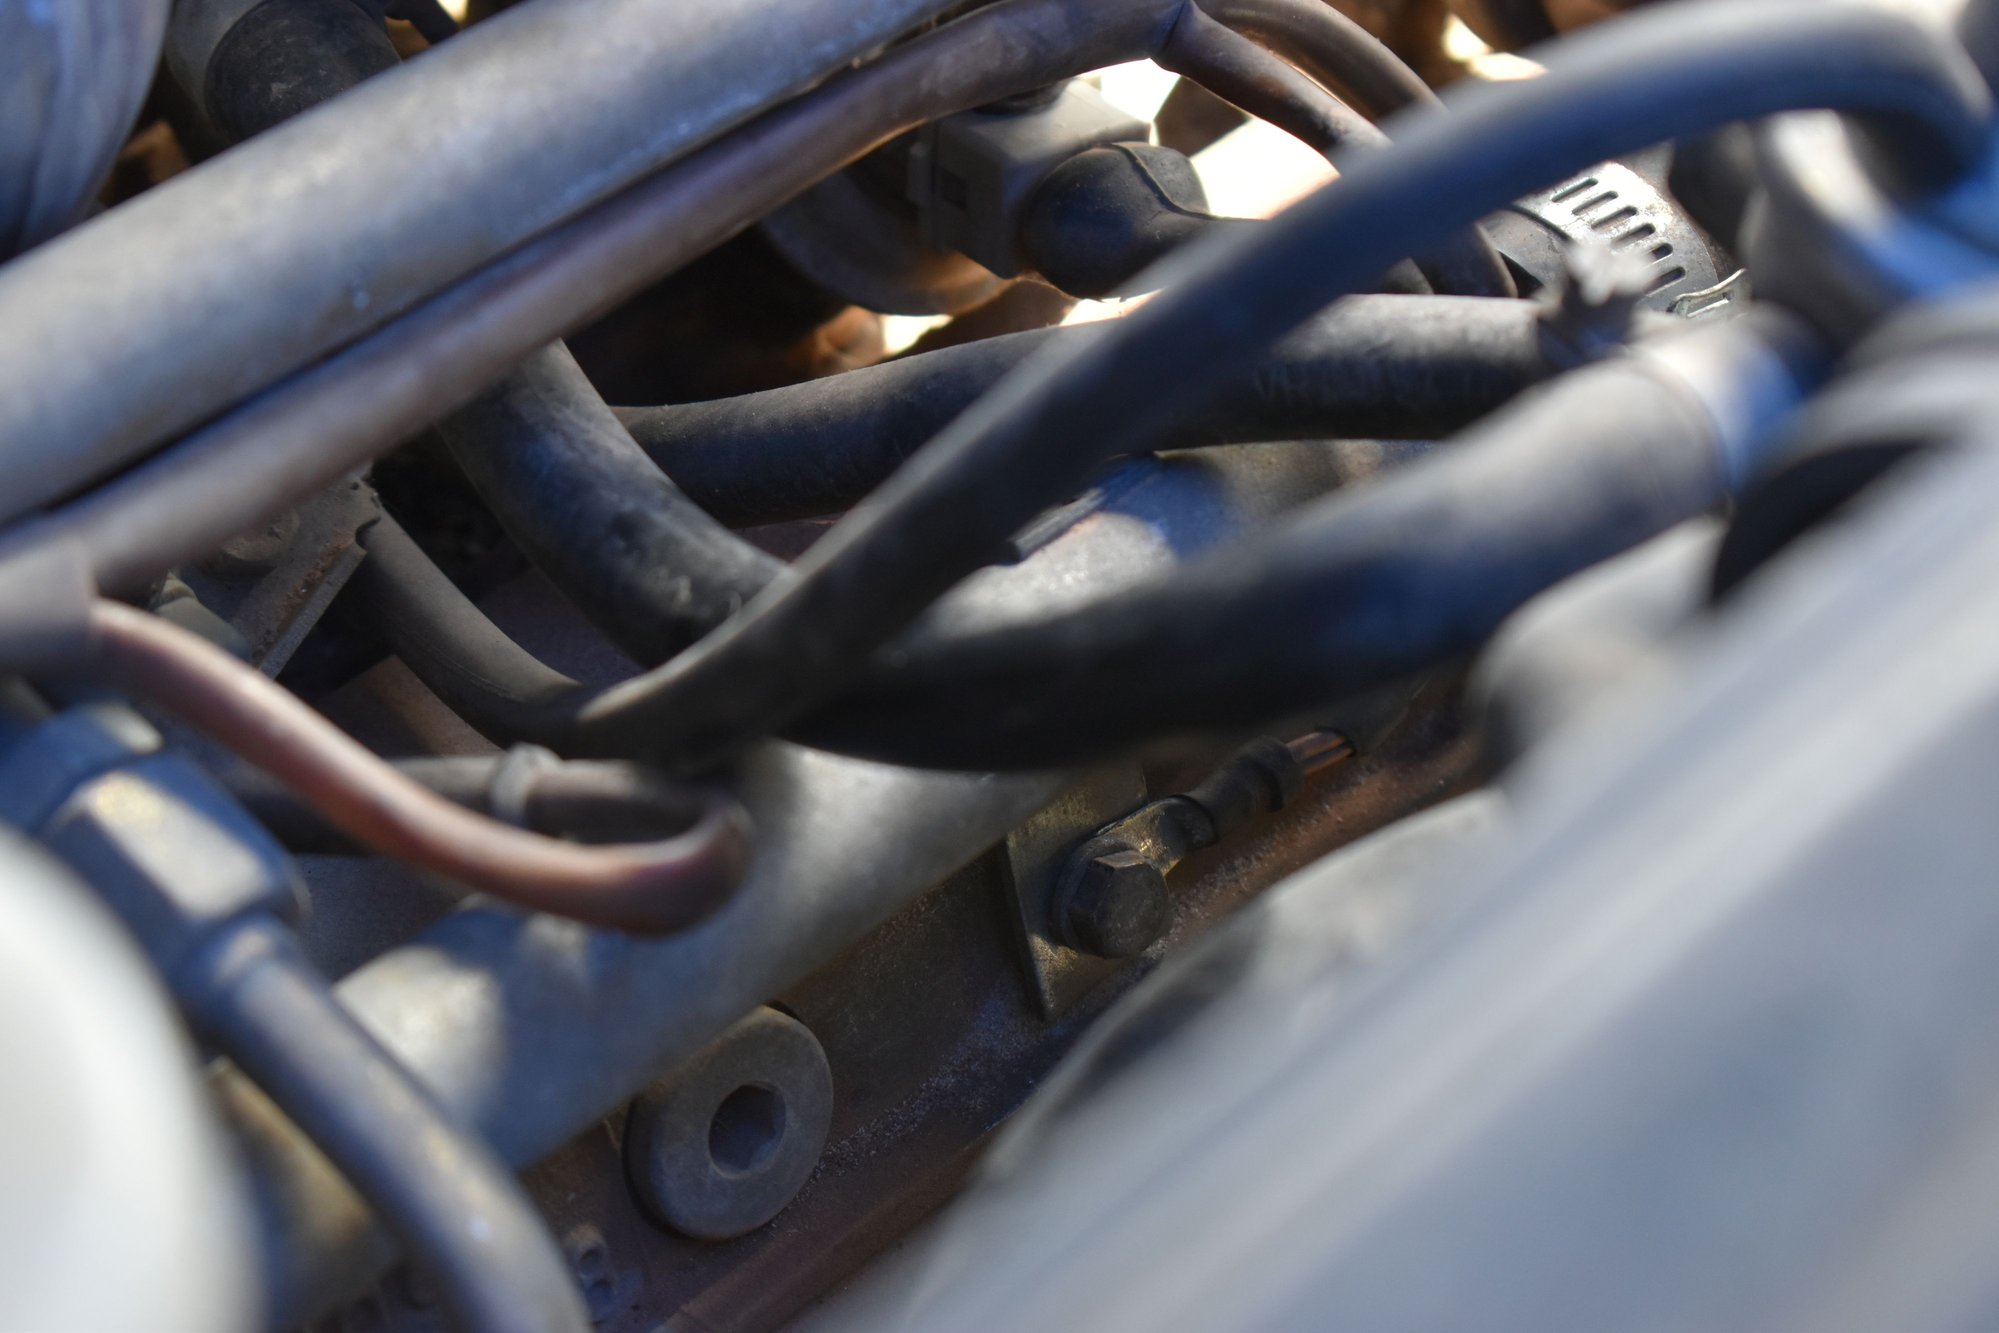
The three I got too were the one on the front of car by the headlight motor, the one attached on the passenger side near the air intakes, and lastly one of the two attached to the passengers side engine block.
Tomorrow is going to be front of car passenger side, second engine block point on passenger side, and then jacking the car up to get to the ones a little more underneath!
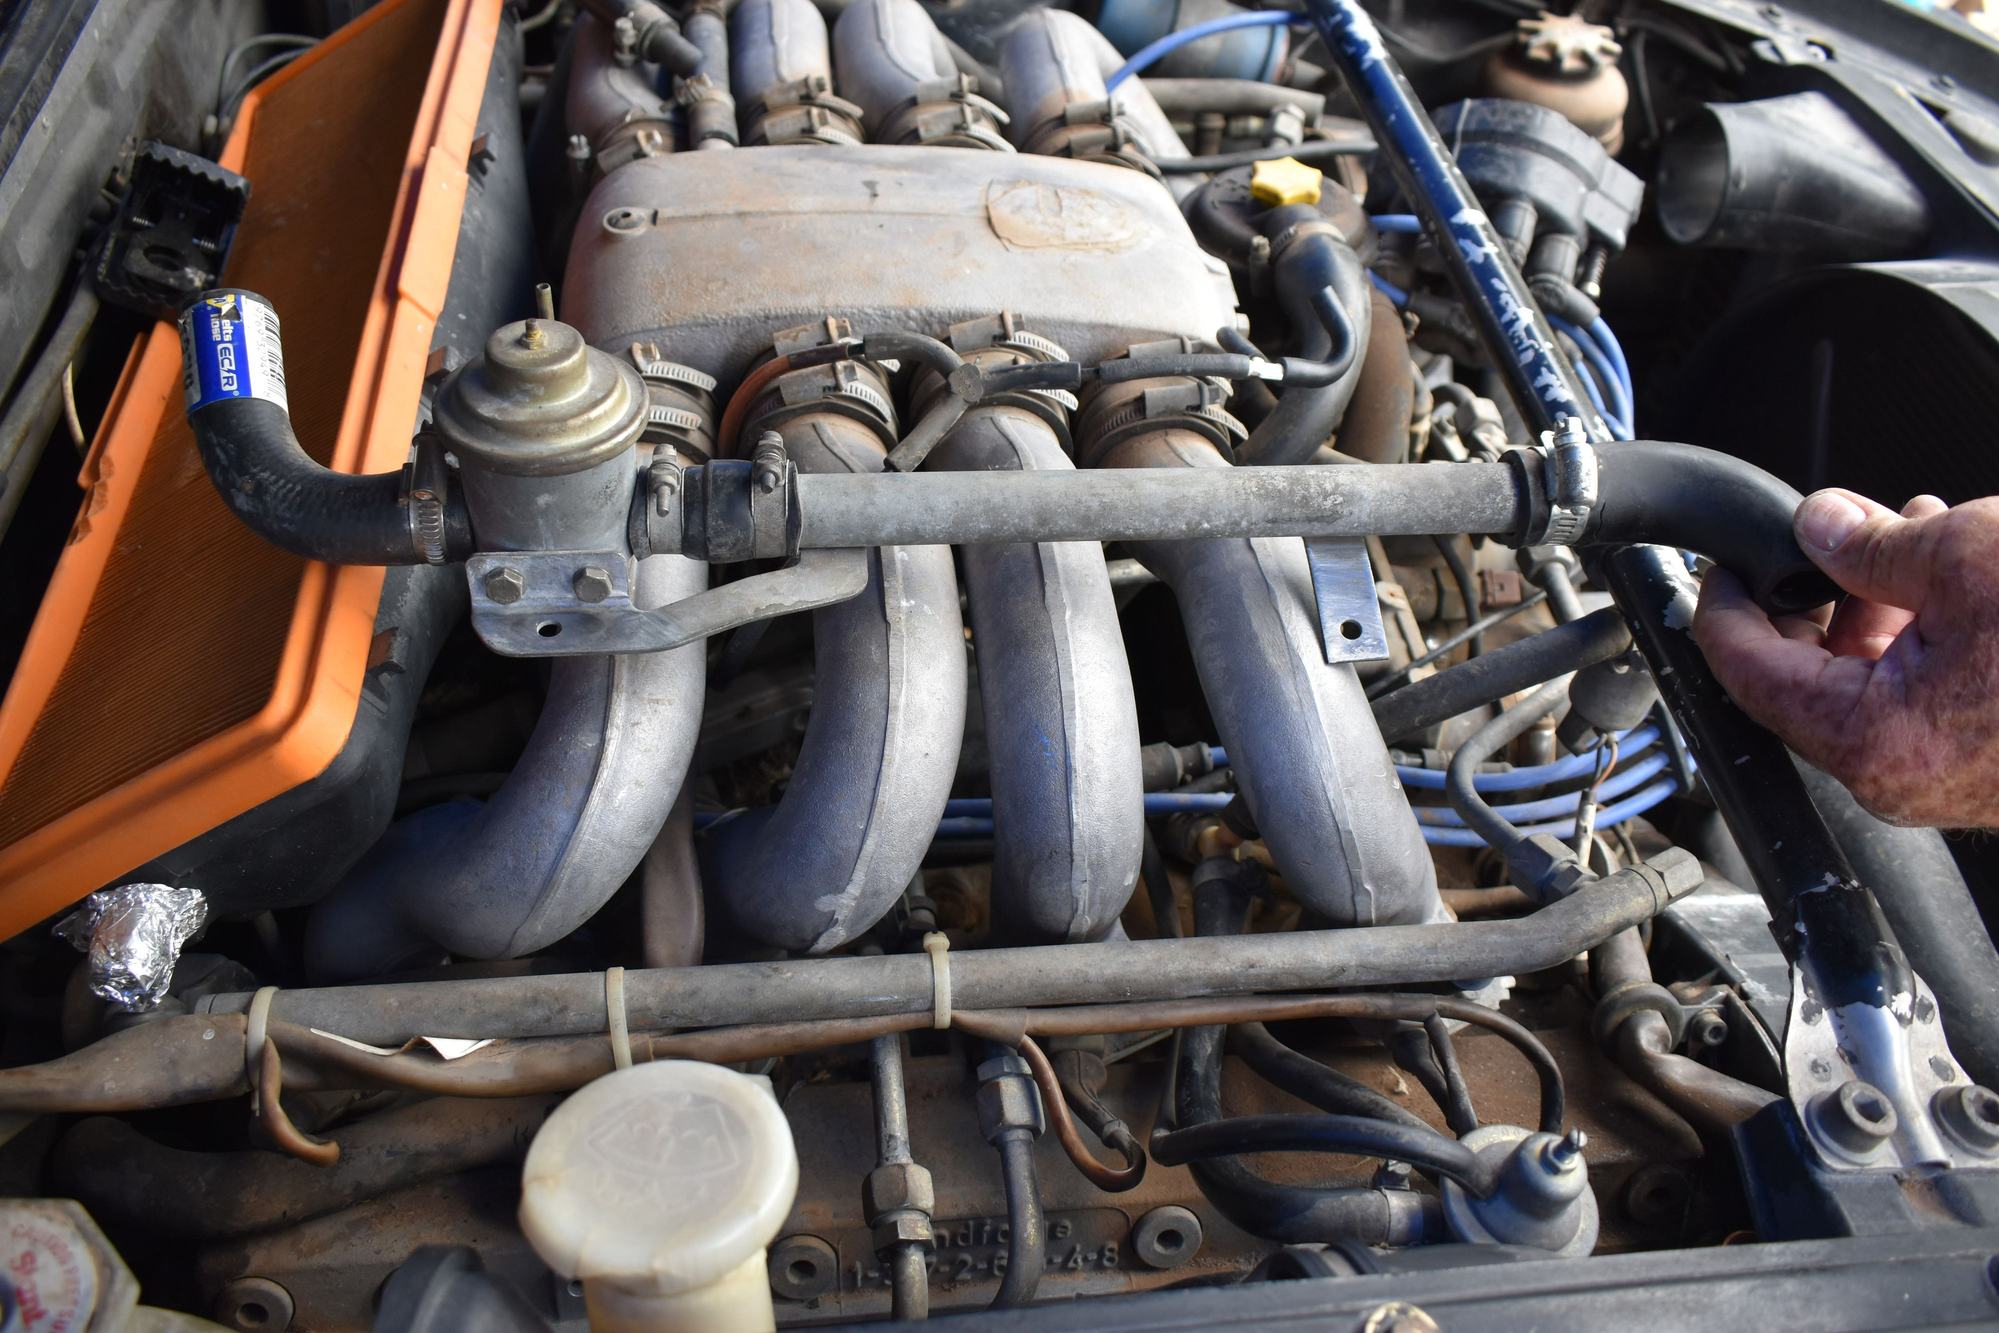
The areas around aren't the most clean, however the actual contacts have been sanded down to bare metal and make solid contact. Front GP Near Air Intakes Passenger Side GP Near Headlight Motor Mount Driver Side First GP On passenger Side Engine Block
This godforsaken air pump. Had to take this entire line out to properly clean the grounds and brackets attaching this.
Took a solid hour and a half getting this out to get to the GP underneath it.
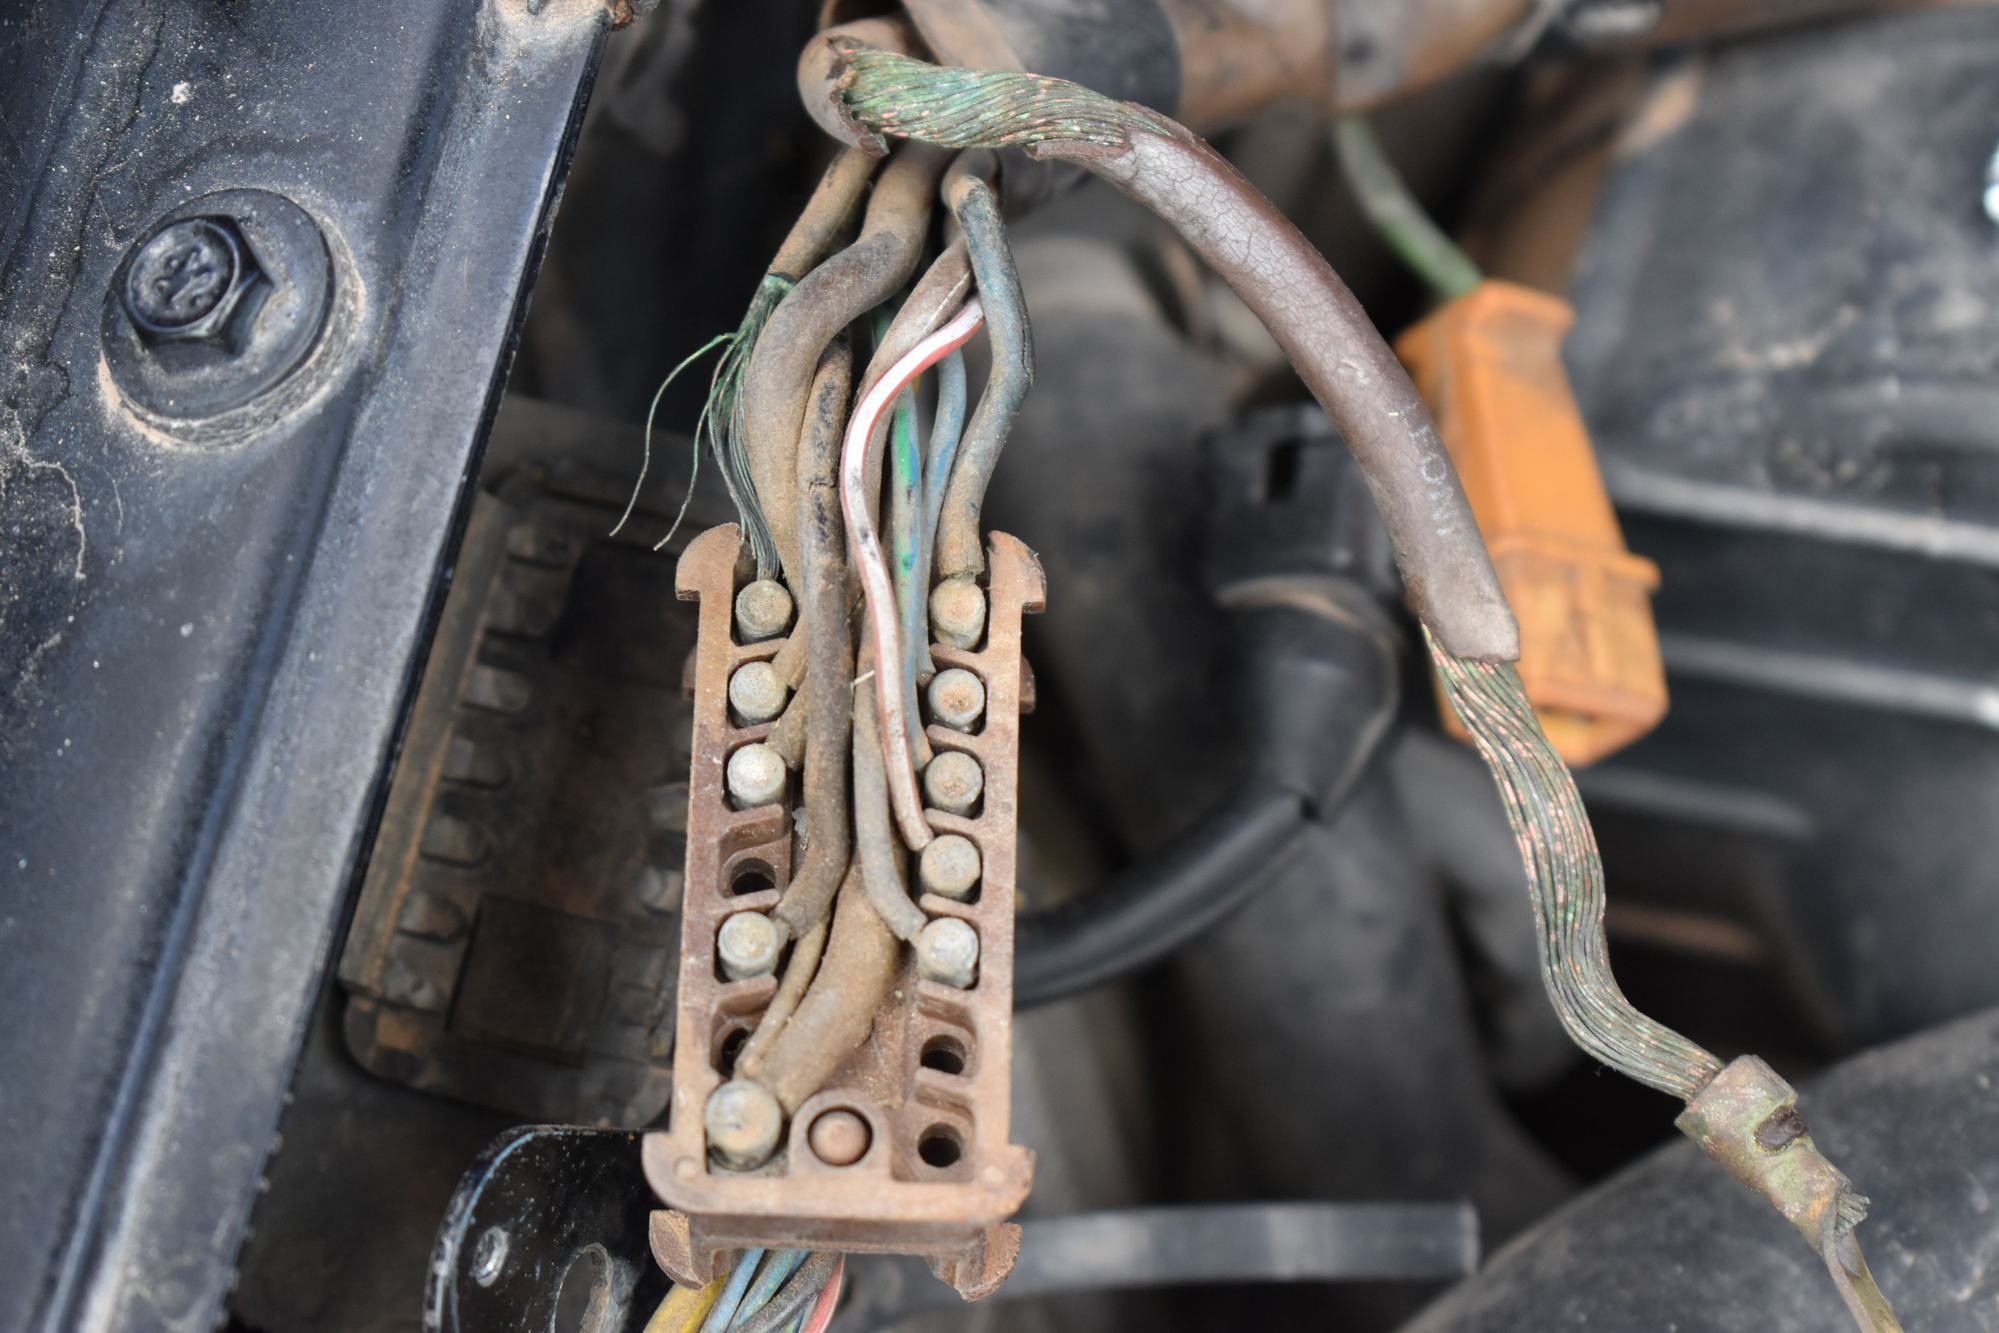
Also uncovered some just lovely damage up by the 14 pin connector and underneath its cap as well as running to the hot post from the alternator. Gunna end up pulling out this entire harness and refreshing the torn up wires.
Me losing spark after the first time I turned this thing over last year is starting to make a lot more sense.


 06-29-2021, 10:26 PM