When you click on links to various merchants on this site and make a purchase, this can result in this site earning a commission. Affiliate programs and affiliations include, but are not limited to, the eBay Partner Network.
I recently completed most of this list on the drive side. The best advice I have is to be patient, take your time and follow the WSM for adjusting the fit of the glass once reassembled. The glass itself will come out easily once the seals and felts are removed. You will have to unfasten the glass from the slide anyway to replace it so might as well take it out to clean it thoroughly.
The mirror can be tricky unless you have the correct tool to disconnect the pin connectors.
I've done this on both my doors a while back. The one piece I did that is not on your list is the rubber/felt window trim that goes around the window frame. If you are doing this then you'll have to remove the interior trim piece that goes around the window frame. There are a bunch of little metal tabs and probably half of them will break off when you try to remove it. I was able to get all but one to securely reattach using JB Weld.
Take some good close-up photos of the nylon window slides and their mounting position before you take them out. They have a lot of adjustment and the closer you can get to getting them "right" the first time, the less adjustment you'll have to make to fine-tune it.
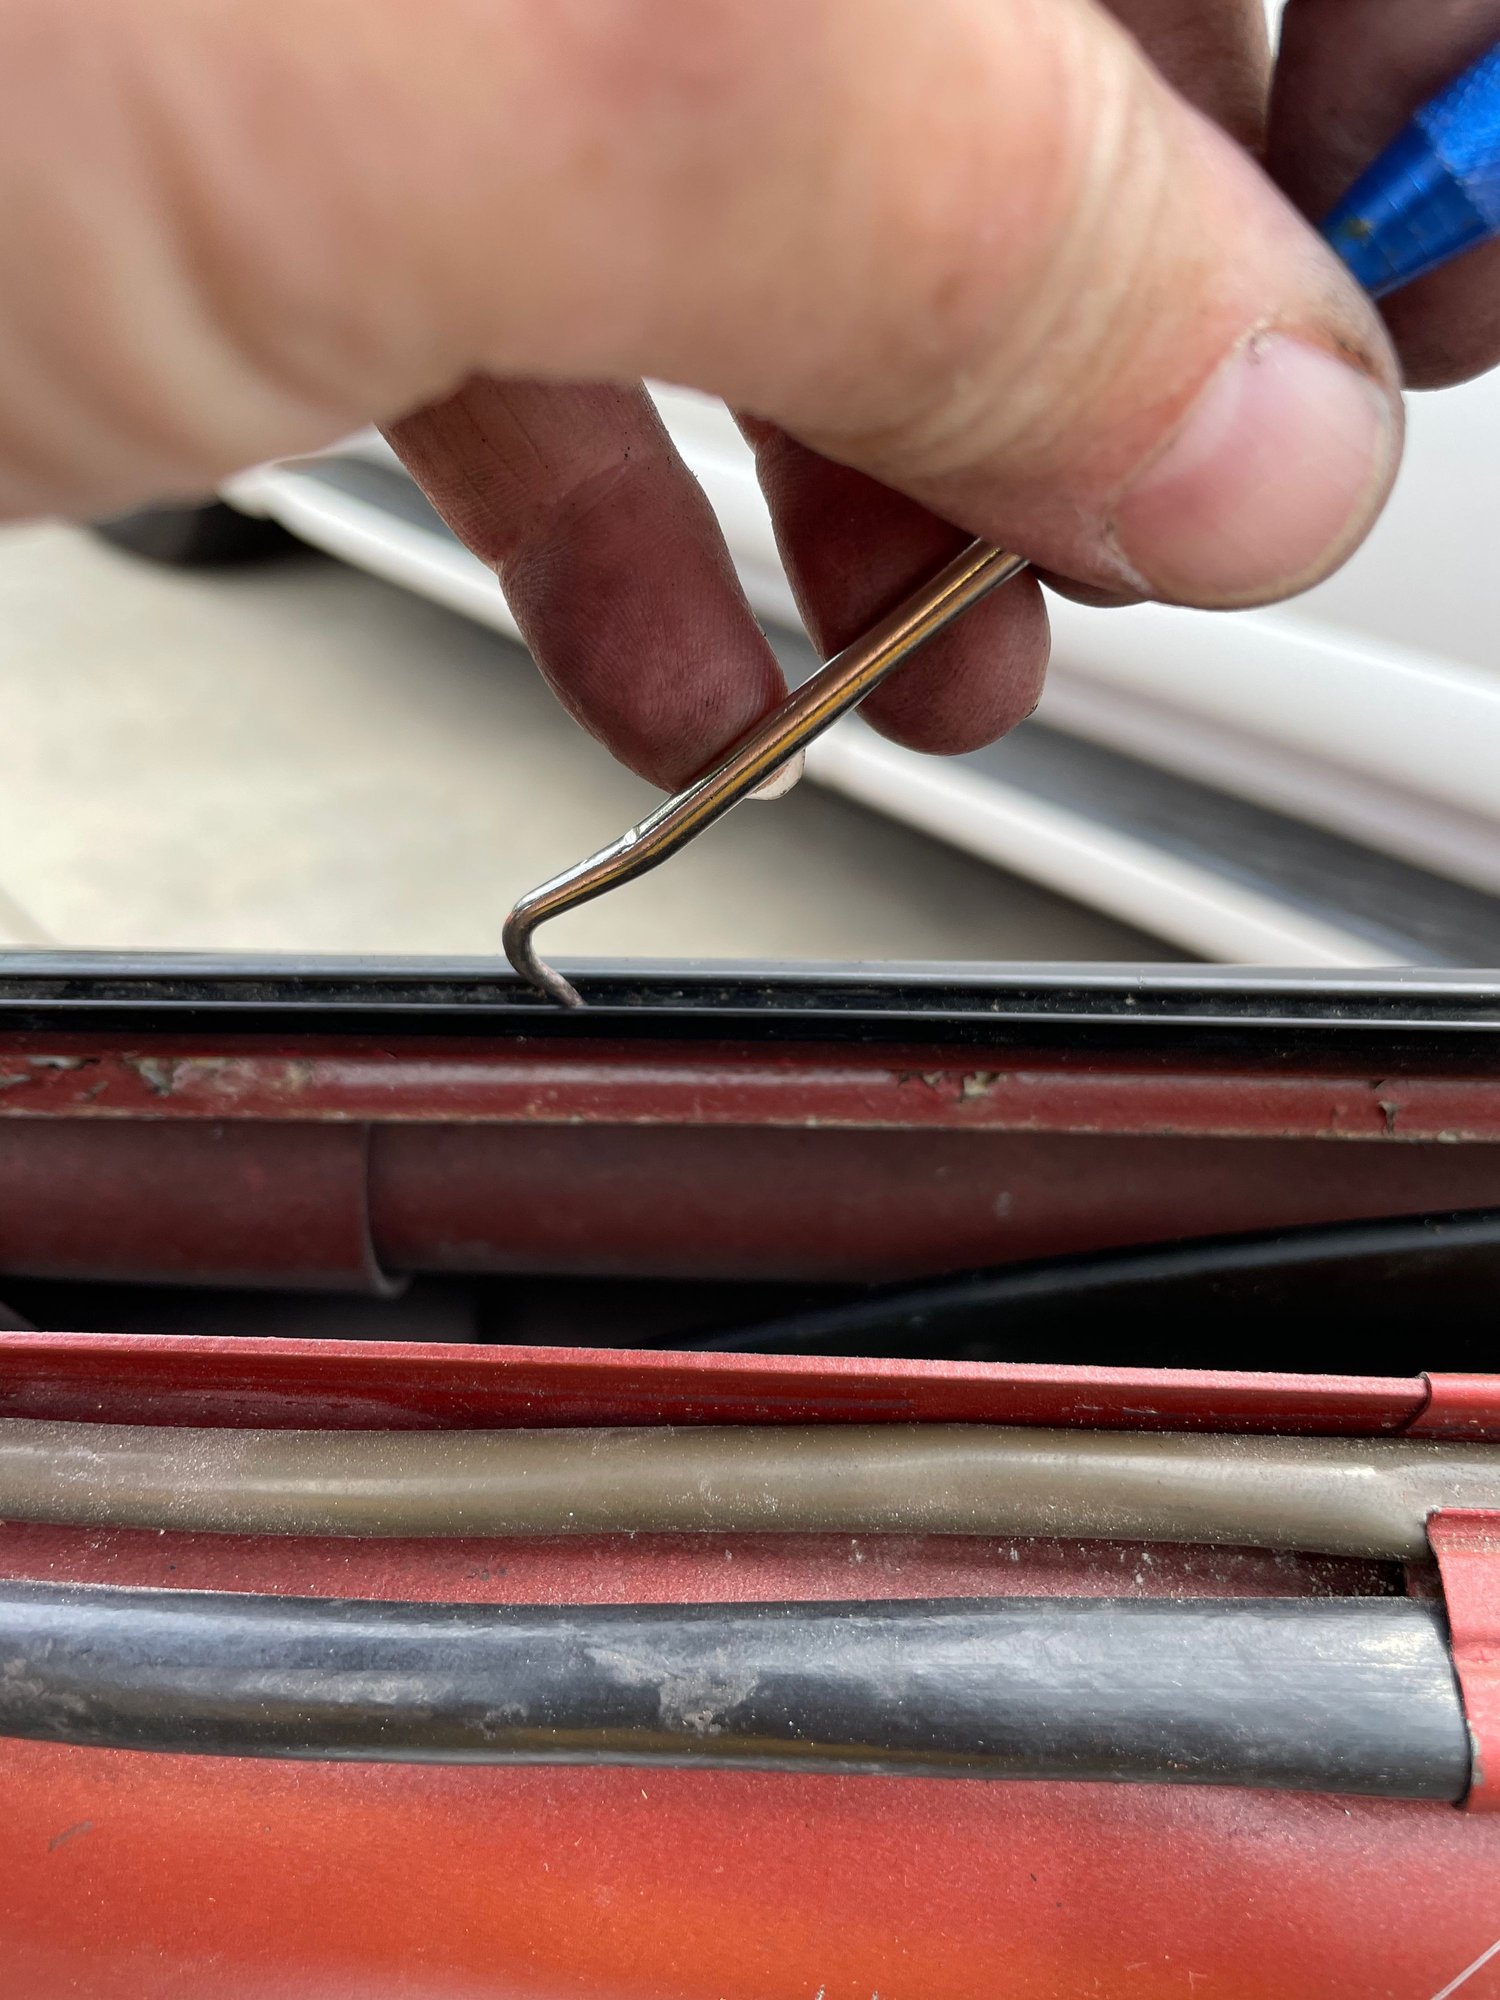
You'll want to install the outer scraper while the window is out. you'll have a lot more room to work.
Thanks all - A few pictures to update the work so far. The job has not been nearly as bad as I thought it would be thus far. But have only really disassembled everything. My big issue right now is another thread I posted to get some more traction - the door lock motor on the passenger door is out of sync with the driver door. Apparently it can be indexed by removing the cap to the motor unit and reattaching, so I will be trying that next.
So...everything was disassembled without much problem. See comments below pics.
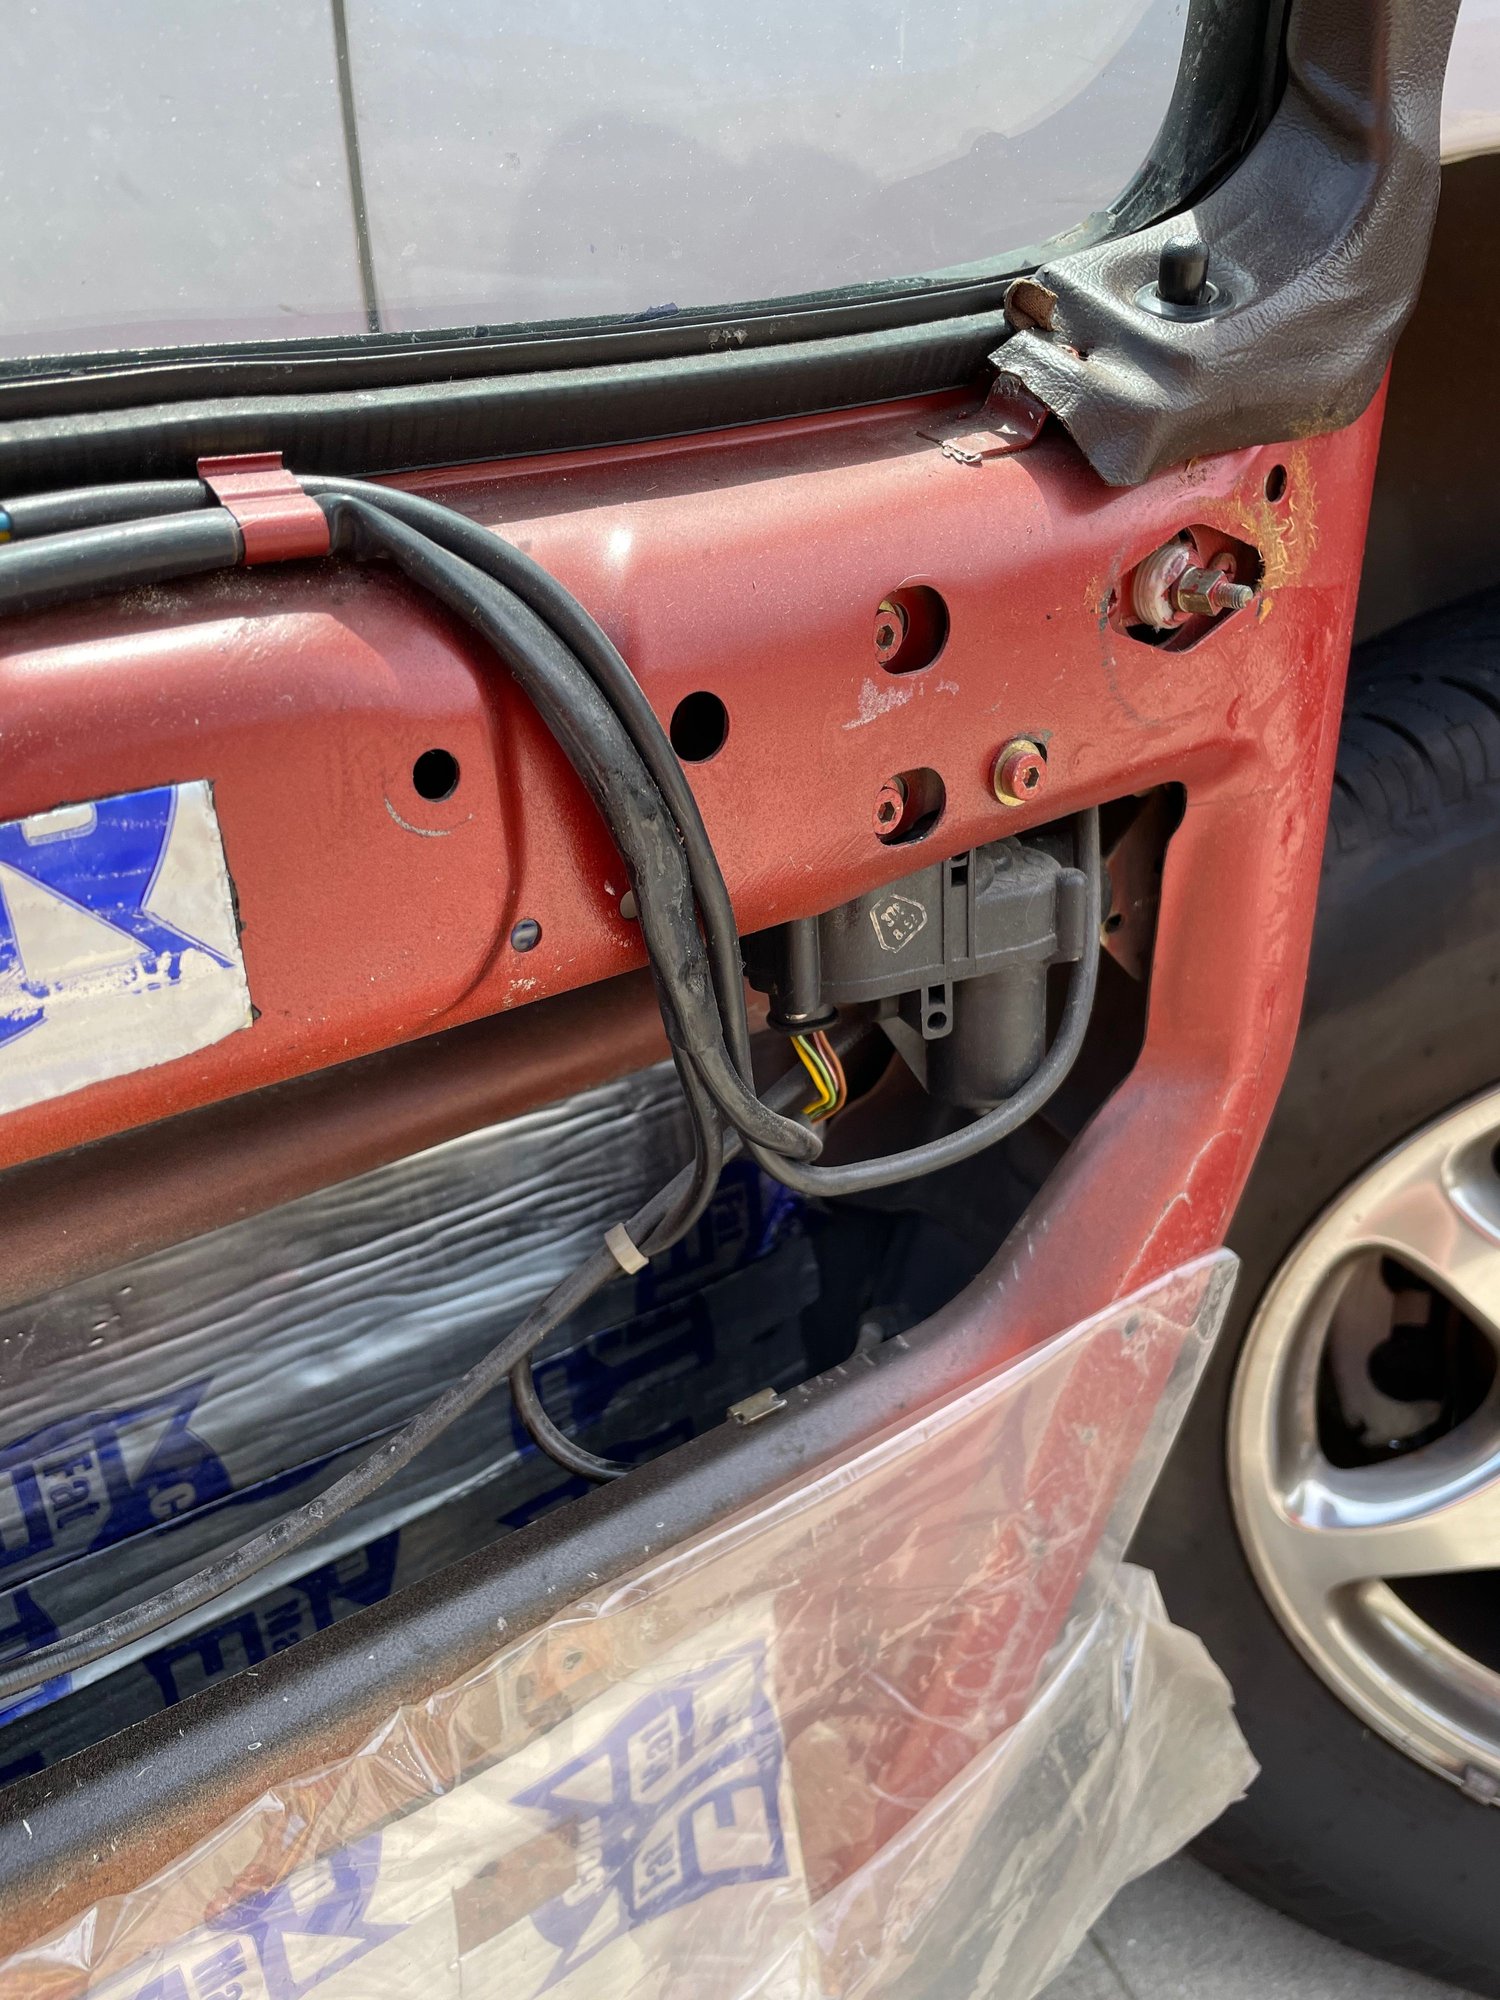
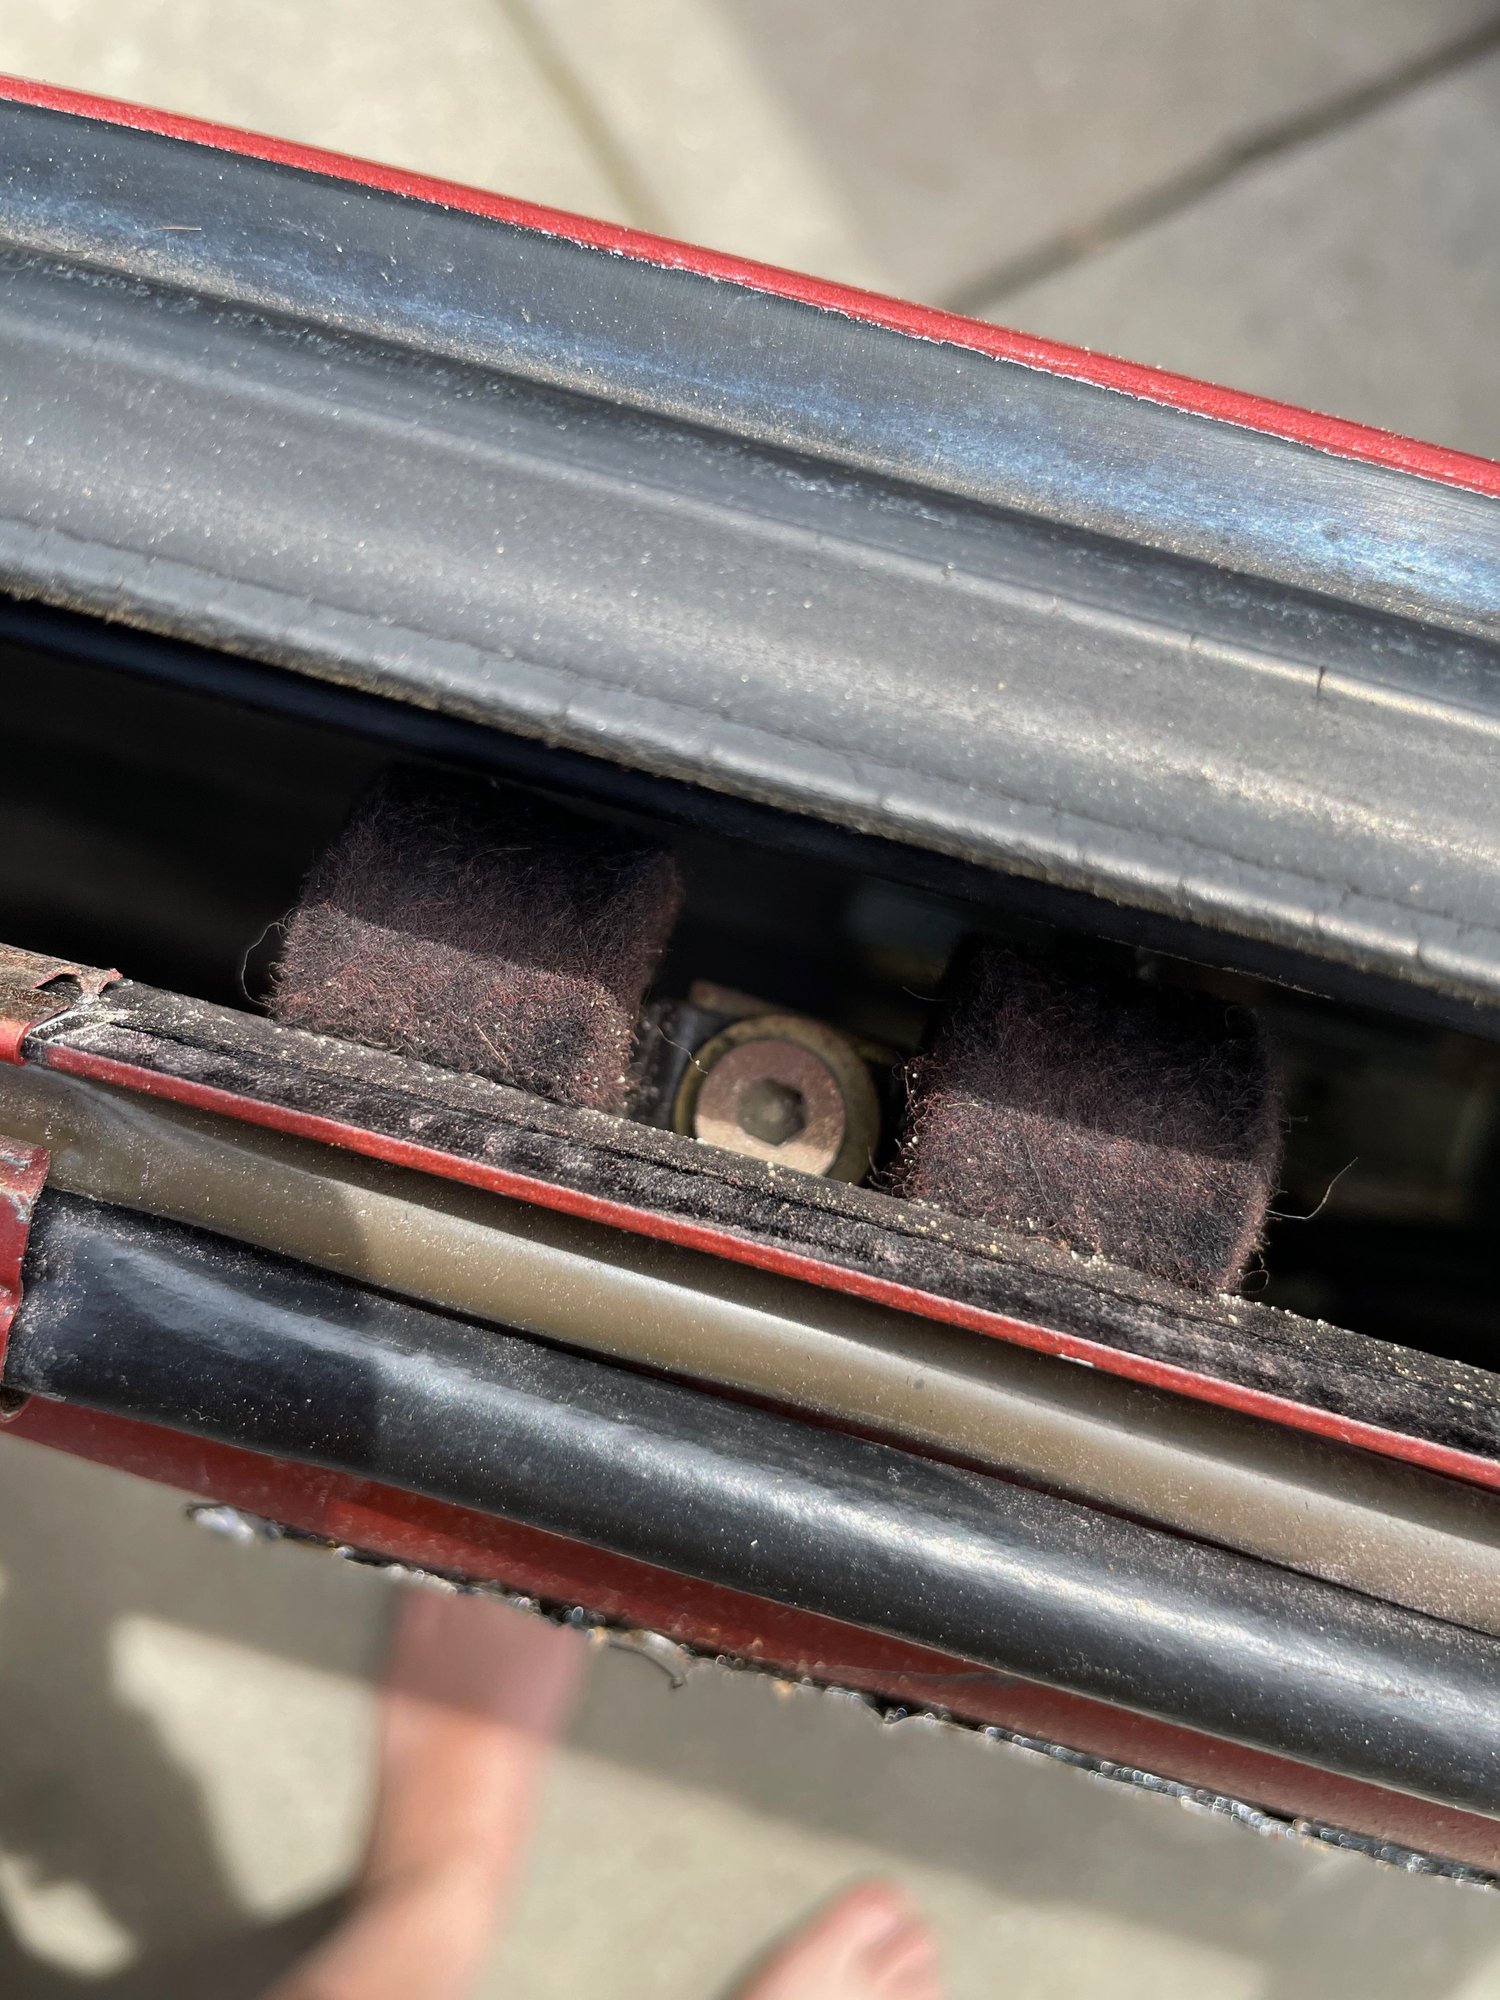
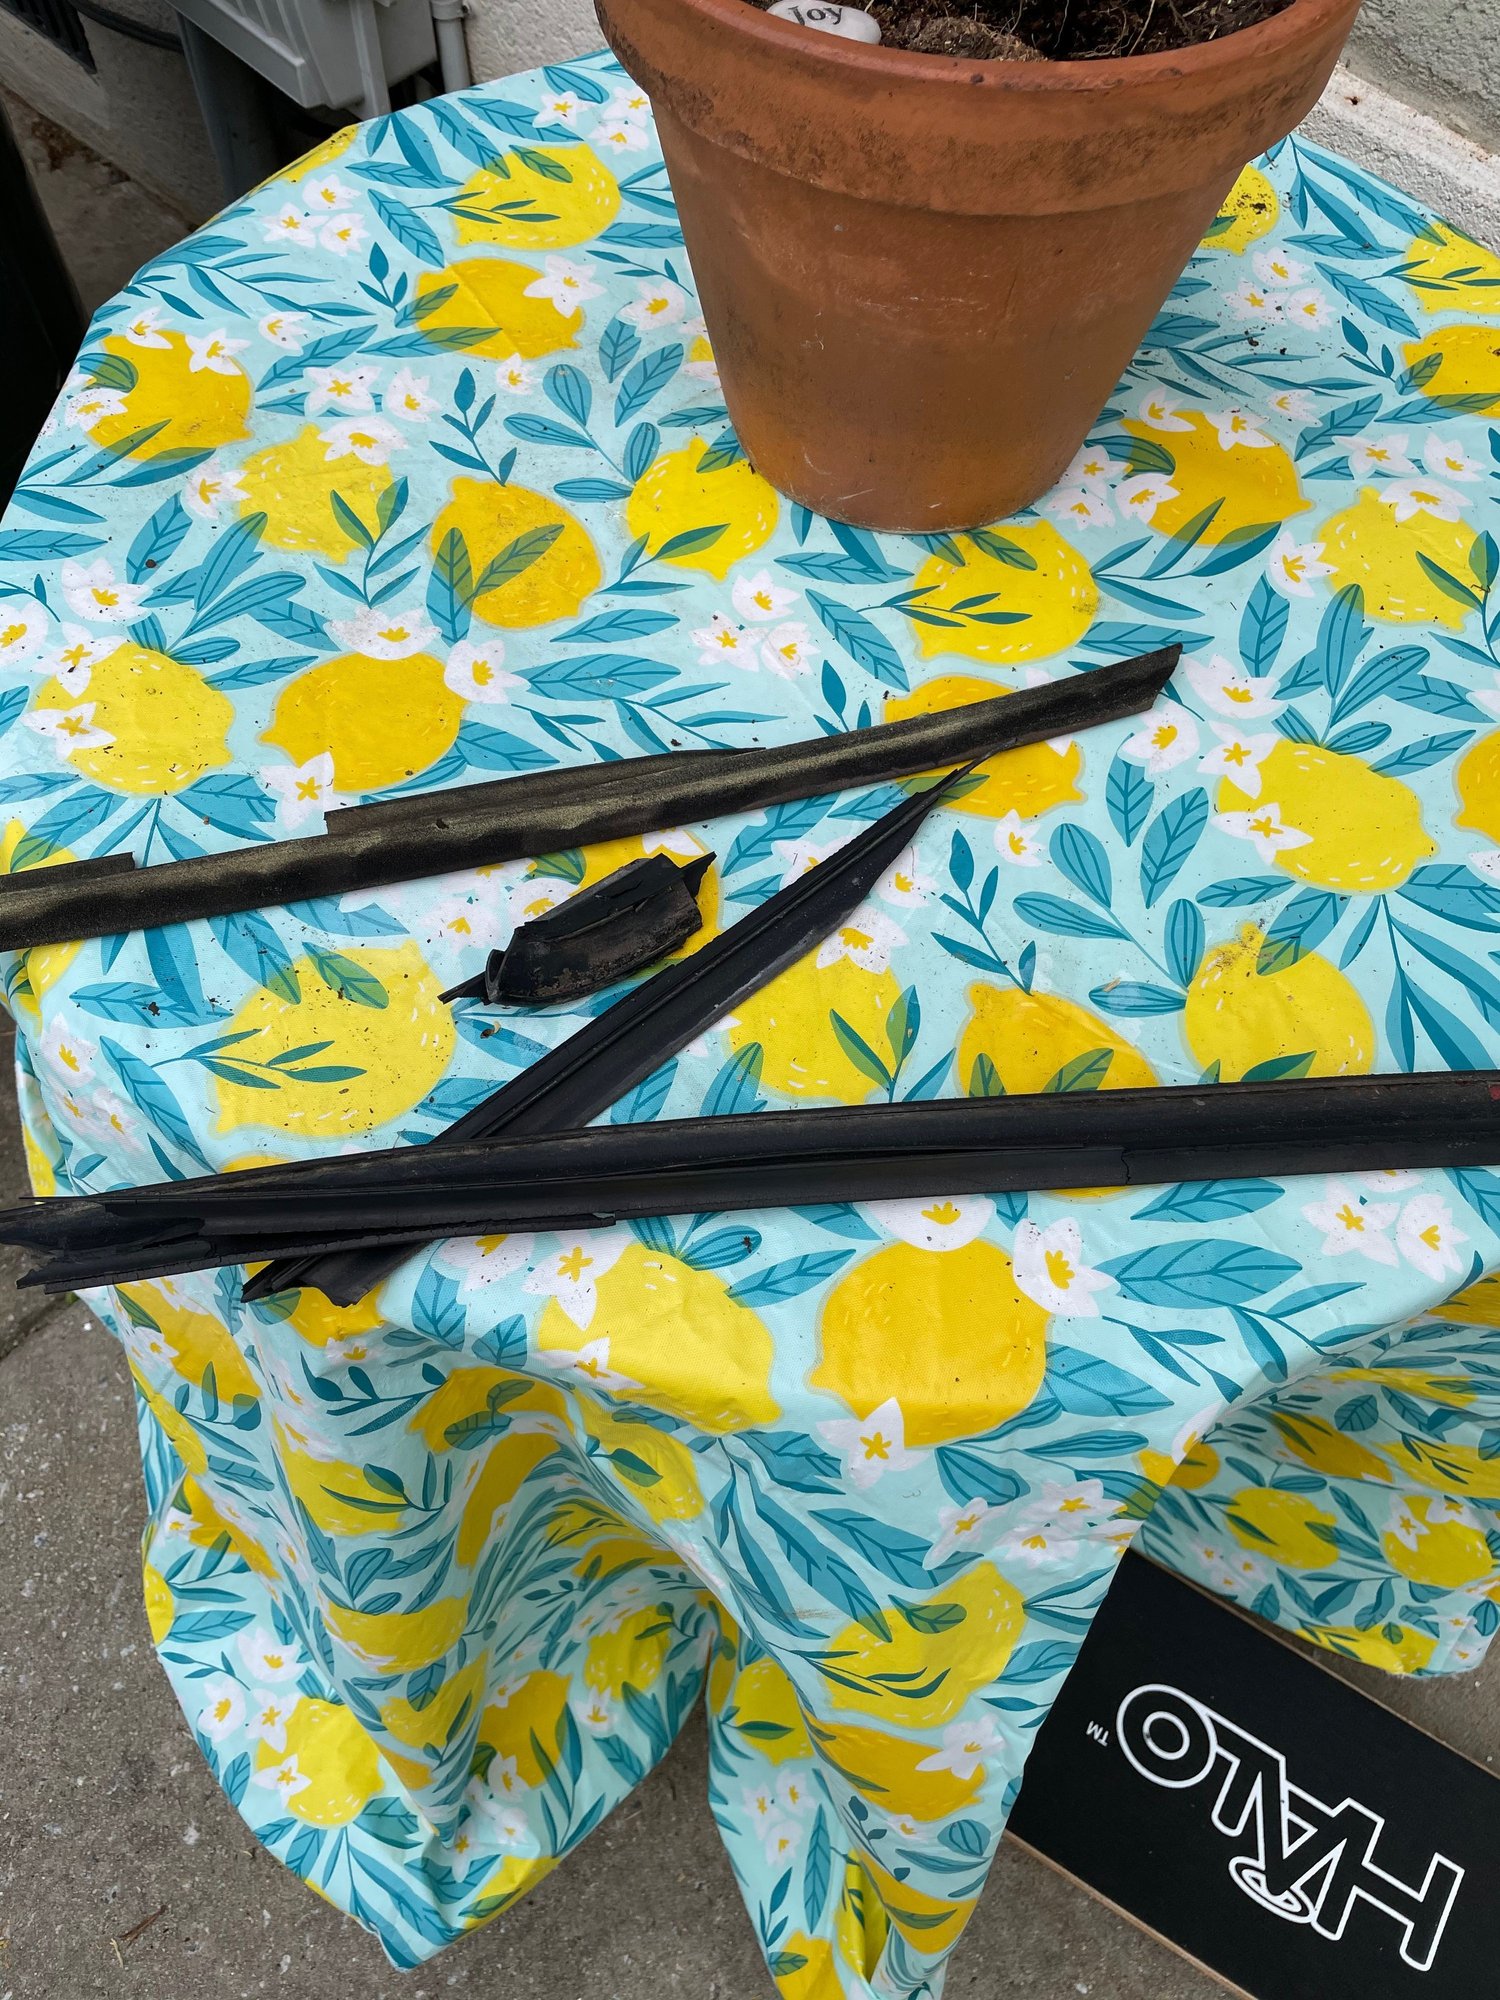
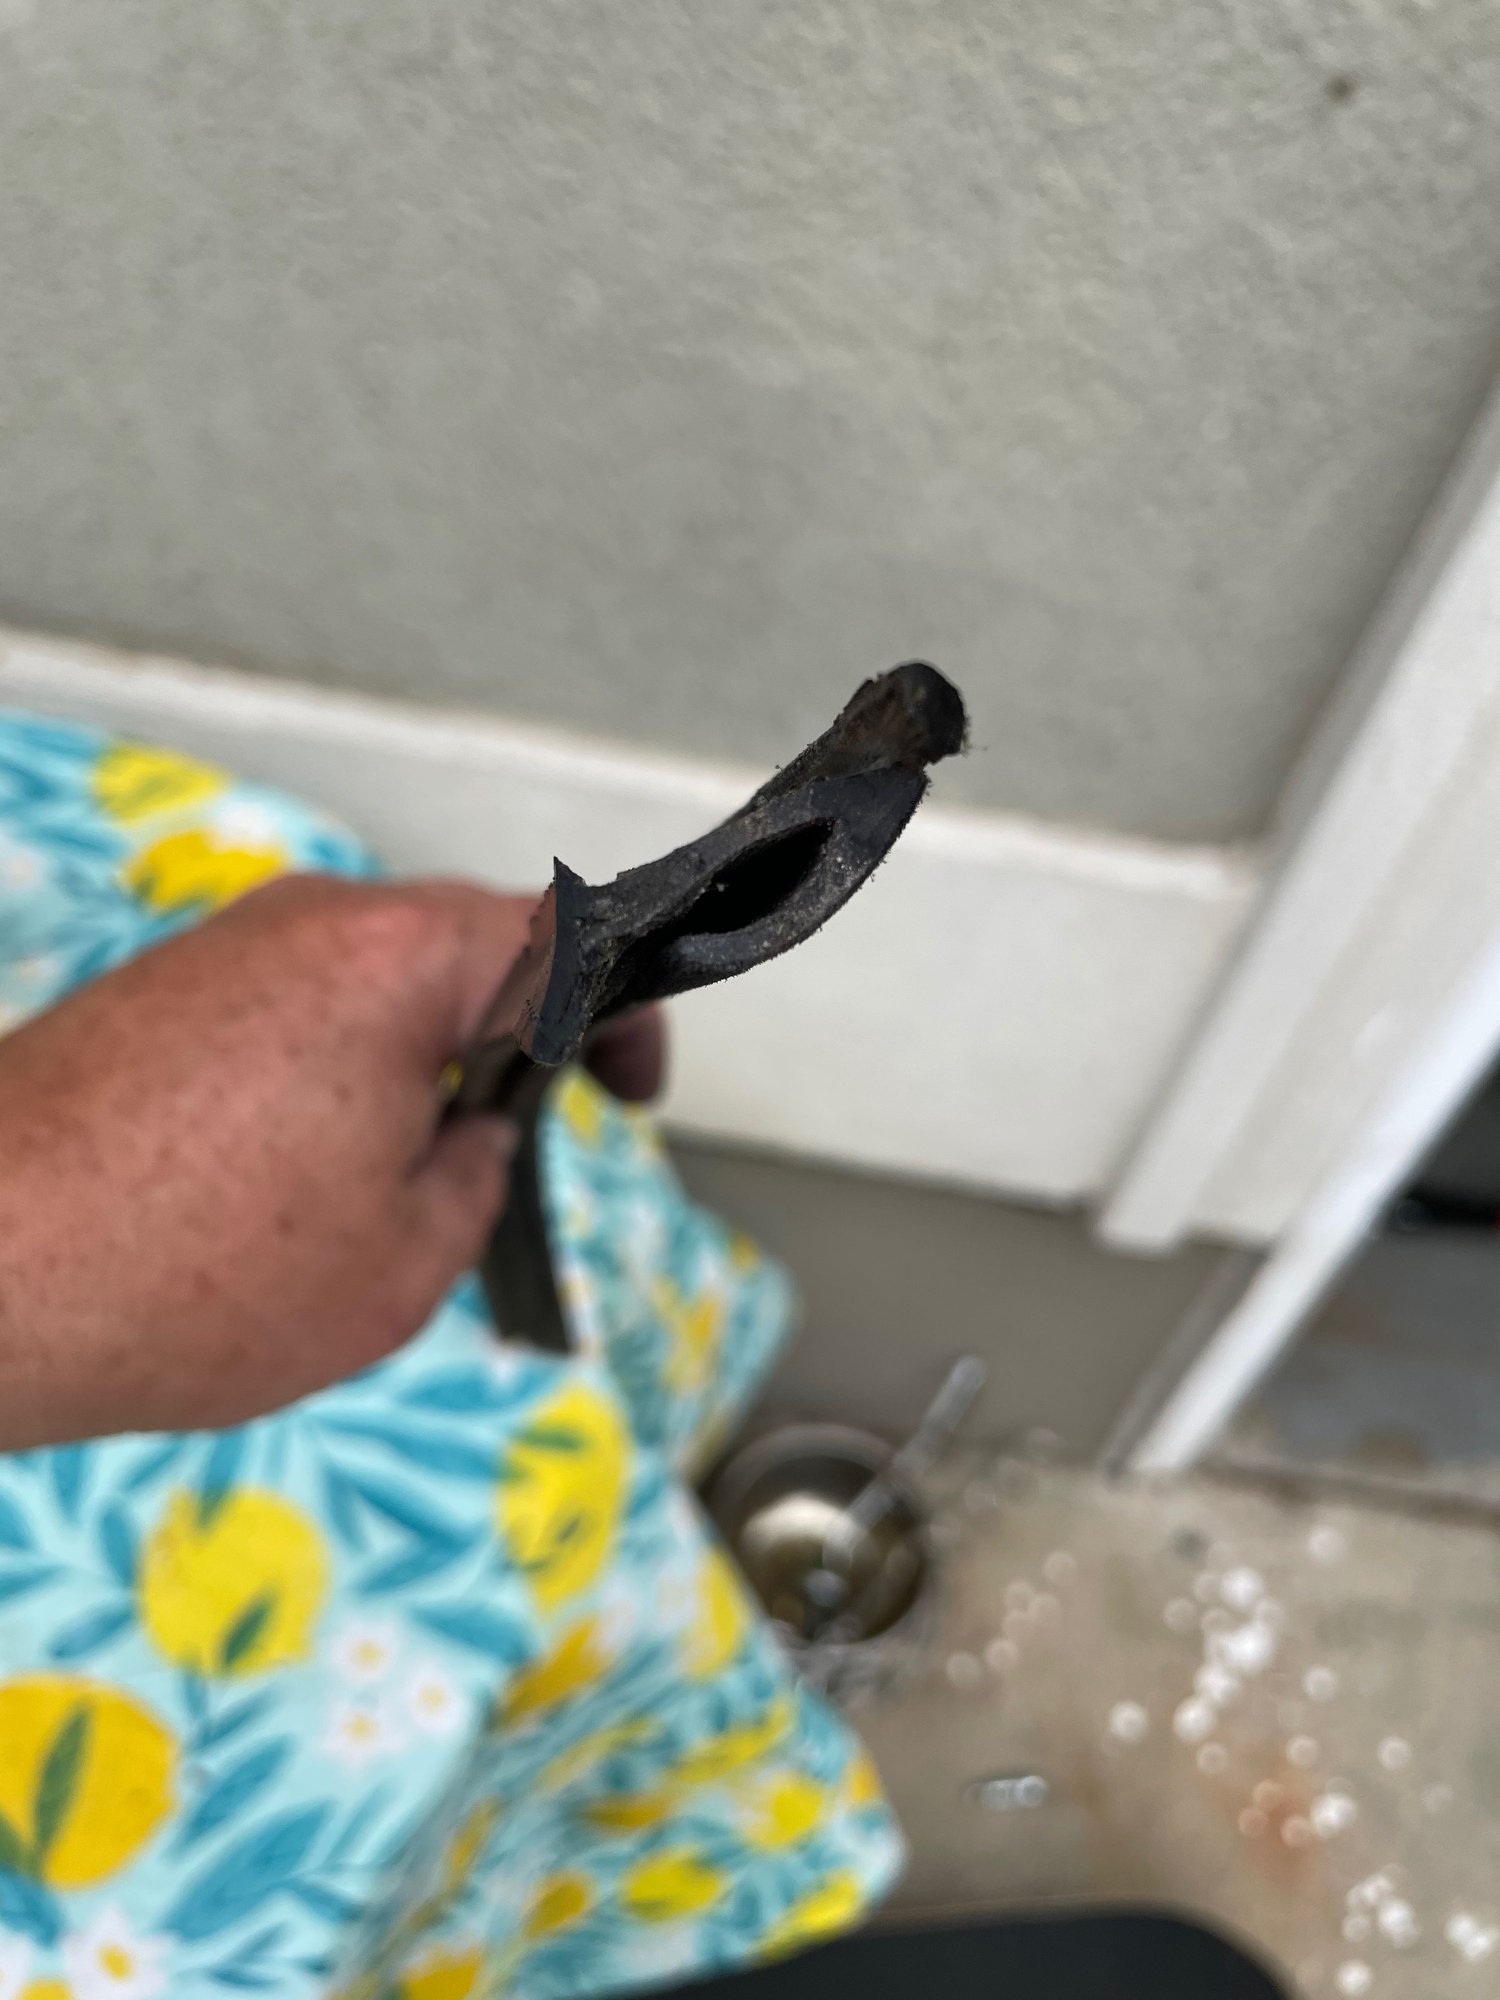
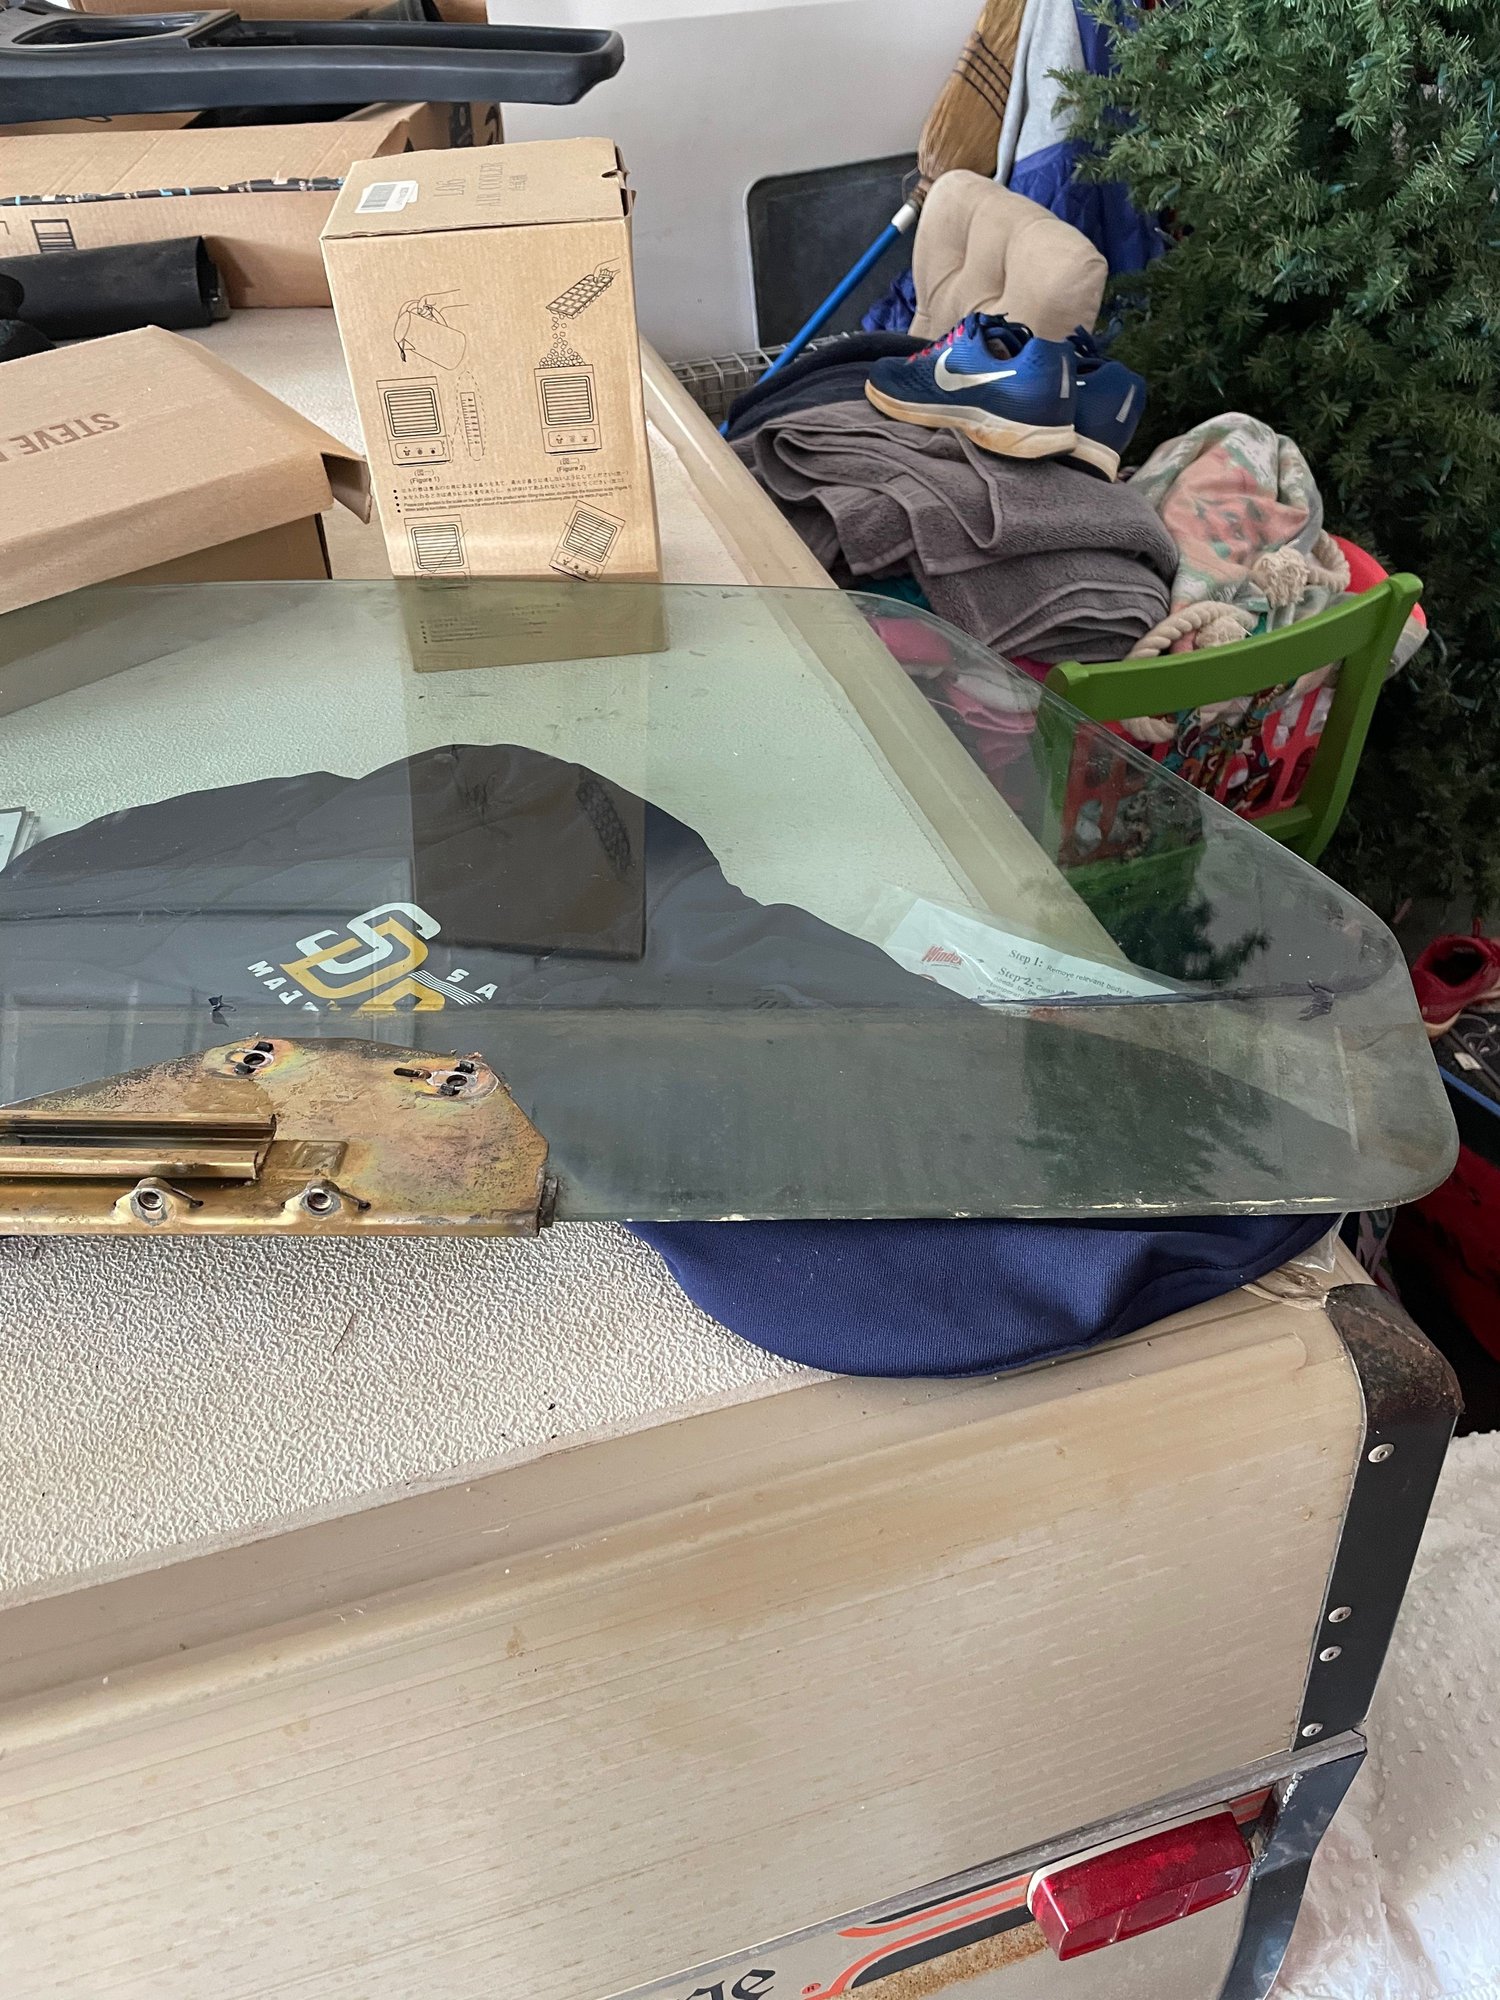
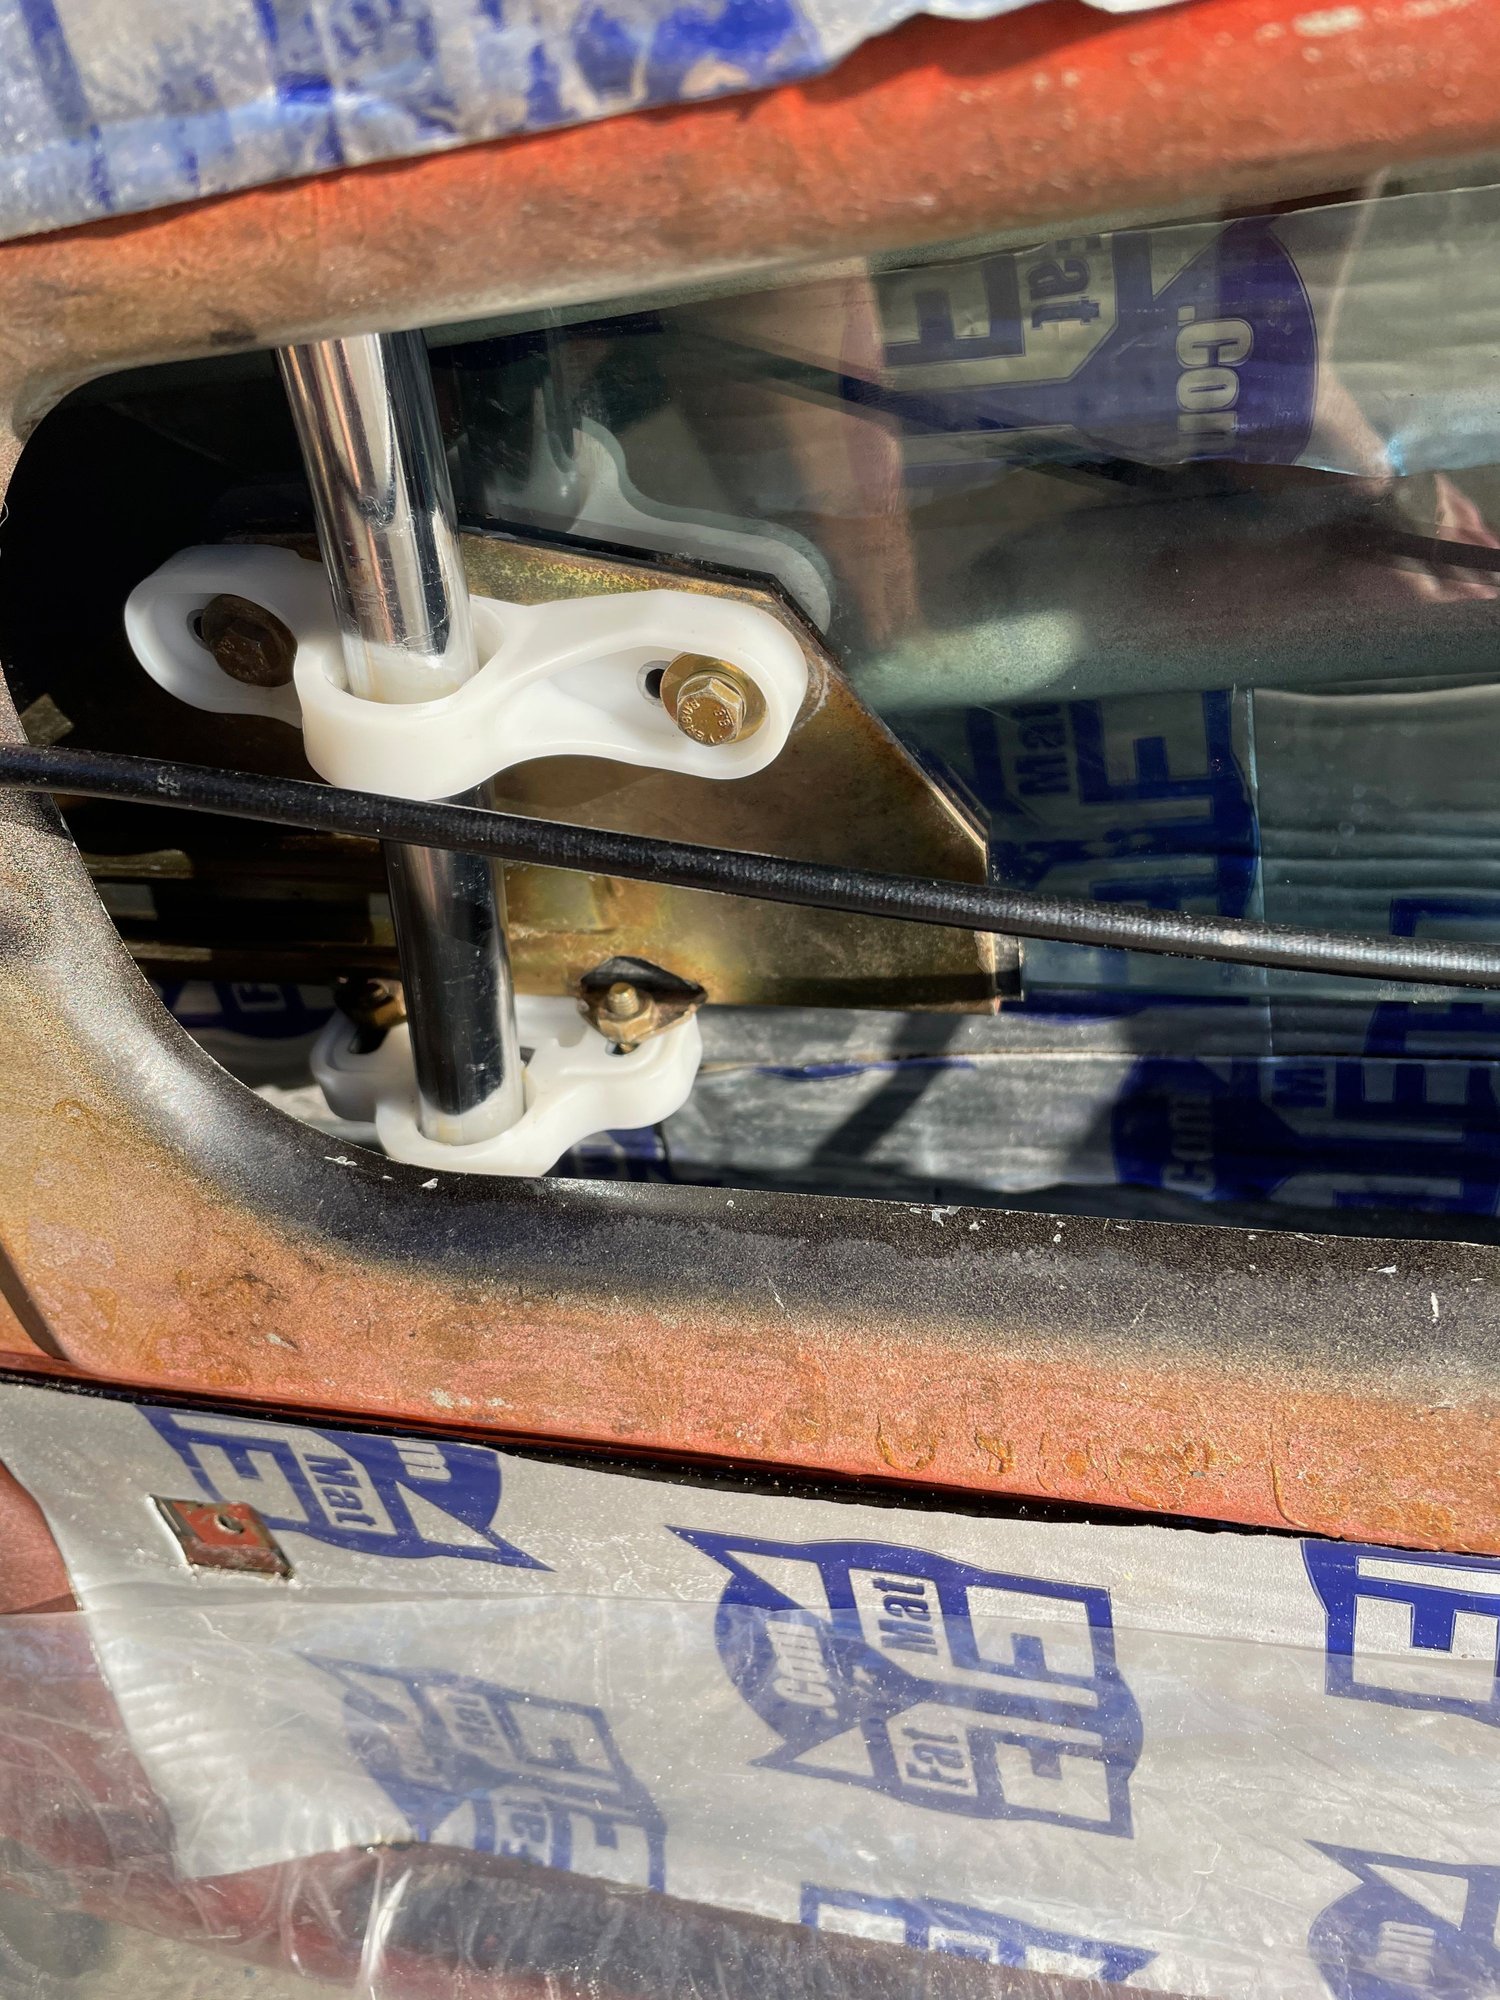
Door panel removed - no drama there. Felt guides look really good (and really large - much more so than I thought), so I am going to leave them alone. The old outer scraper. Just ripped to shreds when trying to remove. Smushed profile of the old outer scraper. One thing I noticed is that MANY bits of the old scraper seal remained in the little channel at the top of the window where the seal broke into pieces. It occurred to me that this could be an issue that some had with ill-fitting replacements. Used a pick tool to get the channel clean. Old guides and bar after removal. The guides were a mess and obvious wear. Nice to have completely clean window glass again. Had no idea had this part of the window system worked and attached - makes much more sense now. Forgot to order new bushings (duh) for the bottom of the guide tubes, but improvised with a new rubber piece on the floor and new rubber inside the tube at the bottom to keep it from flopping around. Guide tube reinstalled with new clean white guides. The new ones are MUCH tighter but have not been lubed yet - Some have suggested lithium grease, but I may try sylglide that is used on the sunroof rails.
Was able to get quite a bit of work done yesterday.
1. Replaced the electrical connectors for the mirror.
2. Finally got the new scraper installed. That was a chore.
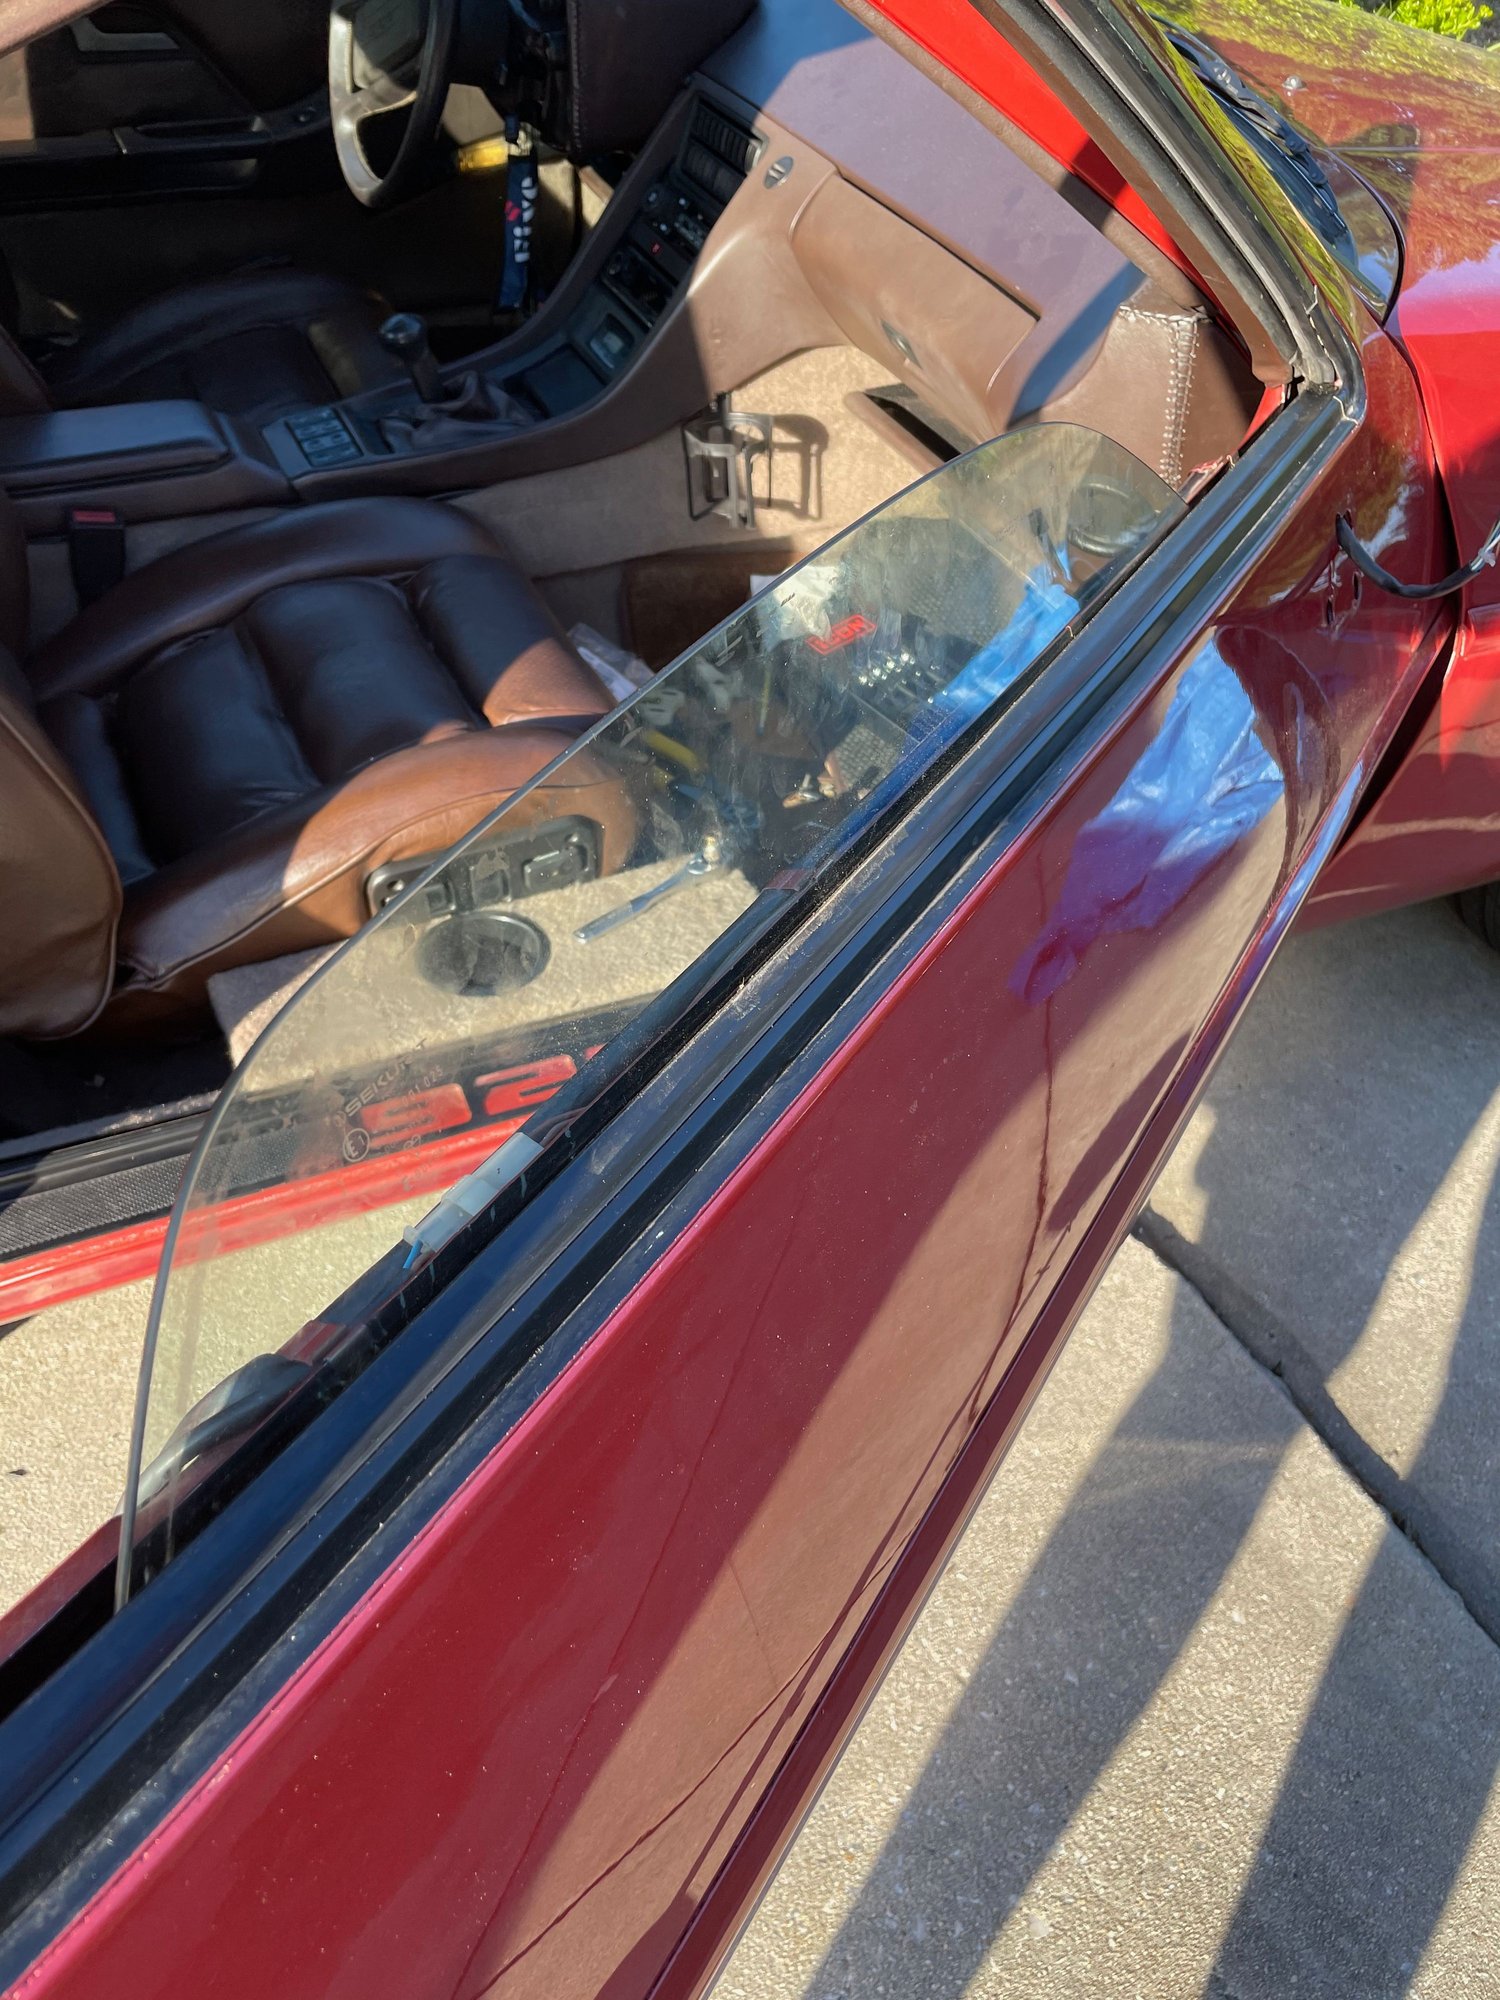
3. Reseated window.
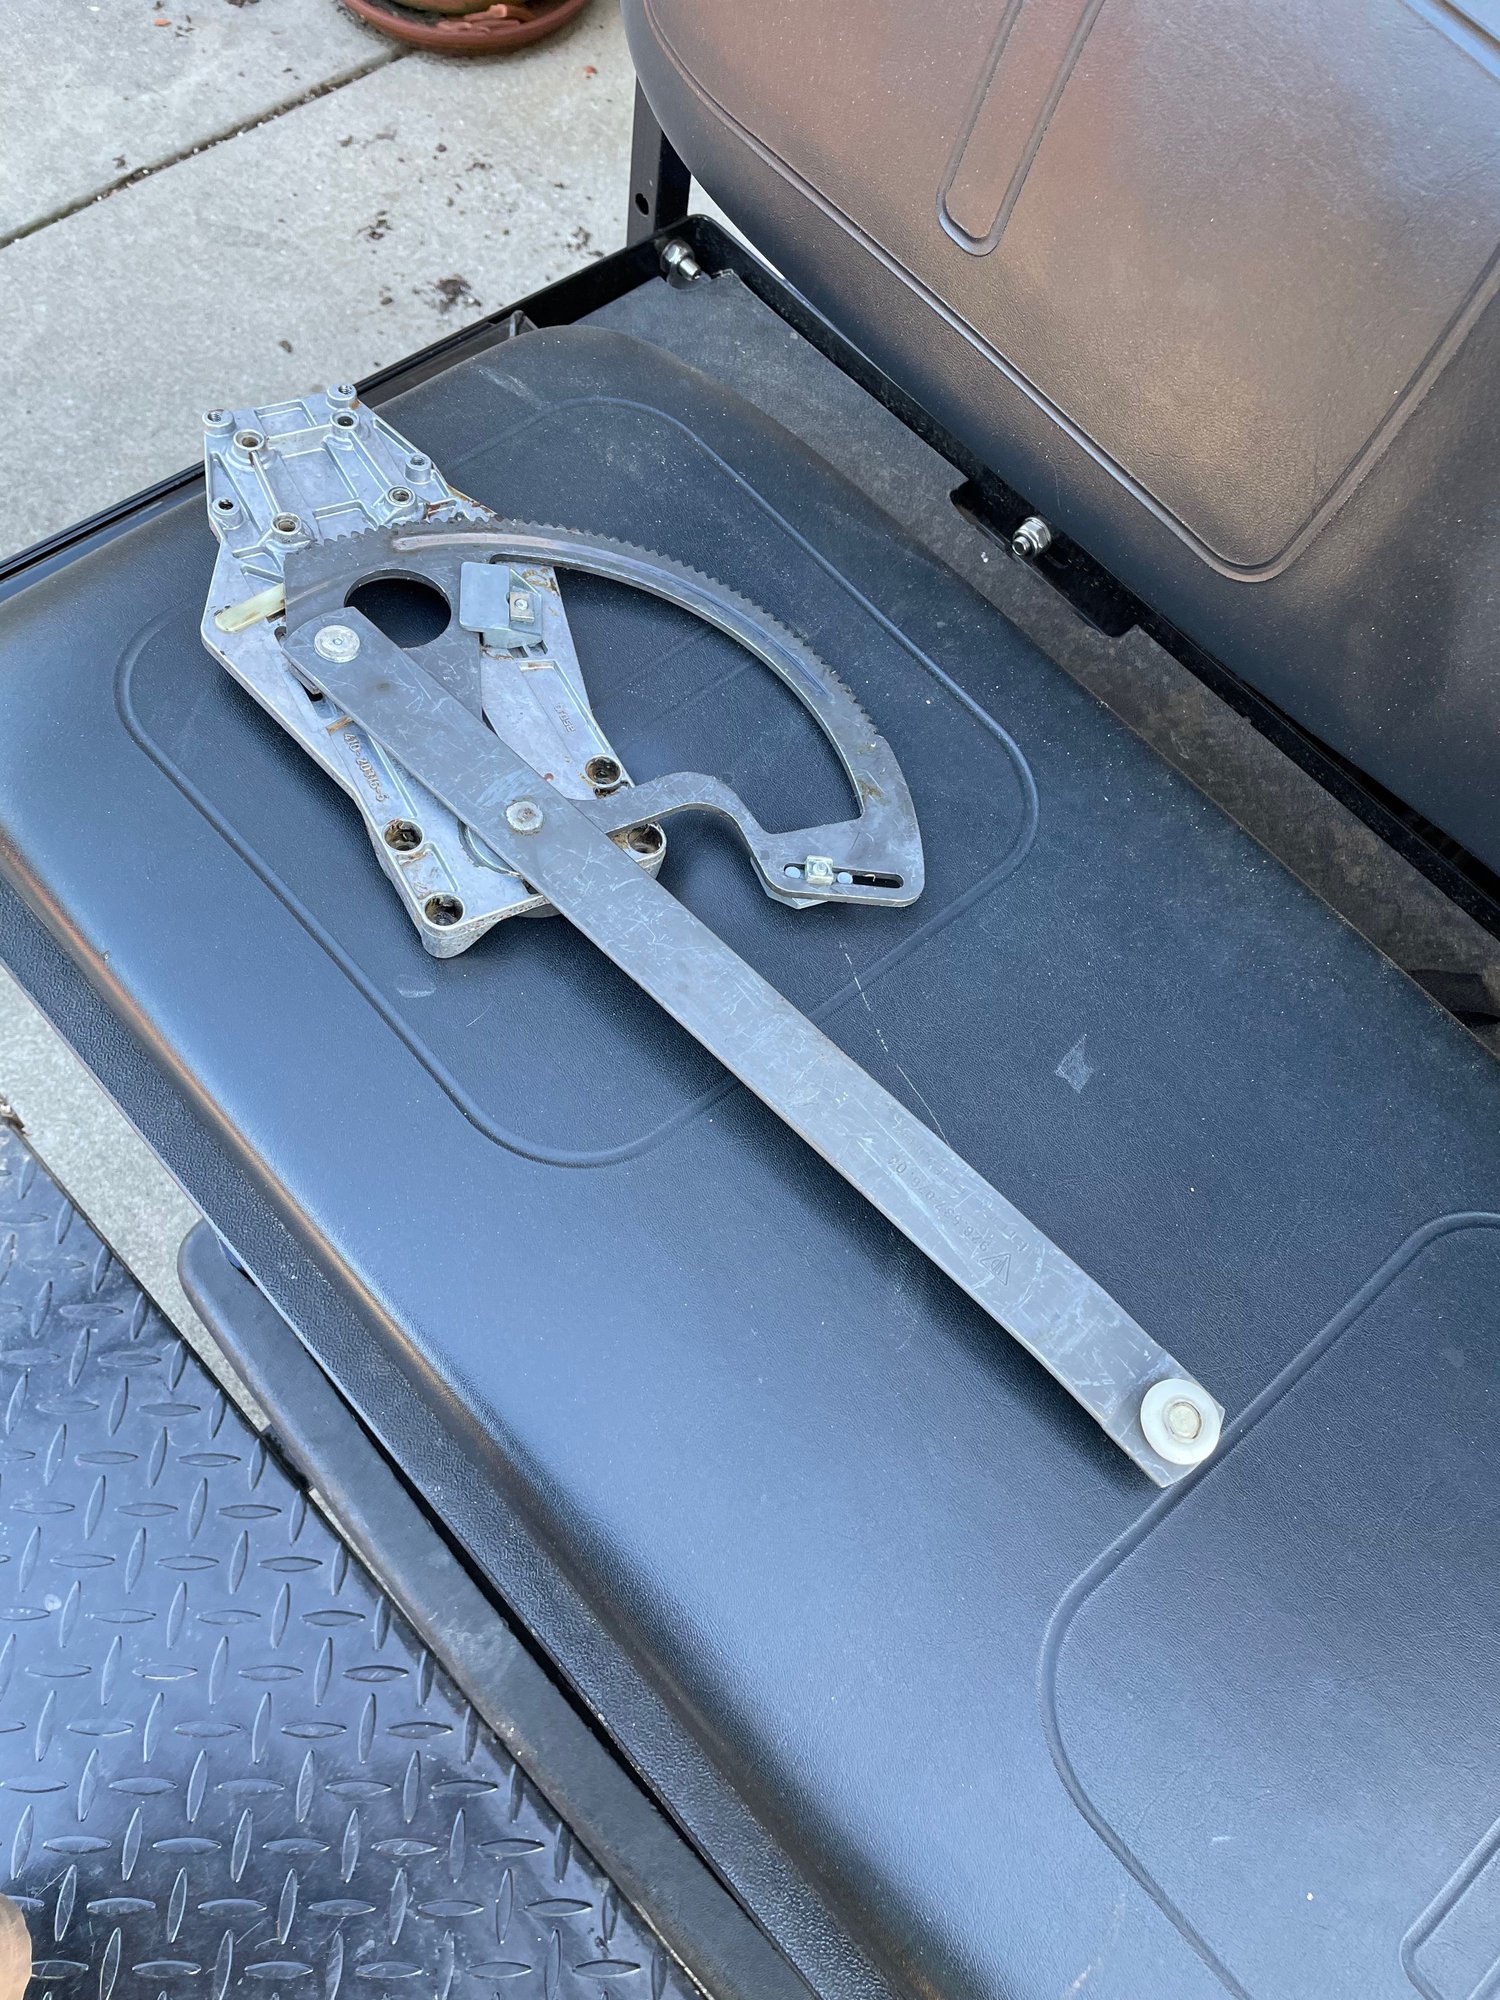
4. Cleaned regulator and transmission.
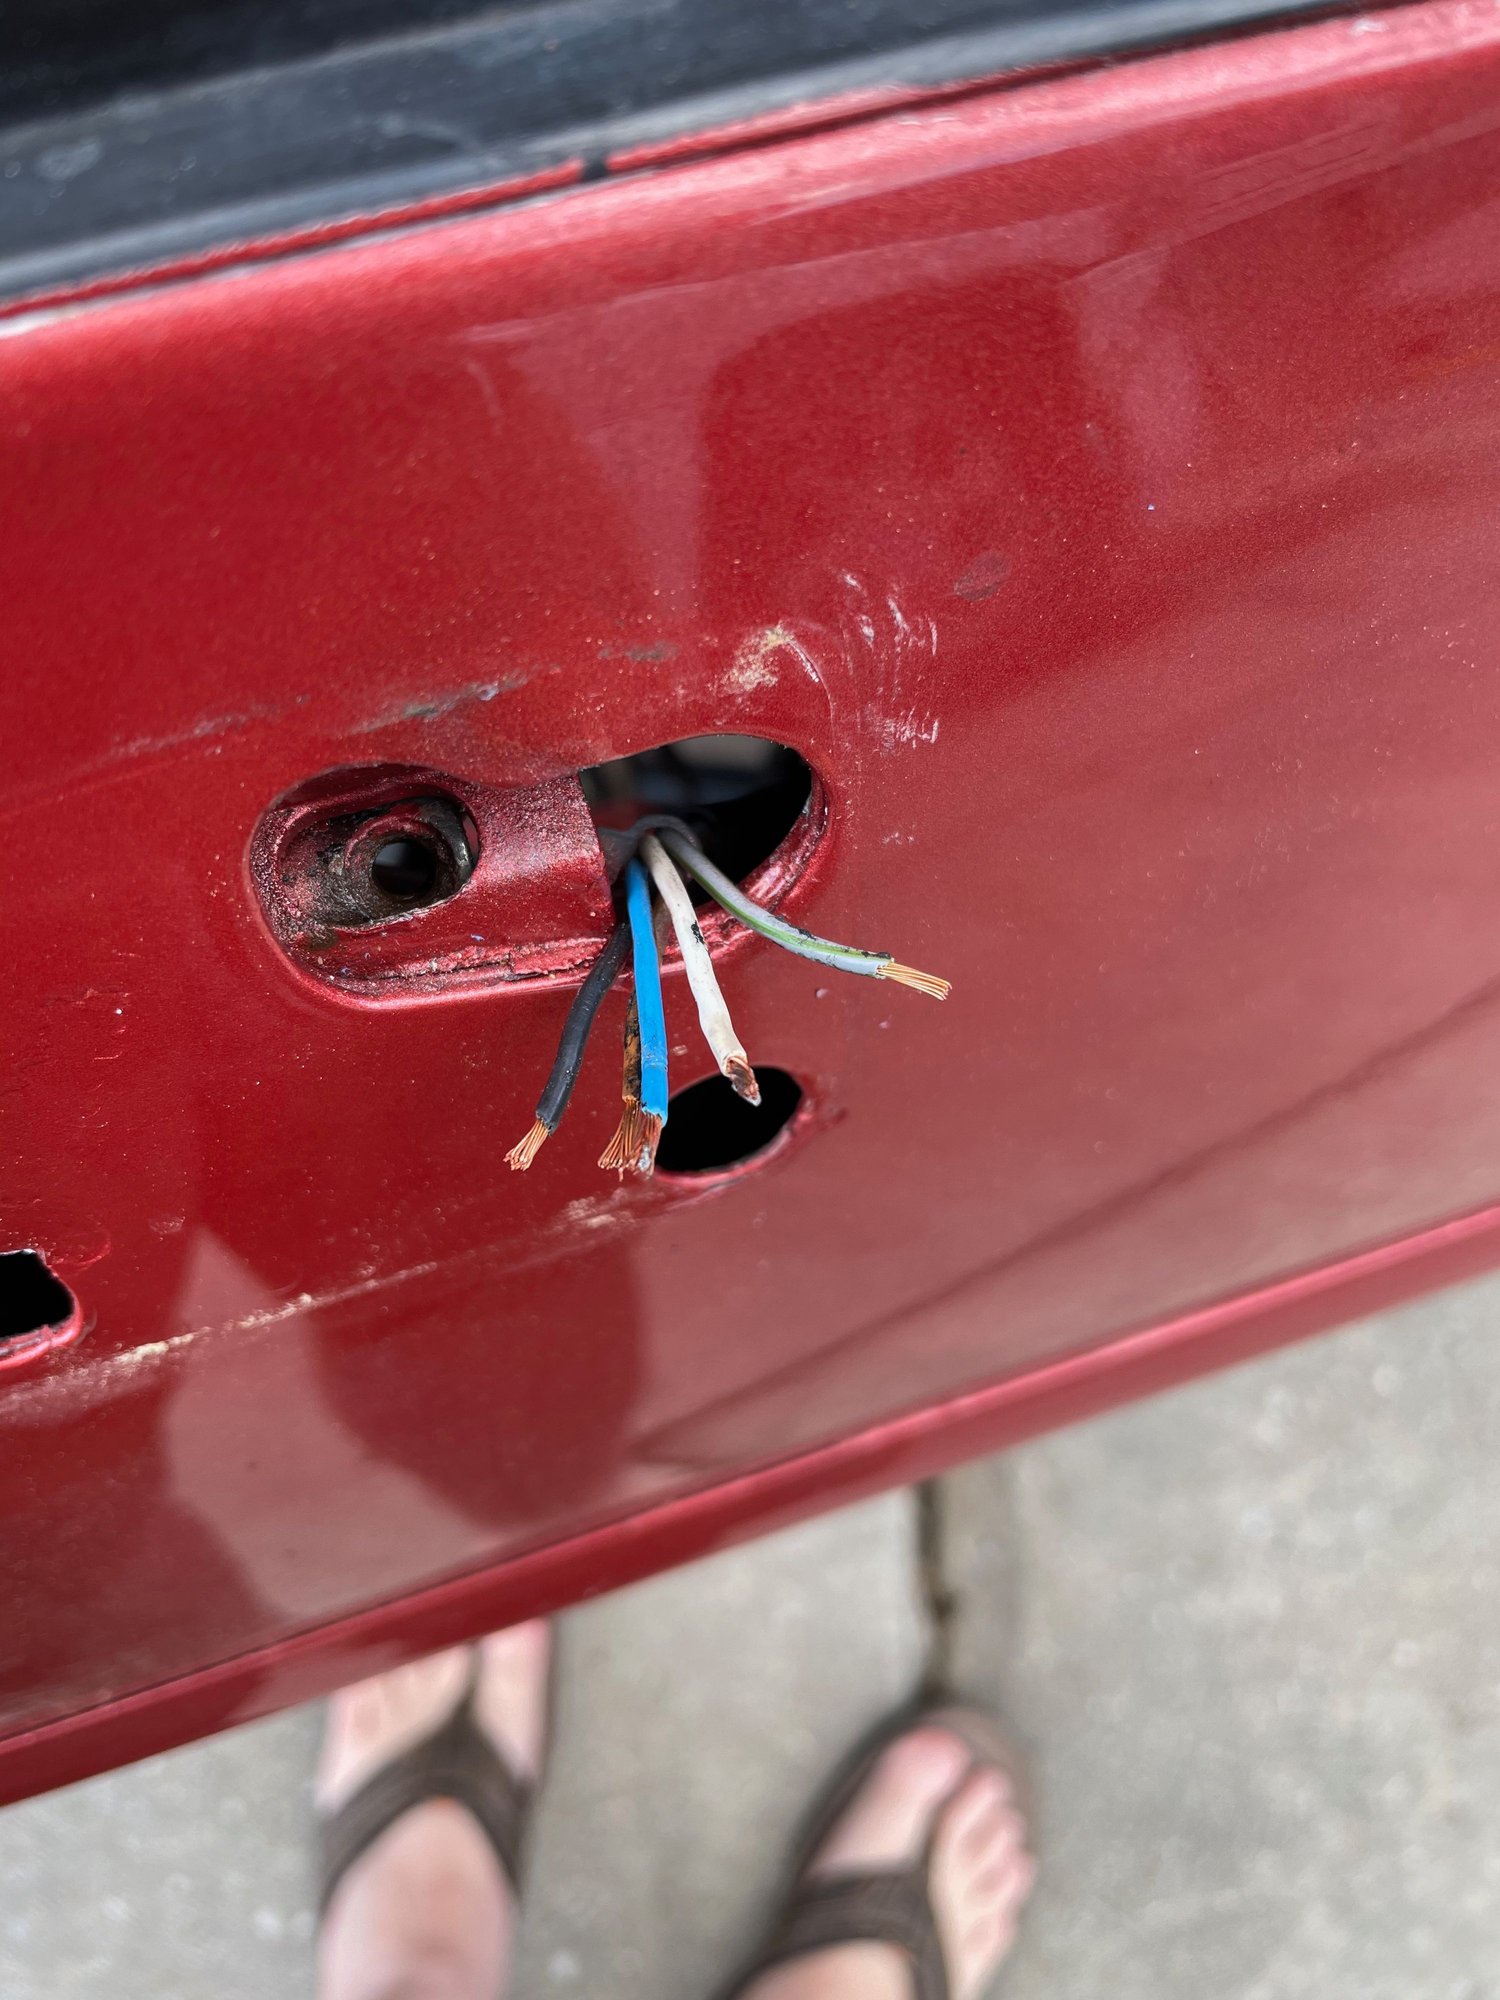
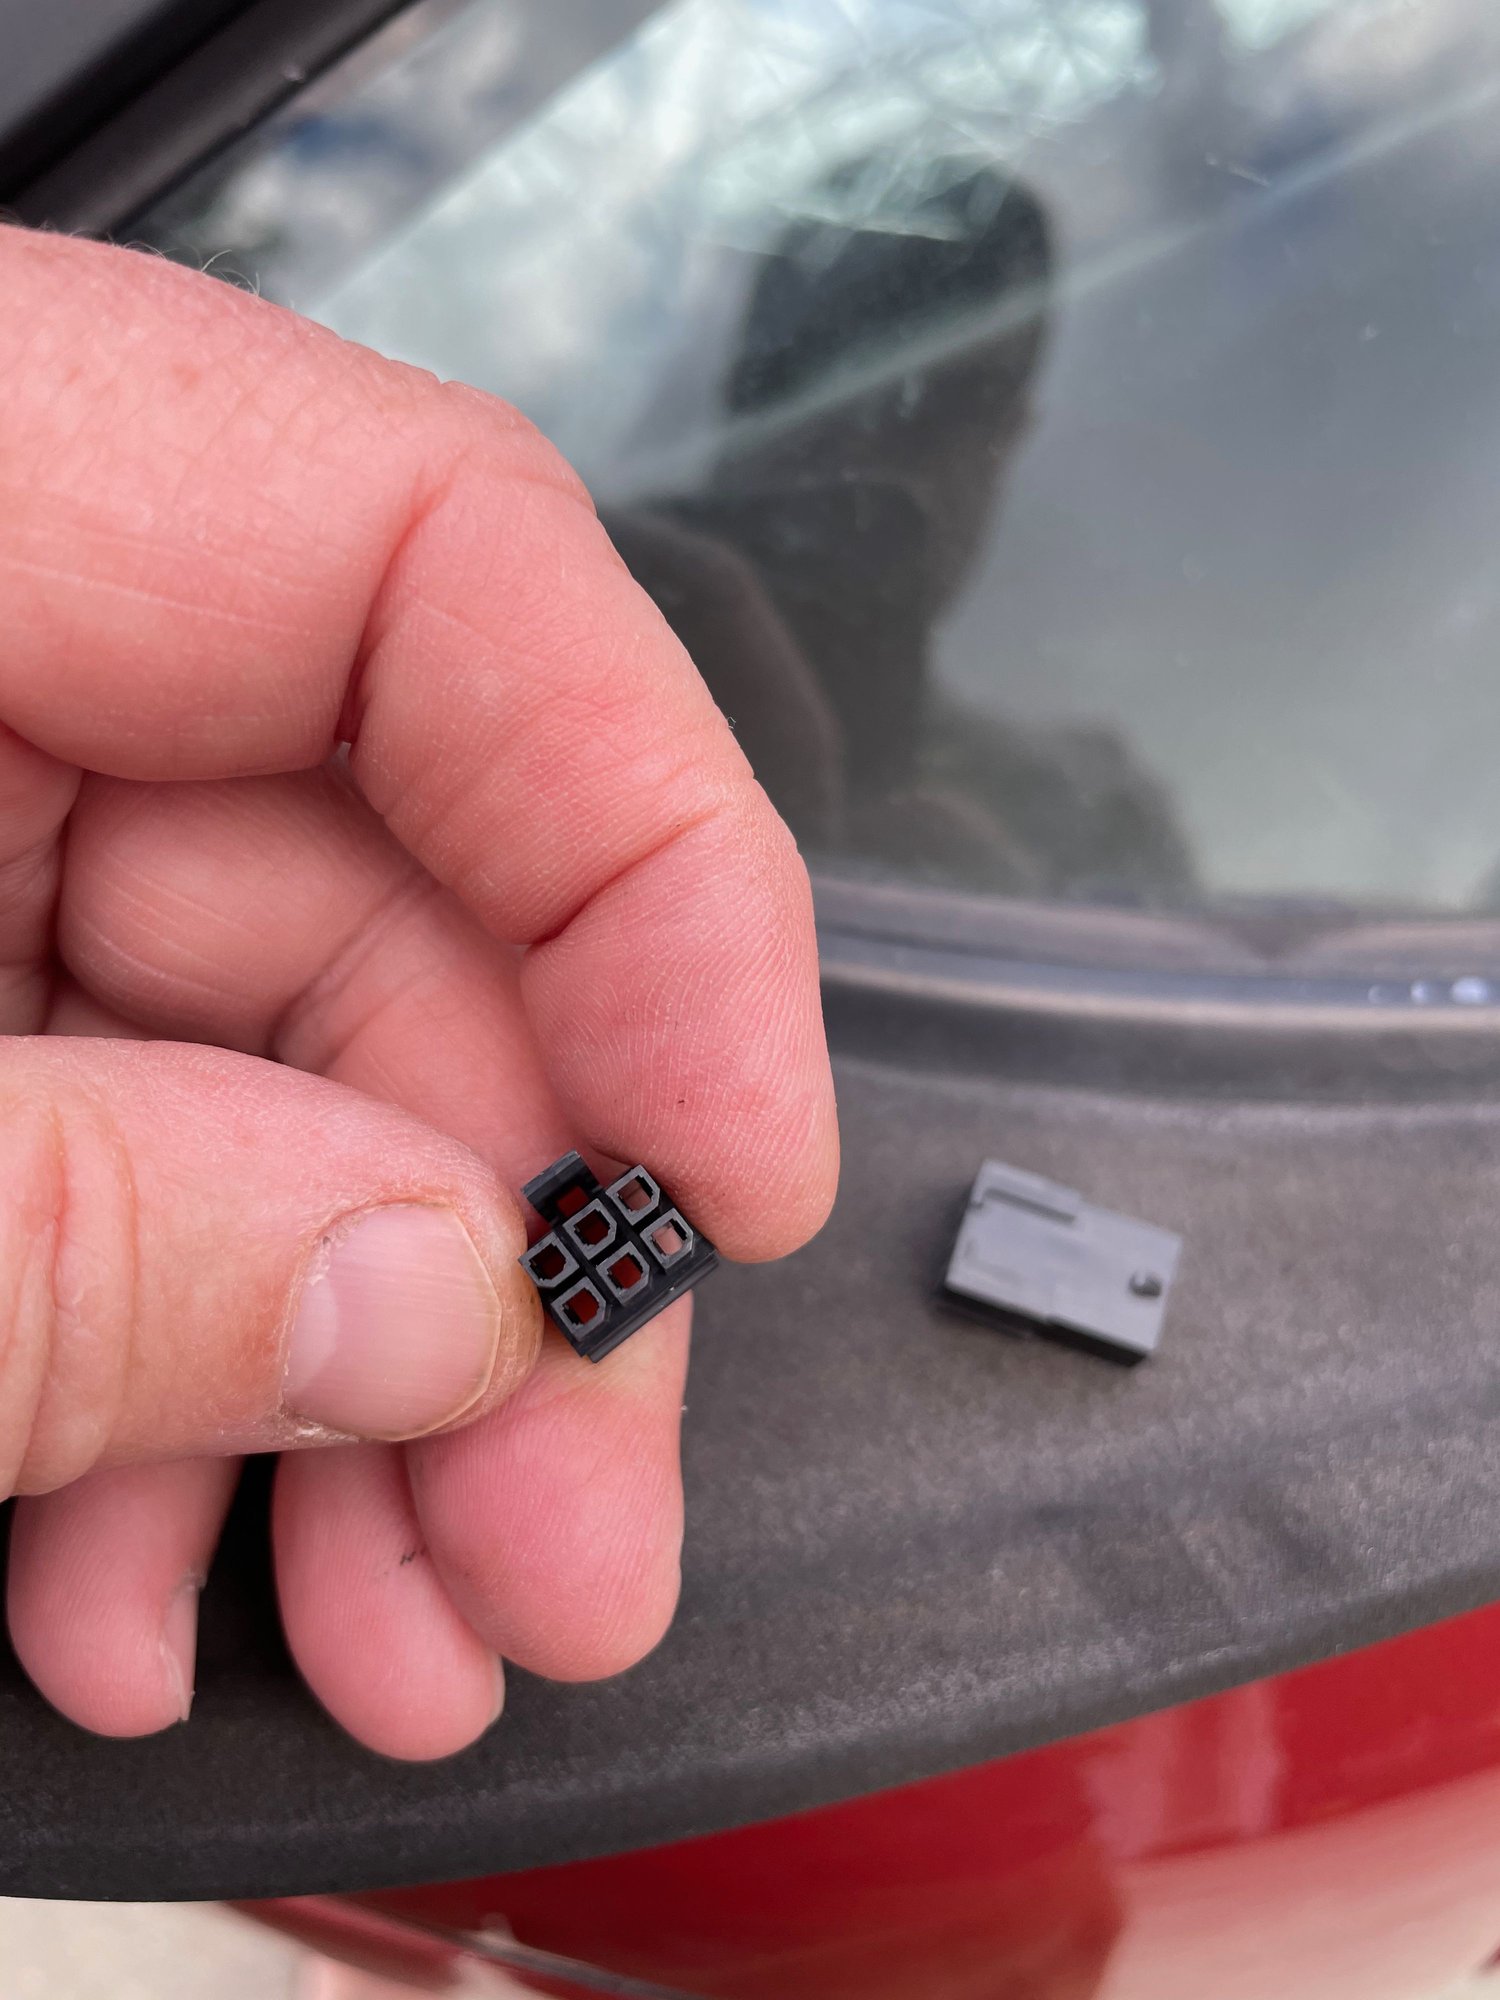
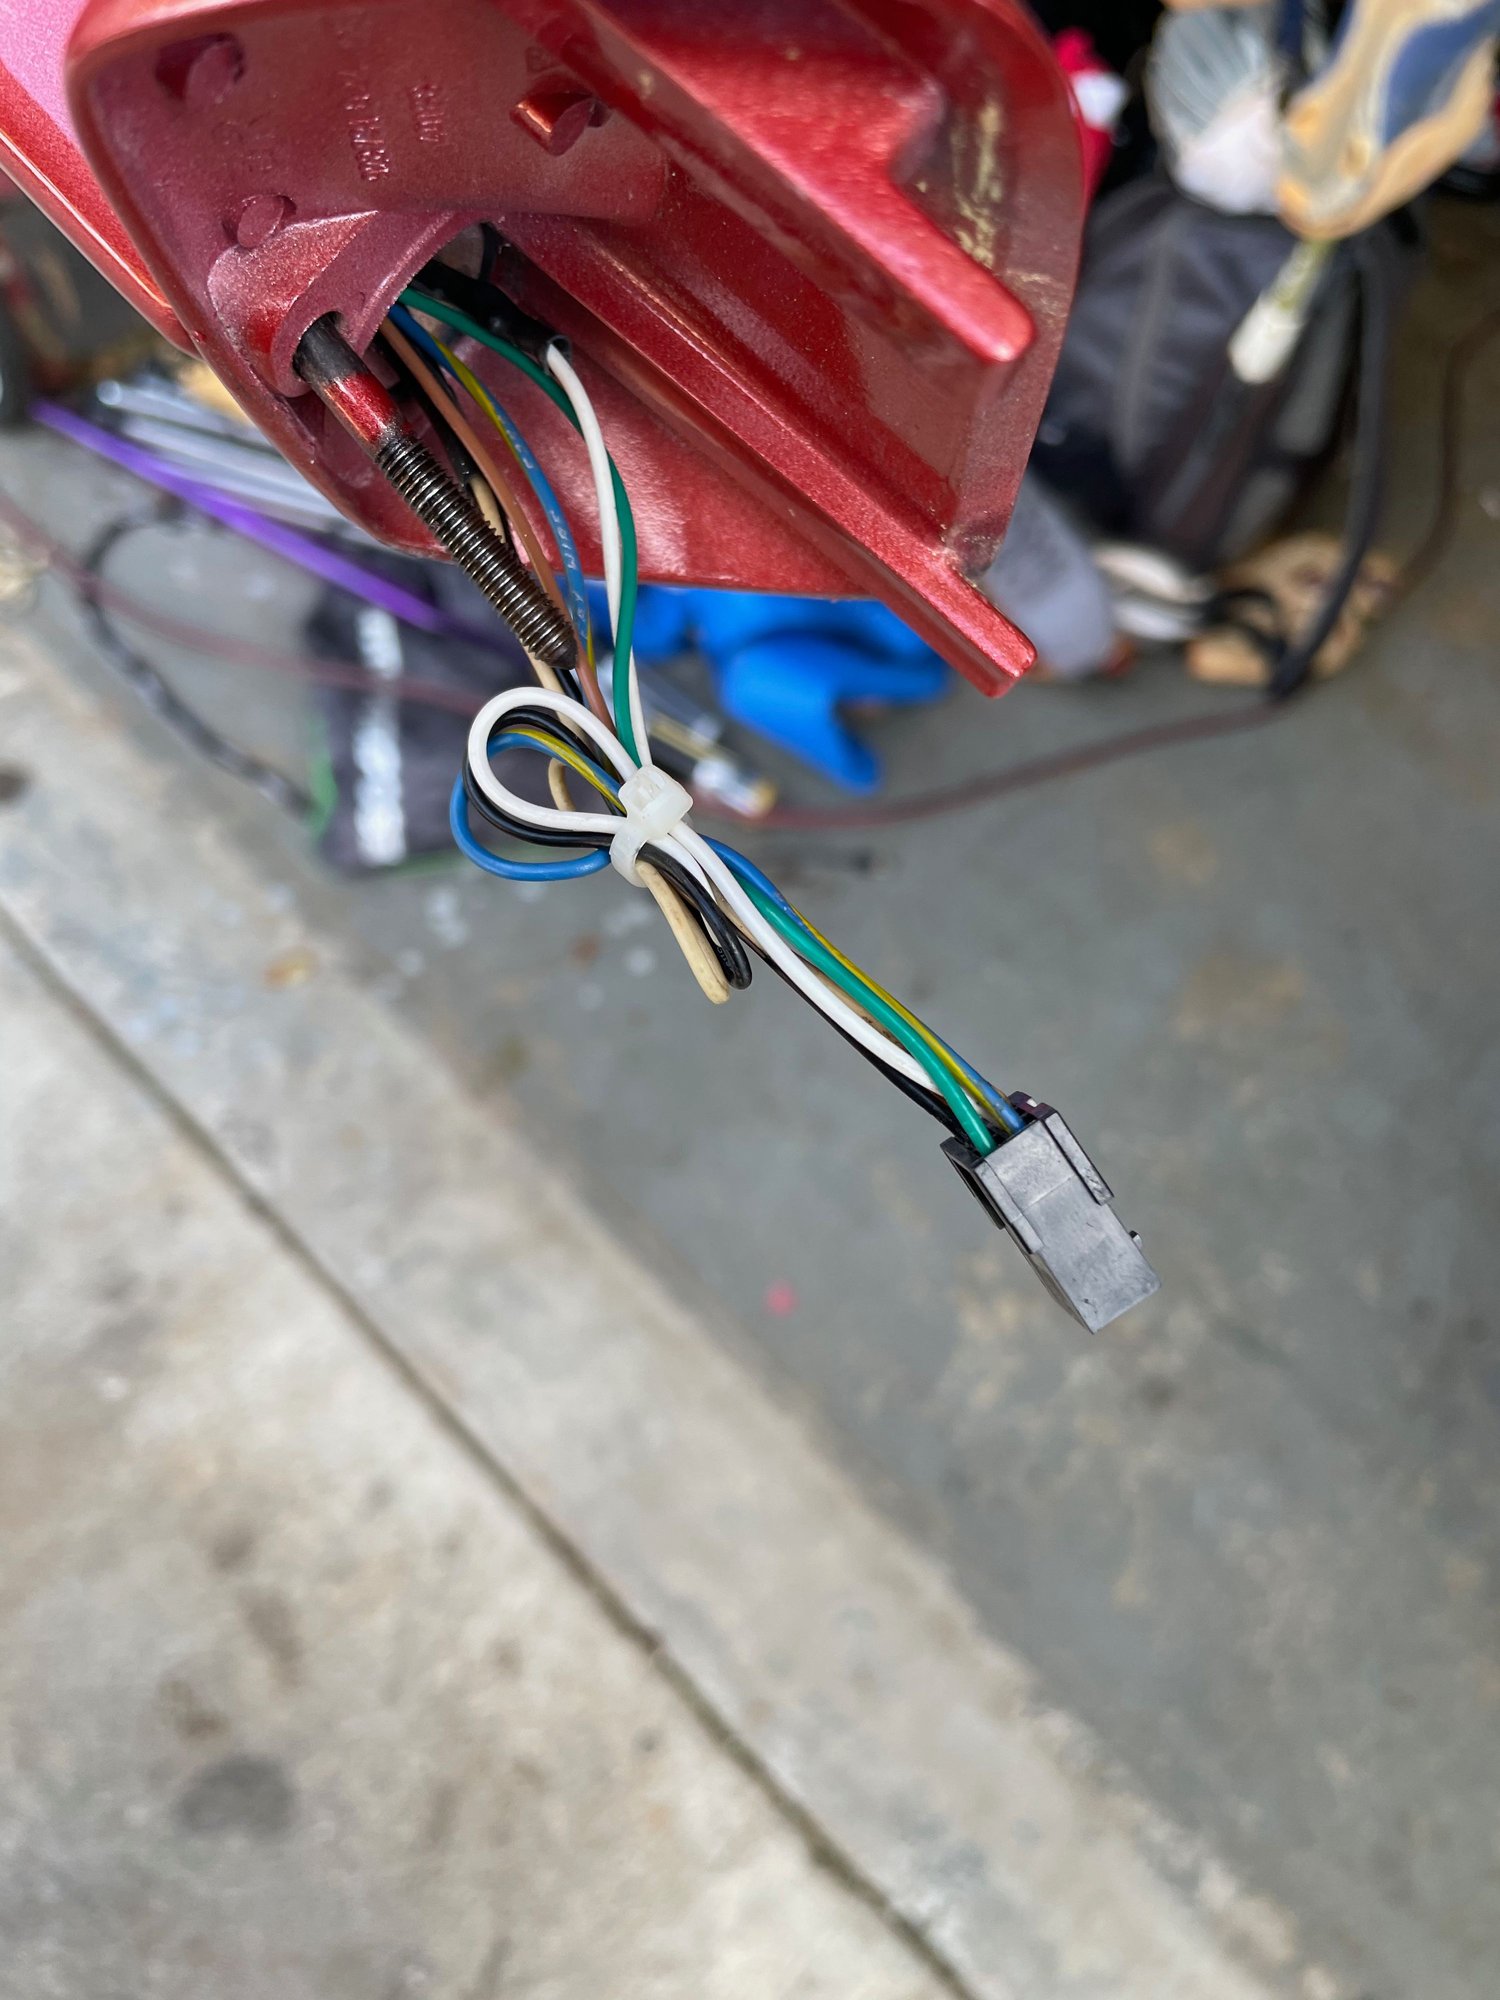
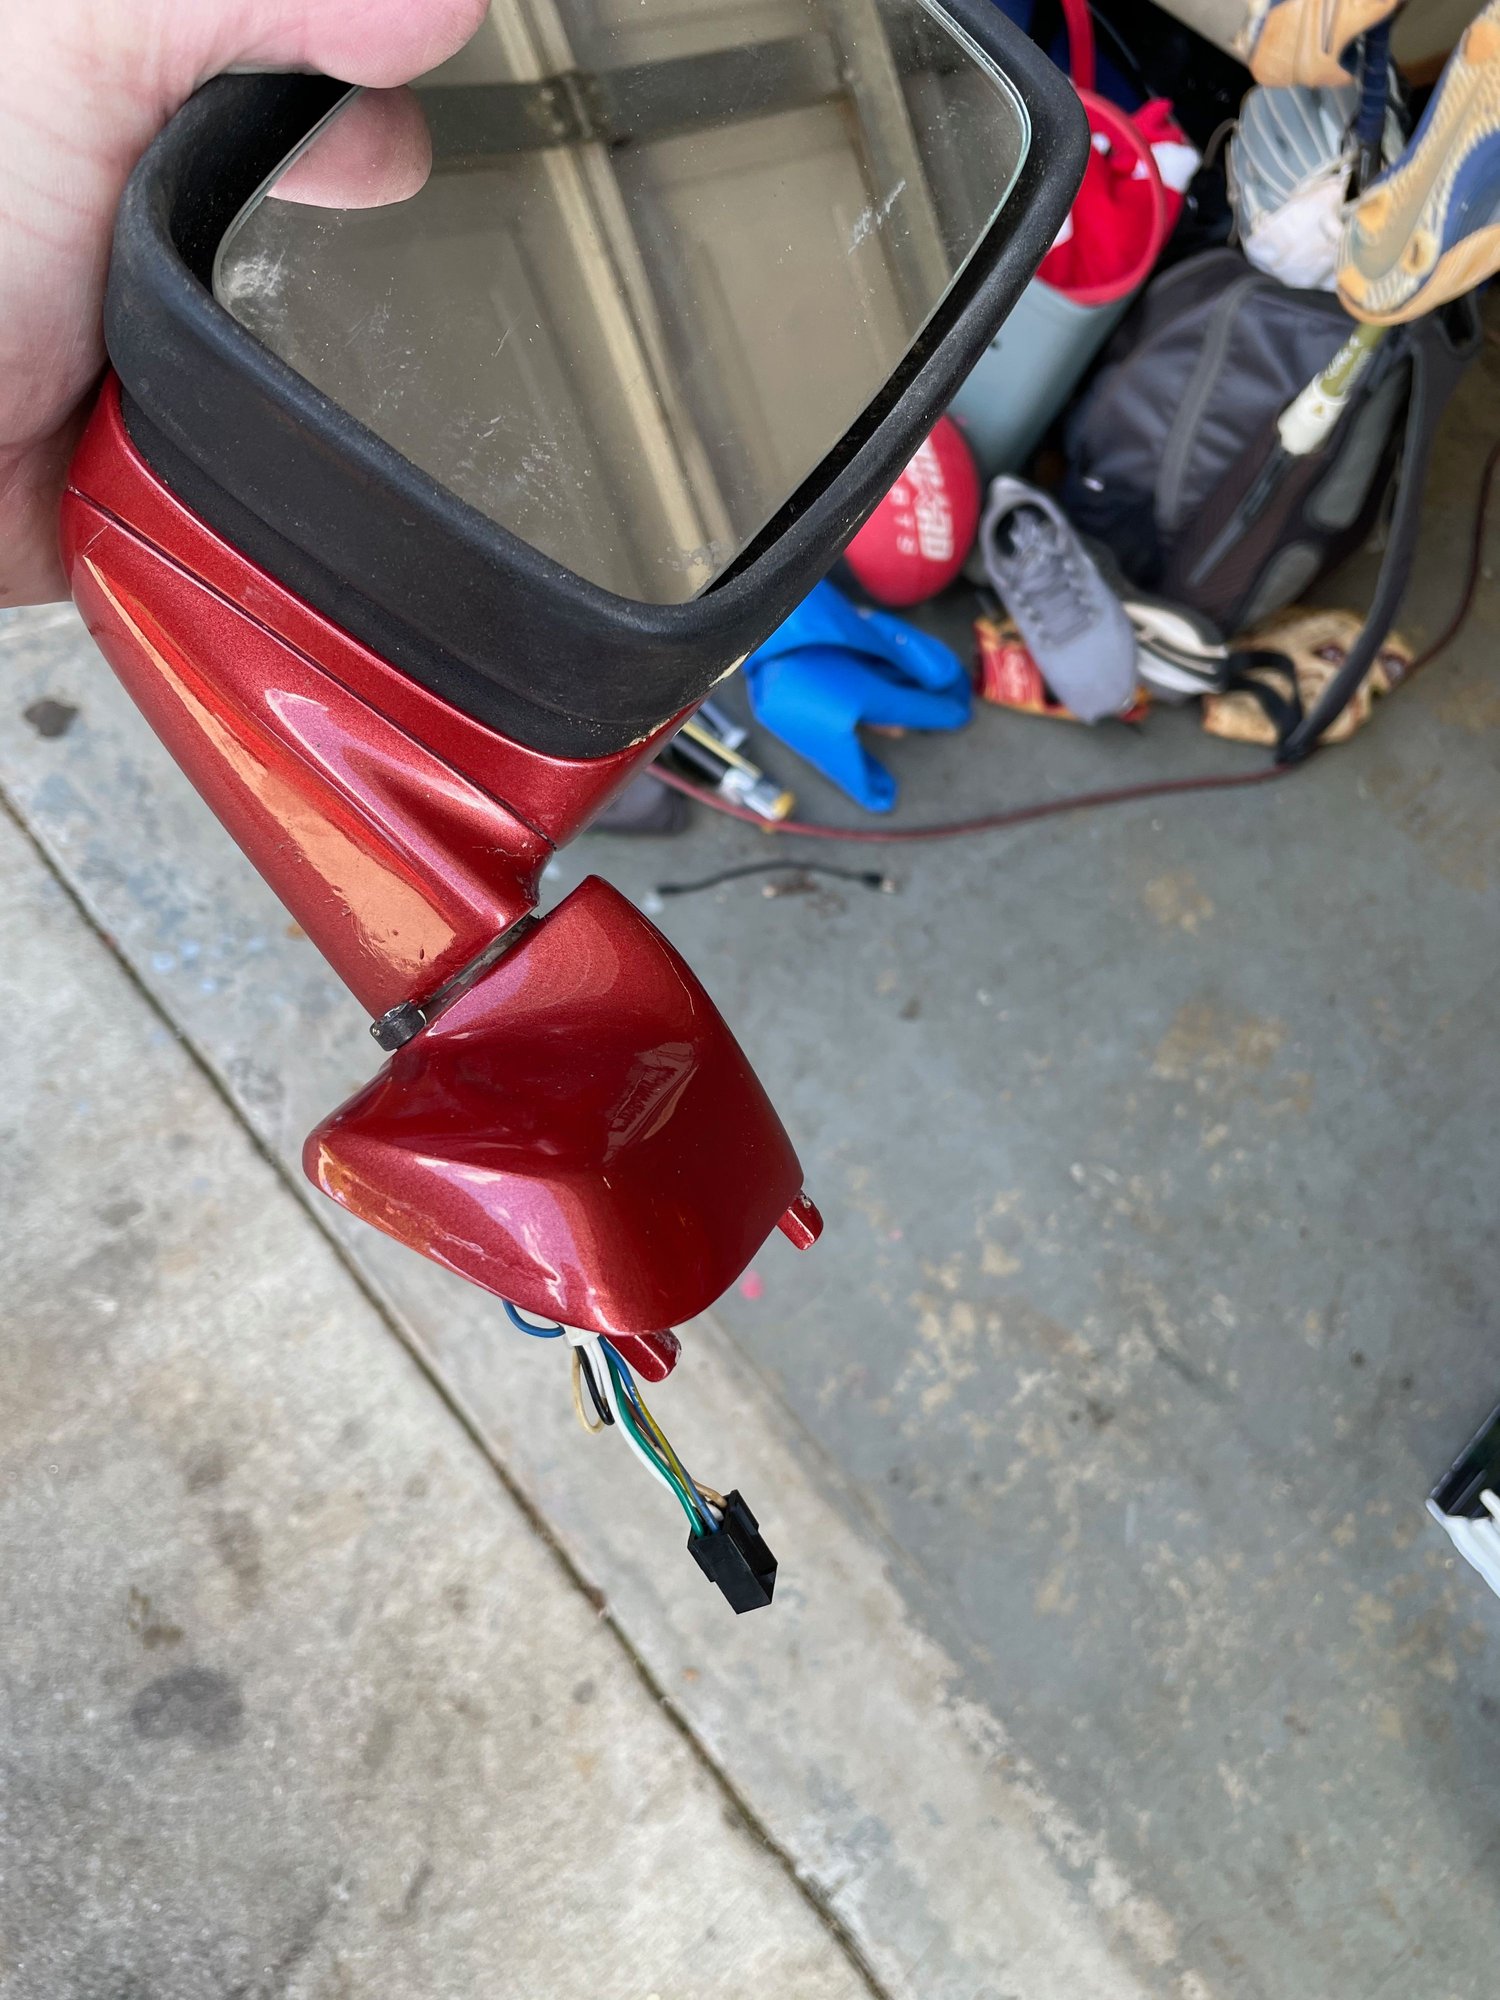
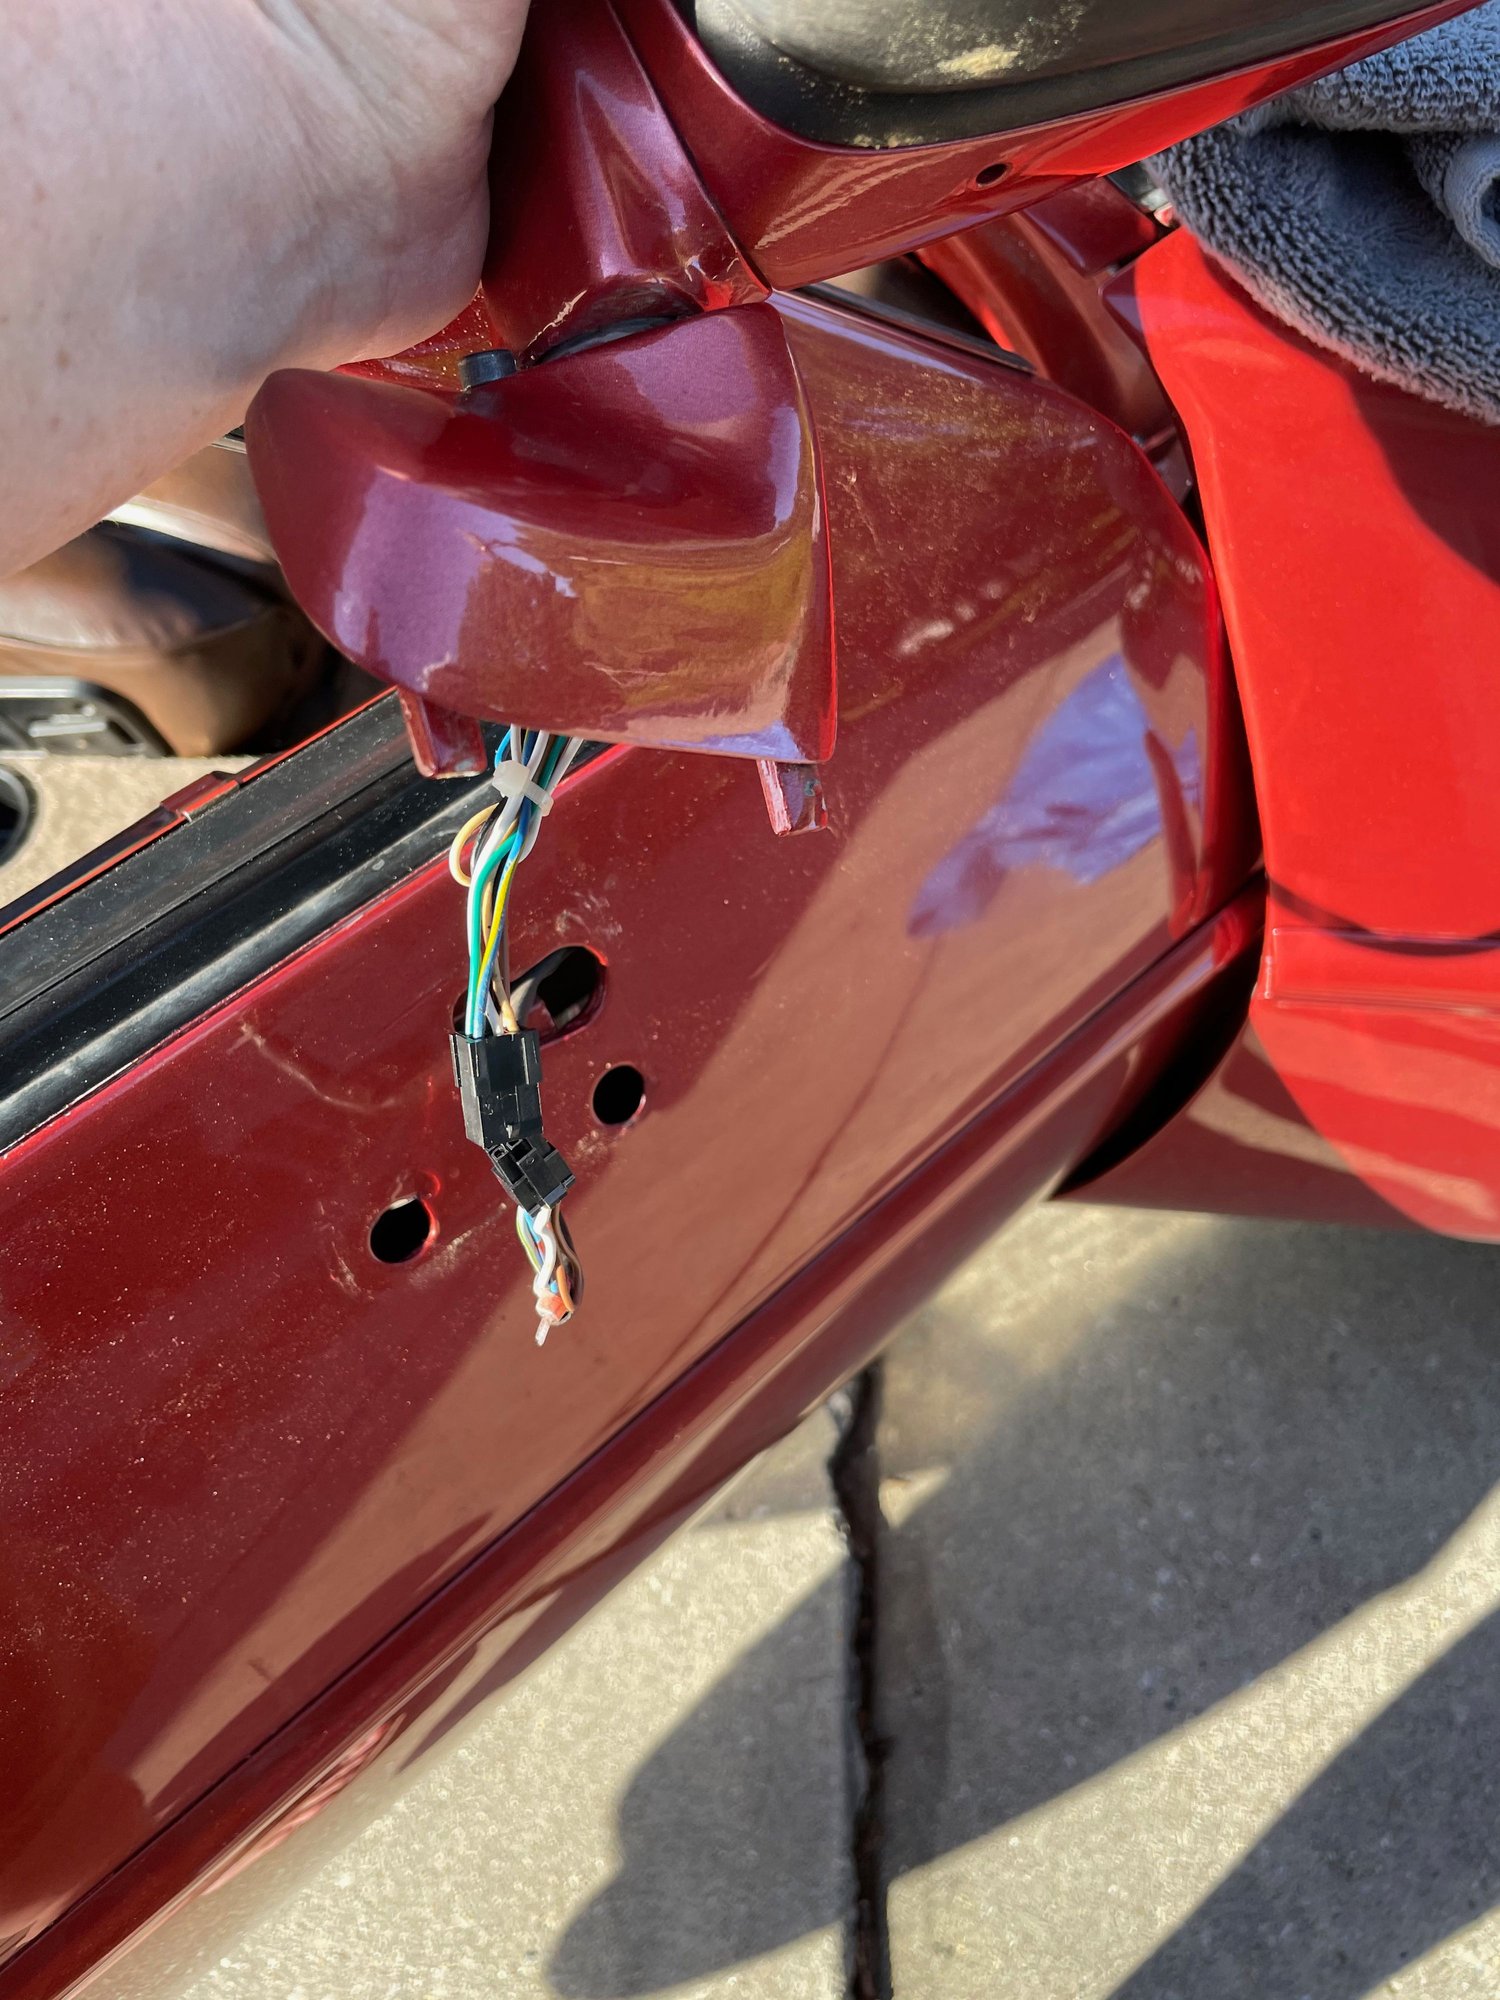
It is amazing how much "tighter" the window is now (combination of the new scraper and new guides). The motor flies - still have to lube it and reinstall with transmission. I imagine the window will really move up and down now. Wire harness where mirror was broken off. A PO had actually used a 9-pin computer serial port in here at some point so I was glad to replace it all. Using these Molex Micro connectors. Bought as a kit with male and female housings and pins. Its a locking connector. Extended the wires coming out of the mirror base. This way when the mirror is removed, you can unplug it. Finished mirror side. Plugs will mate outside the door and then the plug can be pushed through the hole in the door. Glass reseated in window. New guides loosely bolted in. Nice clean regulator.
nice clean up job, Your doors will be solid when your done.
FWIW since your working with the mirror harness make sure you look inside the door for the routing of the harness,
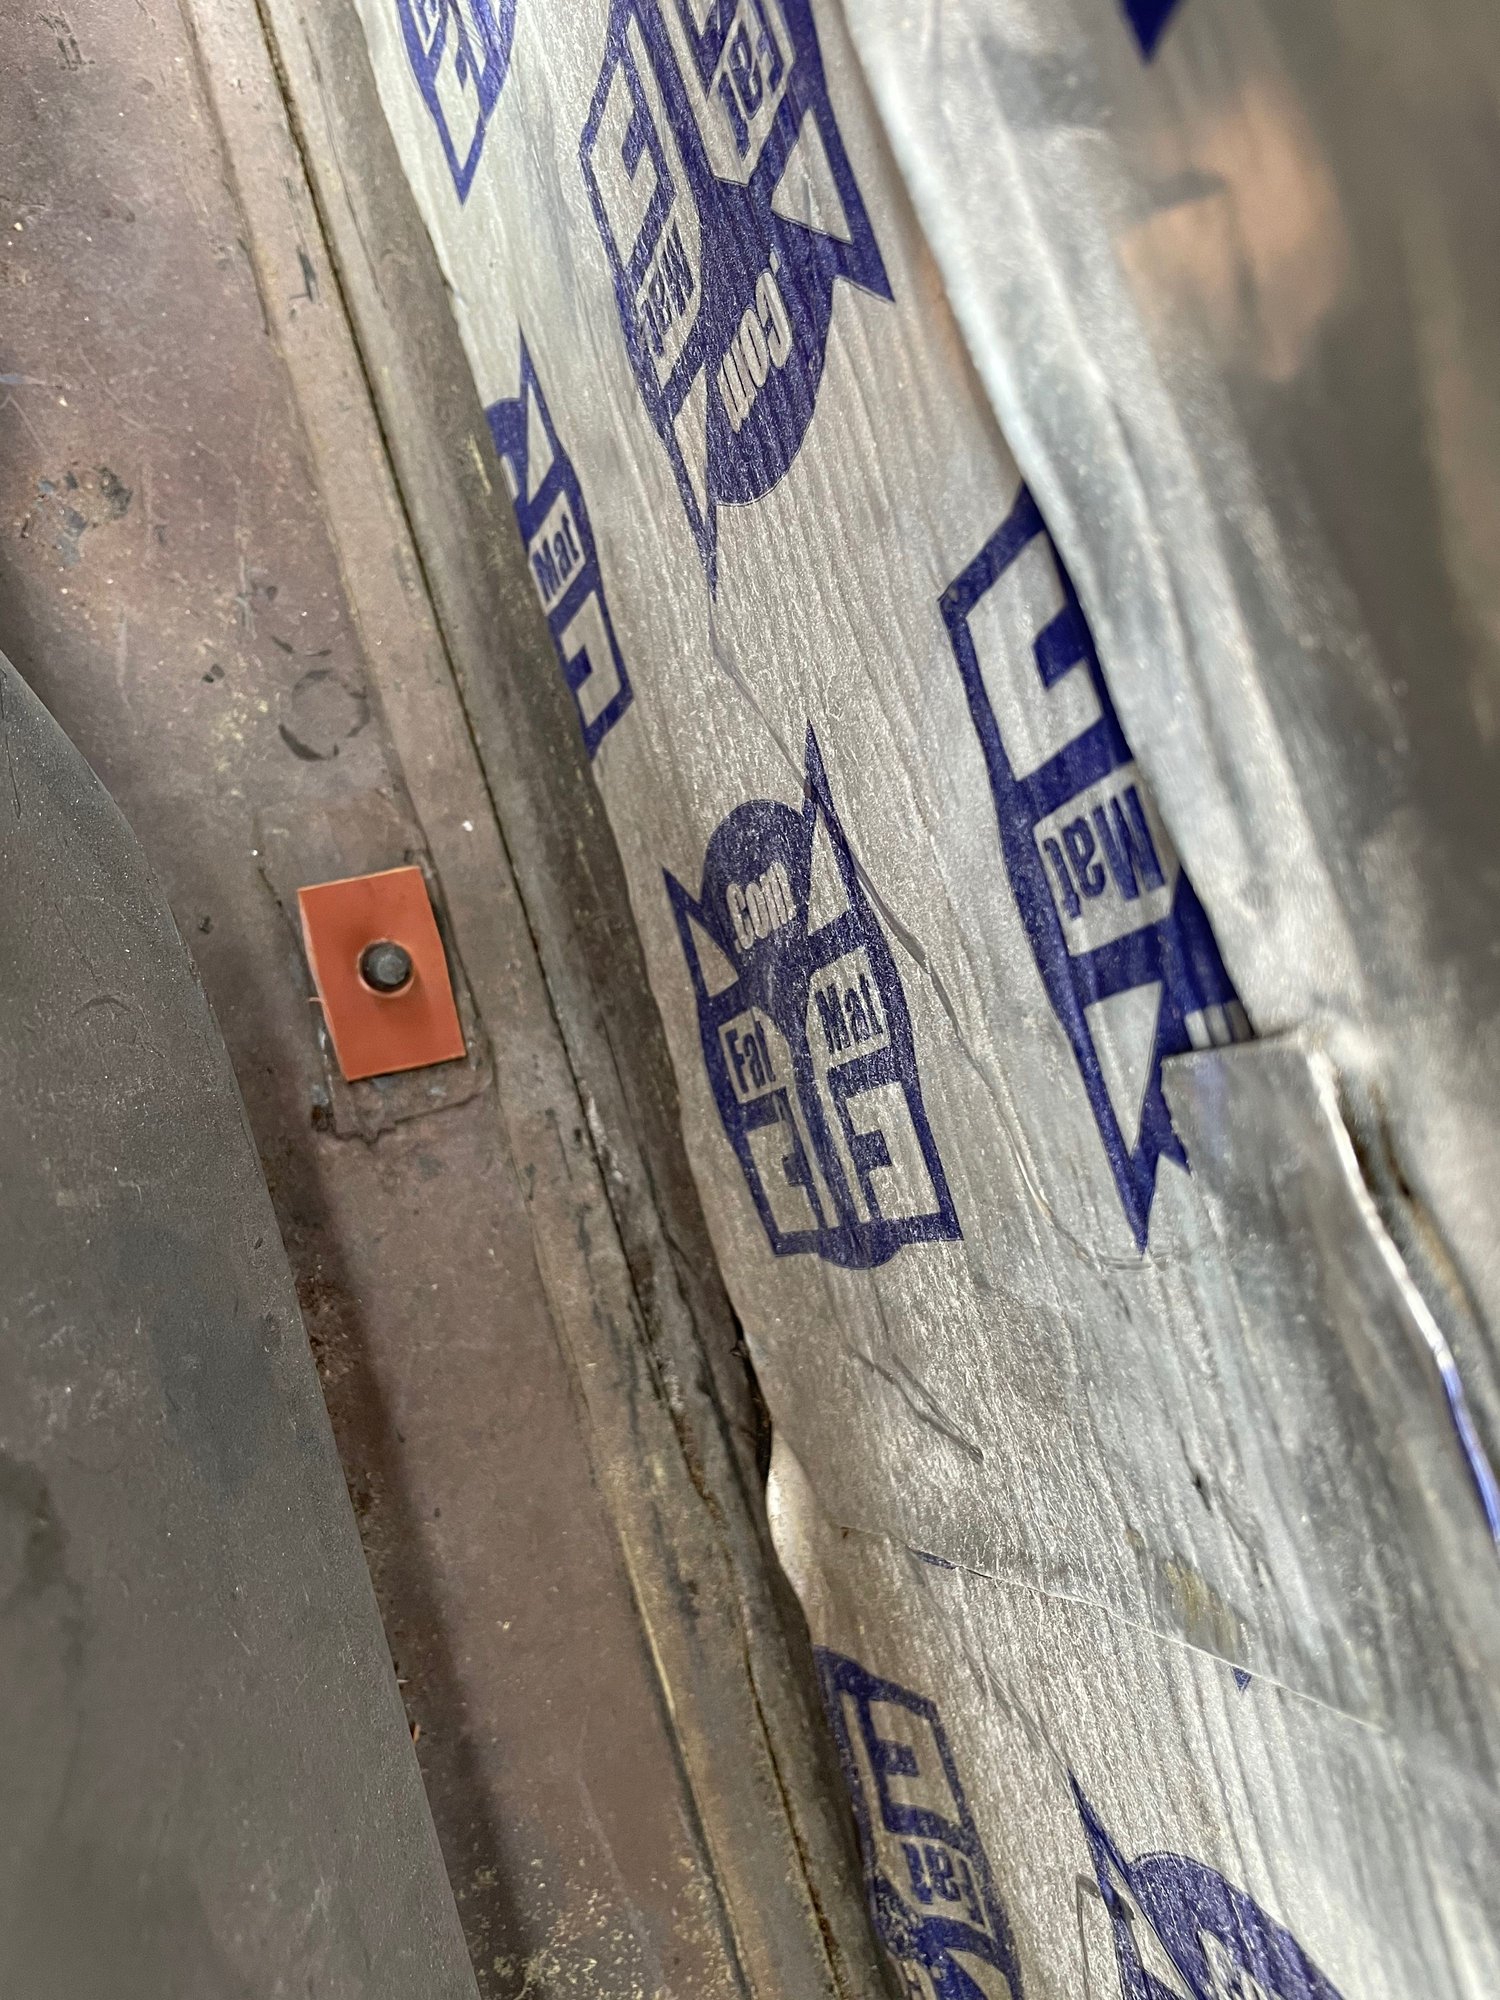
as it goes from the inner panel to the outer panel the wires are routed in clips to keep the harness clear of the window,
if the harness is not secured then the window will catch and damage the harness.
Thanks Stan - I noticed that the mirror part of the harness was really tucked high up in the door. I don�t think I added enough but will double check when it goes back together.
thanks Seth! Definitely not as intimidating once you get in there.
I have pulled everything out again - can�t stand that noise.
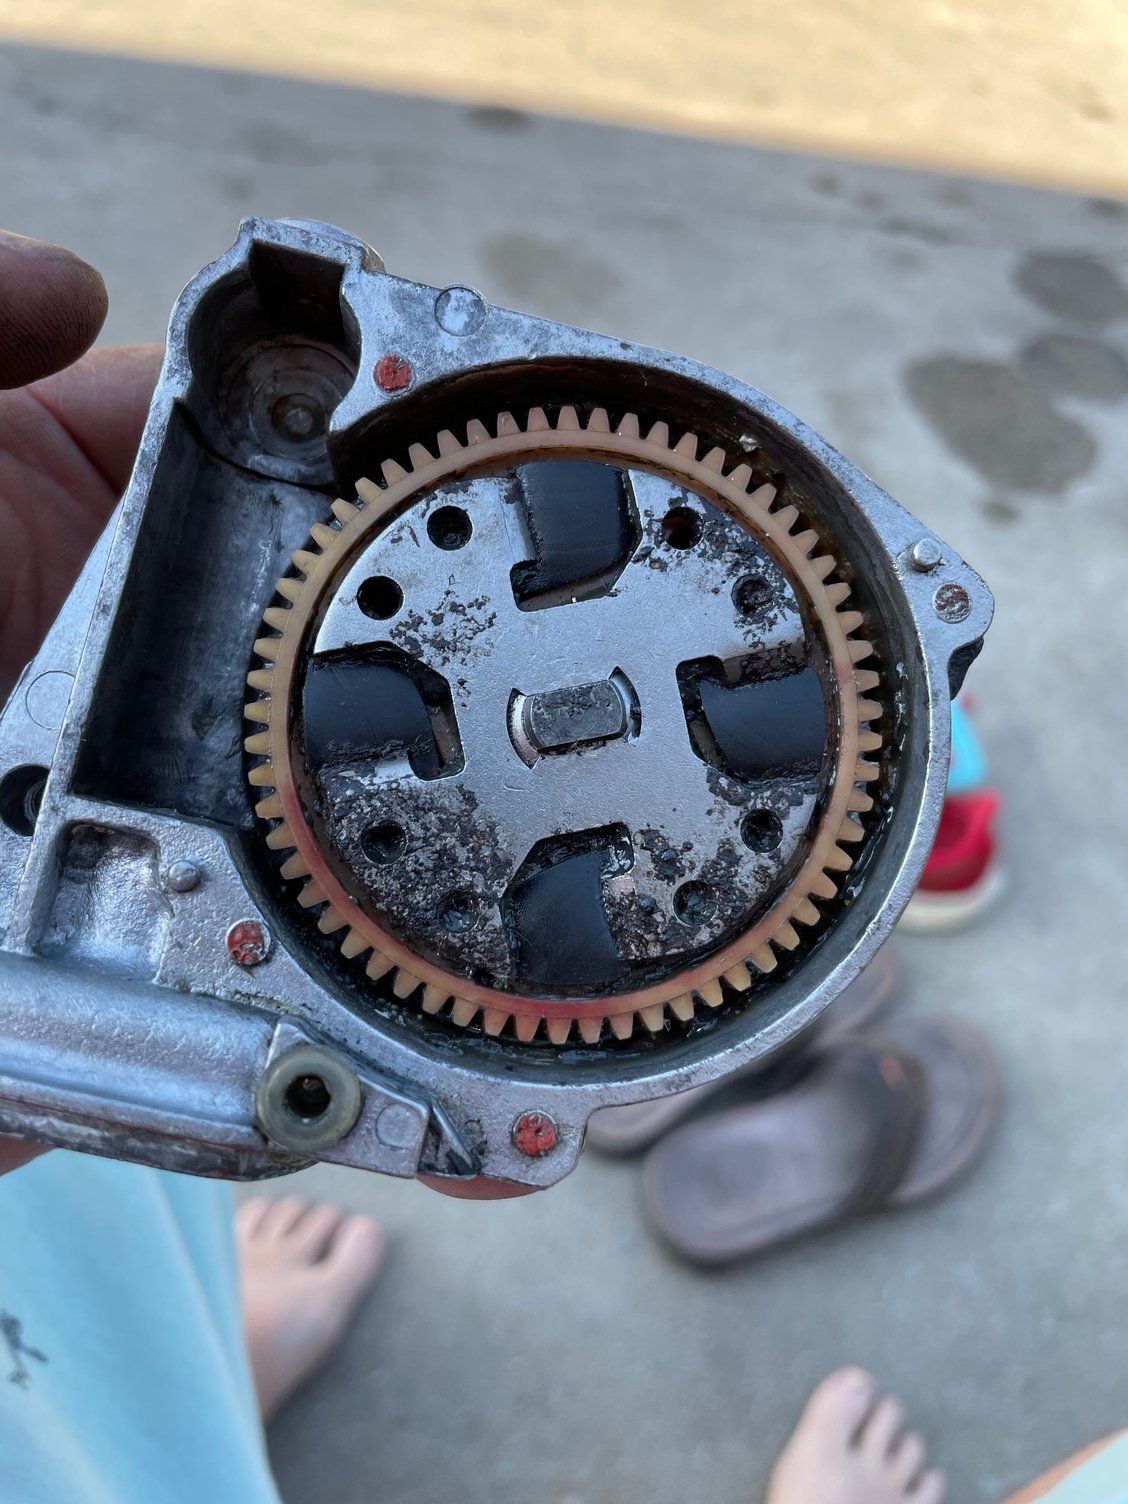
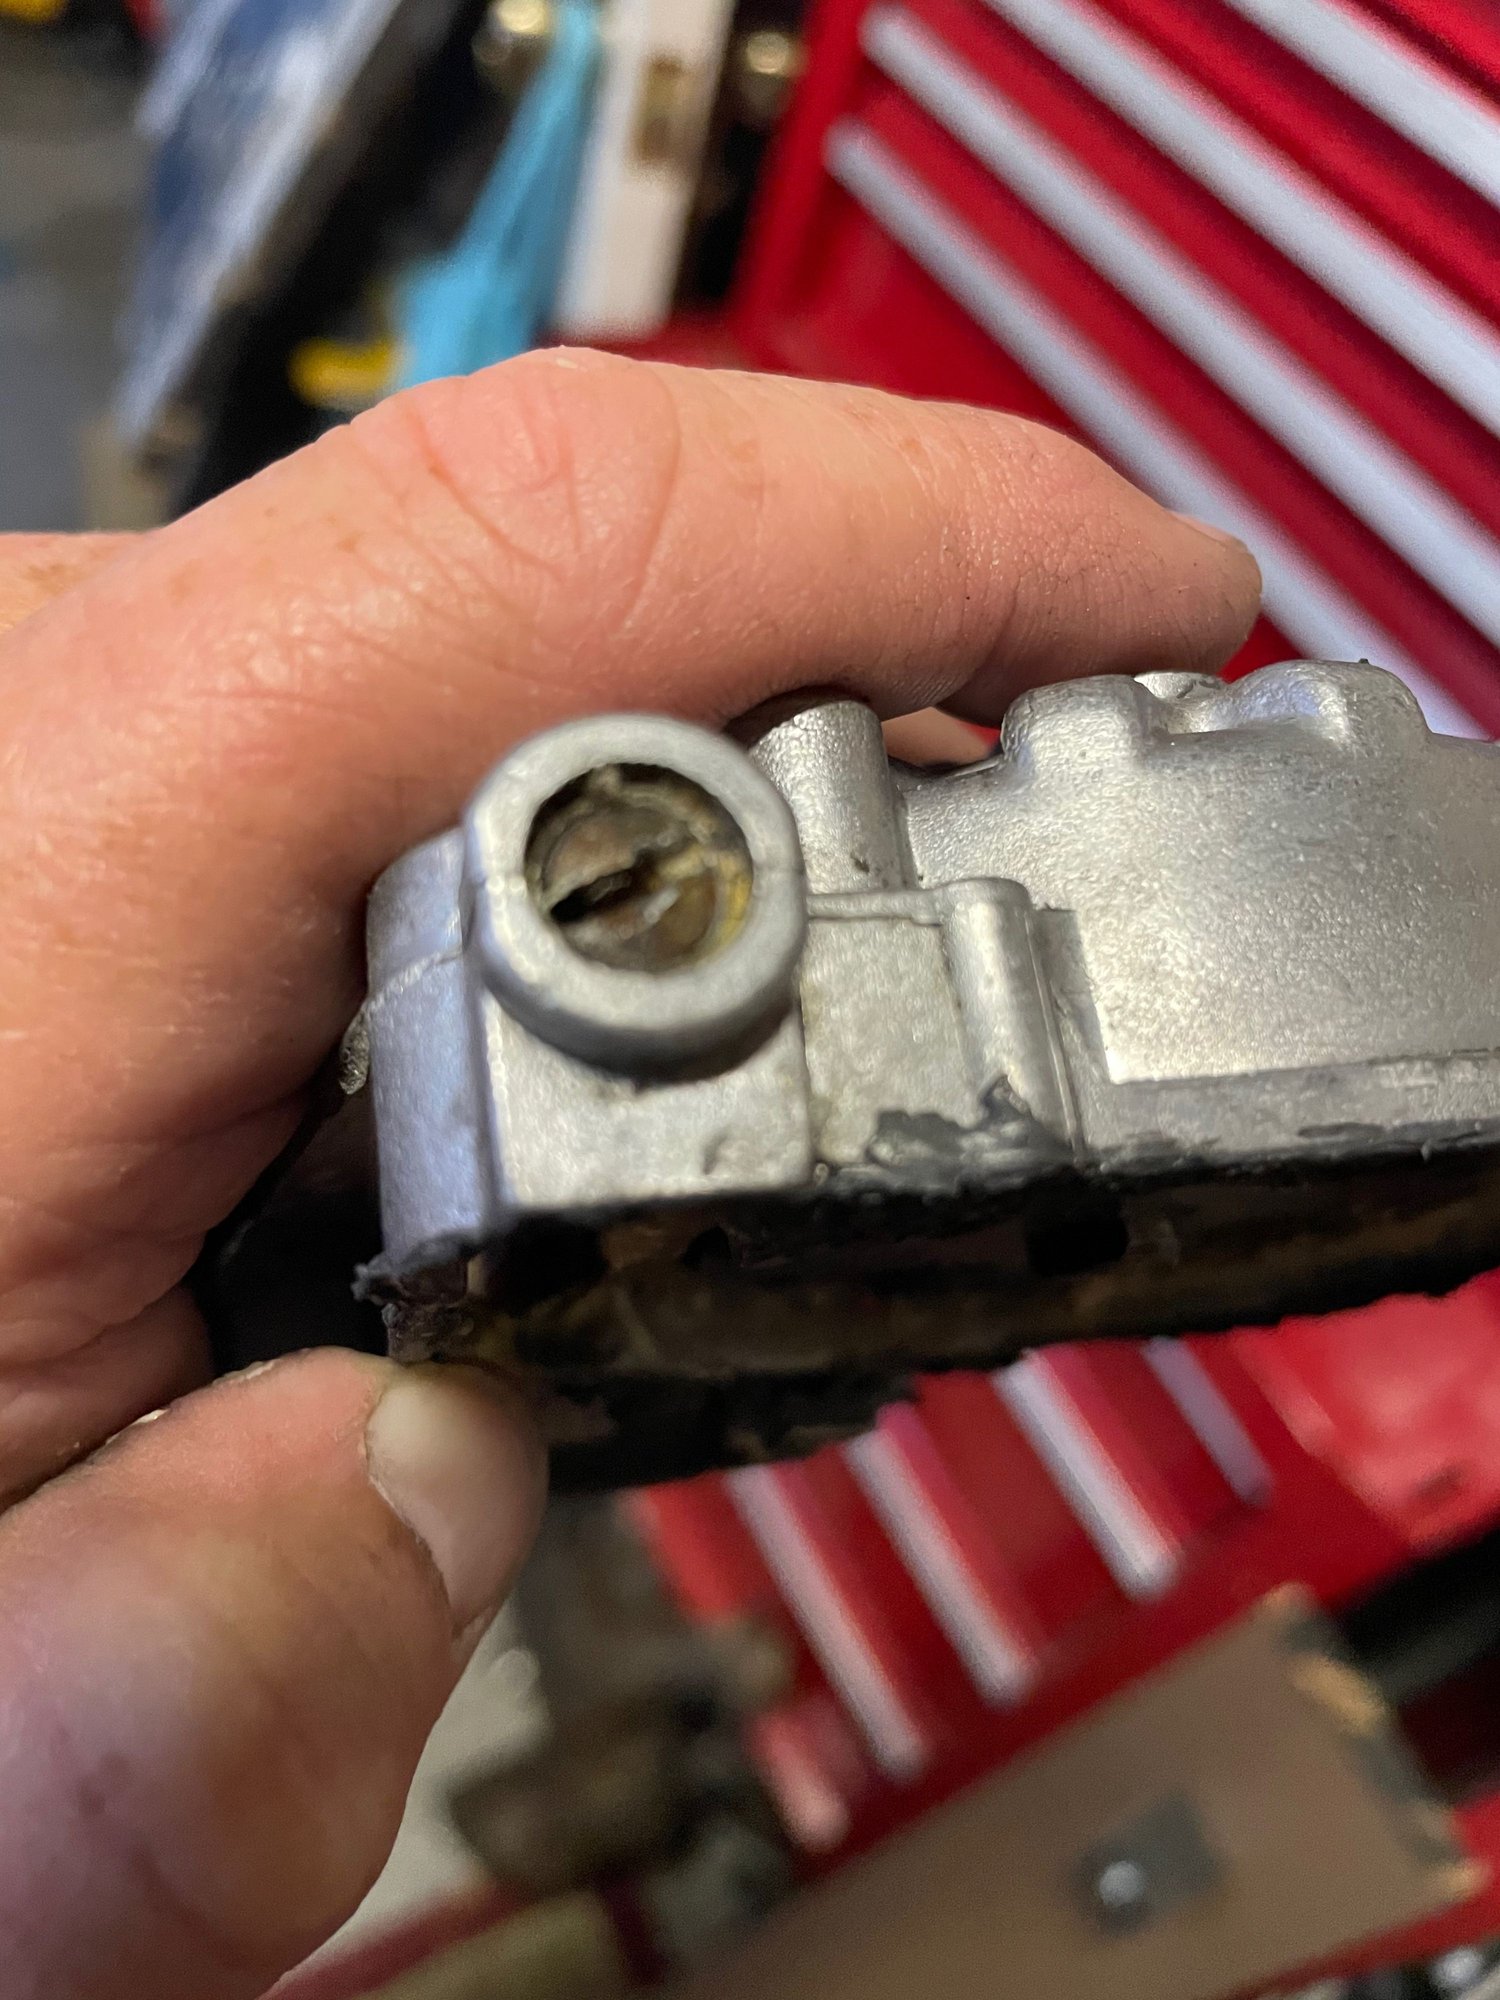
there is a slight bit of lateral play under the drive gear. Not sure if this may be part of the issue or not. Is this a pressure fit? I tried tapping with a drift and it does not come off easy if at all.
Ther is a bit of lateral play and what sounds like some bearing type noise where the shaft for the drive presses through the housing - how does this assembly come apart?
if the gear case gets water in it then the drive pinion will rust this could be parts of the noise as the gear will not be smooth turning against the driven gear.
By looking at the gear it appears that it has been rusting, at this point it might be prudent to get another window motor look at Saab 900 they seem to be the same
Interesting, both my window motors make the same noise (although at different pitches as I have two different output gears). I haven't tried to root out why, but I speculate that something is causing too much friction. All bushings etc. have been renewed, and the long lift "arms" are straight. I look forward to your diagnosis.
Old guides and bar after removal. The guides were a mess and obvious wear. Nice to have completely clean window glass again. Had no idea had this part of the window system worked and attached - makes much more sense now. Forgot to order new bushings (duh) for the bottom of the guide tubes, but improvised with a new rubber piece on the floor and new rubber inside the tube at the bottom to keep it from flopping around. Guide tube reinstalled with new clean white guides. The new ones are MUCH tighter but have not been lubed yet - Some have suggested lithium grease, but I may try sylglide that is used on the sunroof rails.
I am going to do this soon. Do I need to replace all parts in this diagram or just #9?
I replaced all three of those, as well as bought new felt to recover the two #16's...
Most of the wear was on part 8.
Also replaced the roller on the end of the regulator assembly - its not numbered separately in PET, but Roger has it and the rivet that attached it. You will destroy the old rivet to remove it.
1) I have purchased a Remote door lock kit and will bo converting to that. I finally messed with the servo motor so much that I broke the cap. That was nuts anyways.
2) Figured out the issue with the window - at least partially.
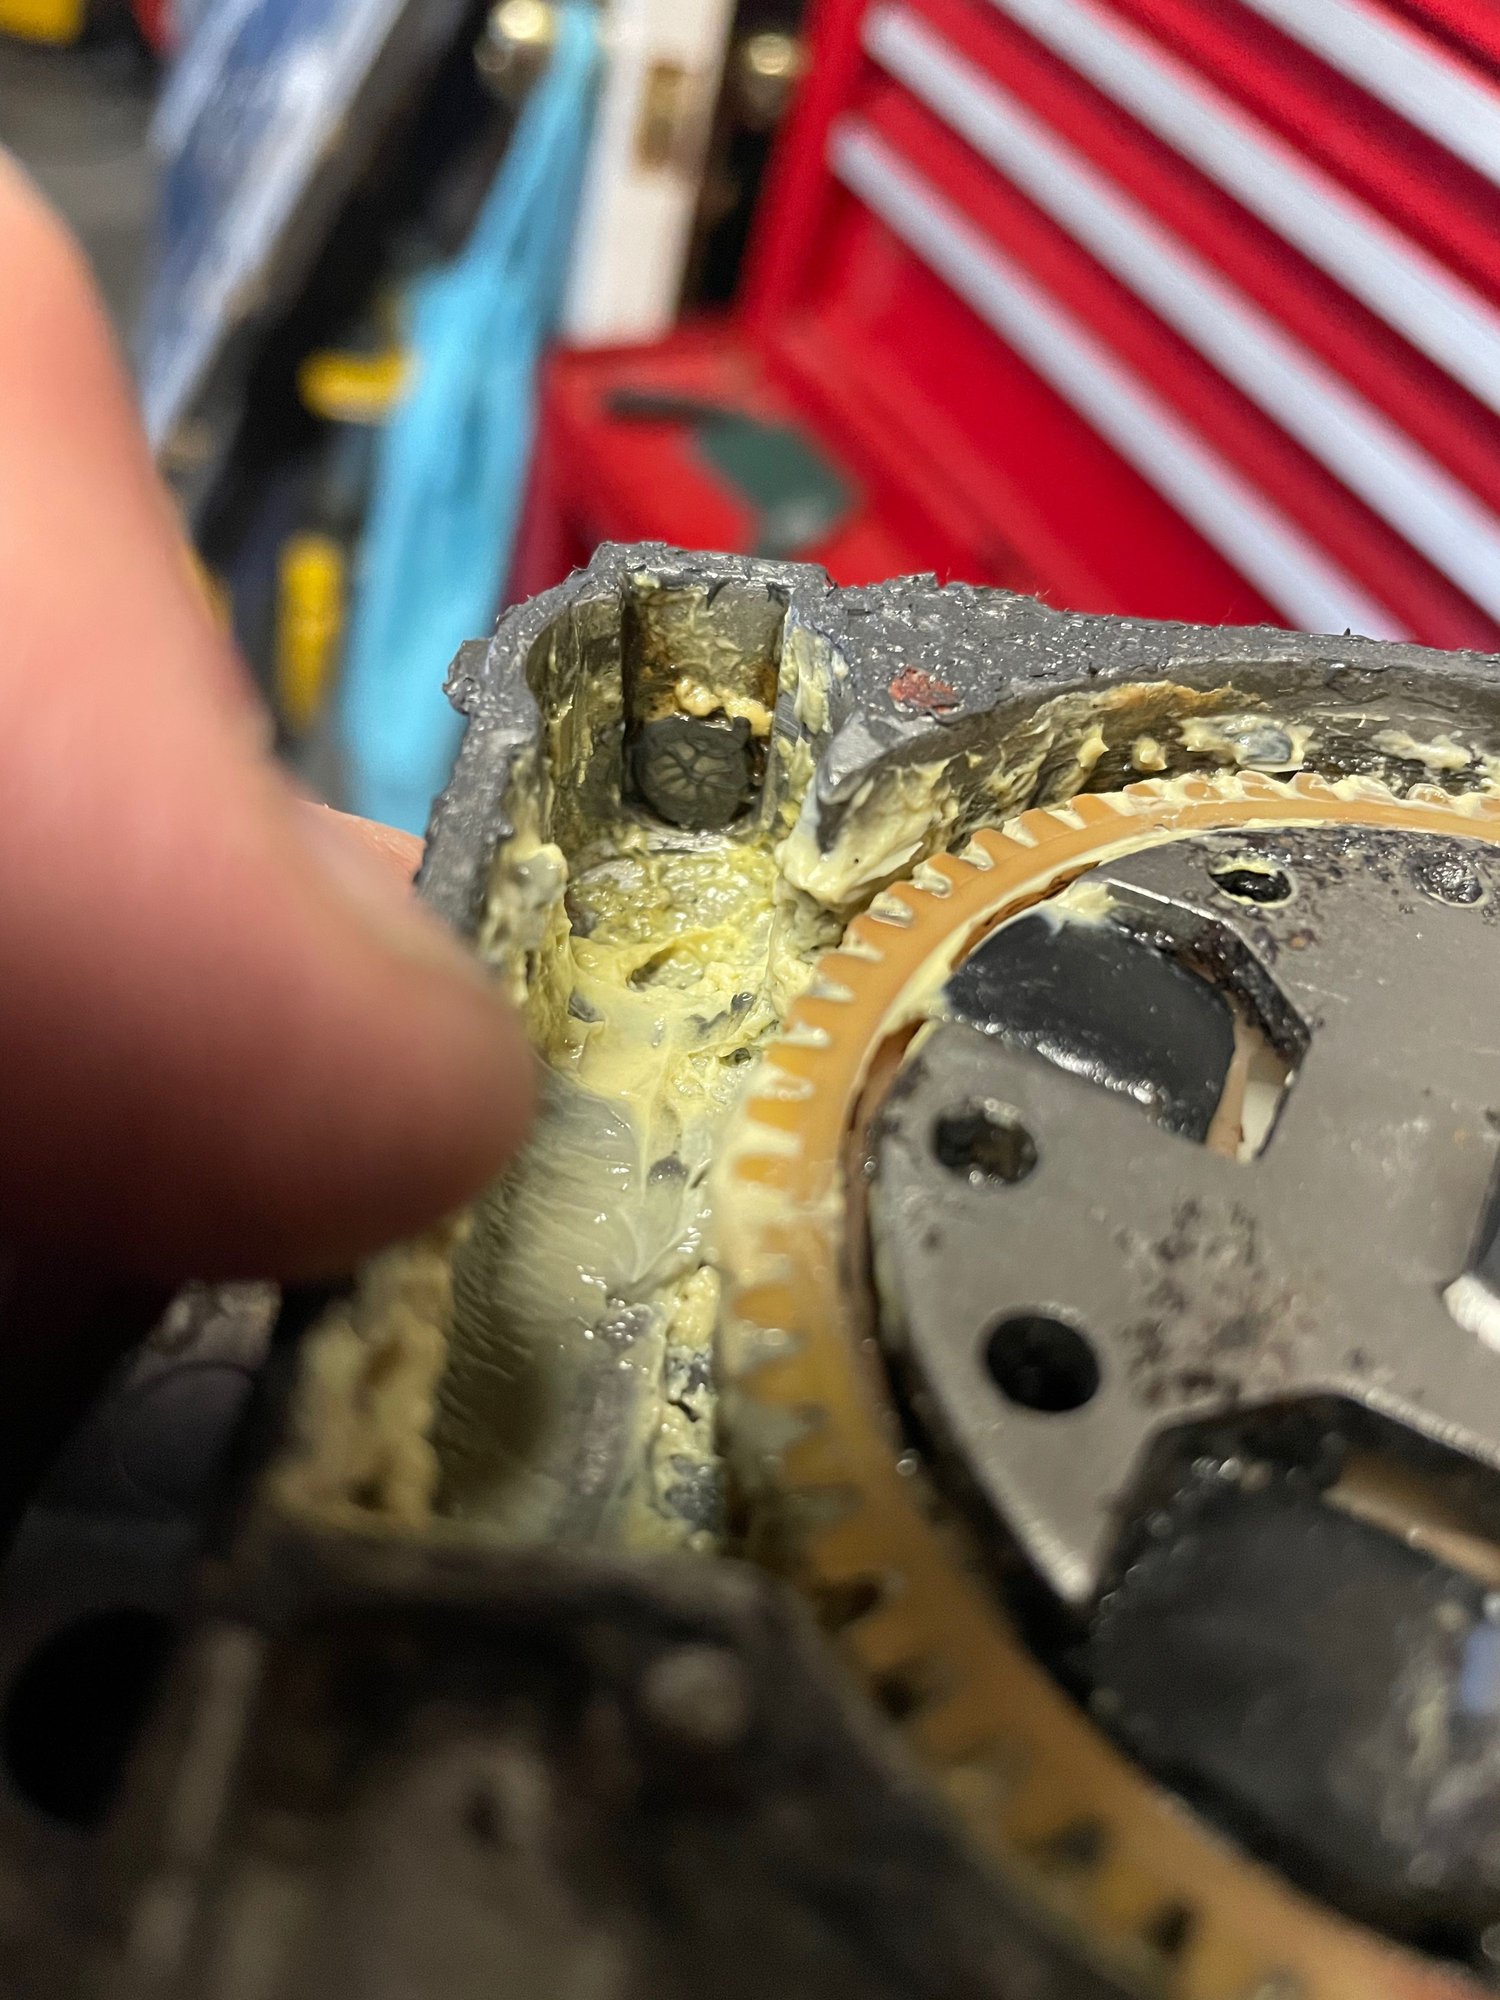
I took everything apart and cleaned it all again. I think some of the noise in the window operation was being transmitted from the motor assembly into the door itself as a vibration and being made louder. There was a little bit of grit in the bottom of the motor where the shaft rides, so cleaning again with the magnets out seemed to smooth the operation out and reduce the noise.
The window had gotten to a point where sometimes when going up it would get stuck. I finally realized that the pads on the adjustable stops were completely gone so replaced those and thought all would be well. Not so.
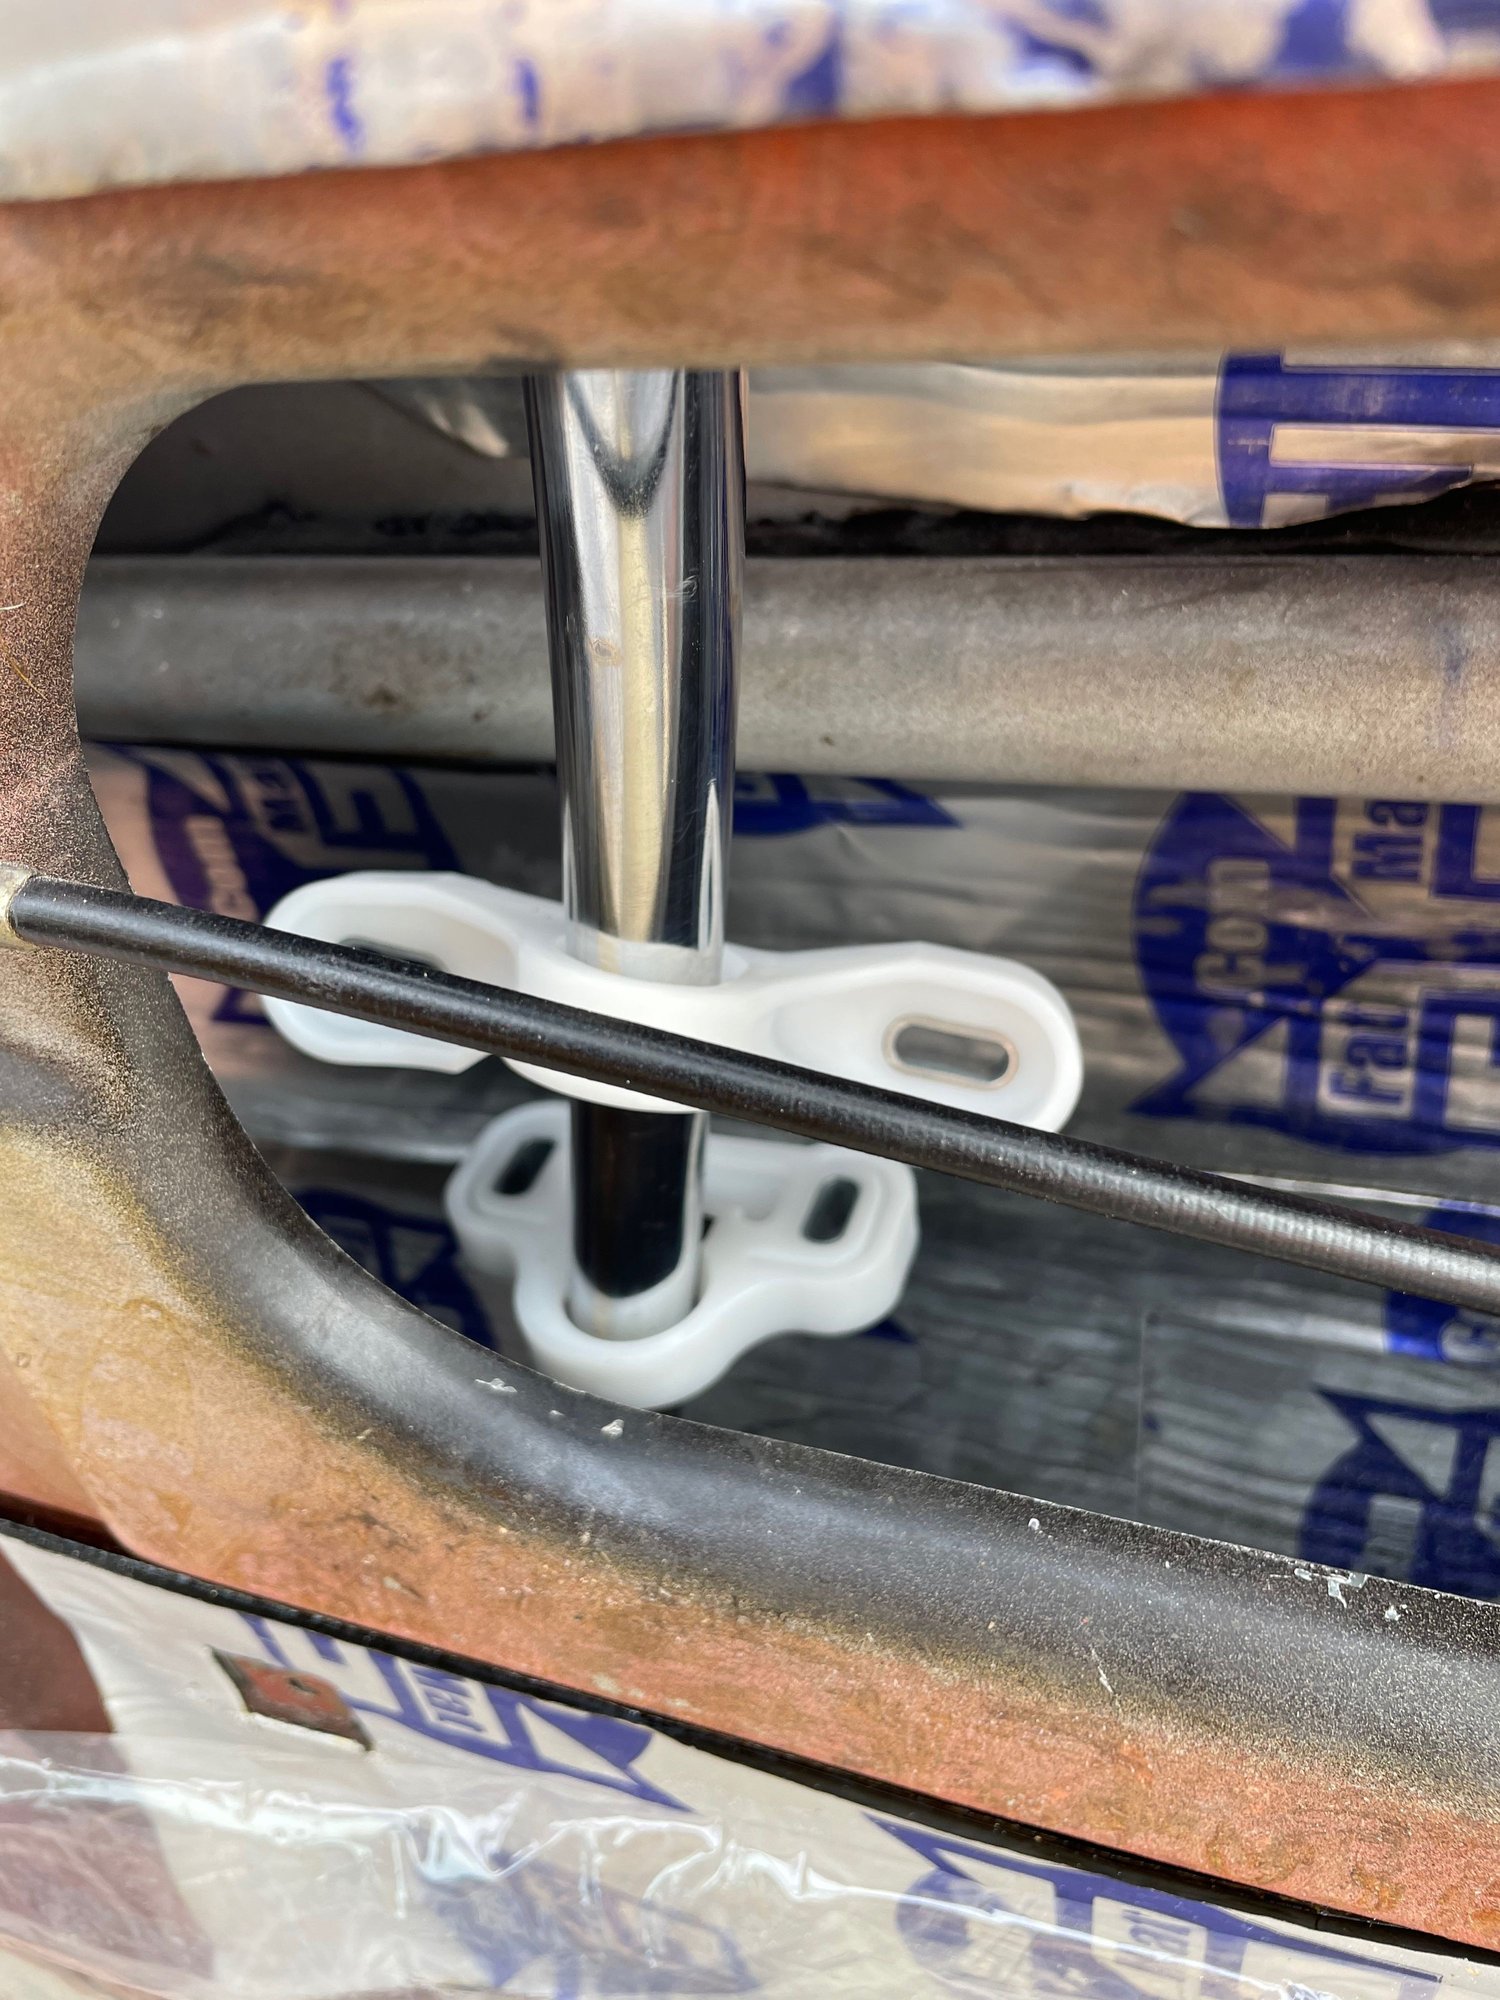
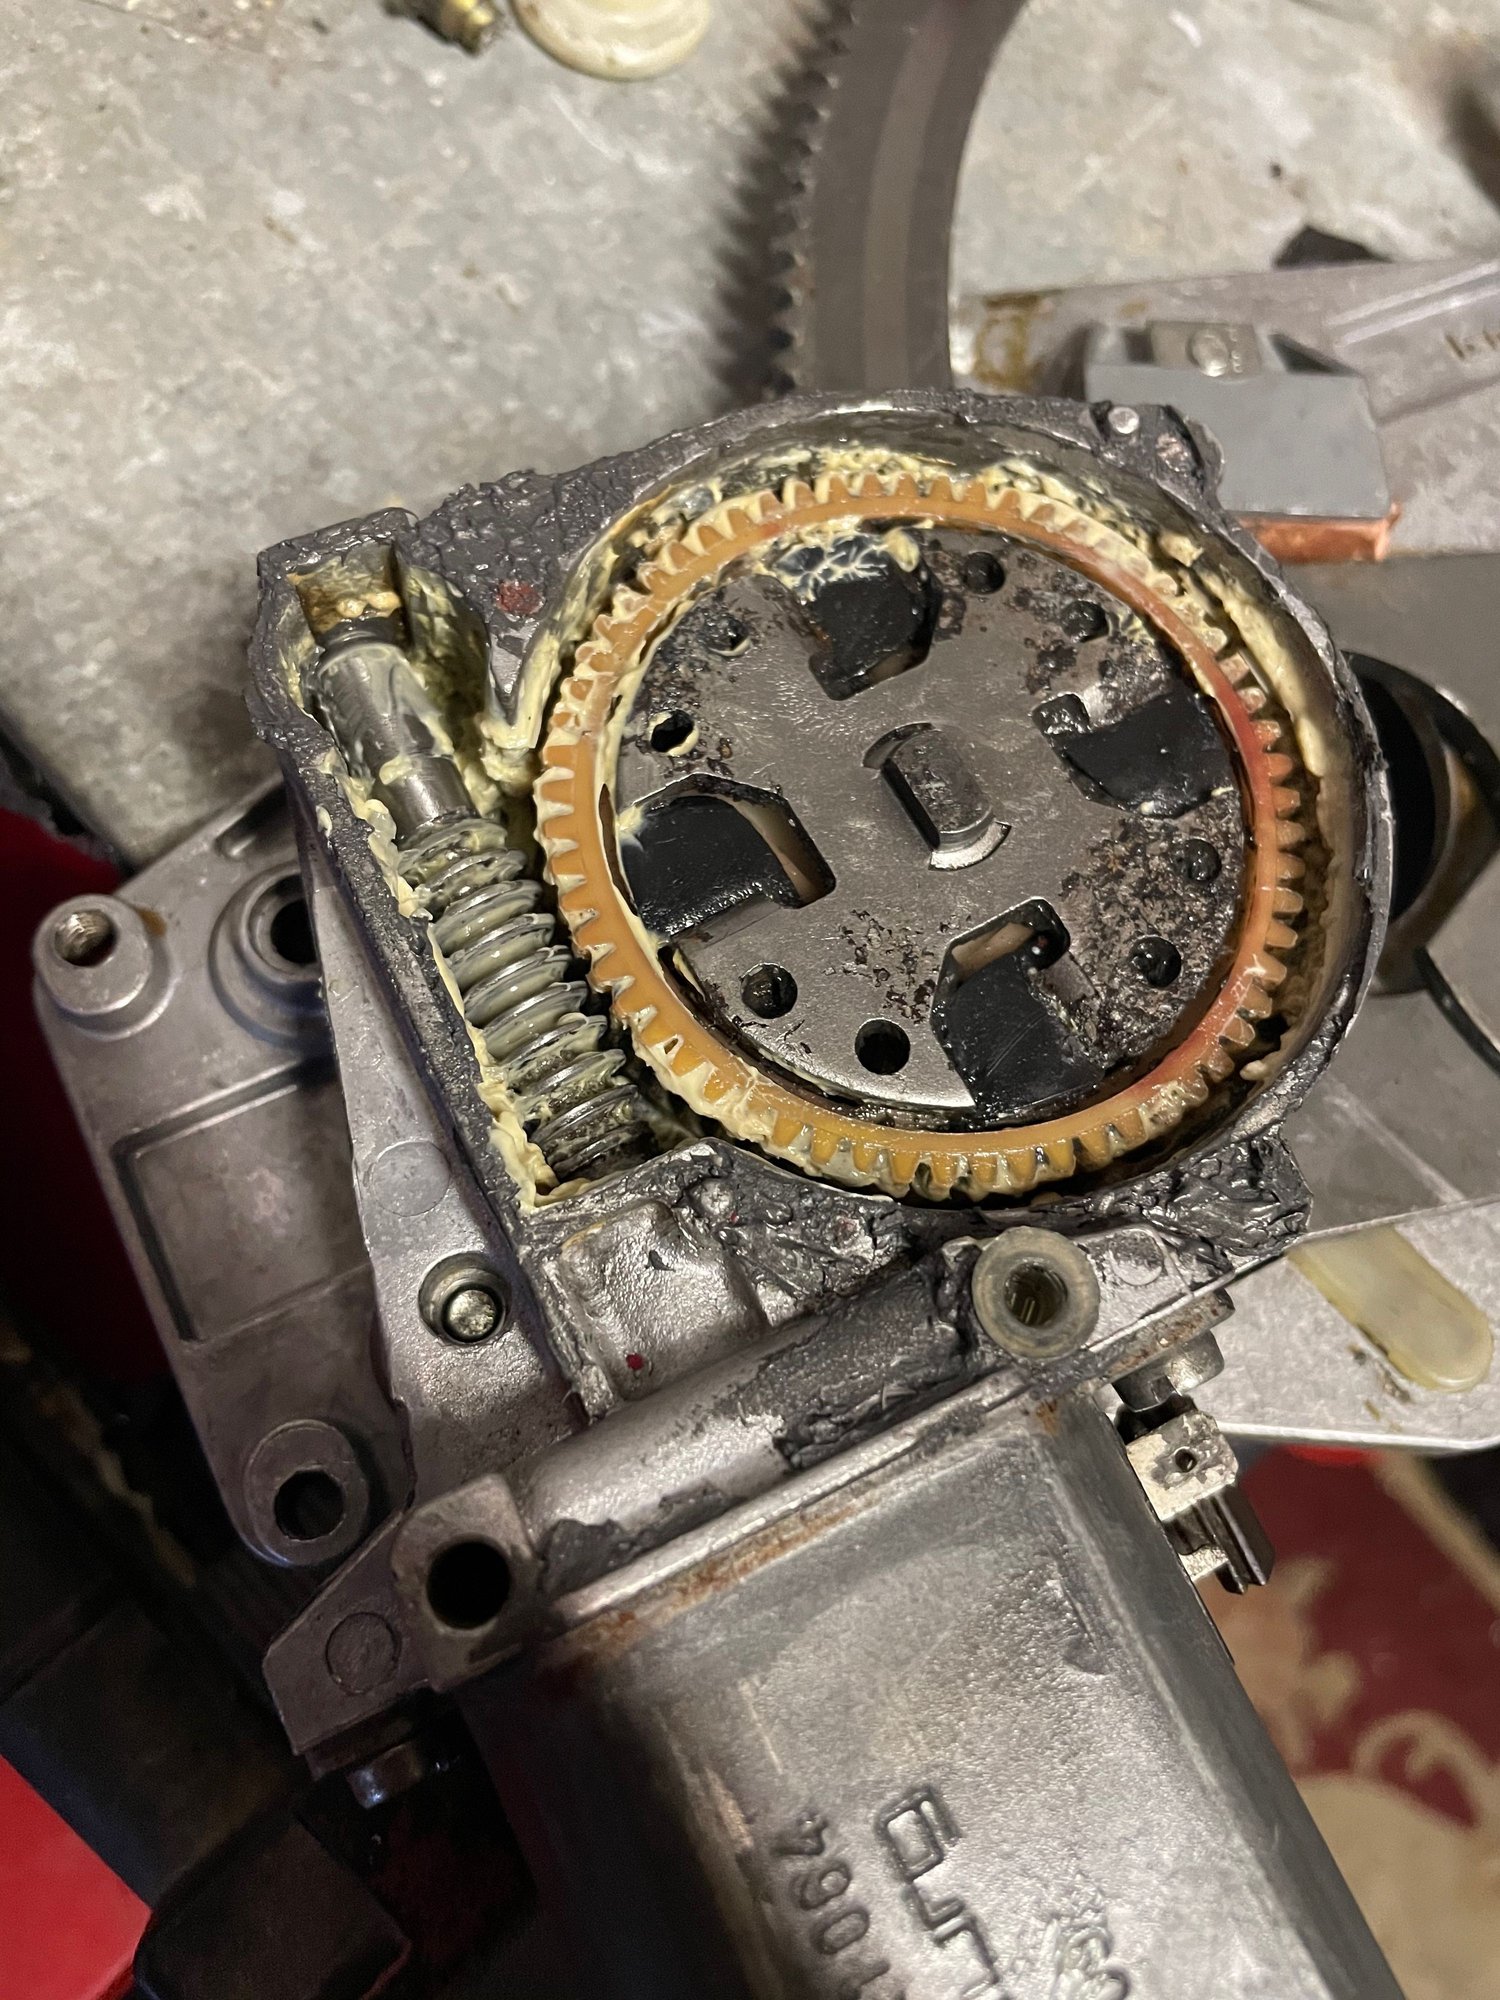
Took the assembly out so I could run the motor attached to the regulator but without the weight of the window. Action is smooth until it reaches the stop in the up position. The rubber makes contact but then compresses a little. When this happens, the motor shaft gets pushed to the side and disengages/binds against the large gear in the transmission (see photos). Any thoughts?
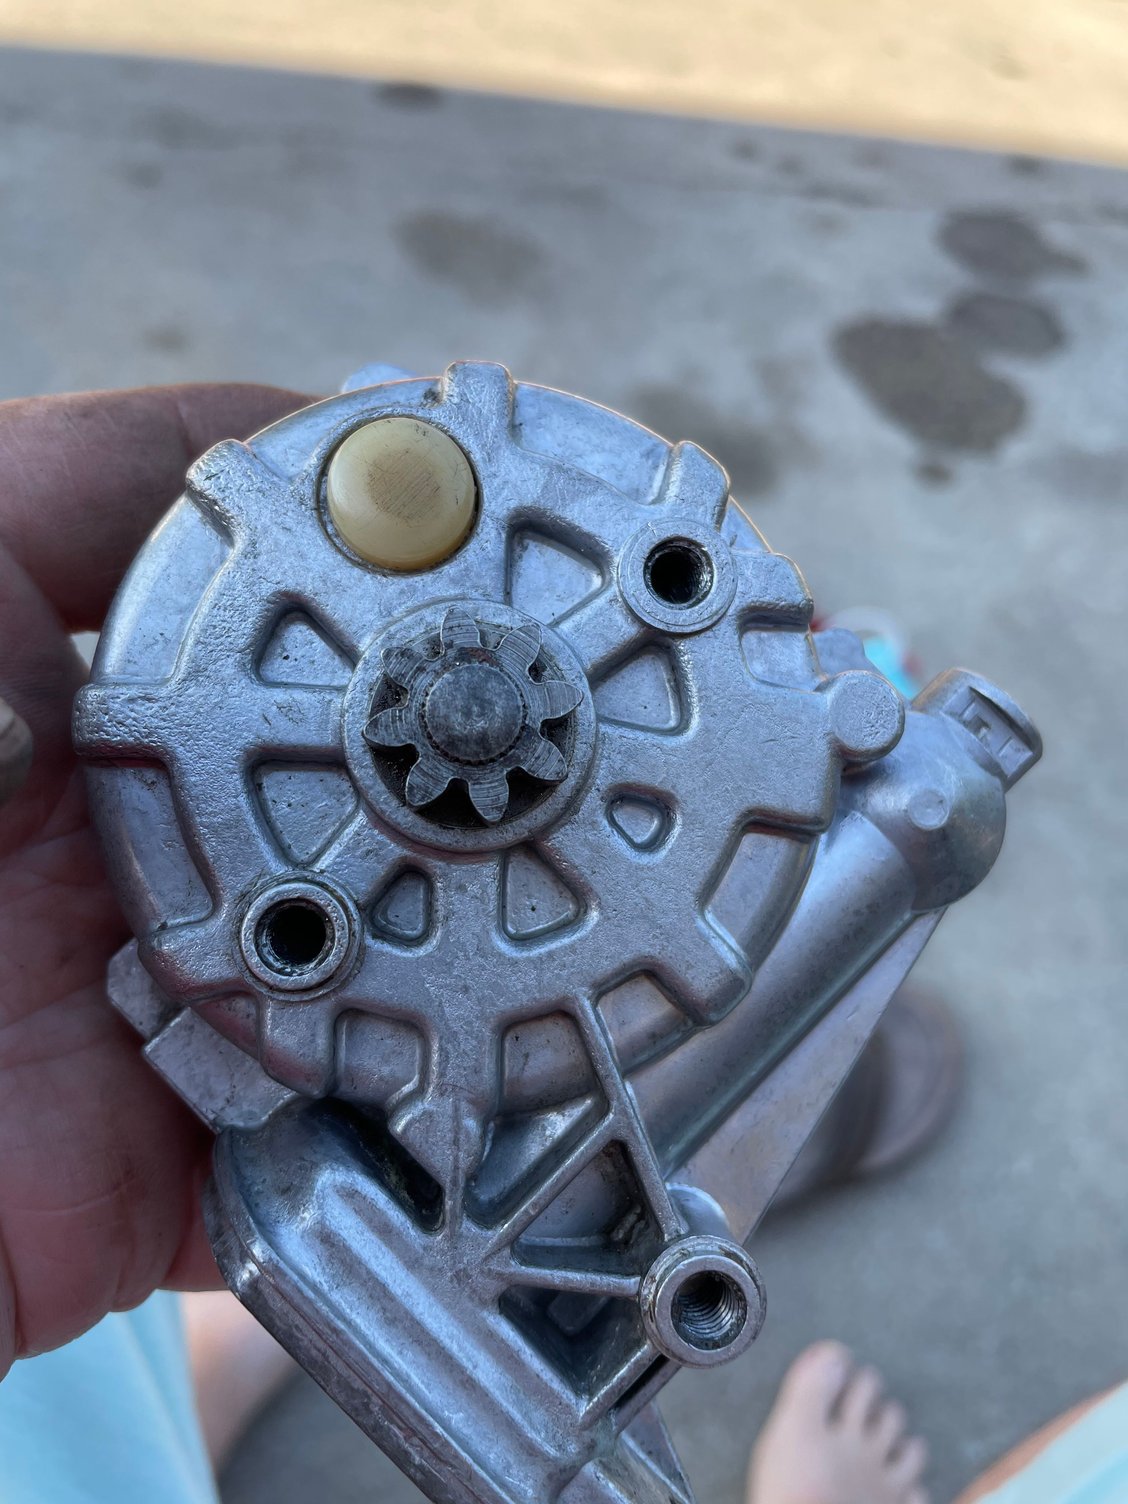
It is a little hard to see with the grease, but the motor is still attached to the regulator here. The motor output shaft has been pushed to the left (see alignment at the top of the shaft is not centered and the "teeth" are not meshed. Here is the motor removed. I am assuming the shaft should ride in the center of the little round pad at the top. This is the other side of that 'pad'. Obviously either a screw to adjust motor positioning or to remove and facilitate adding grease. If I loosen this would it allow the shaft to ride up inside the recess and not get pushed to the side?

 05-07-2021, 10:12 PM