When you click on links to various merchants on this site and make a purchase, this can result in this site earning a commission. Affiliate programs and affiliations include, but are not limited to, the eBay Partner Network.
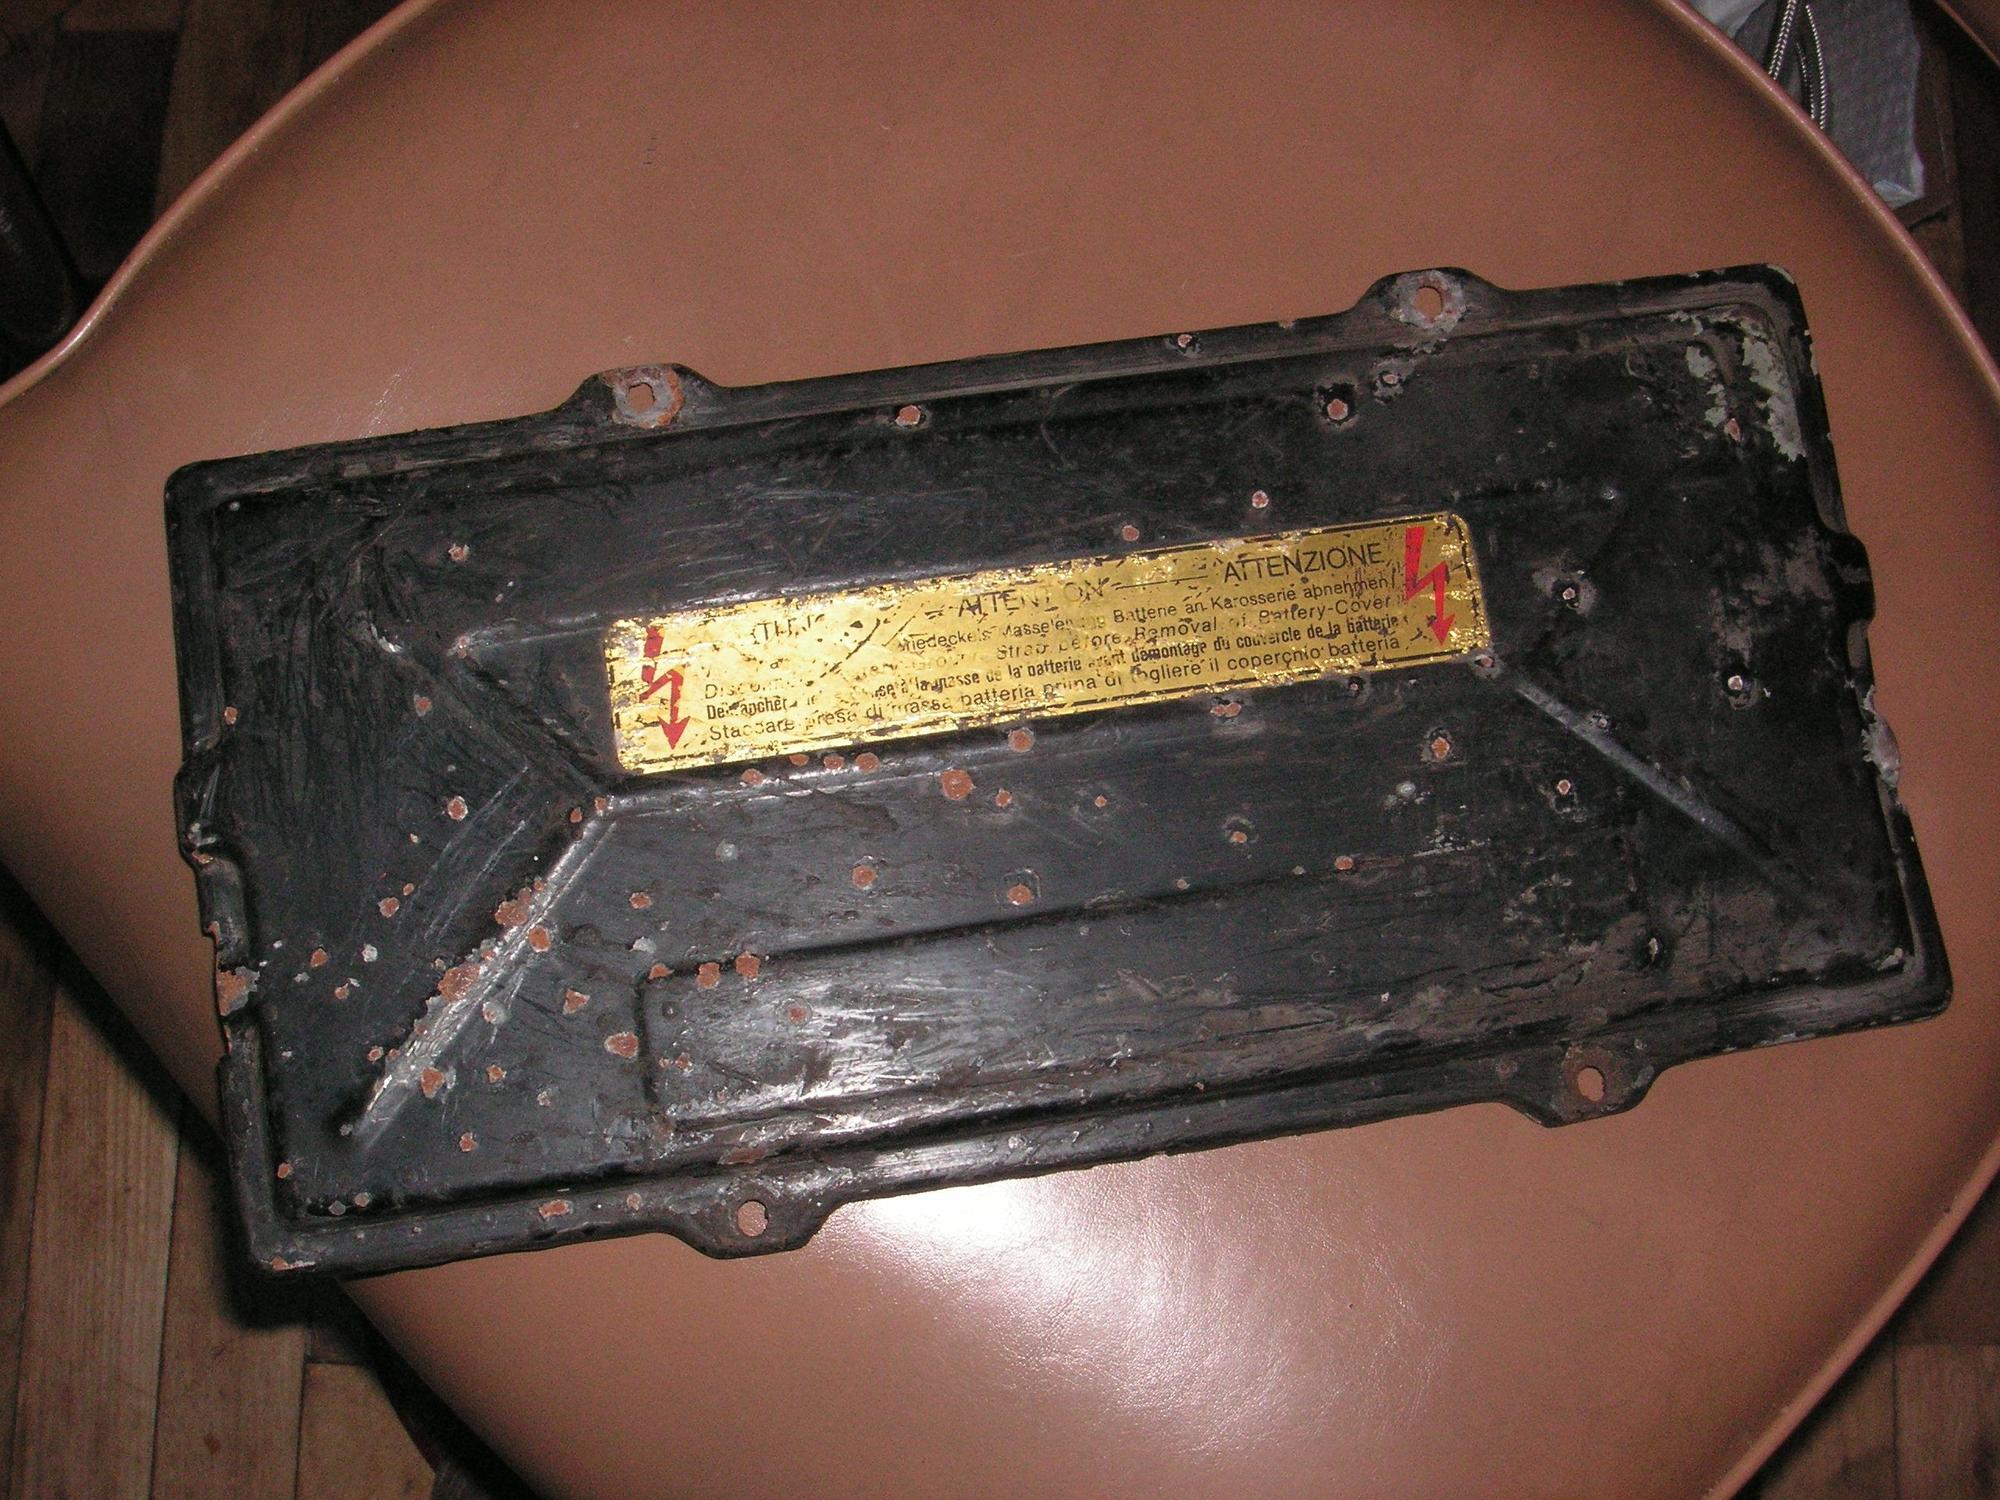
I probably should have waited at least until I had the heavy steel plates I have ordered to make the forming dies out of to form these battery box covers, but I thought I would get a little head start on this thread. I have received the well used lid from Belgium Barry that he gave to me for this project and it is going to give me all the dimensions needed for this project. Next I need to work up some paper drawings of the dies from it and then I'll be able to work them up in the metal plates I should have later this week.
Based on some significant input in the other thread about this item I plan to try to duplicate more than just replicate the original covers, but there seems to be a lot of differences in those that were provided by the factory. Those differences do give me some slack in my execution, but I'll be true to the original plan so that if I succeed at all mine should not be discernible from any one or another of the originals.
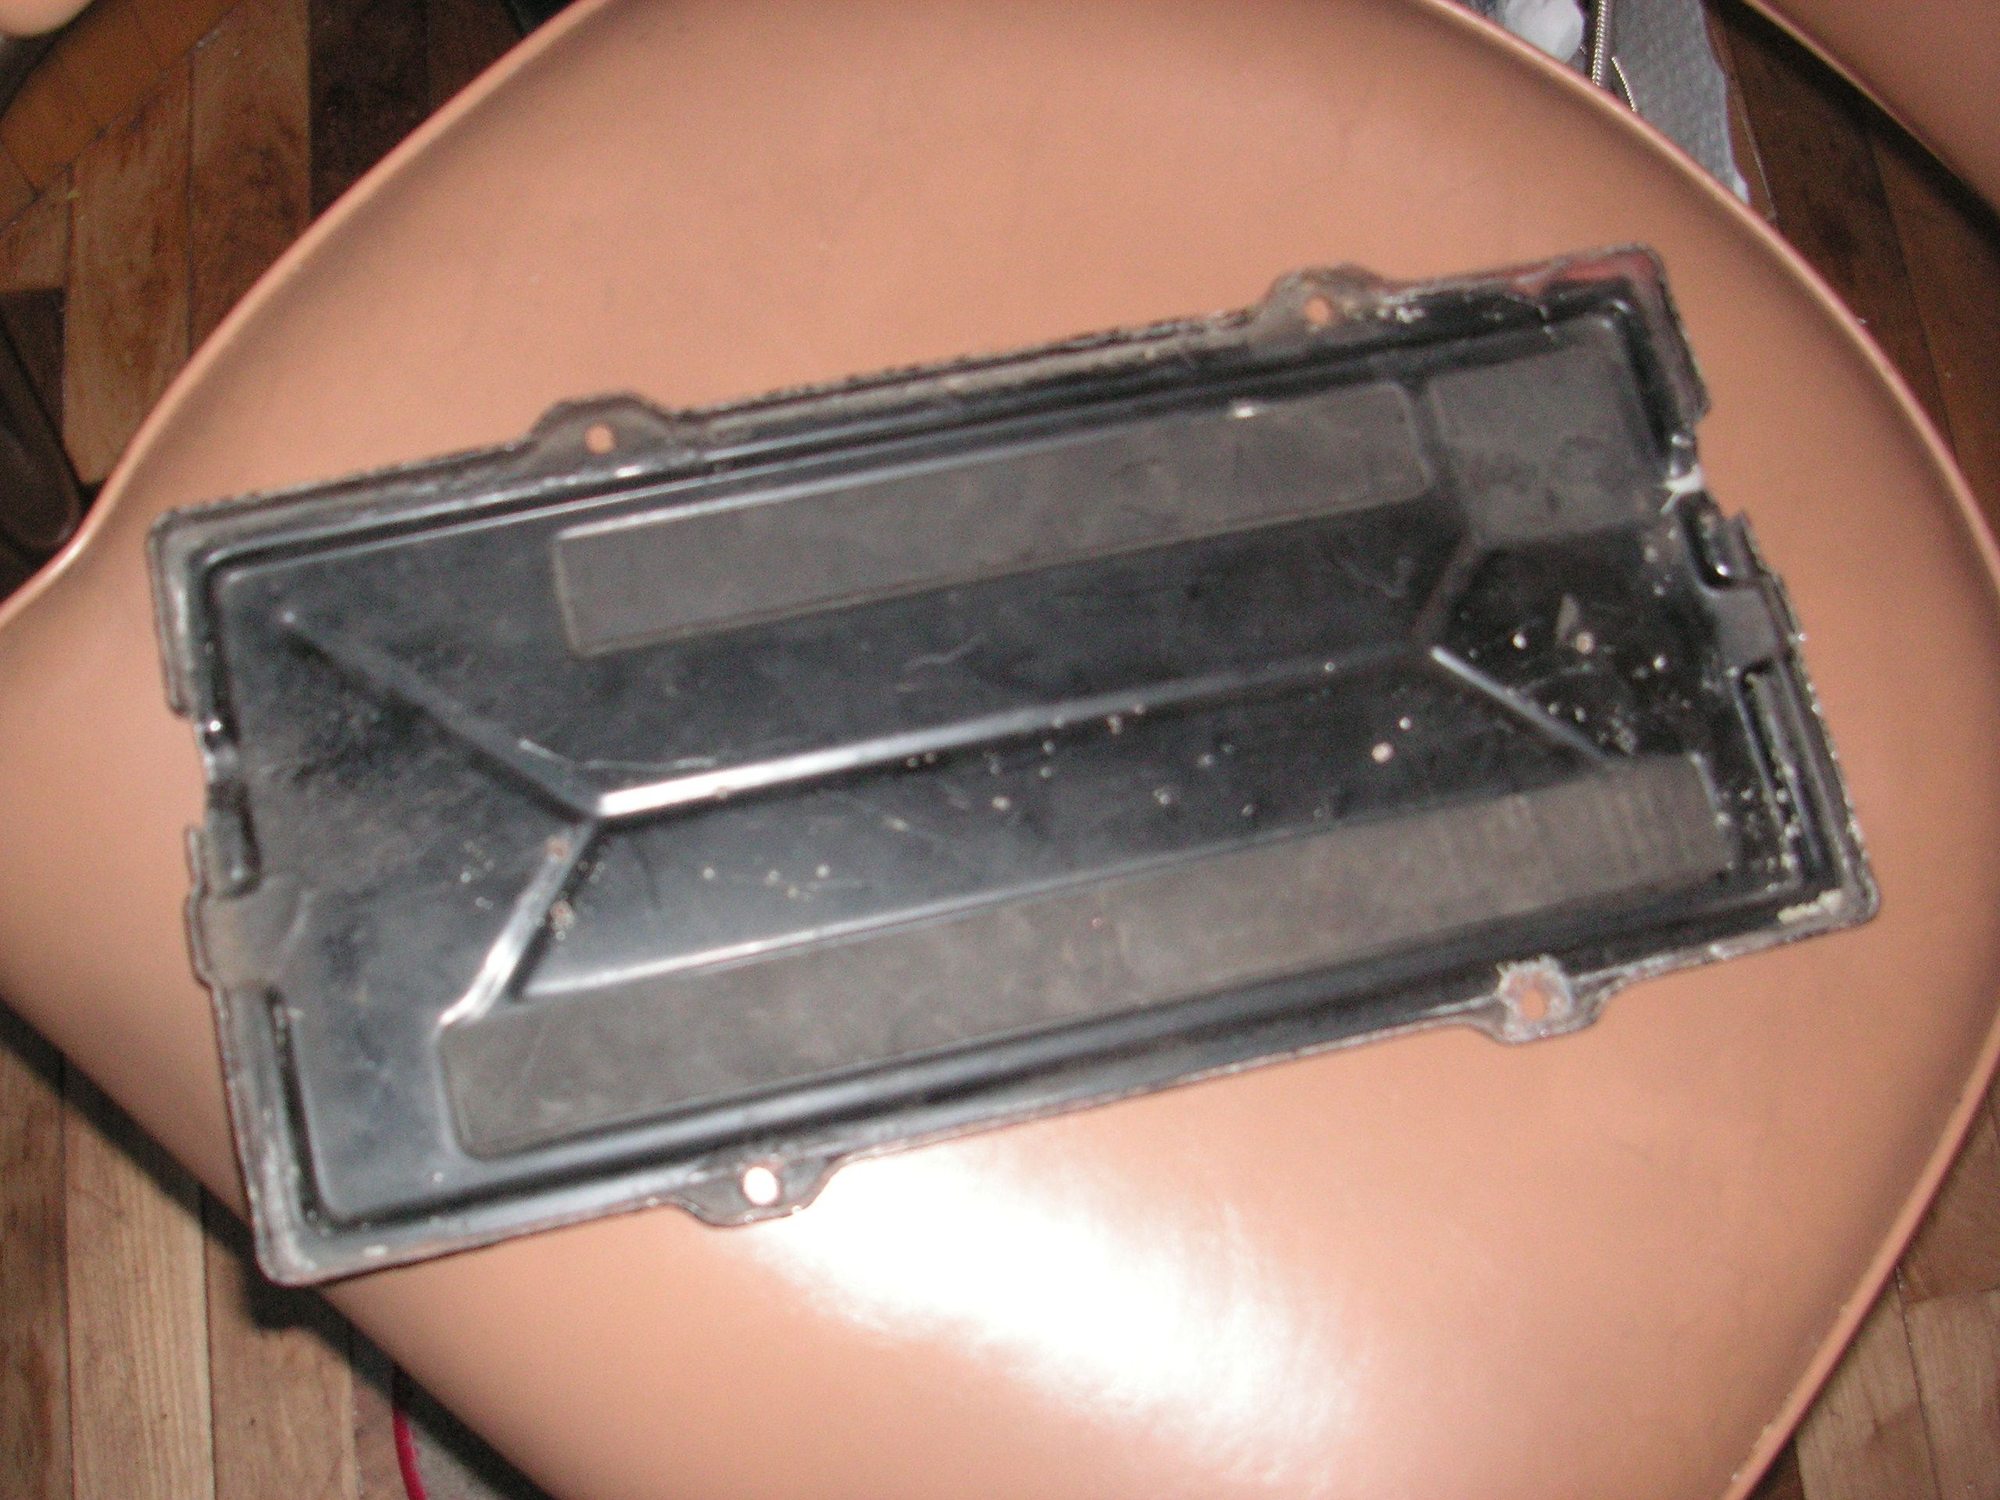
Here are pictures of the one Barry Gave me and you can see that the reliefs in the top surface of it are formed quite shallow, much moreso that those seen on others as shown in the other thread. I plan to form these reliefs somewhat deeper and that probably means making them out of slightly lighter gauge steel. I think this one form Barry is about 16 gauge, but I think I'll shoot for about 18 gauge.
Last edited by Jerry Feather; 03-30-2021 at 09:32 PM.
Oh, good. The steel is ready for me to pick up this morning. I ordered the heavy steel plates to be cut to rough size, but I still need to add some flat bar stock to the order for some of the details in the lids.
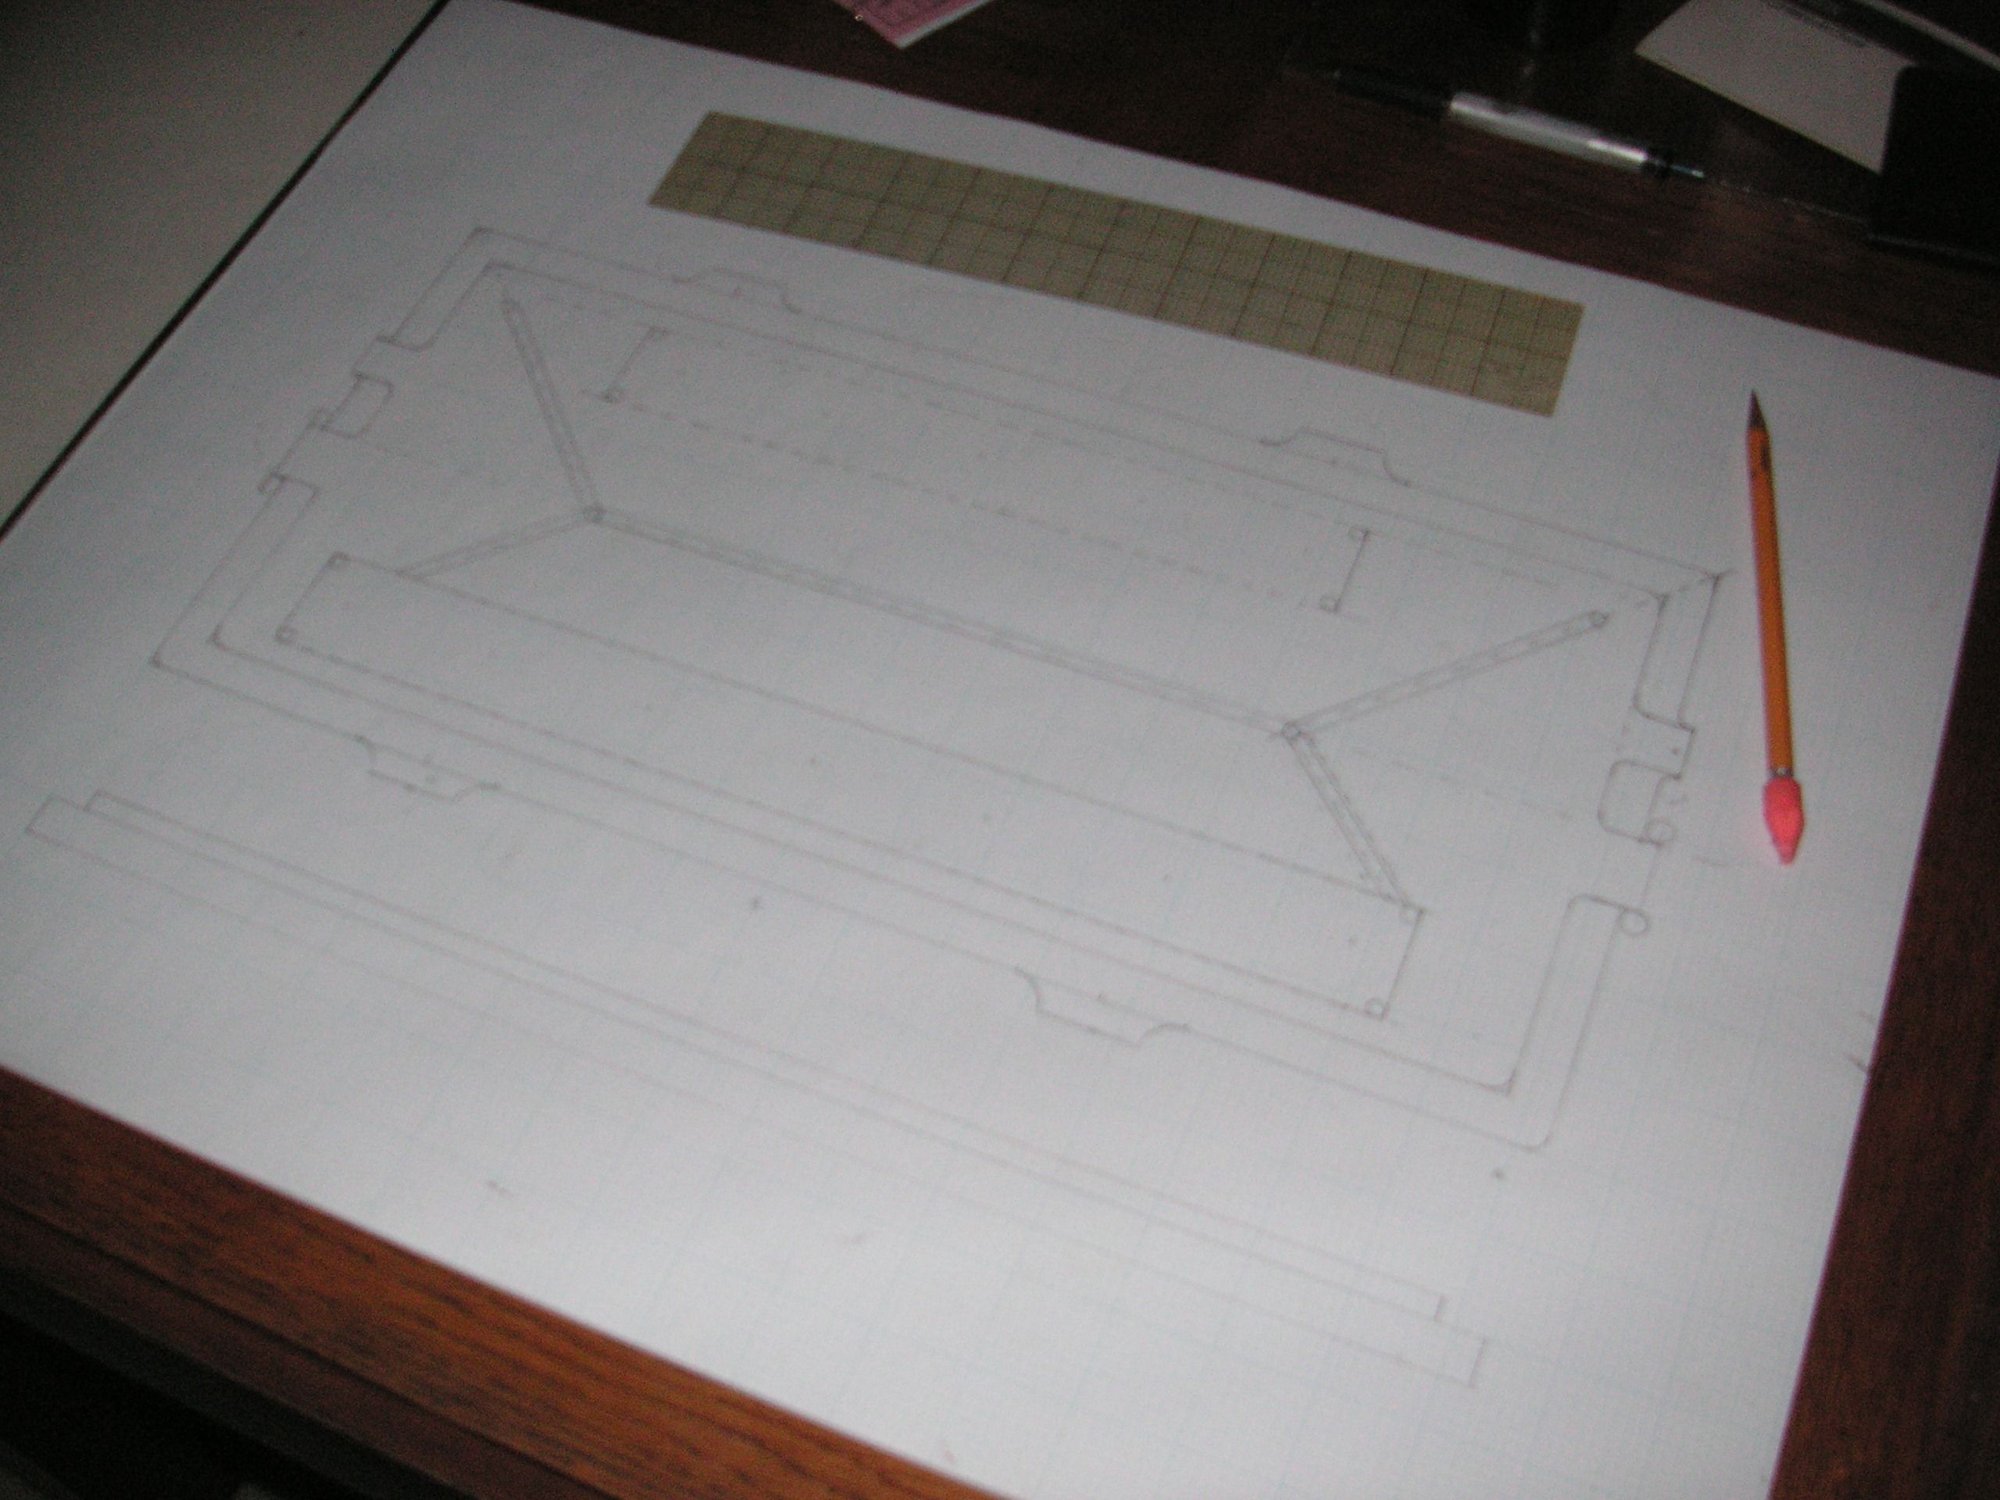
I was able to draw up the paper drawing of the male die by taking measurements carefully off of the lid from Barry. I have that one done except for the addition of the exact measurements so I can reference it as I work on the die.
I had originally thought that I would start with the female die and the hold down ring (or rectangle), but then I have now decided that it will be best to make the male die first then work up the female die and the ring to fit. That way I can put small holes through the male die at the corners and ends of the reliefs the be formed and then drill them into the female die as markers so that they come out an exact match, which will otherwise be a real measurement nightmare. I could do it, but this will be so much easier.
I need to clean up the shop of all the aluminum shavings so that I don't get it all mixed up with these new steel bits.
A) Steel is much more interesting when you Dukes of Hazzard it over a bump and the battery welds itself to the cover.
B) The factory was using the battery box and cover as a cantilevered mass off the transmission to damp torque tube vibrations, a lighter plastic cover would result in inappropriate new resonances at certain rpm.
C) The reproduction battery box sticker that Jerry will also make will stick better to steel.
D) Anyone going to the trouble of creating a quality reproduction part will typically reproduce the part in the 'correct' material, if possible.
E) None of the above, they're gonna be steel because Jerry says so.
hey Jerry , thanks for your payment shipping . I just have seen it , but don't check that every day.... not even once a week.
good luck with your project !
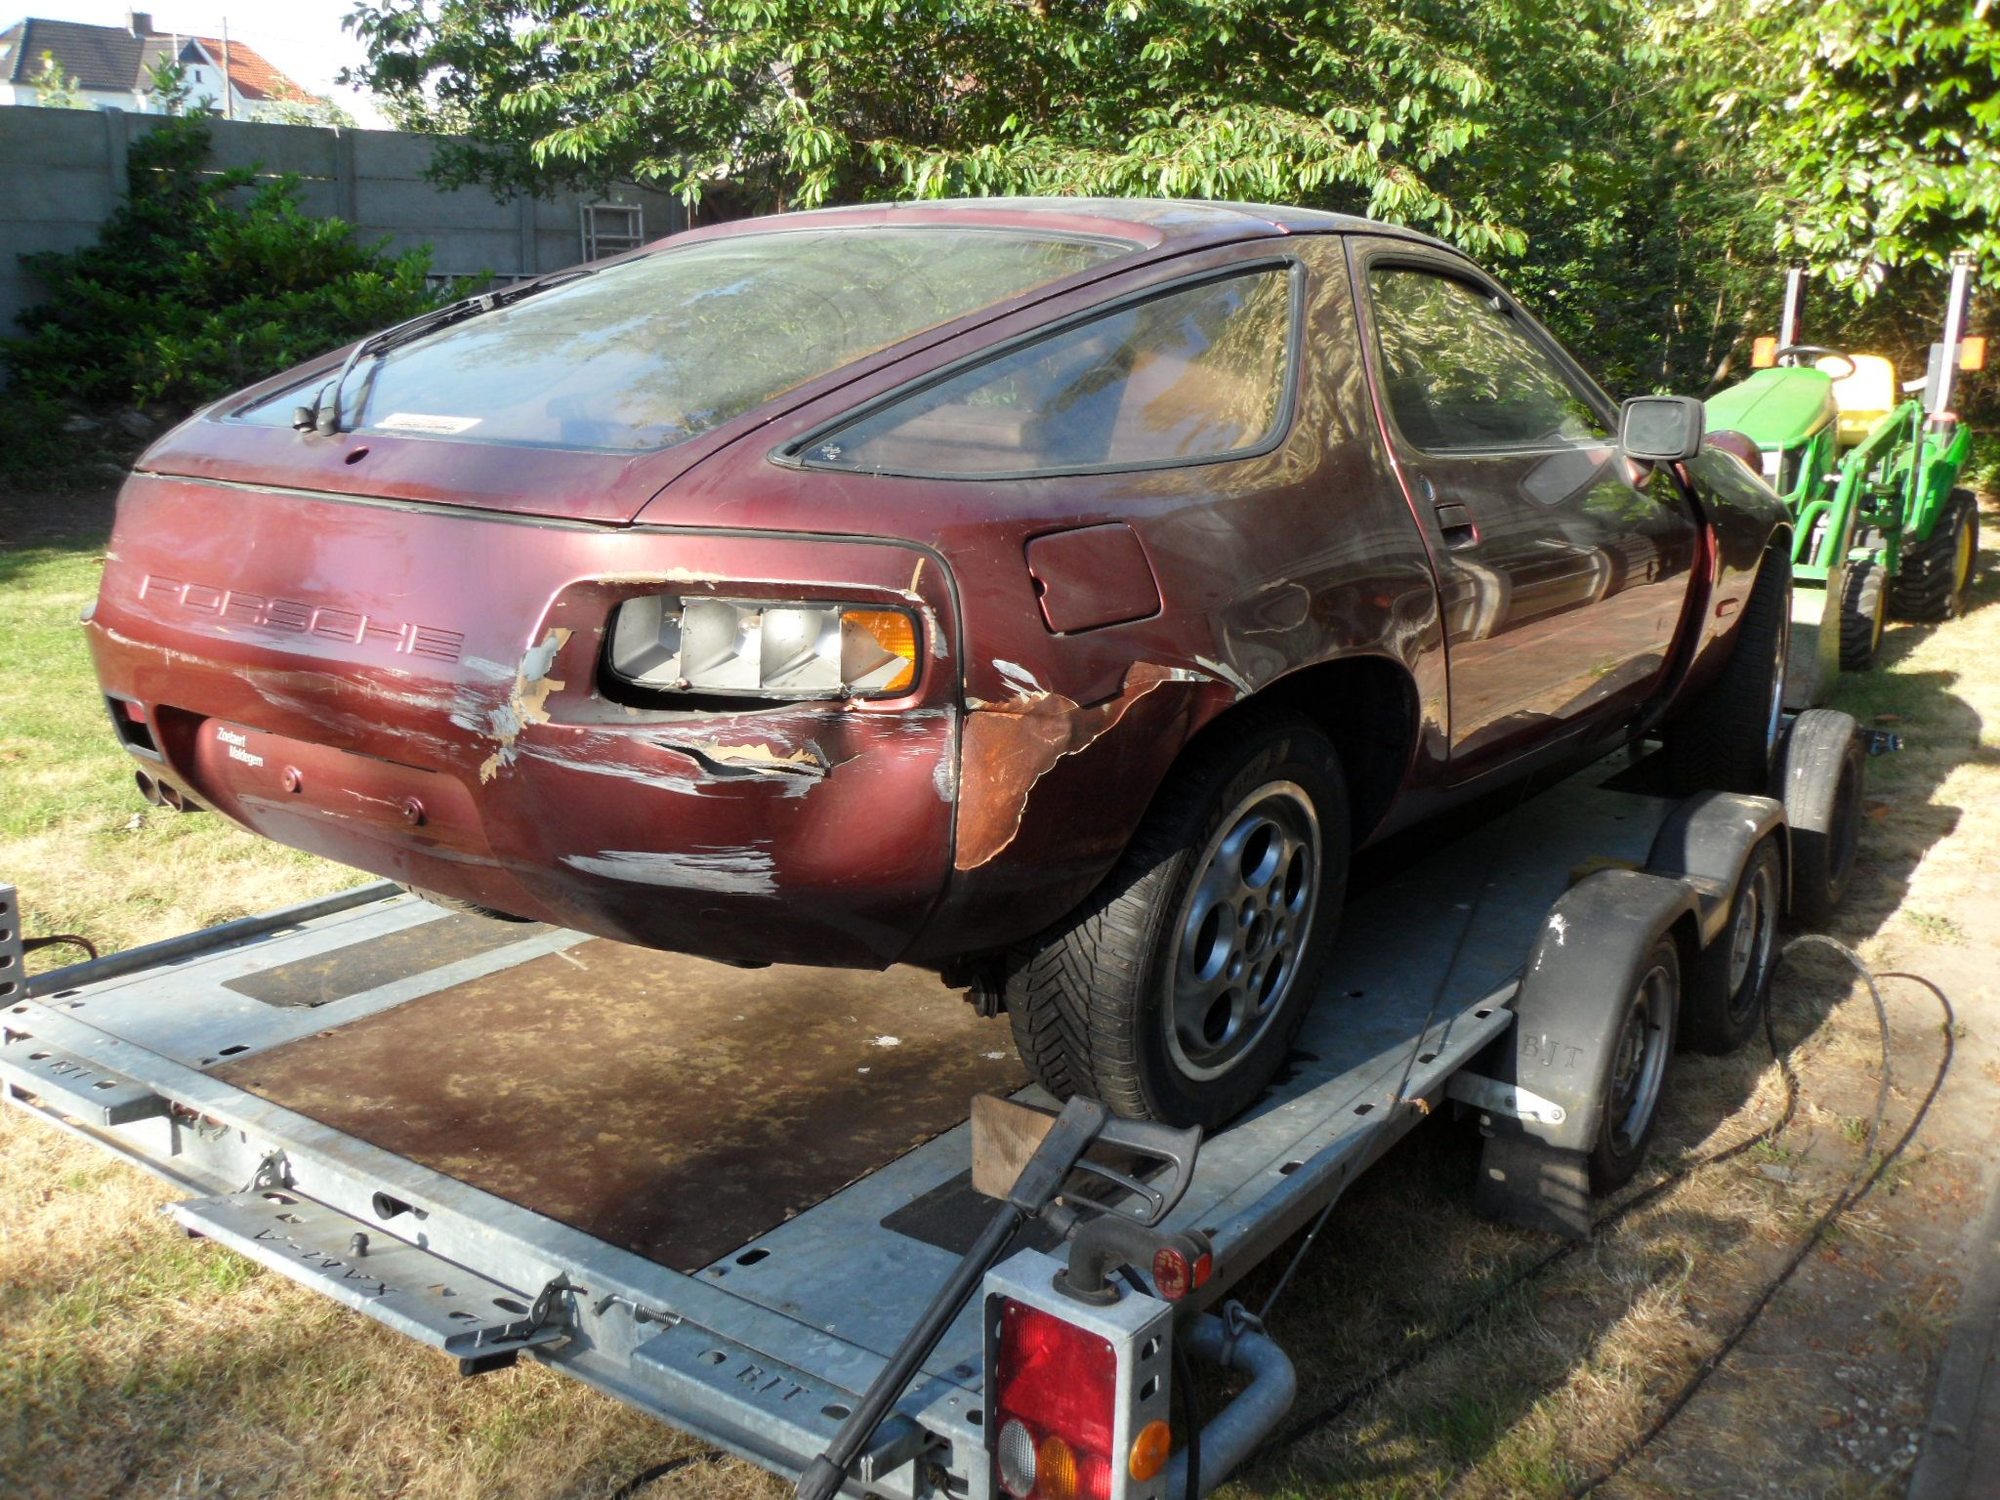
this is her '78 mother....
Last edited by belgiumbarry; 04-01-2021 at 06:50 PM.
Why not make them out of heavy gauge plastic, like your tire covers?
Shawn, there are a lot of things I could do different with these lids, but the weight of interest is heavily in favor of duplicates of the original. Even at that I see where I am going to deviate by tiny bits here and there, but probably nowhere where anyone will be able to actually tell, especially since I still think there are at least three or four versions of this lid in circulation.
I could even make them out of stainless steel or even aluminum; and I suppose there is some remote chance that I may have to if forming them out of ordinary steel does not work with the dies I am going to try to make.
I have most of the steel in the trunk of one of my other cars and they are much heavier that I had hoped. The raw
base female plate weighs 102 pounds, the male plate about 67 pounds and the plate for the hold down ring about 34 pounds. I'll hope to reduce those weights some in the process of machining them, but it probably won't be that much.
Last edited by Jerry Feather; 04-04-2021 at 10:56 AM.
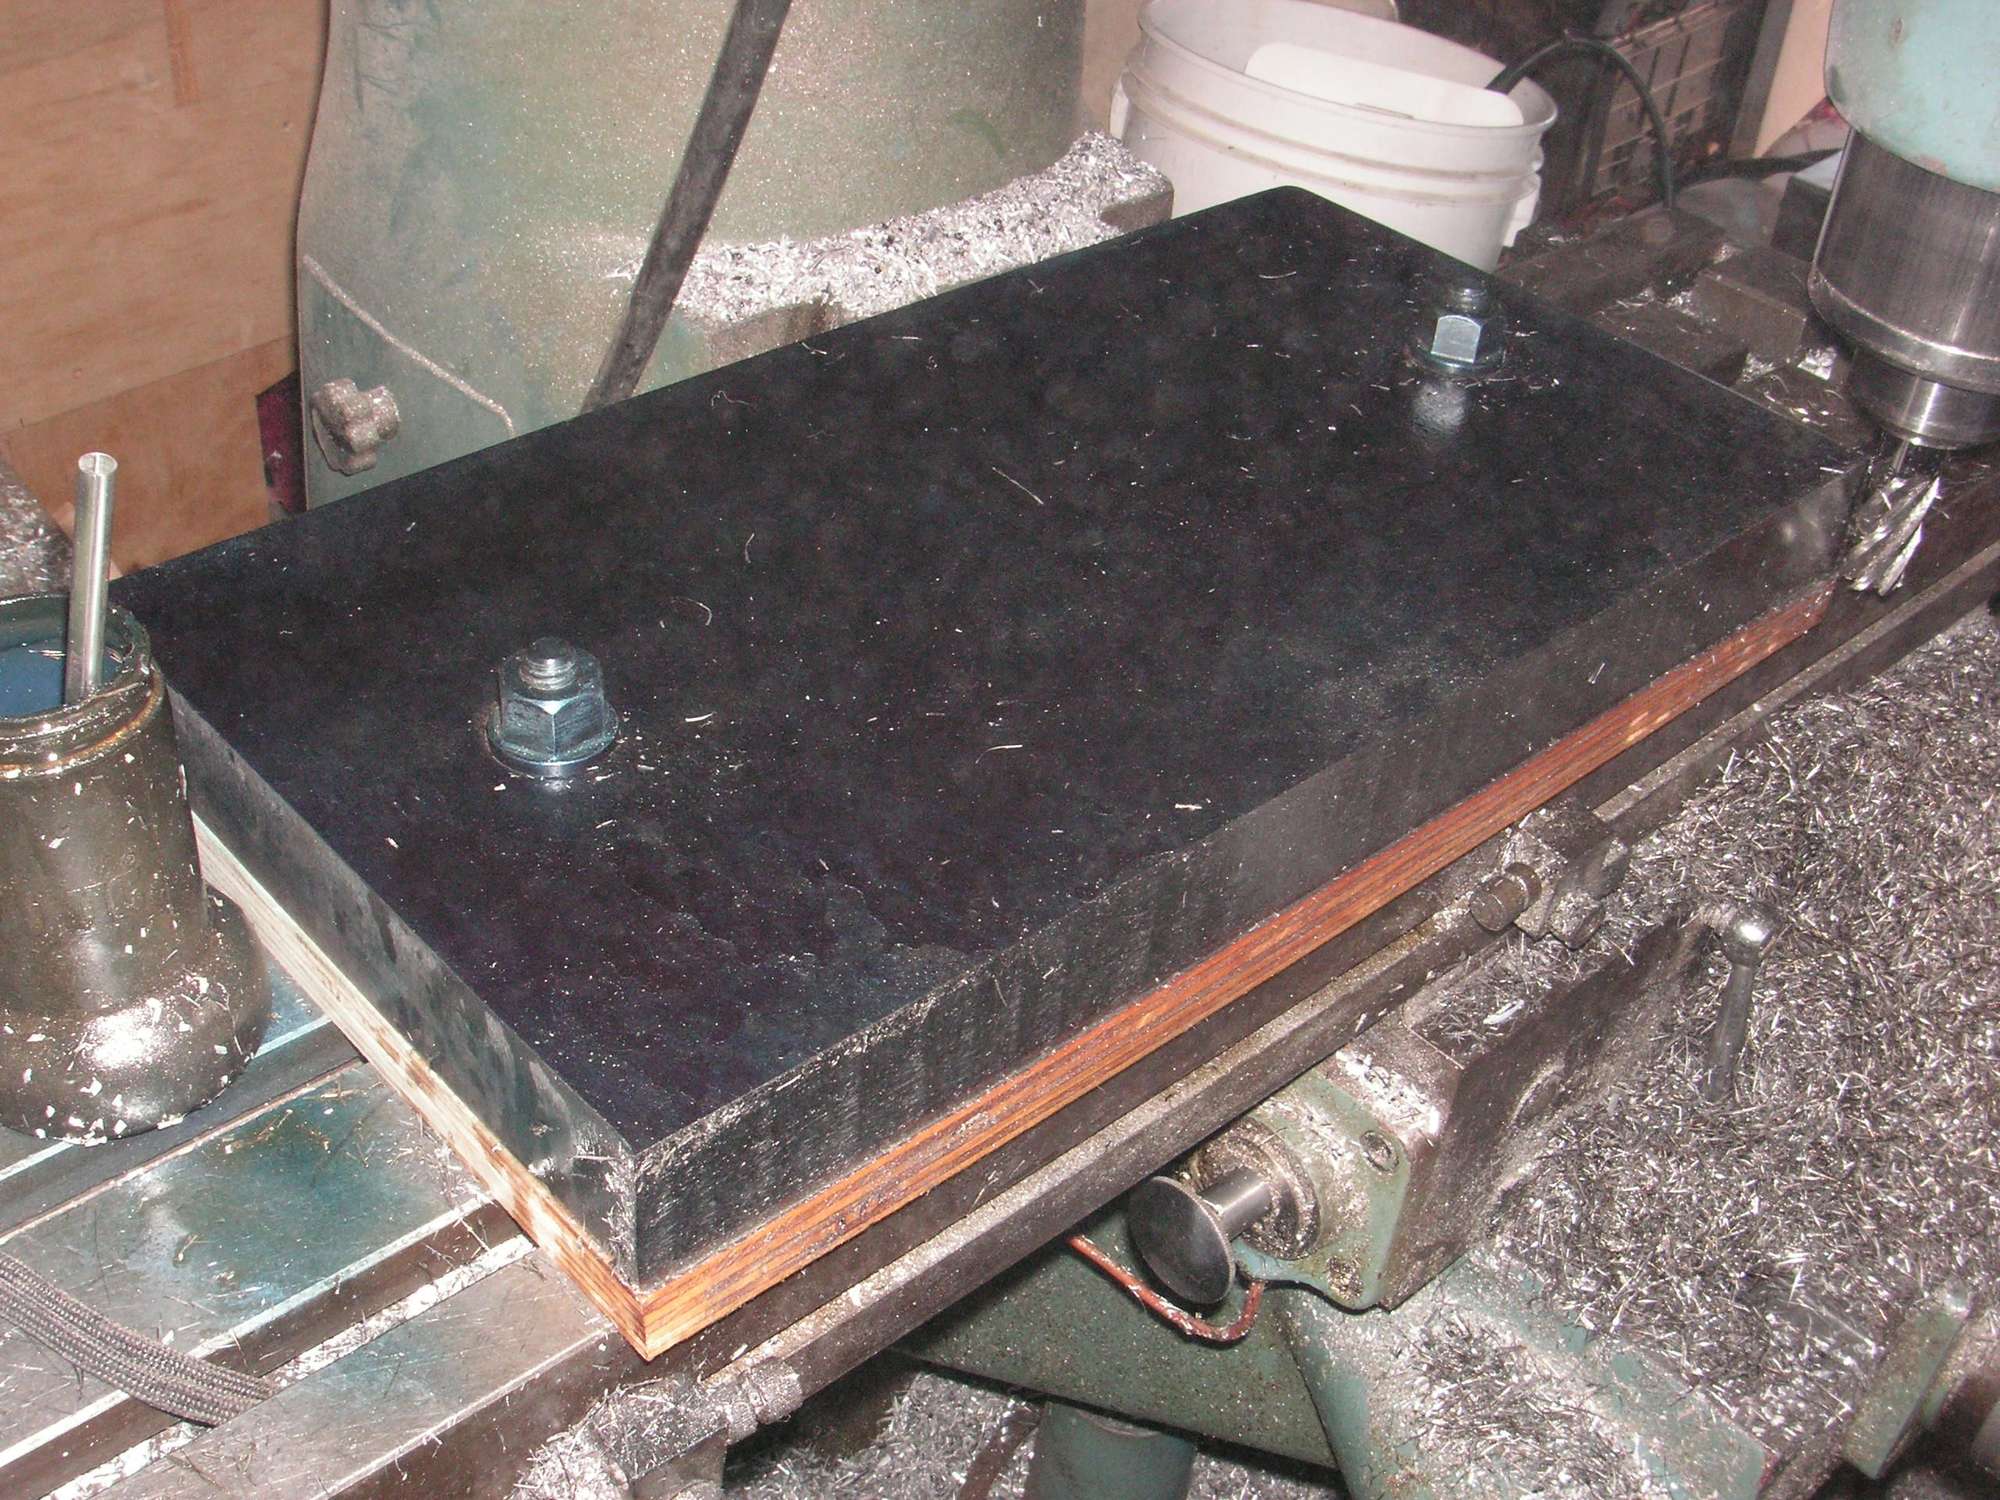
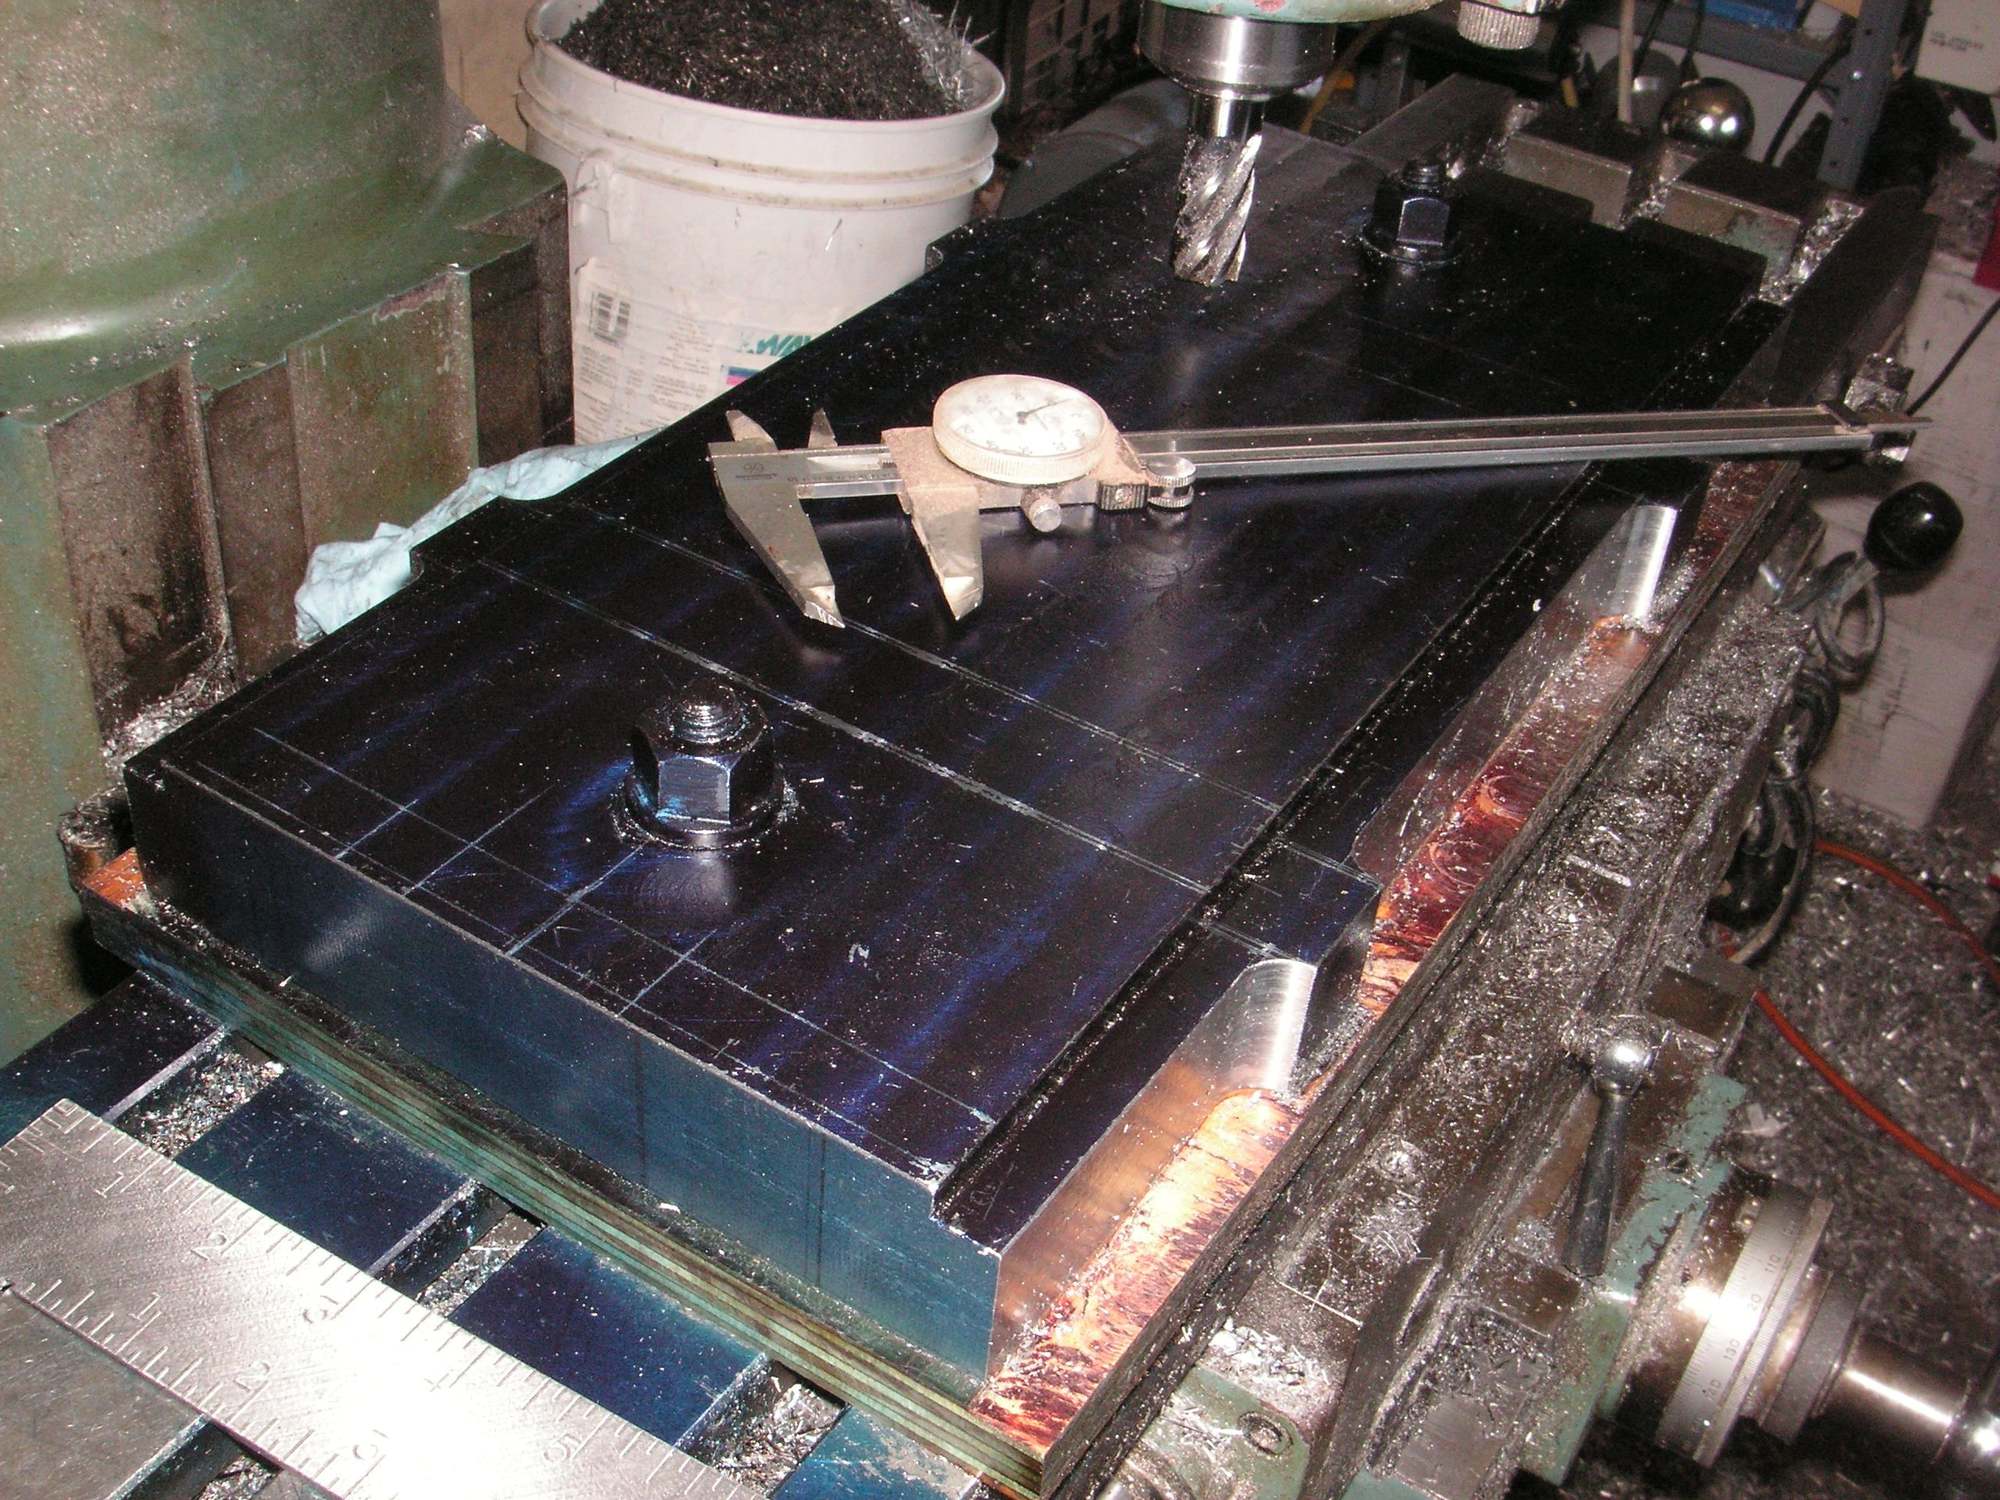
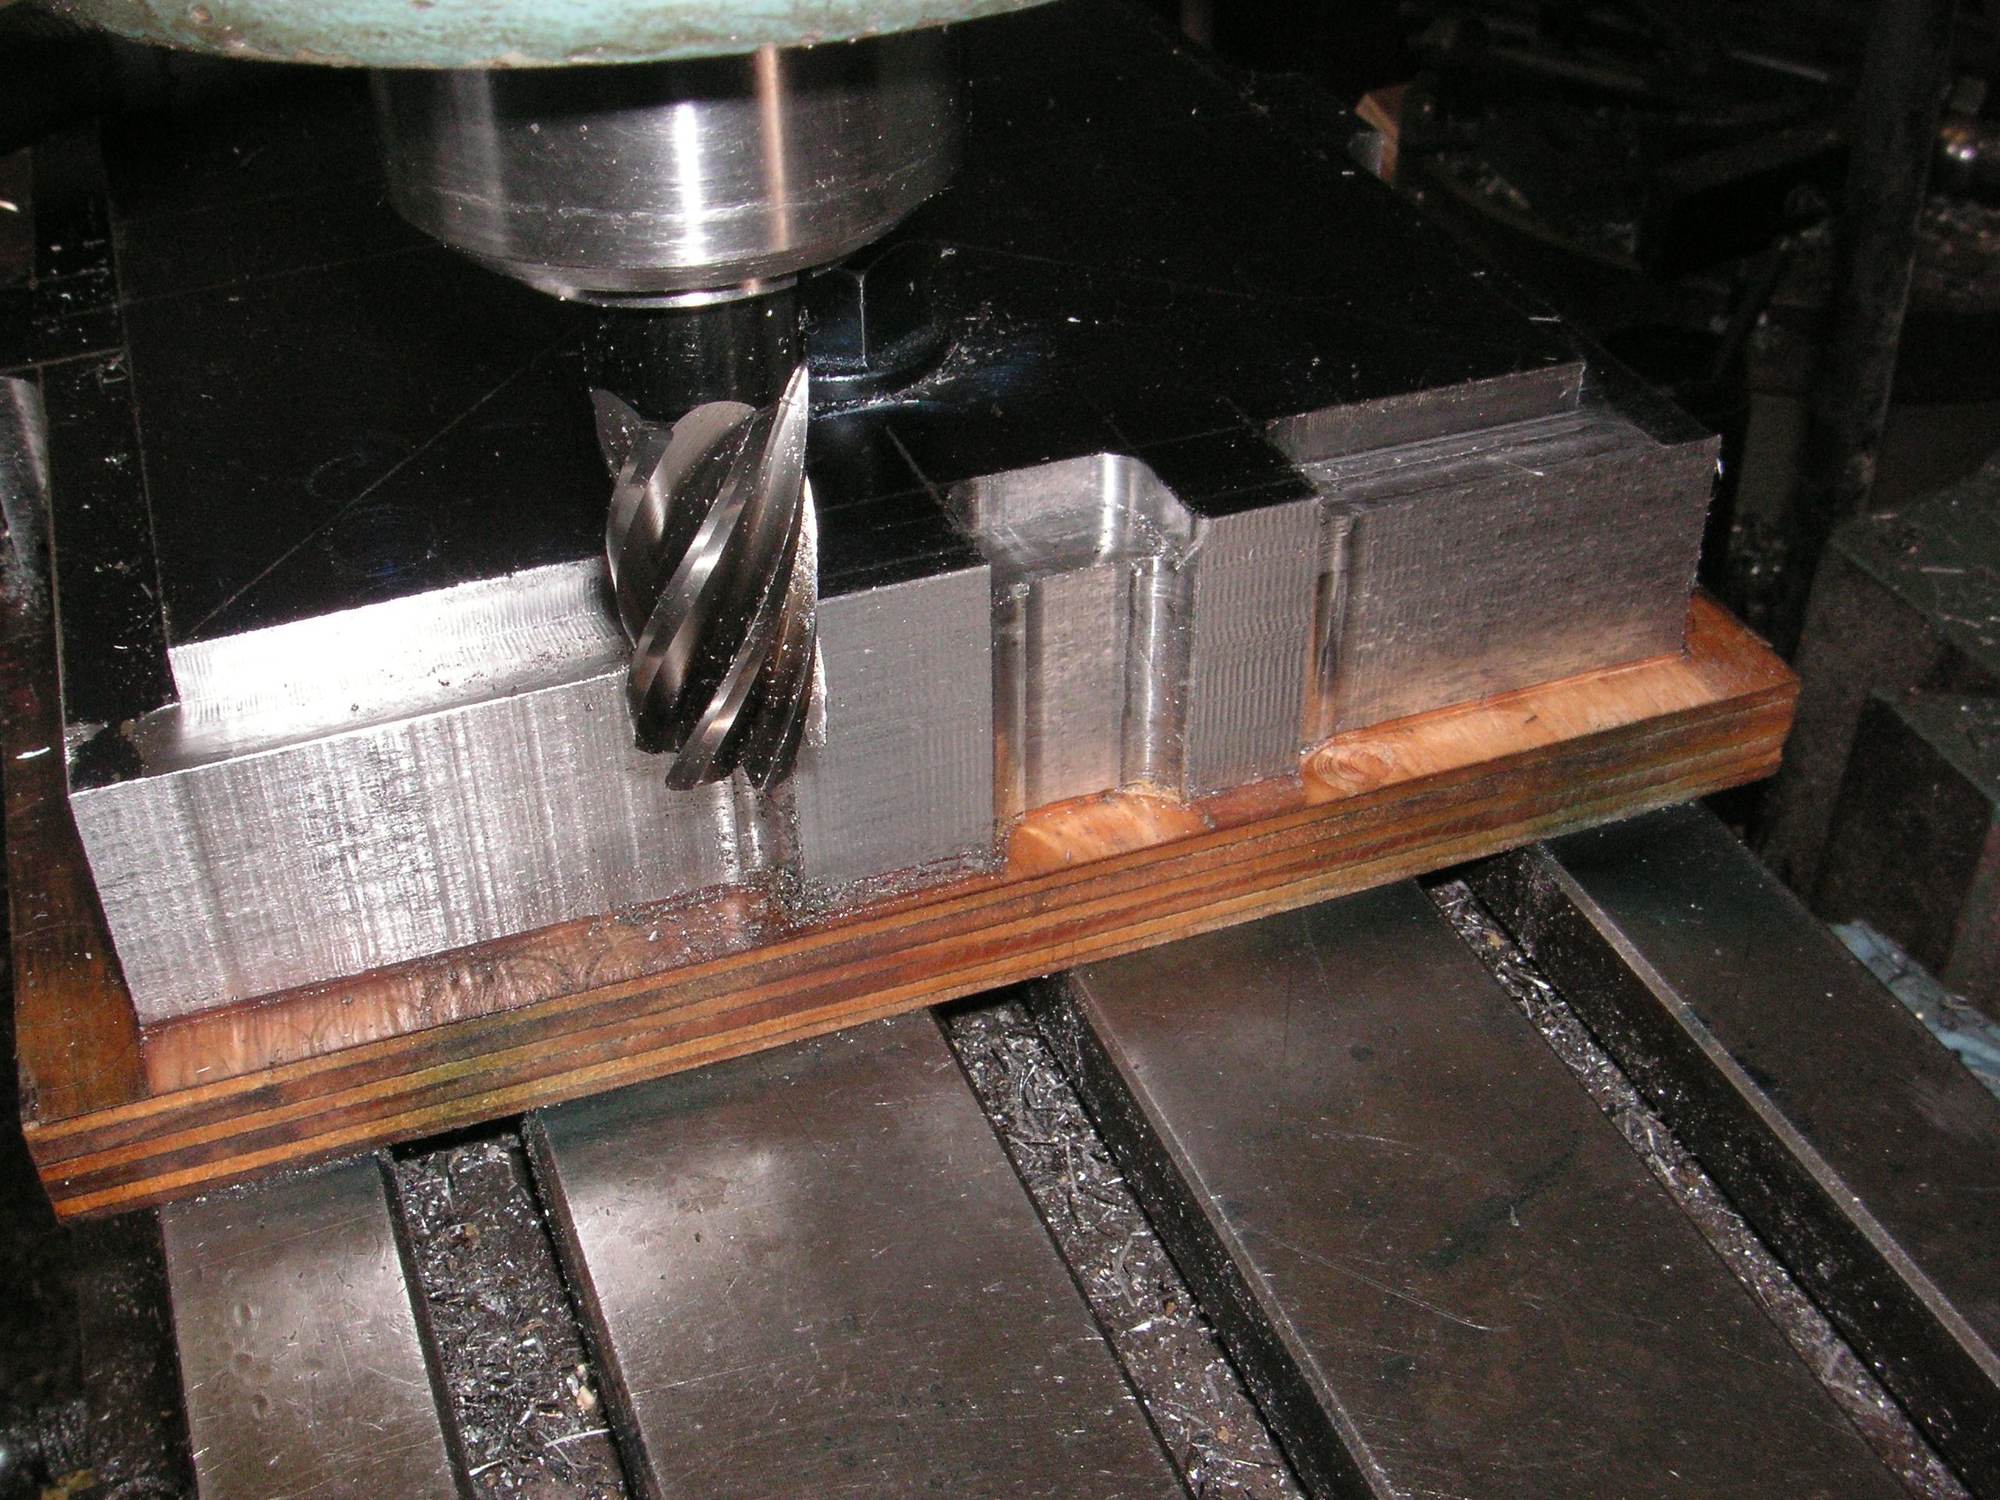
I drilled a couple of holes in the male die plate so I could bolt it directly to the mill table rather than using clamps to hold it. Then I milled one of the edges true and to size and started the other long side. When I get it to the correct gross width I'll do it to length and then start refining the edges to their net shapes.
Last edited by Jerry Feather; 04-05-2021 at 10:06 AM.
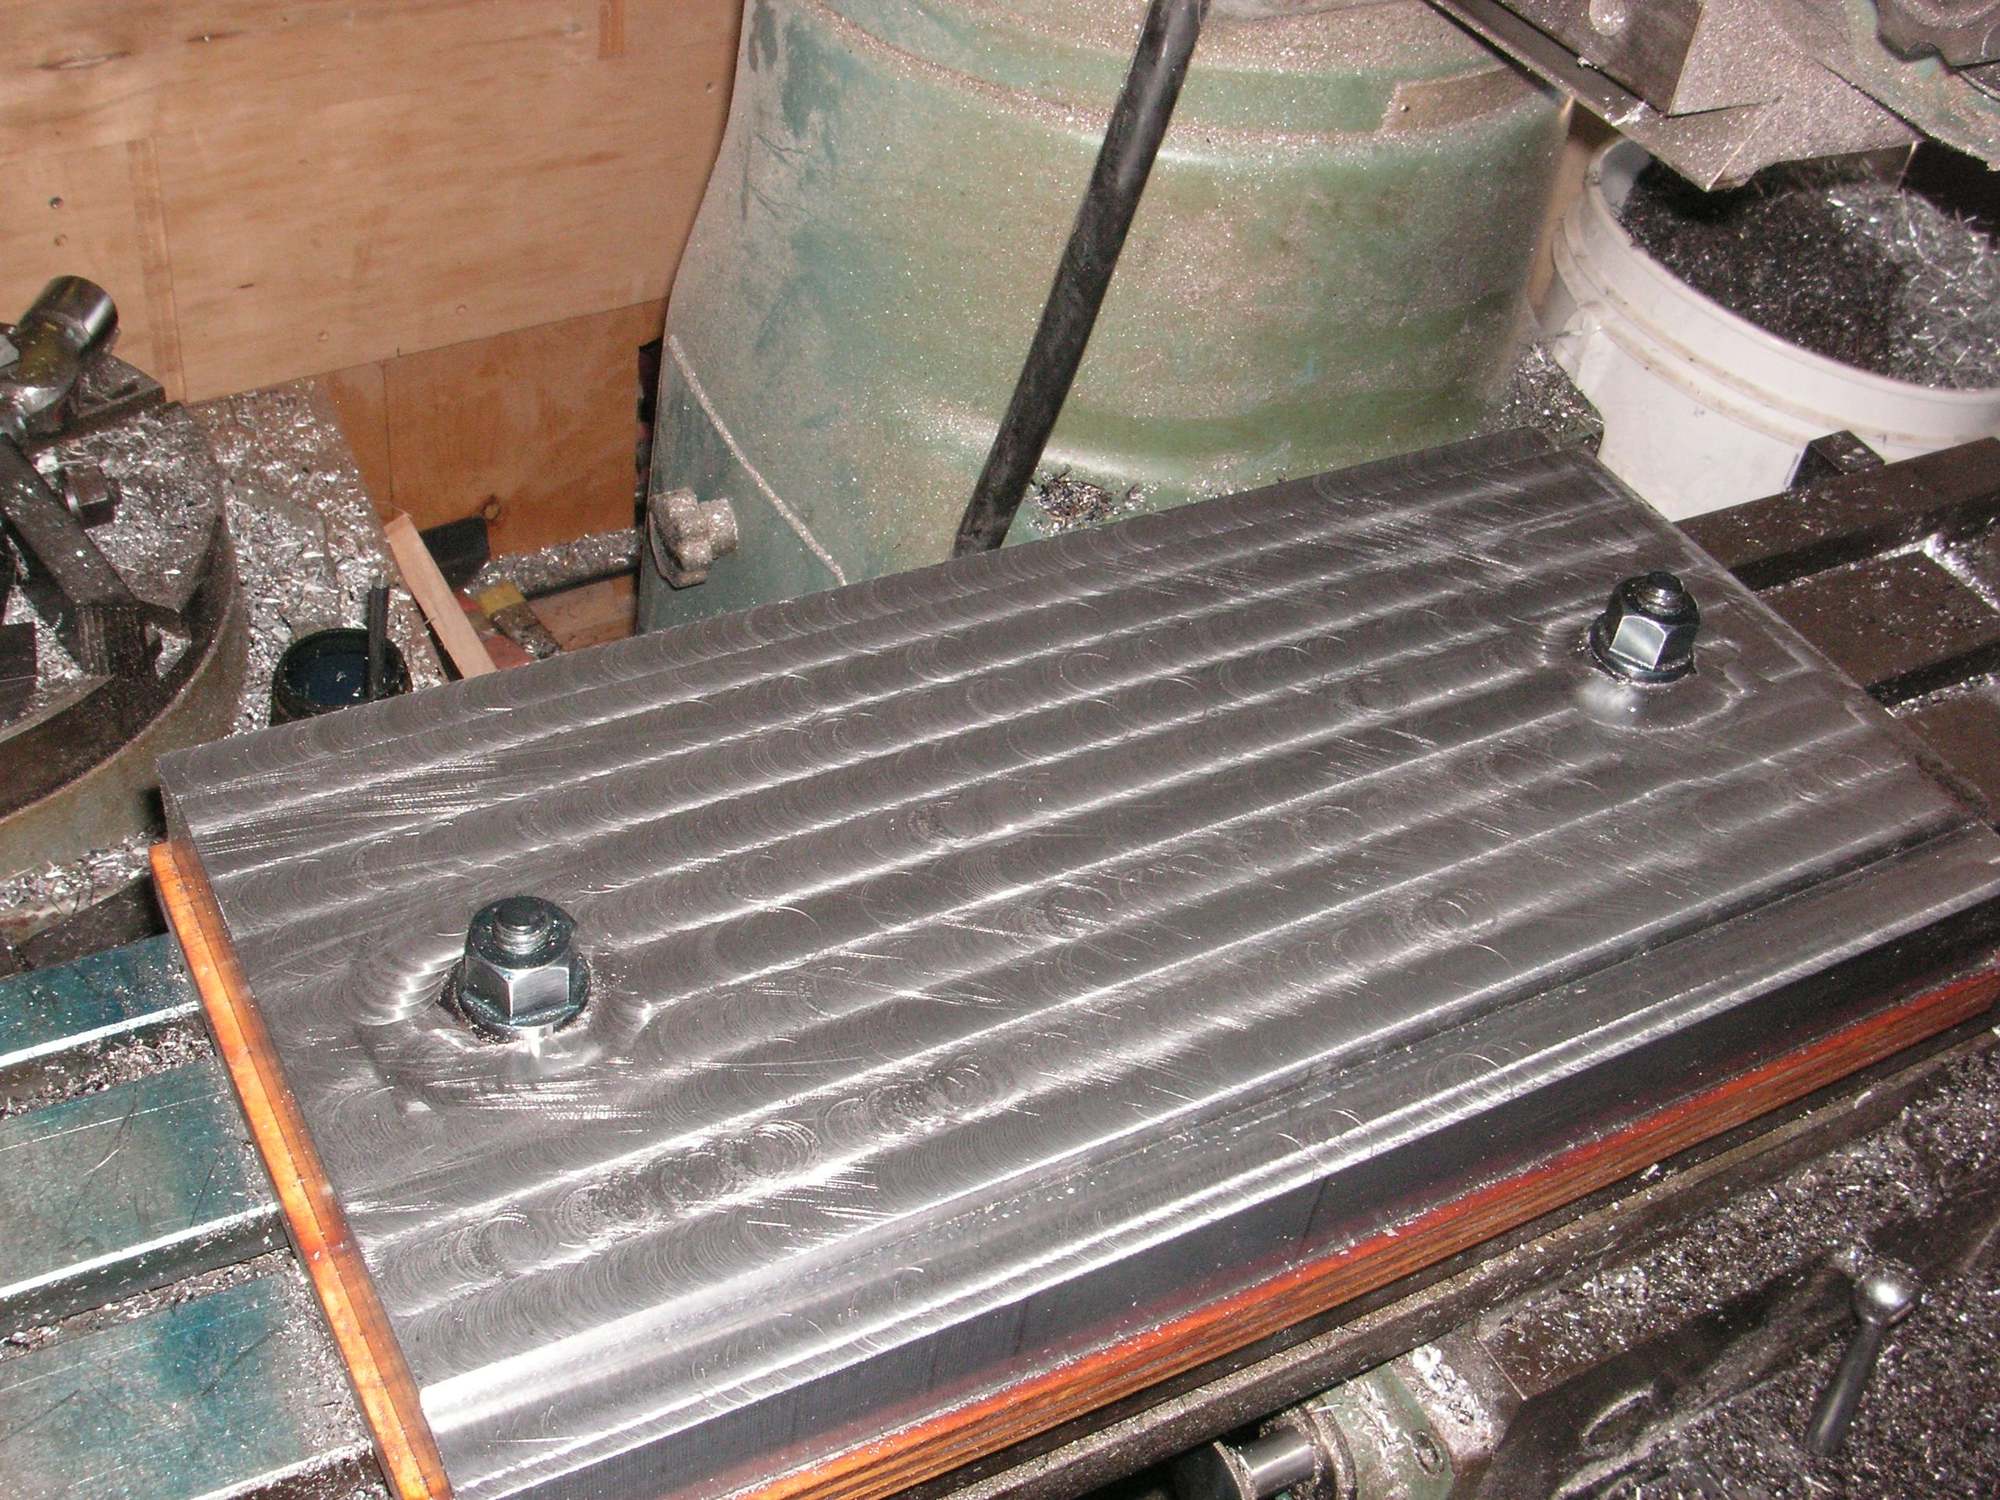
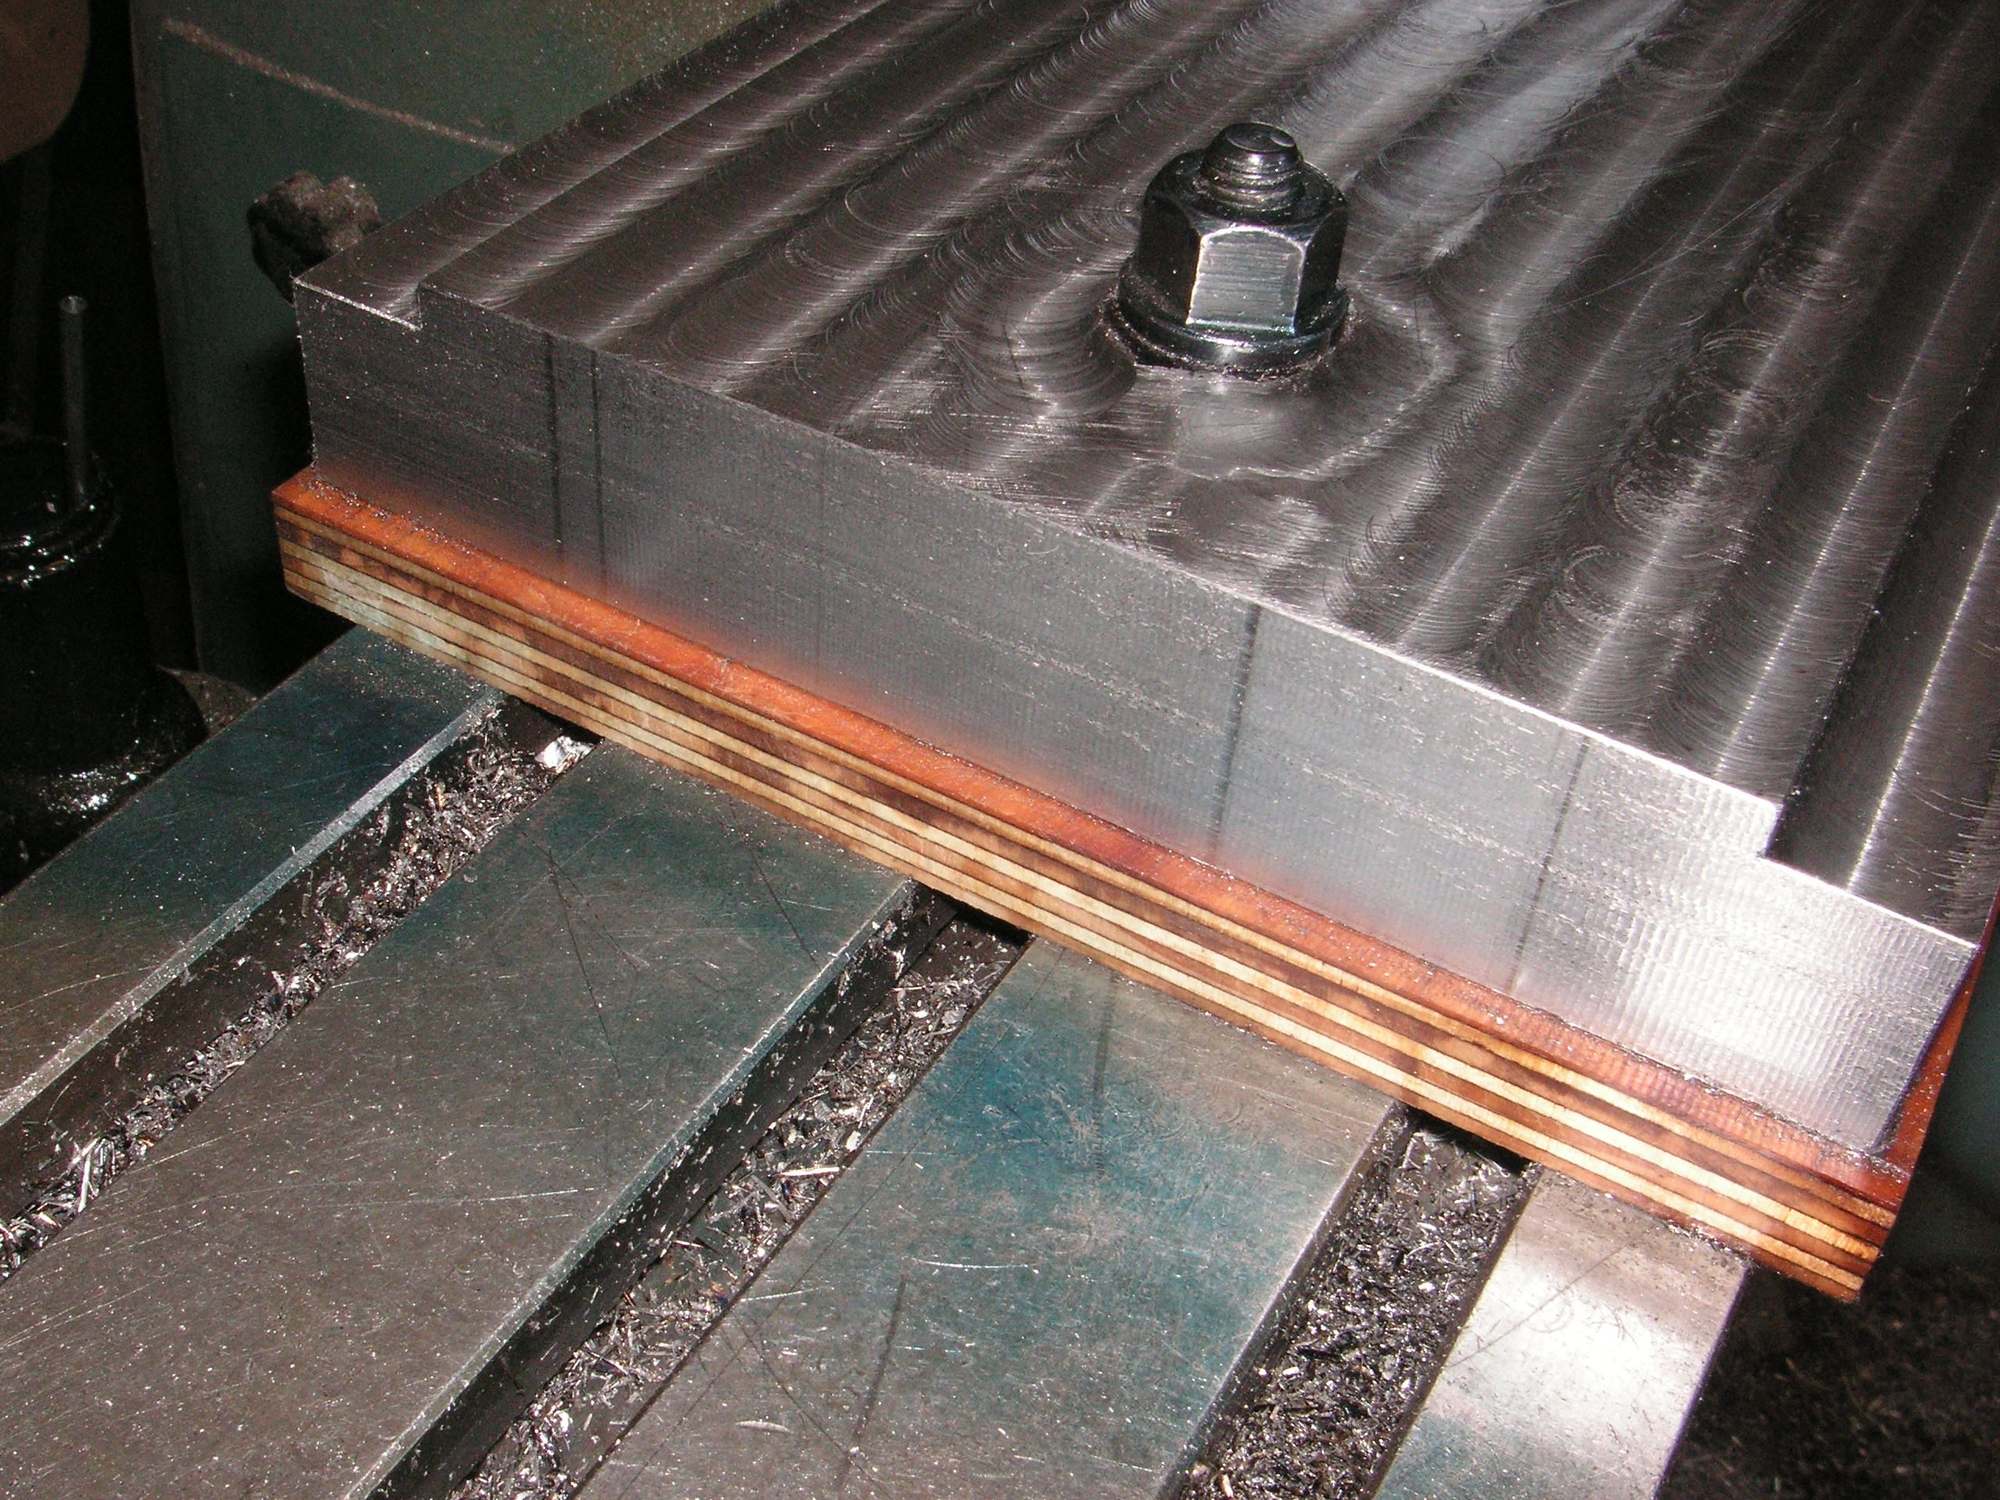
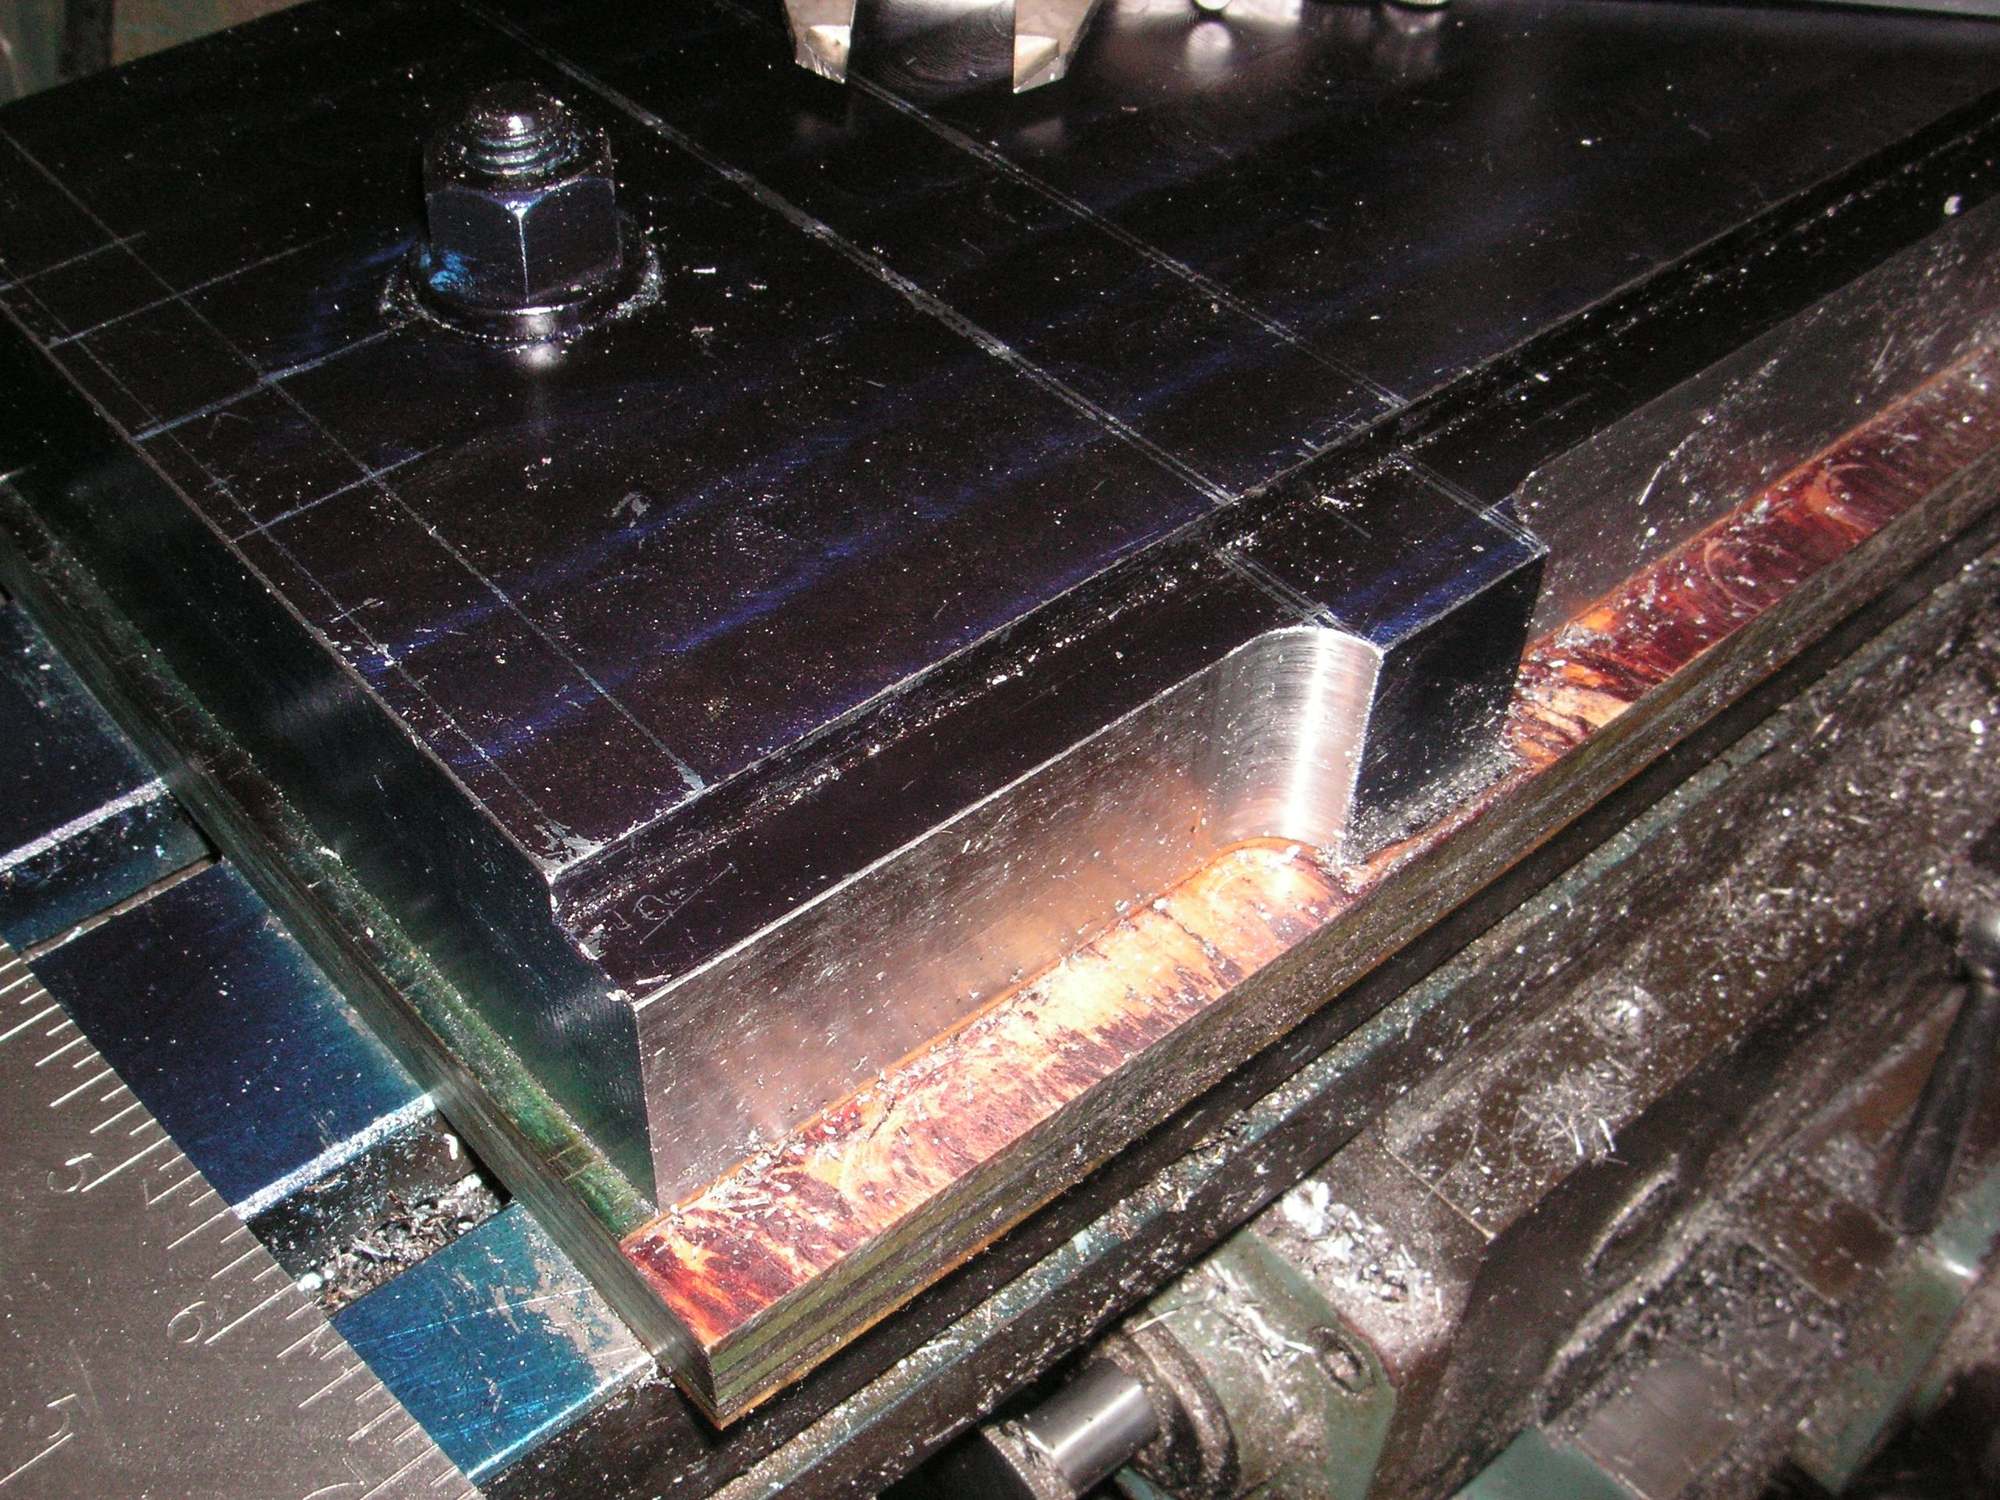
This morning I trued up the back edge of the male die and then did both ends to their gross outside measurements. I thought that before I start working on the net measurements which will define the vents, cable notches and the stud hole bosses, I ought to take some of the top material out at the edges so it might be a bit easier to further work on the sides, and I also decided that I ought to both clean up and true up the top surface, so I did. I cut the edges of the long sides down to their finish height. I could also do the ends, but their top edge is not as easy since both ends have a vent and a cable notch to work around.
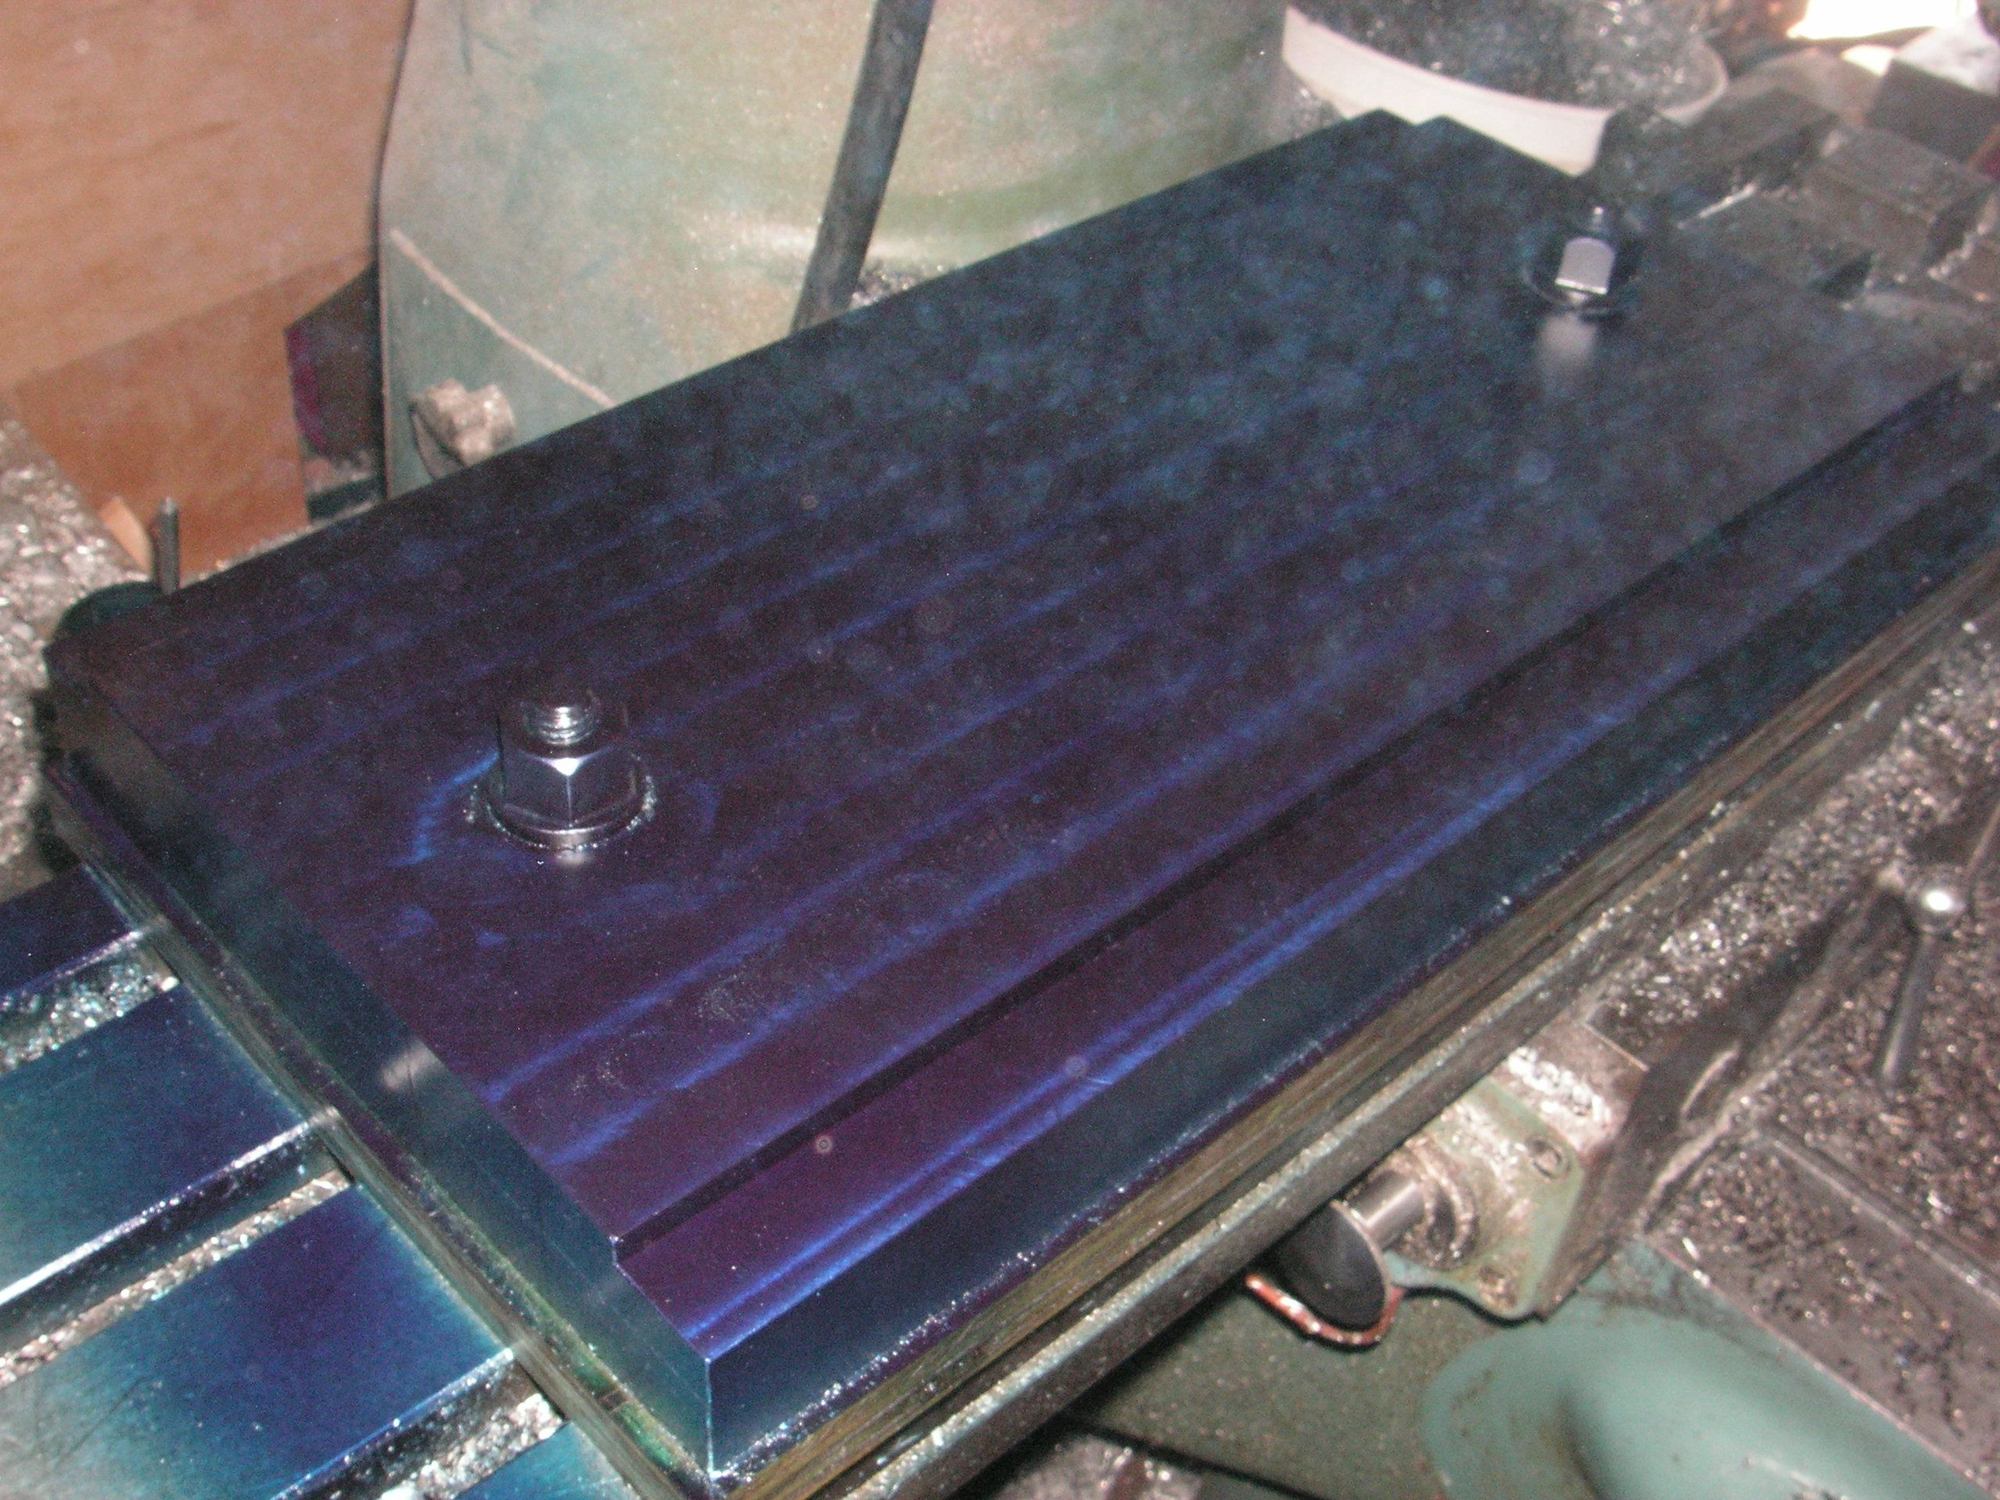
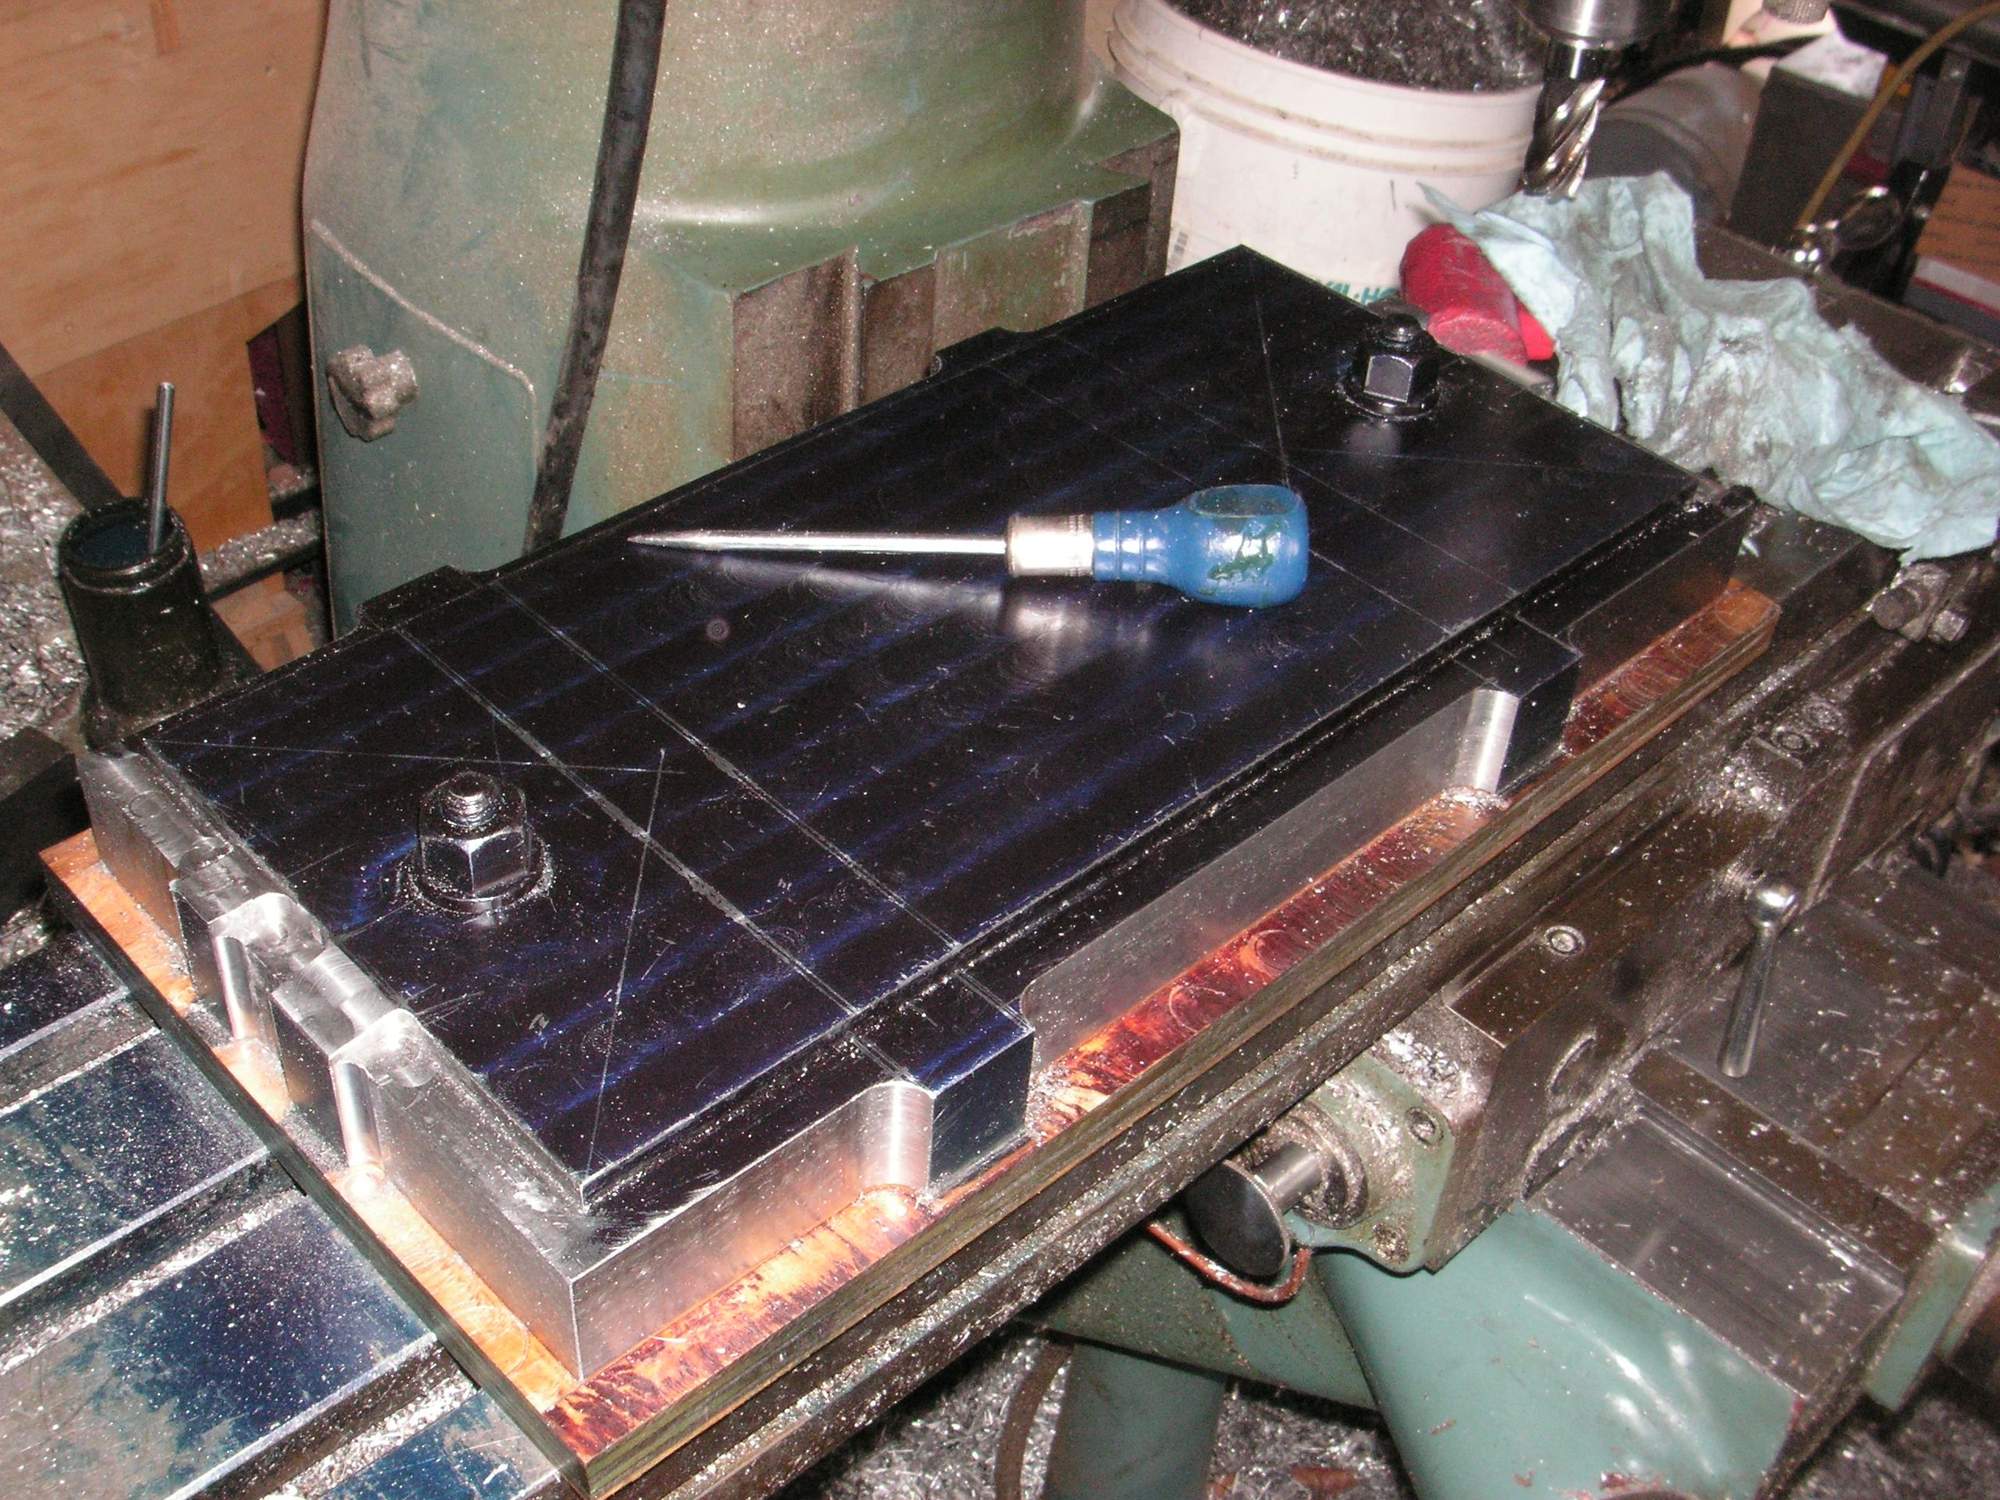
I painted the top and side surfaces so I can scribe the pattern into it to guide me in the next machining. As soon as I finish this break I'm going to take my drawing out and transfer much of it to the male die and into the die painted on it, with the scribe.
Last edited by Jerry Feather; 04-05-2021 at 10:08 AM.
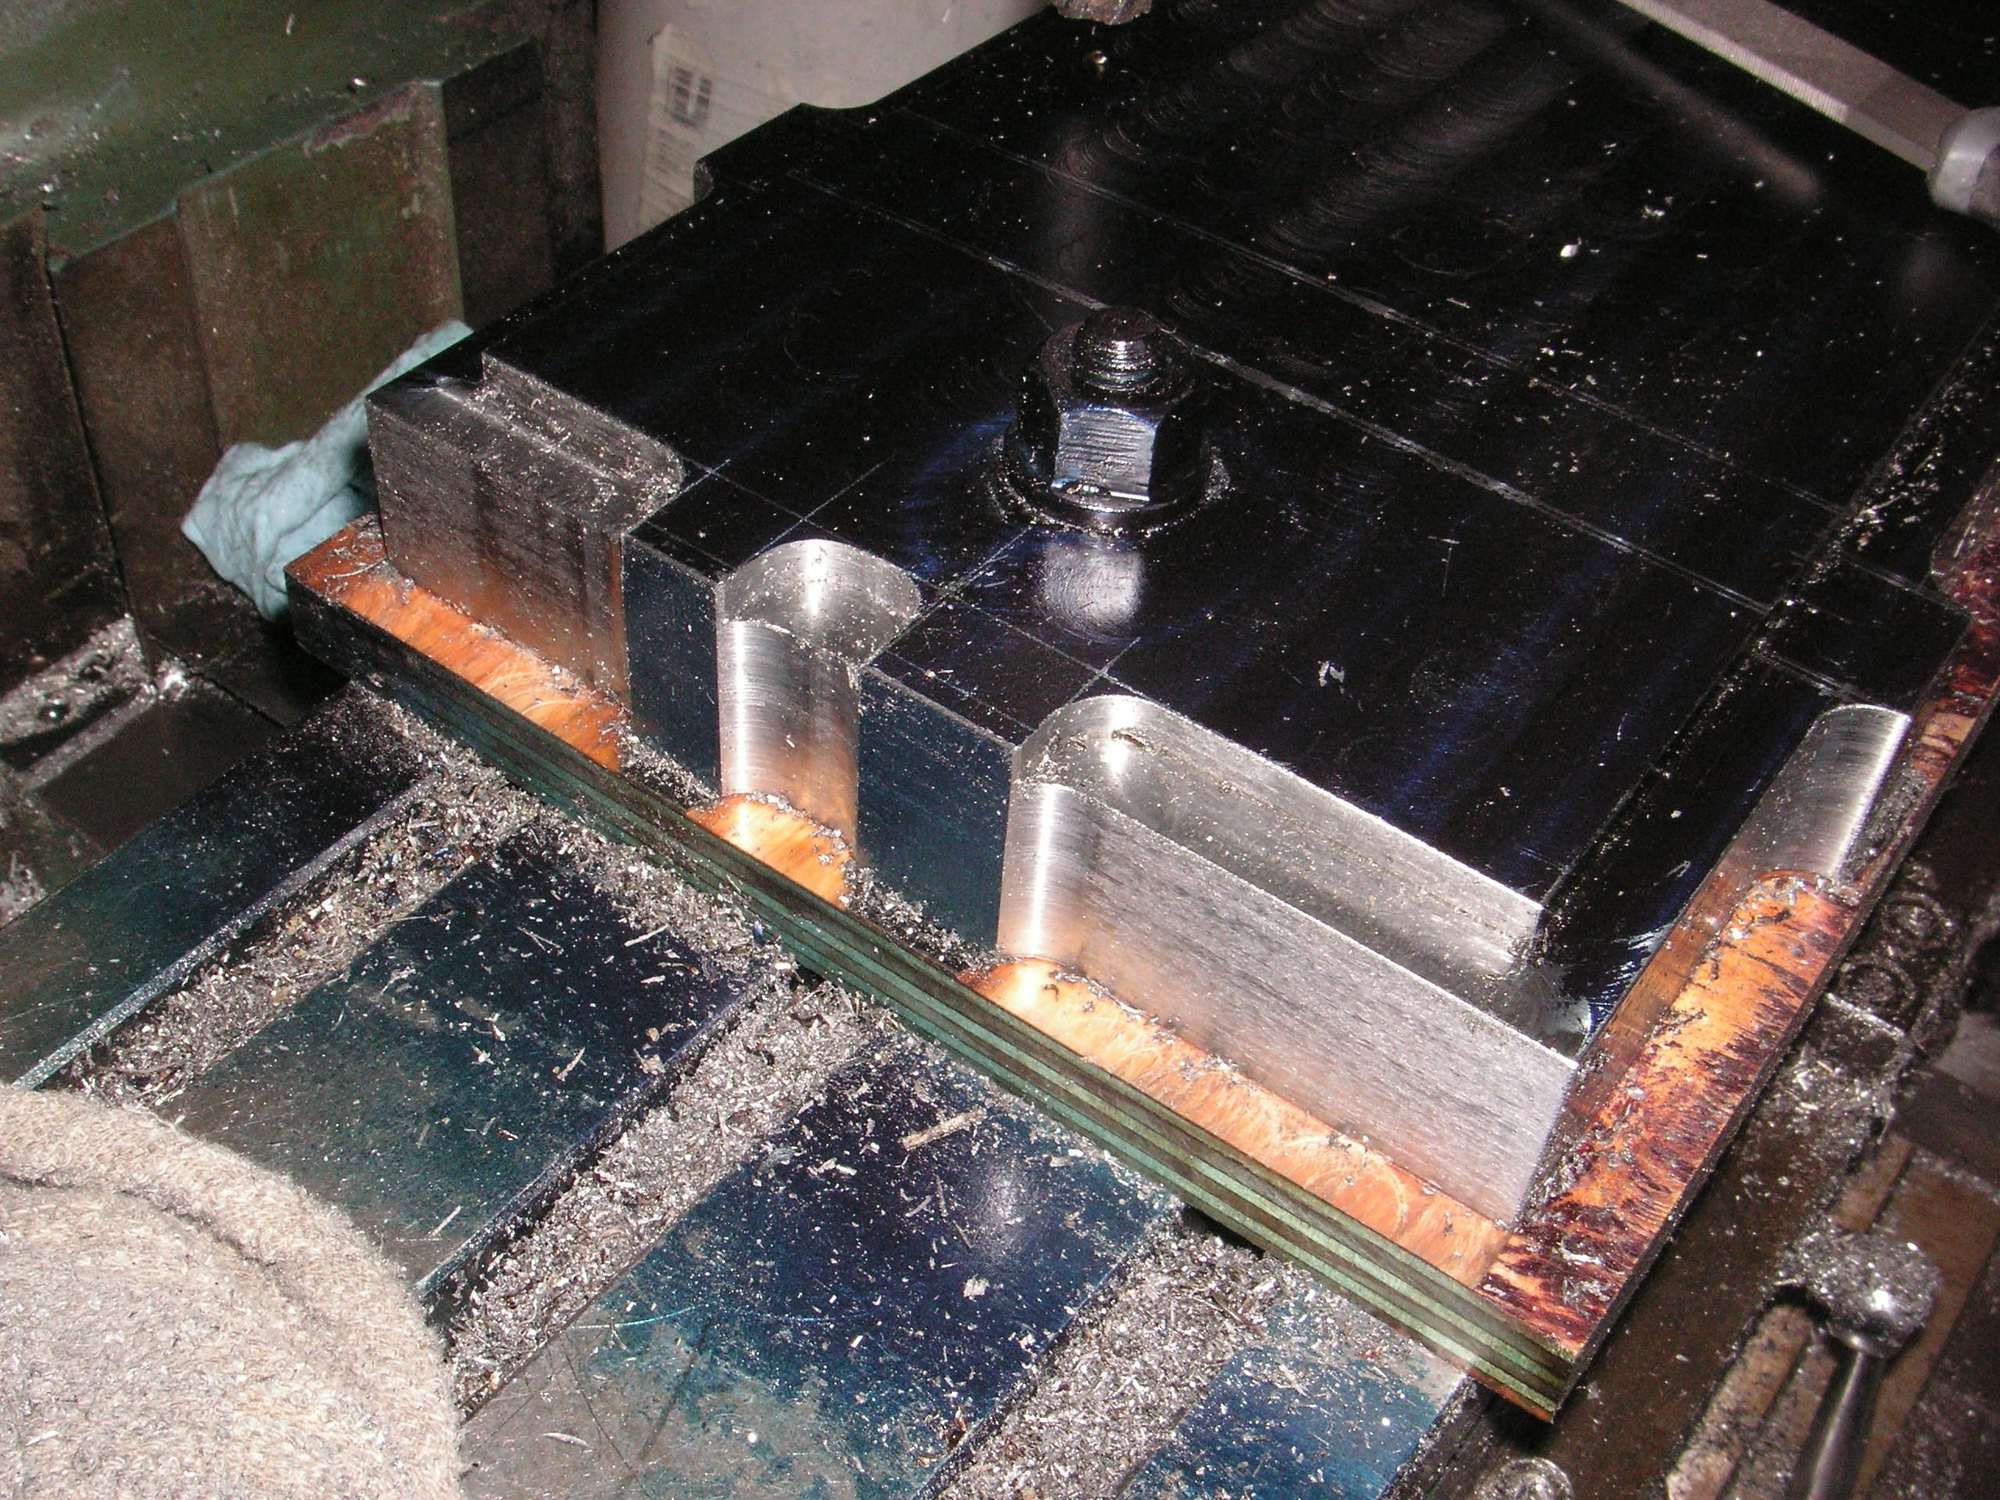
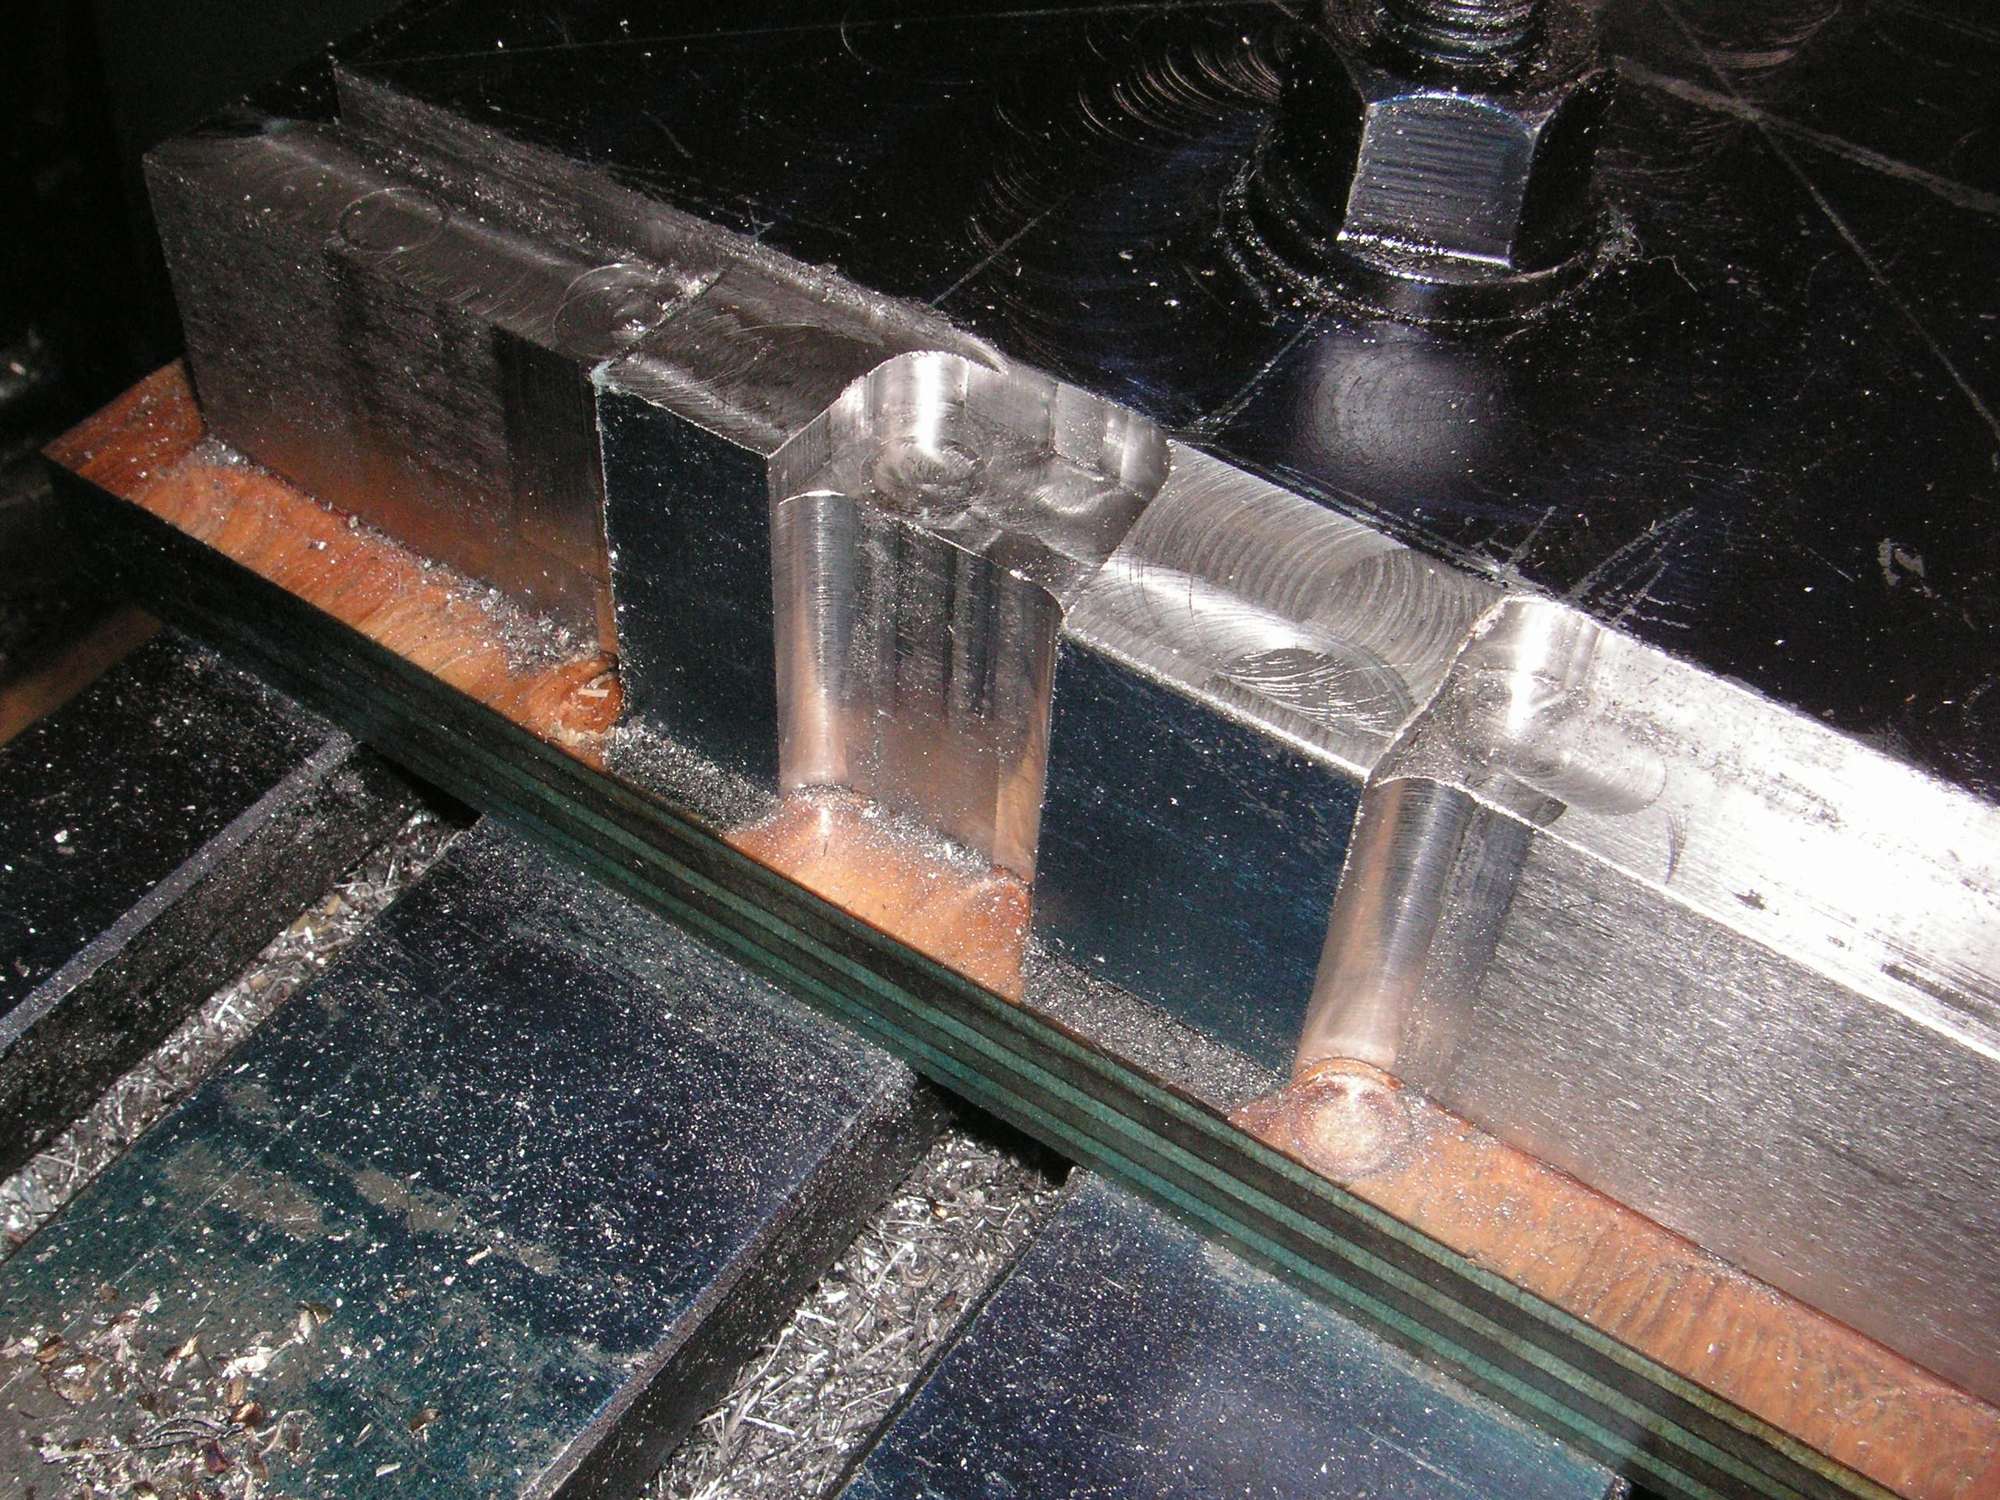
This is kind of like sculpting an elephant. What you do is get a big rock and then chip away everything that does not look like one. Here I am kind of doing that in the negative by chipping away what does not look like the void inside a battery lid. I have about 80 percent of the excess steel chipped away about now and the rest will be chipped away in more detail so it will be done kind of slower but not with so much hand cranking of the mill. It is beginning to look a little bit like the inside of the lid.
Last edited by Jerry Feather; 04-05-2021 at 10:06 AM.
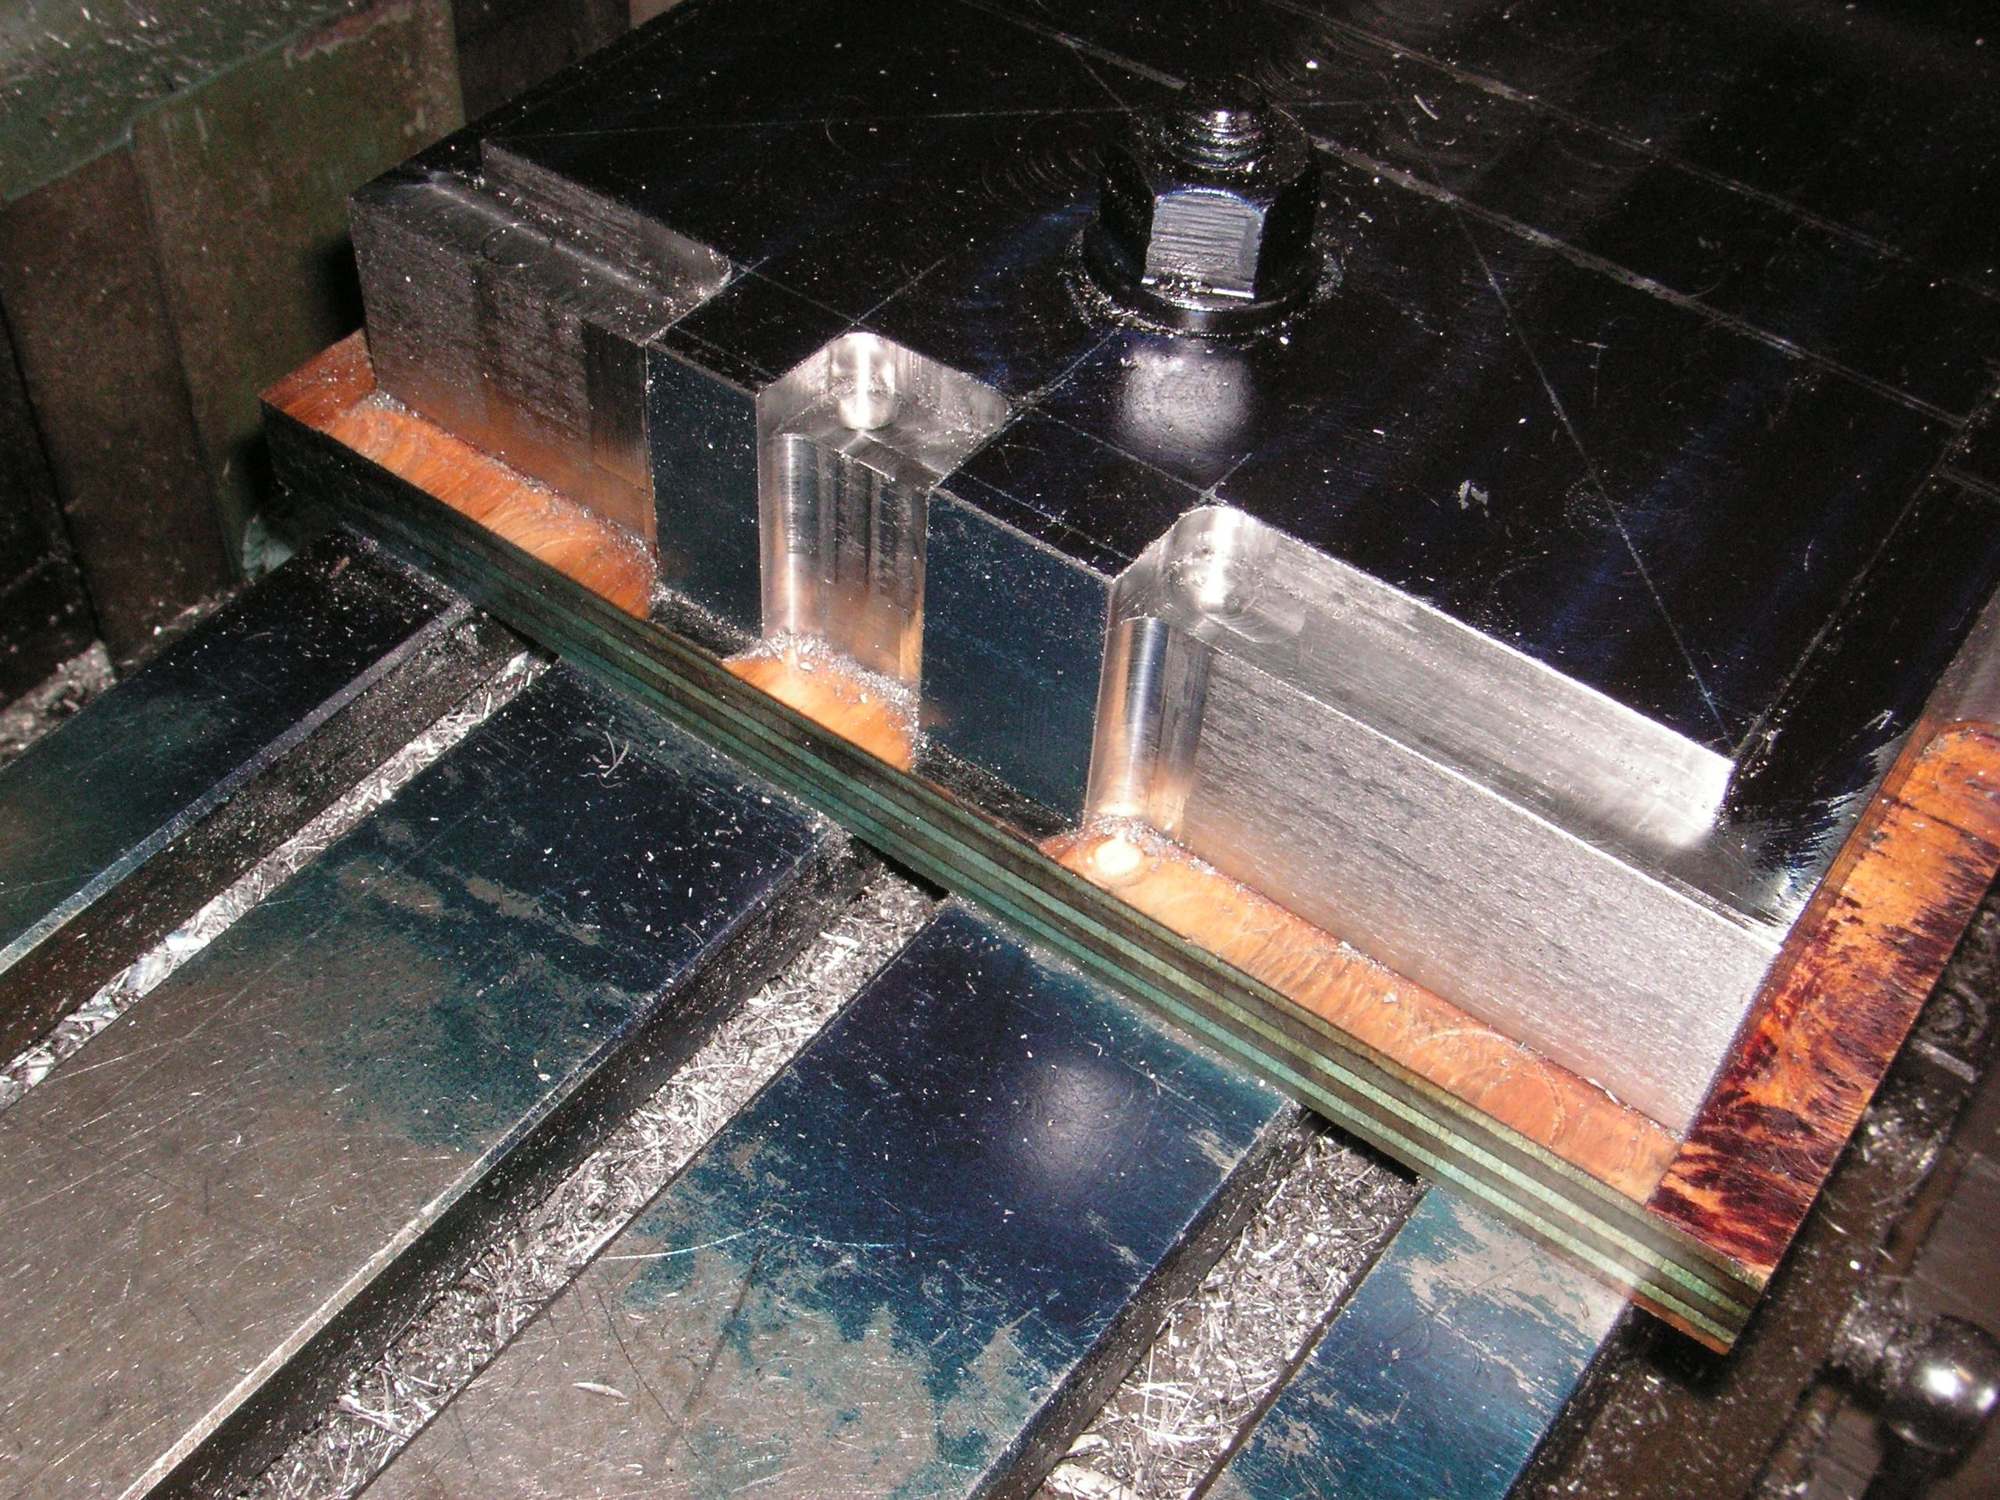
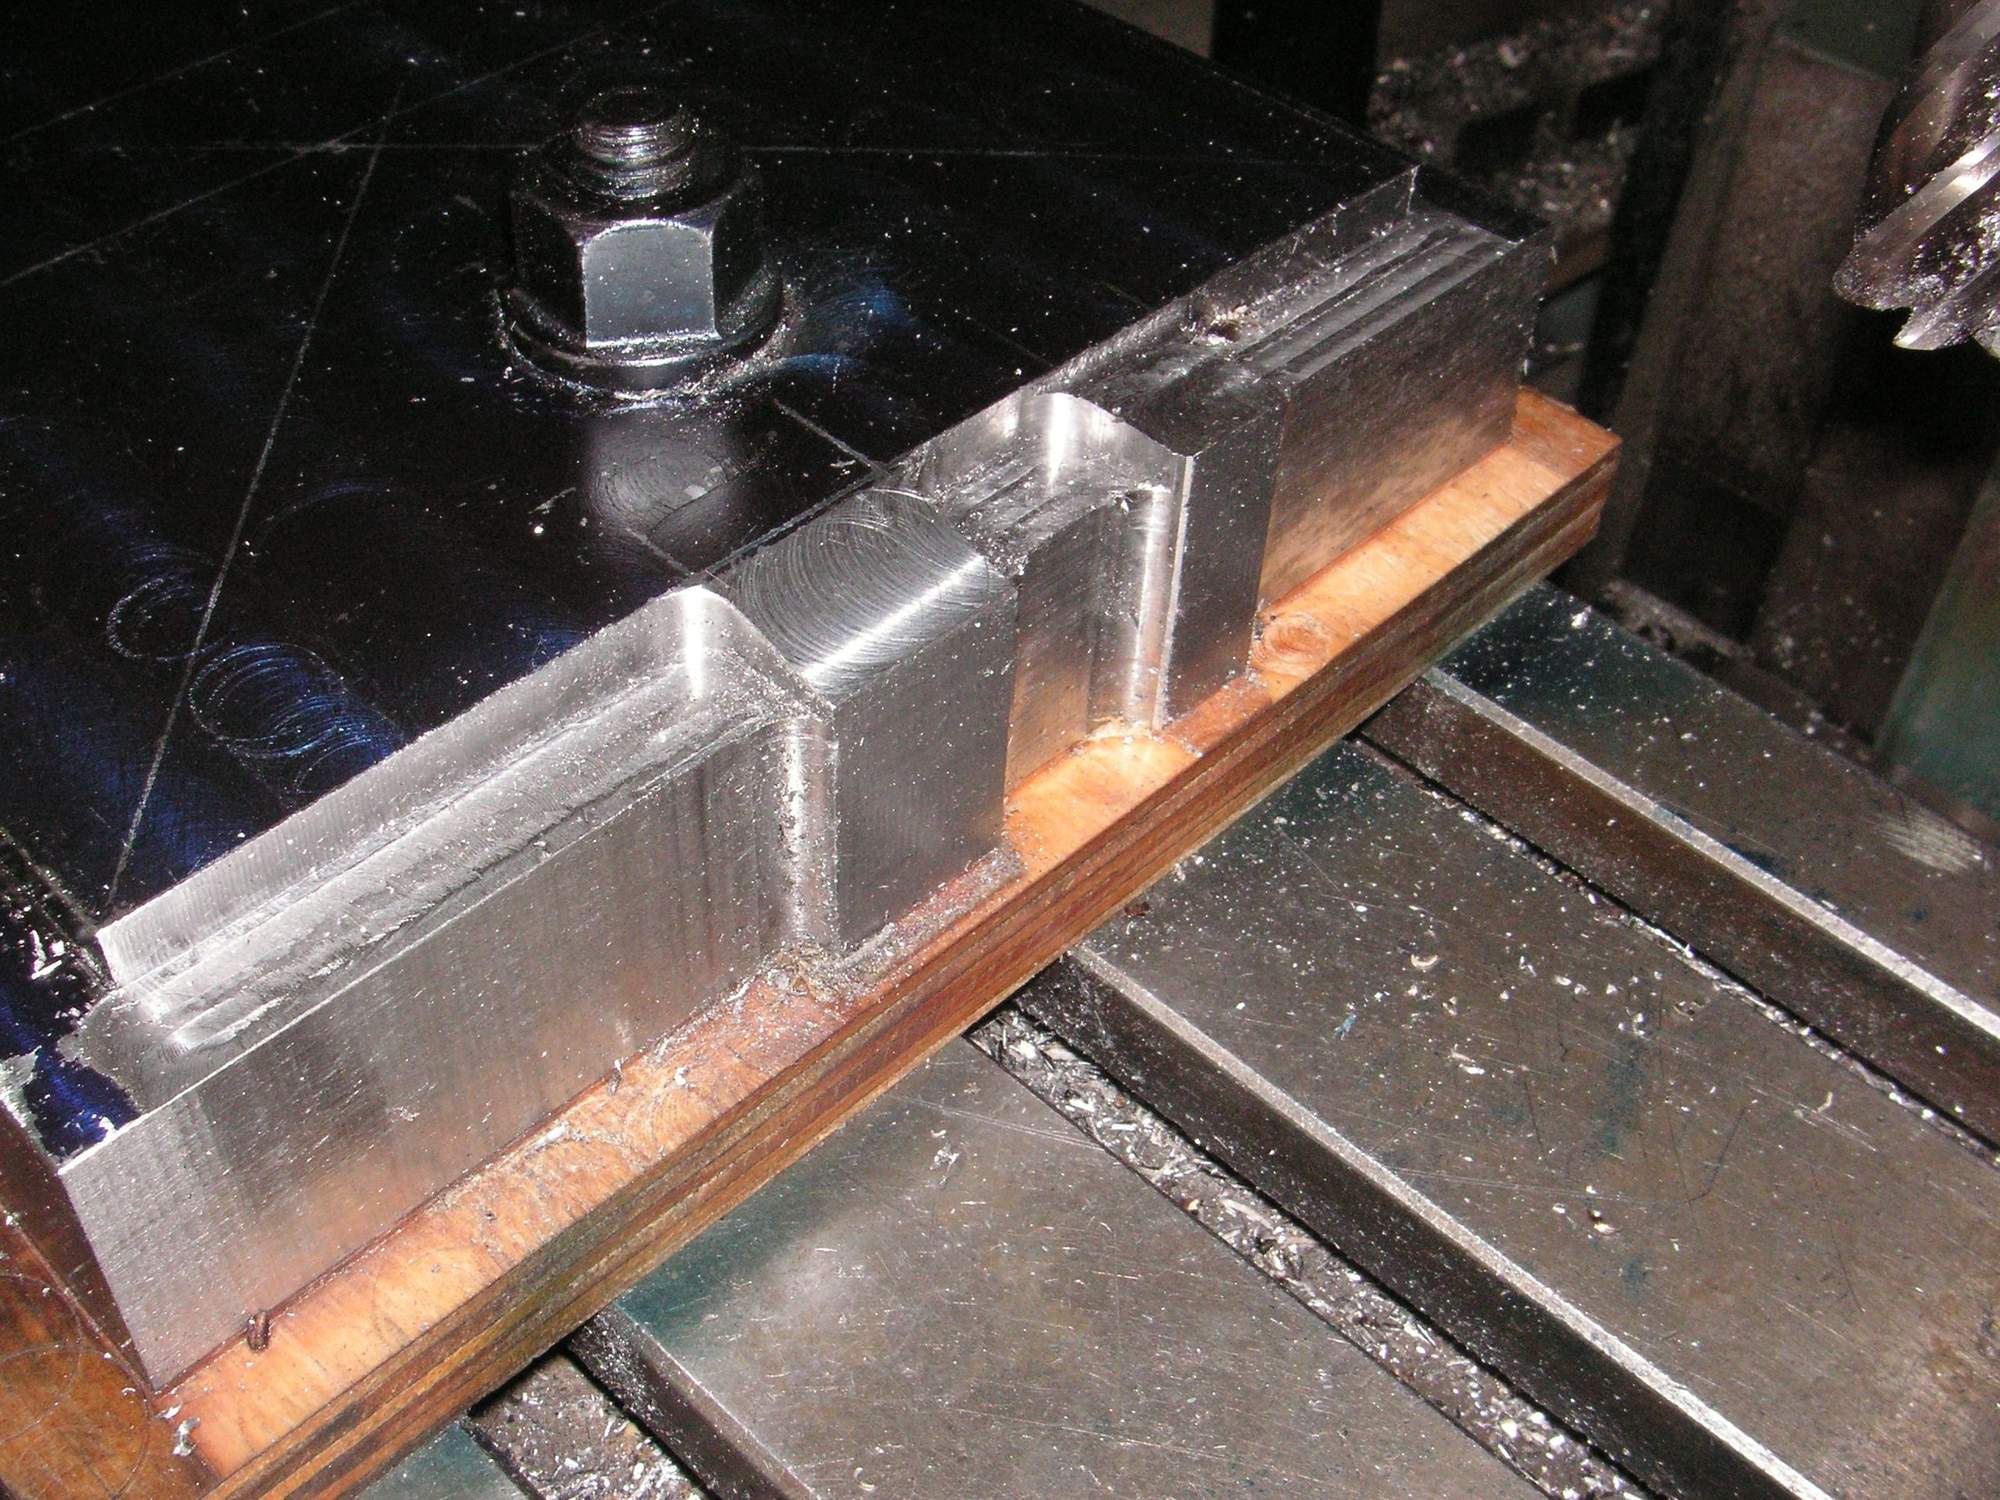
I roughed in one of the ends with the 3/4 inch end mill and will refine it with a much smaller tool. Then I have some of the relief lines laid out. For those, I don't intend to try to mill around them in this die and then try to match them in the female die. Rather, I am going to cut some recesses in this male die and then implant the relief die segments into the recesses. Both will be so much easier to make; and besides, I'll be drilling small holes at the corners and ends of the recesses and drill them through so that I can transfer the exact locations to the female die when I get to it. That way they will be certain to match.
Last edited by Jerry Feather; 04-03-2021 at 08:49 PM.
I kind of refined the first end I had done yesterday and then did the other end also to the point of refinement. That is all but a lot of corner and edge rounding which I think I am going to have to do my hand with a file and sander.
I have laid out the details to be formed in the top surface and will start working on that next. I am going to correct what I perceive as a tiny mistake in the original design of the detail on the top, but I doubt that anyone else has noticed it and I doubt that anyone will be able to see how or that it was/is corrected in my creation.
Last edited by Jerry Feather; 06-05-2021 at 03:20 PM.
My next step in this milling process is to mill some groves and recesses in the top surface to duplicate the design of upward recesses in these lids. In preparation for that I have laid out the design of it all in the marking dye, but before I do the milling I have been trying to figure out the rhyme and/or reason for much of it. I think I pretty much have the rhyme figured out, but the reason(s) pretty much escape me. My best guess about the two long narrow recesses that have the strips of rubber in them on the inside is that those are there for the rubber in particular and the rubber is there to protect from what Rob suggests might happen if one were to do a Dukes of Hazard over an unnoticed speed bump or such which would cause the battery with the posts on the top to weld itself to the lid. Why there are two strips and of different lengths I think is because whatever this box and lid were repurposed from had a dual application and that involved two different sizes of battery. In fact I doubt that anyone in a 928 has ever had a battery installed that is long enough to actually fit this box. I happen to have a 1982 Mercedes 380SL and it actually has a battery that is long enough to most likely fit this box.
In further respect to the rhyme of it all, the lid mounting stud bosses are not centered on the sides but rather are more offset toward one end. They are the same spacing on both sides. Then in laying out the pattern on the top I finally noticed that the two rectangle rubber strip recesses are evenly space with the stud bosses. I think all of those locations have to do with the location and size of the intended battery.
The recess line formed upward in the center of the lid and then breaking into kind of inverted points at its ends is still a puzzlement to me. The rhyme of that is that it is centered and that the end points point toward the corners of the lid, at least three of them do. One does not. That one is what I have decided is intentional and I perceive it as a mistake. I find that if that line were also formed toward the corner it would obscure one corner of the long rubber strip recess in that location so that the corner would become a 135 degree rather than a 90 degree corner. I think the designer was not in favor of that so rather than extending the rubber recess he just changed the angle of that line. I'm going to change it back; and I don't find the need to extend the rectangle recess to look like the original because the original still looks like a mistake to me. I'm still not sure why that system of lines is even formed there.
When this all settles in my mind I'm going to forge ahead.
Last edited by Jerry Feather; 06-03-2021 at 11:08 AM.
...
In fact I doubt that anyone in a 928 has ever had a battery installed that is long enough to actually fit this box. I happen to have a 1982 Mercedes 380SL and it actually has a battery that is long enough to most likely fit this box.
I was actually surprised at how large the battery box on my 78 was, but happy because I was able to put my spare battery for my diesel Jetta in it, instead of buying a new battery just for the 928...
That said, I am glad my battery has plastic covers that snap over both lugs, because it's talk enough that bouncing and shorting to the lid is a very value concern!
Much like your MB, and my old 300 SD and 500 SEC, the early TDI cars had options for some large batteries.
A) Steel is much more interesting when you Dukes of Hazzard it over a bump and the battery welds itself to the cover.
B) The factory was using the battery box and cover as a cantilevered mass off the transmission to damp torque tube vibrations, a lighter plastic cover would result in inappropriate new resonances at certain rpm.
C) The reproduction battery box sticker that Jerry will also make will stick better to steel.
D) Anyone going to the trouble of creating a quality reproduction part will typically reproduce the part in the 'correct' material, if possible.
E) None of the above, they're gonna be steel because Jerry says so.

 03-30-2021, 09:25 PM