When you click on links to various merchants on this site and make a purchase, this can result in this site earning a commission. Affiliate programs and affiliations include, but are not limited to, the eBay Partner Network.
Hello !
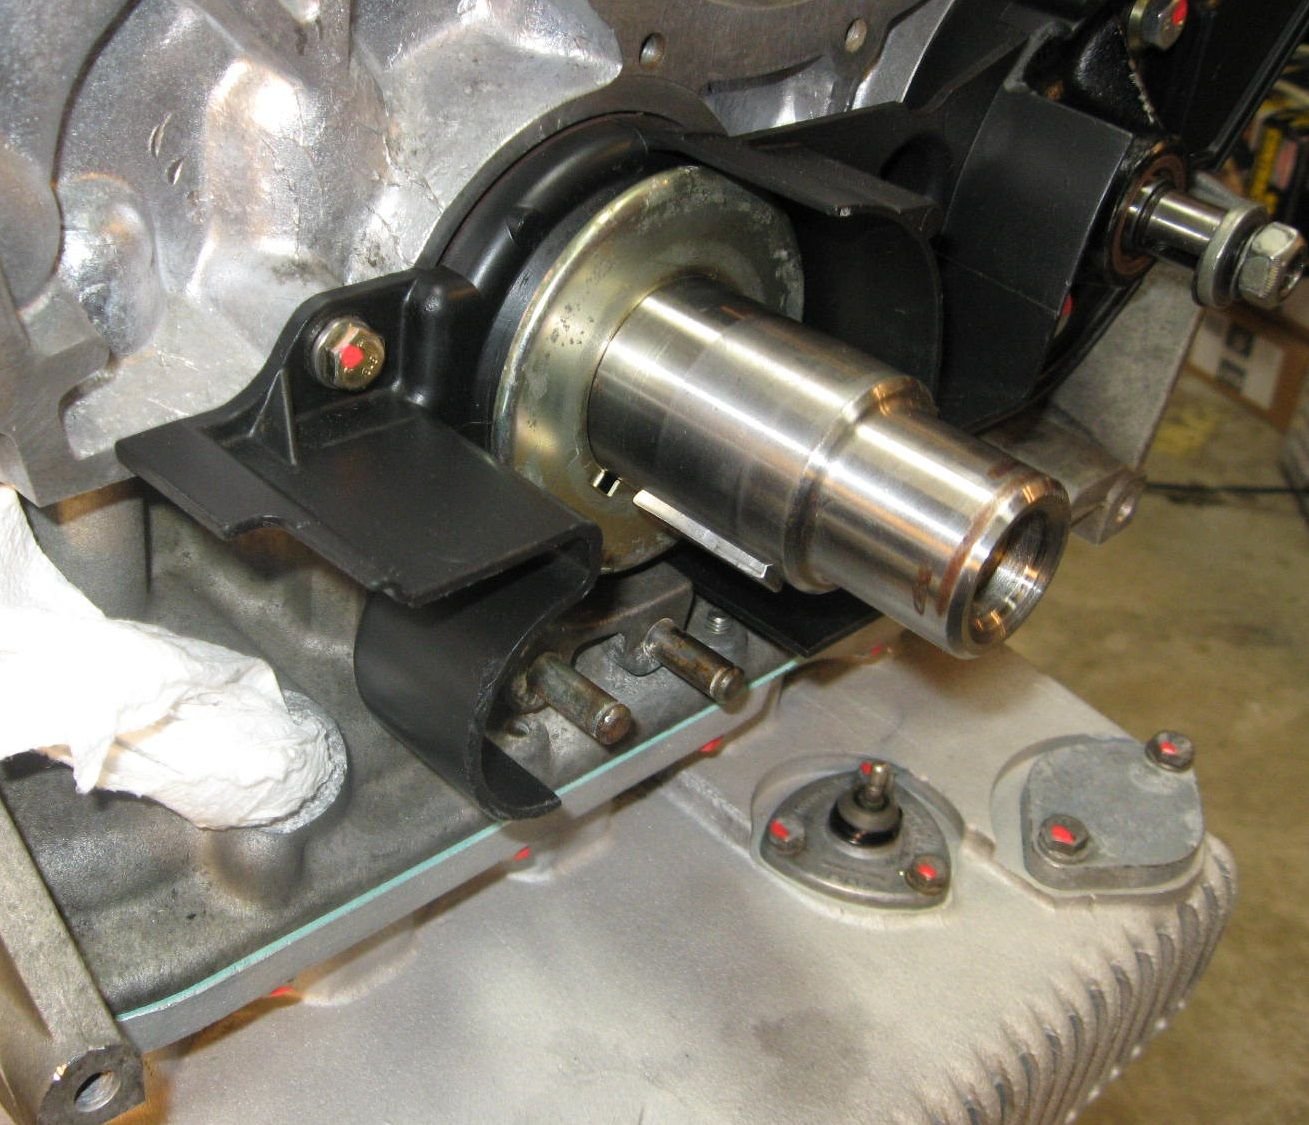
Installing the crank gear spacers and crank gear on the crank.
I have a few questions.
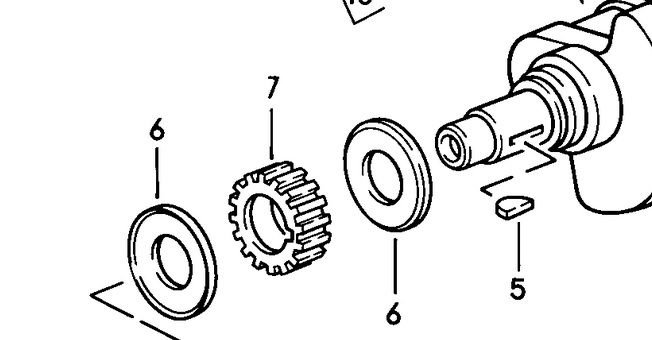
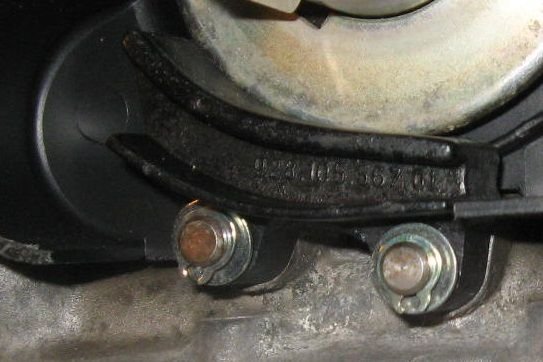
First of all, I would like to confrim that this is the correct orientation for the spacers?
The curved "hollowed-out" sides of the spacers both face away from the crank gear?
I replaced the crank woodruff key with a new one.
It took quite a while of tapping with a wood block to get the woodruff key seated.
My next question is, how "far back" do you install the crank gear itself?
It looks like only maybe the innermost 1/3 of the woodruff key makes contact with the crank gear when it seats back against the spacer.
Do you just install the crank gear "snug" against the innermost spacer? Is there a specific clearance (with a feeler gauge?) that is recommended for these parts?
Thanks in advance.
Last edited by Daniel5691; 12-14-2020 at 02:57 PM.
Hello !
Installing the crank gear spacers and crank gear on the crank.
I have a few questions.
First of all, I would like to confrim that this is the correct orientation for the spacers?
The curved "hollowed-out" sides of the spacers both face away from the crank gear?
I replaced the crank woodruff key with a new one.
It took quite a while of tapping with a wood block to get the woodruff key seated.
My next question is, how "far back" do you install the crank gear itself?
It looks like only maybe the innermost 1/3 of the woodruff key makes contact with the crank gear when it seats back against the spacer.
Do you just install the crank gear "snug" against the innermost spacer? Is there a specific clearance (with a feeler gauge?) that is recommended for these parts?
Thanks in advance.
That is the correct direction for the spacers. The "curve" faces away from the timing belt, acting like guides.
Push the gear all the way back, as far as you can.
When you finish installing all the pieces and tighten the crank bolt, the pieces will all be crushed together with the force of the torque, from the bolt.
1 - Big washers go 'outwards' on the crank. Their actual job is to guide the TB onto the gear.
2 - I put it 'all the way back'.
It's been a couple years and I'm tired, so I may be misremembering, but doesn't the accessory belt pulley end up snug against it?
And that's held on by the stepped washer and the crank bolt that gets a LOT of torque.
And I think the key also holds that pulley.
As always, if I'm wrong I welcome correction.
Edit to add: Duh. Harmonic balancer goes between gear and acc drive pulley.
But at least I was mostly right.
Last edited by Wisconsin Joe; 12-12-2020 at 07:06 PM.
PS Doctor Brown I need desperately to order one of your Super Dampeners.
Thanks again all.
This would be a good time to order it.
We have a quiet, private sale on everything we make......just as long as people are not in a huge hurry for things to be shipped out. (Or billed out.....we never "bill" until we ship, but all discounts are applied at time of order.)
We are so insanely busy that we have reached the limit of our ability to add anything more into the schedule!
If someone really needs something, we will ship it or get it done, but we'd like to keep this to a minimum, right now.
We've been forced to cancel all incoming work until after the first of the year.
And the family is on the 10-12 hours a day, 7 days a week schedule.
I am answering requests, questions, orders, etc. at lunch and in the late afternoon. (This is my lunch, right now.)
Mary is still answering the phone and taking orders, if you know exactly what you need. 714 879 9072 or MaryBBRD@att.net.
If you need assistance, have a question, or need specific help, I look at my private Email three times a day: GregBBRD@aol.com.
Thanks so much Greg, I'll send you an email so that you can read it at your convenience !
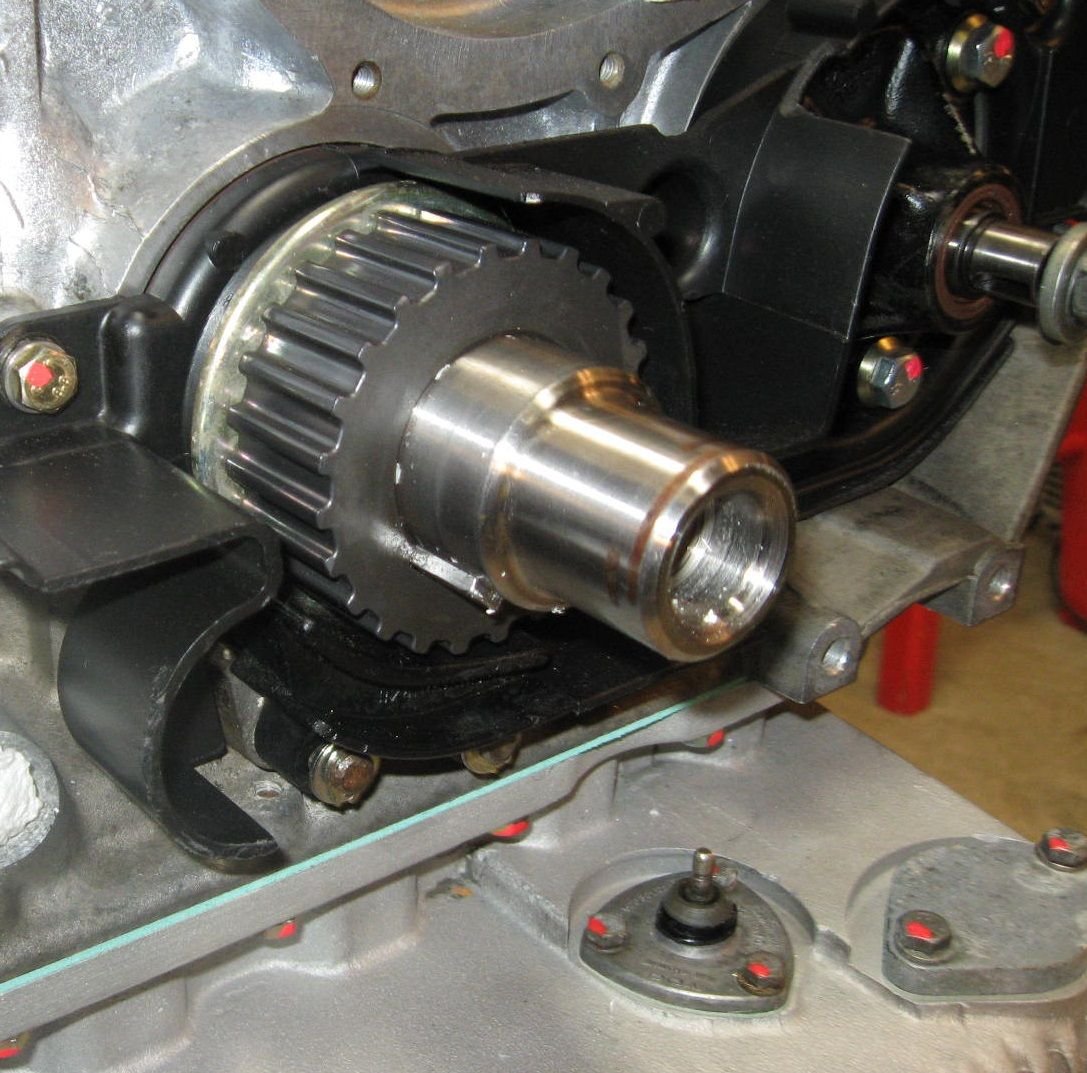
So, thanks to the quick advice, I was able to get moving on the crank gear...
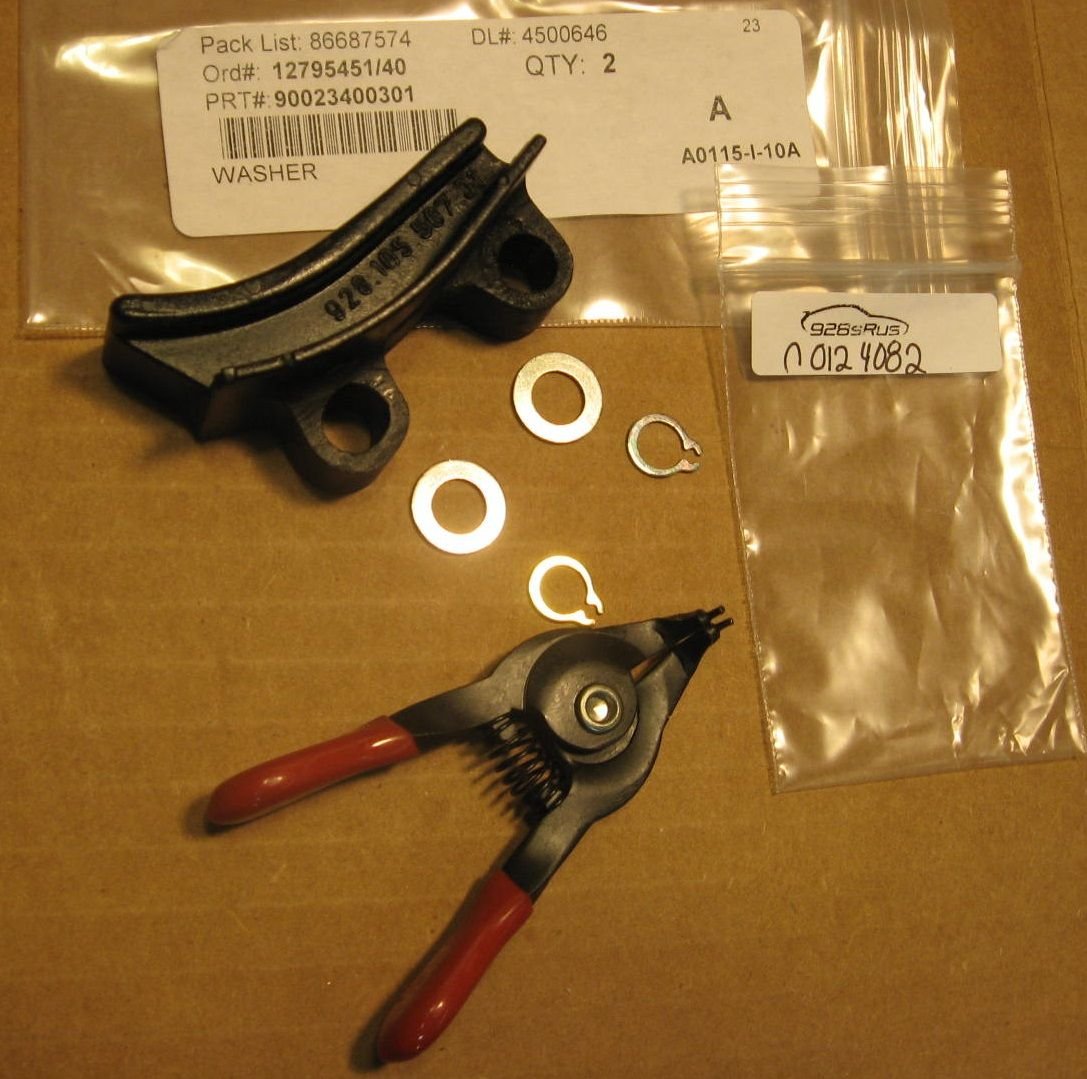
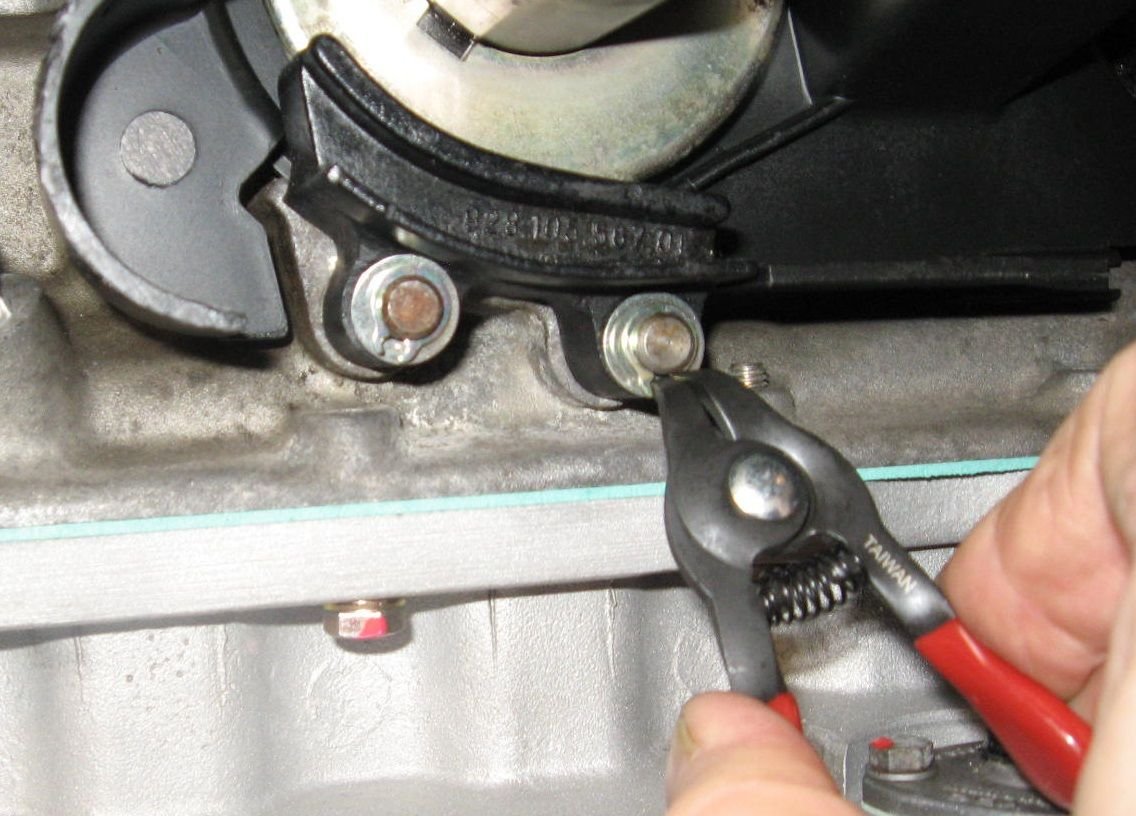
First I installed the belt guide with new washer and circlips...
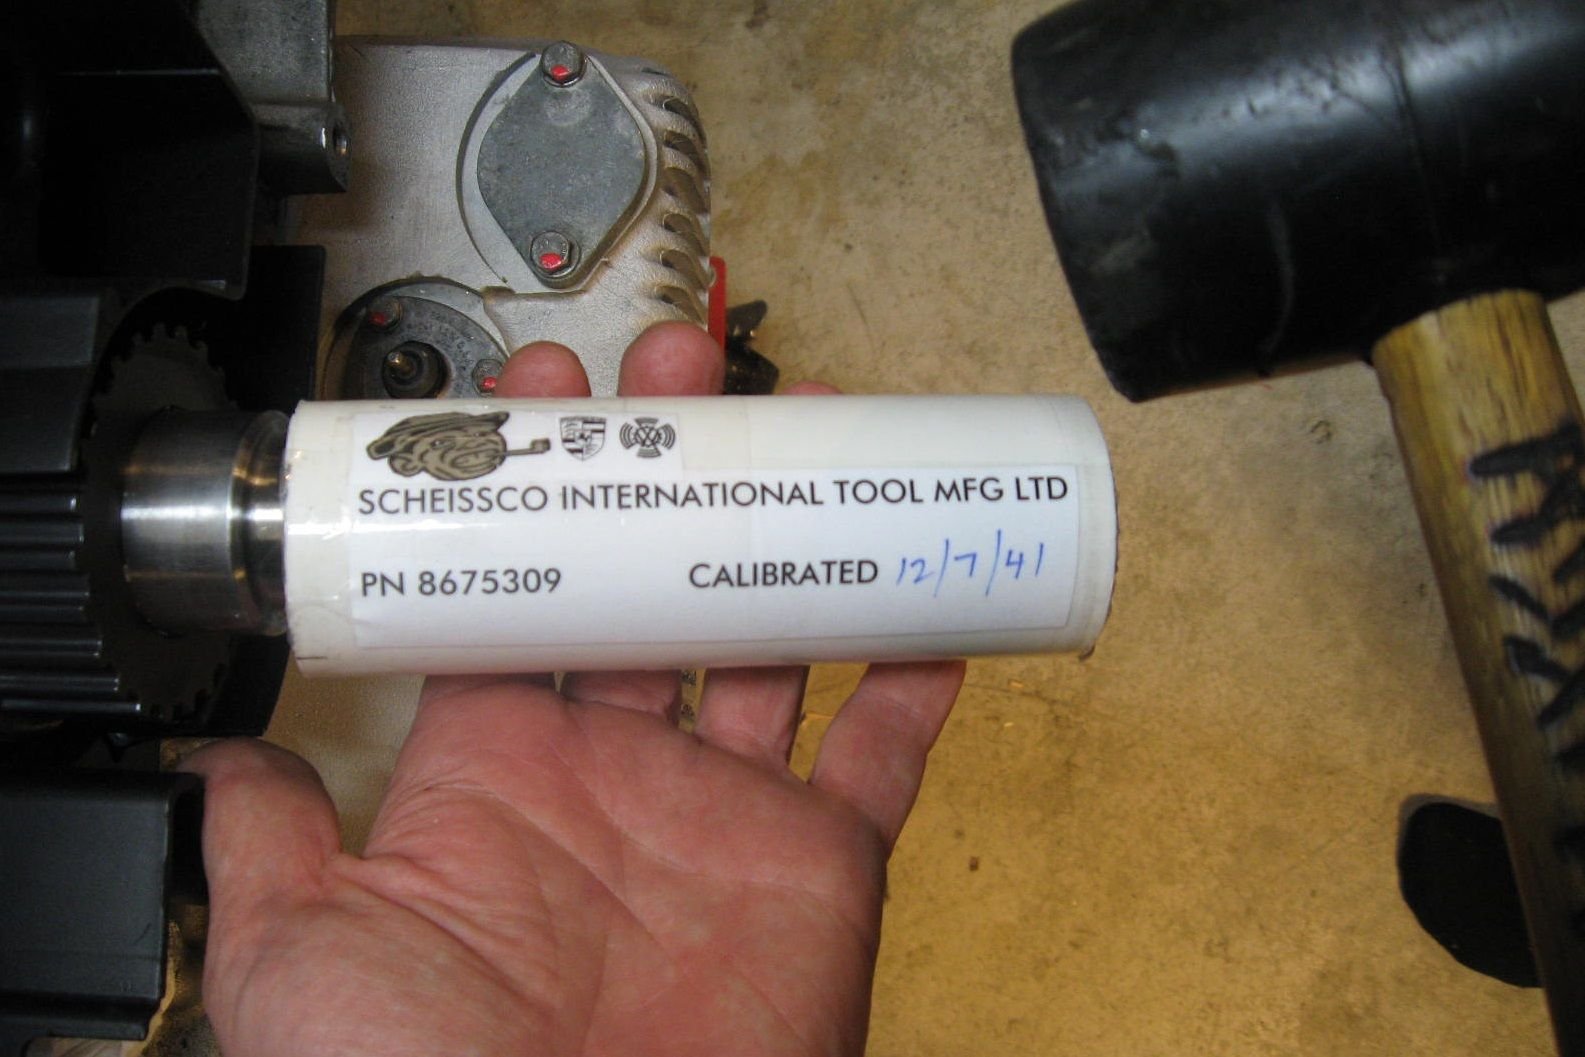
Next, I moved on to the crank gear.
I luckily had a Special Scheissco Factory Tool made just for the job at hand, along with the world's oldest rubber mallet...
Thanks so much Greg, I'll send you an email so that you can read it at your convenience !
So, thanks to the quick advice, I was able to get moving on the crank gear...
First I installed the belt guide with new washer and circlips...
Next, I moved on to the crank gear.
I luckily had a Special Scheissco Factory Tool made just for the job at hand, along with the world's oldest rubber mallet...
Thanks again !
Dan
You got it, everything is correct!
I love that plastic lower guide that you used.
Very few of these pieces have survived.
And...it's great that your early crankshaft gear survived.
Also very rare to find one of those gears which look that good!
(I'm sure you know this, but the timing belt you will use with that crank gear is the "square tooth" design.)
Nice work. I run the steel square tooth pulleys on my engine too - no coating to wear off and they last for 100s of thousands of miles. Yours looks pristine.
Nice work. I run the steel square tooth pulleys on my engine too - no coating to wear off and they last for 100s of thousands of miles. Yours looks pristine.
You do have to be careful.
I don't think it an accident that Porsche "updated" the square tooth belt and gears, when they went to dual valve springs, in the heads.
I frequently "update" the early heads to dual valve springs (single valve springs scare me) and also update the belt and gears to compensate for the increased resistance to turning the cams.

 12-12-2020, 06:31 PM