When you click on links to various merchants on this site and make a purchase, this can result in this site earning a commission. Affiliate programs and affiliations include, but are not limited to, the eBay Partner Network.
I just noticed it looks like you are missing the clips off the headlight motor linkage. I know your doing a lot of disassembly, but wanted to reiterate not to active the headlights without those clips installed if you have radiator back in. that link can come off the headlight arm and the motor will drive it right through the radiator.
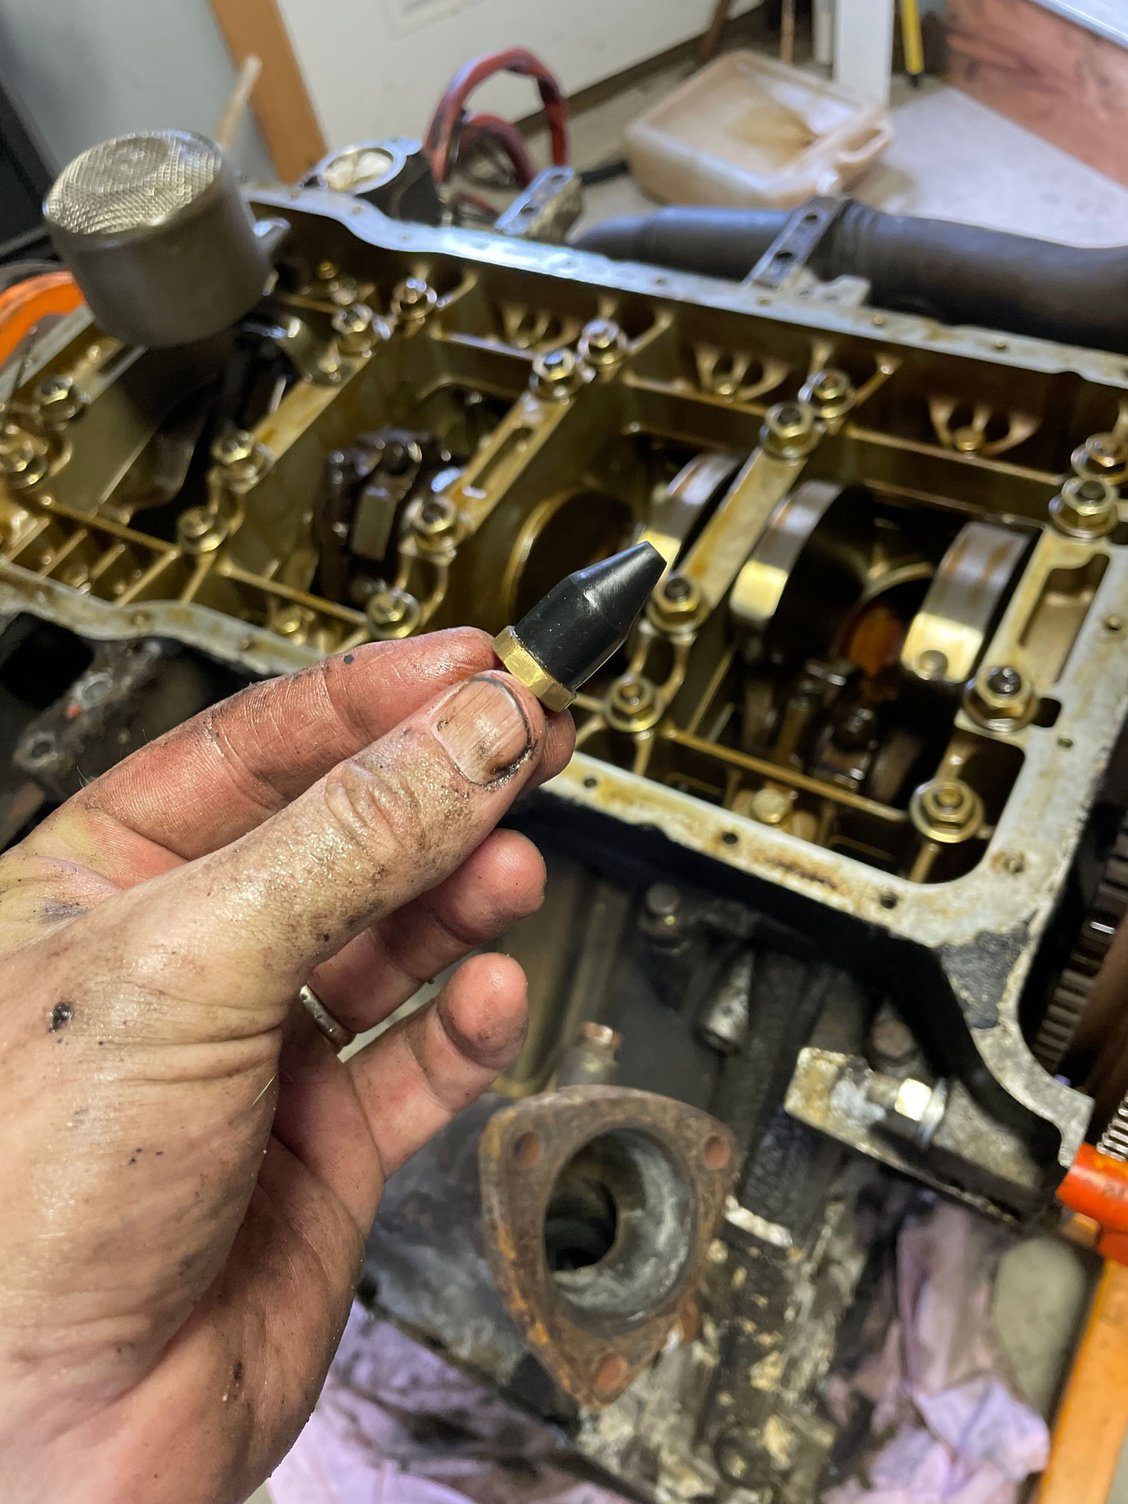
Ok want to know a secret? One of the reasons that finally put me over the edge to take the engine out was when I was using the air compressor the tip had wiggled loose and shot across the engine and landed in the open cams and fell into the oil sump. Well I got that back.
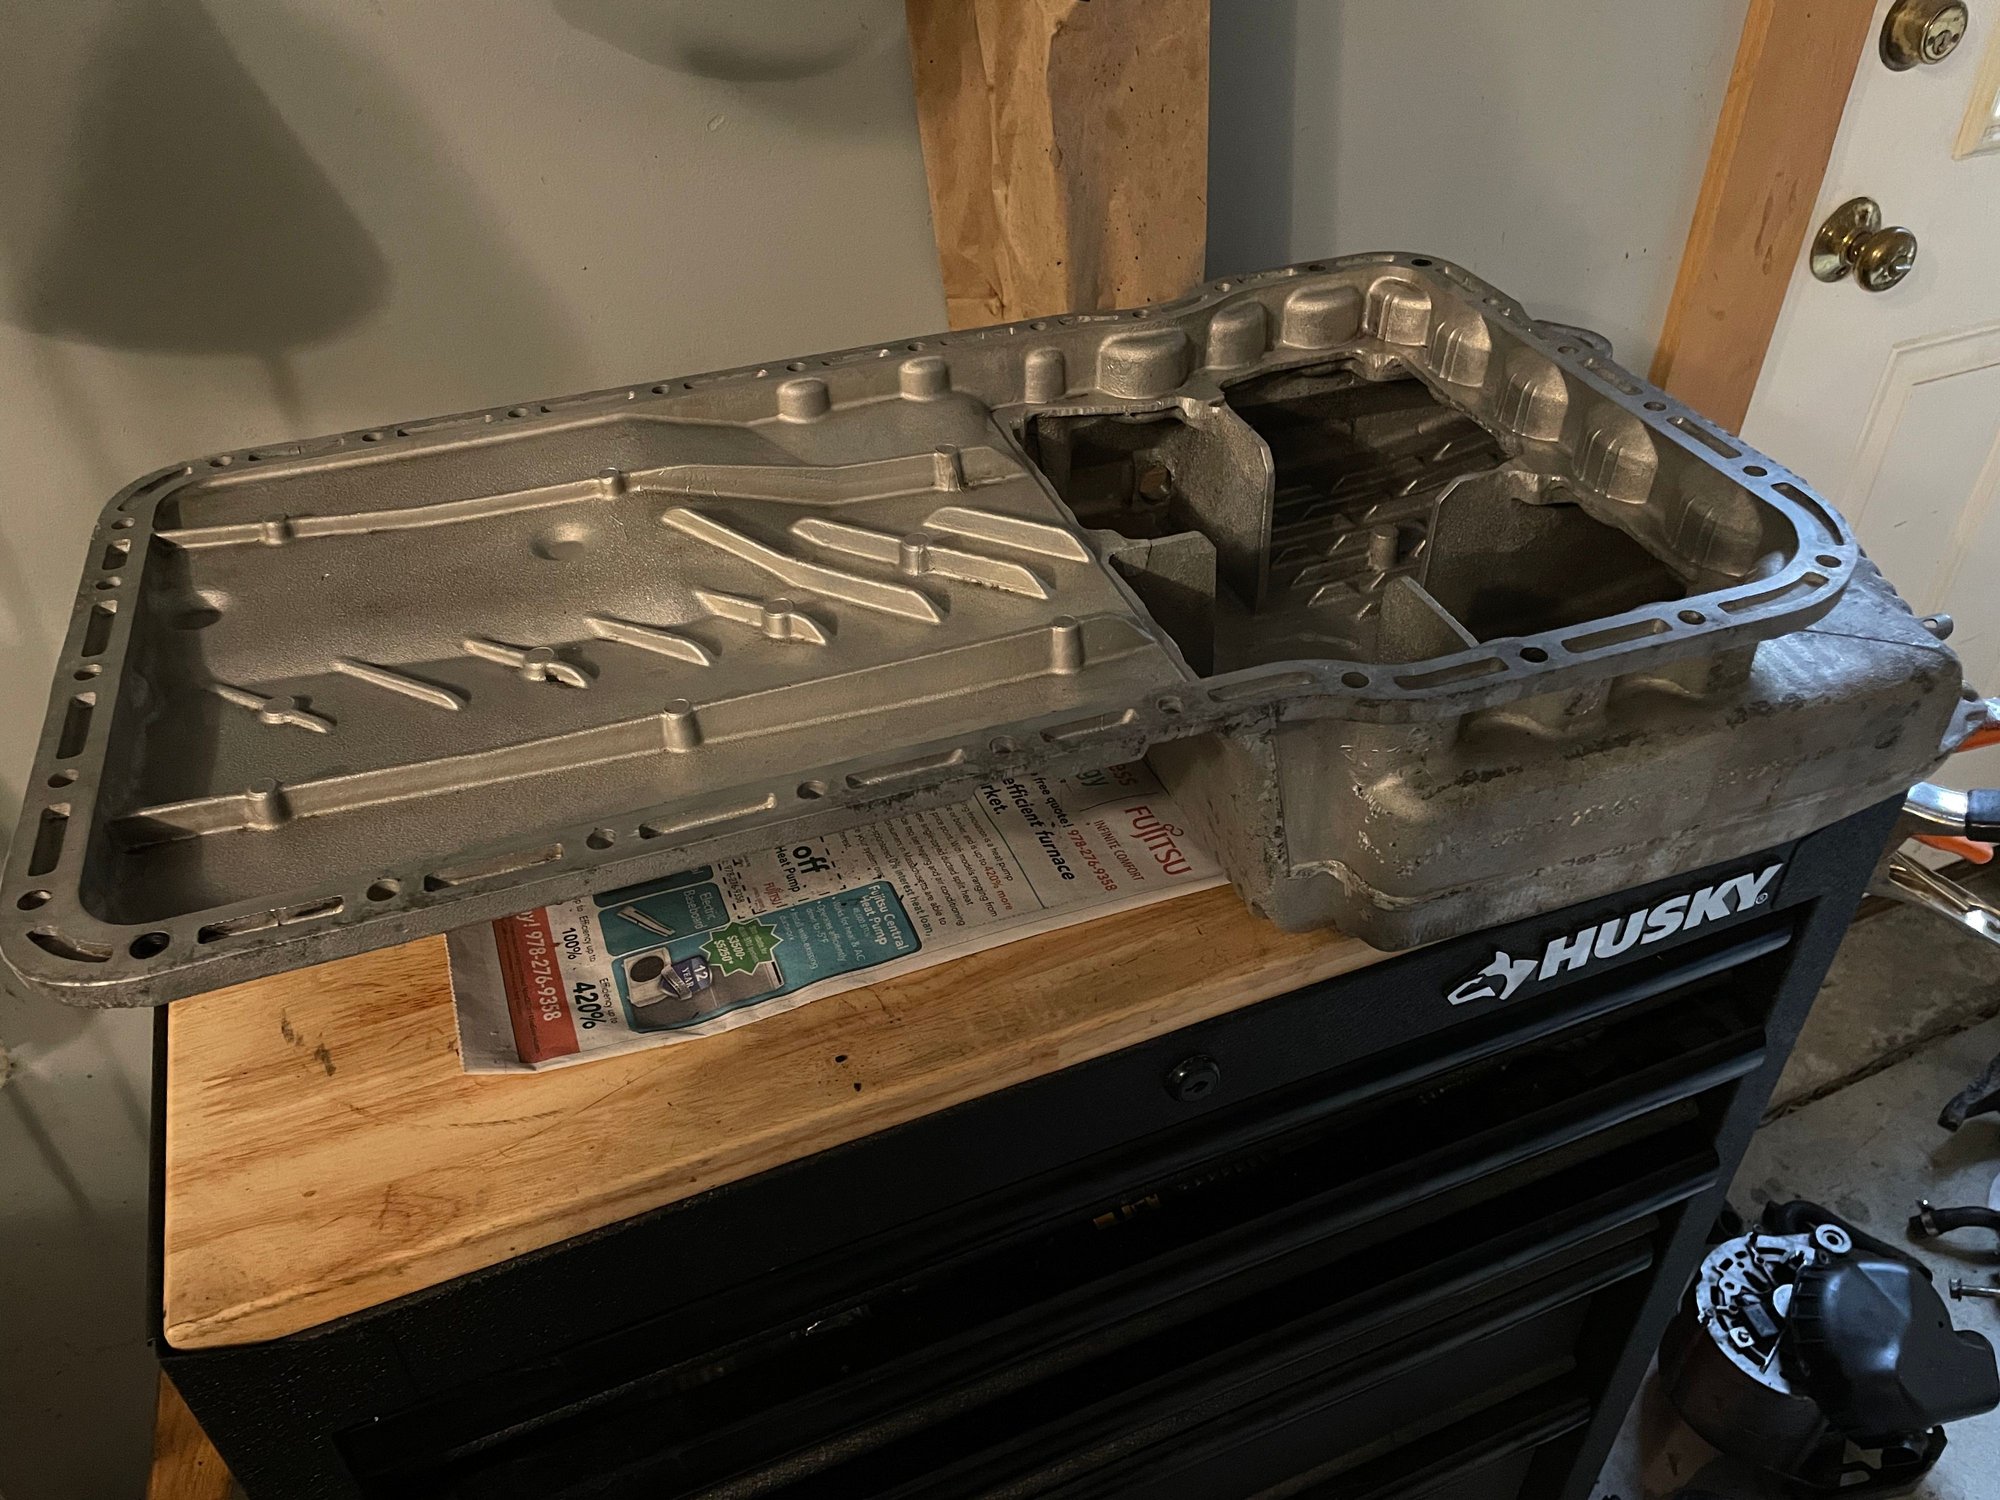
The original cork oil pan gasket had failed quite a while before the car made it Schuyler Lake. Reckon Pierre had a dirty car slot. This will make taking the cross-member and steering column out a dirty affair. I've ordered a new-fangled gasket from Precision Motorwerks. Salesperson seemed surprised that this gasket was going to Massachusetts. I guess not many of these 928S are in these wet, salty New England states. I cleaned up the oil pan and the interface for reassembly.
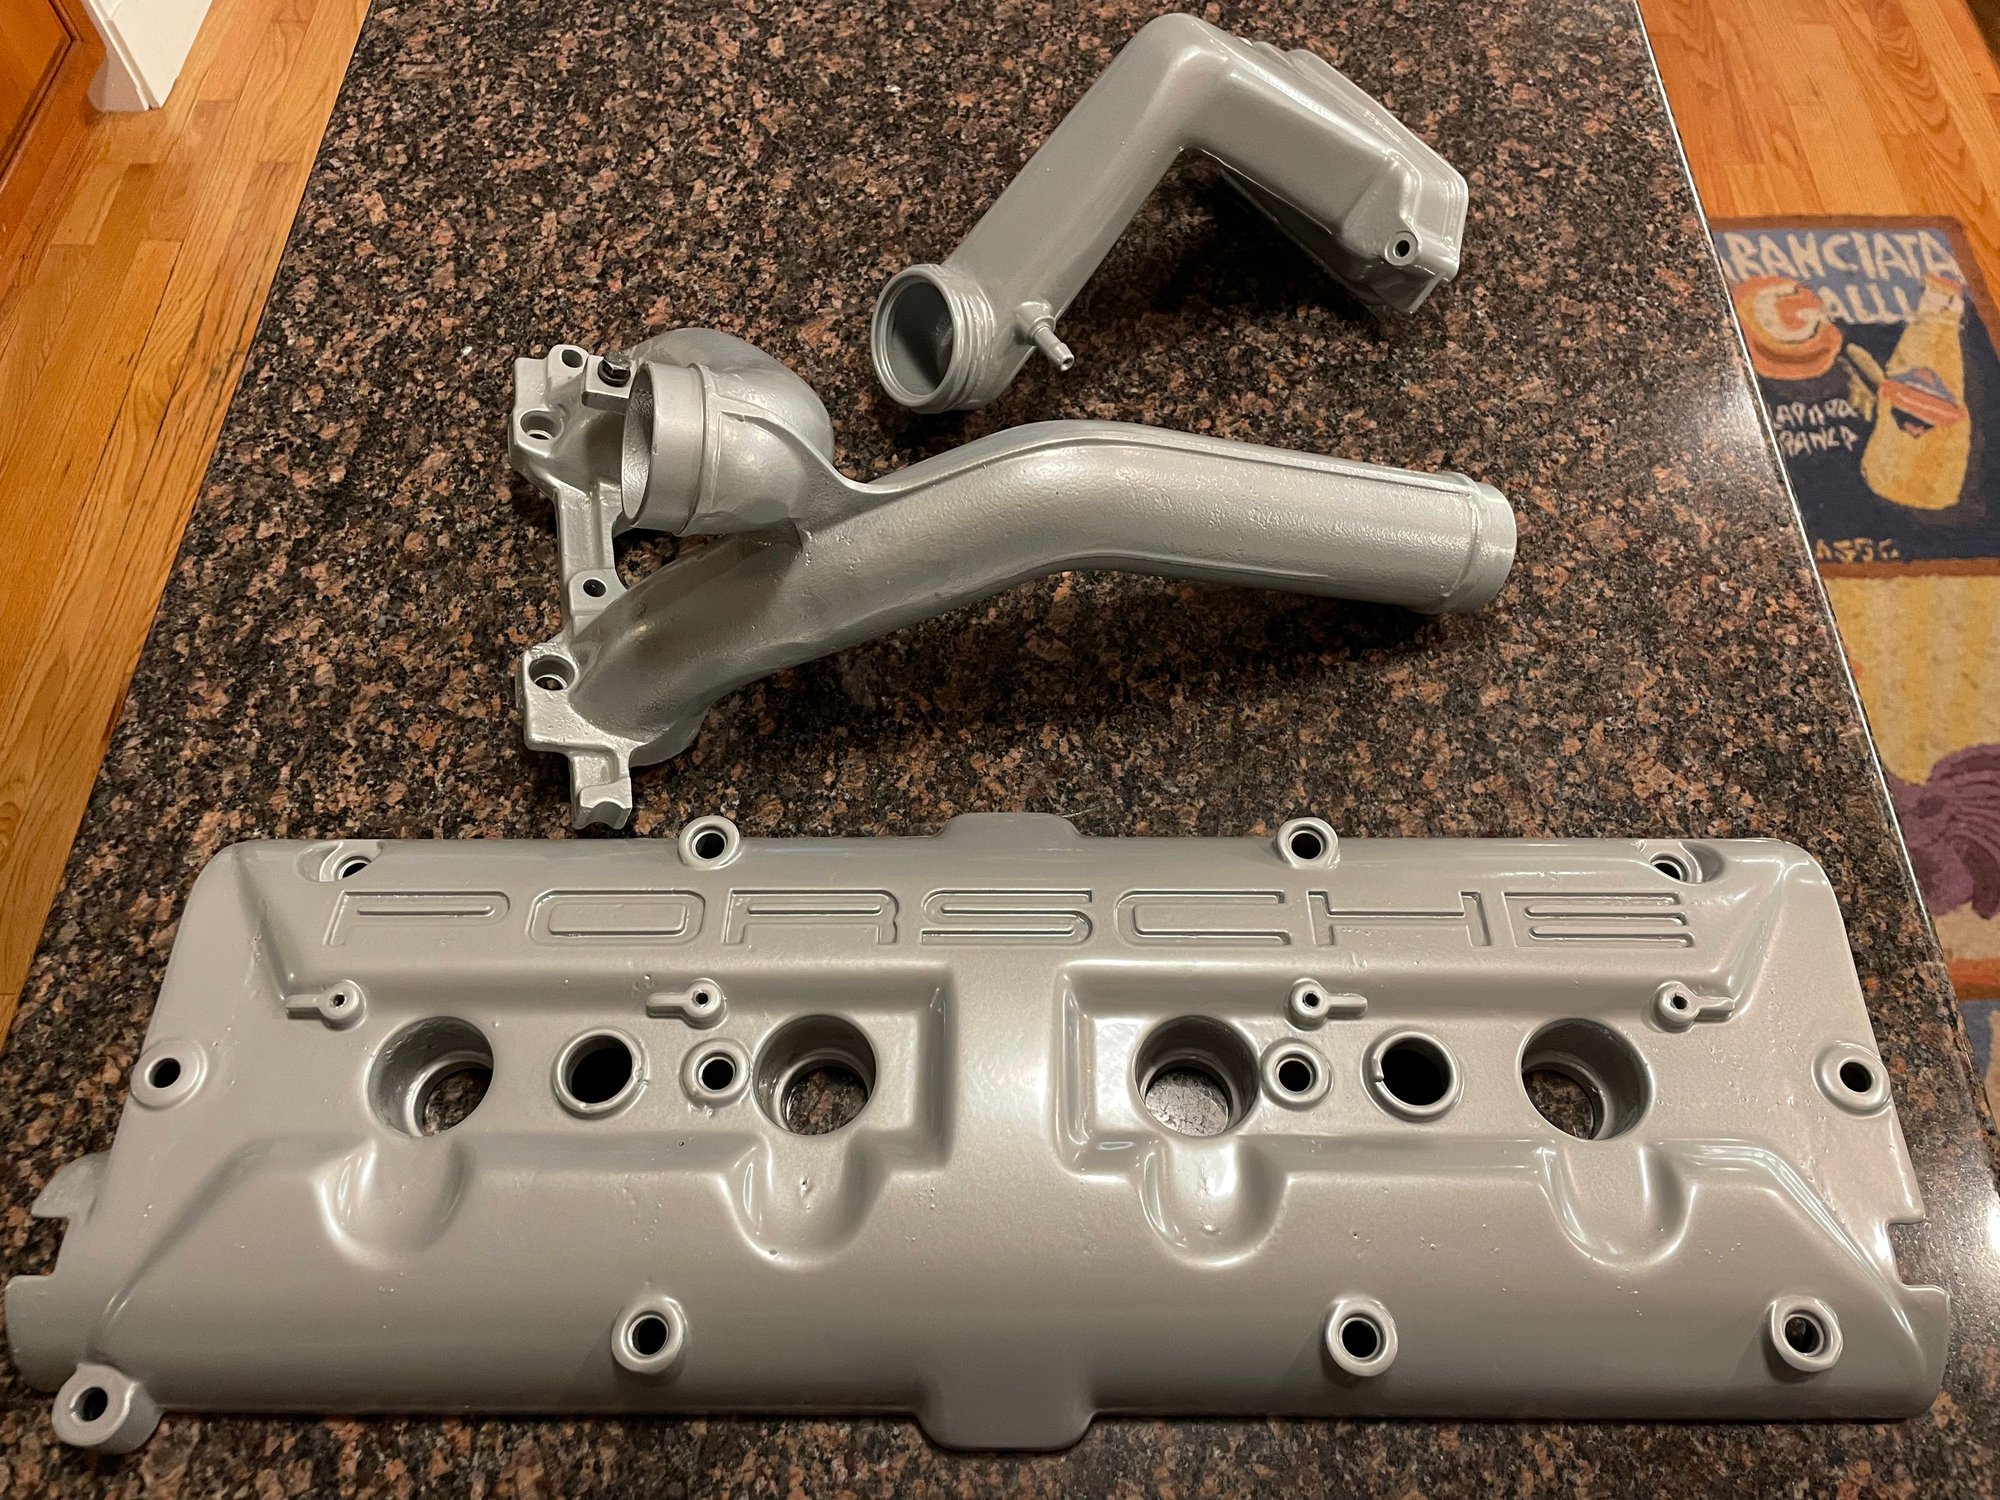
A while back, a kind Rennlister offered my his air tubes and radiator for a good price and I had the oil neck and cam covers sent off to Dr. Blast in Cibolo TX. I think the match is pretty good!
This is a dirty affair and I'm having fun. I love the zen and where my mind wanders. I have some pretty strange thoughts...
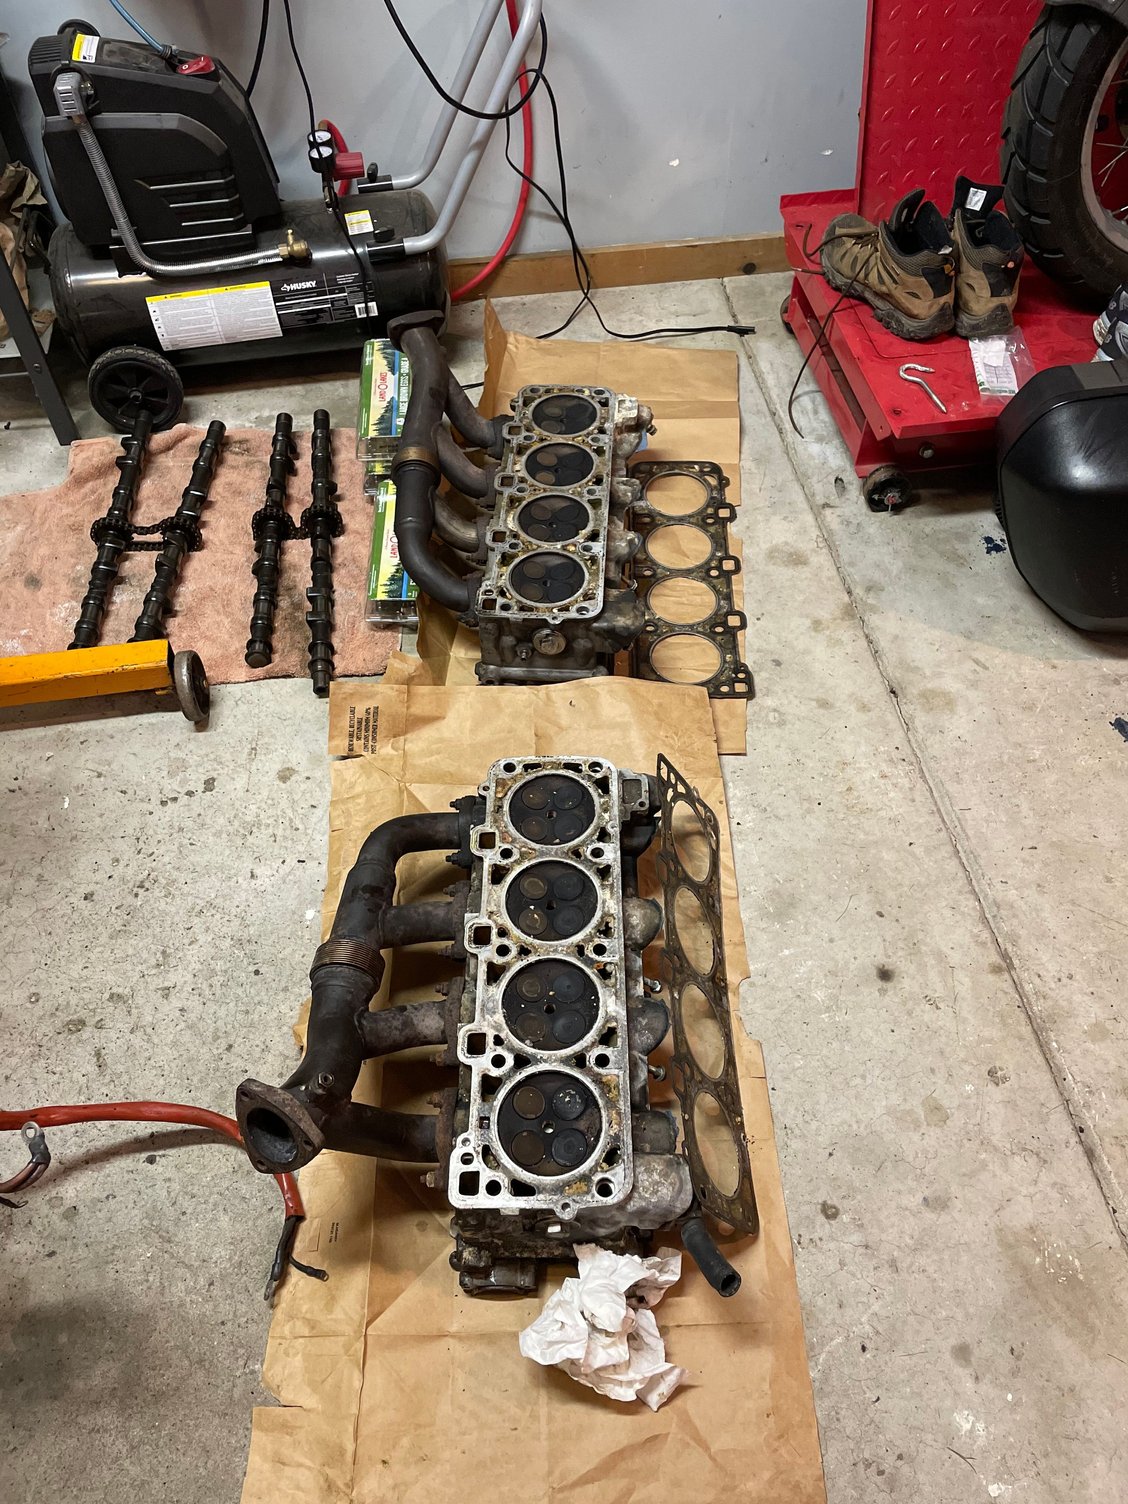
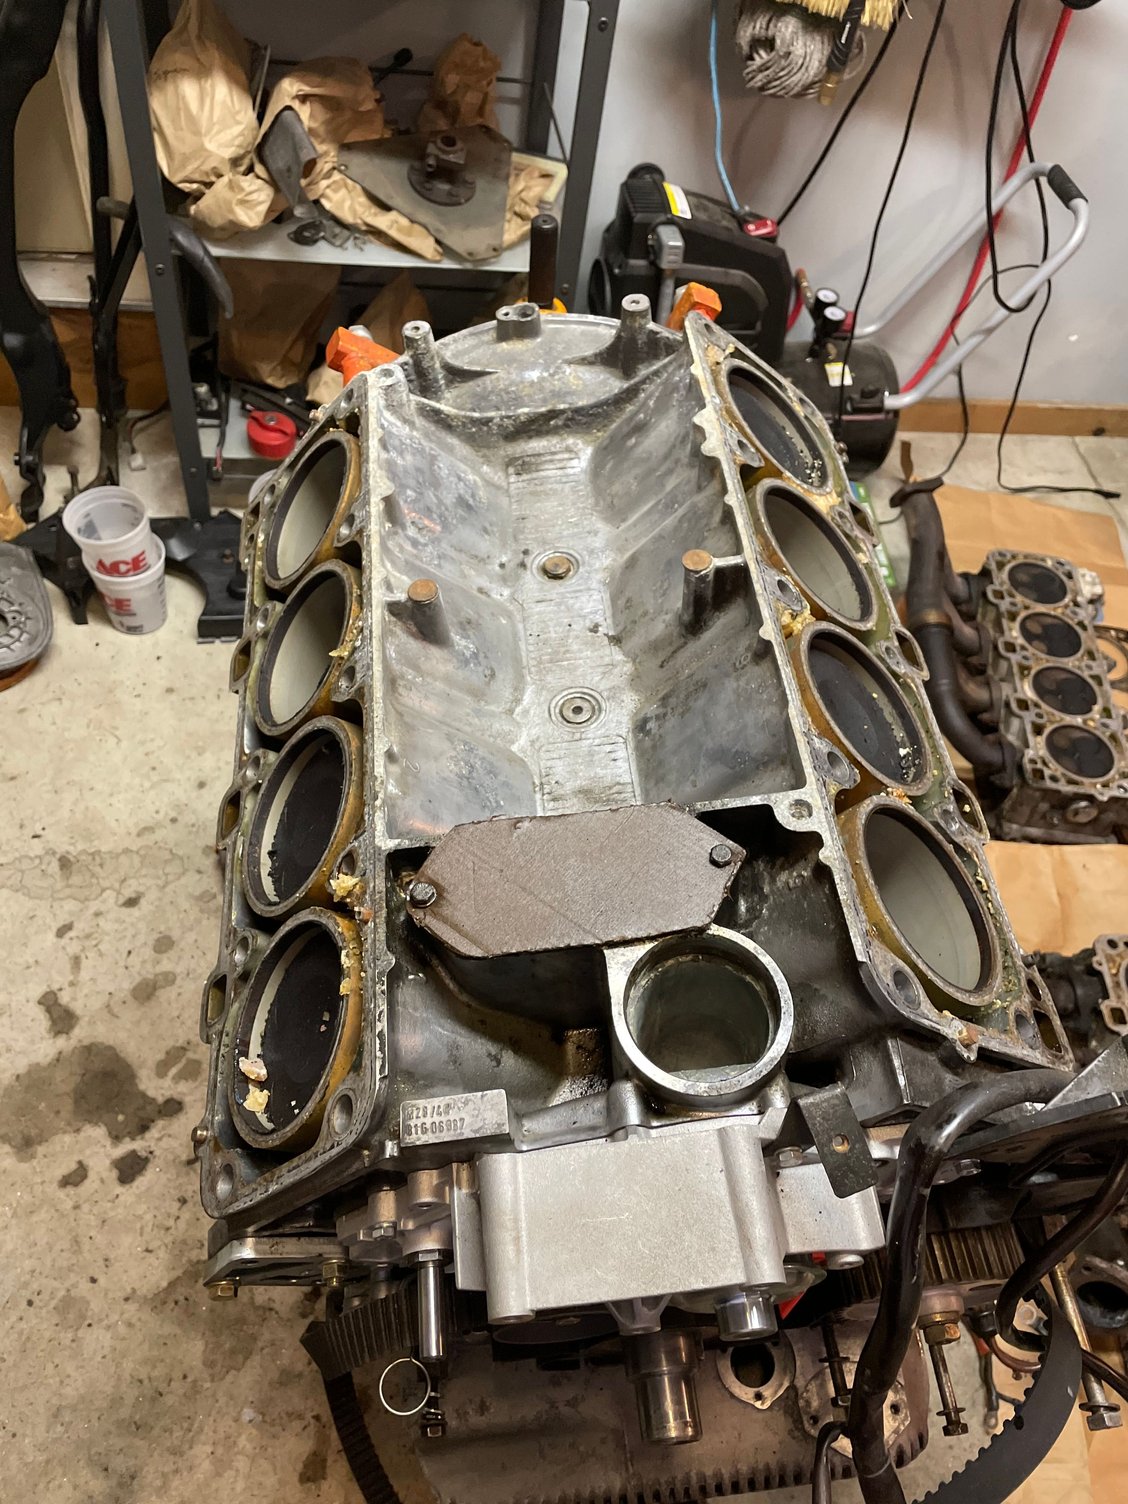
Brian and I got the heads off yesterday. I�ve not seen very many to compare, but Brian was quite encouraged! There is built-up coolant funk which will be easy to clean out but everything looks great.
I�d like to bring them to a place that does resurfacing and valve work to get an opinion on what�s needed/recommended. Anyone know of a Eastern MA/Southern NH machine shop that�s good?
What's the trick to get the ball joint of the steering unit out of steering knuckle? And I separated the steering shaft and found a gross old felt washer. The parts diagram doesn't conceptualize a split steering shaft...
What's the trick to get the ball joint of the steering unit out of steering knuckle? And I separated the steering shaft and found a gross old felt washer. The parts diagram doesn't conceptualize a split steering shaft...
Kevin - might be best to take pictures of what you are dealing with here. Are you talking the ball joint at the end of the tie rod? Or the U-joint at the end of the steering shaft as it connects to the rack? Also, I believe there is a "rag joint" (actually rubber I think) midway up the shaft - seems that part is replaceable, though I don't see it listed separately in PET. Pictures are worth 1000 words.
And removing the U-joint, make sure the pinch bolt is fully removed (can't remember if there is a groove in the splined shaft to capture the bolt), lots of penetrant, and see if the joint is slotted so that you can pry it open a bit.
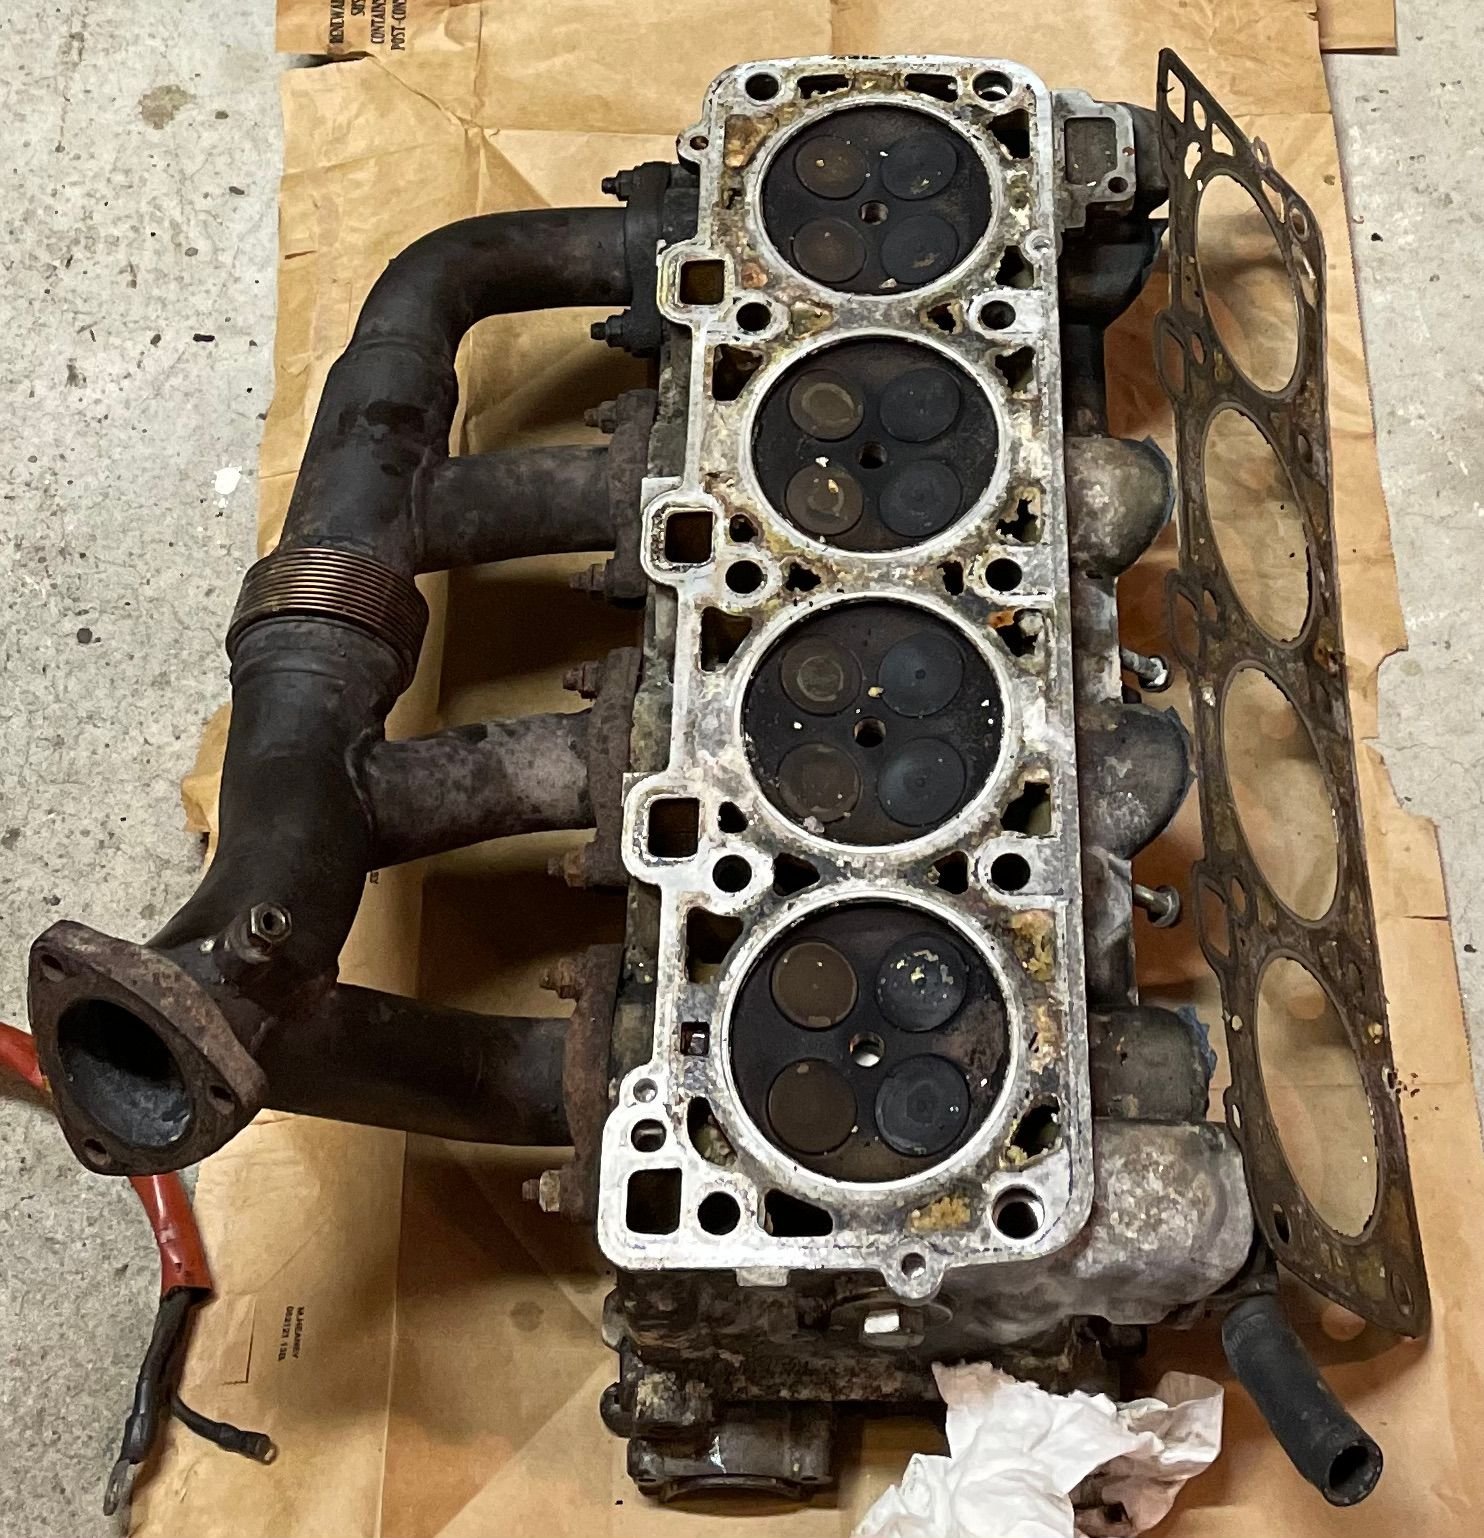
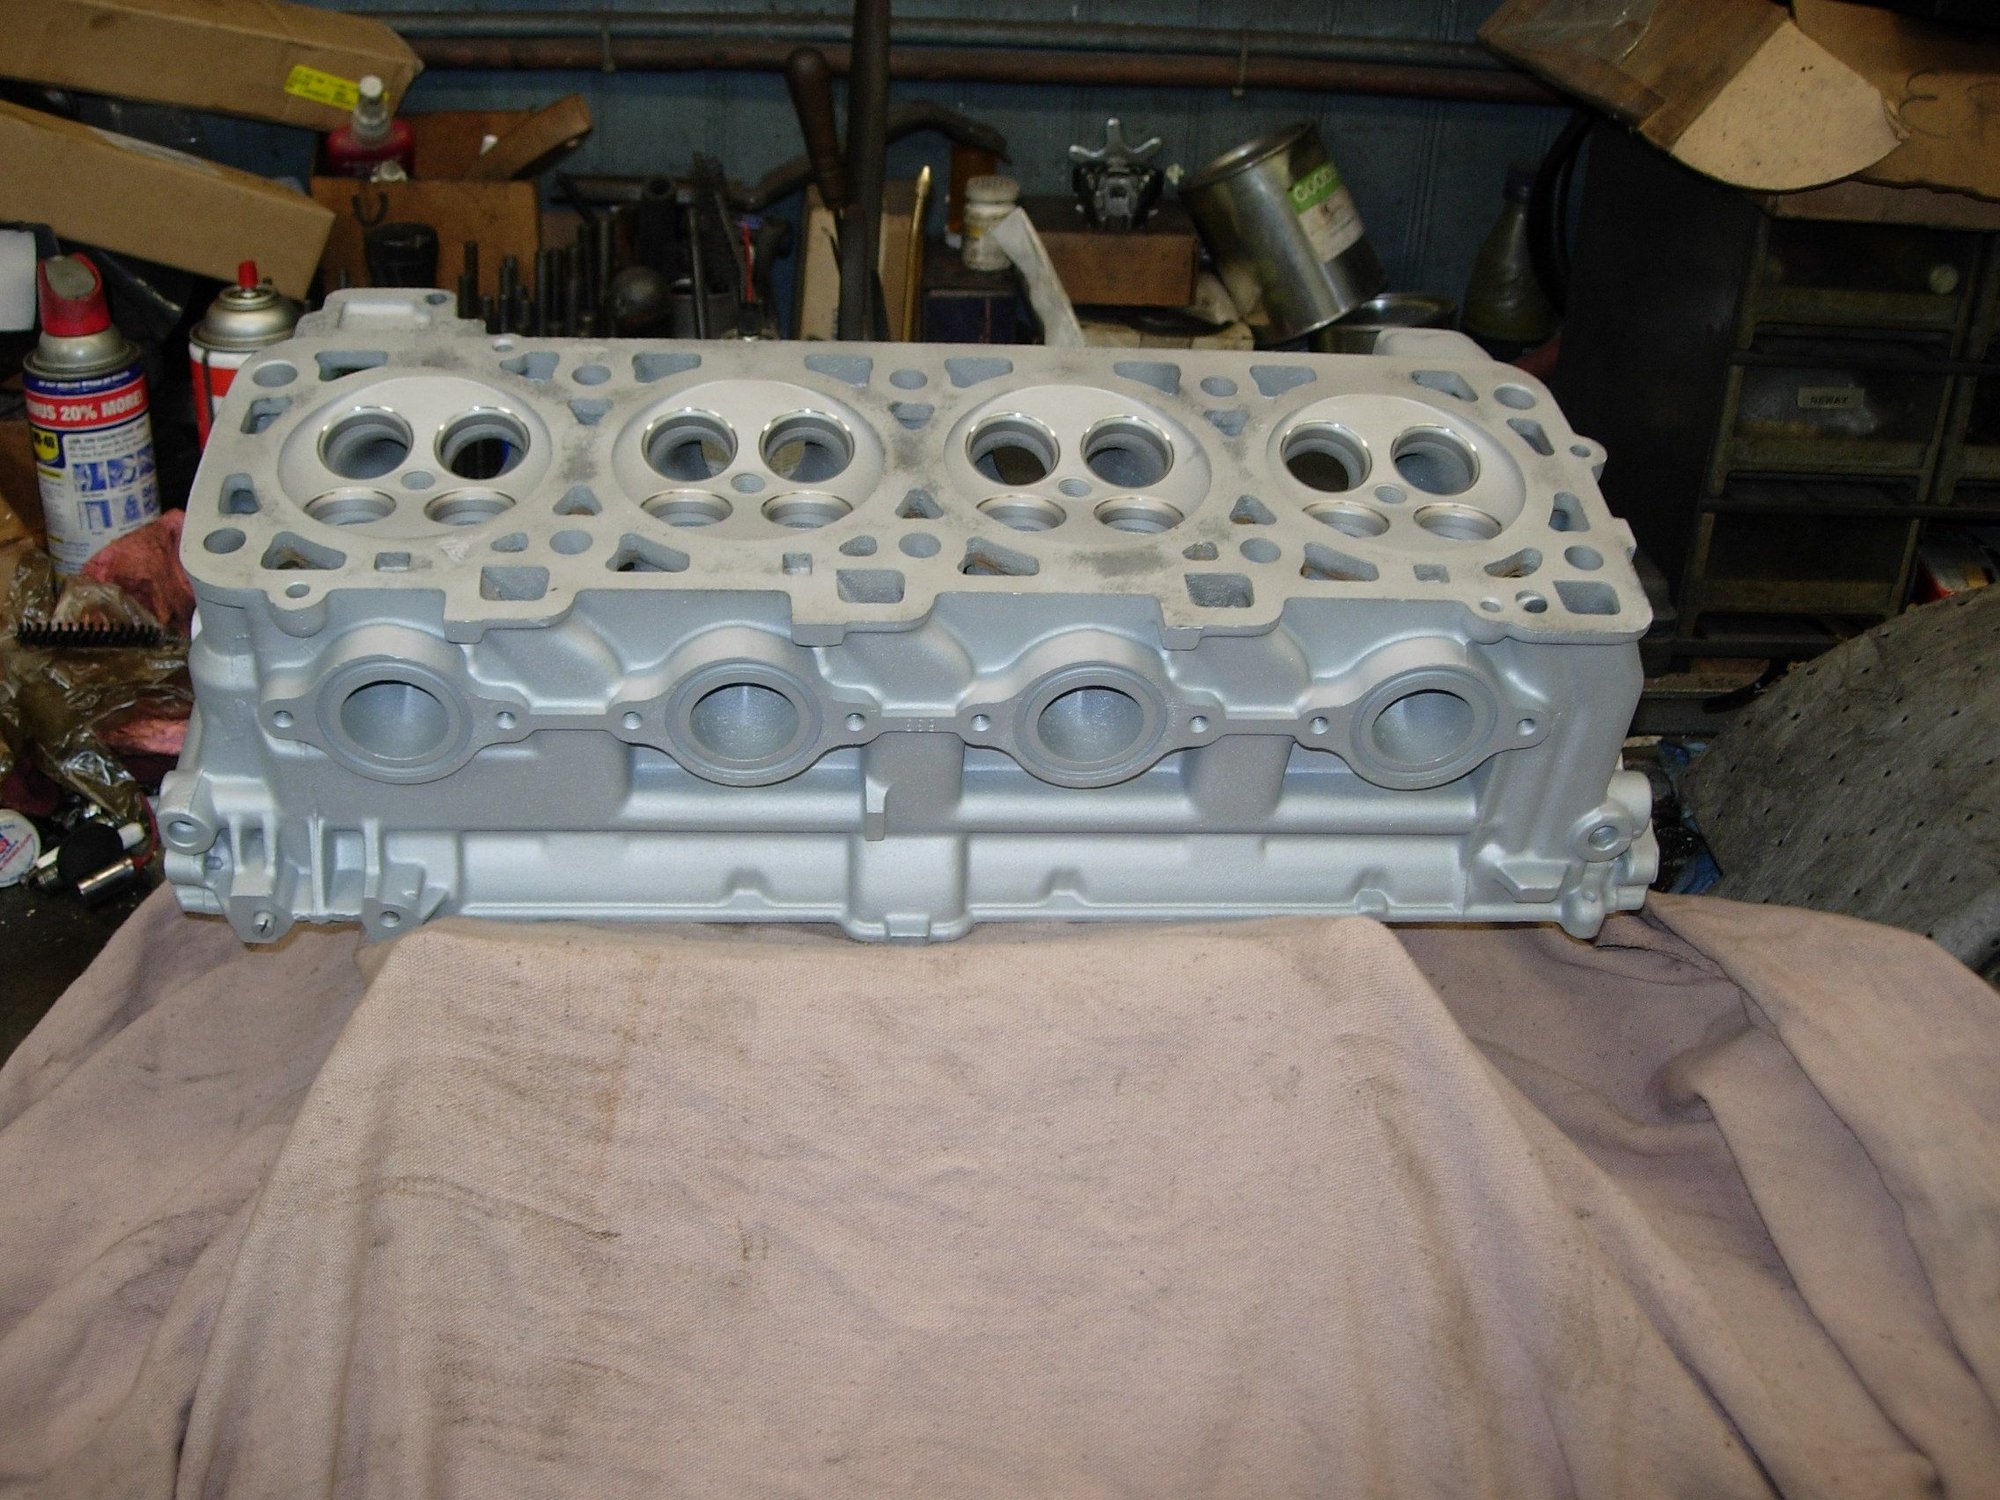
Hal at Century Automotive Machine is servicing my heads. Check out the befe and after pictures! Anyway - he wanted new anti drawback valves. The parts diagram I've been using (1986.5) doesn't have these valves but the 1987 does. So I must have 1987 heads. Can anyone tell me what other differences are? Before After
Long time no post. Since last, I've cleaned up the engine (see picture) and inside the engine compartment (see picture with my new puppy). Got help reassembling the heads (see pic with nephew) and timing the cams. I've done a fair amount of the top-end reassemble (see pic) and dis-assemble of the front suspension, steering and brake systems. I dropped the failed metal fuel line off at a local hot rod shop who will remake.
Next on the agenda horizon - with areas I need advice in bold..:
Degrease and steam clean the wheel wells (see pic of half-done passenger side).
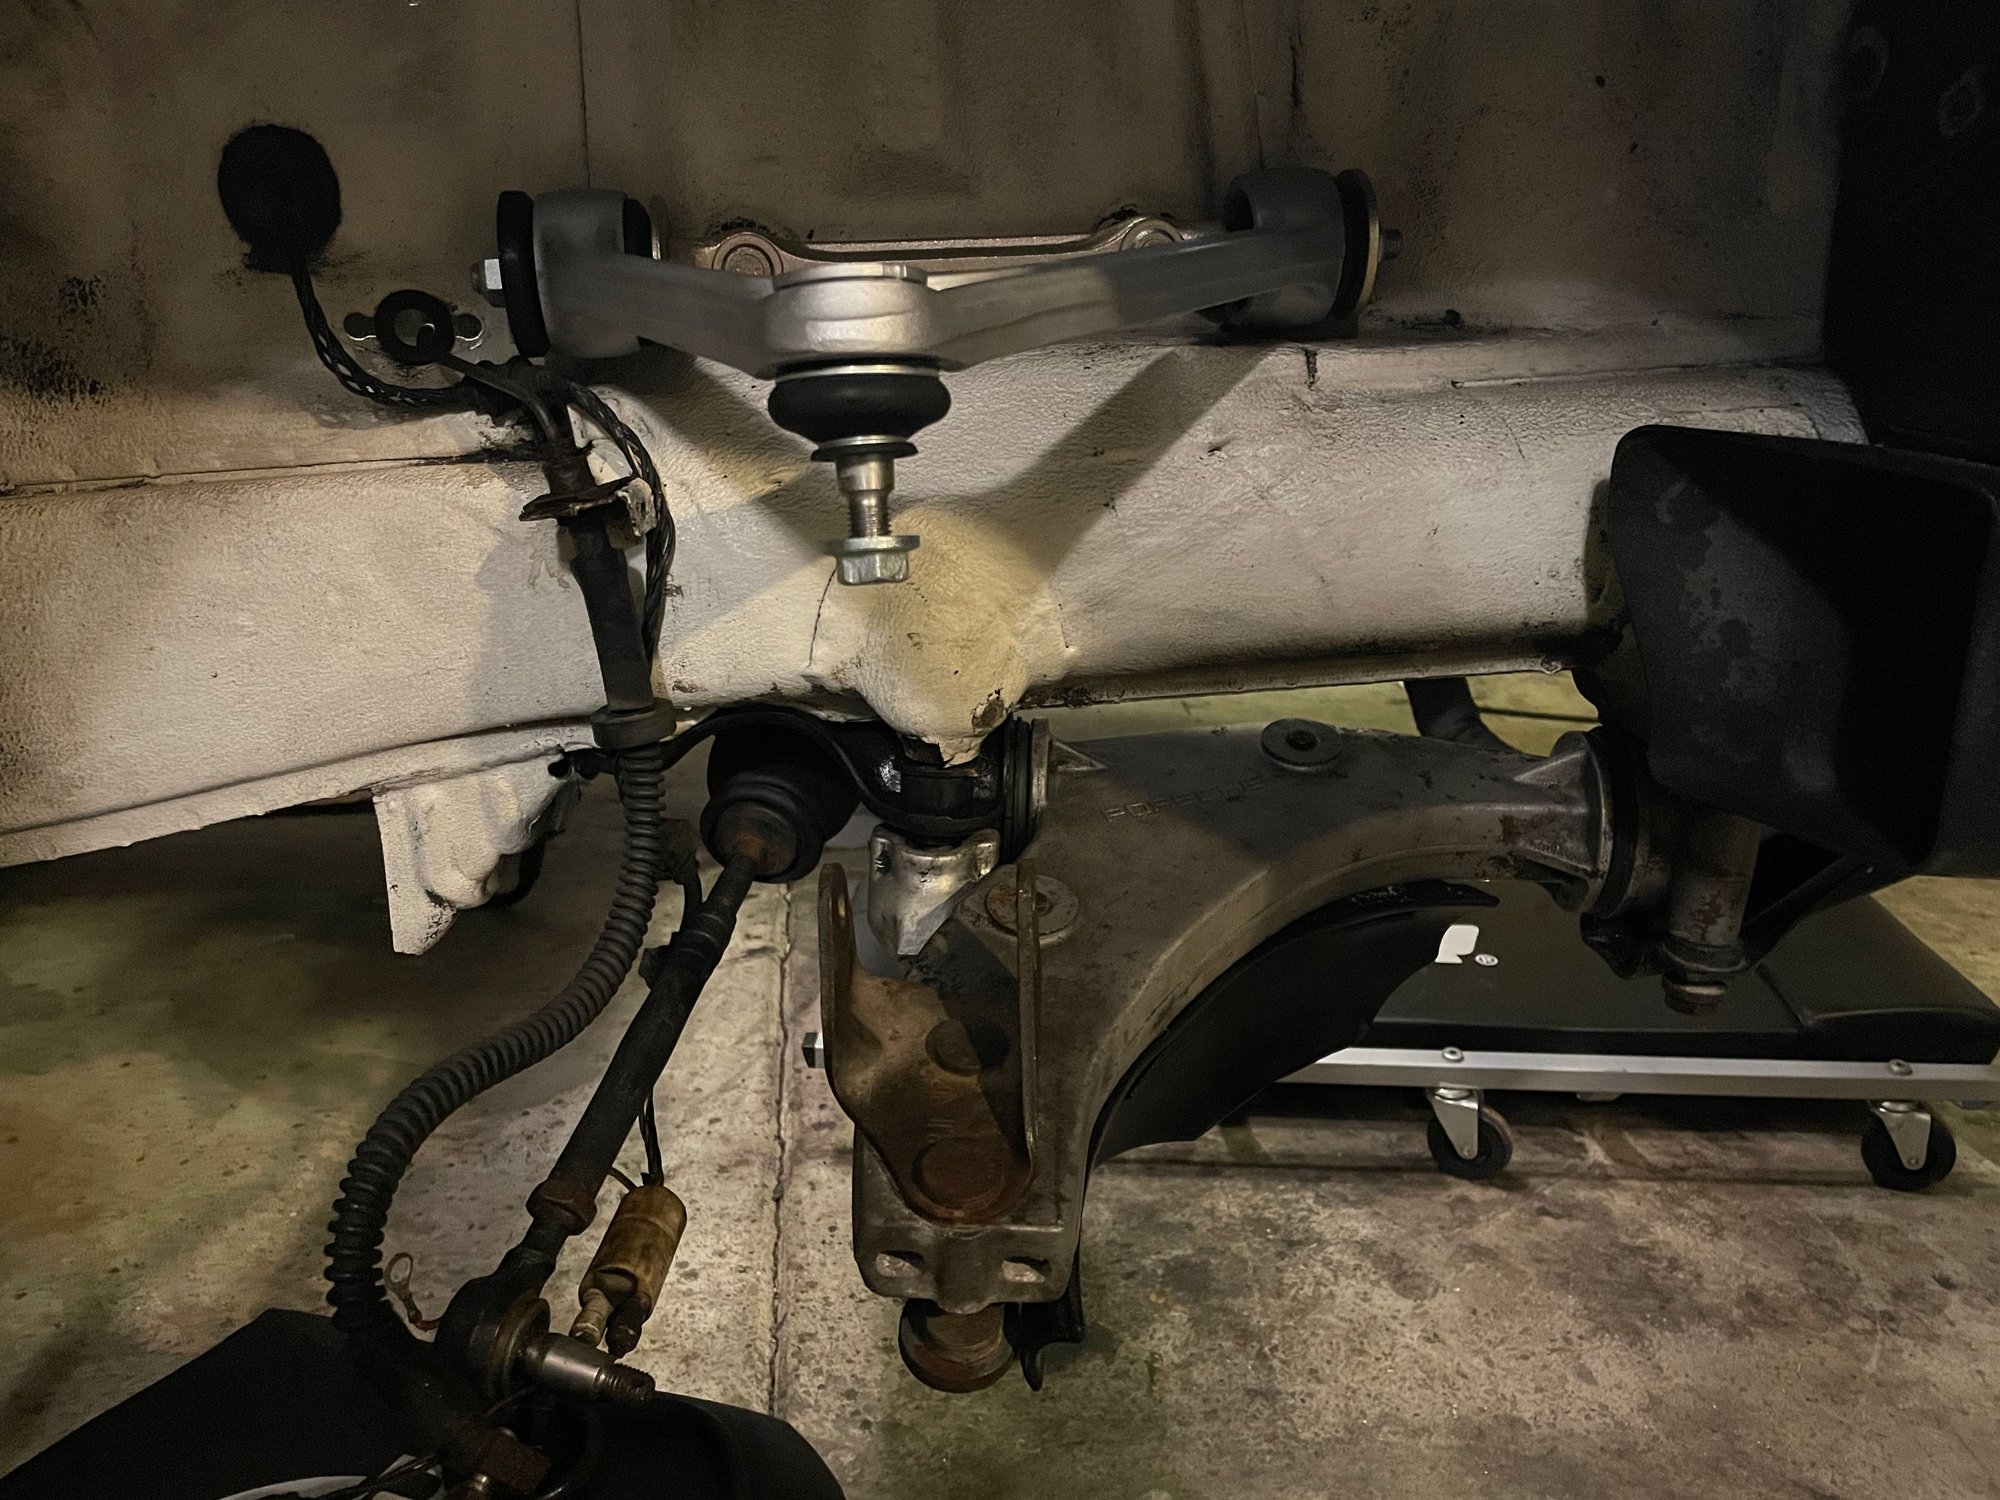
Install refurbished upper control arms to return mine for core deposits.
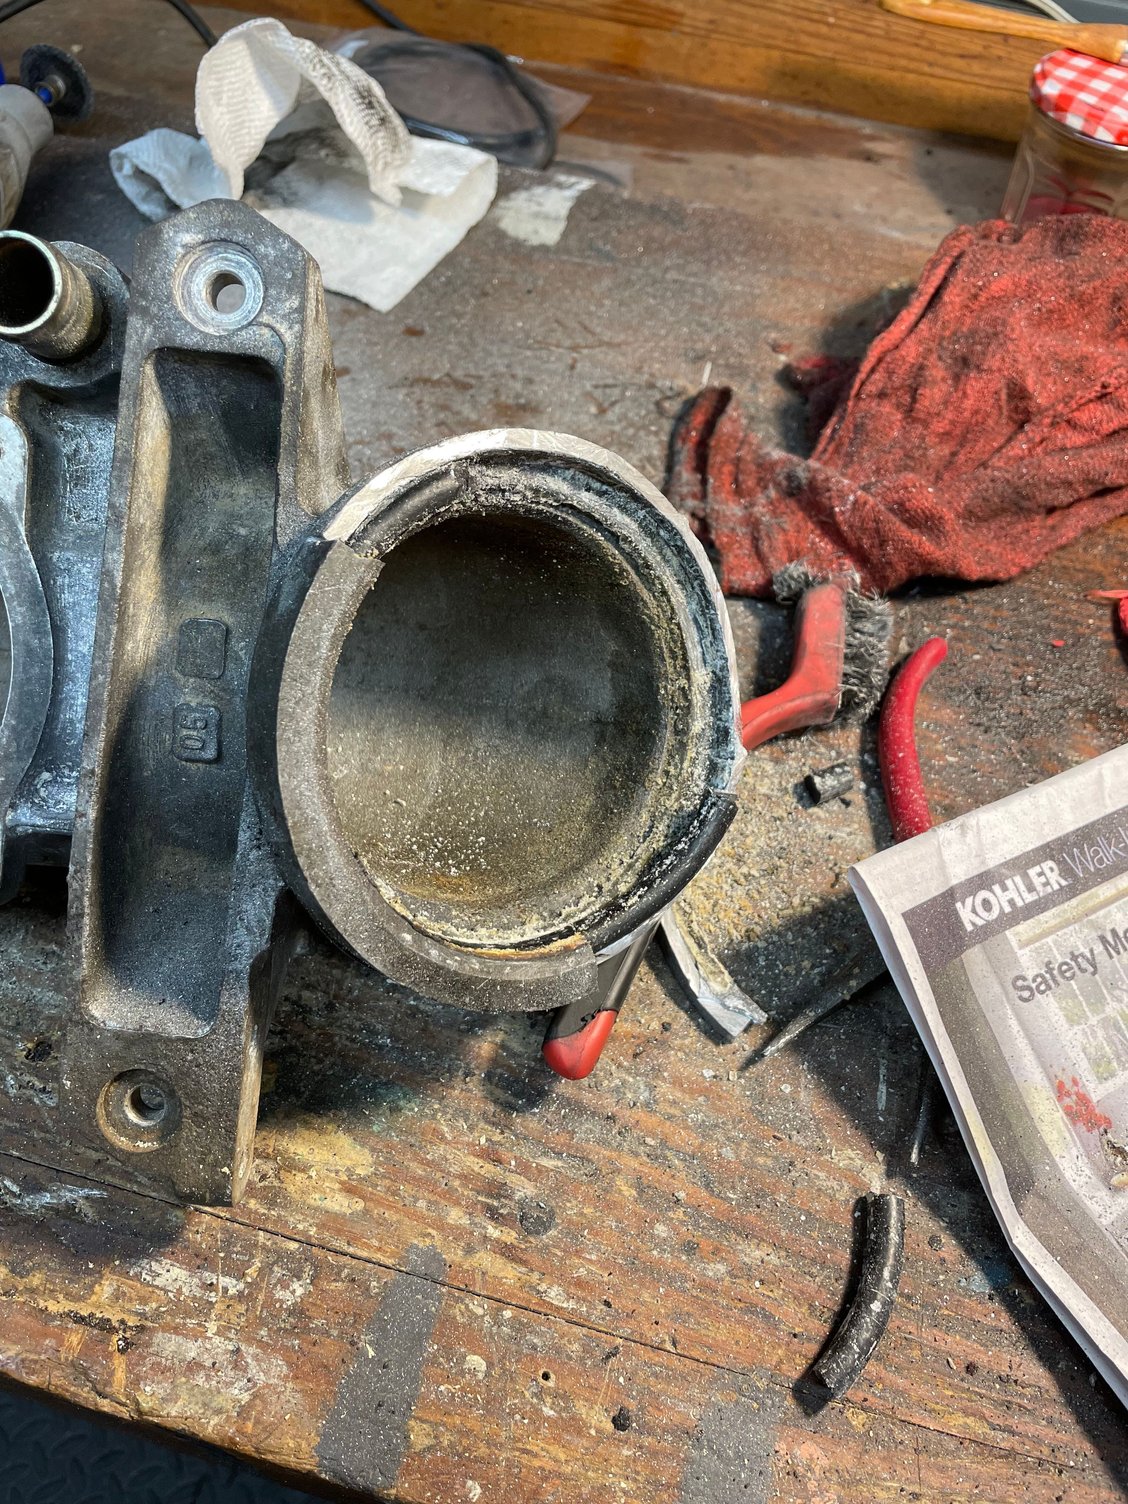
Remove the MAF from the air guide. It is super-stuck likely because the gasket is now fused plastic. I've tried PB blaster & heat so far. Any advice on how to separate? I've tried so hard I've damaged the MAF a little bit.
Get MAF rebuilt or swapped.
Receive remaining hoses and complete top-end reassemble.
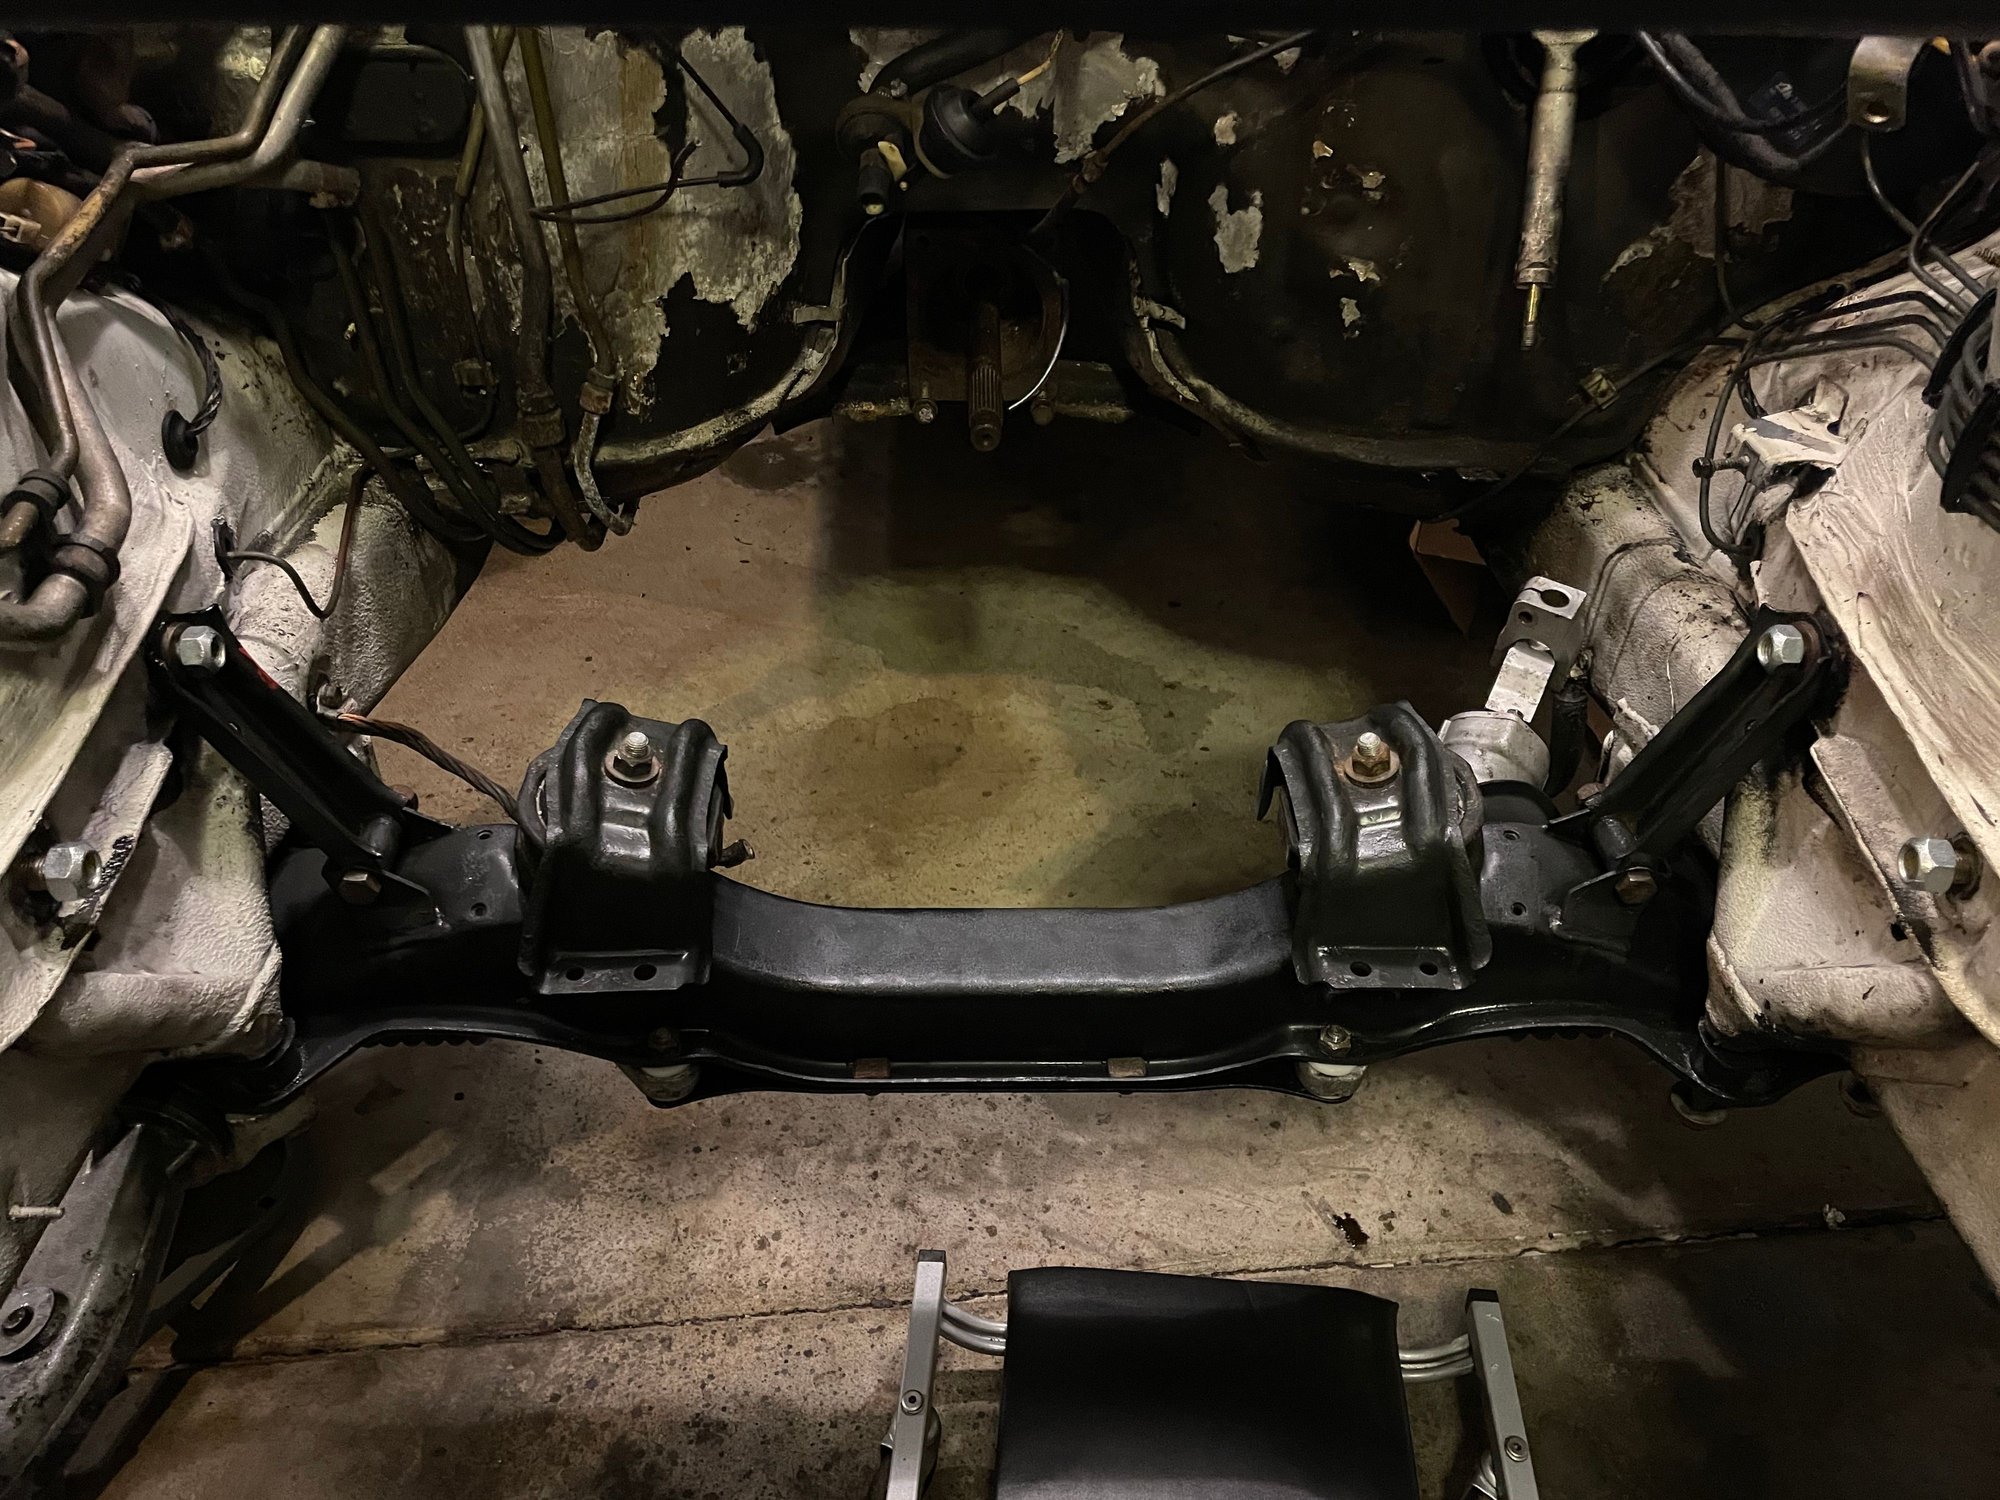
Clean up steering rack, engine carrier and lower suspension. Reinstall.
Install replaced fuel line. How hard is it to take off rear passenger side suspension to get fuel line in?
Strip off old aluminum foil from heat shield, clean and replace with heat tape.
Do I need to take the brake vacuum booster and check it? Seems it'd be a lot easier with the engine out...
I need to replace the shifter cable. I may need to take torque tube off to do that. Likely easier with engine out. Any thoughts on this?
Remove stripped bolt holding driver side brake caliper on, rebuild brakes.
I cleaned up both wheel wells and installed the lower and re-built upper suspension arms (pic), engine brace (pic). I cut the air guide off the MAF (pic) and sent the MAF and LH injection module to get tuned. I removed the brake booster and master cylinder. I'll test the booster and send the cylinder to be rebuilt. I learned how to get the transmission / rear suspension / torque tube off at the same time, but decided to just take the right rear suspension off and access above the torque tube by lowering the front. With the booster off I can start to heat tape the firewall. So I've got lots of labor and not much cost for a while!


 07-12-2021, 11:11 AM