When you click on links to various merchants on this site and make a purchase, this can result in this site earning a commission. Affiliate programs and affiliations include, but are not limited to, the eBay Partner Network.
I don't have much experience on putting together 928 engines but based on my observation the most important thing to do is to _take your time_. It's more fun anyway to take your time and understand the whole thing, at least as long as you are not under a time constraint.
What gear puller can I use (hopefully someone is a fan of harbor freight or amazon lol) to take the front gear off the crankshaft. The one I ordered off of every still has it on. I figured I can practice on the rusted WD40 soaked on I have in my garage. I went to look at harbor freight today and their was multiple gear pullers.
First go by a few cans pf PB Blaster or order some Kroil as these are products that will actually remove the corrosion and free the parts.
WD 40 is a water dispersant and not a corrosion breaker.
hey I am kind of concerned about this ebay crankshaft that came in today. It came in with a free blue blanker. But it had this part number stamped on it 928.103.8R, somewhere else it said E502286 5.0, can I use this crankshaft in an S4 engine?
https://www.google.com/url?sa=t&sour...ybLCVR0AWgWuC0
hey drilling the plugs out looks easy that guy did it with a cheap drill , does anyone have a link to the plugs I would have to use afterwards? I think i can drill much better than he can.
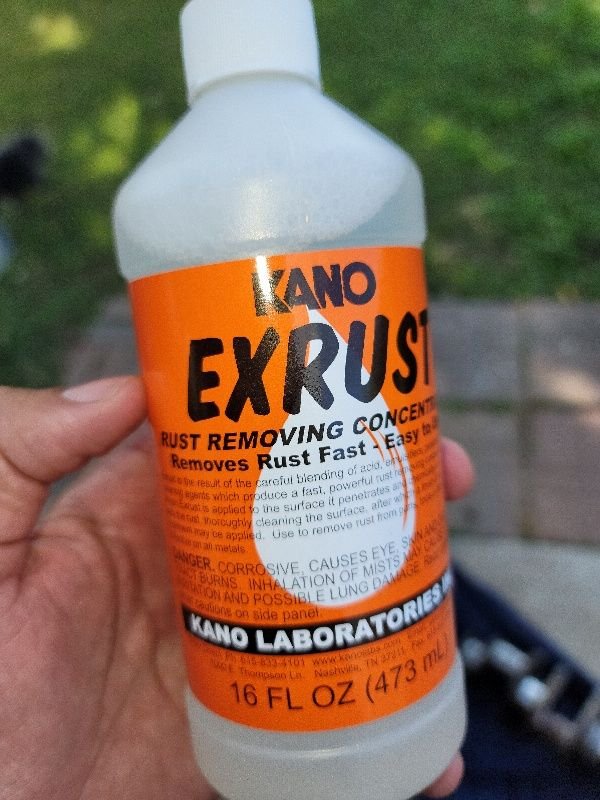
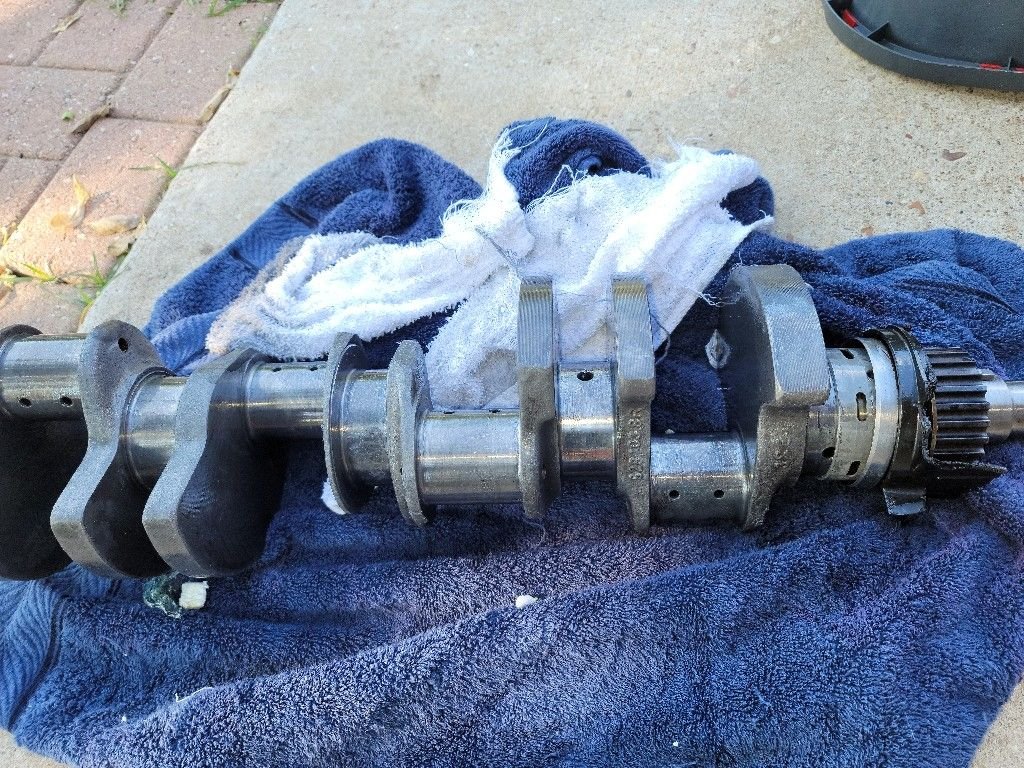
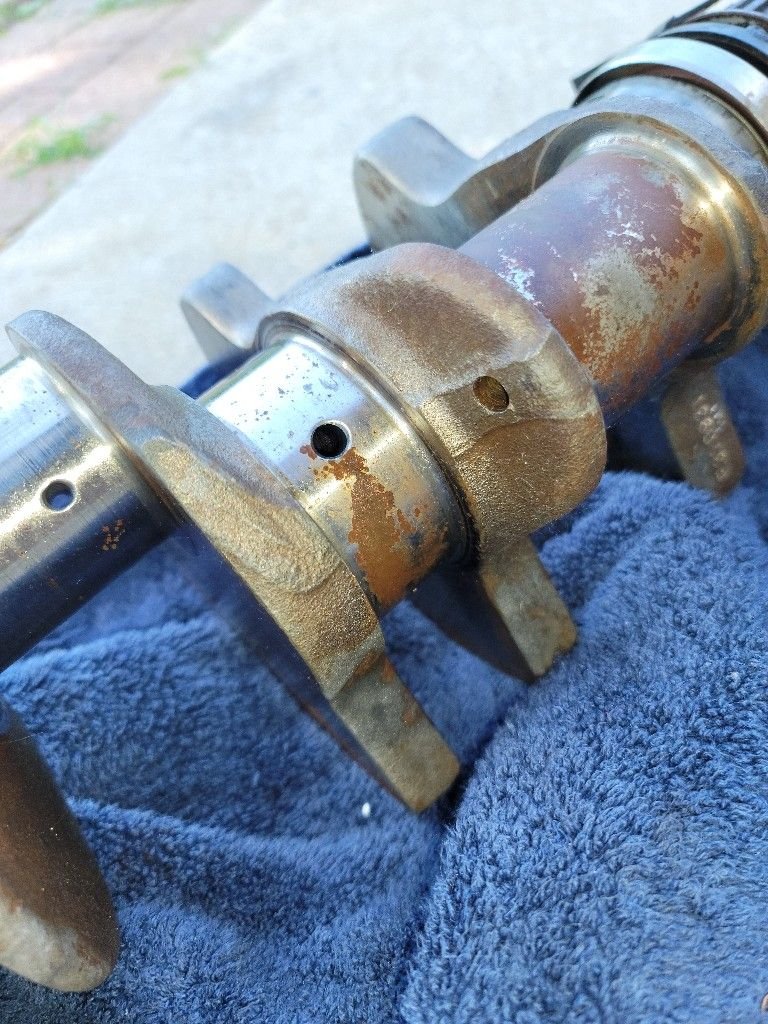
I am experimenting with the old crankshaft to test out techniques and products. I used this stuff called exrust from kano labs it turned out great for 10 minutes work of work. I am going to practice drilling out the oil galleys on this crankshaft, it does not look like a hard task to do. This crankshaft would still have to be polished and grinded for me to use it.
Given you are attempting to put together a complete engine and you have a crank in the state you presented earlier on, one hopes you are aware that the pistons have a special and somewhat delicate coating on iron on them that is vital to the success of the motor. To date you have not mentioned anything about what you are going to use in this department or indeed the block. For the crank to get into the condition it was in suggests that little thought was given to how it as stored - hopefully the other components you have are in far better shape. Might be helpful if you post some pics of the various pieces you intend to use in the rest of your build.
I am experimenting with the old crankshaft to test out techniques and products. I used this stuff called exrust from kano labs it turned out great for 10 minutes work of work. I am going to practice drilling out the oil galleys on this crankshaft, it does not look like a hard task to do. This crankshaft would still have to be polished and grinded for me to use it.
Good plan to do "test work" on old crankshaft.
I agree, it does look so simple and straightforward.
I removed the Pullies from the new crankshaft. I was able to get the gear off while leaving the woodruf key inside, I have a feeling I should replace that part. What was very strange is that the engine seal was still on it. The seal looked brand new and was not an original but the Victor Reinz brand. I sprayed alot of cleaner inside the crankshaft and I did not see any sludge come out. Their was very little trace amounts in one of the passages. I am going to measure the crankshaft out this week. I got a new tube of the 574, i believe it is 50ml. I am not 100% confident one will be enough to seal it.
I removed the Pullies from the new crankshaft. I was able to get the gear off while leaving the woodruf key inside, I have a feeling I should replace that part. What was very strange is that the engine seal was still on it. The seal looked brand new and was not an original but the Victor Reinz brand. I sprayed alot of cleaner inside the crankshaft and I did not see any sludge come out. Their was very little trace amounts in one of the passages. I am going to measure the crankshaft out this week. I got a new tube of the 574, i believe it is 50ml. I am not 100% confident one will be enough to seal it.
Very thin layer. Go to Home Depot and buy a 3" "Premium White Woven Roller for smooth surfaces. Part number 1001 287 500. Squeeze about 1/4 of the tube onto a clean plastic baggy. Roll the roller back and forth until it is saturated.
That 50ML tube will do multiple engines. Very thin layer.
Surfaces have all the old Loctite removed with a razor blade/blades held at a 90 degree angle to the metal......like a scraper. No scratches. If the razor blade chips, throw it away and use another (use #11 razor blades and the they are less likely to chip/break.) Surfaces perfectly clean. Roll a layer of Loctite onto the cradle side.
You need to have all the hardware lined up, ready to go, with the proper sockets and tools. Torque the cradle down as quickly as possible. 15 minutes is too long.
You should see the Loctite squeeze out between the engine block and the cradle....very small bead. If you can wipe away that bead, when you are done (and it hasn't hardened and turned pink, you will be fine.)


 10-01-2020, 03:23 PM