When you click on links to various merchants on this site and make a purchase, this can result in this site earning a commission. Affiliate programs and affiliations include, but are not limited to, the eBay Partner Network.
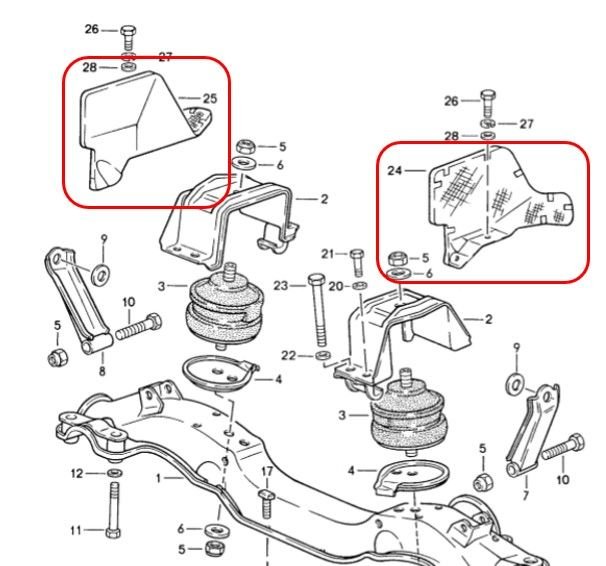
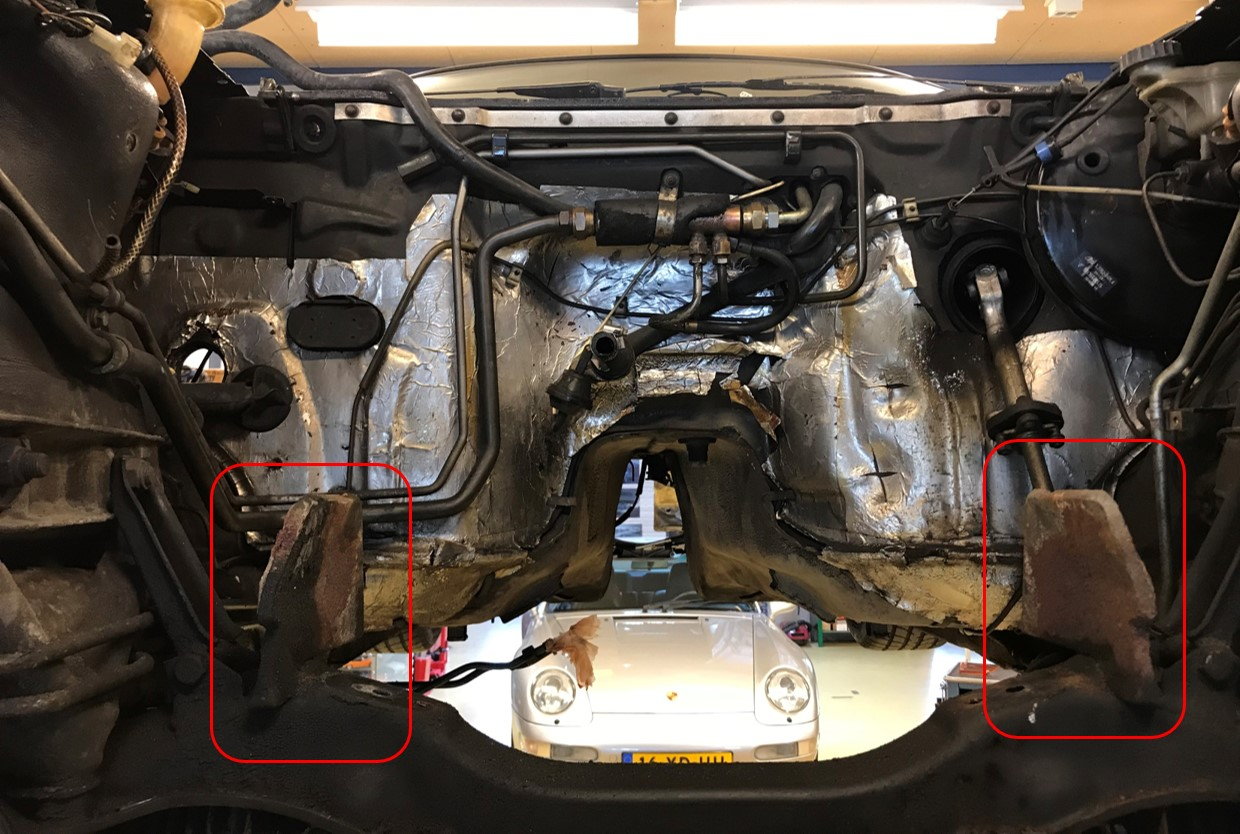
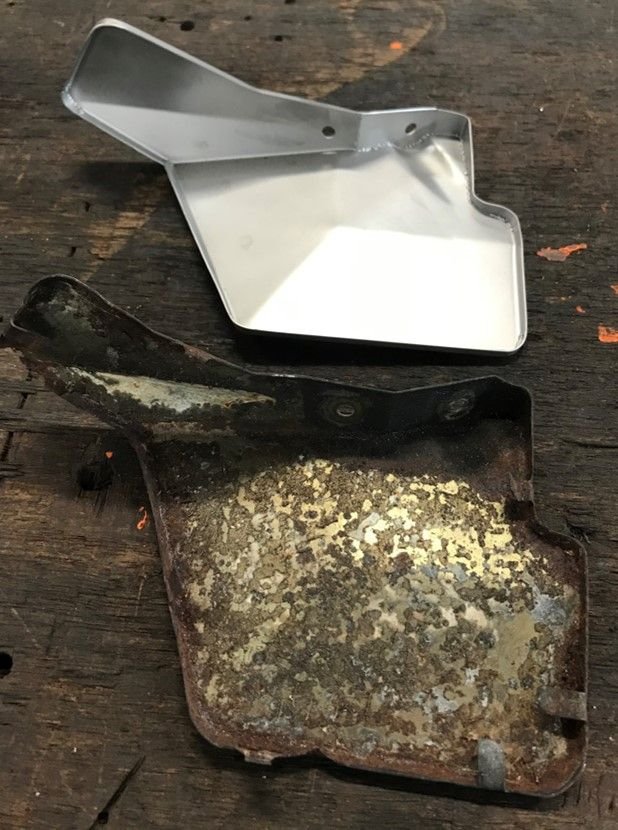
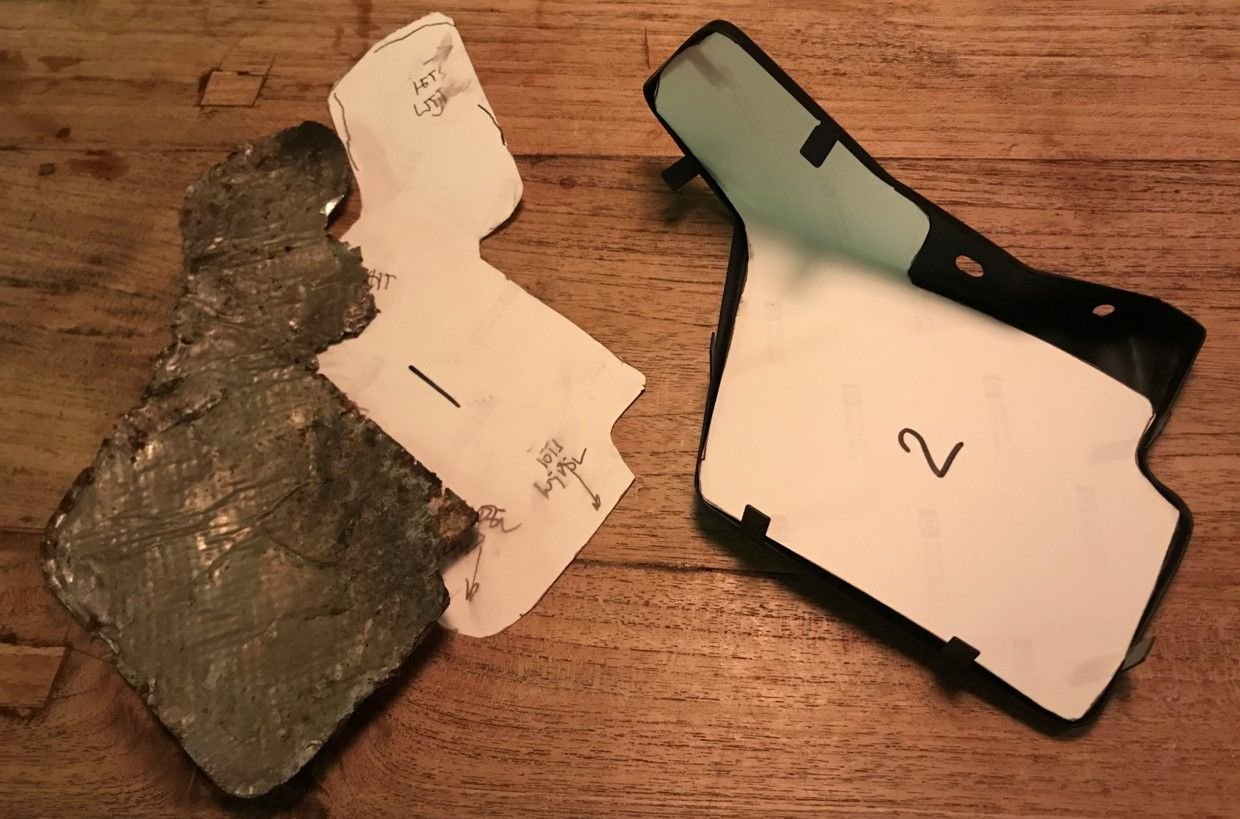
After removing the engine from my car the 2 heat shields on the engine carrier were brought into full daylight again, and they were in an absolutely terrible state:
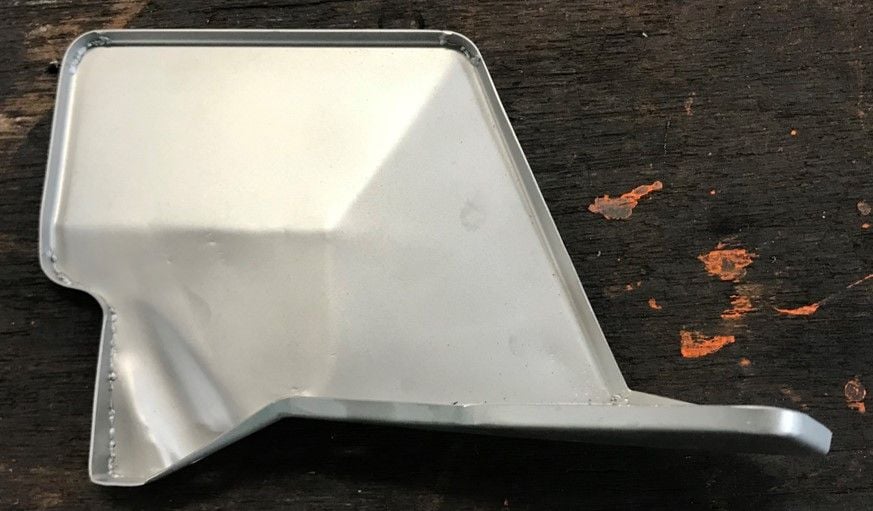
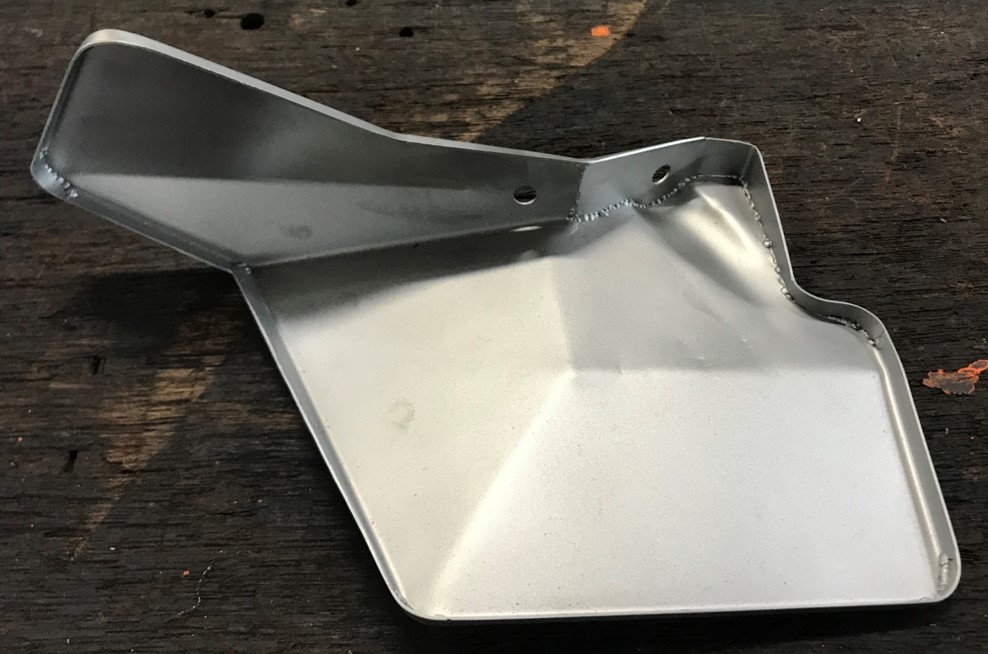
I removed them from the carrier and took them to a local machine shop who are in the process of replicating them in stainless steel:
Not finished yet, but hopefully you get the idea. I'm very happy with the way they approached the job, the end result should be quite nice!
But here are my 2 question:
1. What are the options for replacing the old heat shielding material (which definitely looked like asbestos�)?
2. What should I do with them before attaching them to the carrier? Powdercoat, paint?
These are radiation shields (heat transfer). I would suggest keeping the side facing the engine as shiny as possible and applying insulation on the opposite side. Perhaps you can find something from here. Good luck - they look nice!
Local home heating or plumbing supply uses a similar insulation for some water heater and other AC components. I've purchased small rolls of of it adhesive backing for projects. Foil face, insulation, with heat-proof adhesive already. Cuts with common shop scissors. Add layers until you get the thickness you desire.
For North American readers, I find it at Lowes or Home Depot big-box hardware stores in the water heater section.
Manfred -- If that's stainless steel as you state, no need to add any paint of other finish to it. Insulation foil faces the headers, back stays cooler.
These are radiation shields (heat transfer). I would suggest keeping the side facing the engine as shiny as possible and applying insulation on the opposite side. Perhaps you can find something from here. Good luck - they look nice!
Originally Posted by dr bob
Local home heating or plumbing supply uses a similar insulation for some water heater and other AC components. I've purchased small rolls of of it adhesive backing for projects. Foil face, insulation, with heat-proof adhesive already. Cuts with common shop scissors. Add layers until you get the thickness you desire.
For North American readers, I find it at Lowes or Home Depot big-box hardware stores in the water heater section.
Manfred -- If that's stainless steel as you state, no need to add any paint of other finish to it. Insulation foil faces the headers, back stays cooler.
Thanks for the replies and suggestions! I checked this afternoon on the grade of the stainless steel and it is grade 304. Checking that out online I think that means it is a bit more vulnerable to acidic materials (as opposed to grade 316), and the guy in the workshop advised me to have them powdercoated.
As for the material, I will see what is available over here that matches your suggrestions and has an adhesive backing.
I'll post more pictures when they are finished, but I already think they are totally worth the �150 a piece I'm paying for them�..
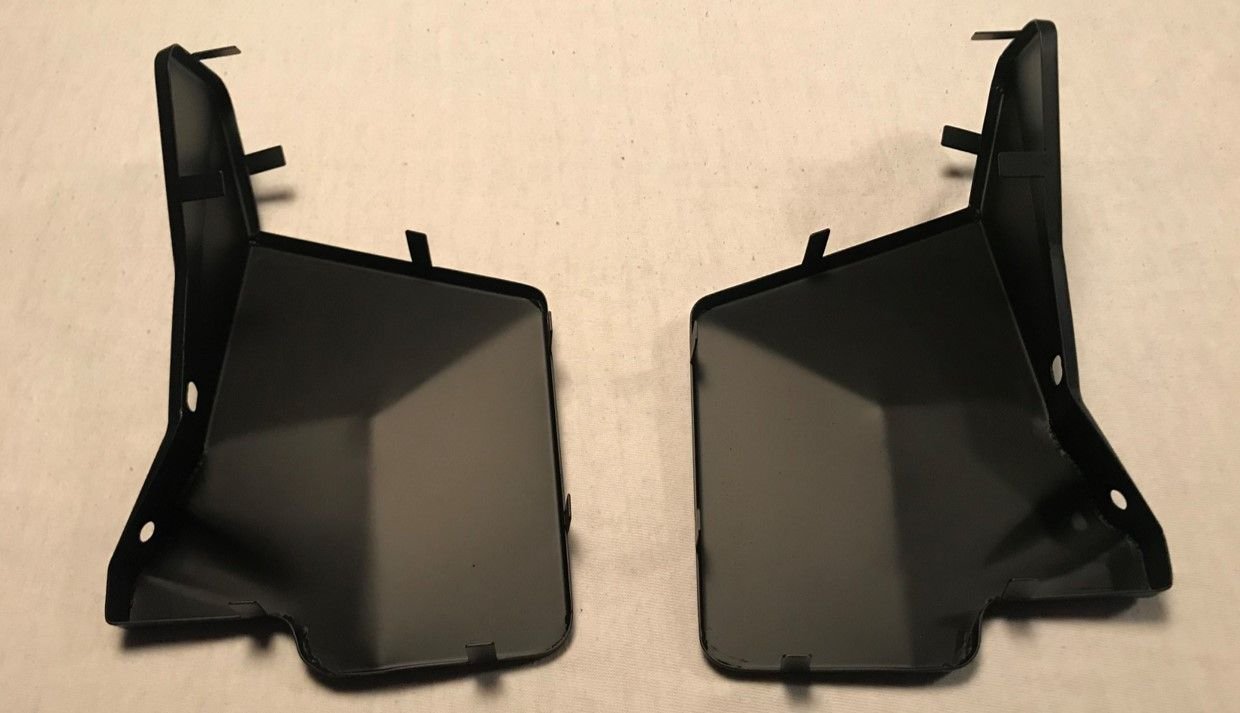
My heat shields looks exactly like that when I recently removed them, see below:
I had them powder coated and I was pleasantly surprised to see how good they looked, see below top right picture and then covered them with:
Covered with:
Hope that helps.
Thanks for the pics, they did come out very nice! You must have had plenty of metal left on them, as mine had holes in them and one corner was missing!
Did you use regular powdercoating material or heat resistant coating?
What is the thickness of that heat barrier material?
.
@slownrusty In order for the heat shields to be fully effective, there should be mat-type insulation on one side of the shield. The exhaust manifolds get glowing red hot (~1500F or more) and this radiates heat towards the heatshield. It is the mat-insultation which reduces this heat transfer either to the heat shield (if on the side facing the manifold) or from the shield to the engine mount (if on this side). Looks like Porsche put the insulation on the side facing the manifold. Not sure what the high temp exposure rating is for powder coating, so that would also be something to look into. For the virgin stainless steel shields, I would just keep them unfinished and add the mat-type insulation only. Maybe hold it in place with some stainless steel wire, as adhesive backing will most likely not handle the temperature for very long.
This reminds me of a time I was instructing at a DE event at Watkins Glen some 20 years ago - a guy there had a McLaren F1, which came with gold foil heat shields in the engine bay.
These are radiation shields (heat transfer). I would suggest keeping the side facing the engine as shiny as possible and applying insulation on the opposite side. Perhaps you can find something from here. Good luck - they look nice!
I LOVE these guys. Quality and nice heavy duty stuff (read hose clamps that can actually stand the vibration and heat at the ICV....those clamps kept going loose...the bane of my vacuum leaks.....
Best thing is they have warehouses around the country....I order and it shows up the next day....for like 6 bucks postage or something.
My heat shields looks exactly like that when I recently removed them, see below:
I had them powder coated and I was pleasantly surprised to see how good they looked, see below top right picture and then covered them with:
Covered with:
Hope that helps.
The source of my "stripper stockings" ....well not exactly....this is more heavy duty stuff;...what I got reduces temps by about 30% and have no adhesive backing....no affiliation but a quality product. Thermo Tec's cool.....
.
Finally an update on these heatshields: they are finished!
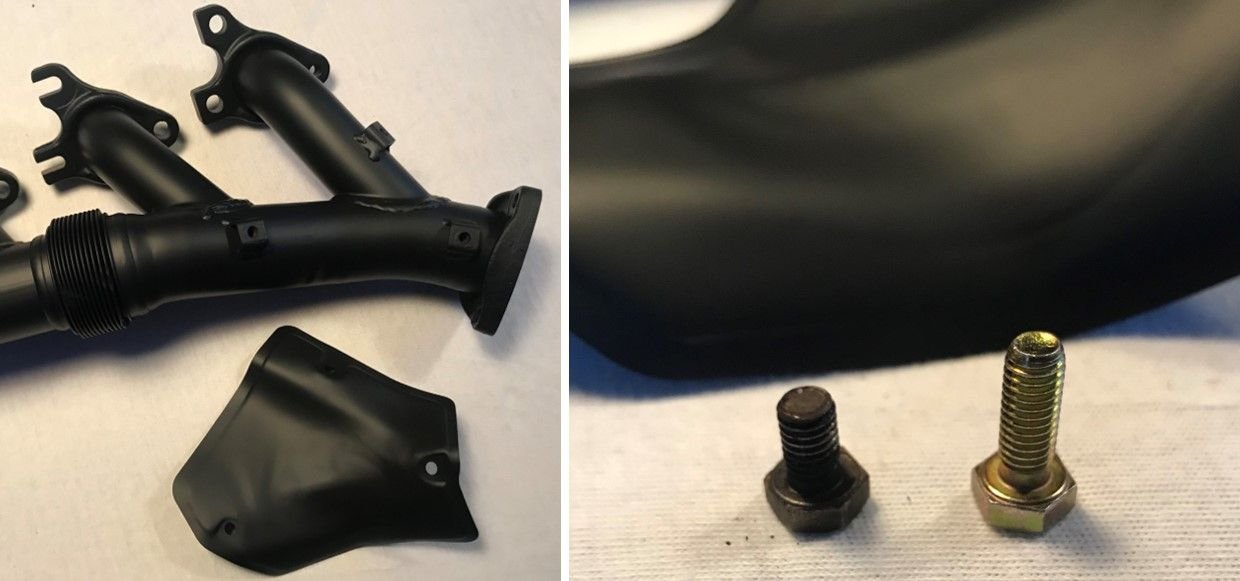
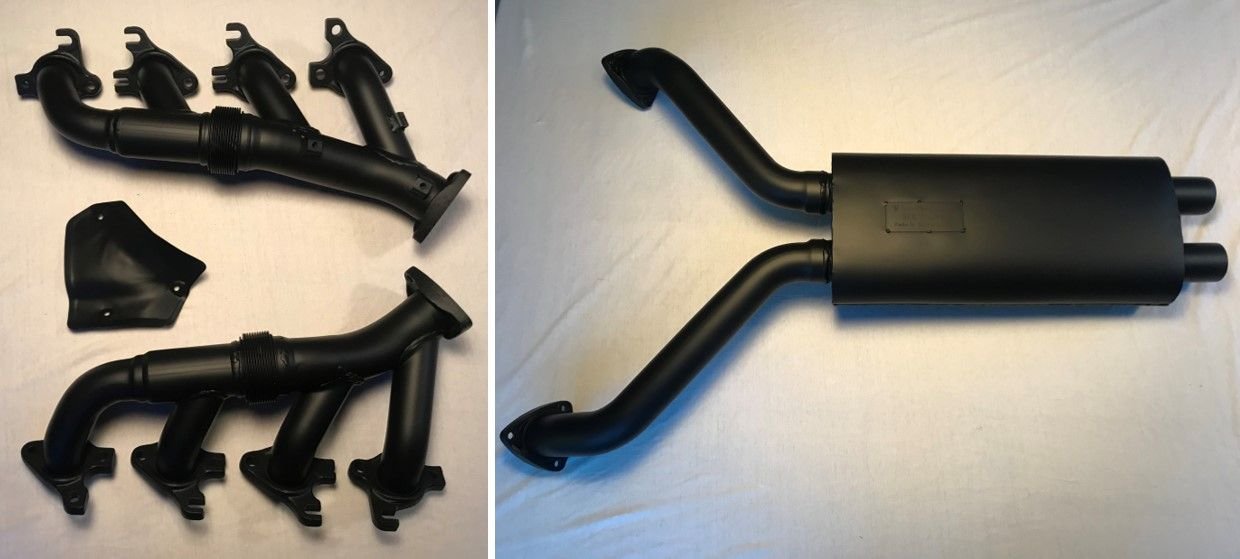
I had them ceramic coated, and I think the result is quite nice:
I also had the exhaust manifolds and new front muffler ceramic coated:
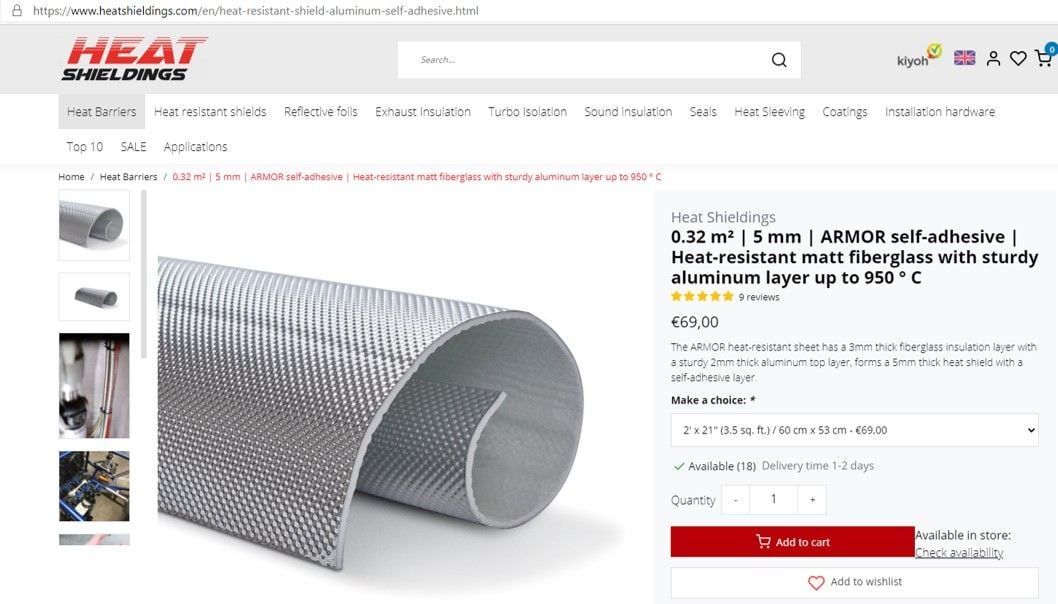
The suggestions you gave me were not easily available over here in the Netherlands, so I decided to go for this stuff:
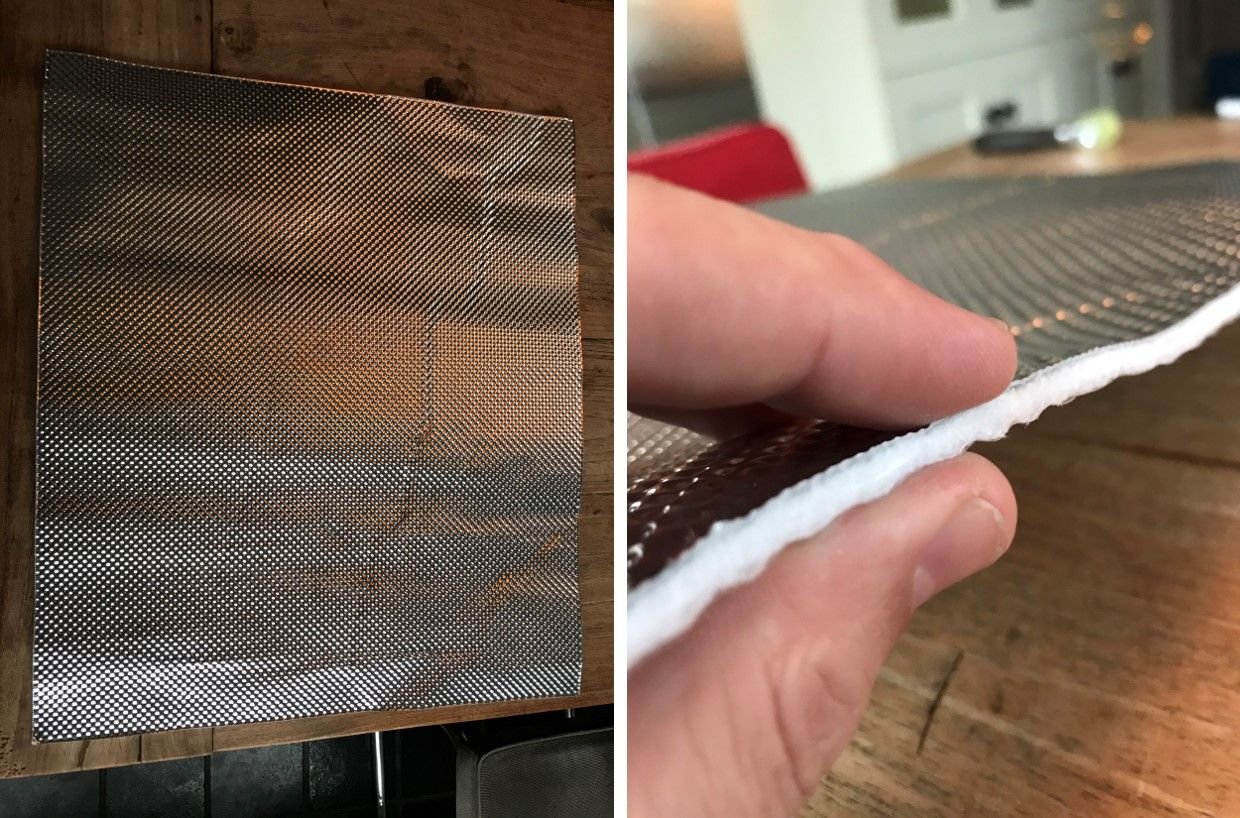
It does have a sturdy top layer:
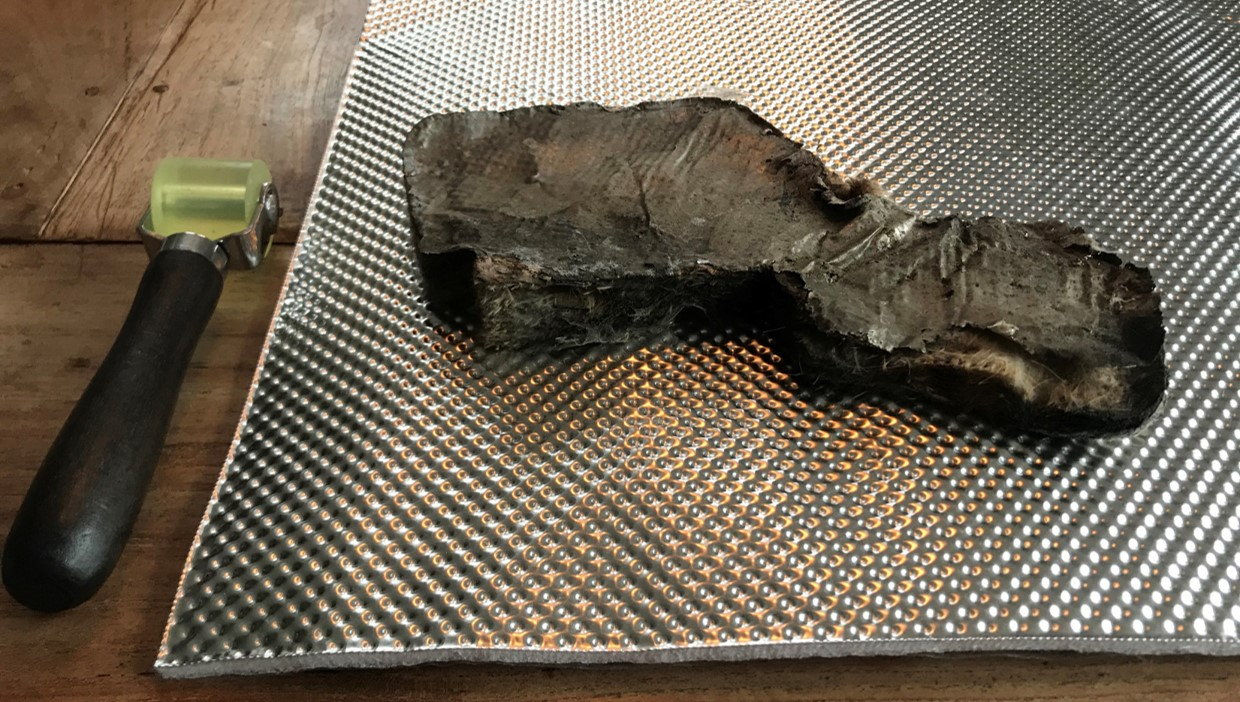
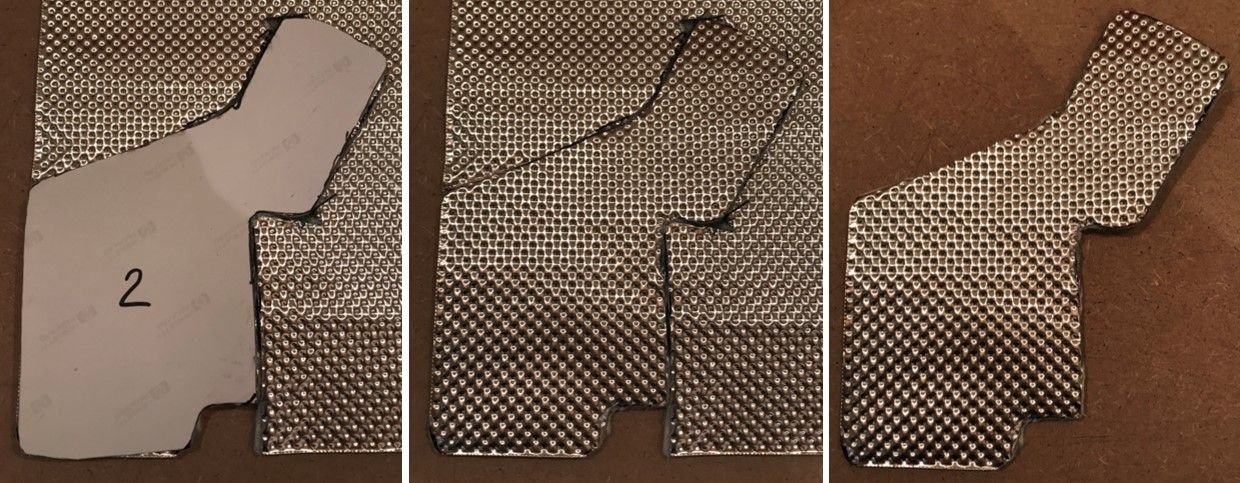
Here is the old material that I peeled of the original heat shield:
Made a template, and I was quite pleased with the second version:
Drew the template on the top layer and used my Dremel to cut through it. I then used scissors to trim the soft layer:
I must admit it needed a little bit of trimming but in the end it fitted nicely :
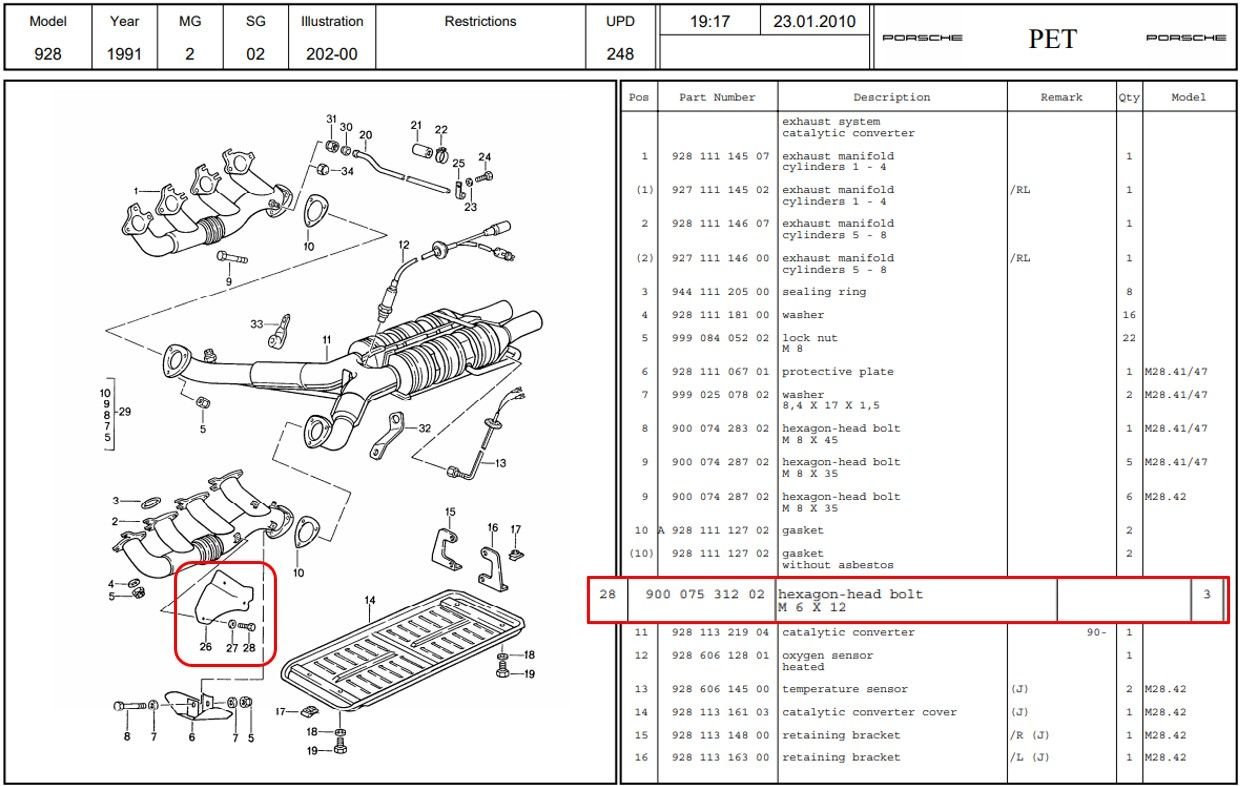
One silly thing I found out was that the size of the bolt for the heat shield on the exhaust manifold wasn't correct: PET shows M6 x 12 mm, it is in fact 10 mm and the replacement I got from Porsche is 15 mm :
I am more than happy with the final result! Now on to cleaning and rebuilding the Air Pump and then the Airco Unit!


 07-15-2020, 01:03 PM
 )?
)?


 :
:
") :
: