When you click on links to various merchants on this site and make a purchase, this can result in this site earning a commission. Affiliate programs and affiliations include, but are not limited to, the eBay Partner Network.
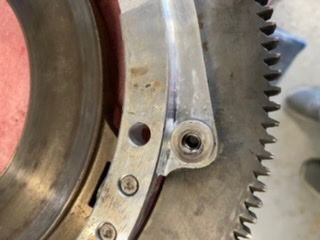
Woody and I removed the clutch again last night. Step 1 will be to repair the intermediate plate. Step 2 will be to figure out the adjustment process with the assembly out and upon reinstall. Wanted feedback on a couple of videos and photos regarding play in the setup.
Should the little tab that you put the 4mm spacer under for removal be pushed back that far with new friction discs and pressure plate? We did not even have to pry it back to put the spacers in to remove it the second time. Almost seems like something is binding or pushing it back.
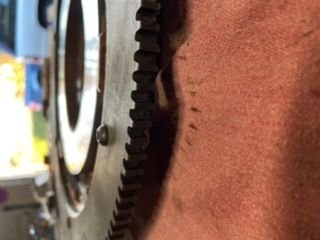
Two links below, both illustrating what we think may be too much play in the fork. In the picture still in the car, nothing has been disconnected other than the starter and the slave cylinder.
I'm not an expert, but rather learning by experience, but I don't think that's too much play. Once you remove the pressure that the slave cylinder rod is putting on that bottom of that assembly, I believe they all have that type of play in them.
The gap in the T-springs looks odd to me though. I had to tap the U-spacers into position on mine for install and had to wedge and pry them out upon reassembly, but my shims are quite a bit thicker than the ones that came with your pressure plate.
I'm wondering the same - hopefully someone will chime in - just seemed like the tab would press in further even with new discs installed. I was worried about the play, but with the slave disconnected that does make sense.
They were versions I had purchased from Mark Anderson for the 83 style clutch that's in my 79. They wouldn't hold with the SC torque so went back to my spec versions and sold these to Scott.
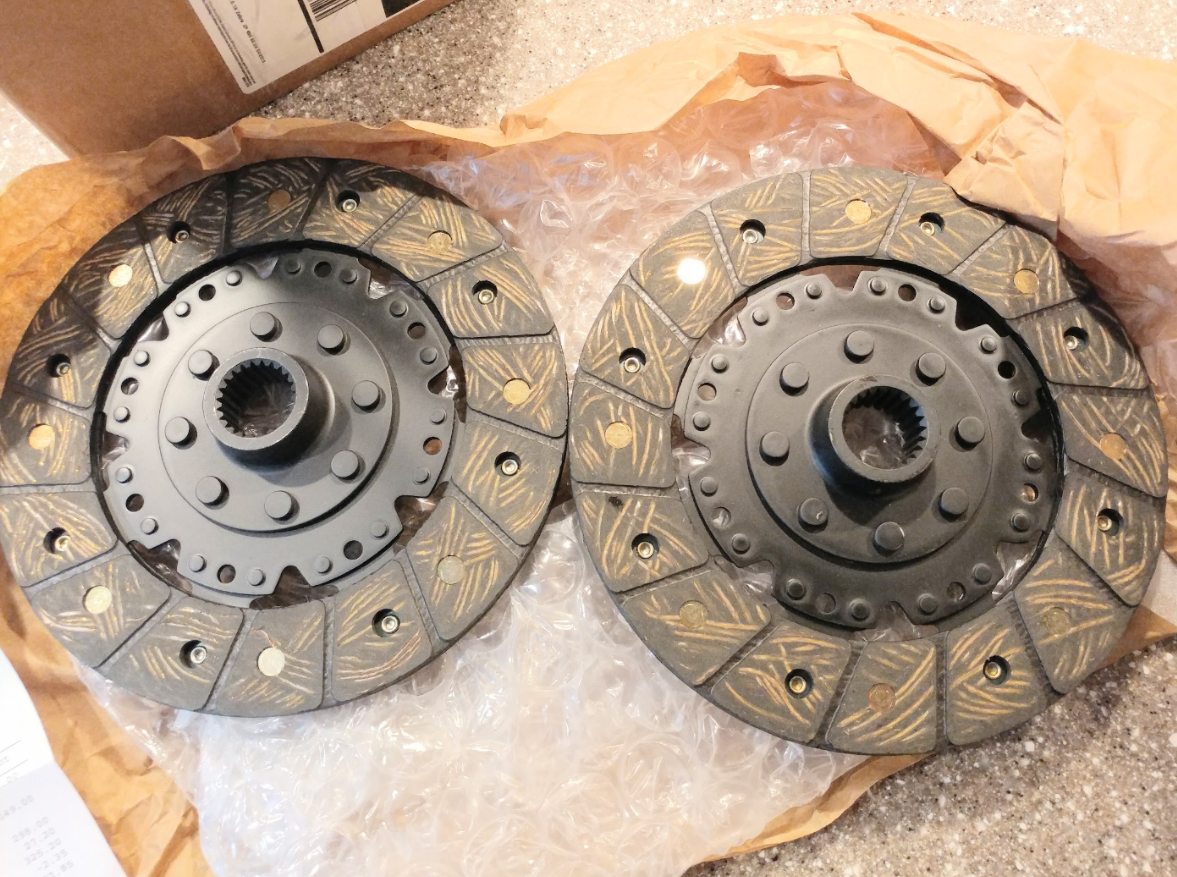
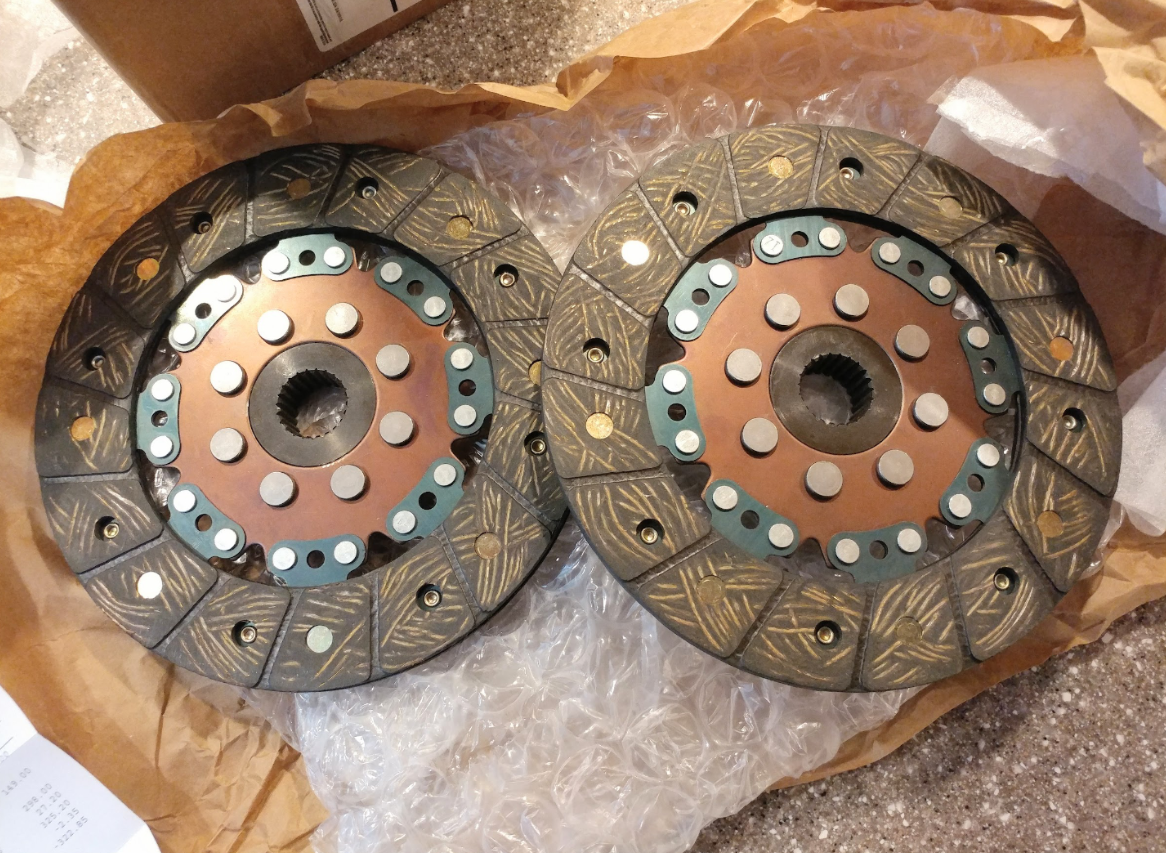
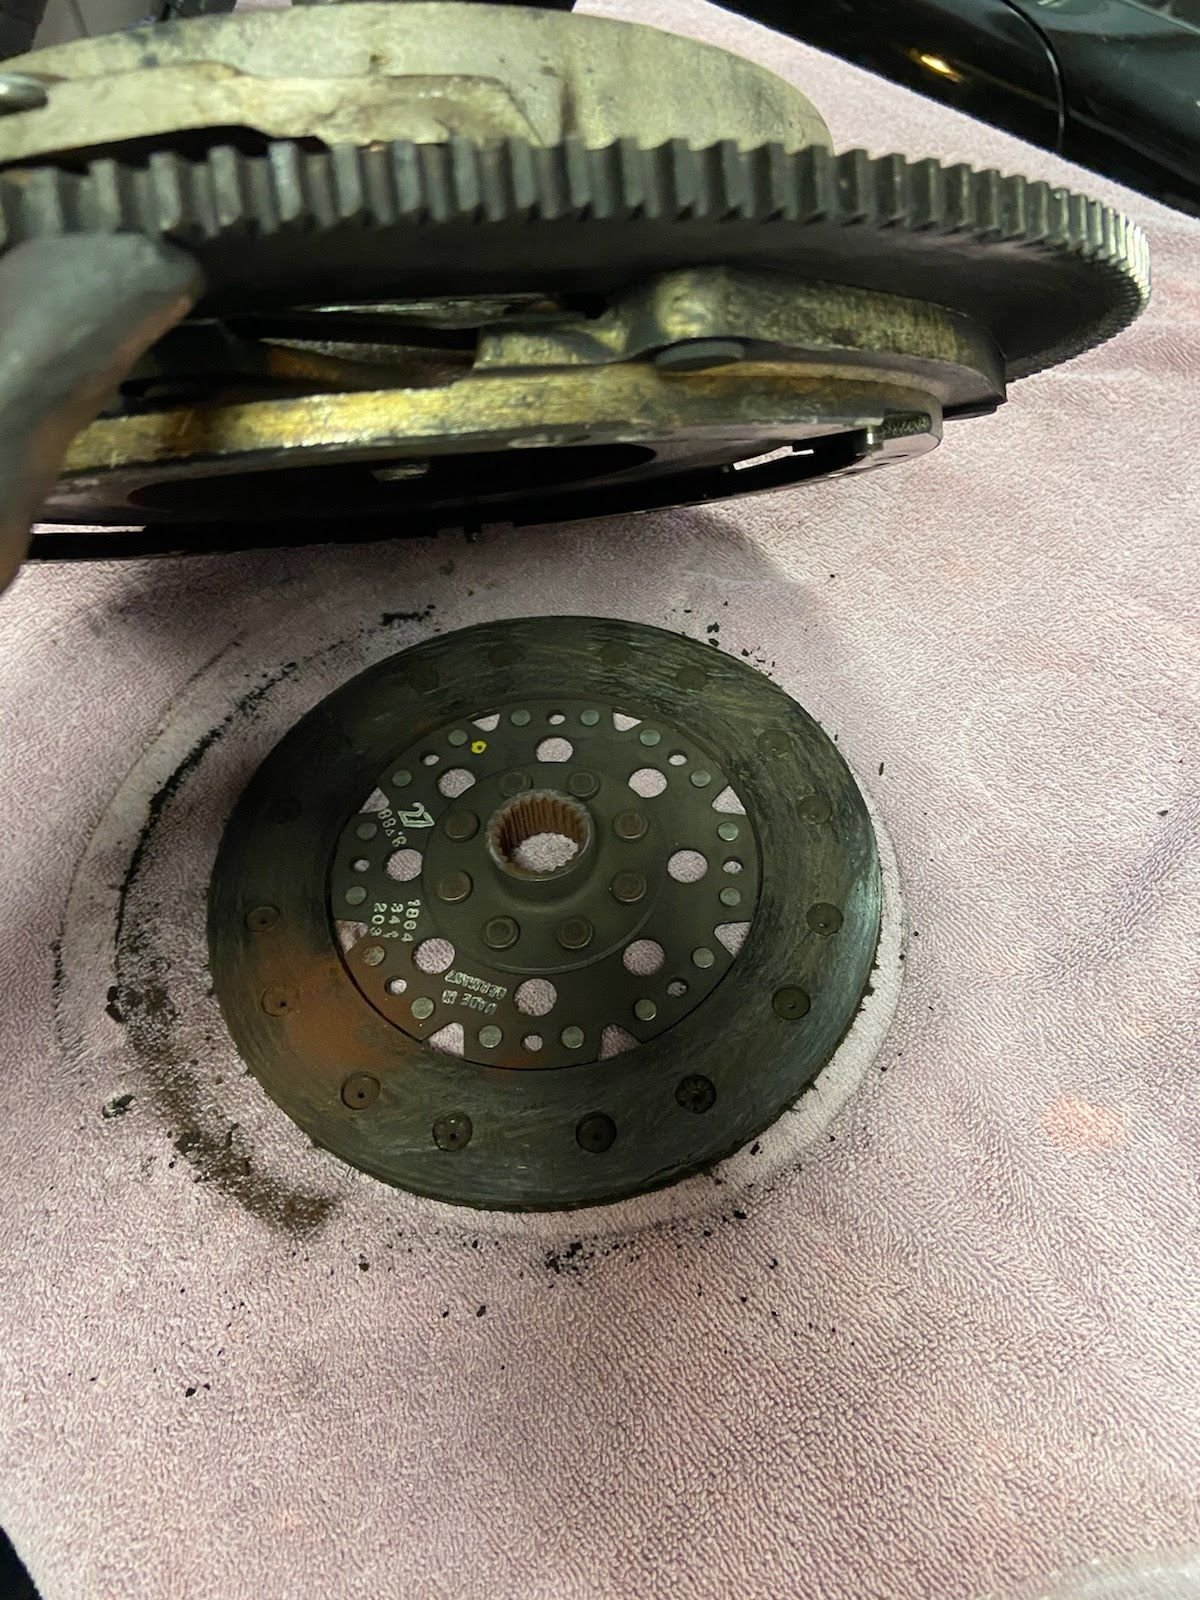
They were installed with the collars facing the pressure plate - same way the old one came out.
On the original clutch discs, I believe only one had a hub collar and the other did not, but now, all discs I've found available are the same, and both have collars, like these I bought, even though I ordered a front disc and a rear disc with different part numbers. Is there another difference between these two discs that are less evident to the naked eye where their positions might have been reversed?
Are both hub collars supposed to face in the same direction, and is that direction back toward the pressure plate - same as the way the old one came out?
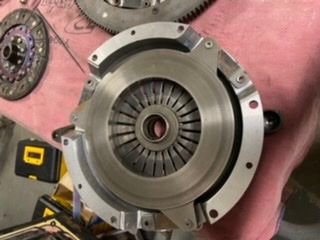
There are "relined" clutch discs, out there, that are thicker than the stock clutch discs. The "extra' thickness will push the cast iron portion of the pressure plate (where the clutch discs touch the pressure plate) farther rearward, pushing those "guide pins" higher in the aluminum portion of the pressure plate. Some clutch discs are so thick that it doesn't appear there is enough "lift" left in the guide pins for the discs to actually spin freely.
Your guide pins appear to be fine....plenty of room for them to travel to the rear, so the discs can release.
The play in your T/O arm is normal. There's nothing to keep it from moving back and forth on the tabs on the T/O bearing. The movement of the actual T/O bearing is not normal. There's a spring washer under the T/O bearing which should hold the T/O bearing to the rear. Many times, that "spring washer" will "spring" flat and then not return...essentially doing nothing, once this occurs. That needs to be solved.
BTW, the new replacement T/O bearing, from Porsche is a much better part than the original version. All of that "play" is eliminated.
We pressed in a new throwout bearing into the arm when doing the clutch the first time. There was some question as to whether that spring ring you reference went in in the proper place and if it was oriented correctly. Do you have a diagram or description of where it should be and how it should be oriented?
Got it reworked. Spring washer was in fact backwards. Now the pressure plate is back together and there is virtually no fore/aft play. As Greg and others have said the slave push rod will eliminate play in the form when it is all back together.
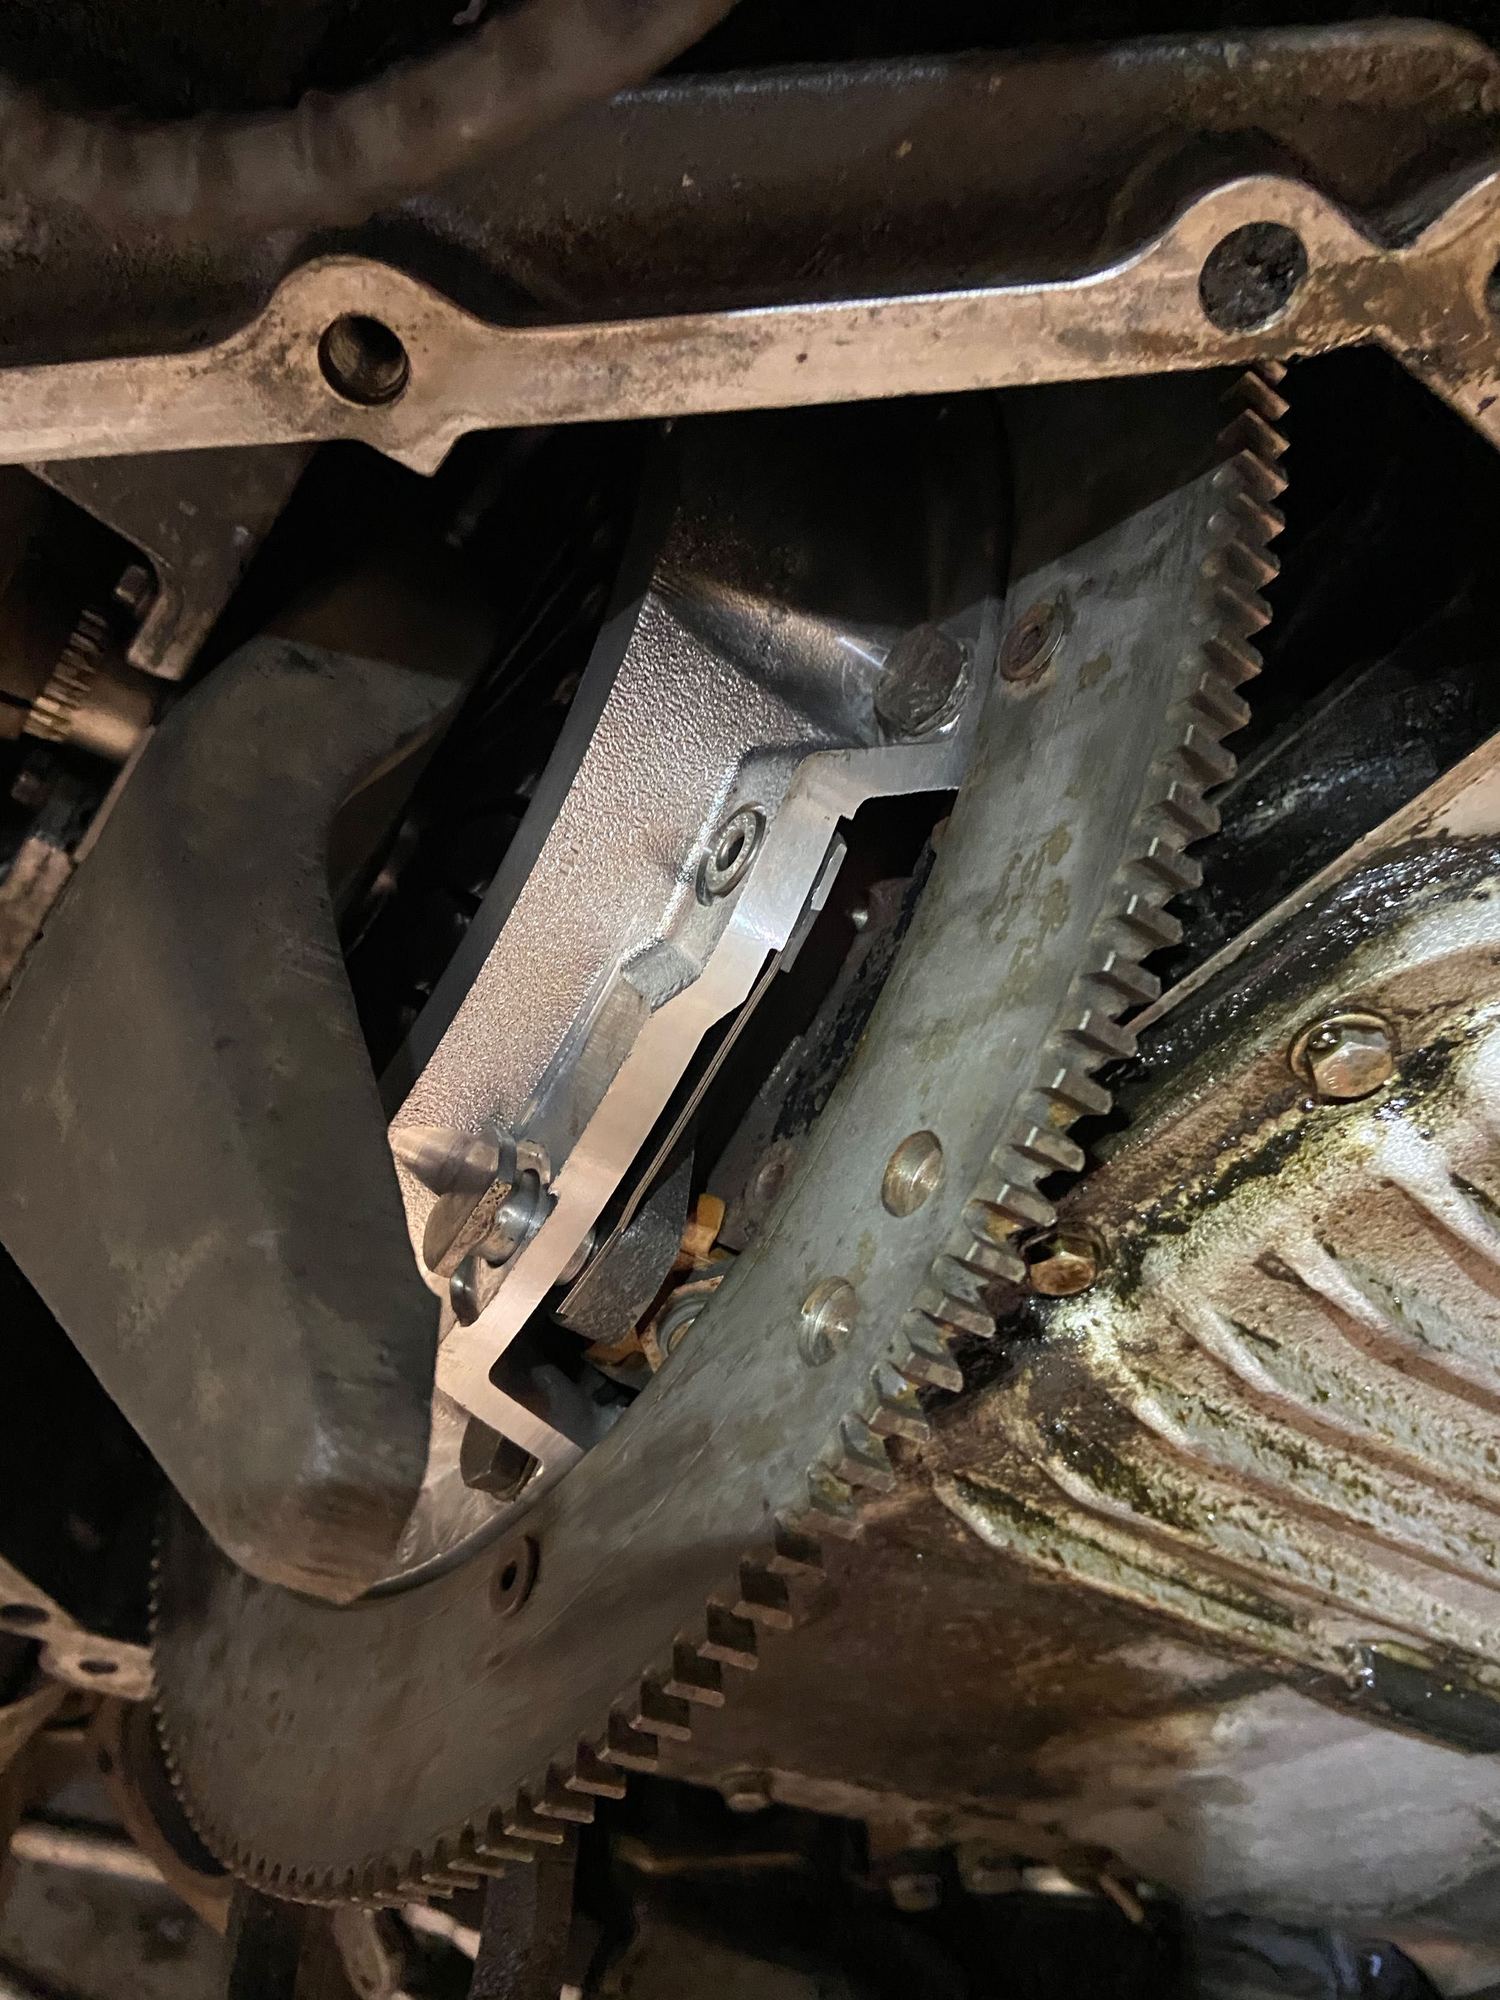
now to repair intermediate plate and start reassembly.
We pressed in a new throwout bearing into the arm when doing the clutch the first time. There was some question as to whether that spring ring you reference went in in the proper place and if it was oriented correctly. Do you have a diagram or description of where it should be and how it should be oriented?
I'm not Greg (obviously! ) but I just assembled the pressure plate on my post-1980 style assembly (with the three same-diameter centering pins). I used a new -27 pressure plate, a new Porsche throwout bearing, and new -09 release arm. The spring washer has the "teeth" part facing the TOB, then the outer portion of the pressure plate fingers lay on that, and then the rear washer after that (with the rounded side of the washer facing the inner part of the pressure plate fingers).
Here's my 3rd grade representation of how it should look:
F flywheel
I clutch disc I with the hub facing the rear of the car
IP intermediate plate
II clutch disc II with the hub facing the rear of the car
o washer with the rounded portion facing the rear of the car
___ pressure plate
\/ spring washer with the "teeth" facing the rear of the car
~ |||| ~ throwout bearing and release arm
EDIT: the dumb message board software keeps deleting my spaces so the above diagram looks like crap.
EDIT 2: make sure you're using the Porsche Olista "sticky" grease!
Haha! I would imagine no one would ever claim to be Greg!
Thanks for the diagram though. Here�s a pic of the revised assembly with the spring washer corrected. Also are a couple of pics of a test fit of my repair idea for the intermediate plate.
New t-but test fit Button head on flip side. Profile view of buttonhead. Revised assembly.
I'm not Greg (obviously! ) but I just assembled the pressure plate on my post-1980 style assembly (with the three same-diameter centering pins). I used a new -27 pressure plate, a new Porsche throwout bearing, and new -09 release arm. The spring washer has the "teeth" part facing the TOB, then the outer portion of the pressure plate fingers lay on that, and then the rear washer after that (with the rounded side of the washer facing the inner part of the pressure plate fingers).
Here's my 3rd grade representation of how it should look:
F flywheel
I clutch disc I with the hub facing the rear of the car
IP intermediate plate
II clutch disc II with the hub facing the rear of the car
o washer with the rounded portion facing the rear of the car
___ pressure plate
\/ spring washer with the "teeth" facing the rear of the car
~ |||| ~ throwout bearing and release arm
EDIT: the dumb message board software keeps deleting my spaces so the above diagram looks like crap.
EDIT 2: make sure you're using the Porsche Olista "sticky" grease!
Oops...you got bad advice or asked for the wrong thing....
You absolutely can not use the '09 arm, with the early (pre-'86) T/O bearing. That arm is only to be used with the late model (got updated) '87-on T/O bearing.
The "flat" '09 arm will not pull out correctly on the "flat" early T/O bearing. Because the arm works in an arc, the two flats will pull the T/O bearing at an angle....destroying the pressure plate and the T/O bearing, very quickly. There has to be a "curved" surface on one part or the other. You need to get an "early" arm, with a curved surface or re-use your original arm.
This is disconcerting as I remember reading about this before, but even Porsche's own internal parts database shows that the -06 (early) release arm supersedes to the new -09 arm.
The system also shows that the original -24 throwout bearing supersedes to the new -25 version. Does this mean that Porsche appears to have it wrong?
I have no idea. I know what goes with what and hardly ever check what Porsche says.
This does "mess" up many a clutch replacement, however.
The easy way to remember the confusion about T/O arm and T/O bearing (for all years) is simple:
Never flat with flat. Never curved with curved. The only thing that works is curved with flat!
If you stop and think about how the arm moves and how the arm pulls on the T/O bearing, it's crystal clear.
You need a curved surface on a flat surface, so the "contact patch" is at the top of the curve, allowing the flat part to "pivot" on that curve.


 01-13-2020, 09:10 PM


 ) but I just assembled the pressure plate on my post-1980 style assembly (with the three same-diameter centering pins). I used a new -27 pressure plate, a new Porsche throwout bearing, and new -09 release arm. The spring washer has the "teeth" part facing the TOB, then the outer portion of the pressure plate fingers lay on that, and then the rear washer after that (with the rounded side of the washer facing the inner part of the pressure plate fingers).