When you click on links to various merchants on this site and make a purchase, this can result in this site earning a commission. Affiliate programs and affiliations include, but are not limited to, the eBay Partner Network.
Swapping rocker bars from control arms to control arms
Hello Gentlemen,
As usual, I have gotten myself into something. An offhand comment I made in someone else's thread has brought rise to I might be doing a 'Bad Thing.'
In a nutshell, I have pressed out the rocker bars from the 1988 S4 rear lower control arms with the bent 'blades' that I have. I intend to press them into the good rear lower control arms that came from the Red Witch. The cam adjusting bolts are nuclear level seized in the rocker bars that came on the Red Witch. Hence the swap.
So...I am going to post photos of what I have done. We will then see if my intent and methodology are true and just, or if I am yet again an idiot.
Best case scenario: I continue on and press in the rocker bars.
Worst case scenario: I am on the hook to 928 International for a used set of rear lower control arms. And probably another Jackhole Award.
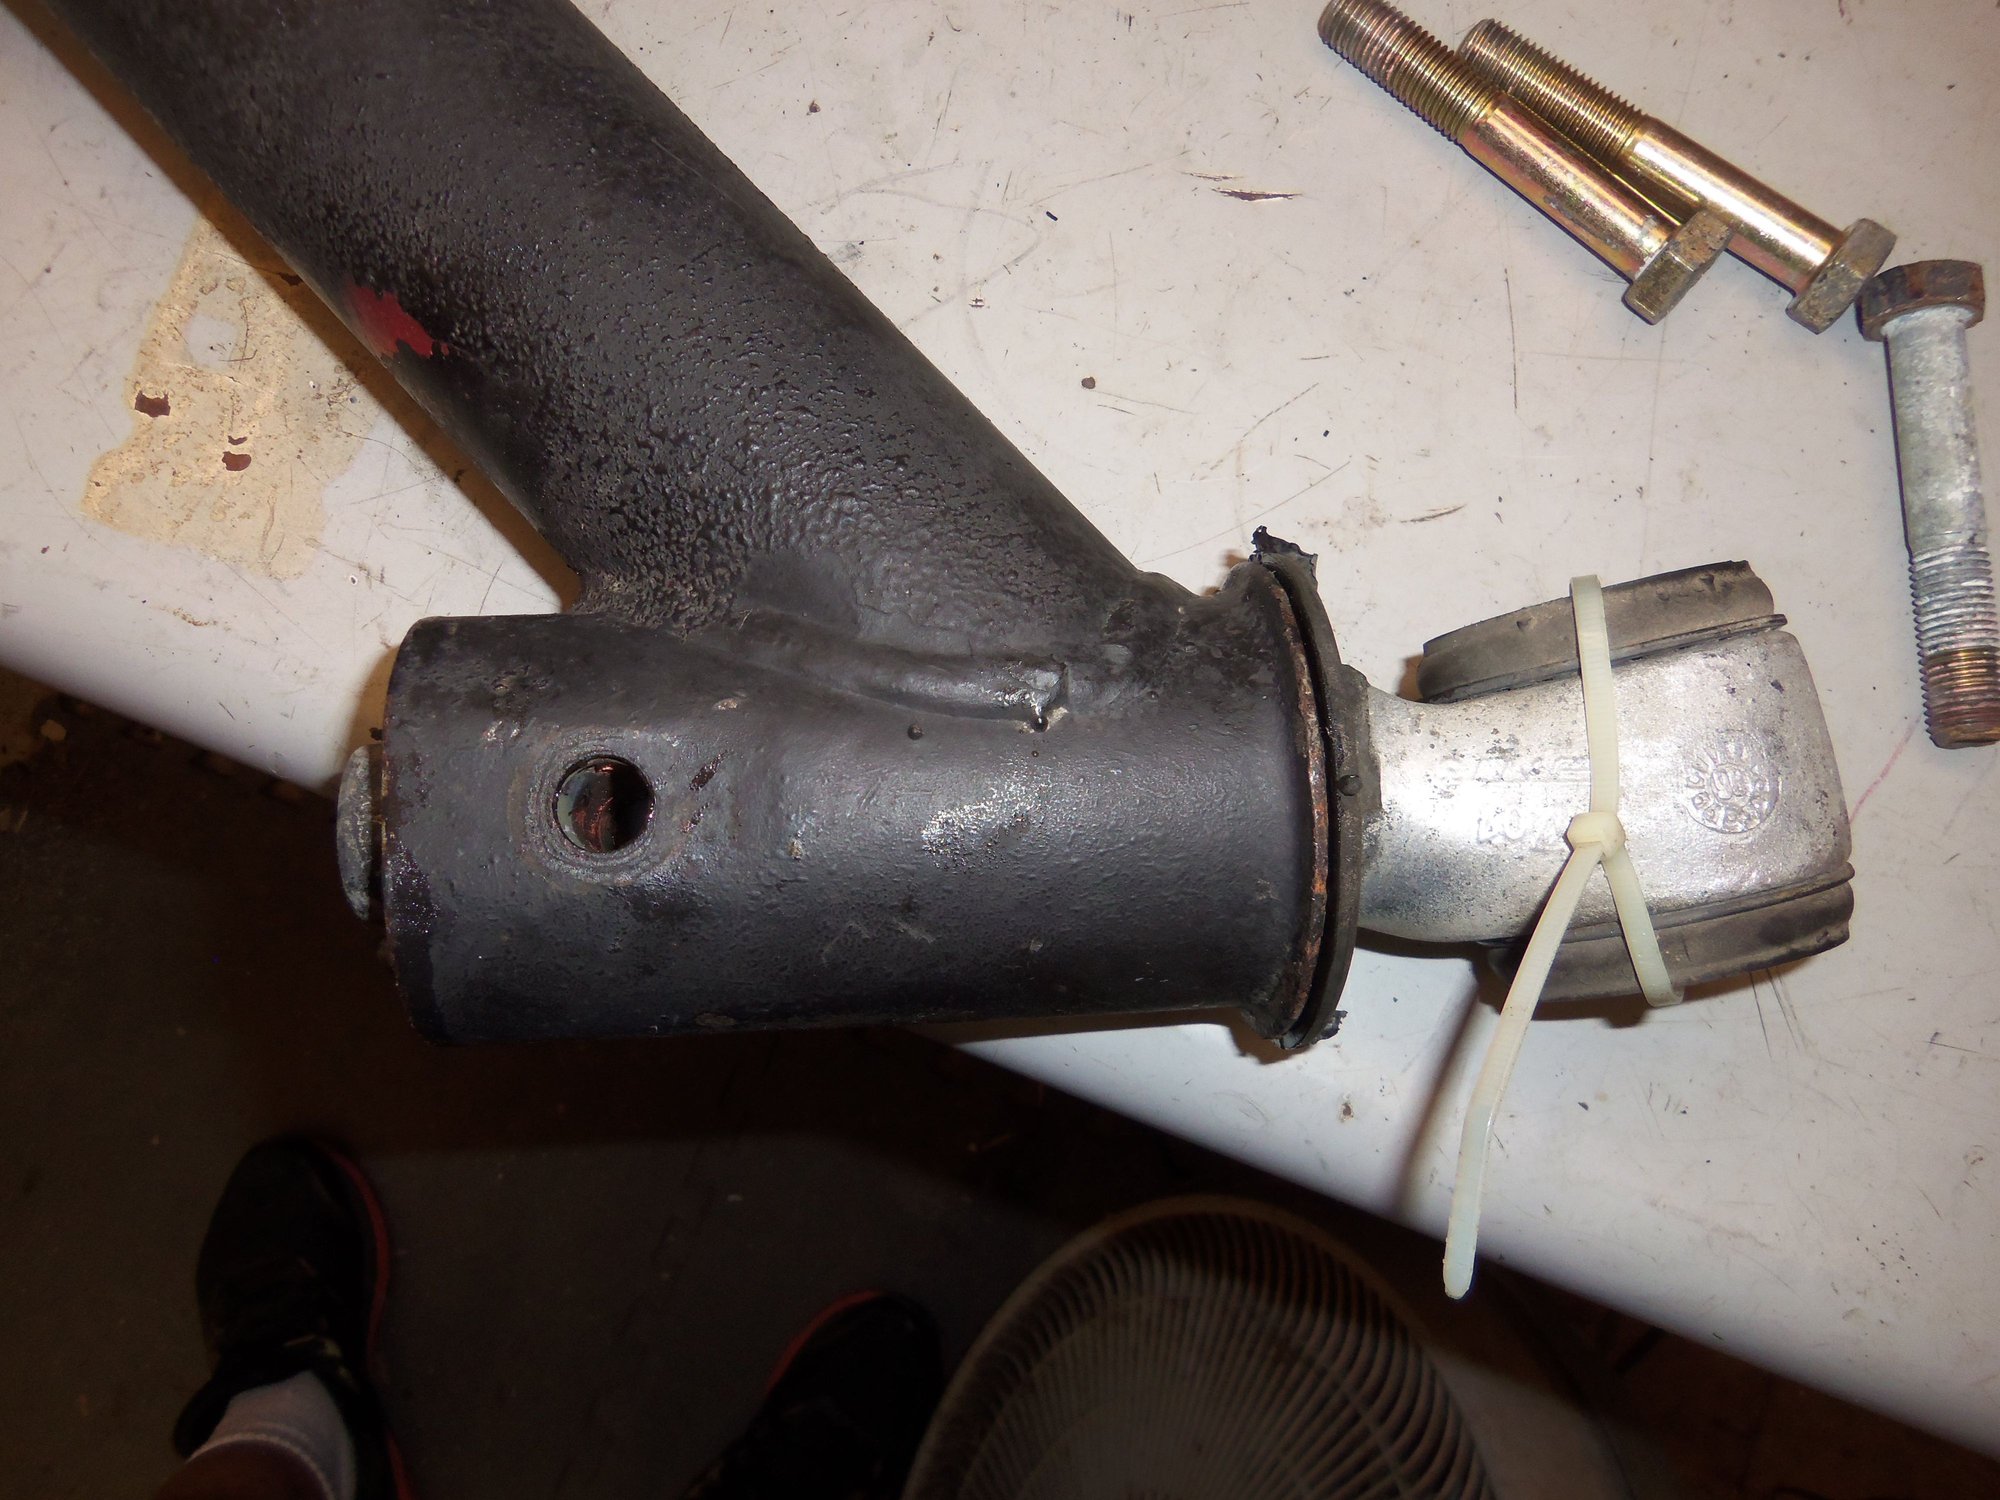
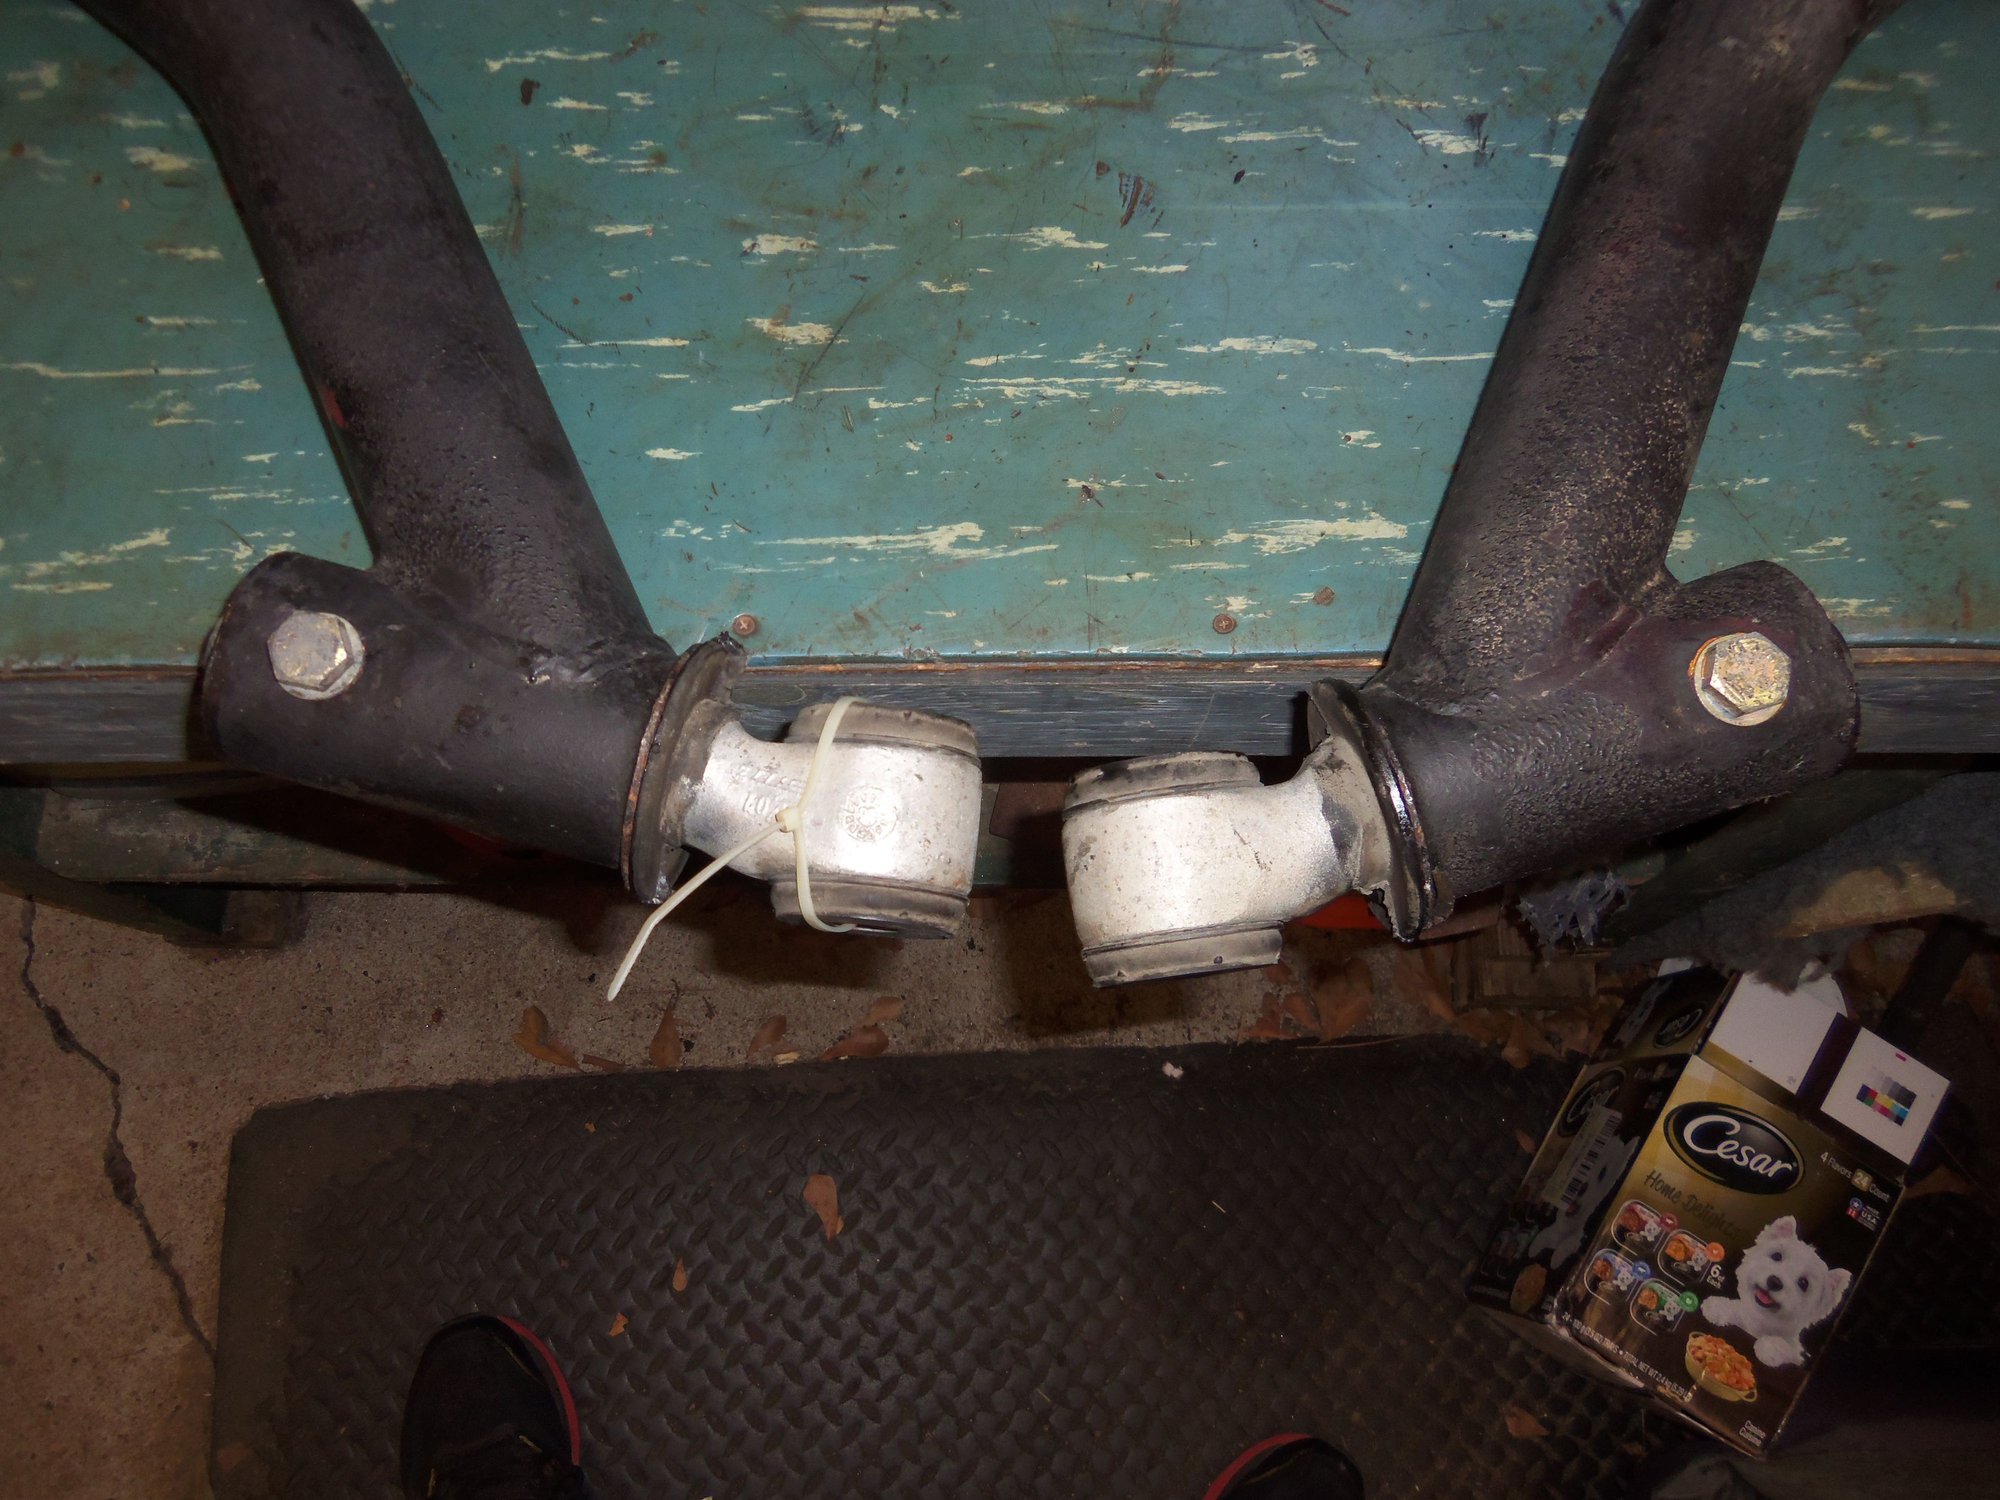
Long ago, I dropped the rear suspension to remove the transmission from the Red Witch. In doing so, I sheared the end off the passenger's side rear lower control arm front adjusting cam bolt. I found the adjusting cam bolts seized hard for both sides. Normal methods of pneumatic impact tools and BFH did not get the bolts to move. So I dropped the control arms with the front mounts still attached.
I bought the complete rear suspension from a 60,*** mile 1988 S4, as it cost only slightly more than what I would have spent at 928 International for replacement parts to the control arms. That I knew of then.
So, I didn't worry about the original control arms or the seized bolts.
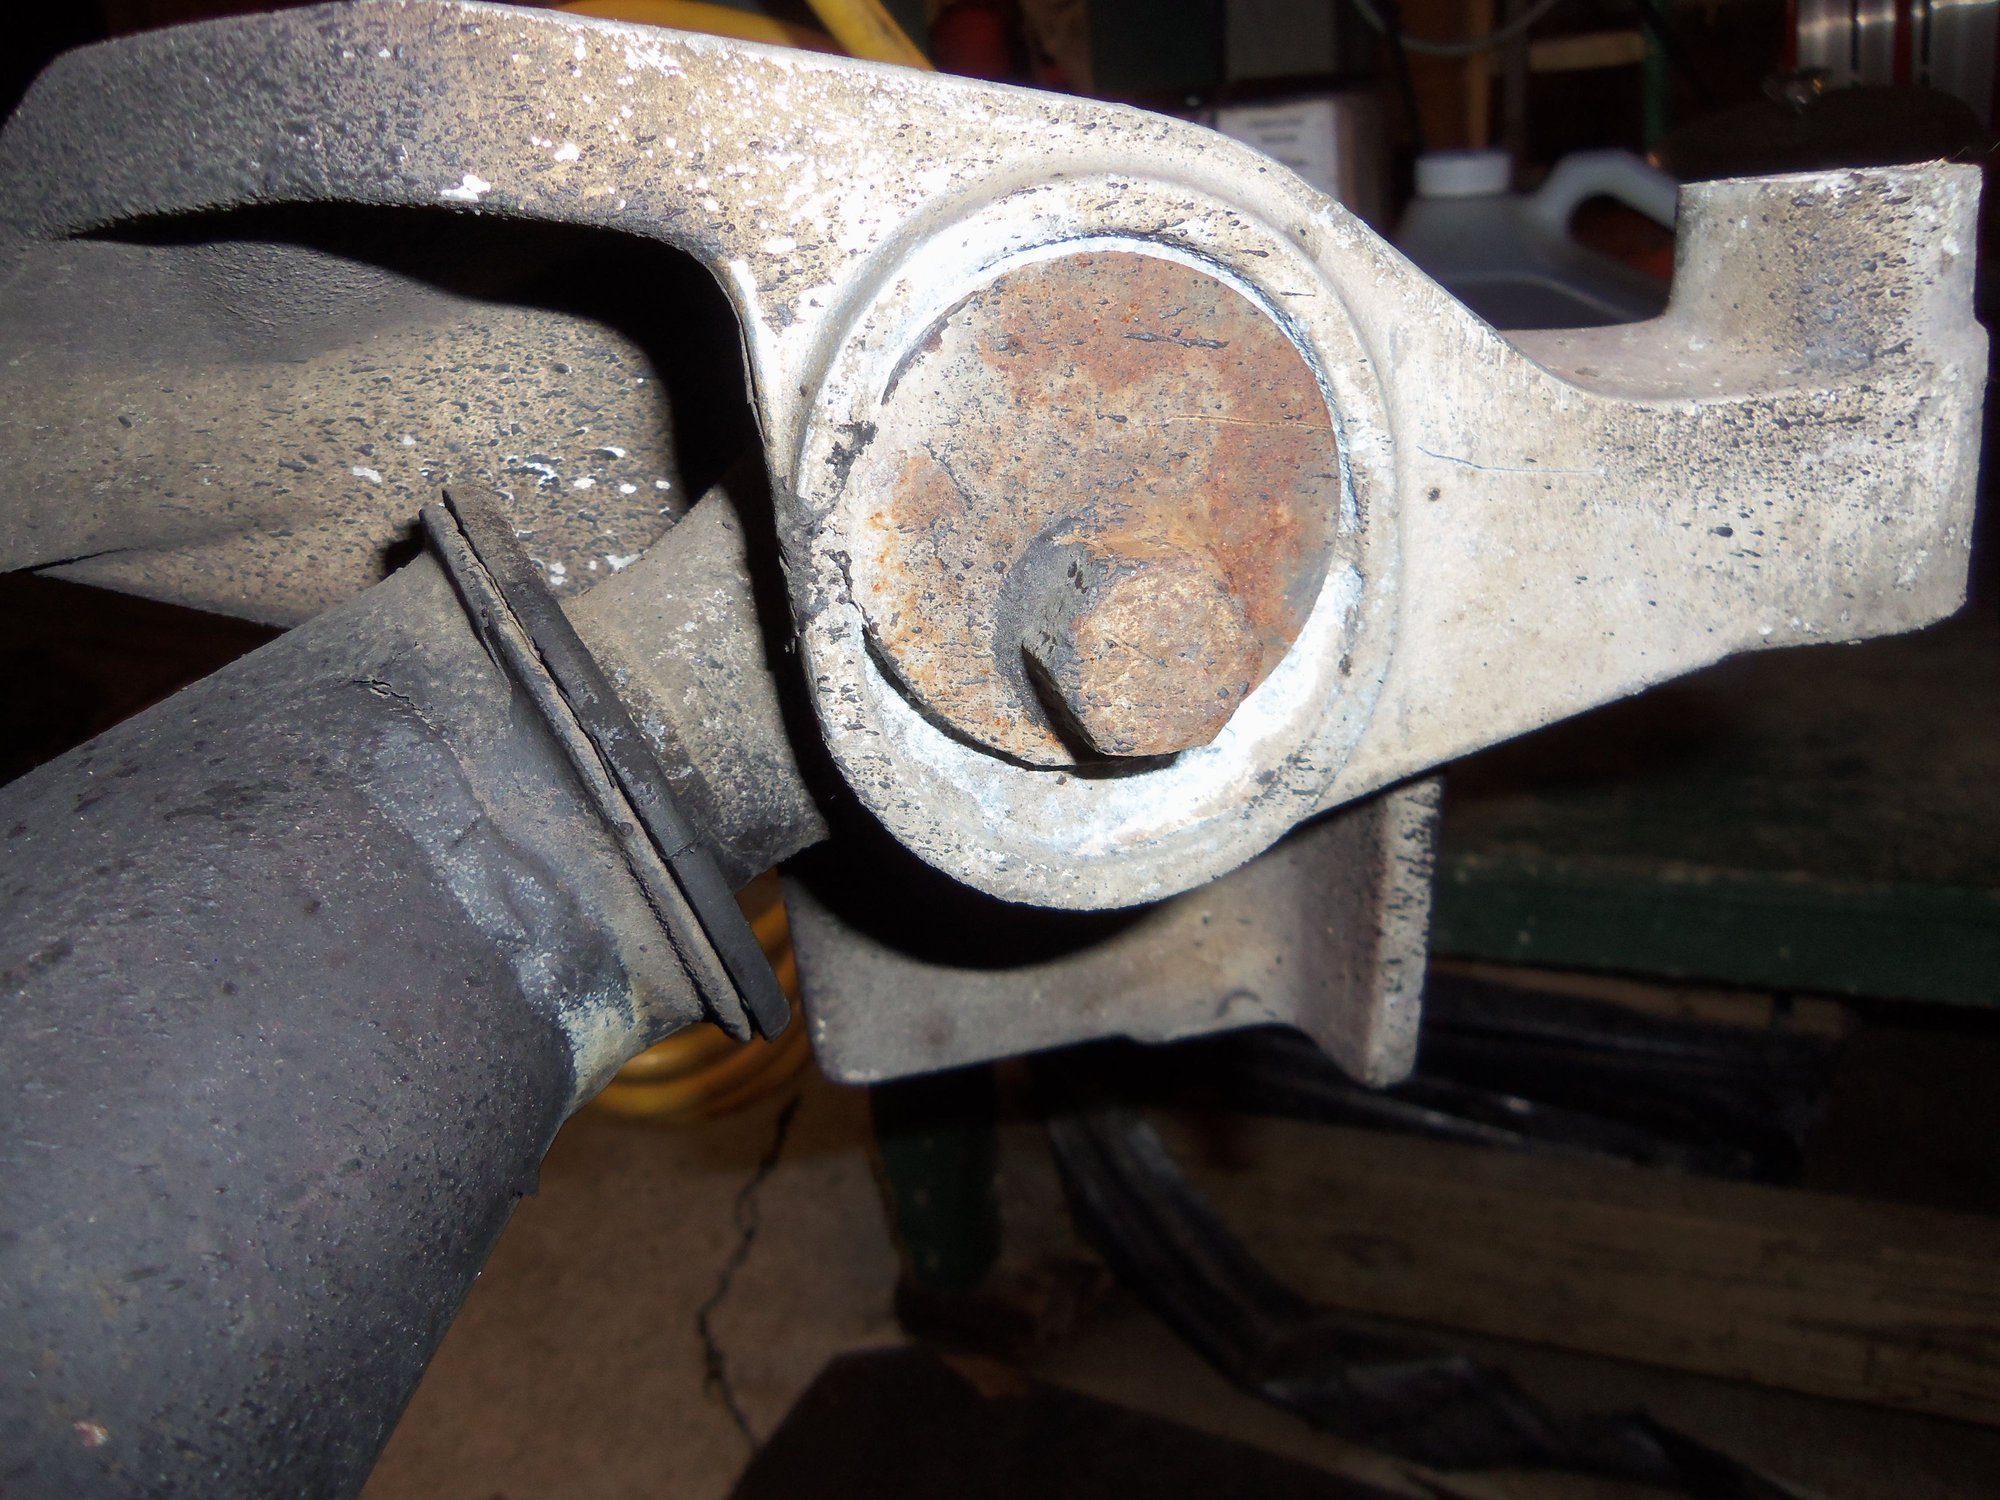
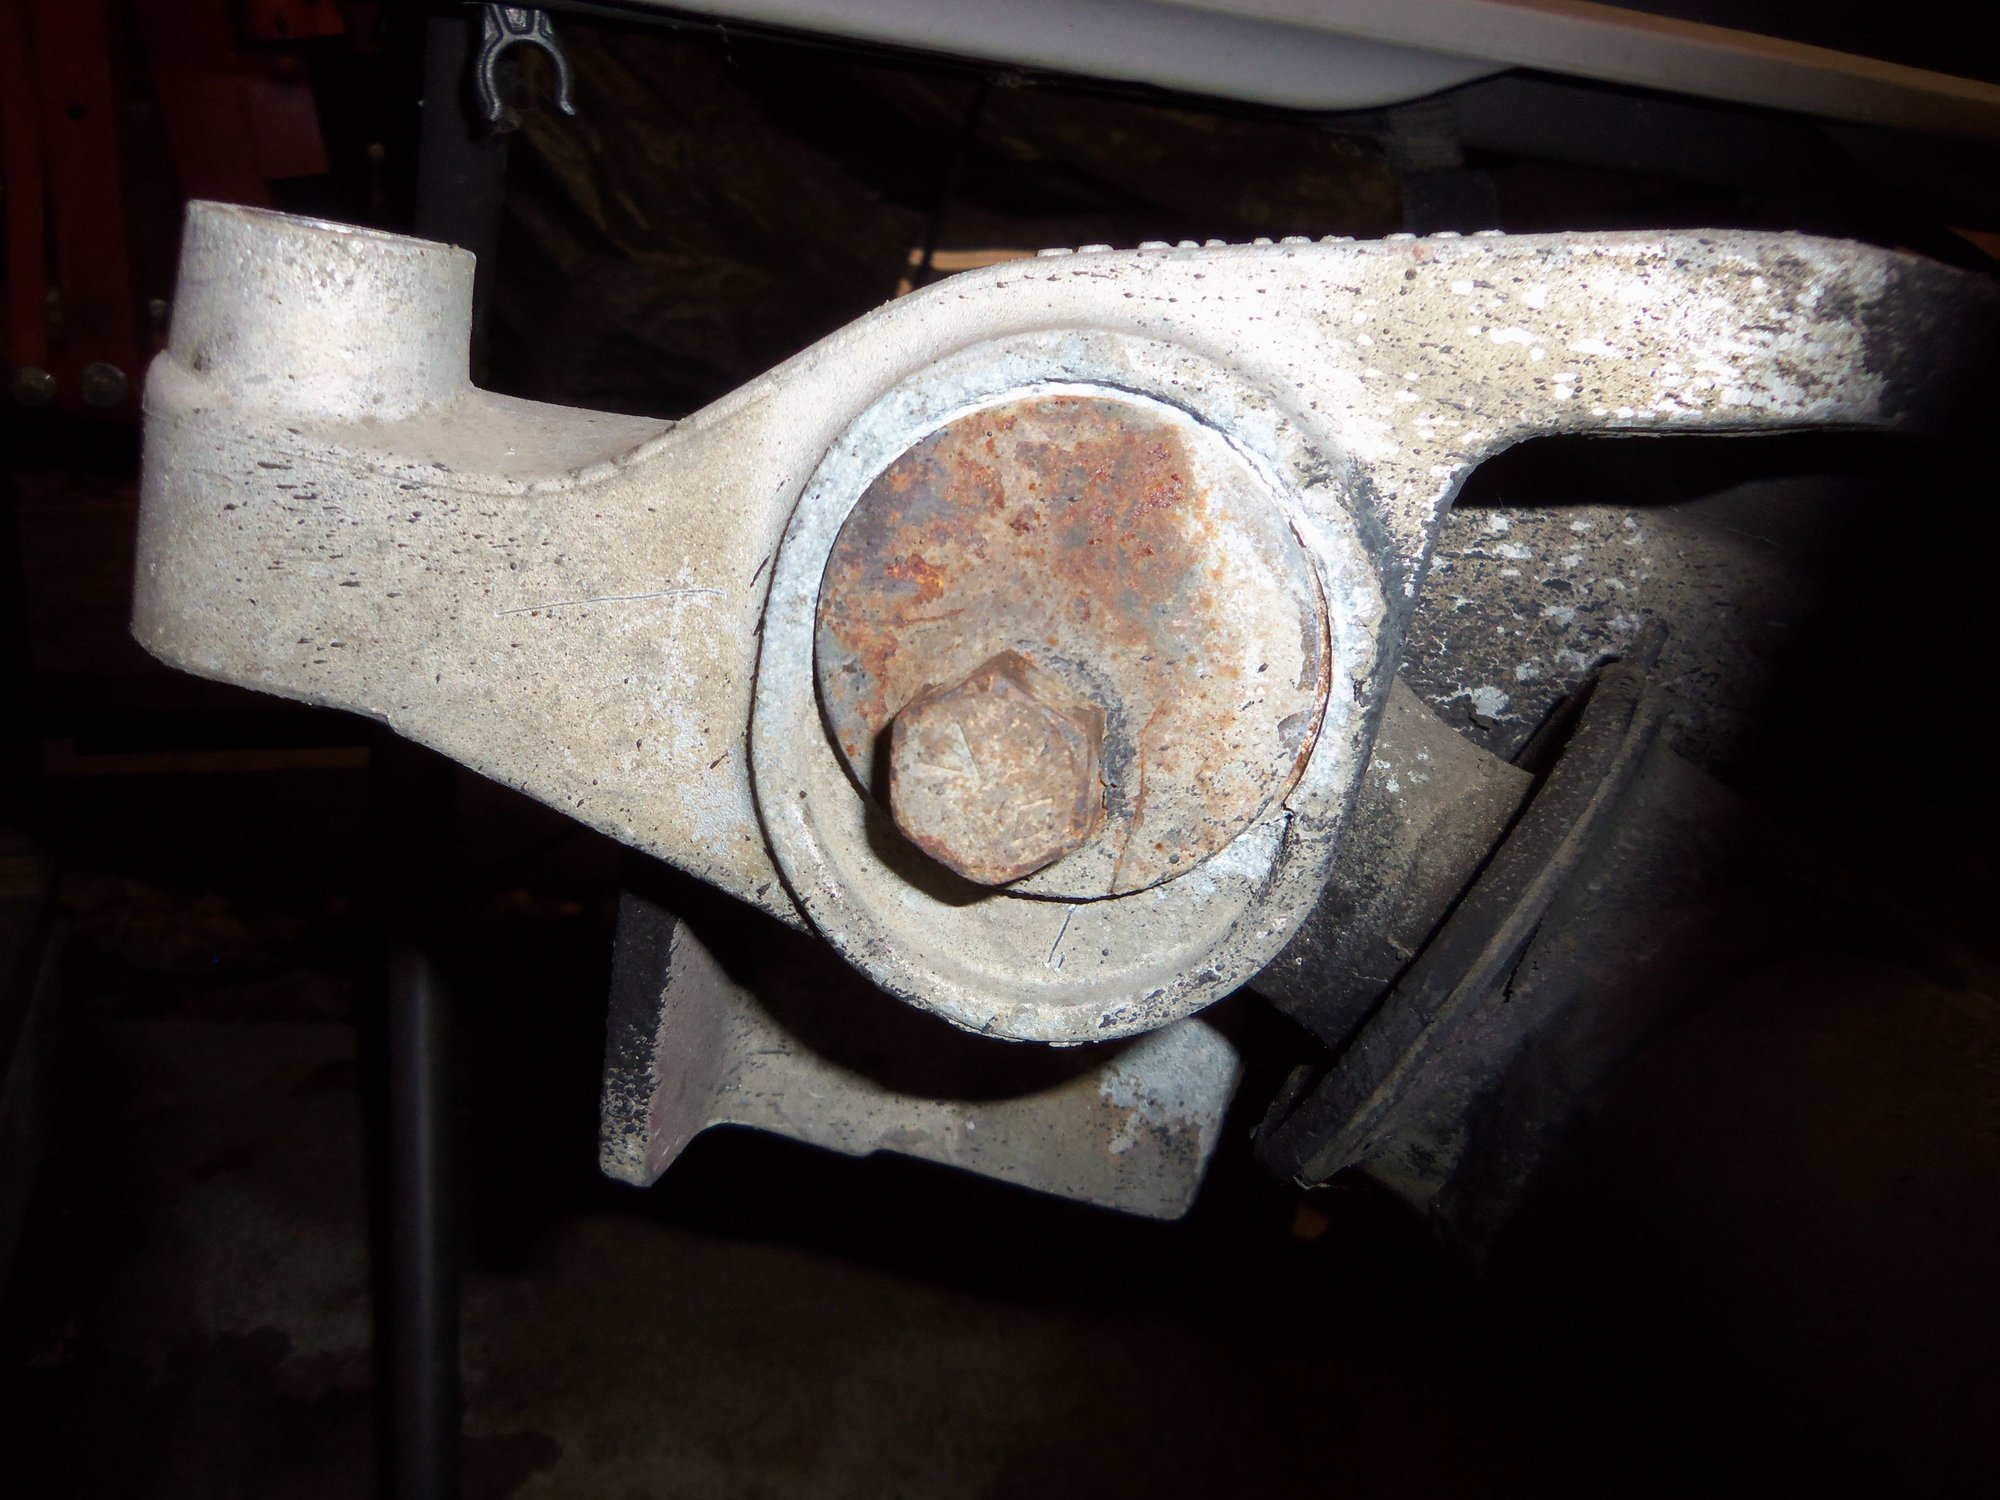
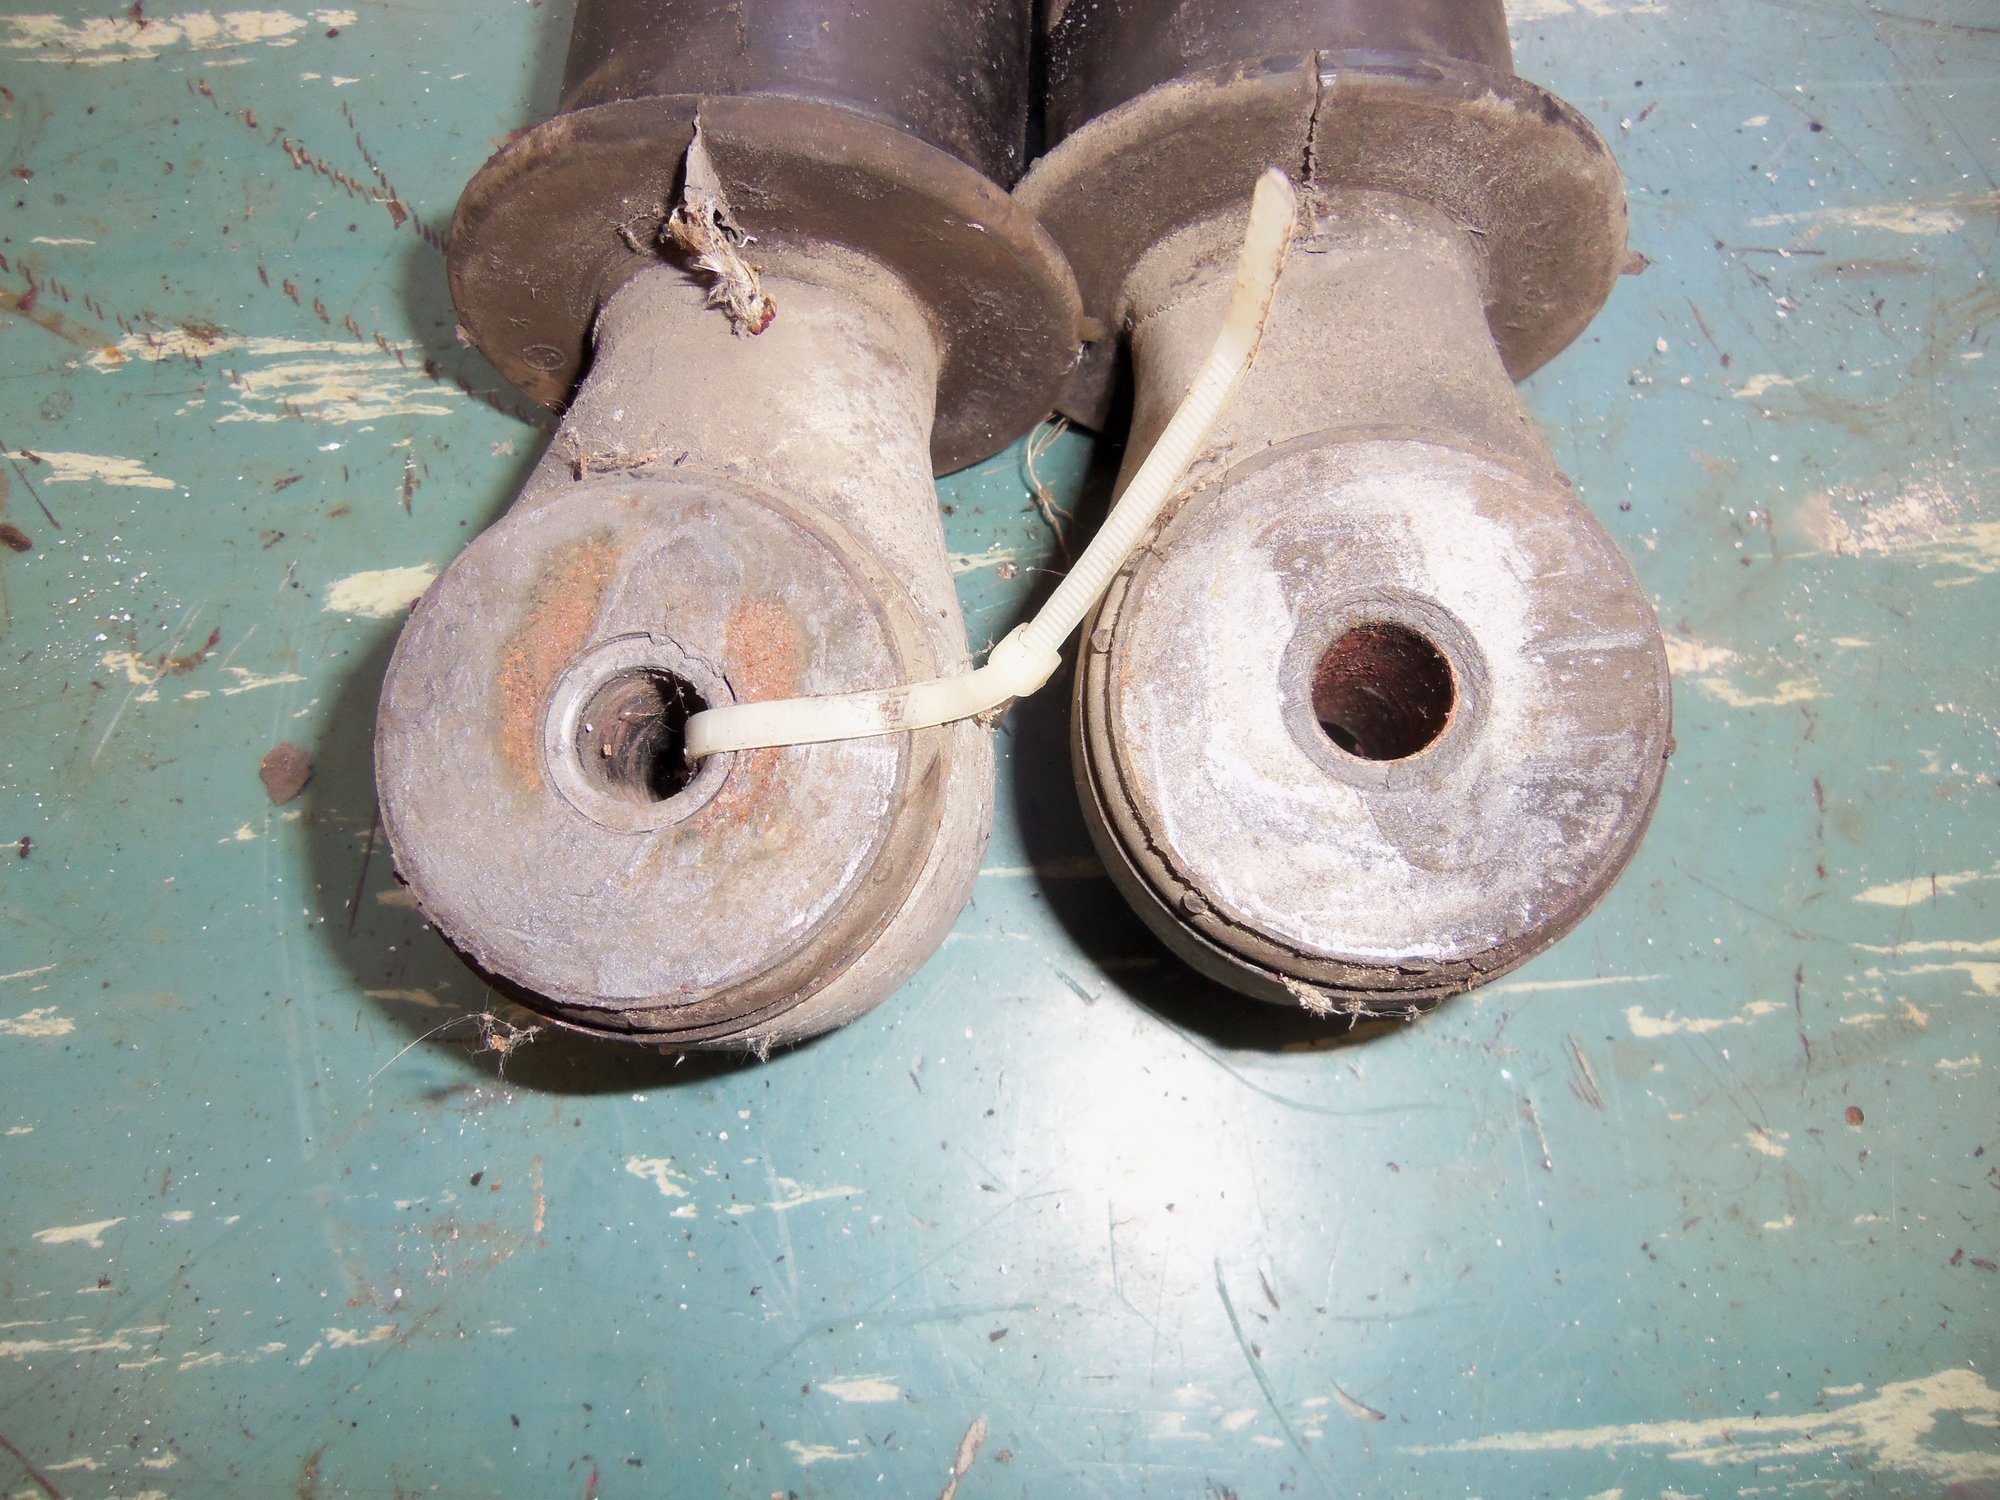
Passenger's side lower control arm front mount cam adjusting bolt. Disturbing amount of corrosion on the aluminum mount.
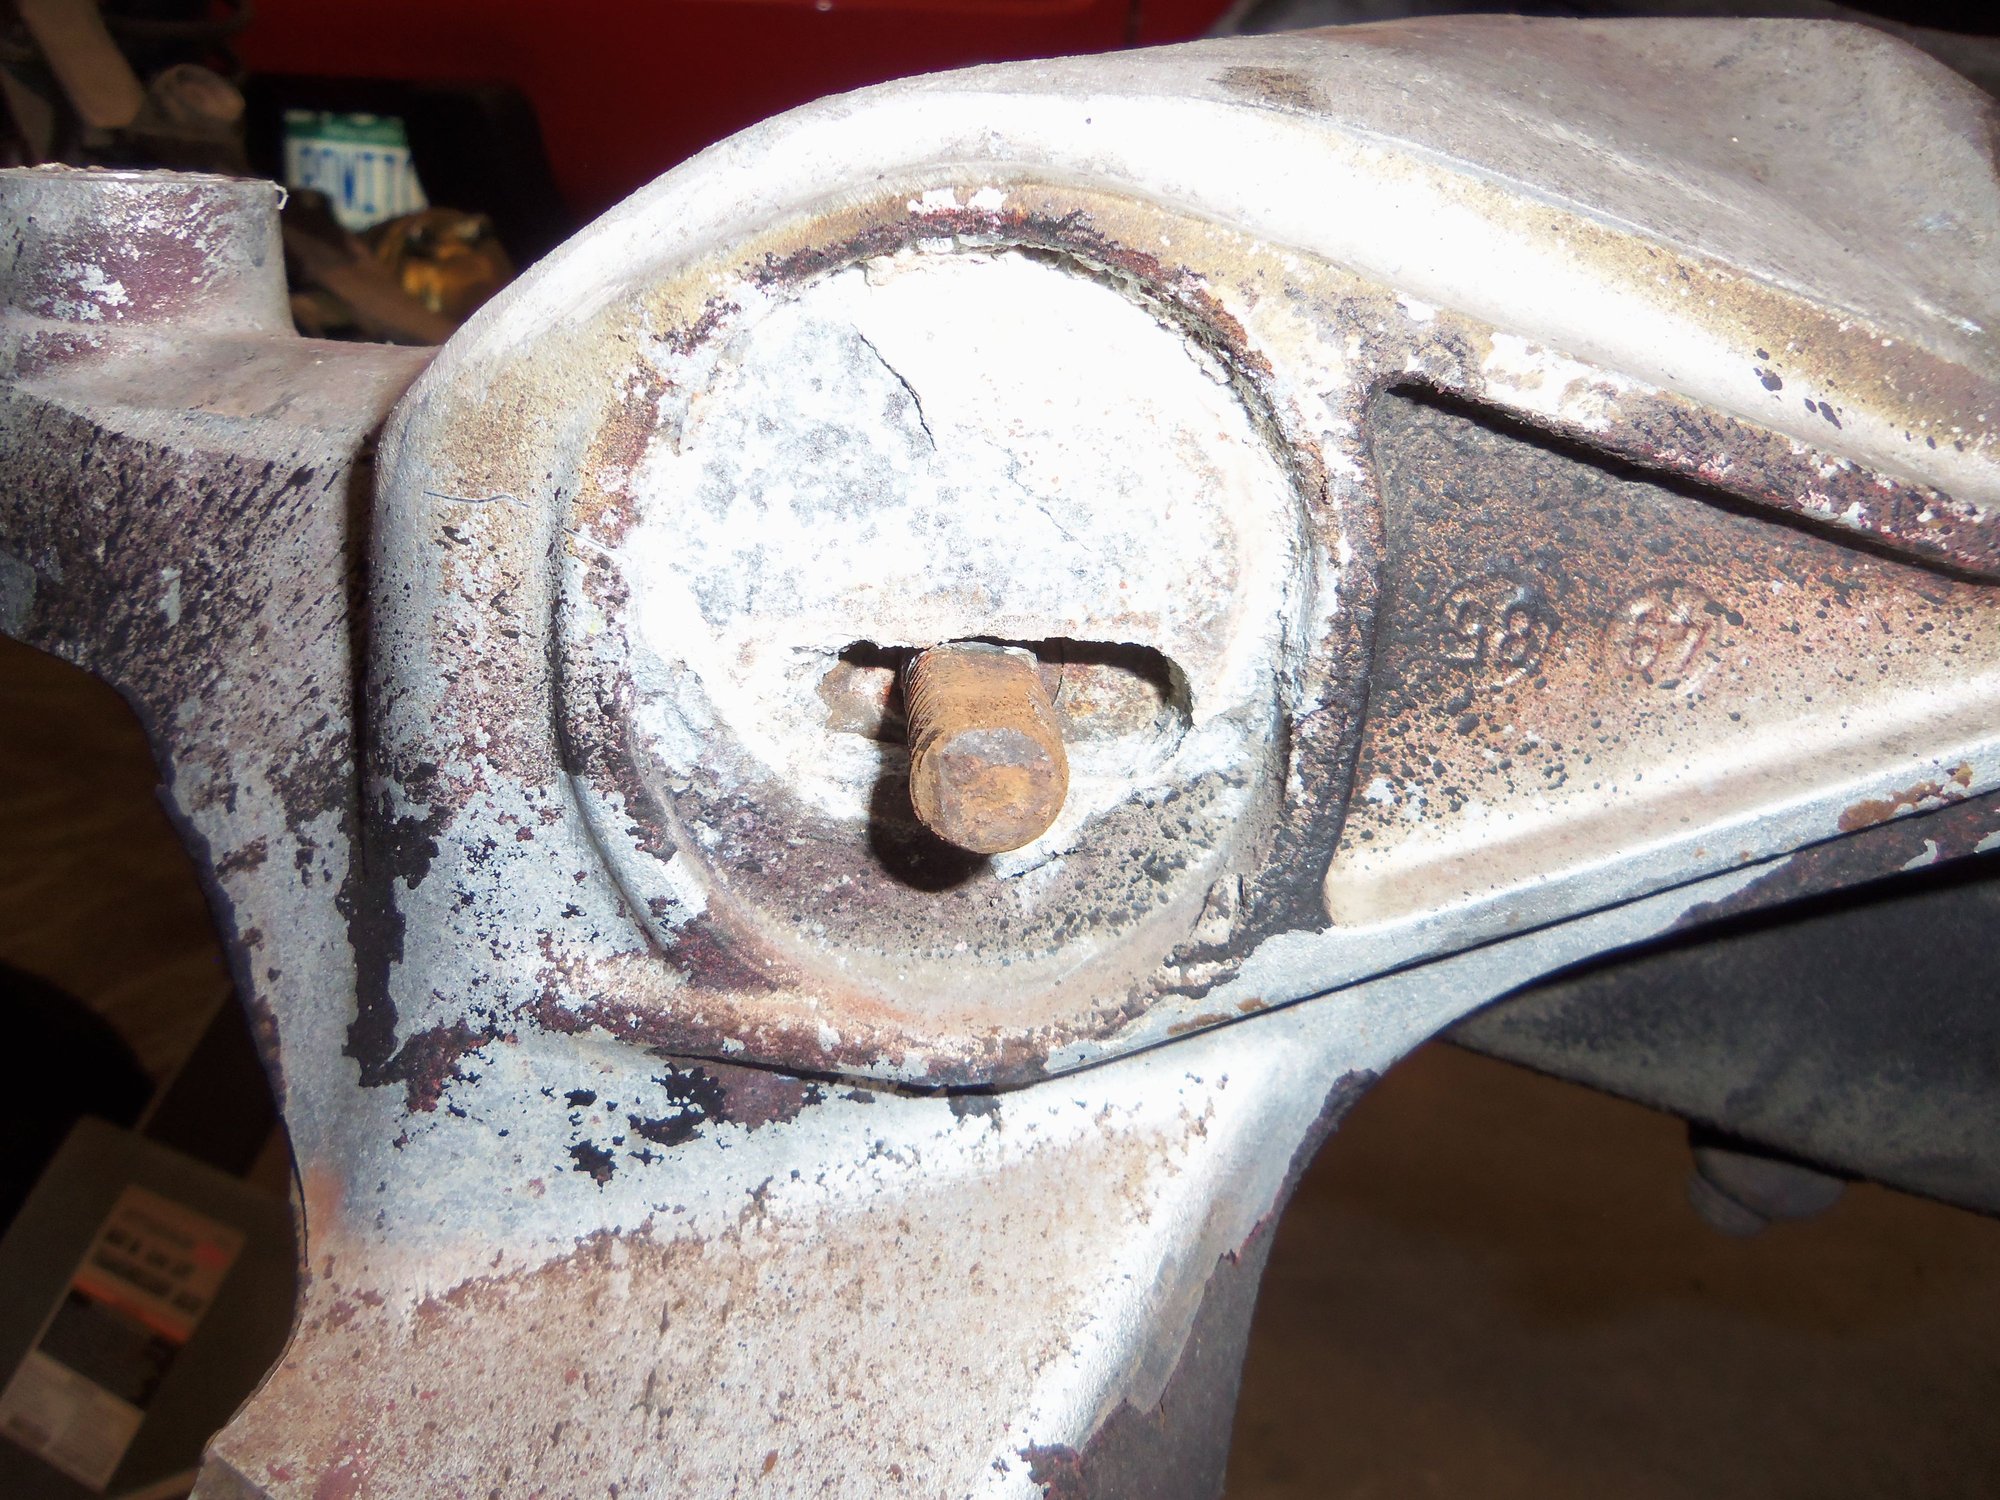
Other side of the mount, end of the bolt is sheared off. Lots of corrosion in the cam pocket.
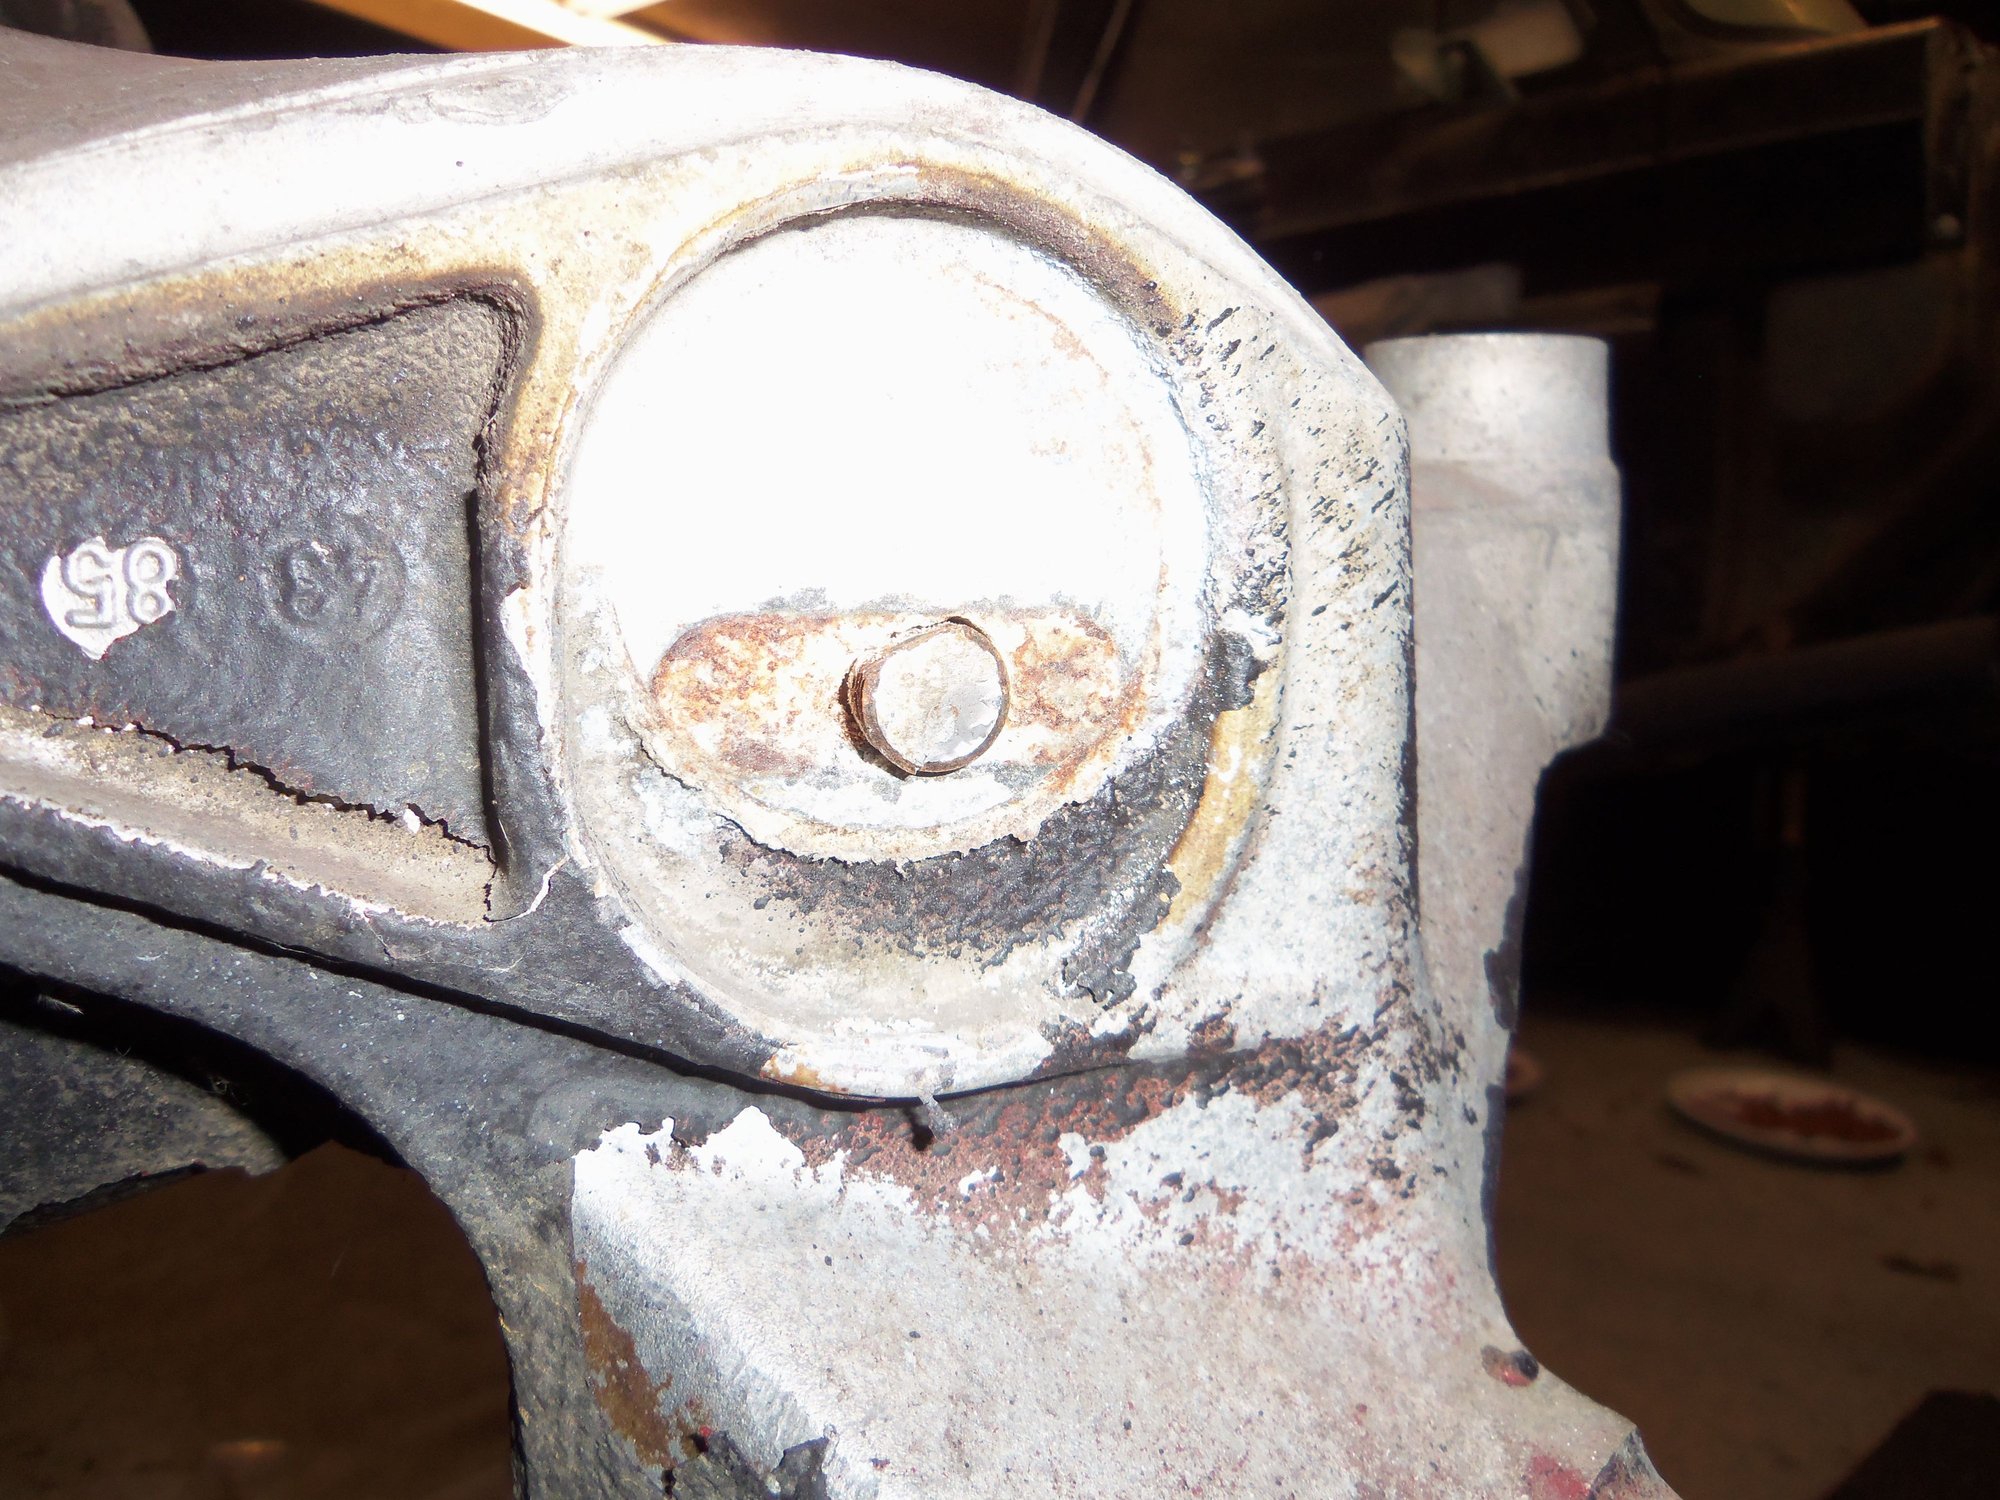
Driver's side lower control arm front mount cam adjusting bolt. Disturbing amount of corrosion on the aluminum mount.
Other side of the mount, lots of corrosion in the pocket.
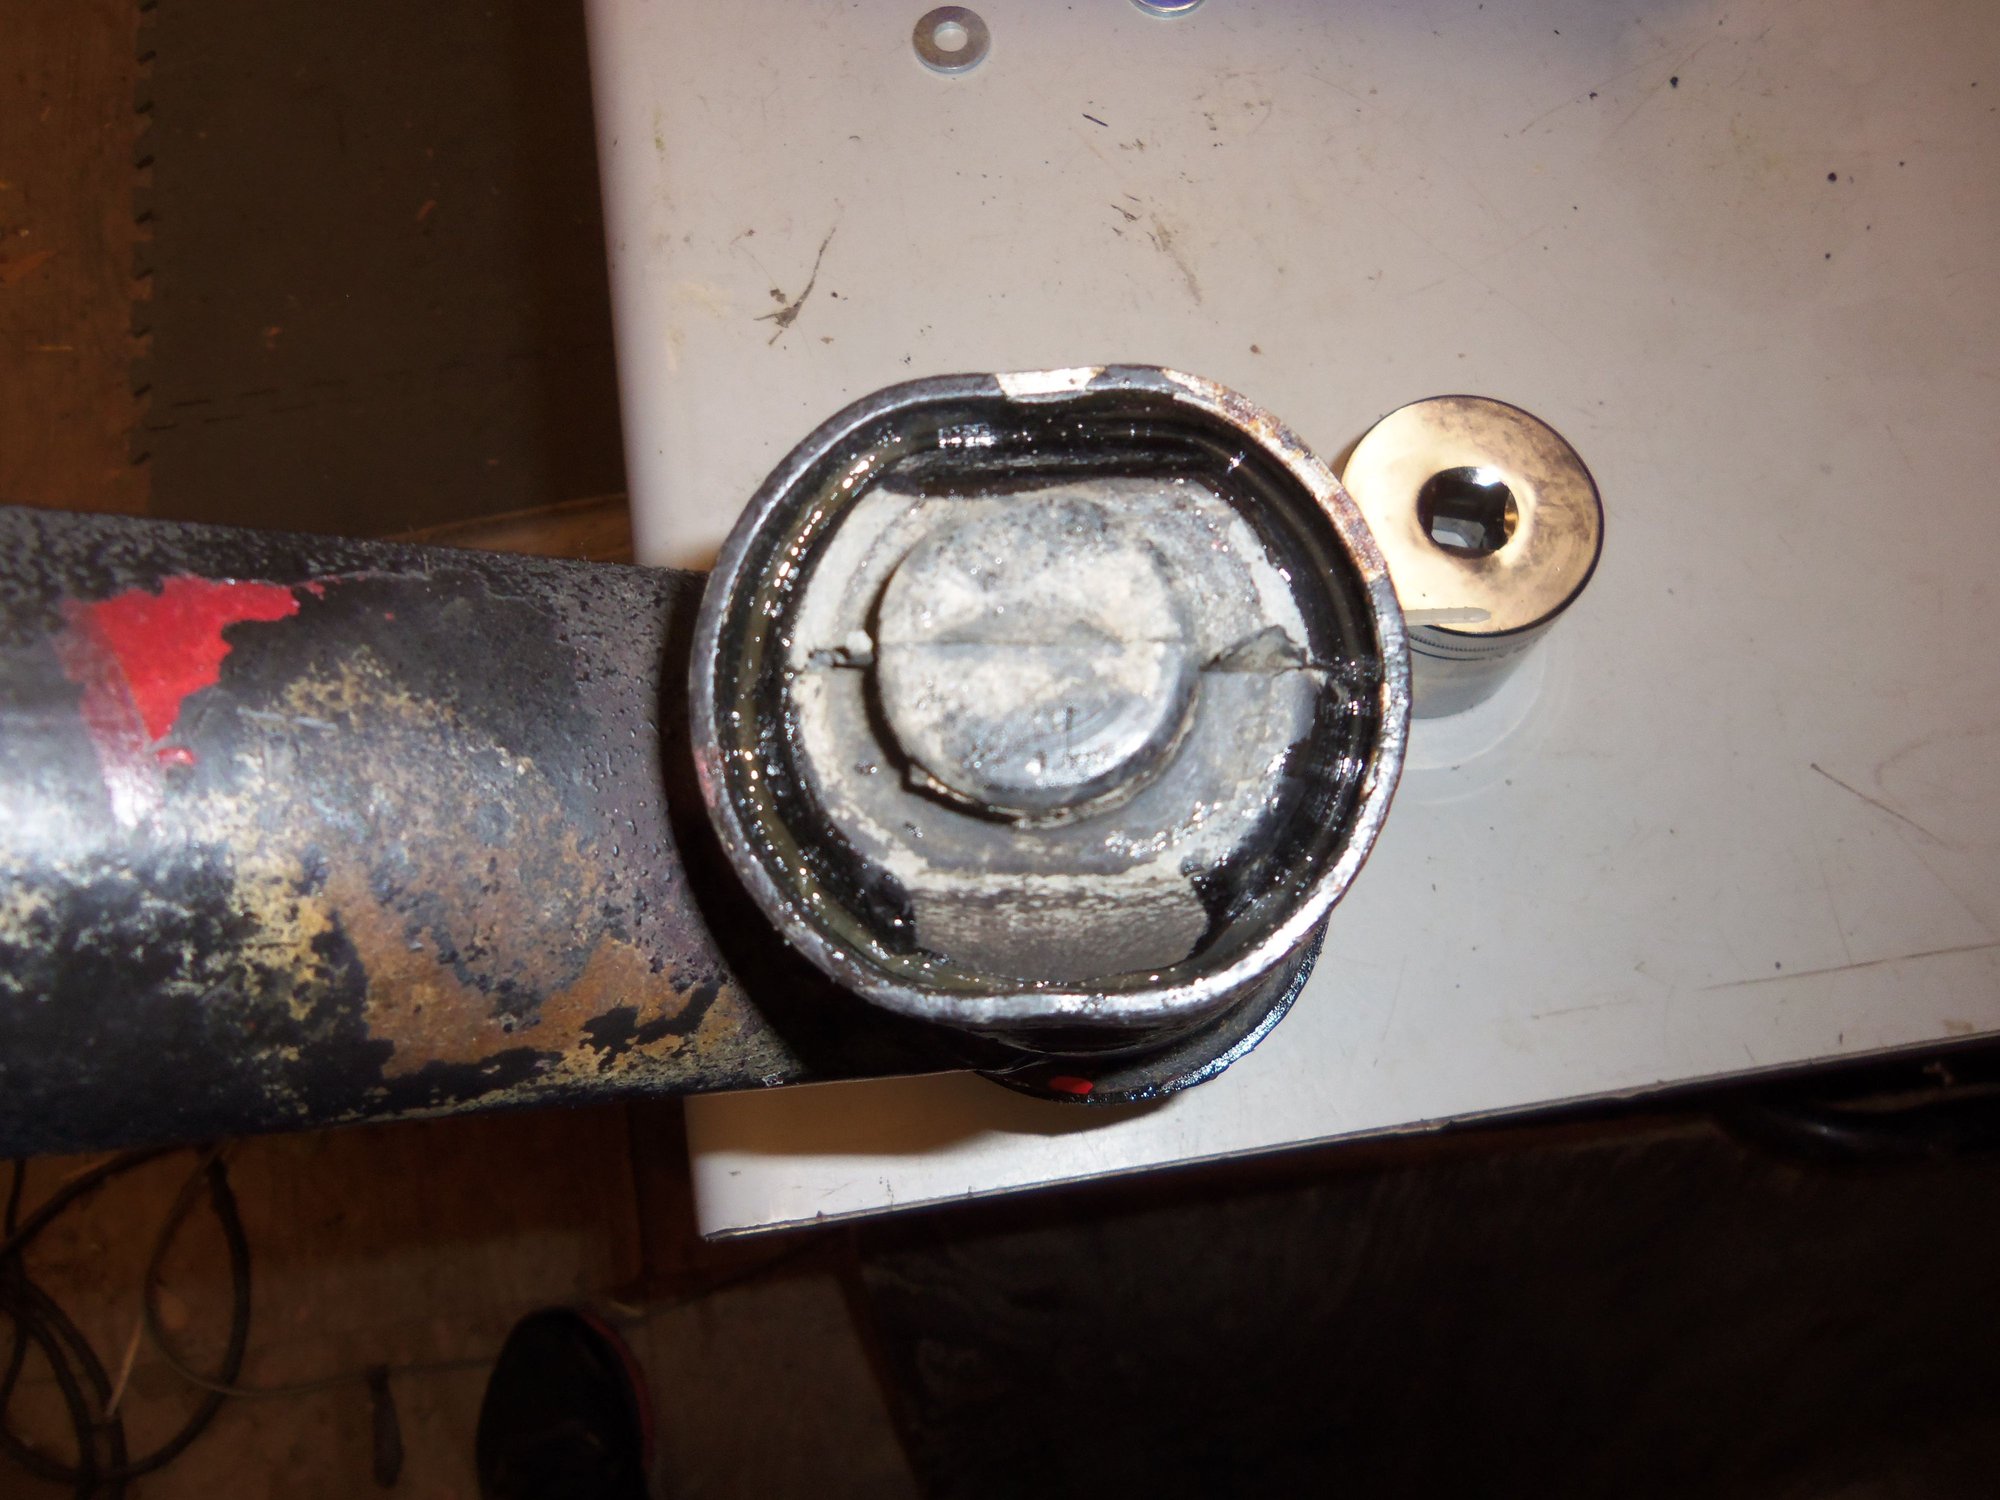
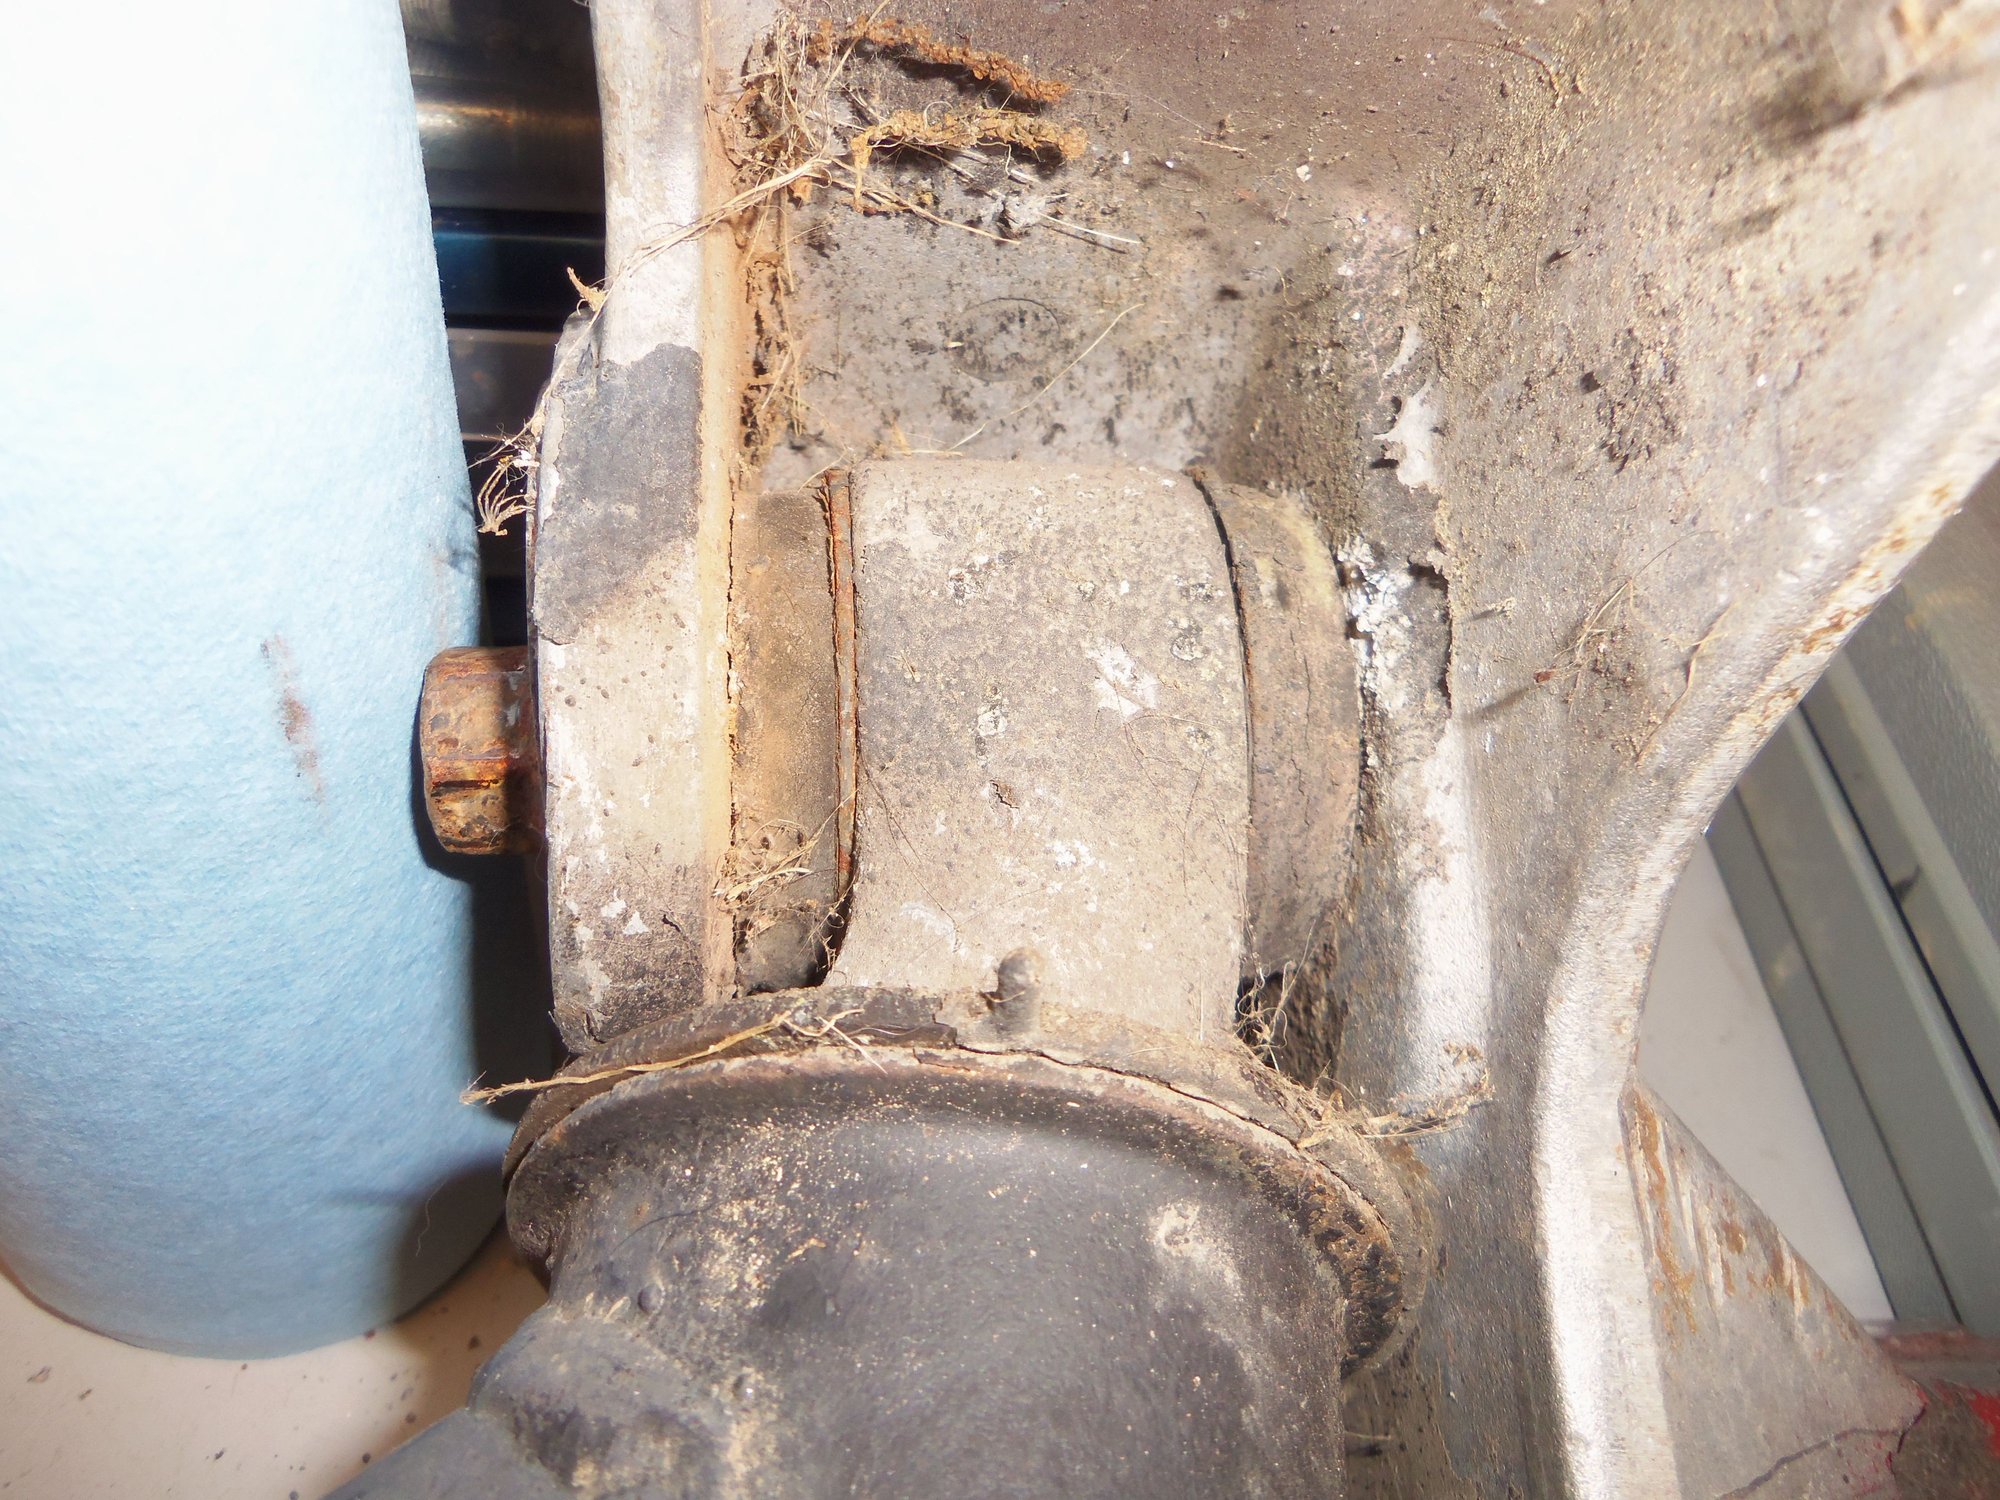
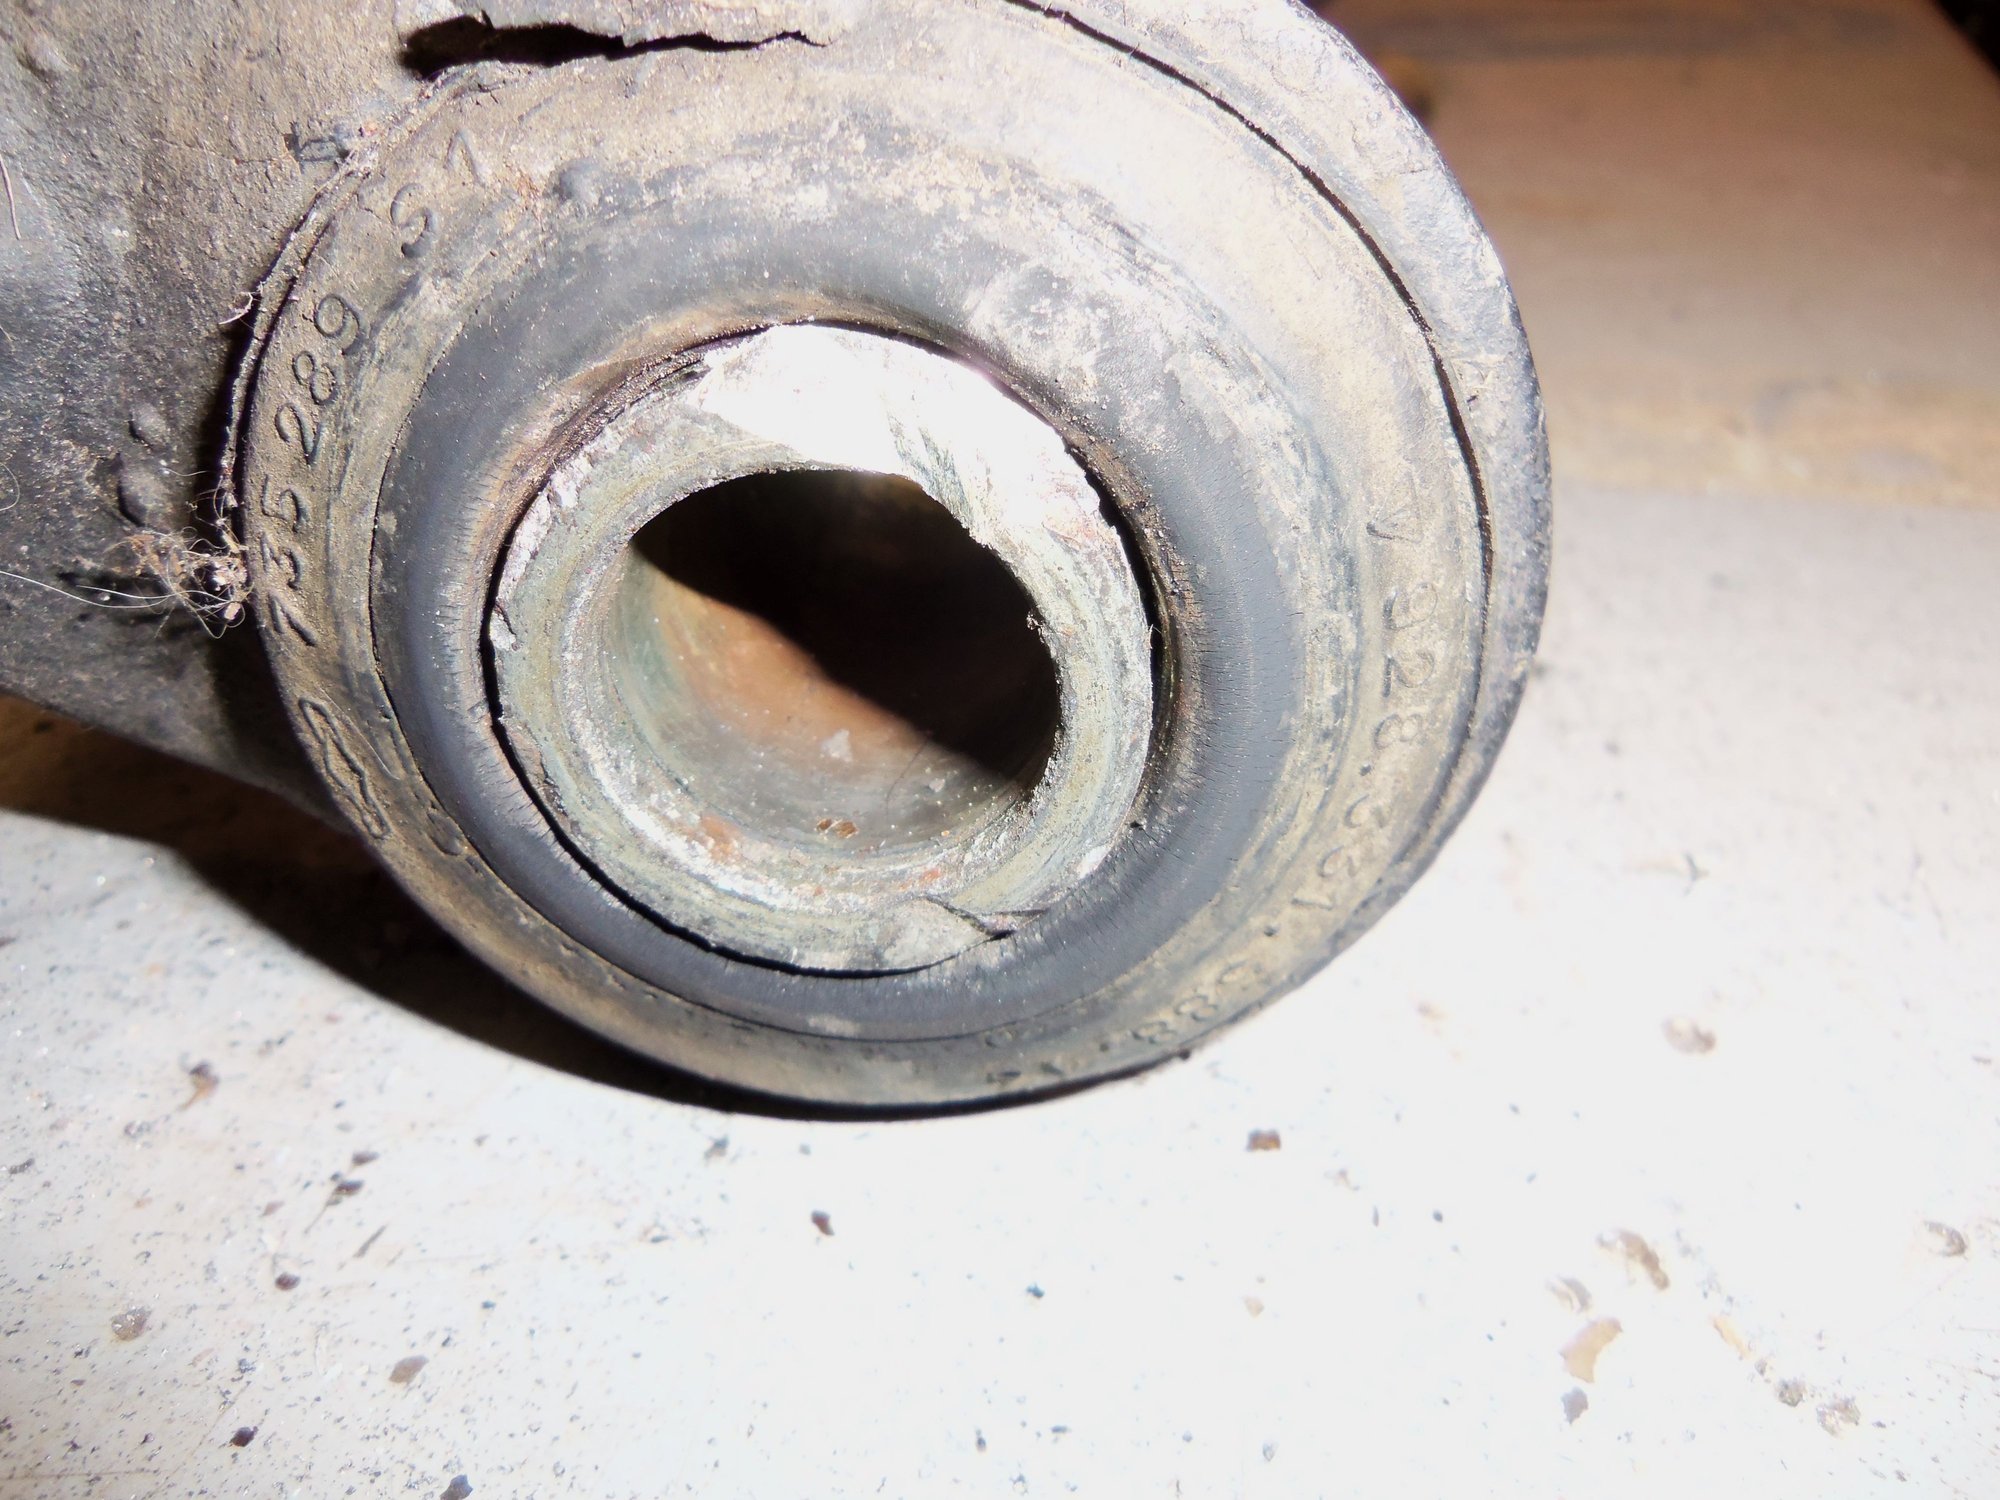
Inside of the mount and the end of the rocker bar look none to good...
Then I come to find out the 'blades' are bent on the 1988 S4 rear lower control arms. I posted a thread about that, and received good opinions and ideas. I have chosen to NOT use the bent 1988 control arms.
Which means I now have to deal with the original control arms and seized bolts.
Like a fool, I again tried pneumatic impact tools and violence with a BHF. No good. Onto the press. My press is only 12-ton, but I thought it would be worth a try.
Nope. That didn't work. Not only did the seized bolts not move, but my press started to flex, and the aluminum on the control arm mount started to distort on the receiving cup underneath.
I brooded over this for awhile, and decided more violence was the answer. 14TPI blades in a reciprocating saw level of violence. I needed to trim the aluminum control arm mounts so they would fit in the bed of my tiny press.
My new plan was to swap the good rocker shafts from the bent 1988 S4 control arms into the good control arms from the Red Witch.
WSM Volume 4, Section 42, page 42-12 makes this seem like a relatively straight forward process.
It wasn't.
Its me, of course it wasn't.
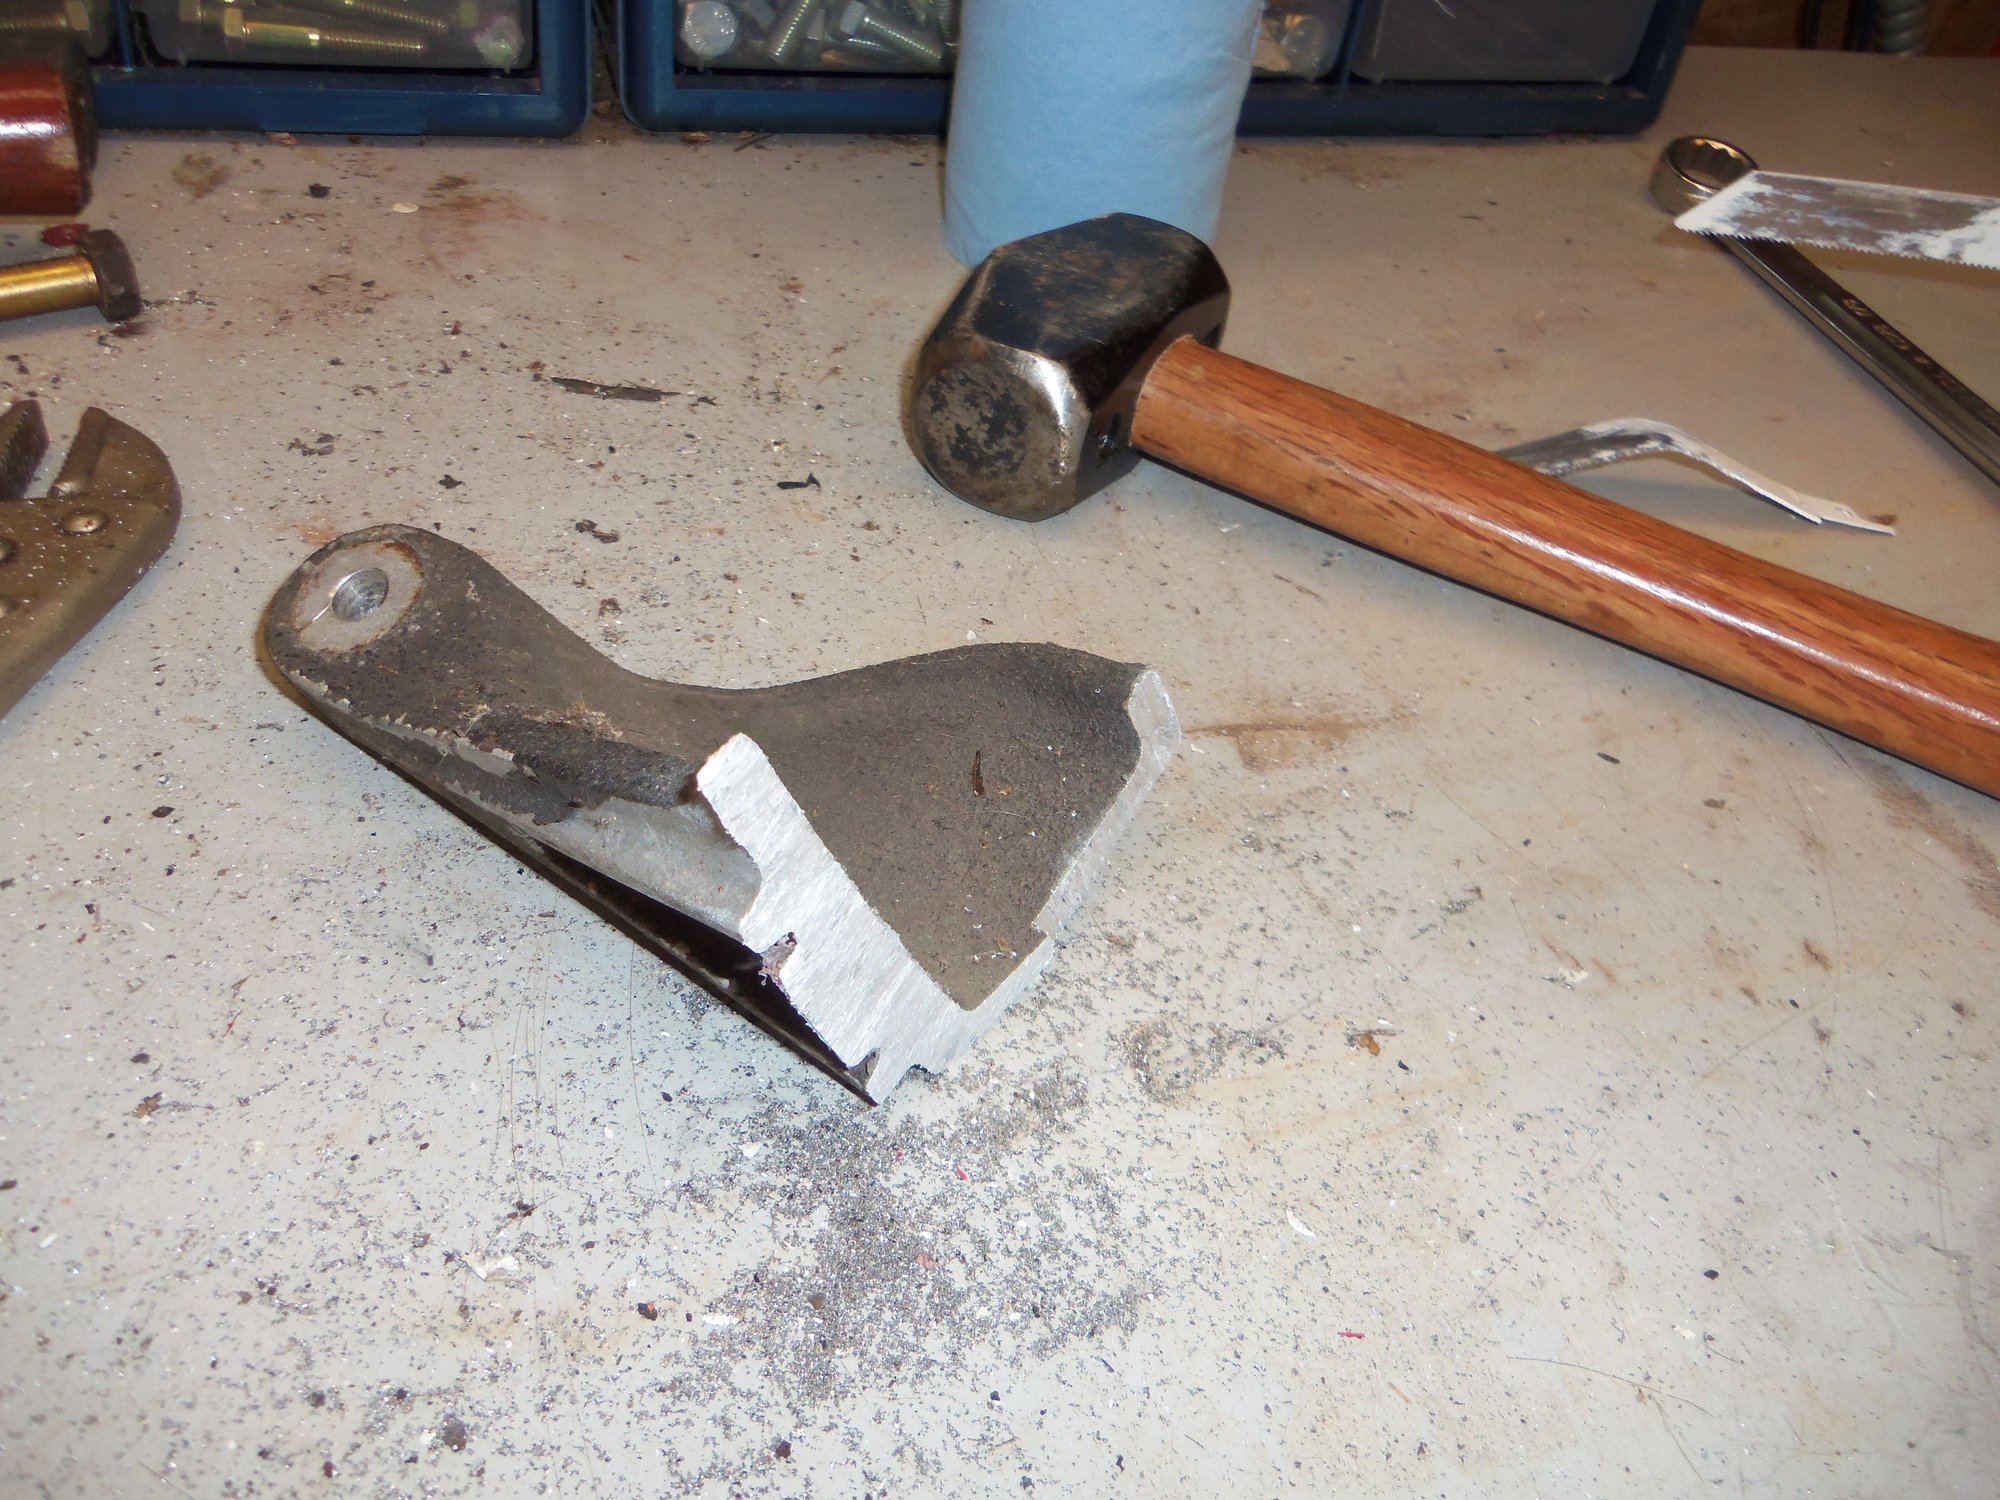
After some really quality time with the reciprocating saw and several blades, I thought I had enough cut off the aluminum mounts to allow them to fit through the bed of my press. Not quite.
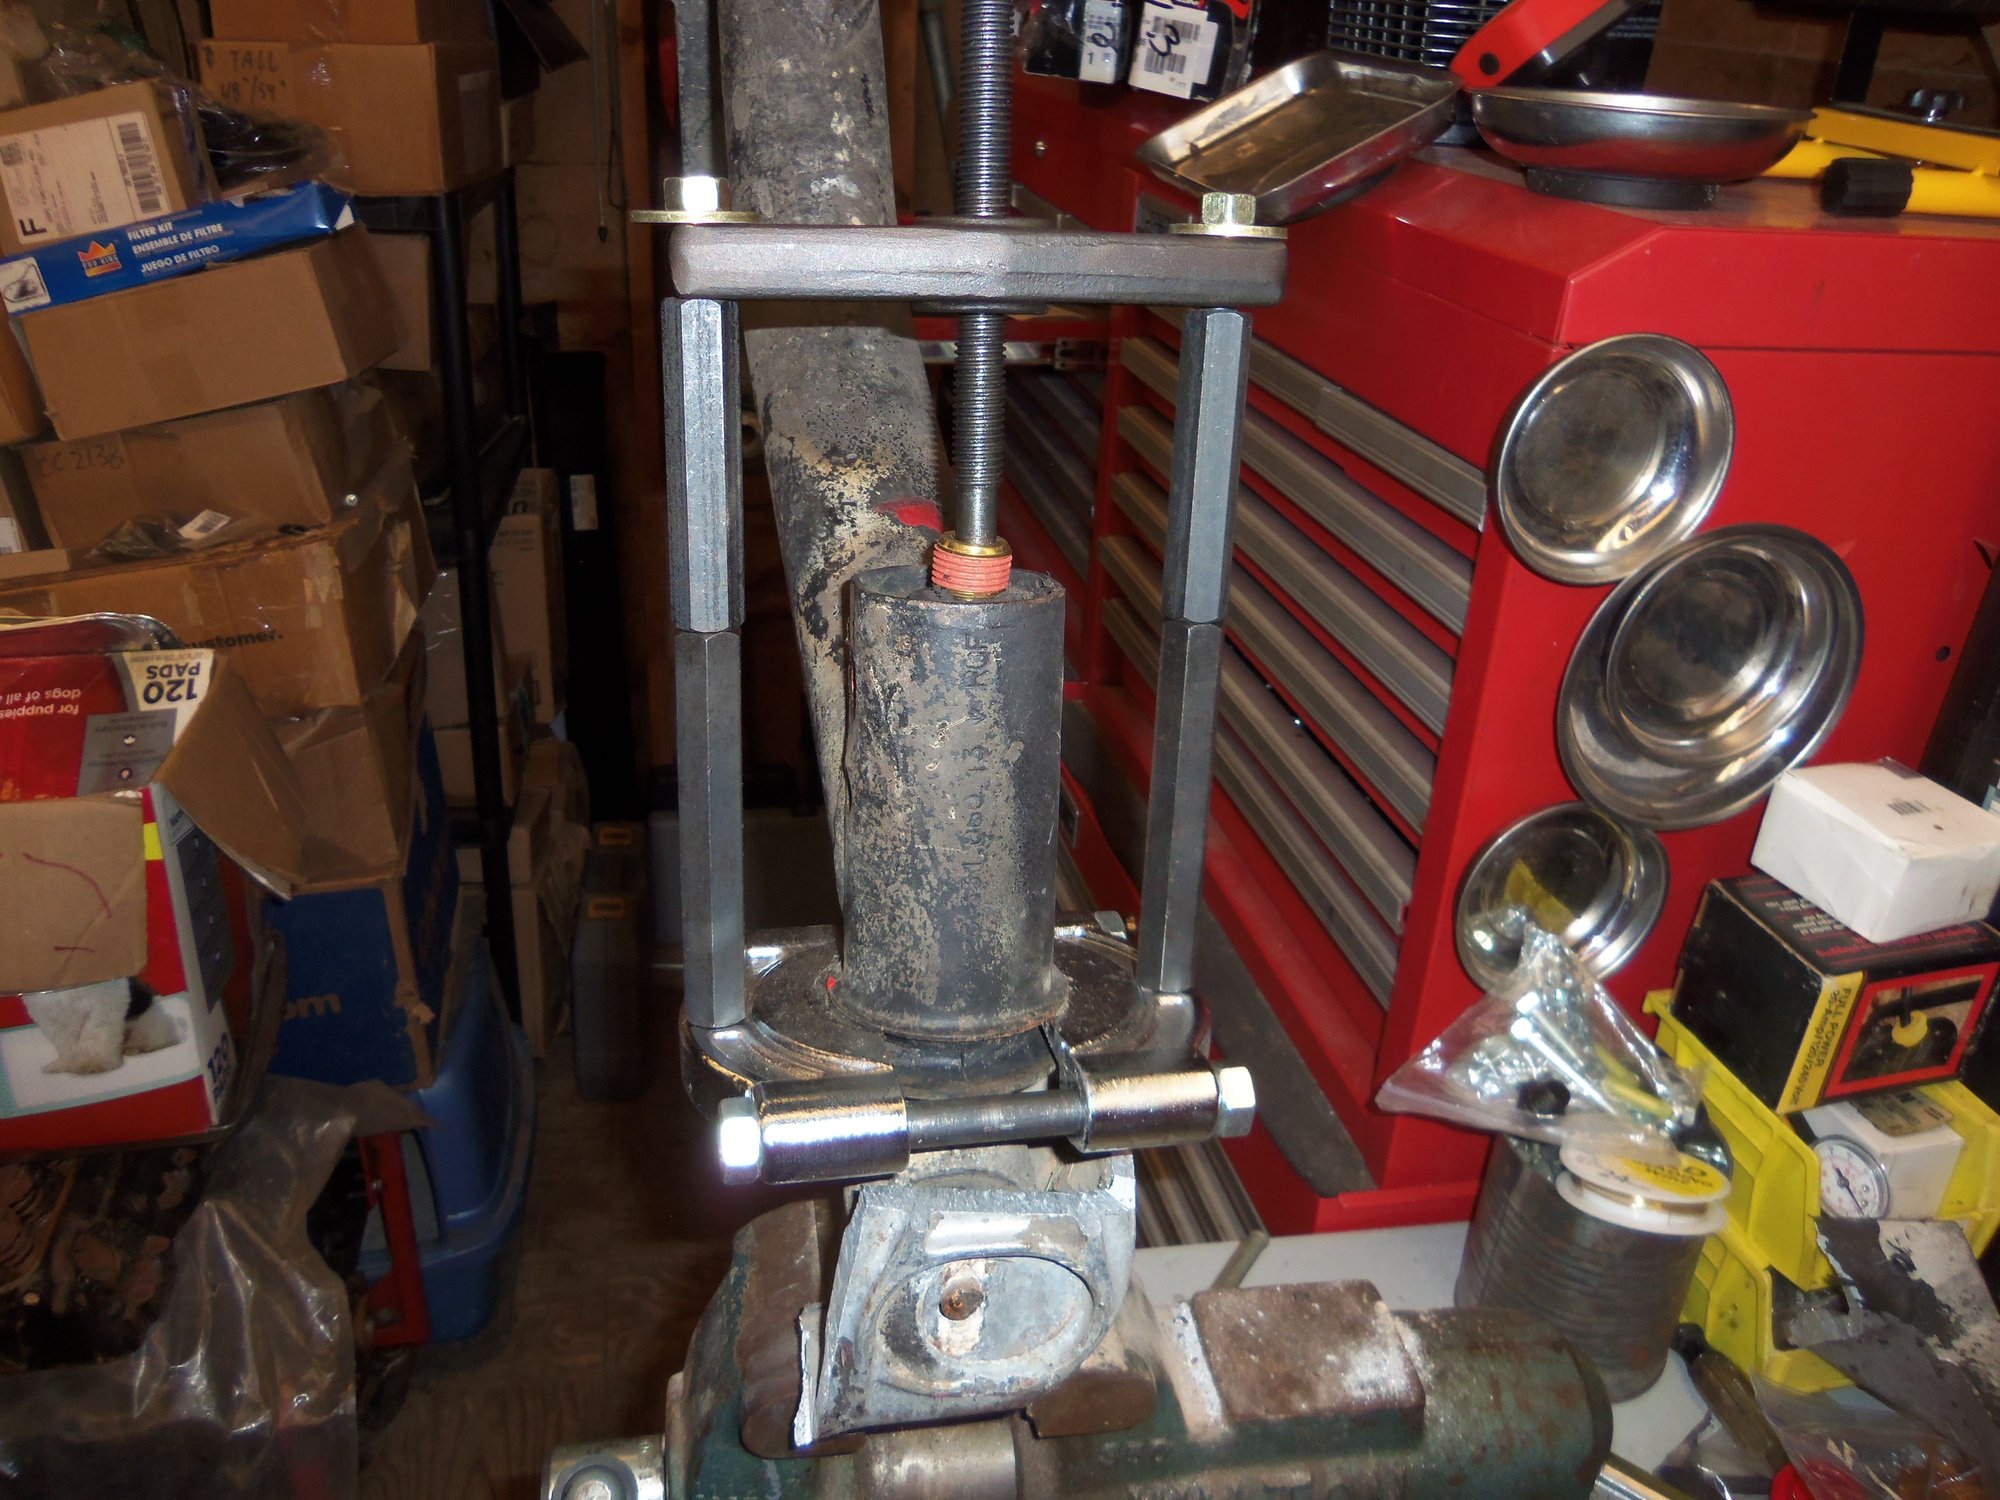
So, I got some scrap bar stock from Tool & Die at work to use as spacers for my press bed. It took some finagling, but I got everything jigged up and started applying pressure. To my surprise(and secret delight), the rocker bar started moving right out. Unfortunately, I ran out of press travel due to the cut up mount not being cut up enough.
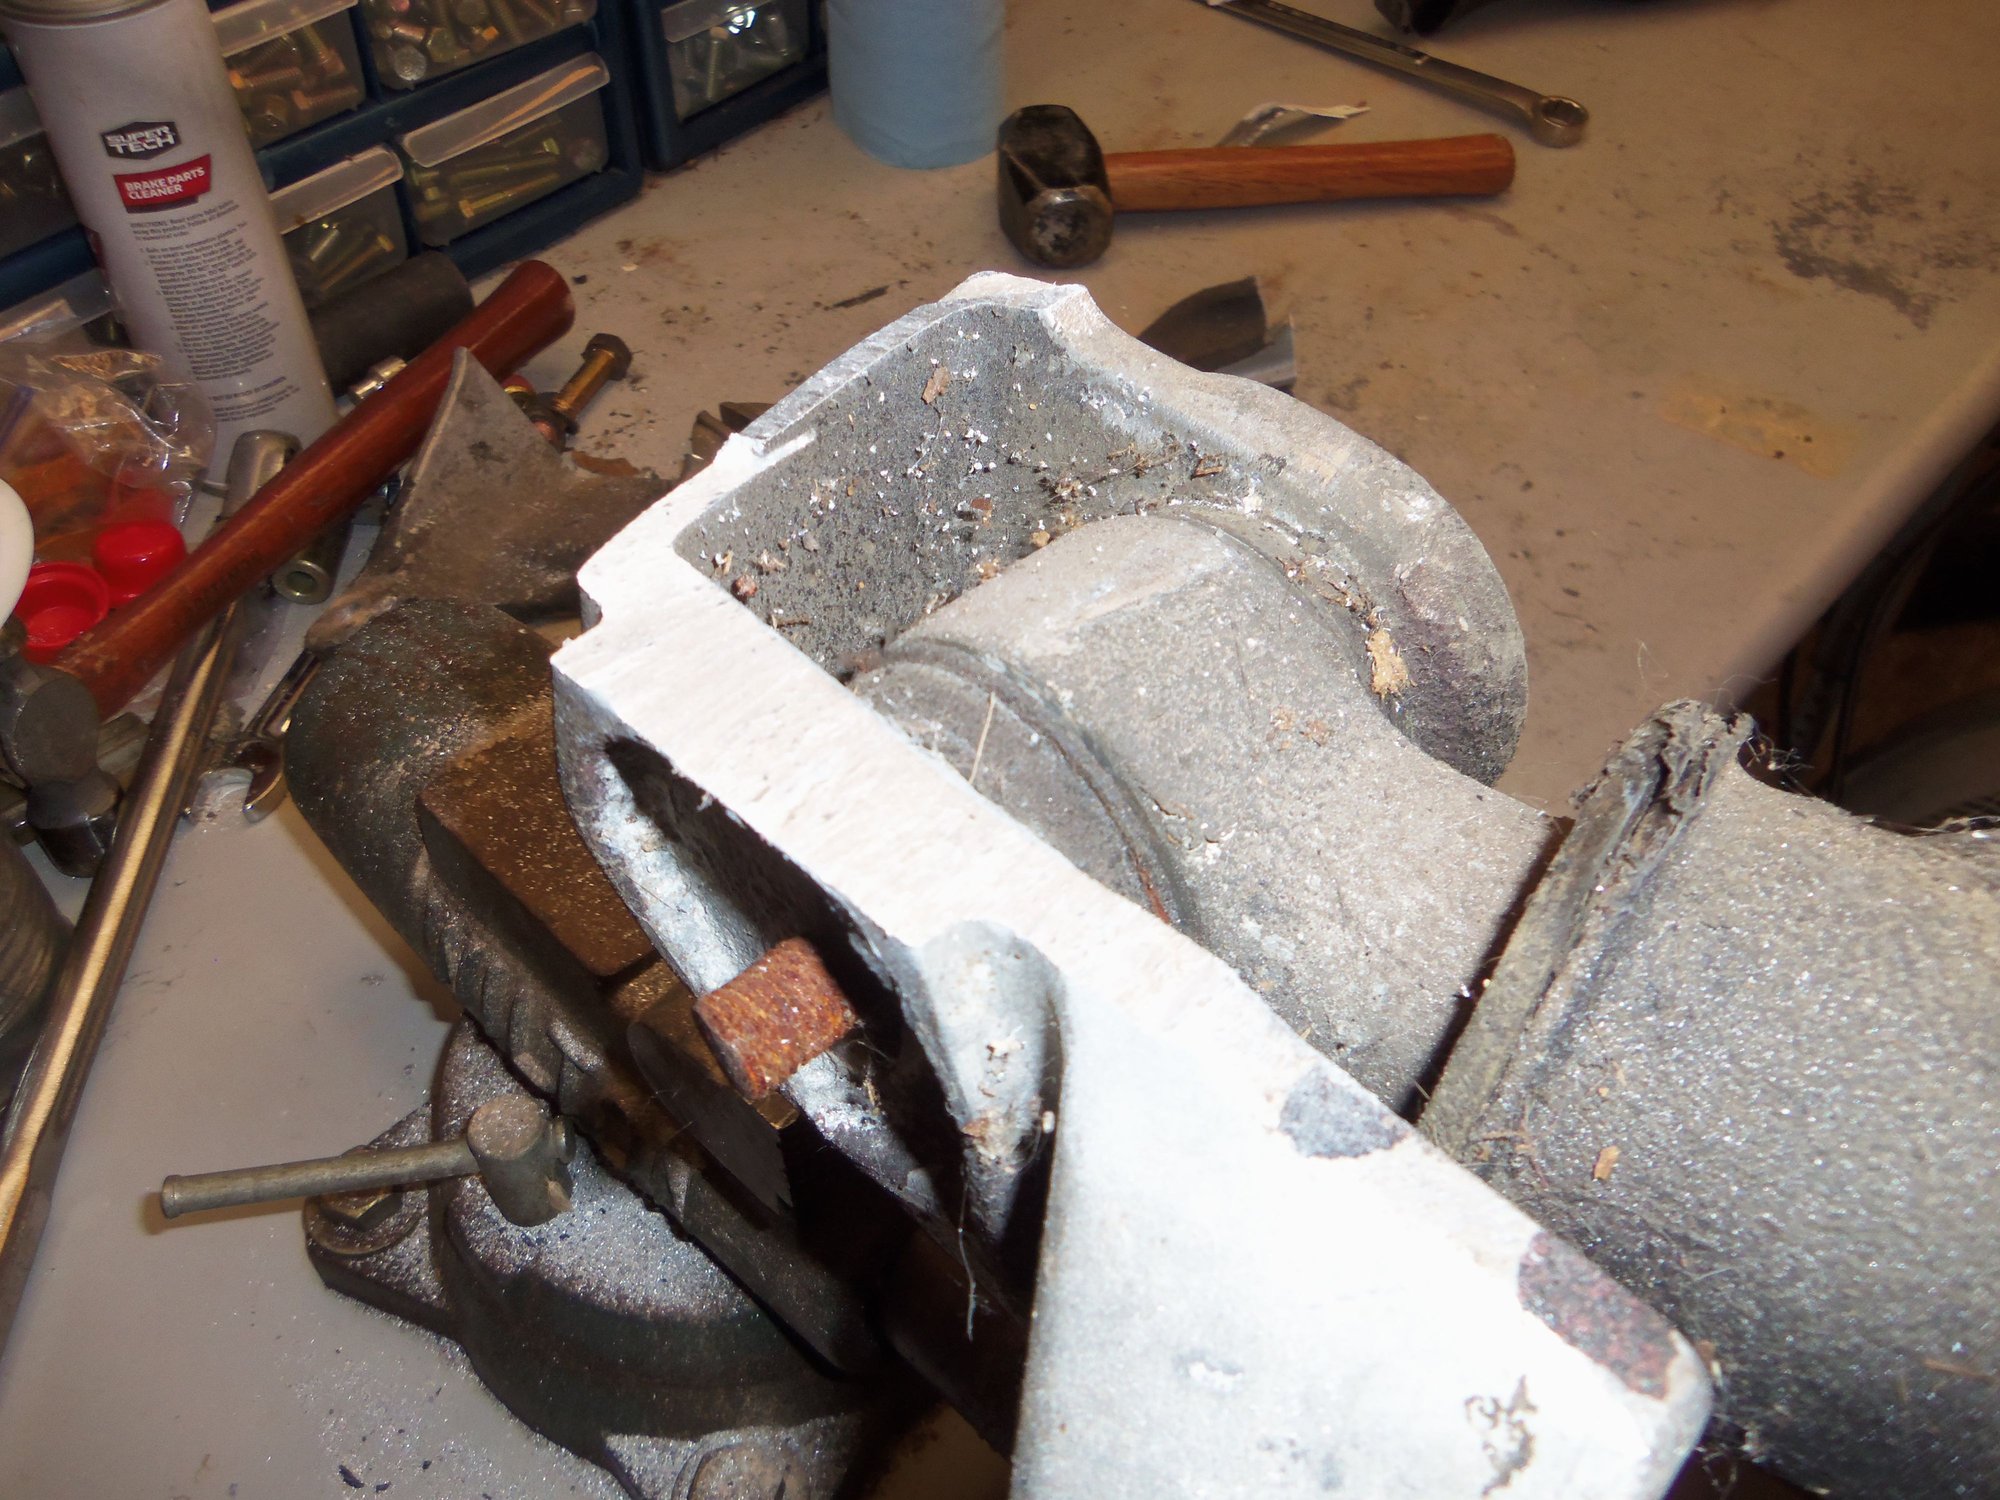
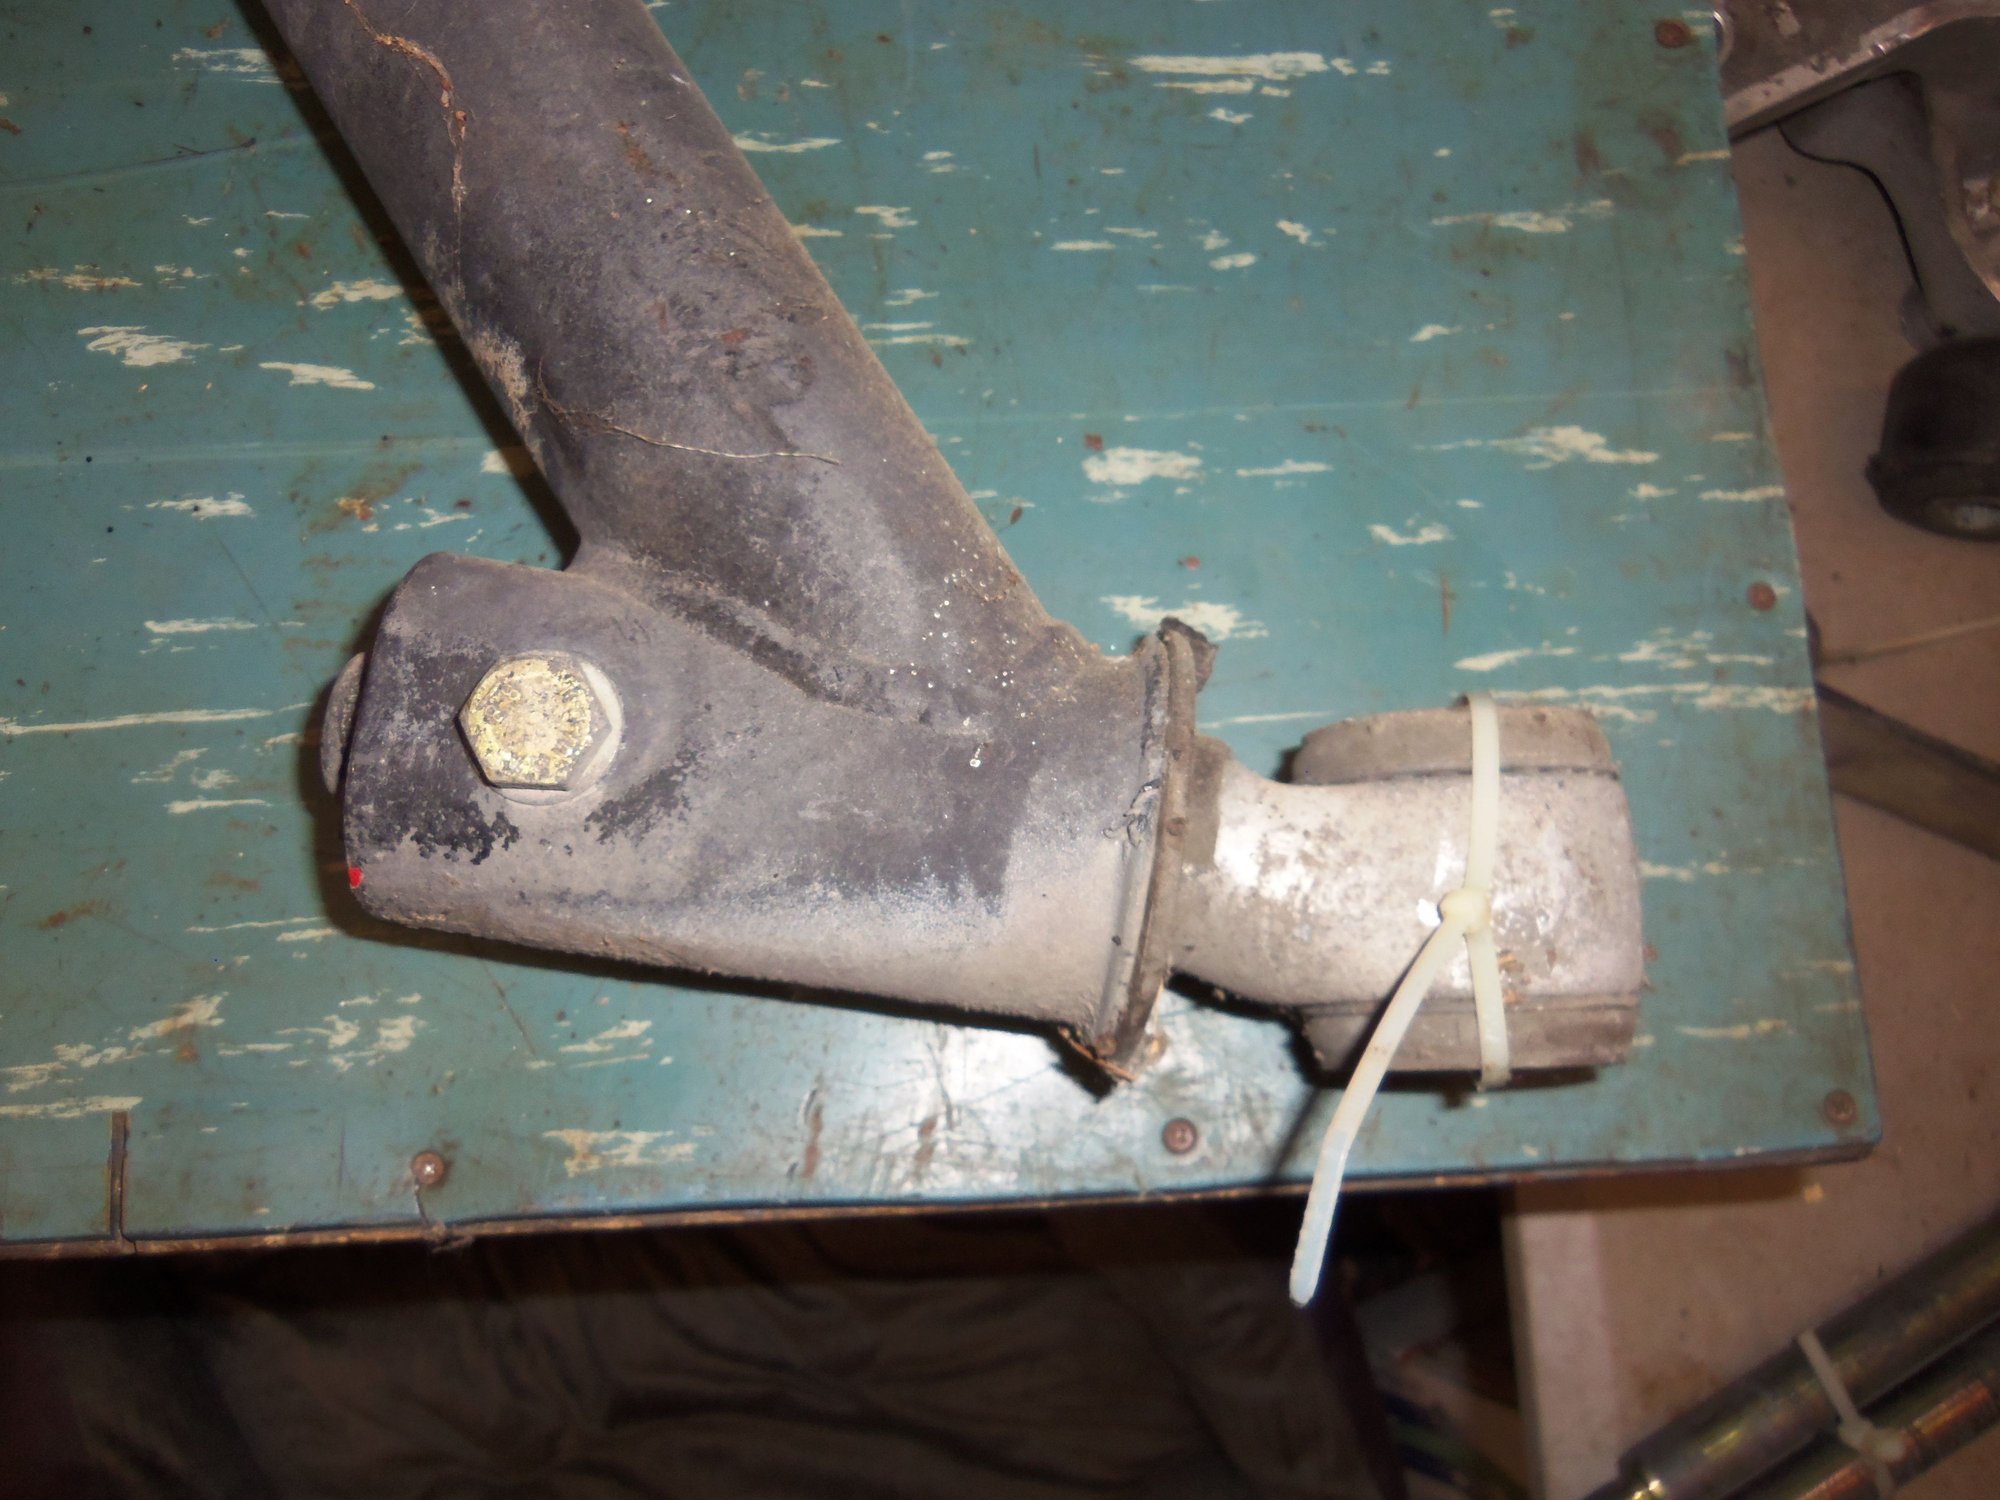
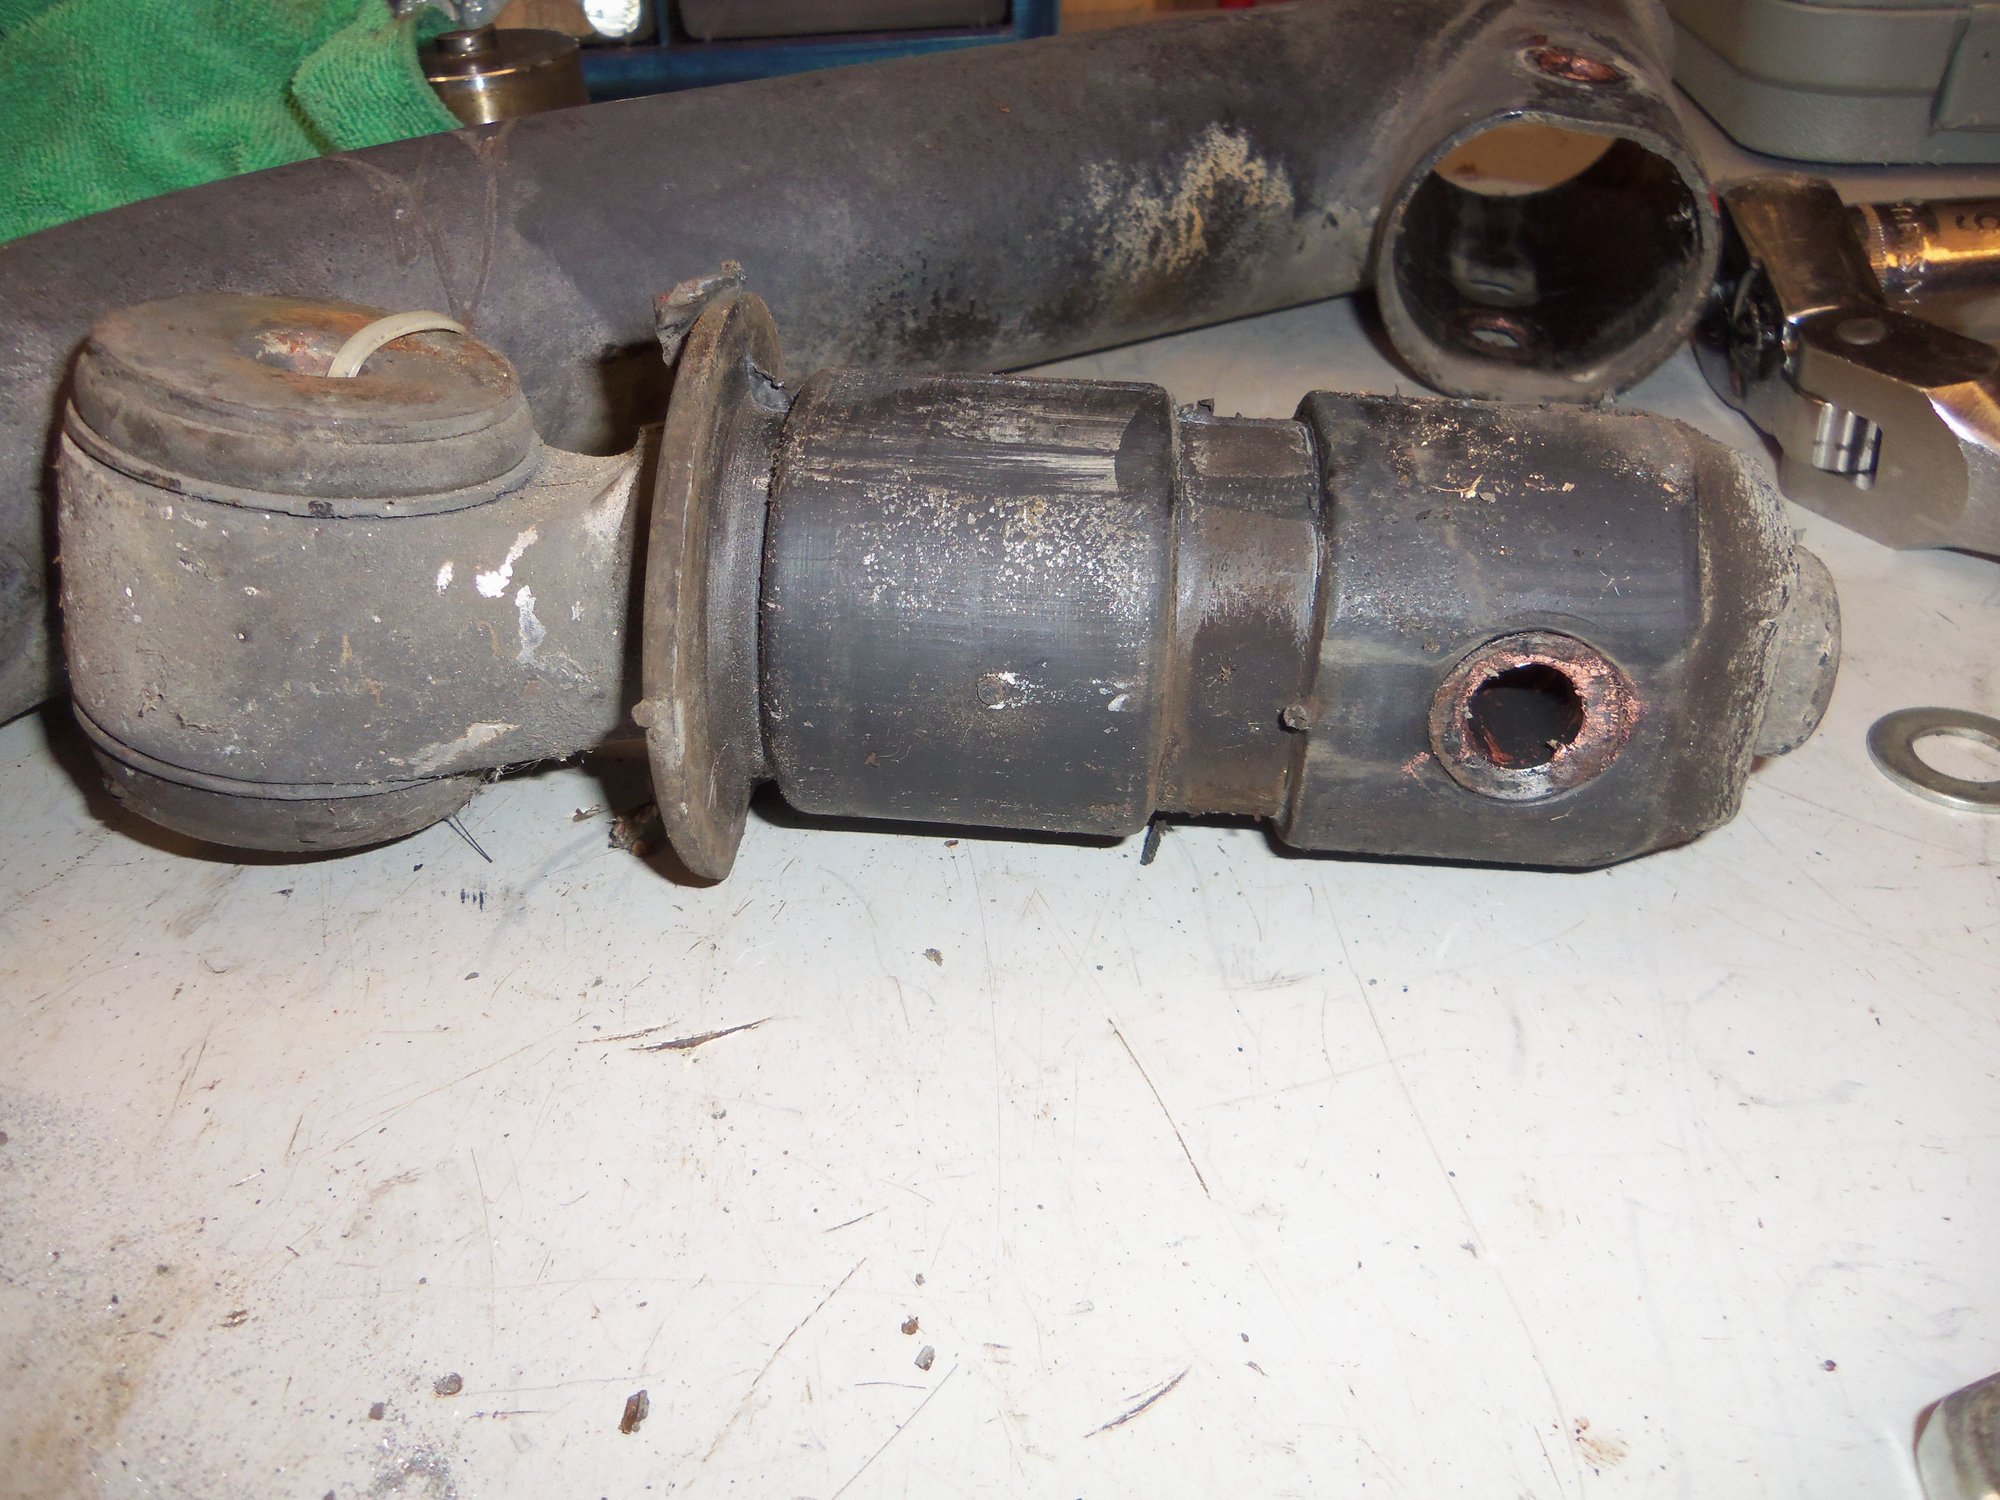
I transferred this circus over to the vise on my work bench. I brought out a bearing separator that was JUST big enough to fit around the rocker bar. I was able to use the bearing separator and puller set to push the rocker bar the rest of the way out of the control arm. And, no damage to the rubber bushing surrounding the rocker bar.
For the other control arm, I didn't even bother with the press. I only cut enough material off the mount to allow fitting of the bearing separator. Again with the bearing separator and puller, I pushed the rocker bar out of the other control arm.
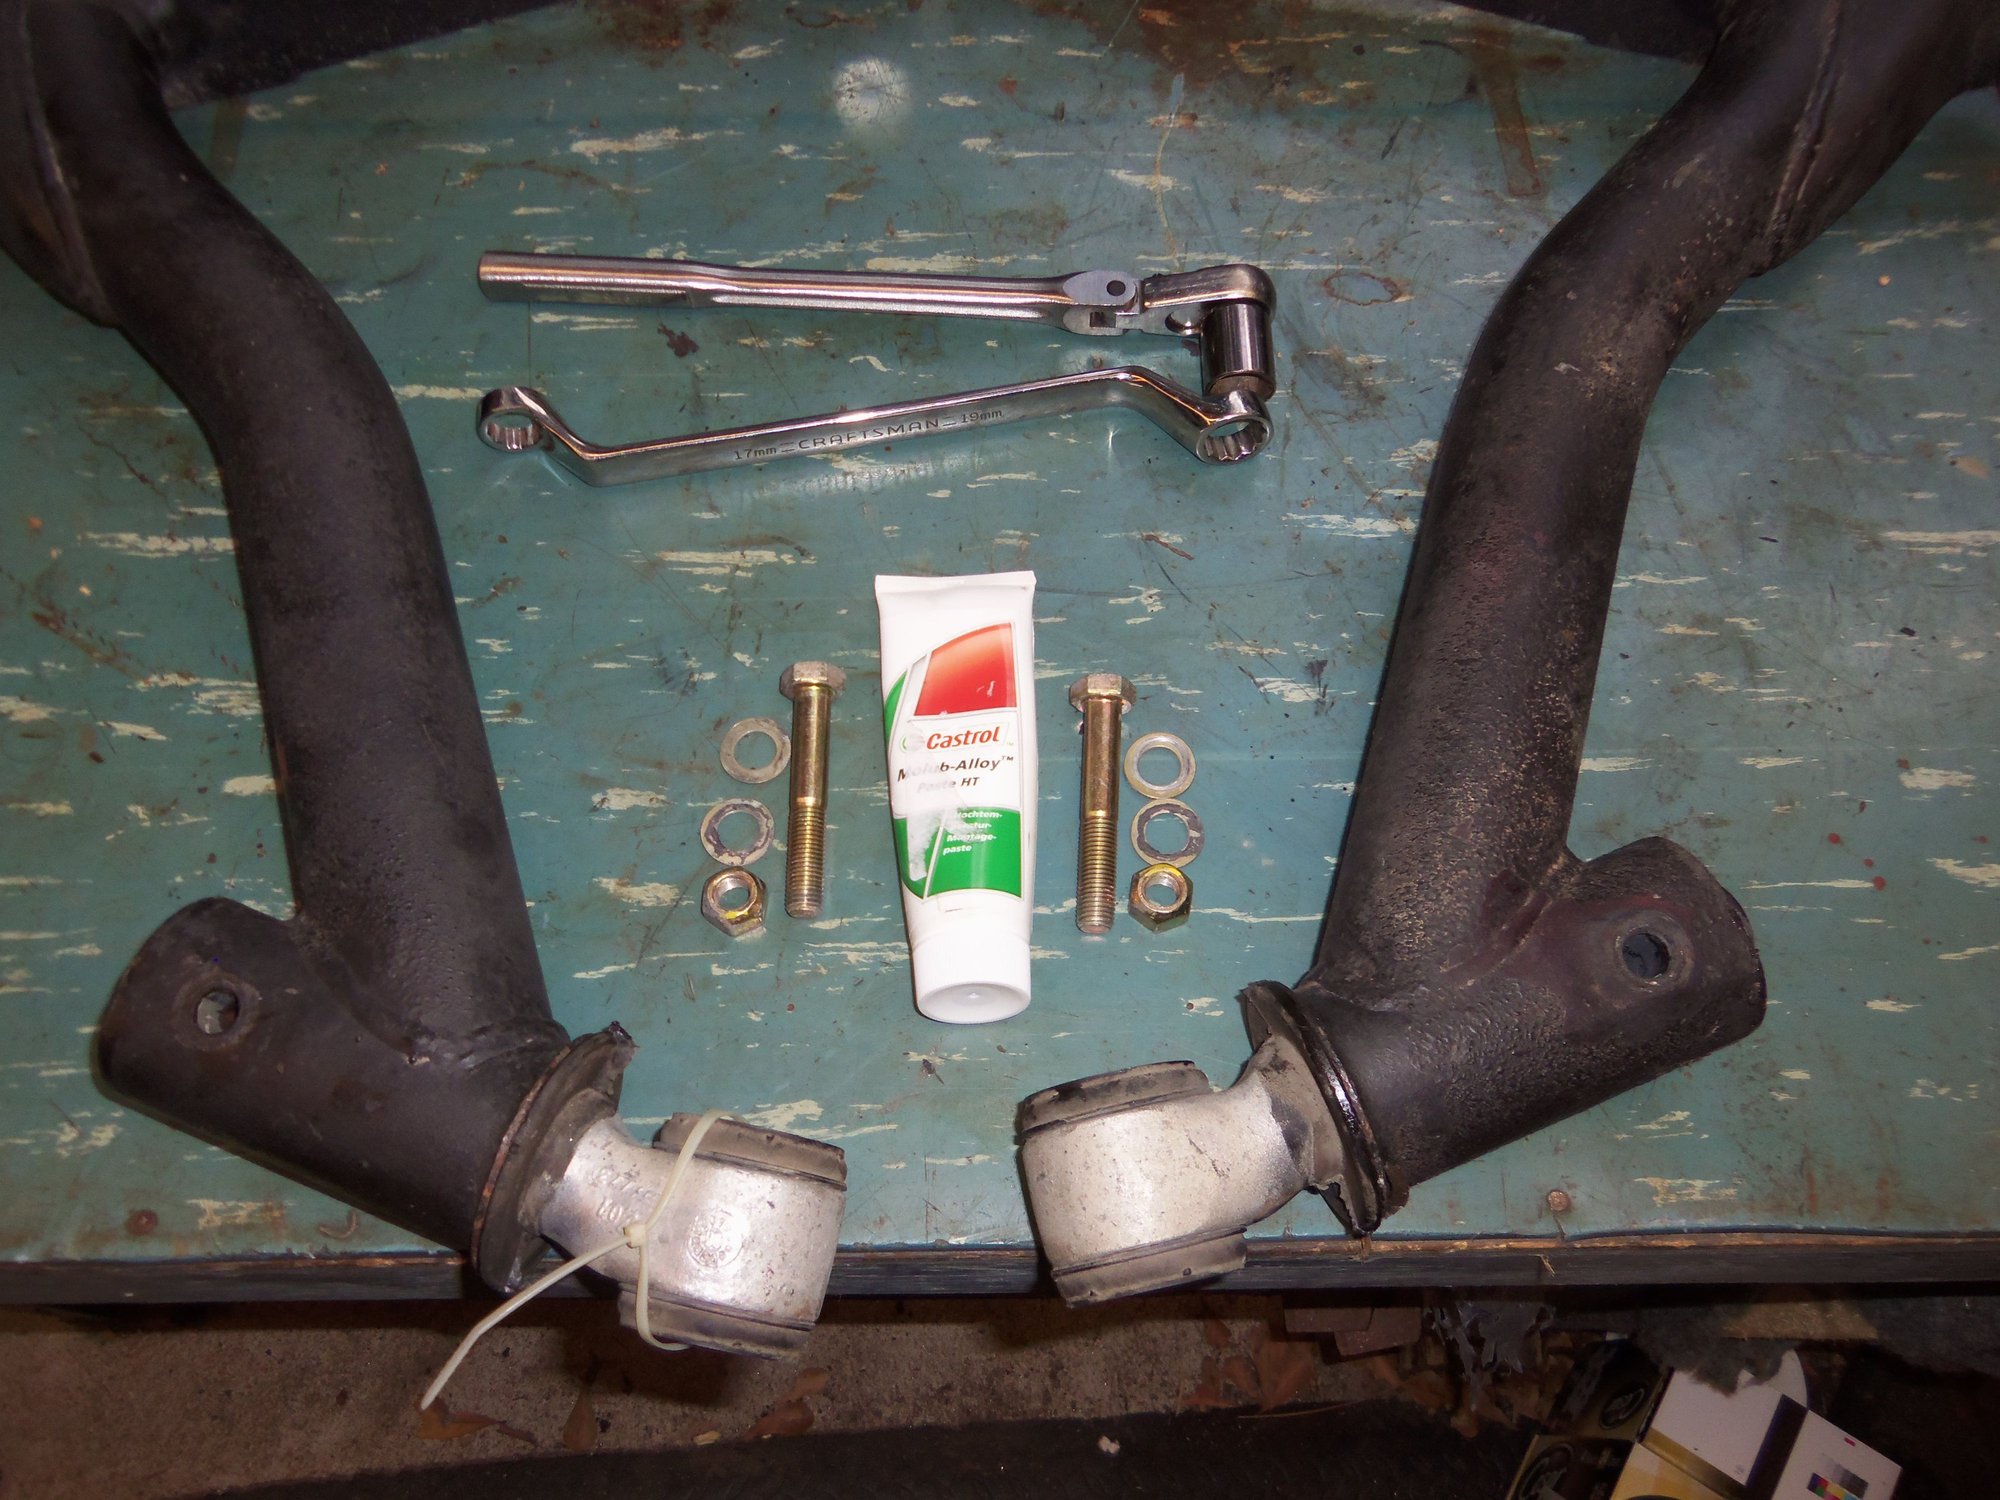
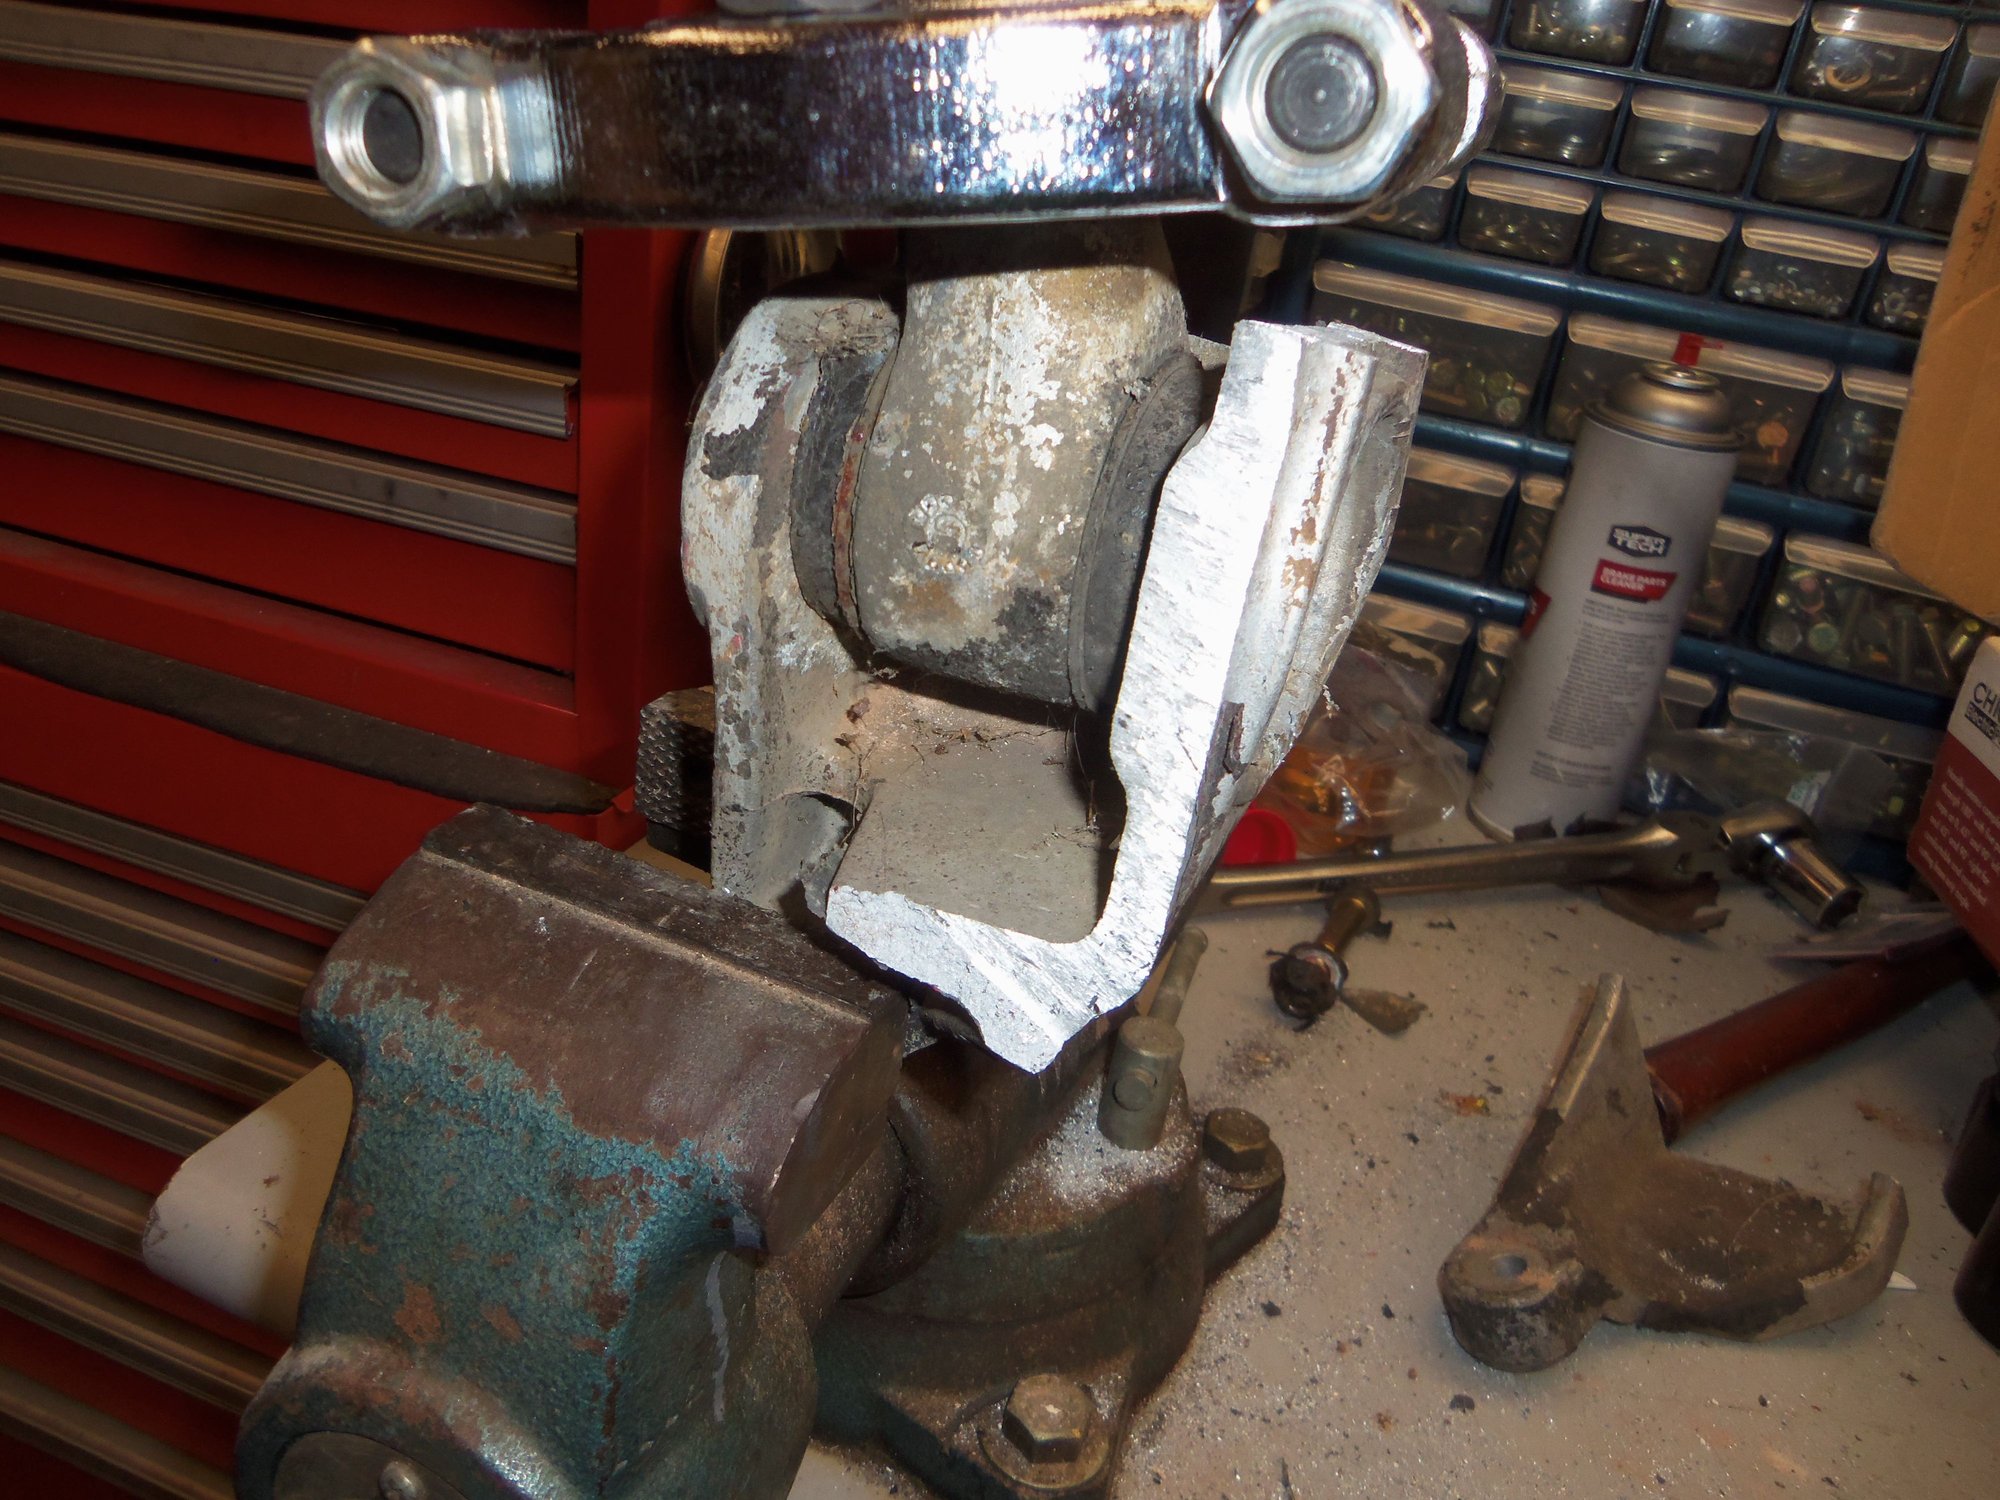
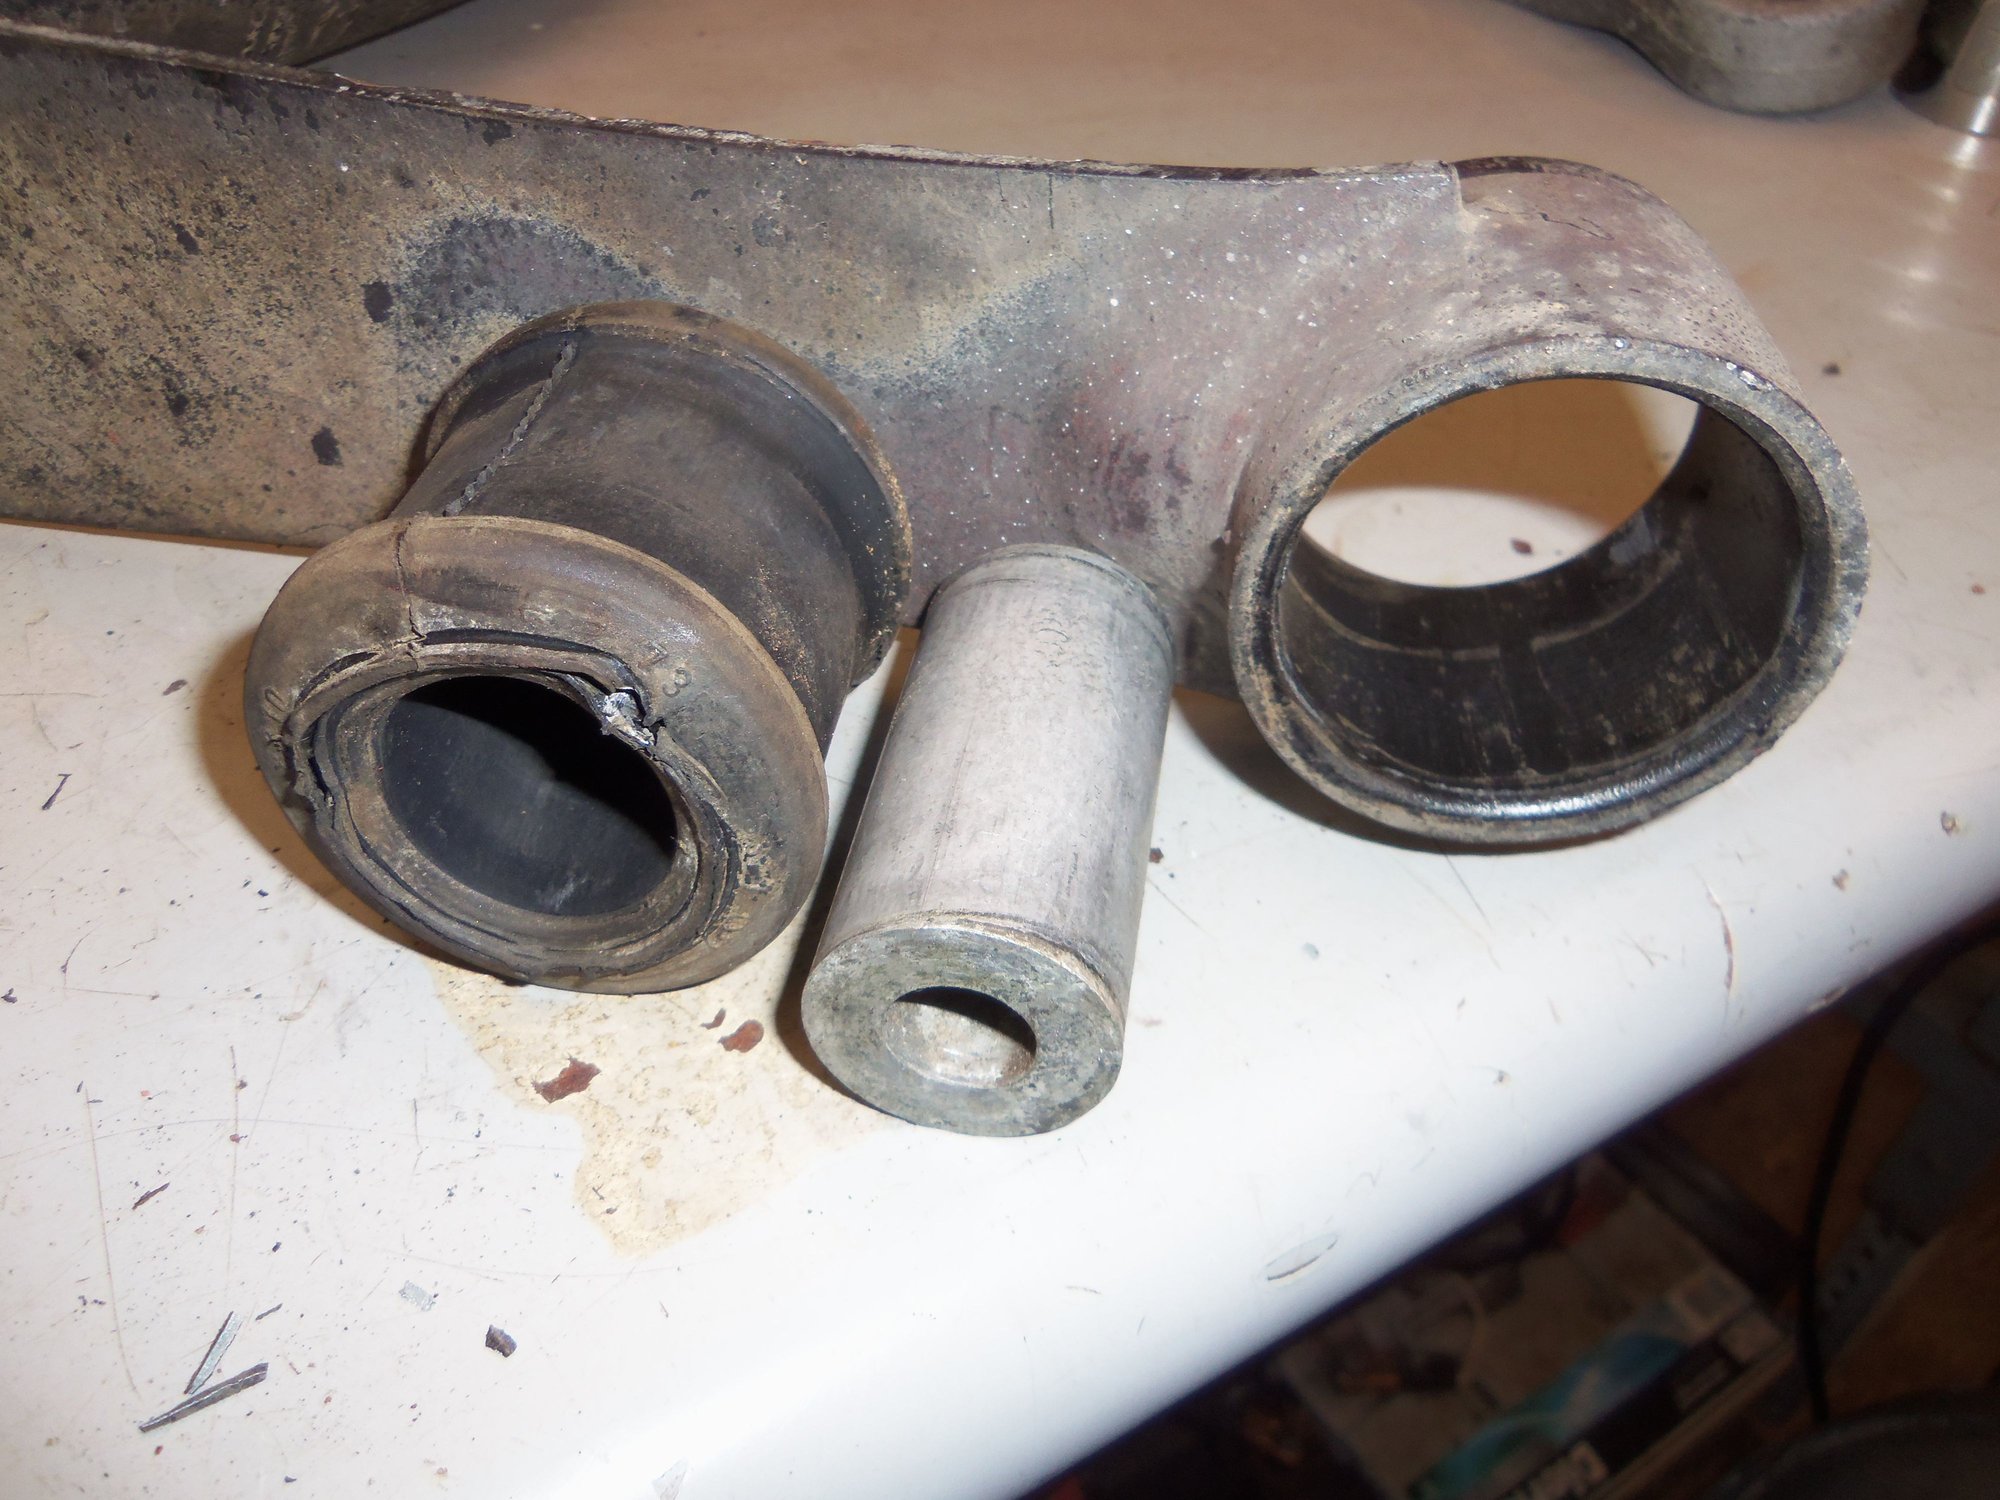
Results of fun with reciprocating saw.
Circus-like, but it worked.
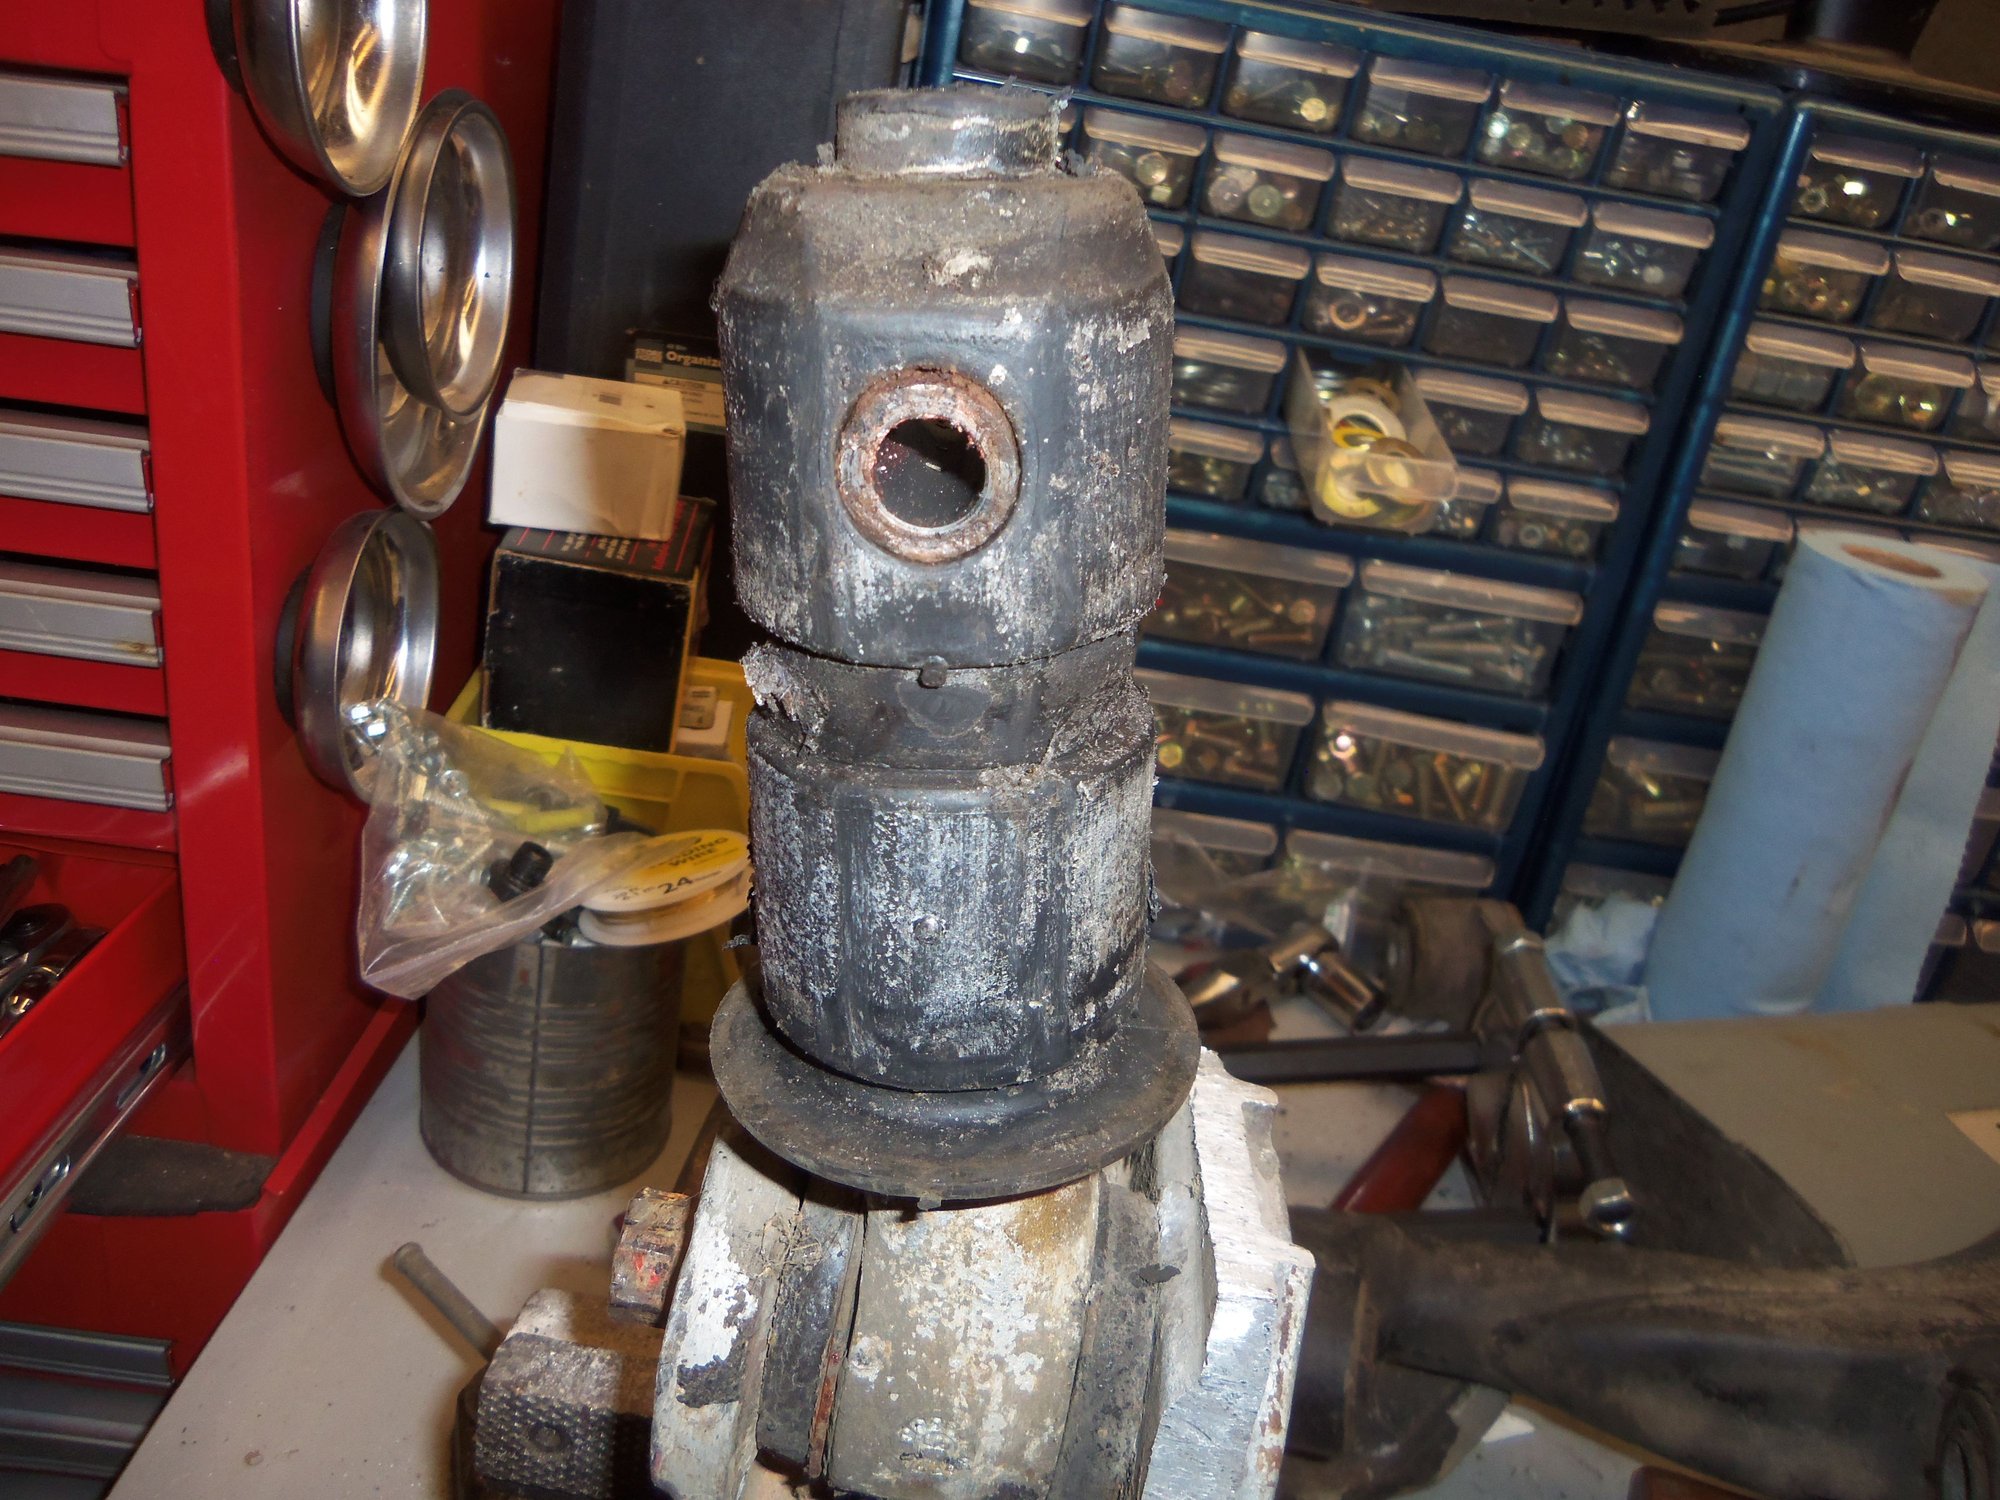
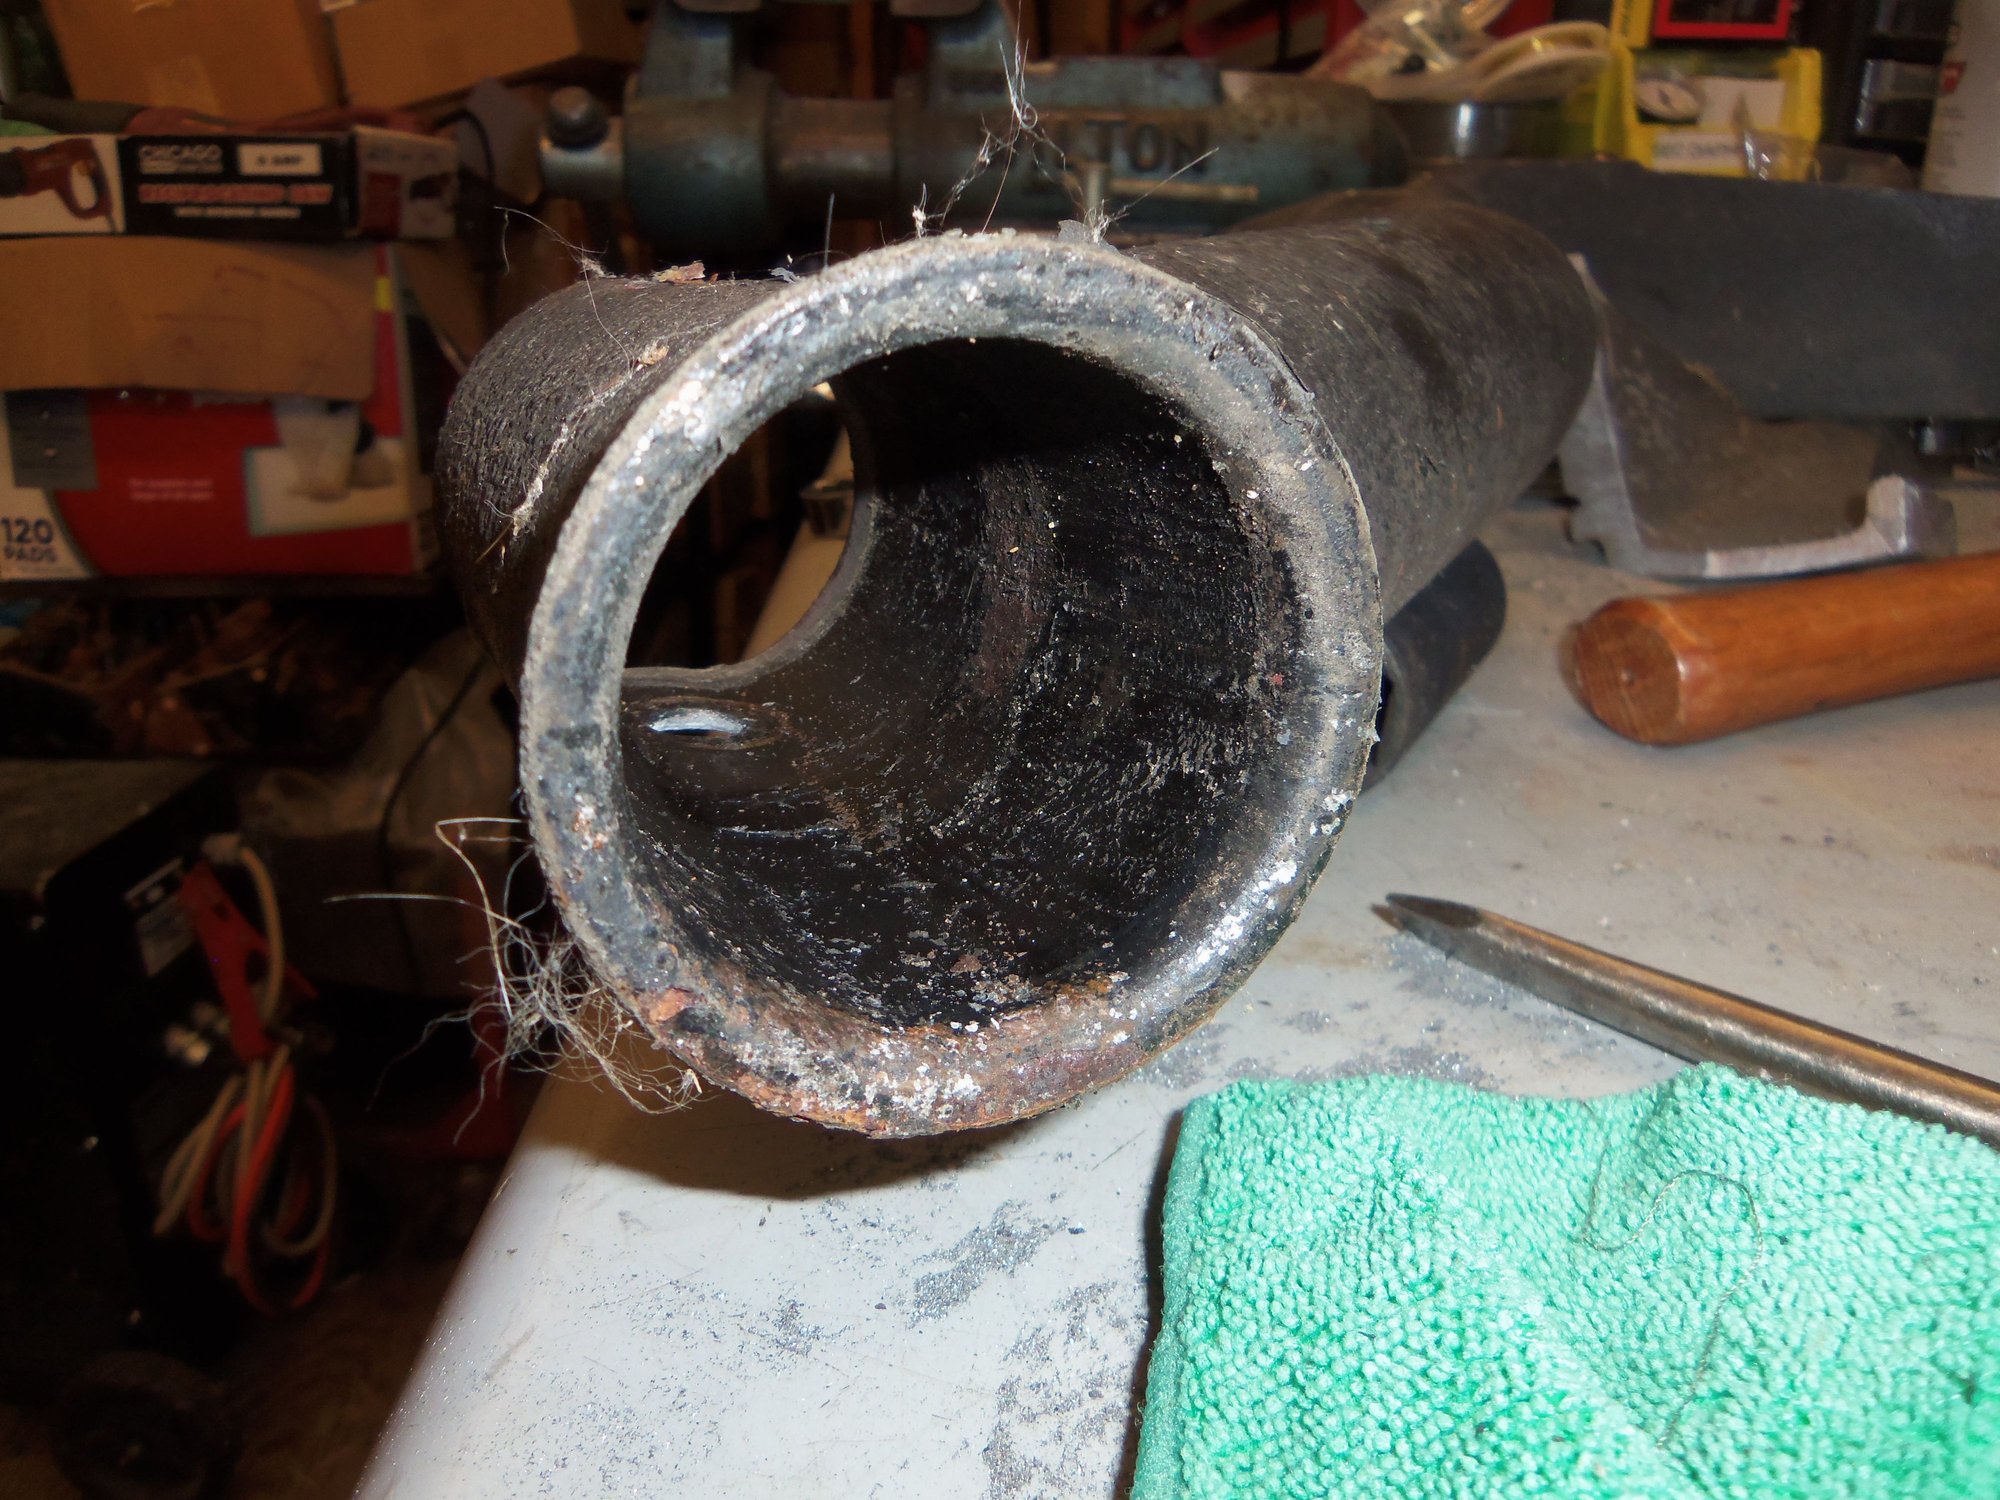
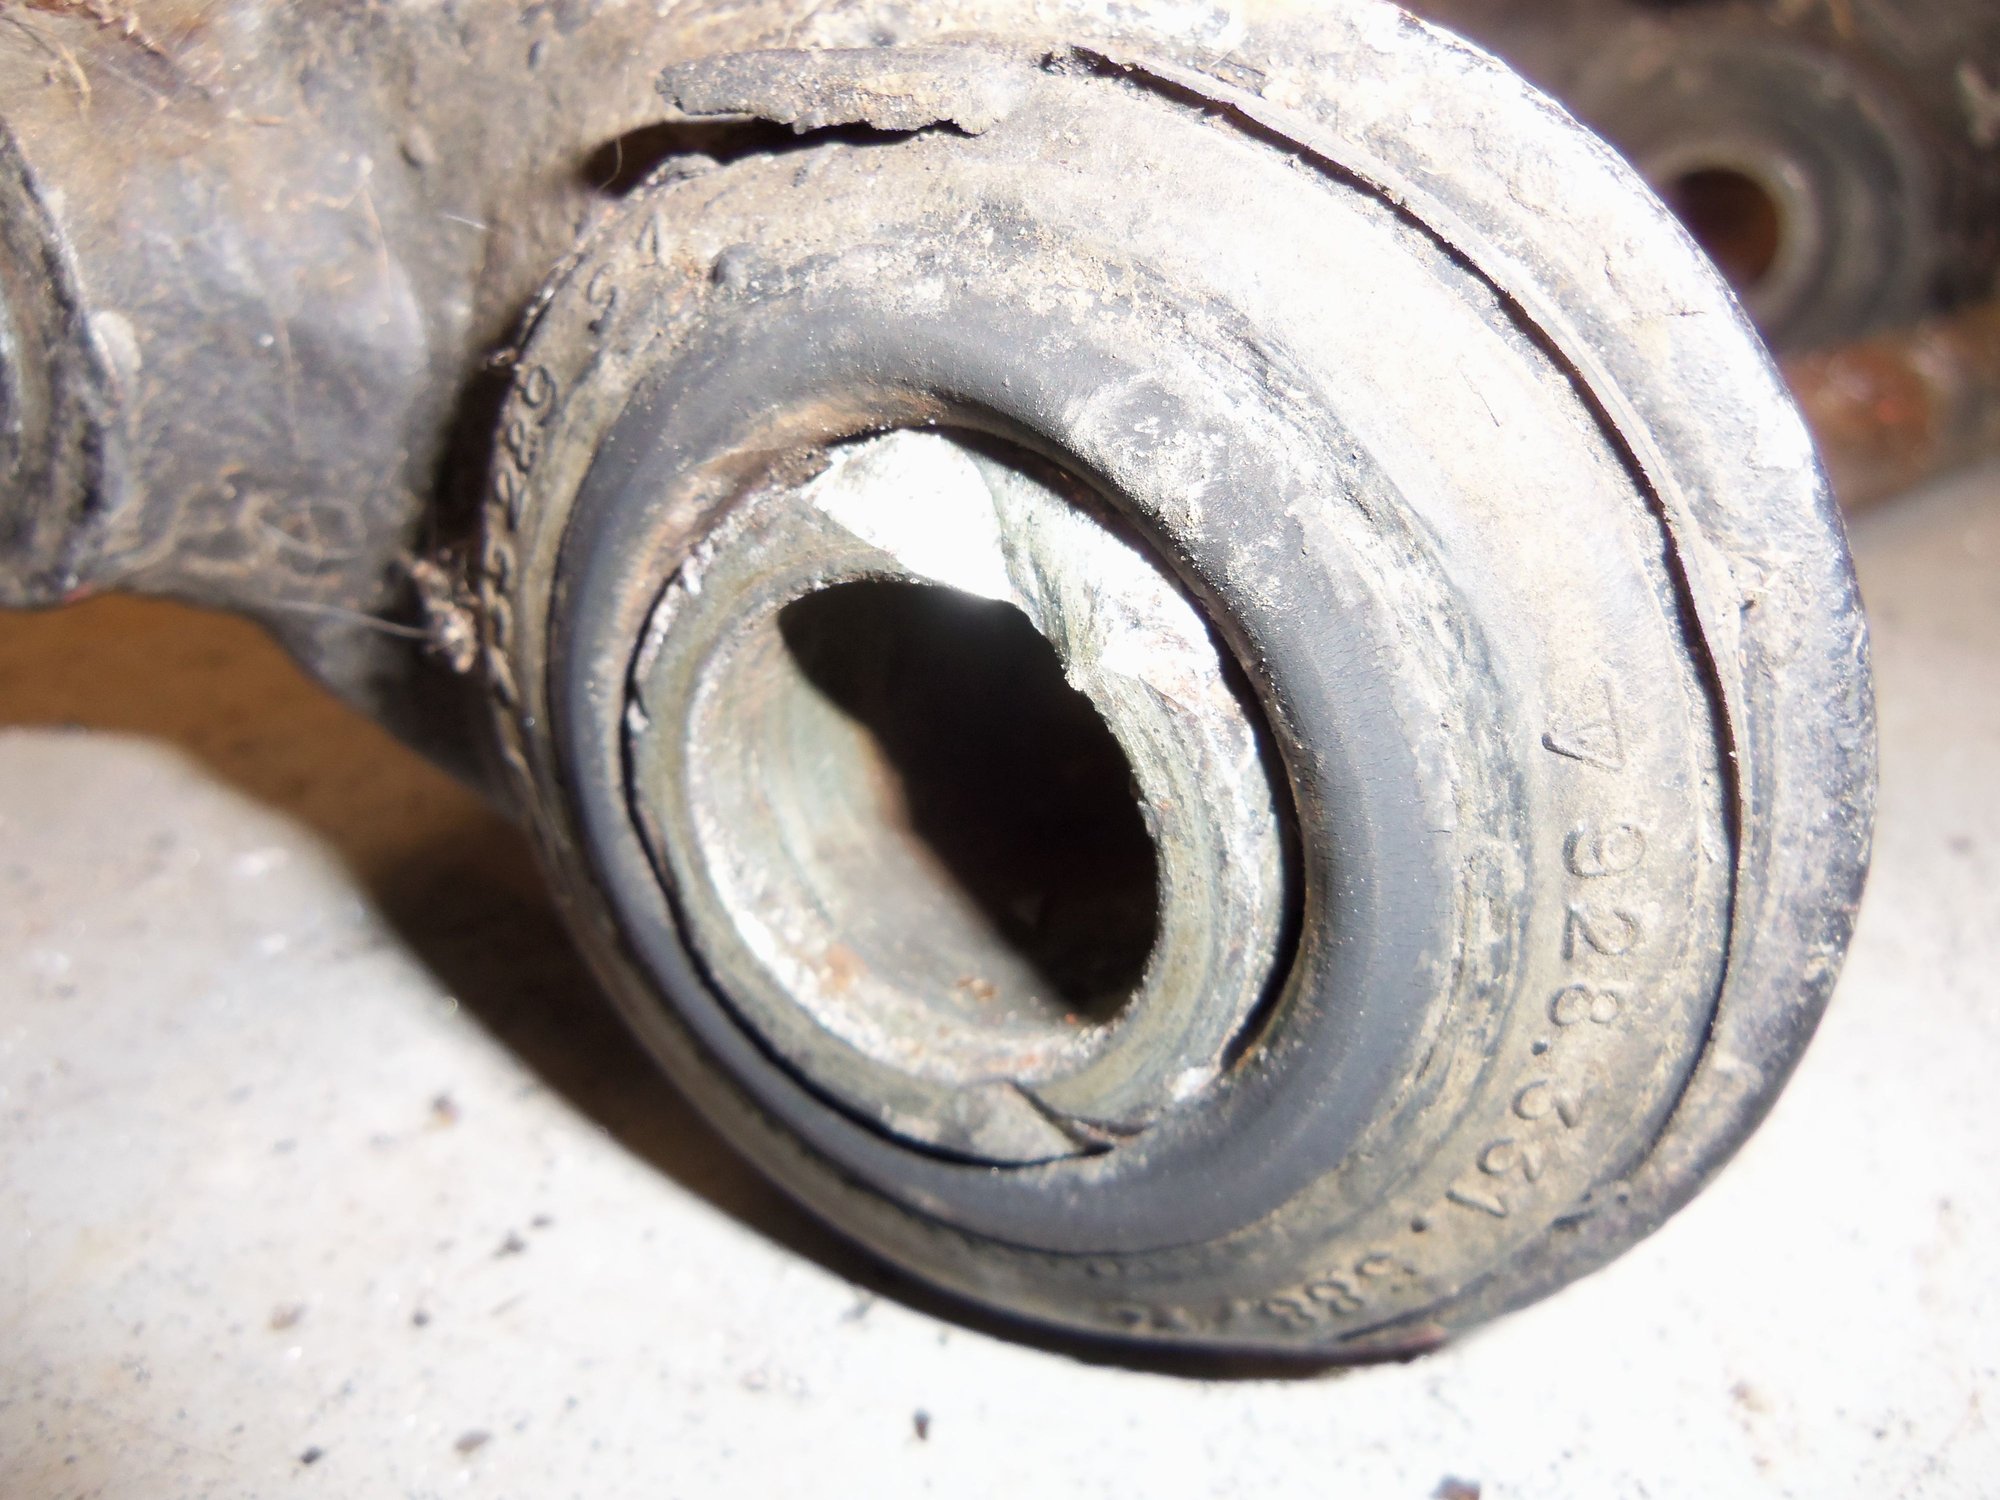
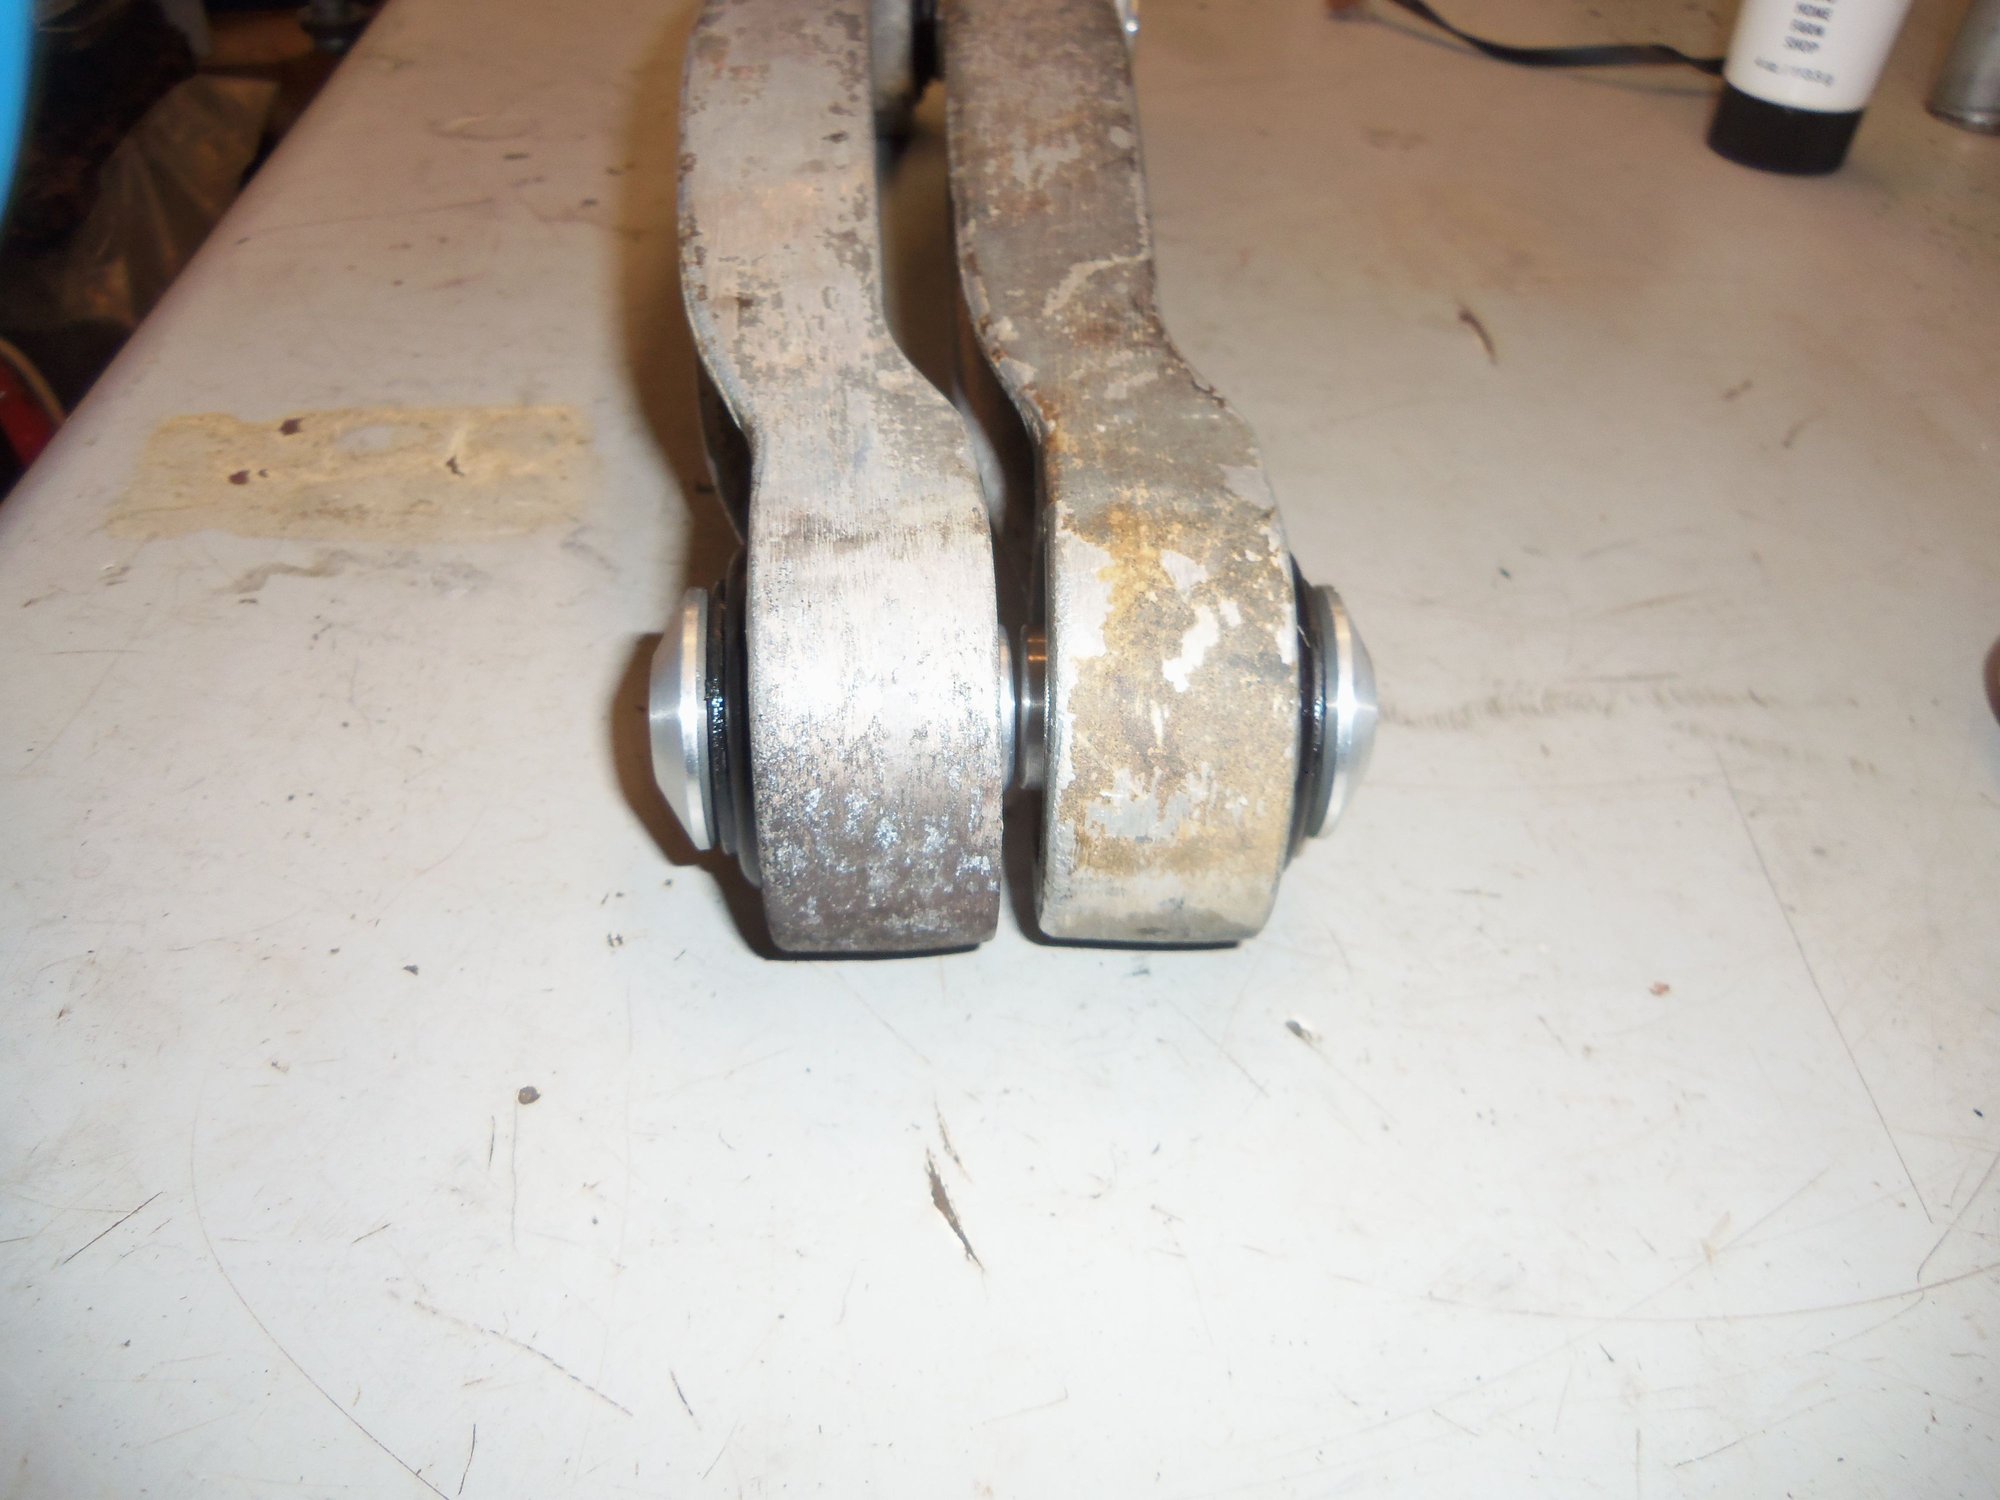
Rocker shaft bushing is undamaged.
View of the bushing 90 degrees out.
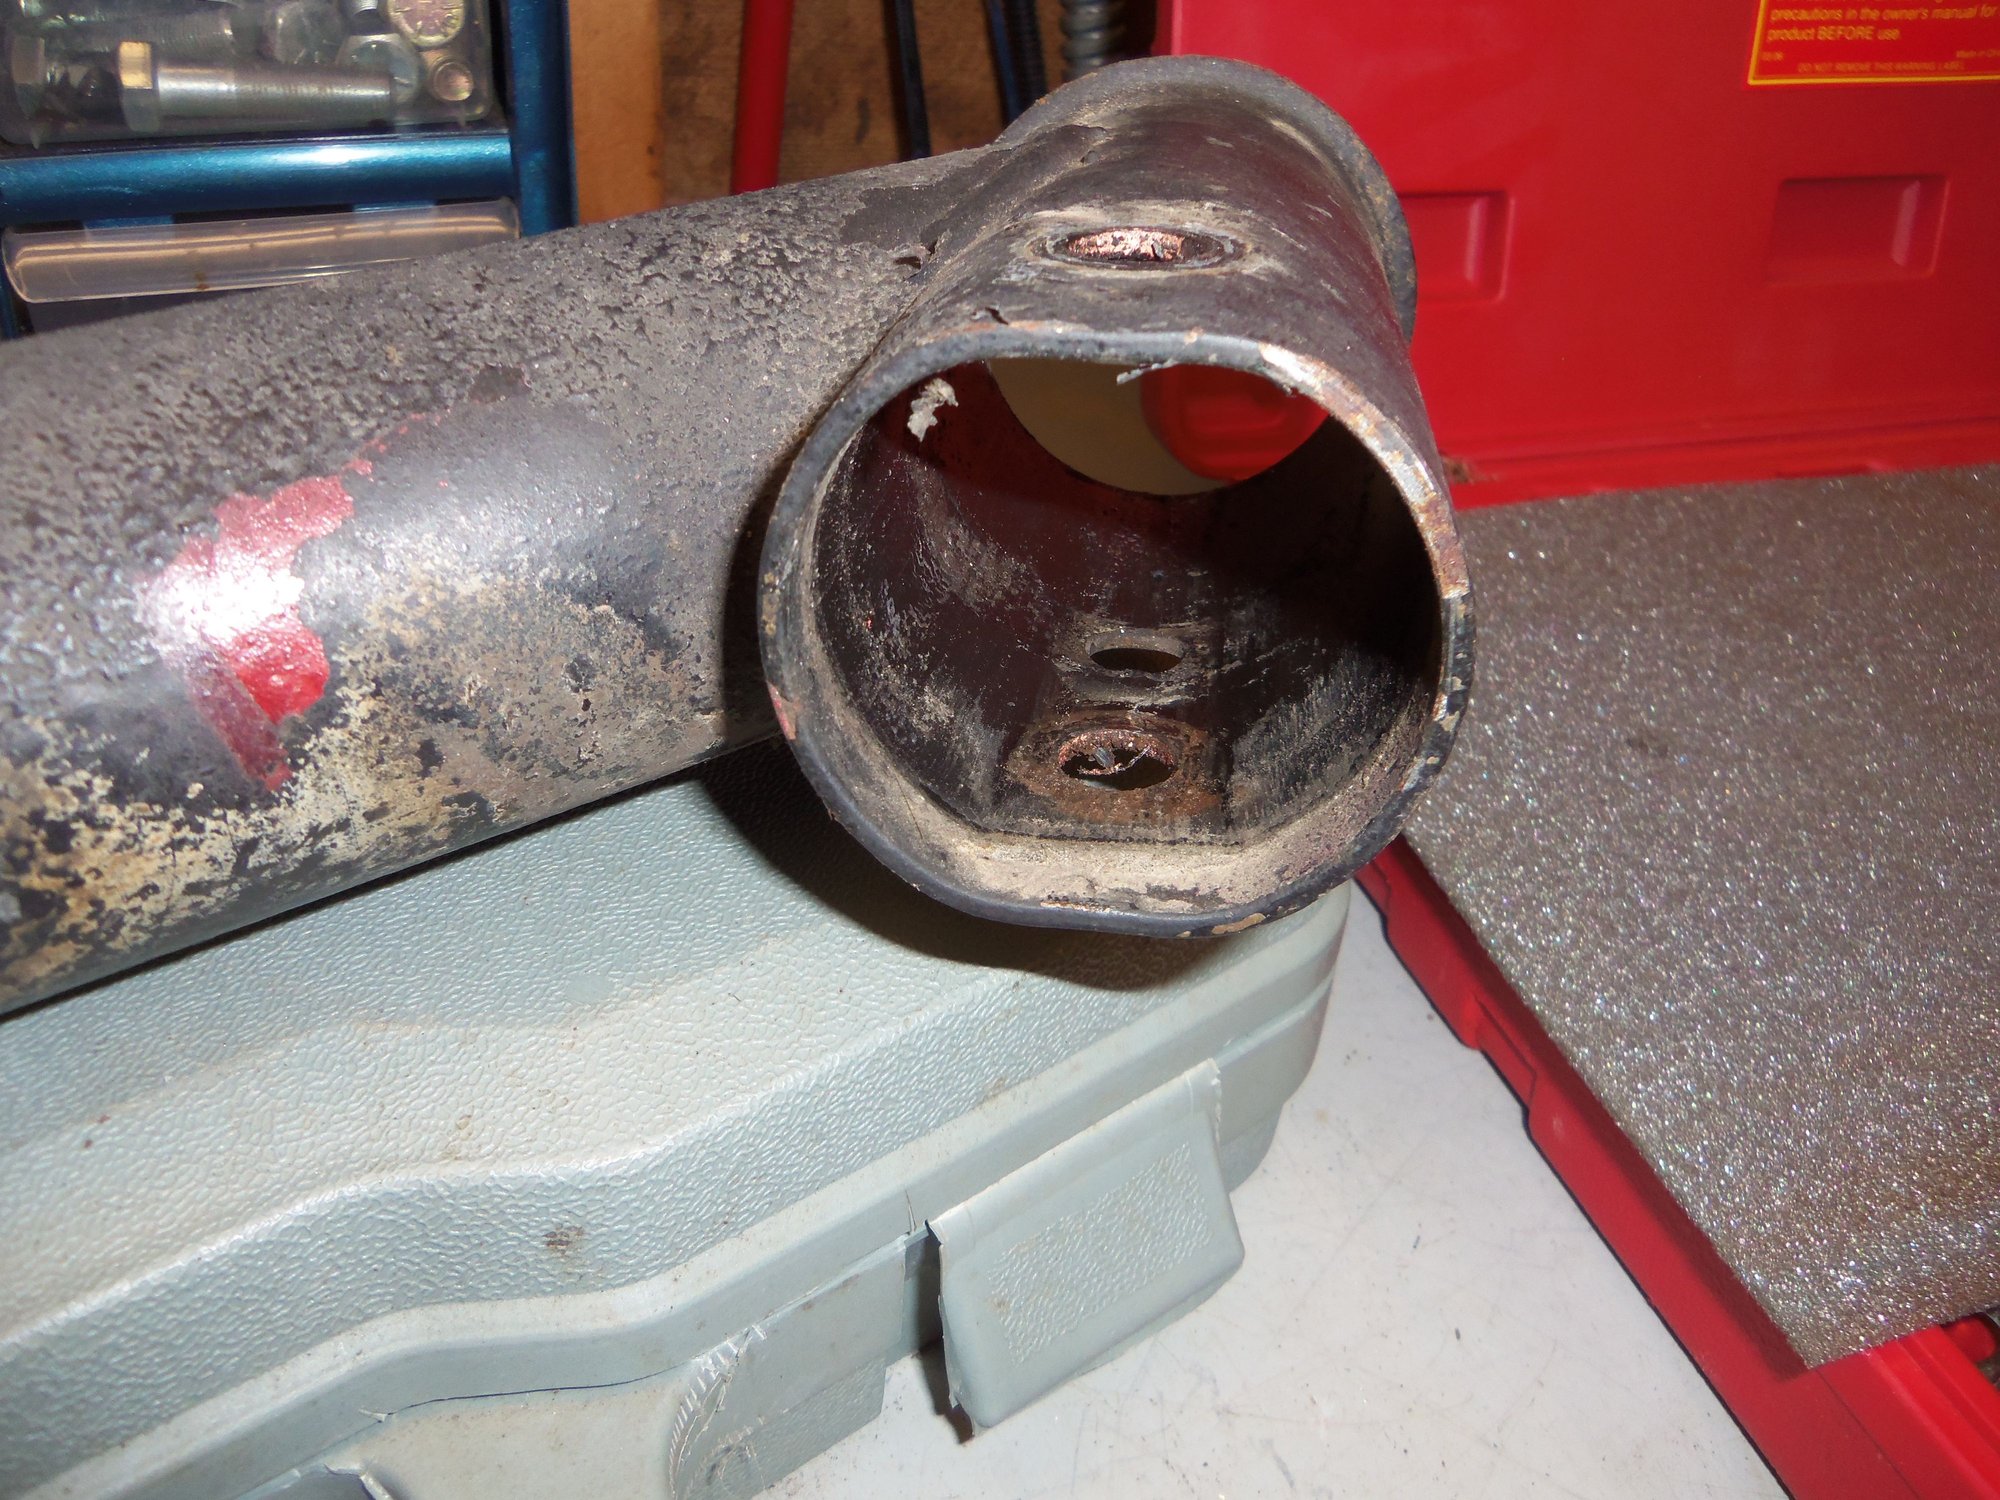
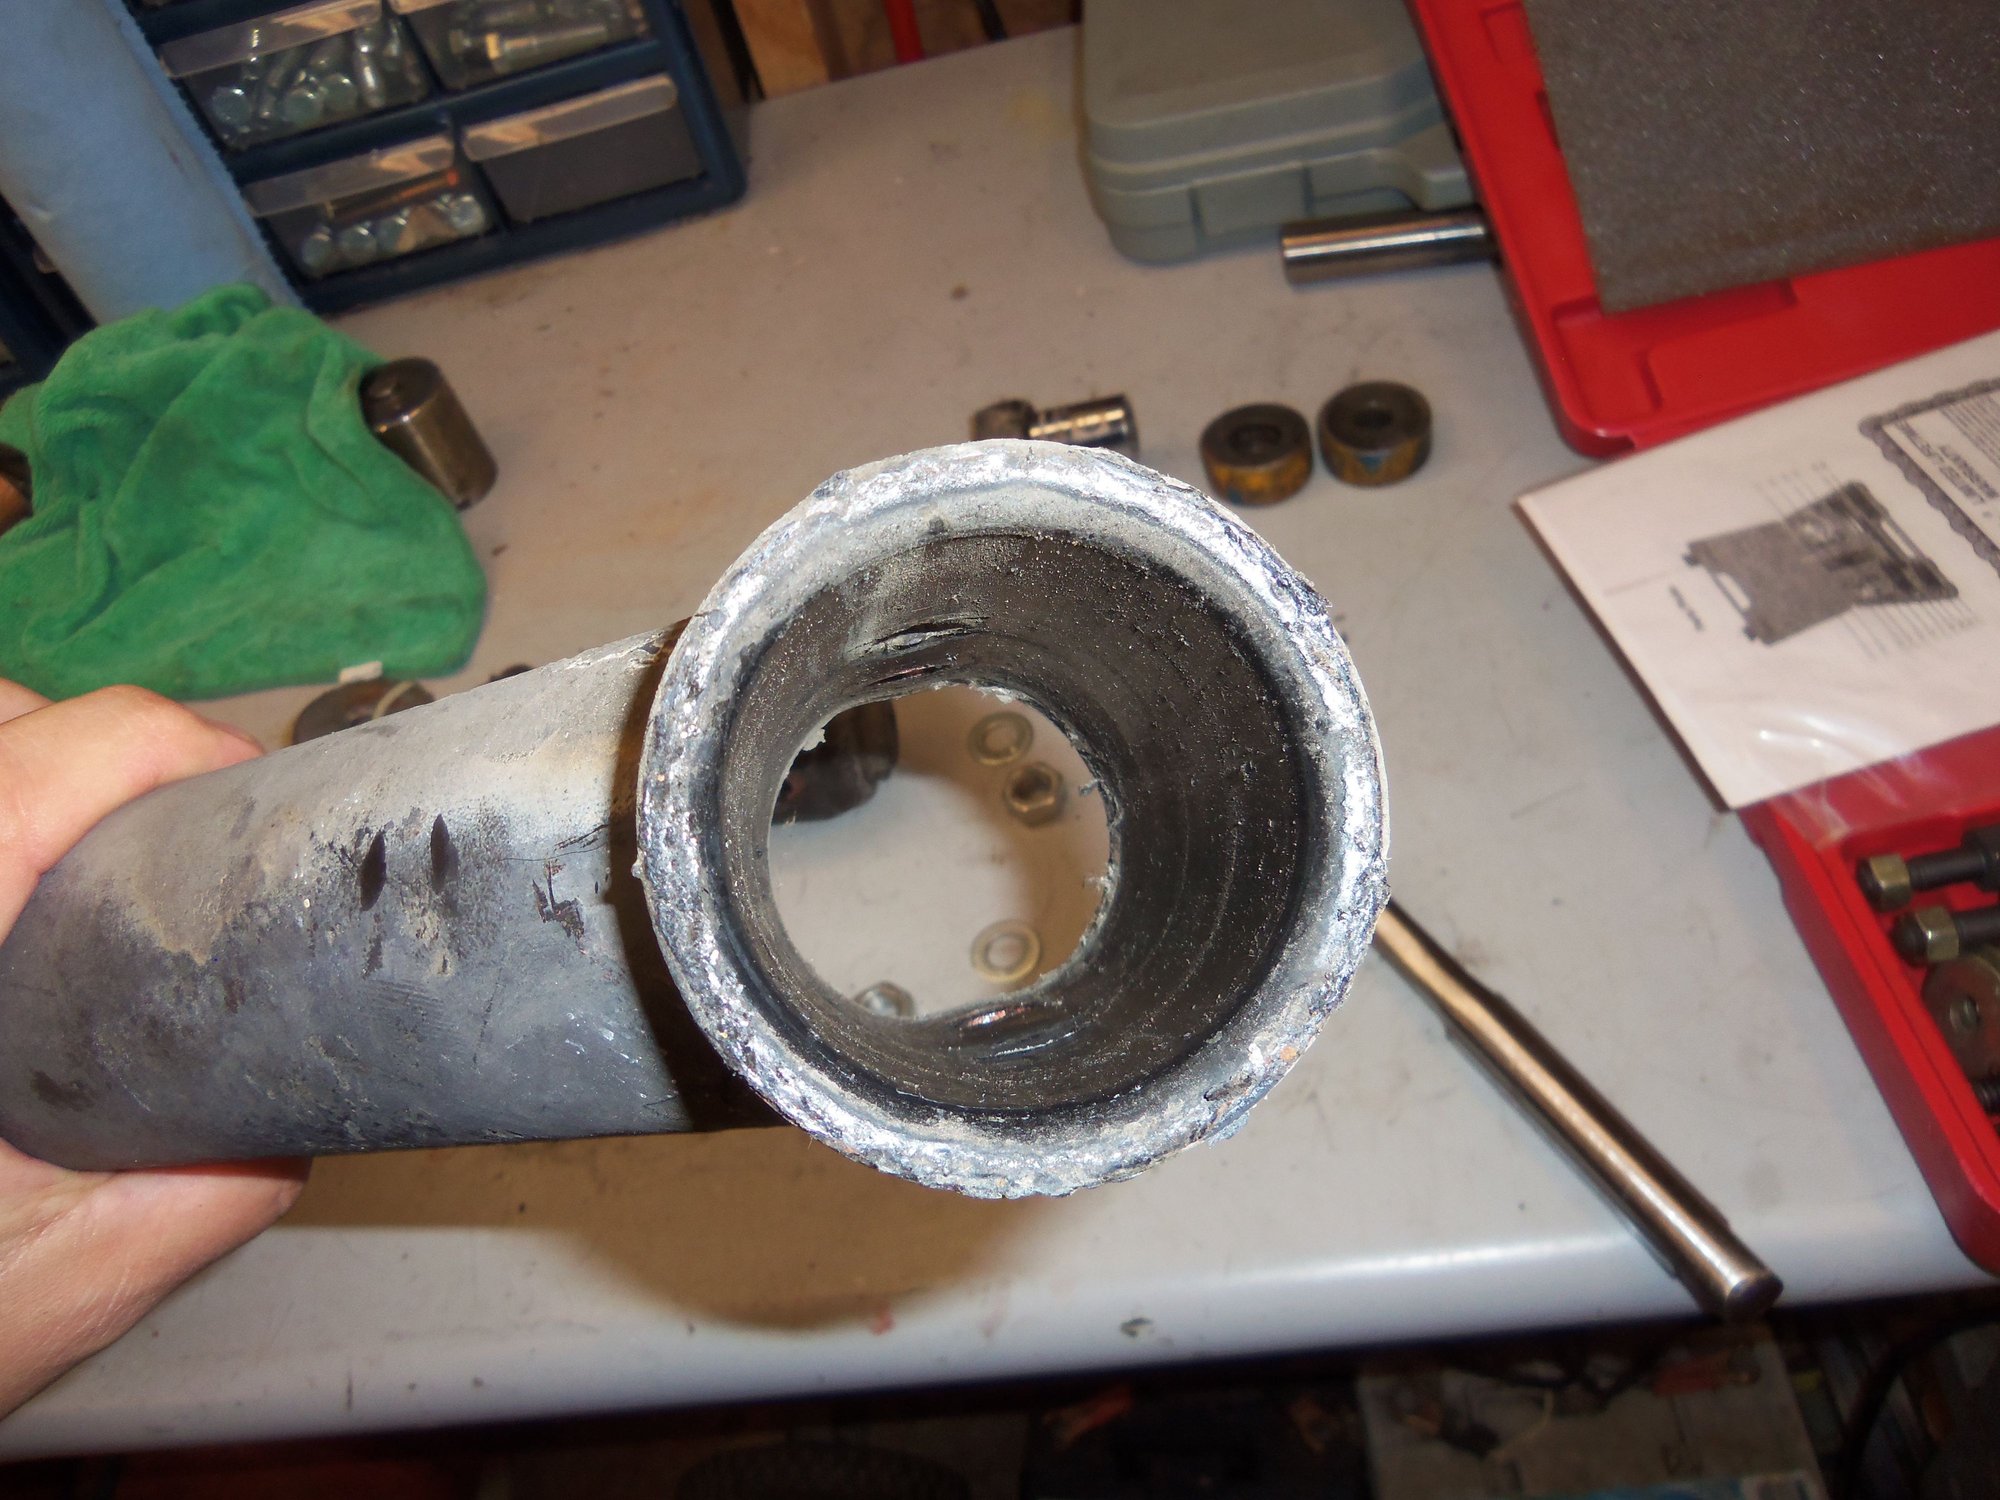
Receiver in the control arm.
More reciprocating saw action on the other control arm.
Chunk removed.
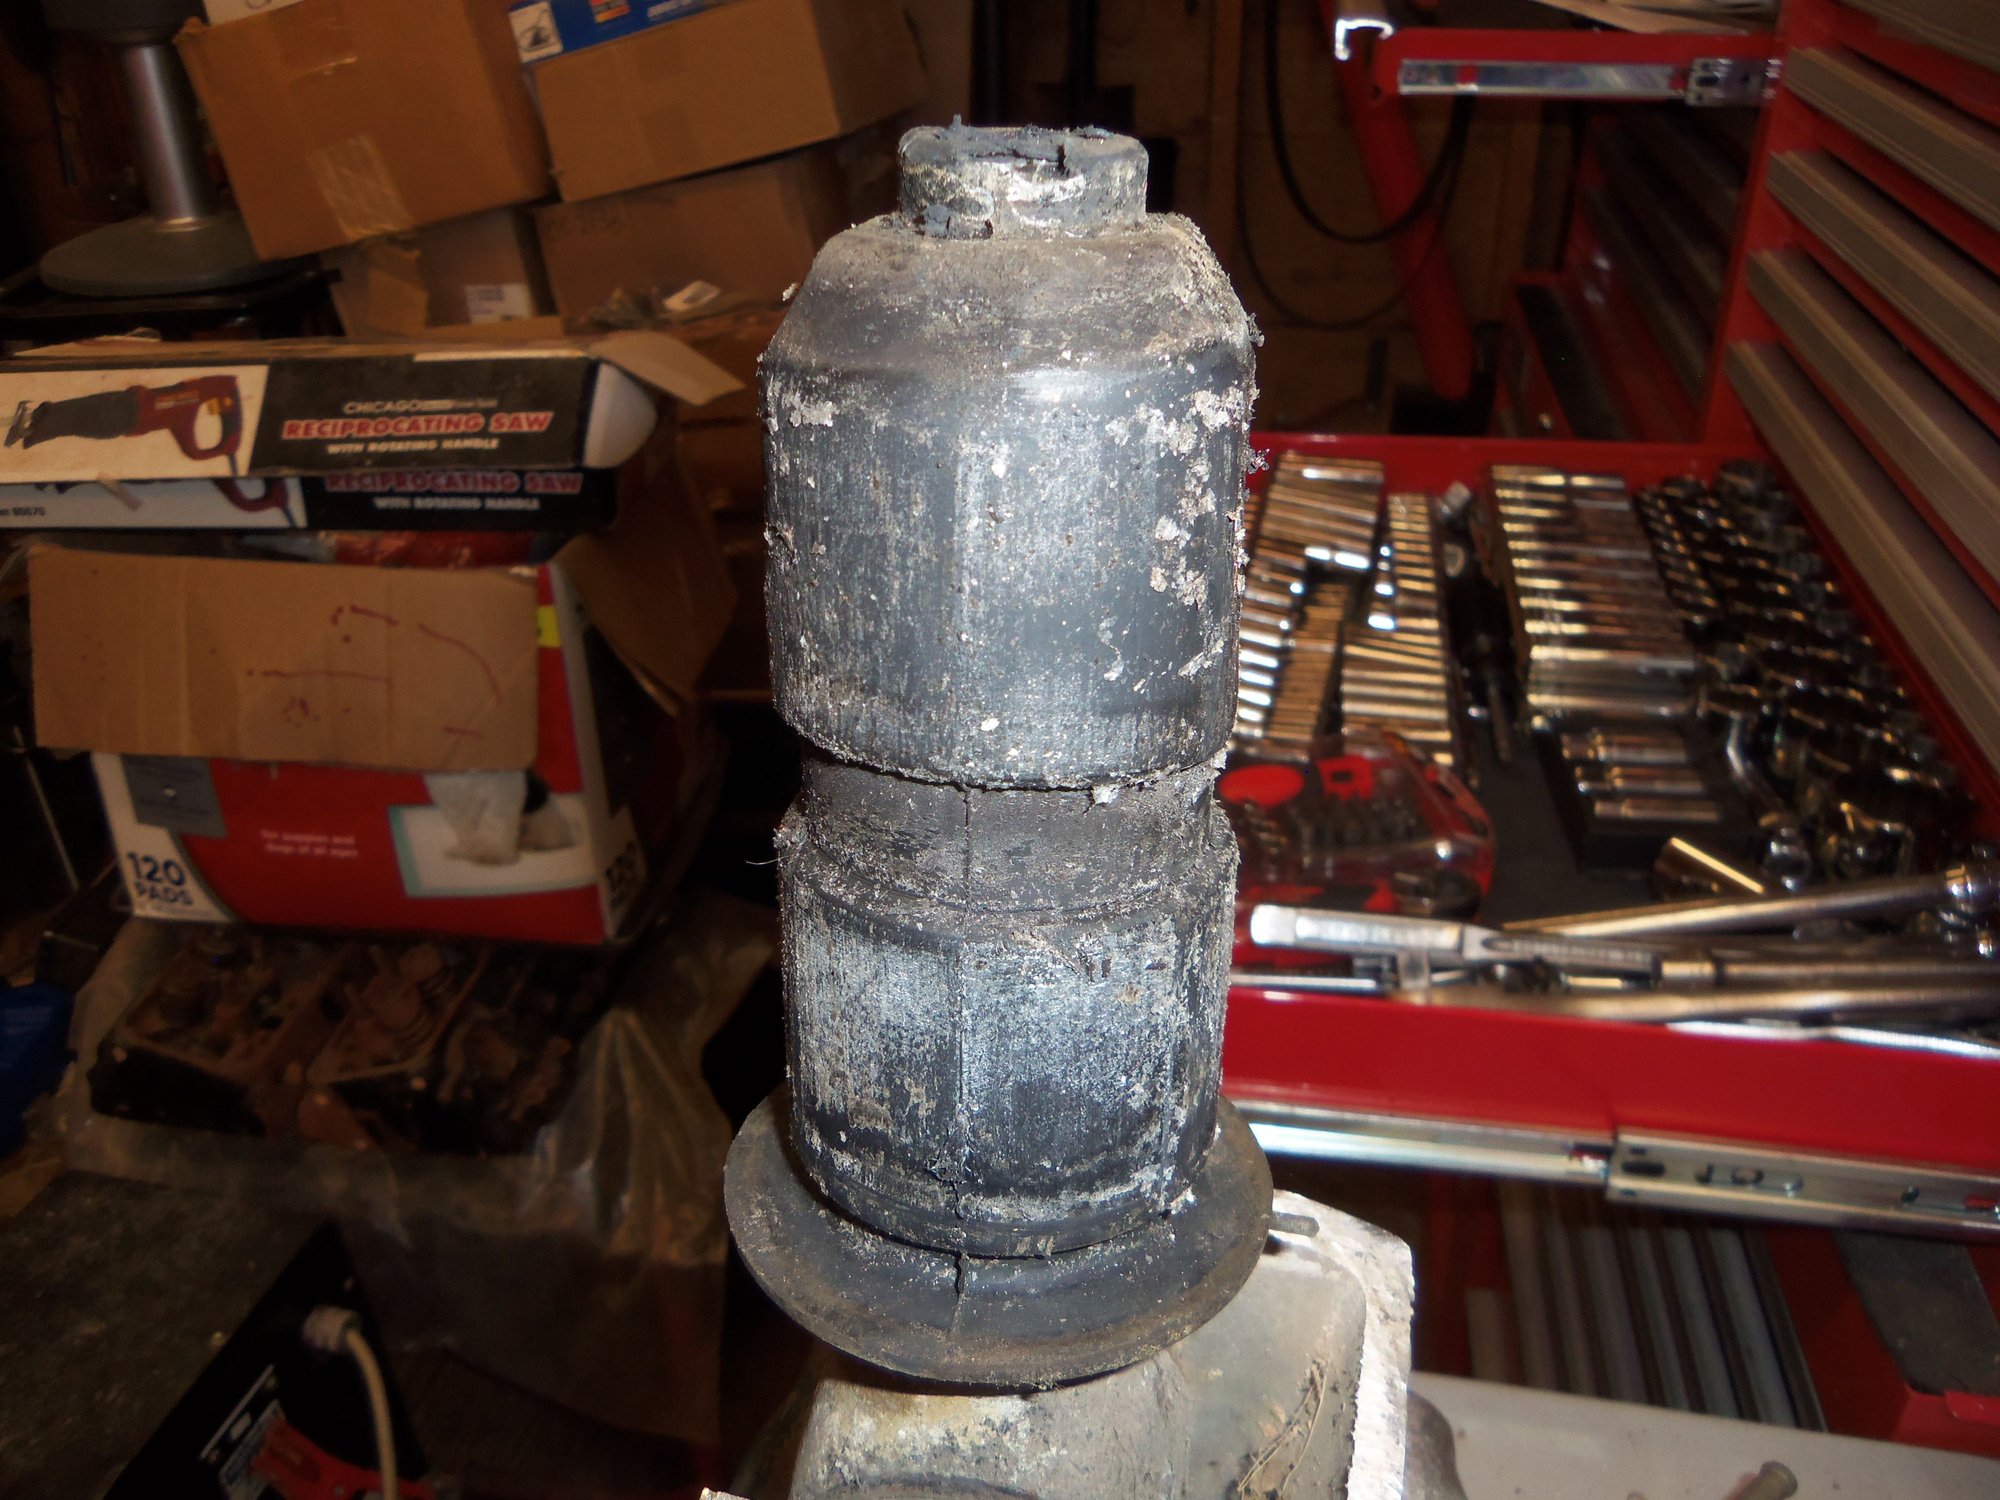
Other rocker shaft bushing undamaged.
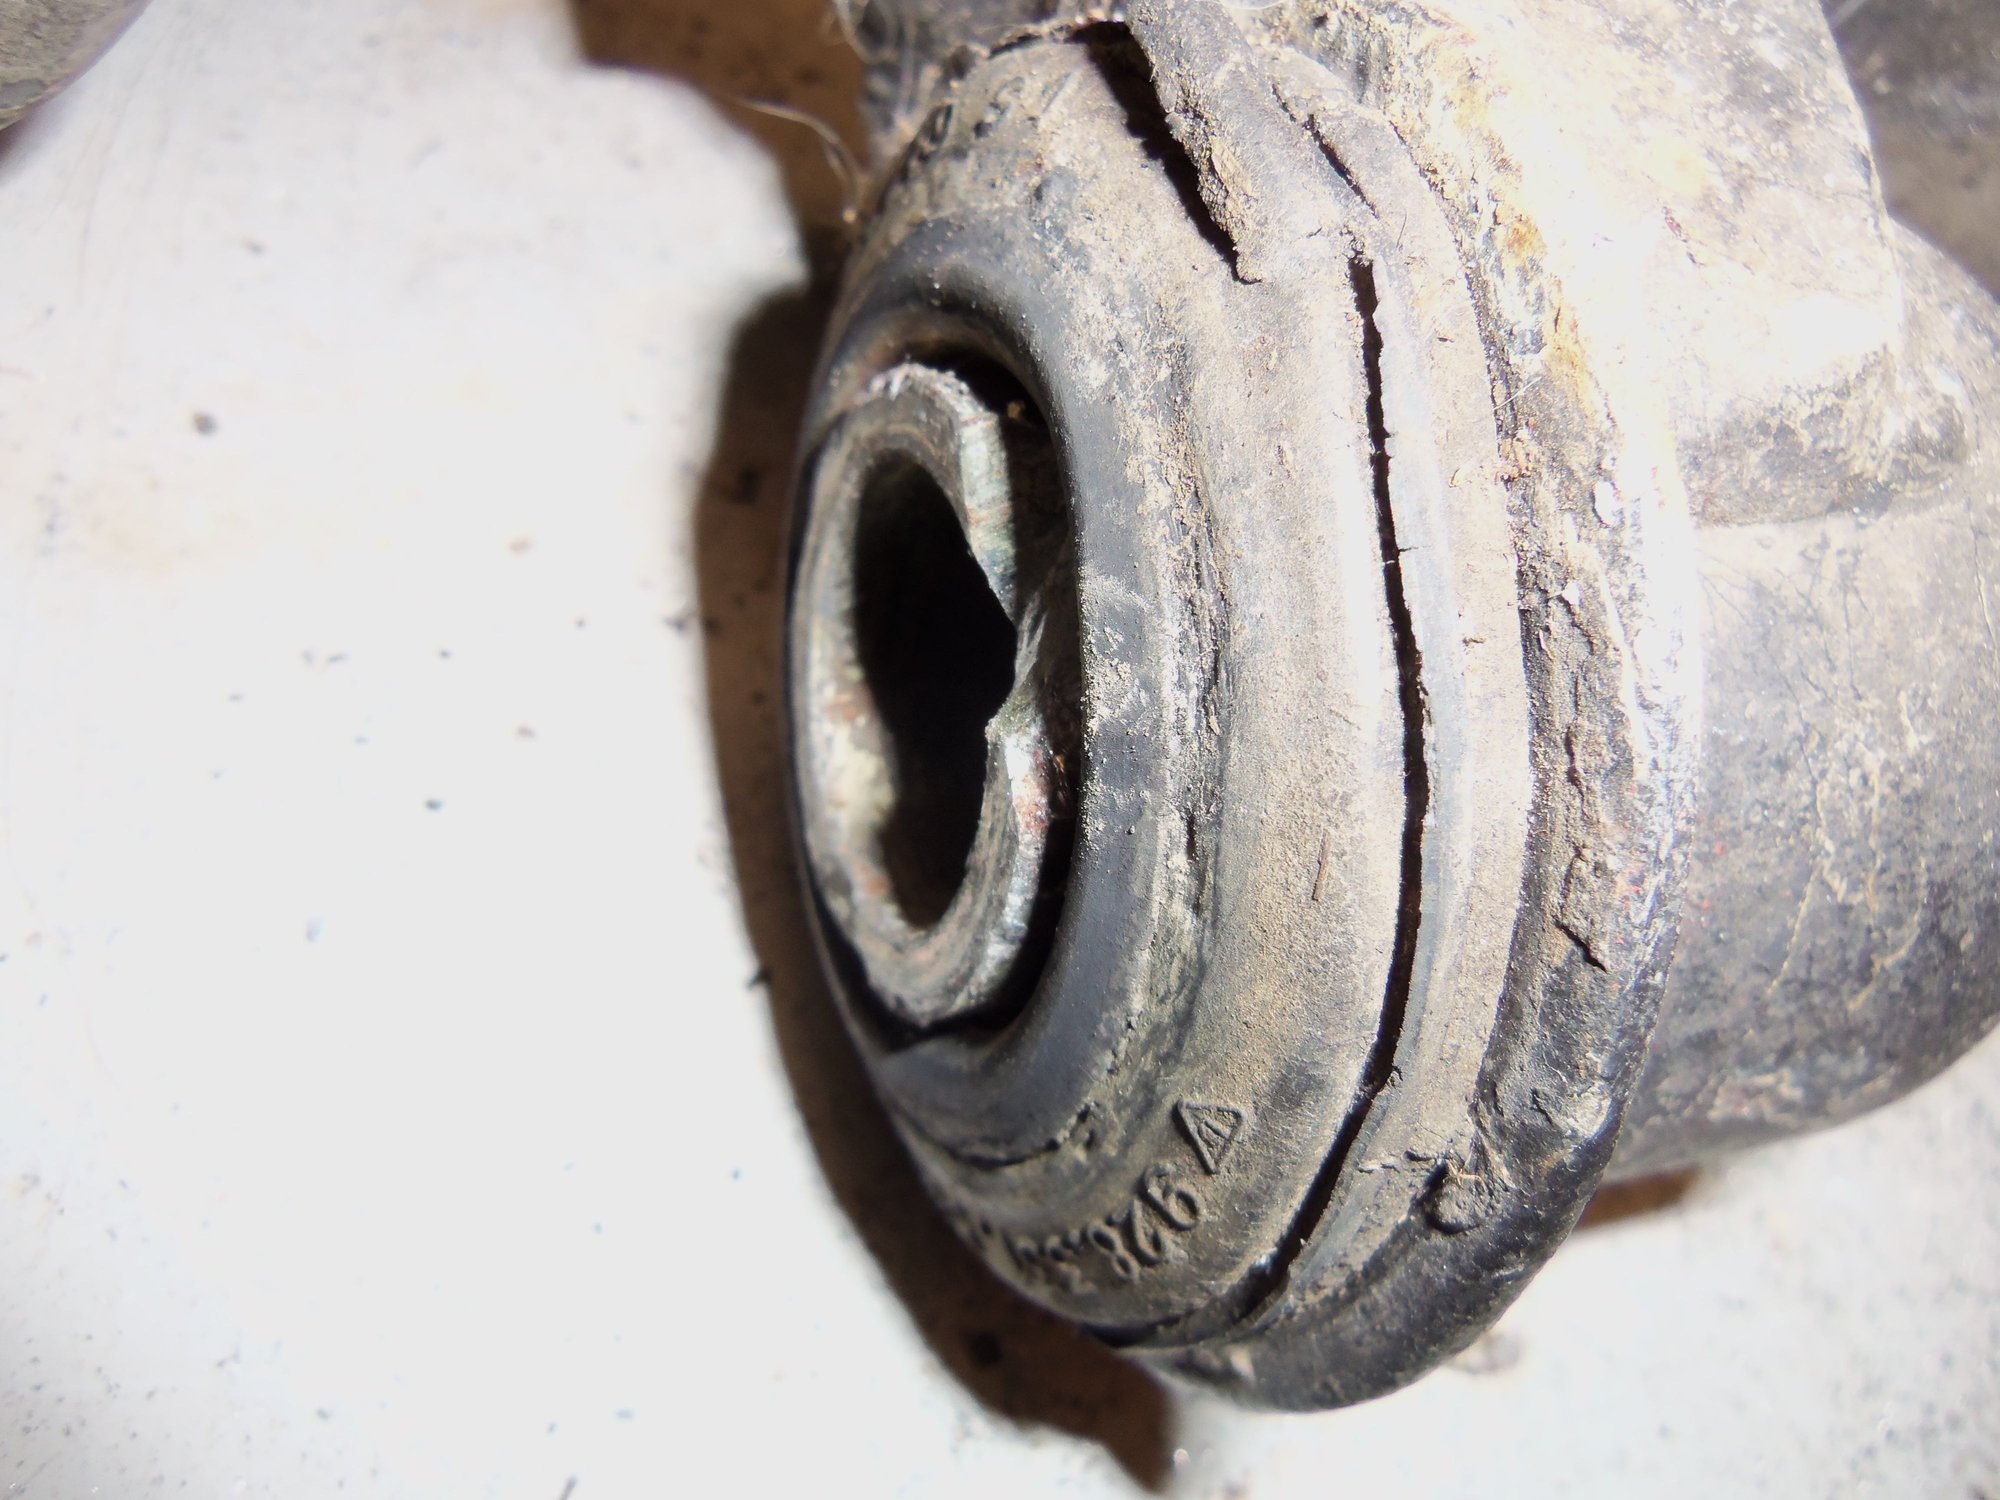
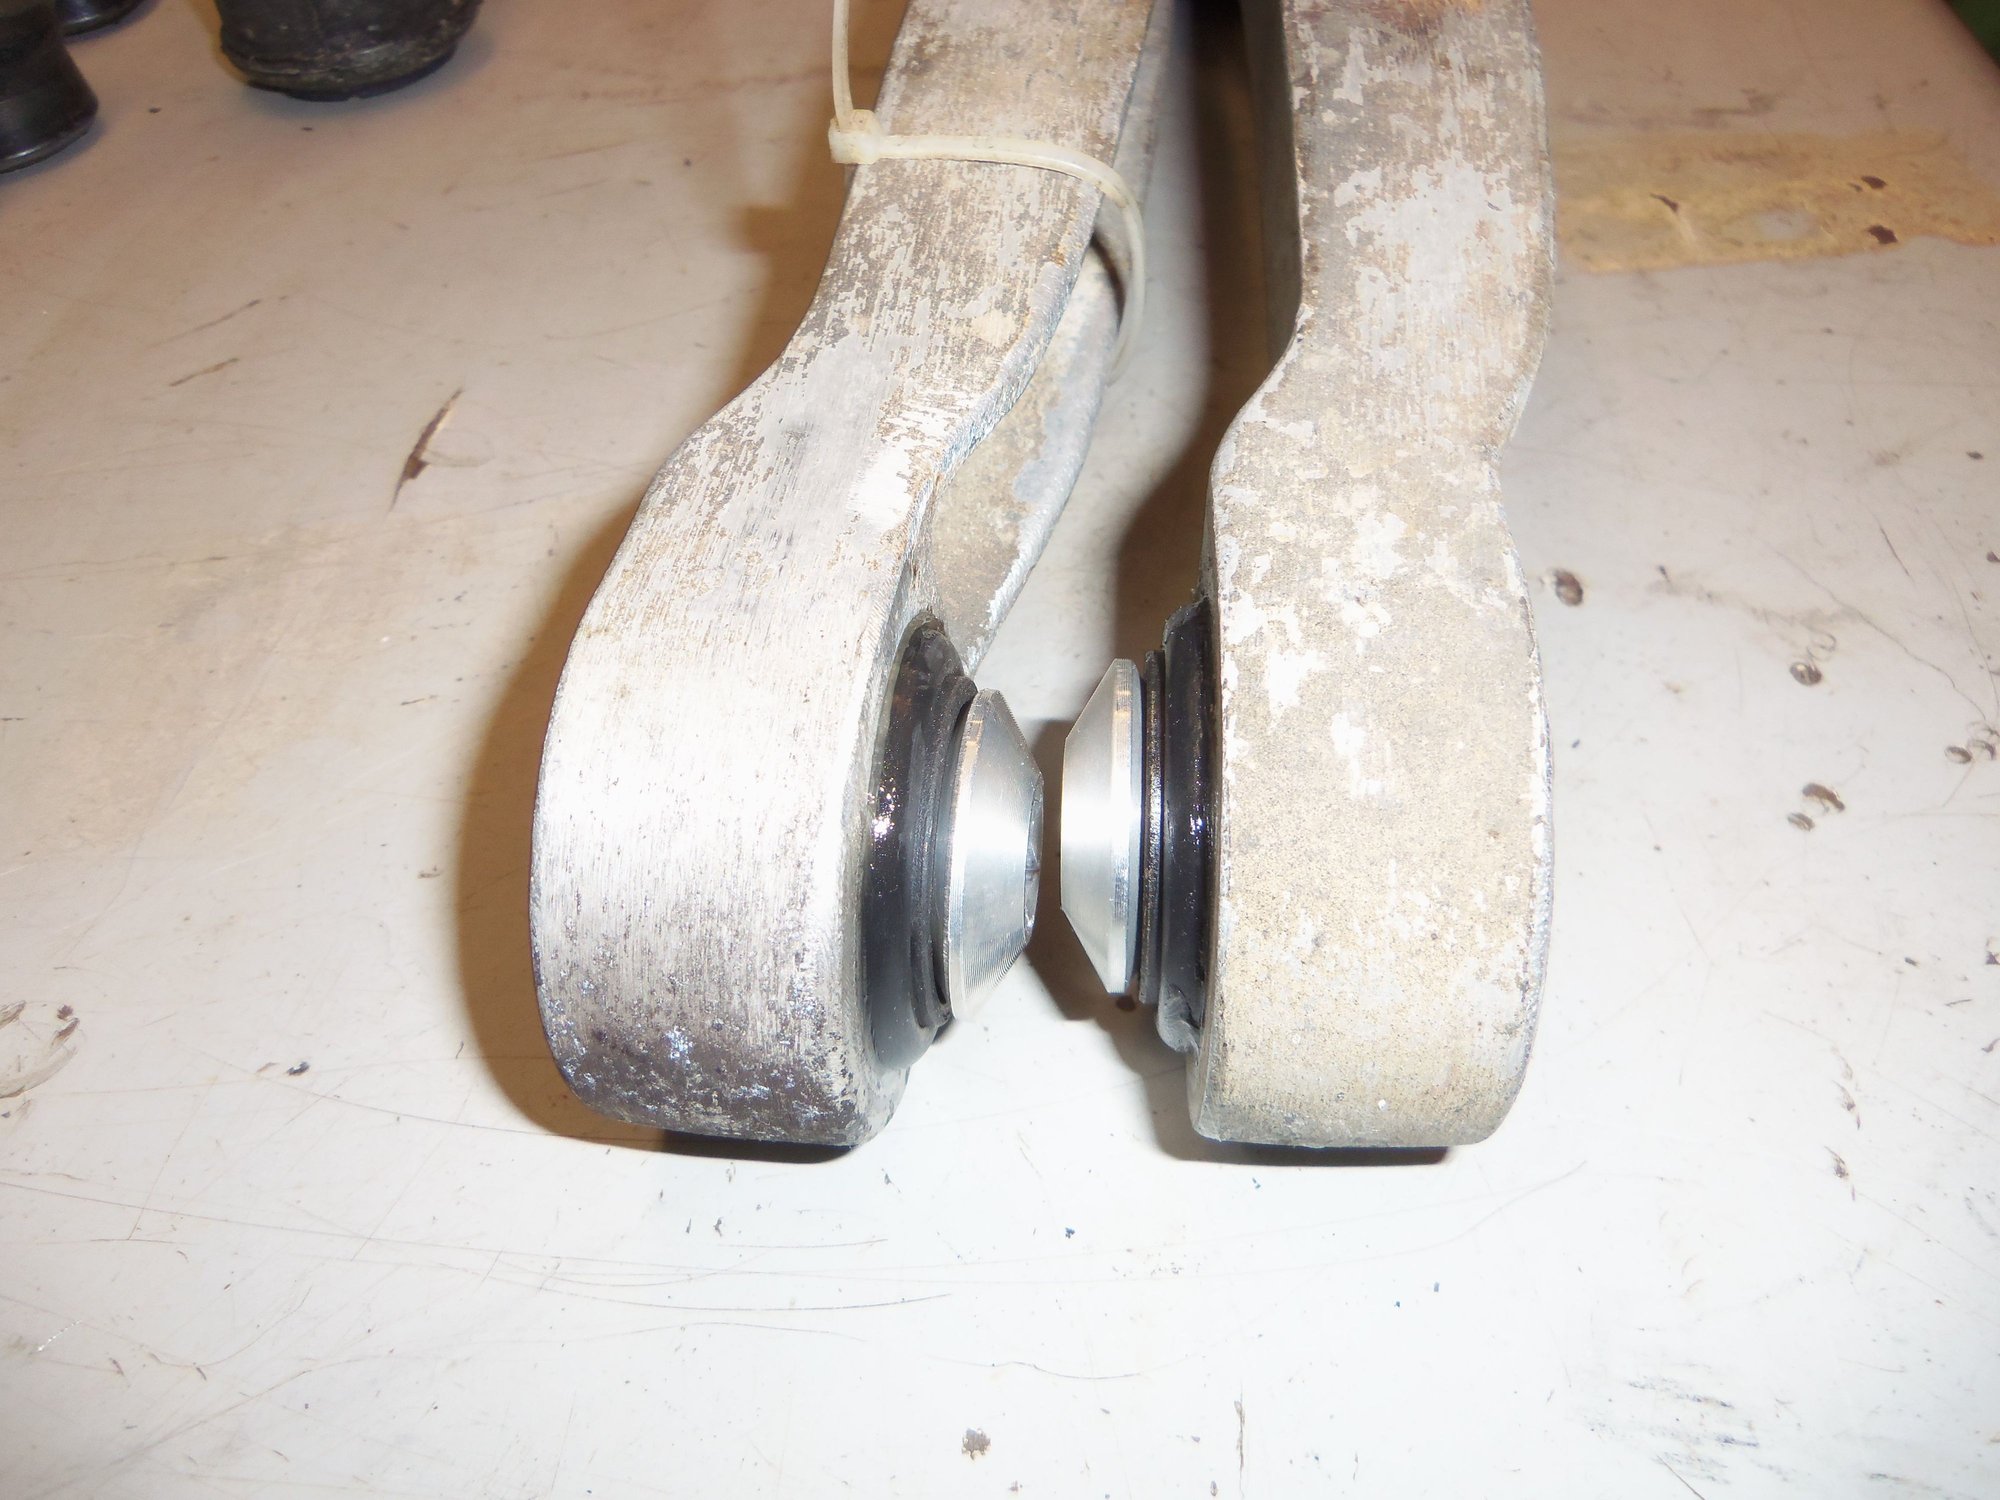
Note the lip at the bottom. That has to be pushed away from the control arm receiver.
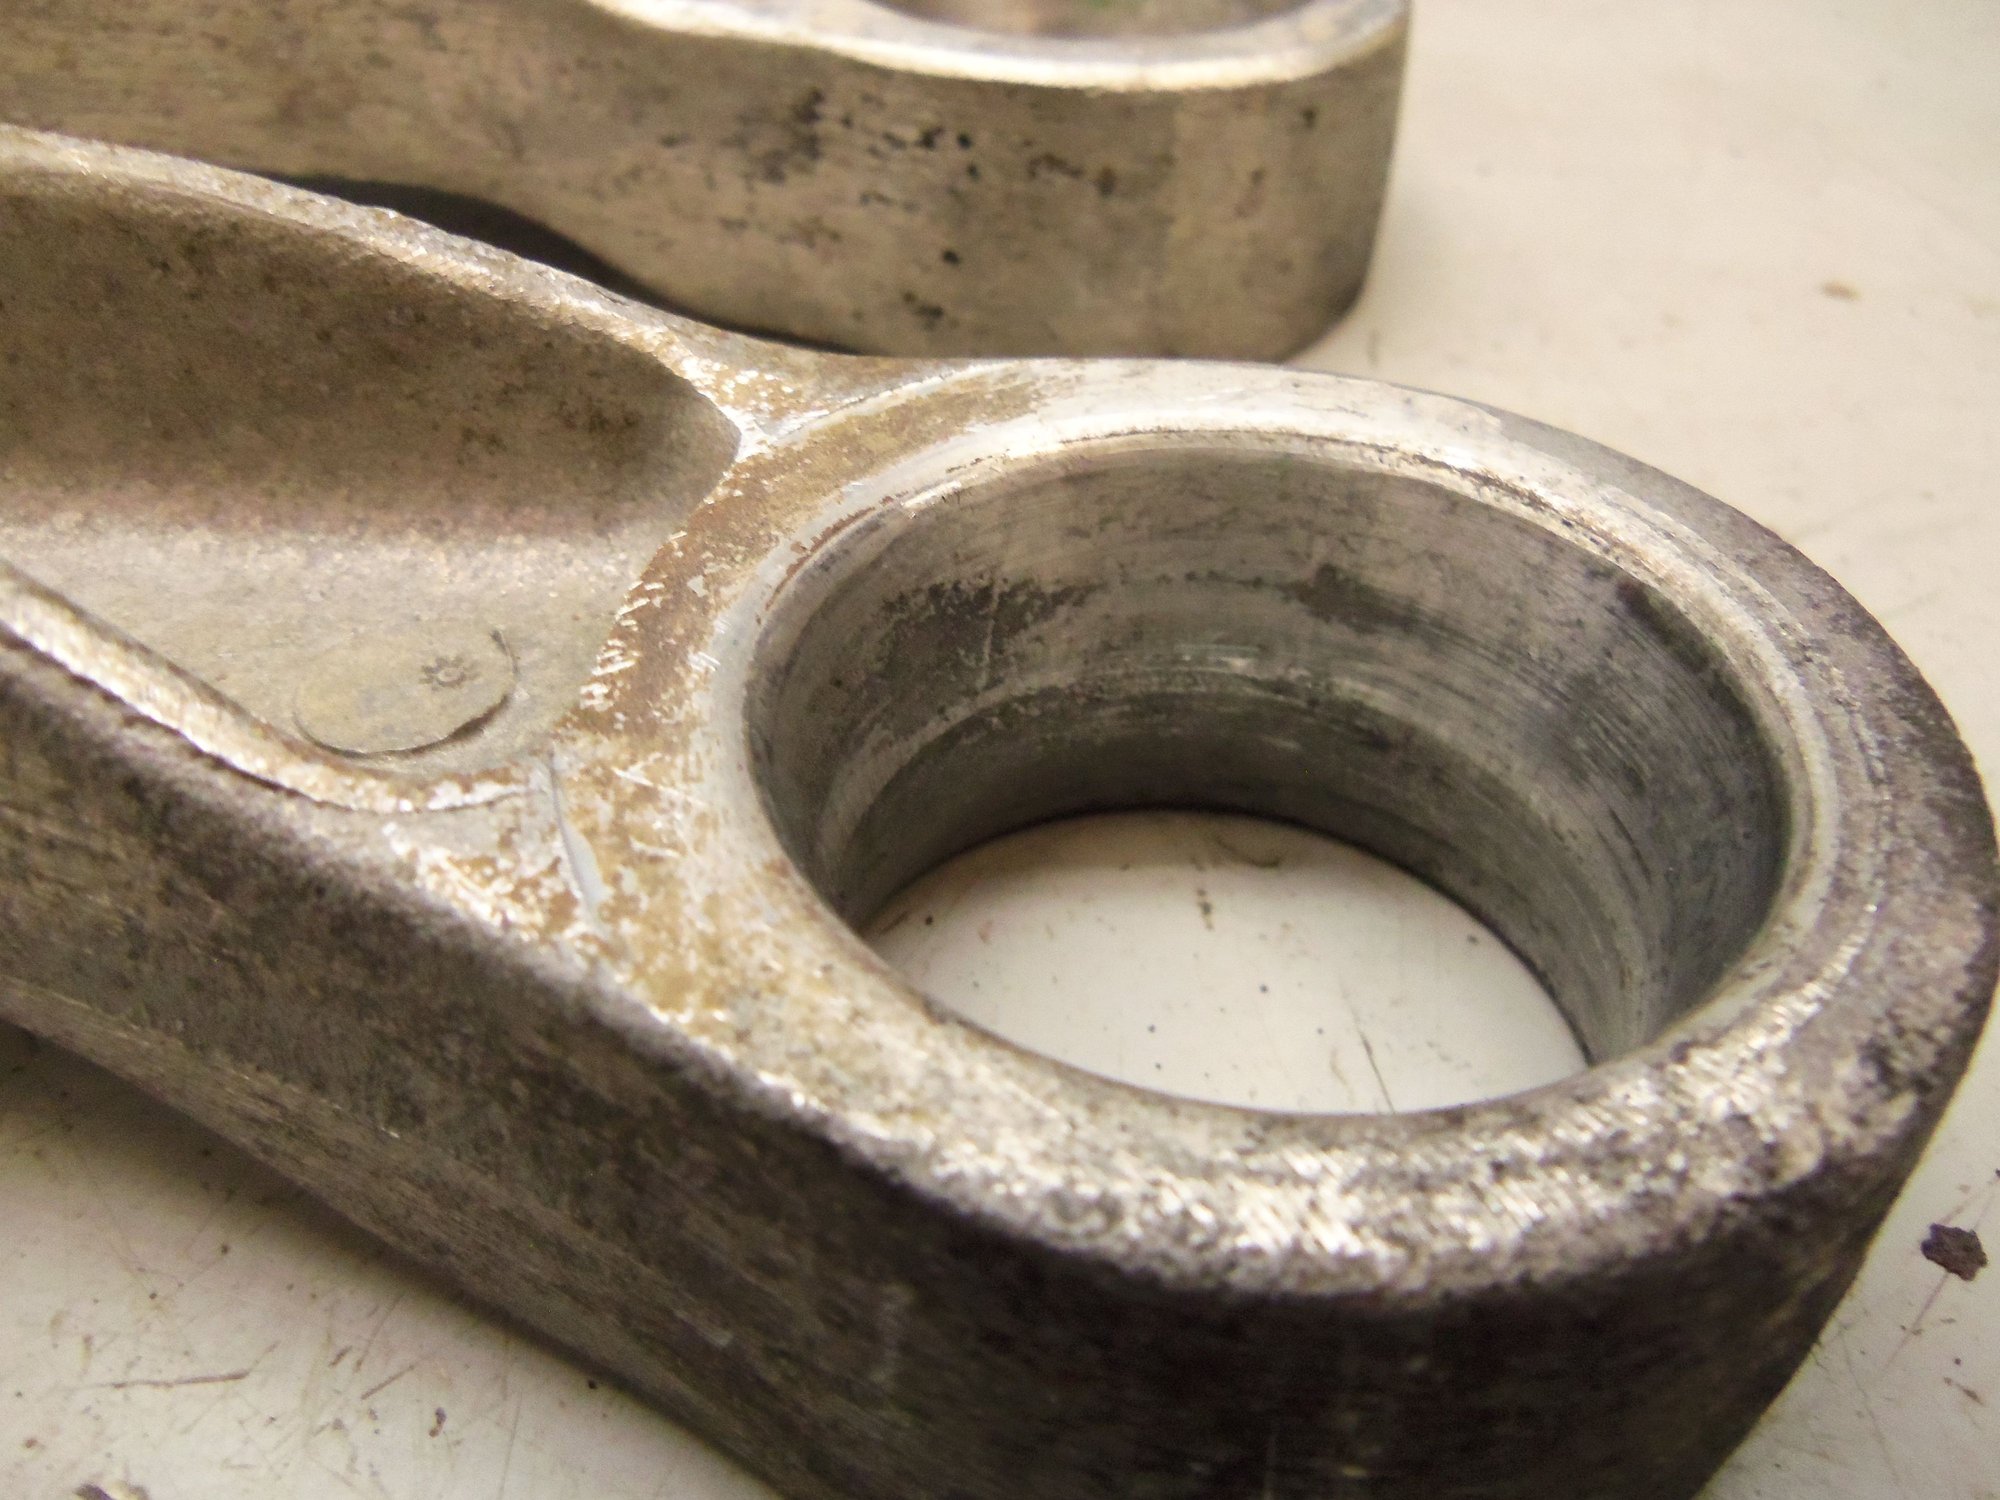
Control arm receiver.
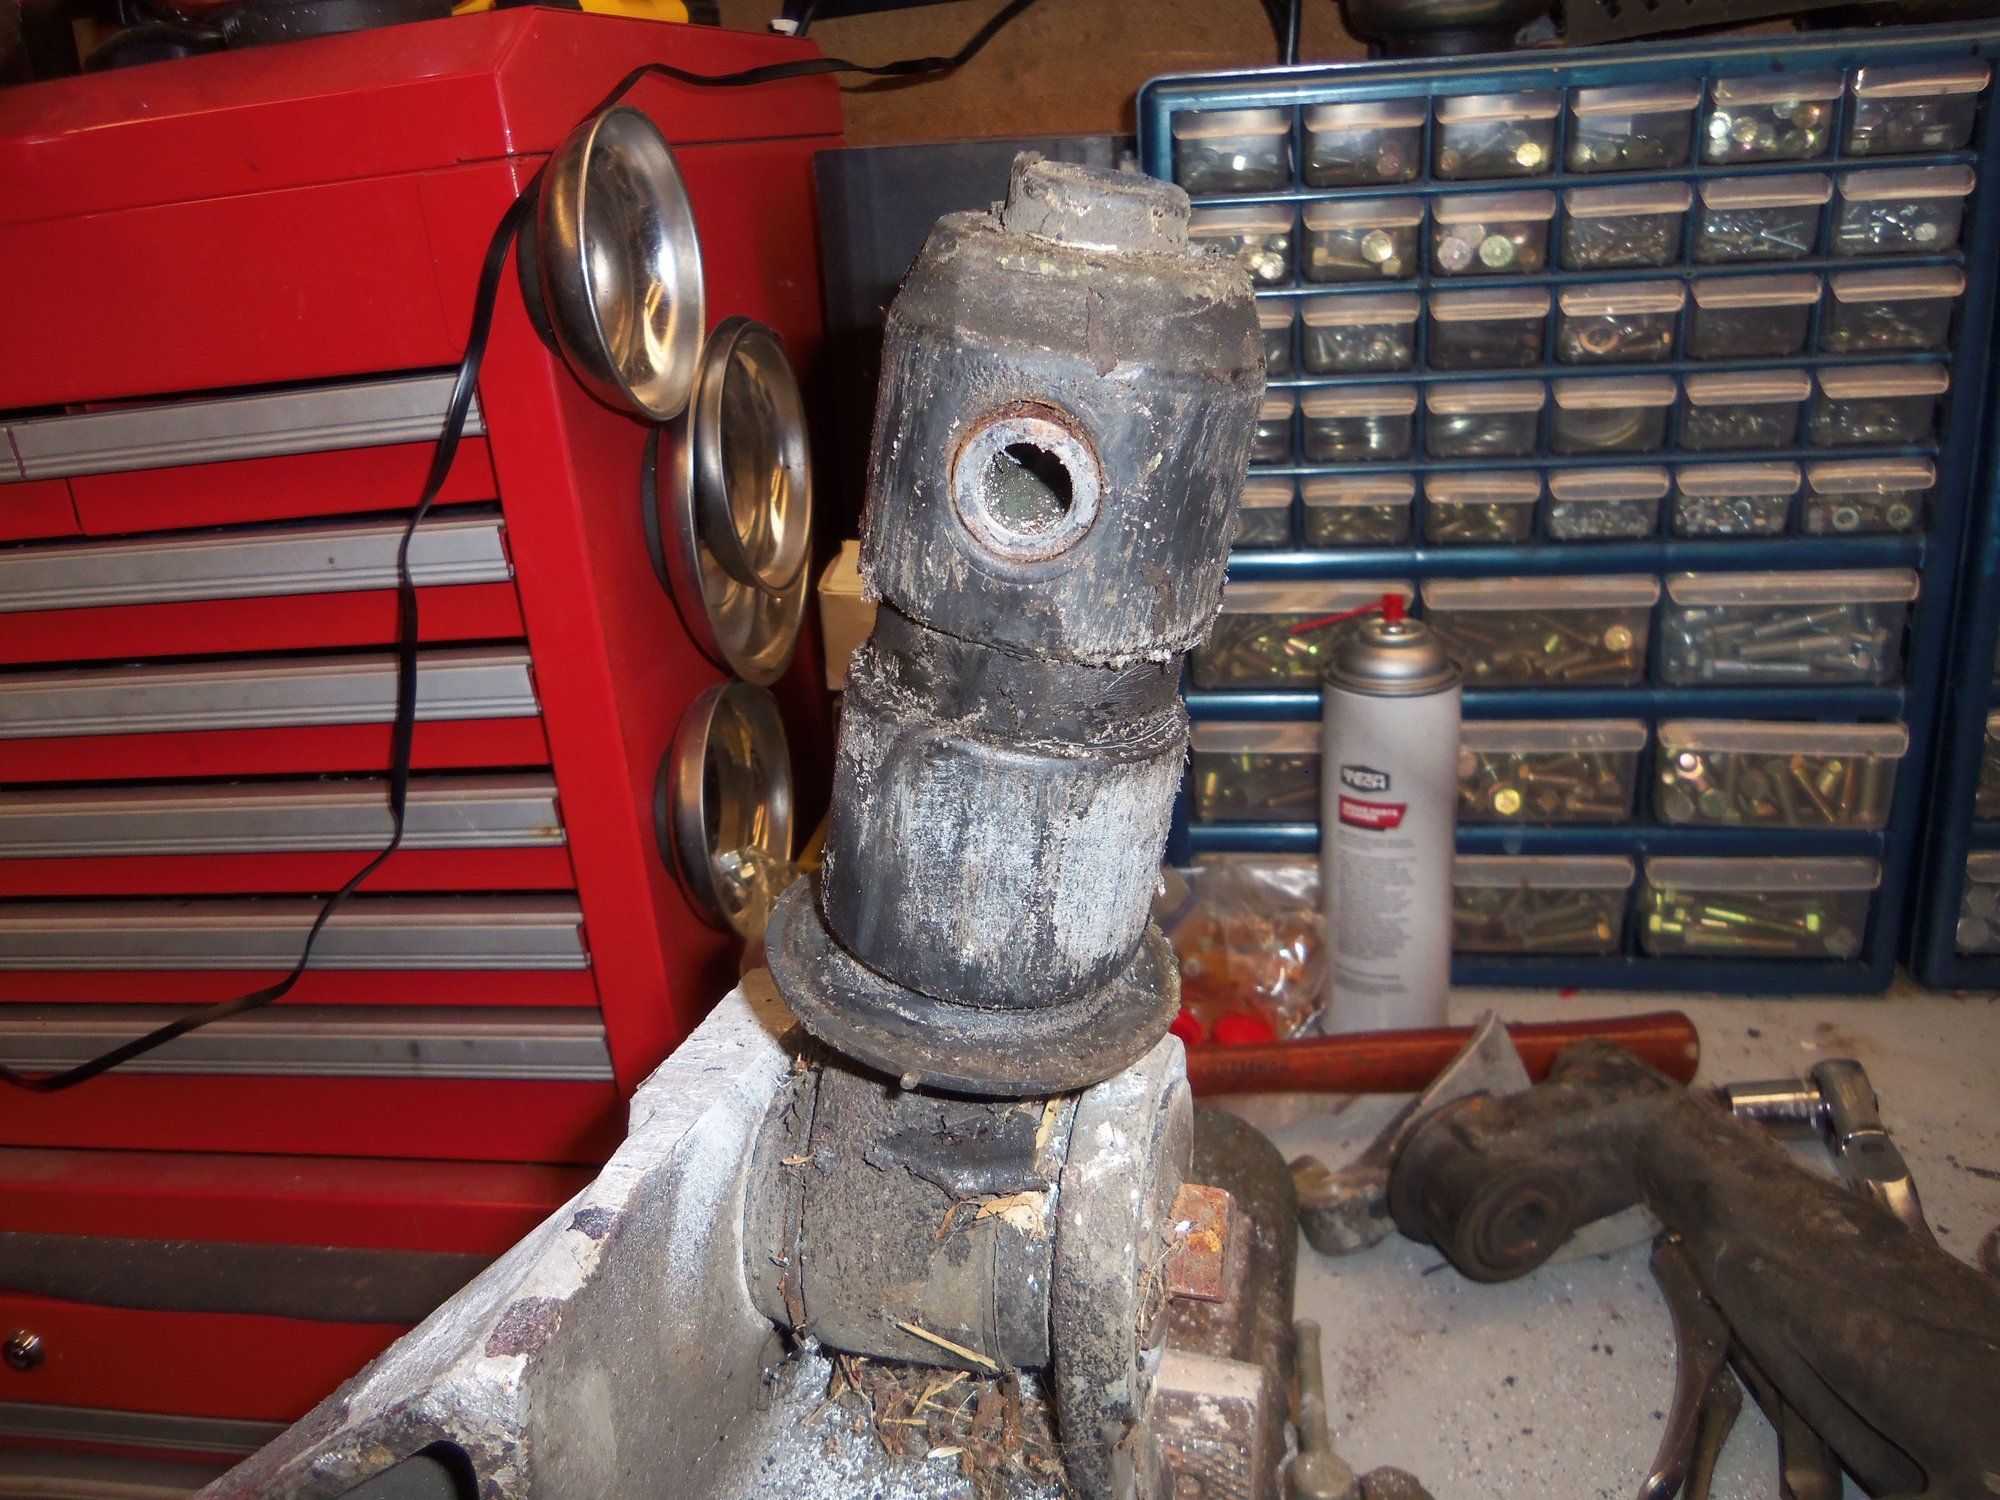
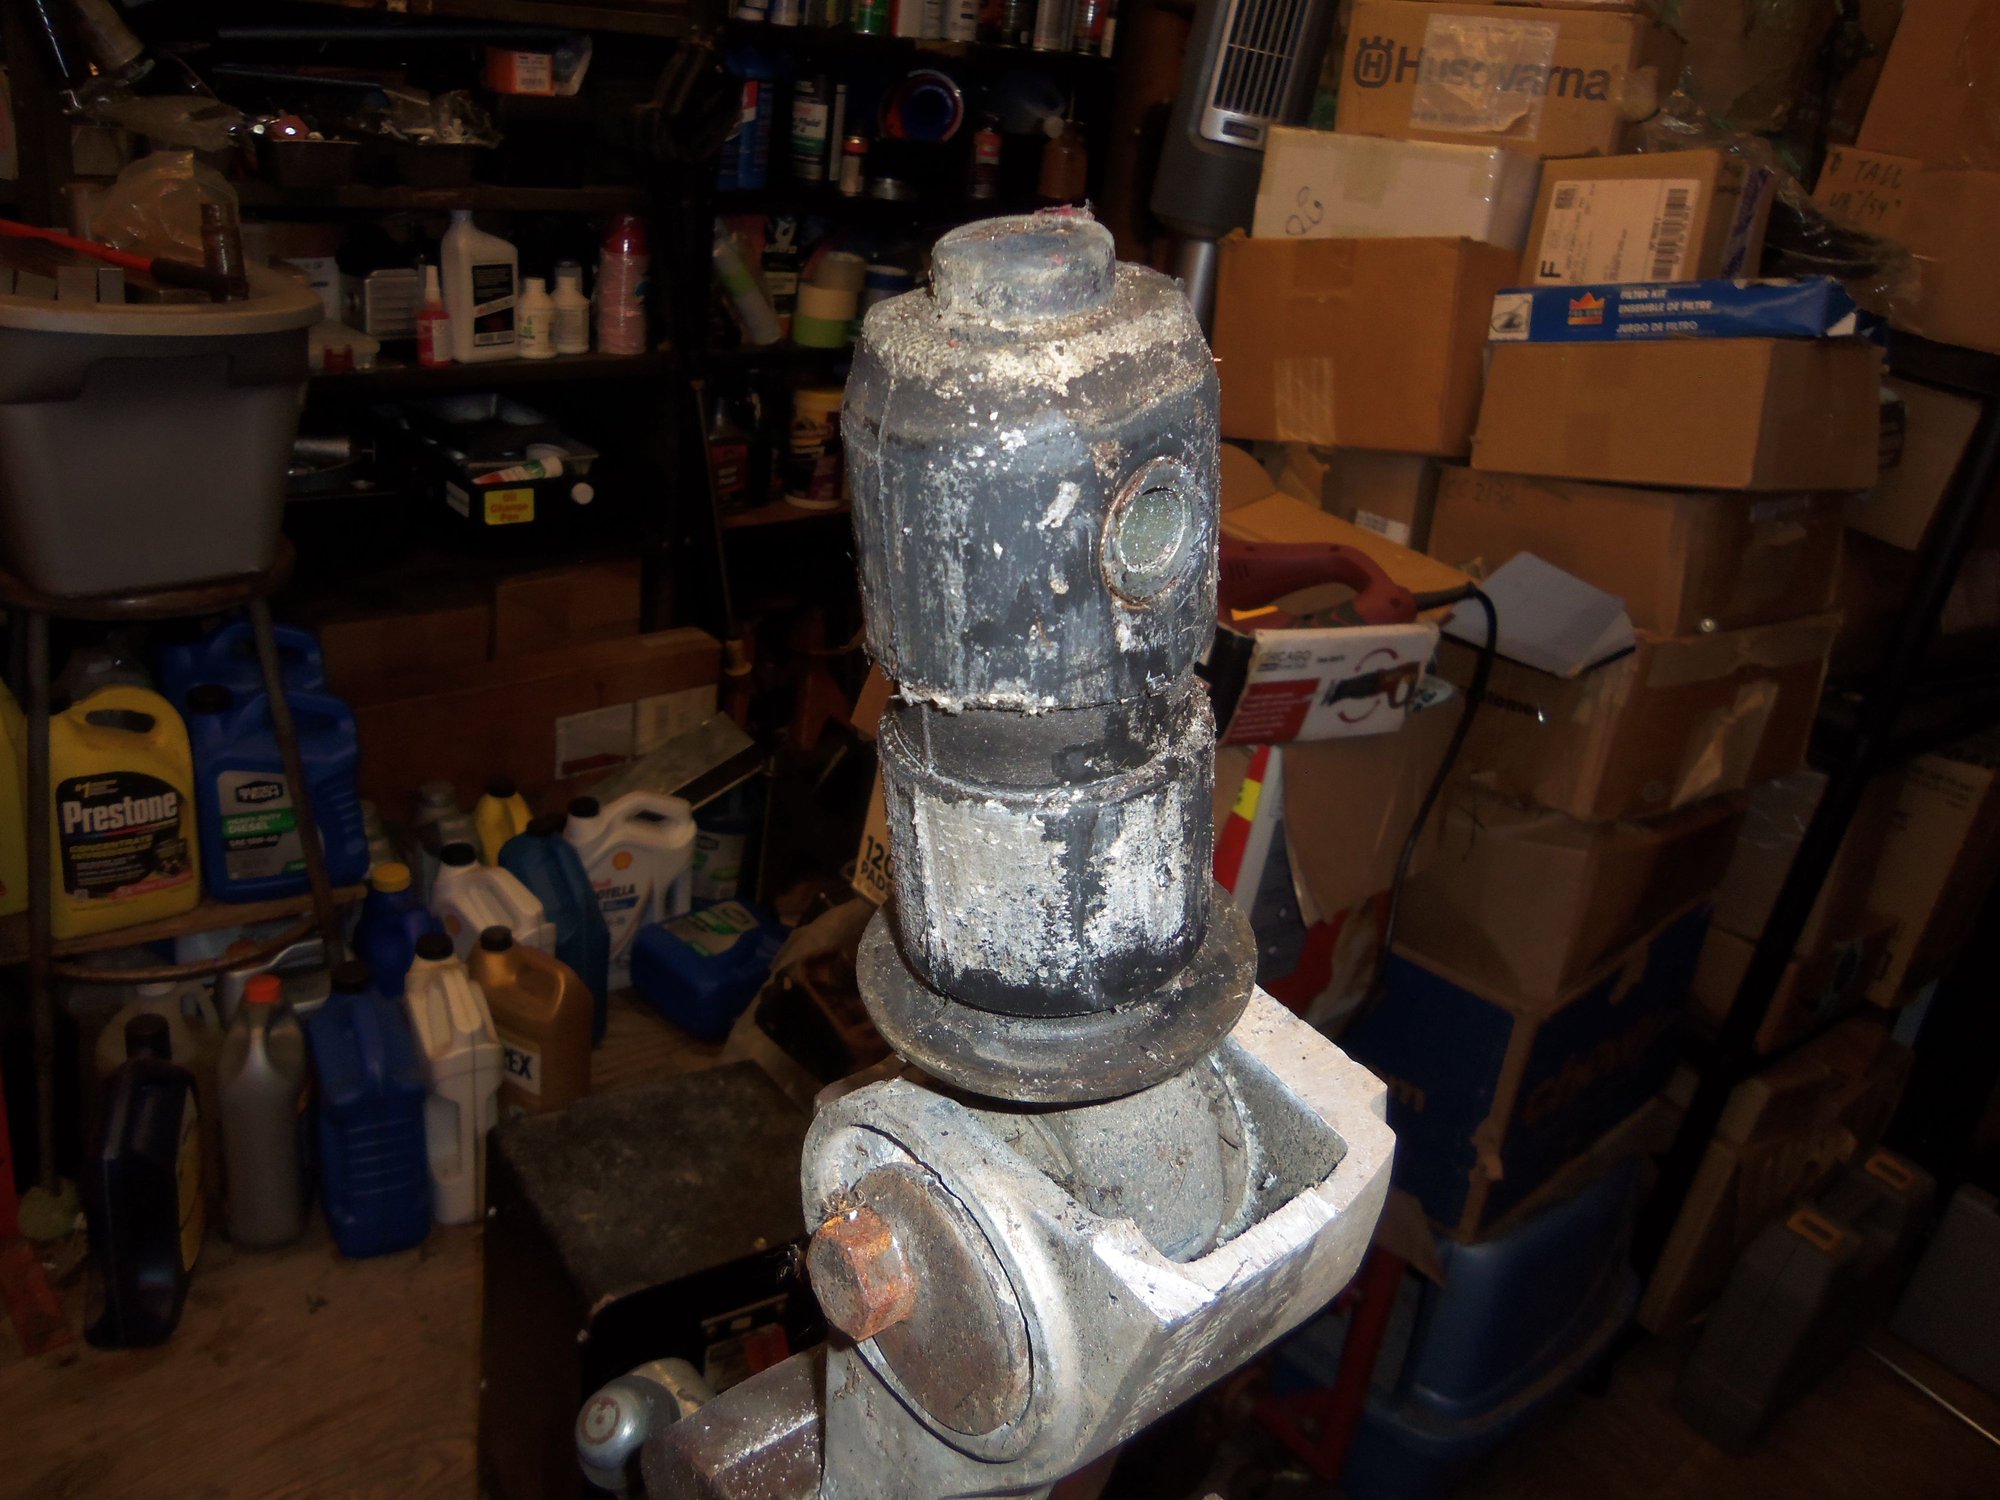
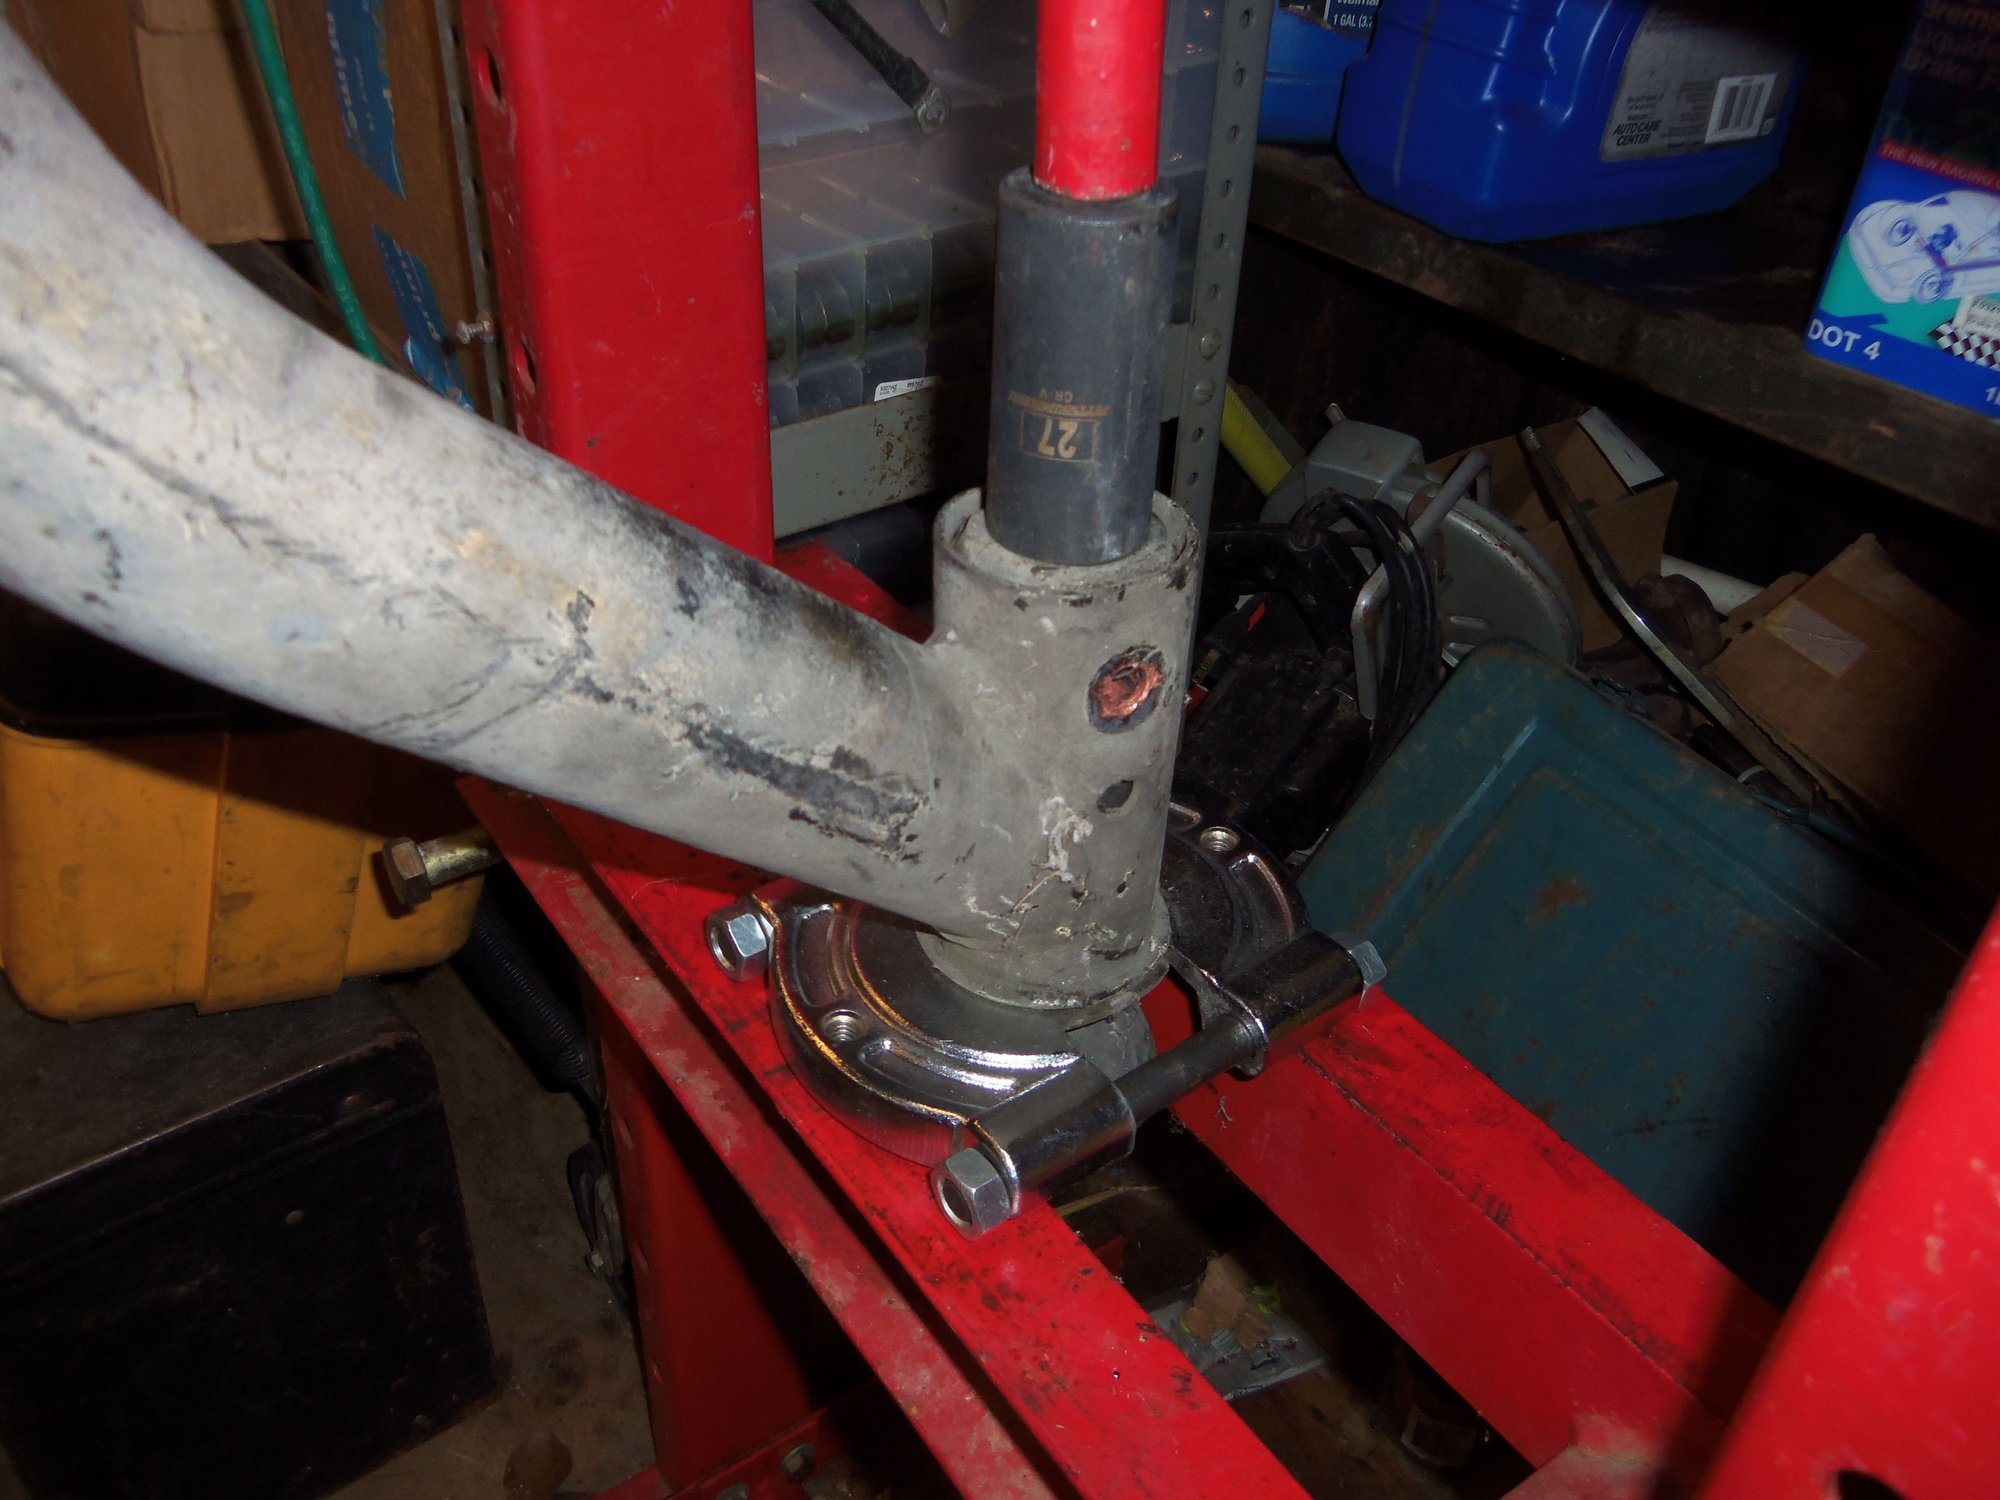
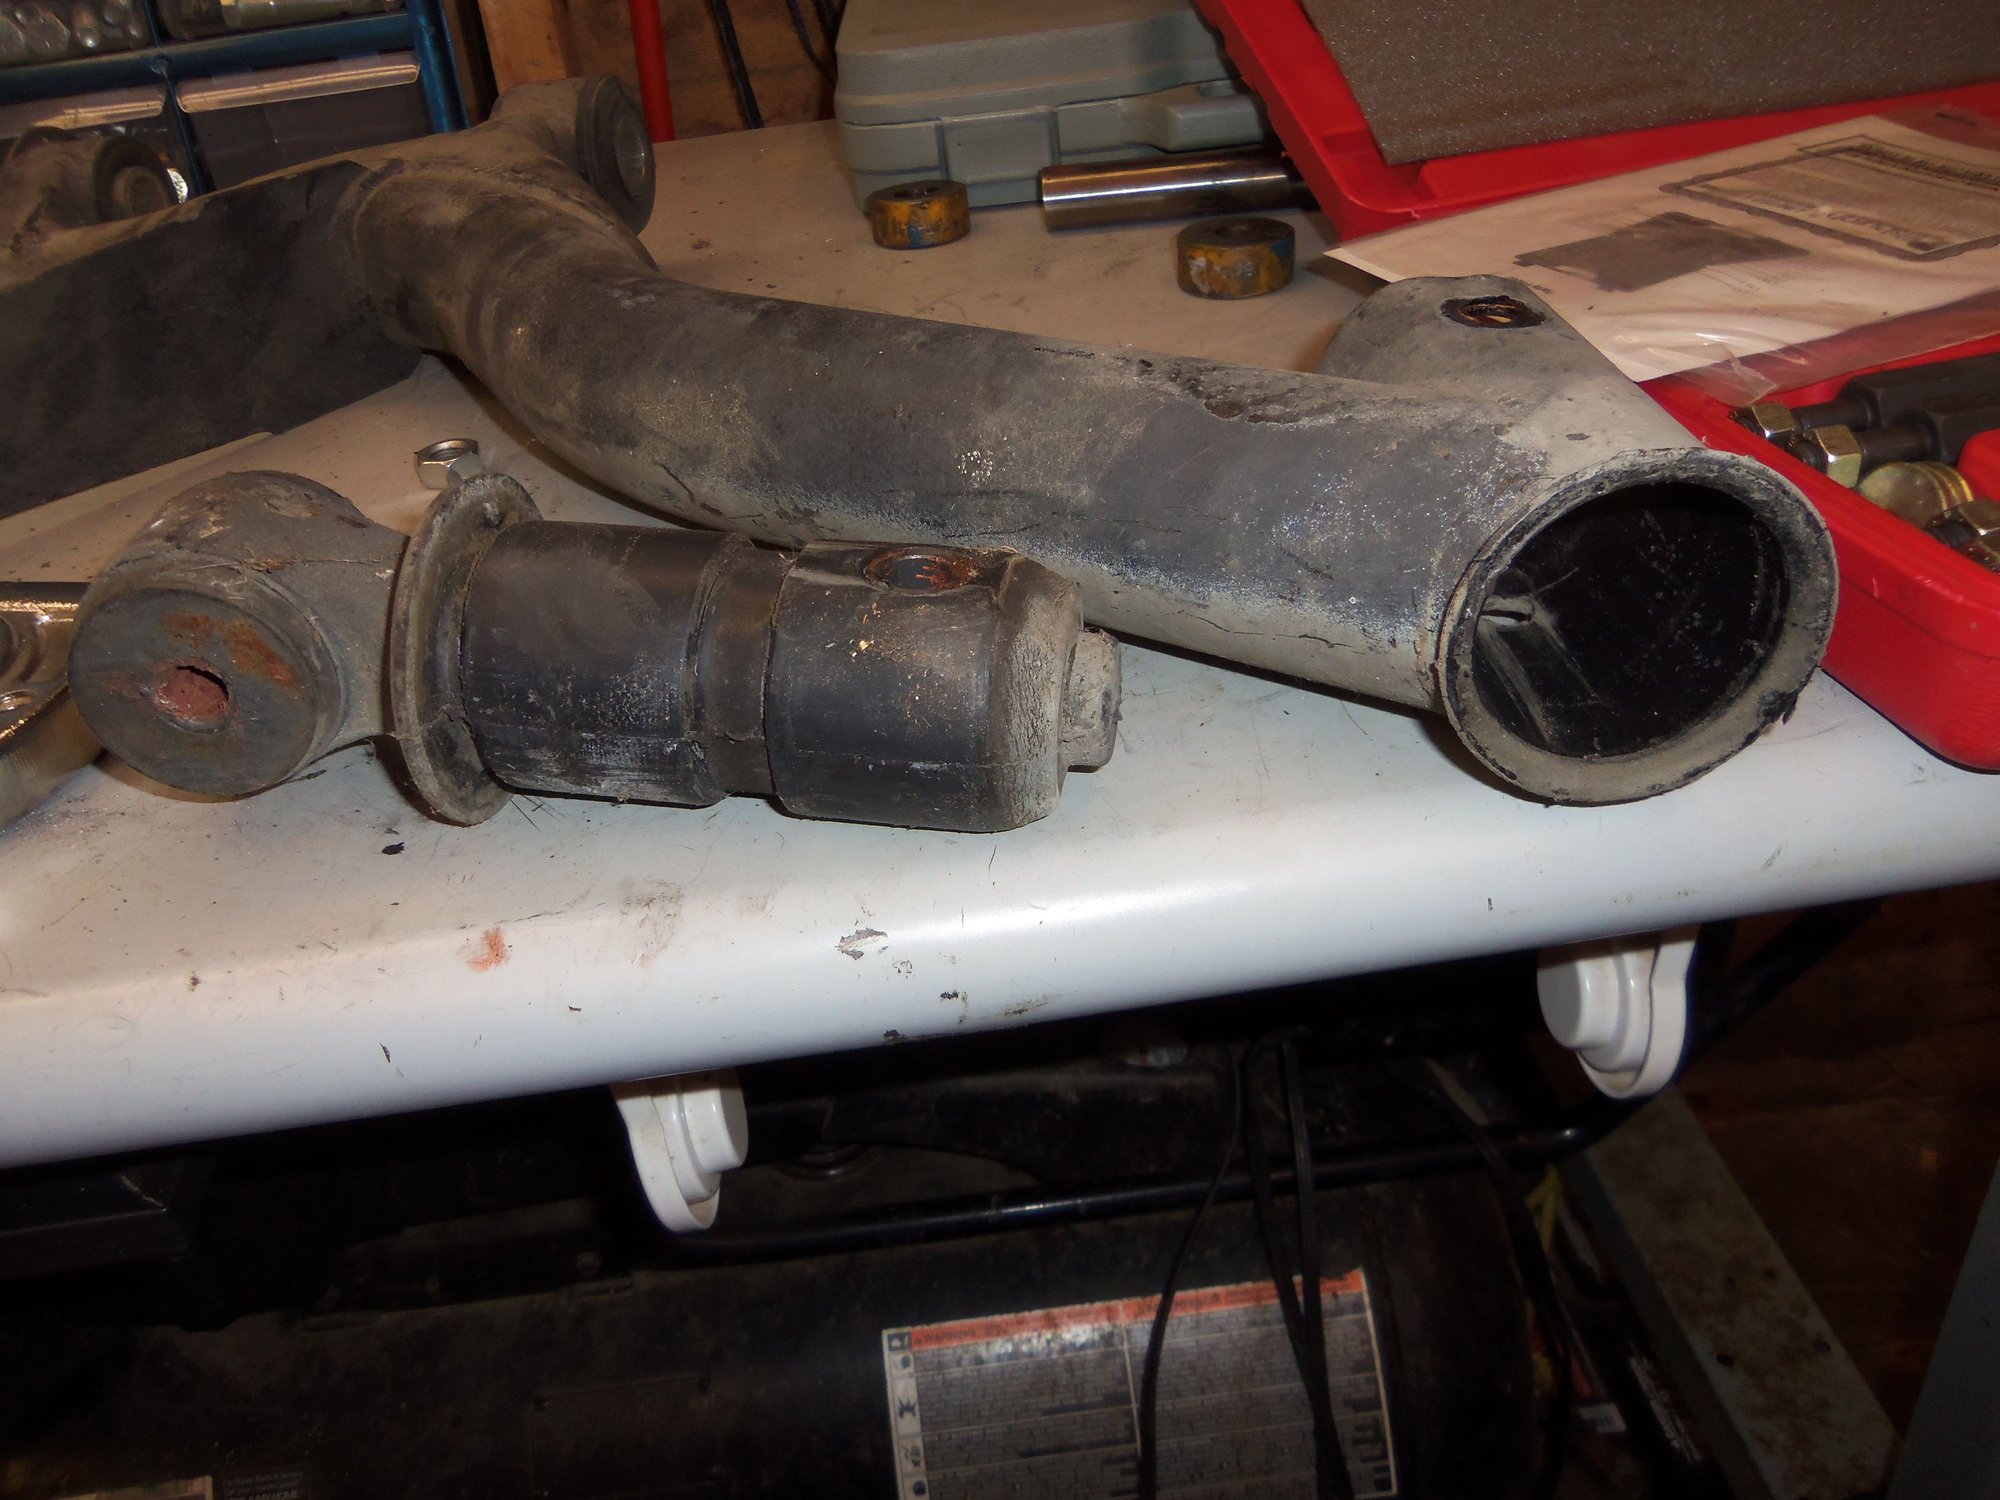
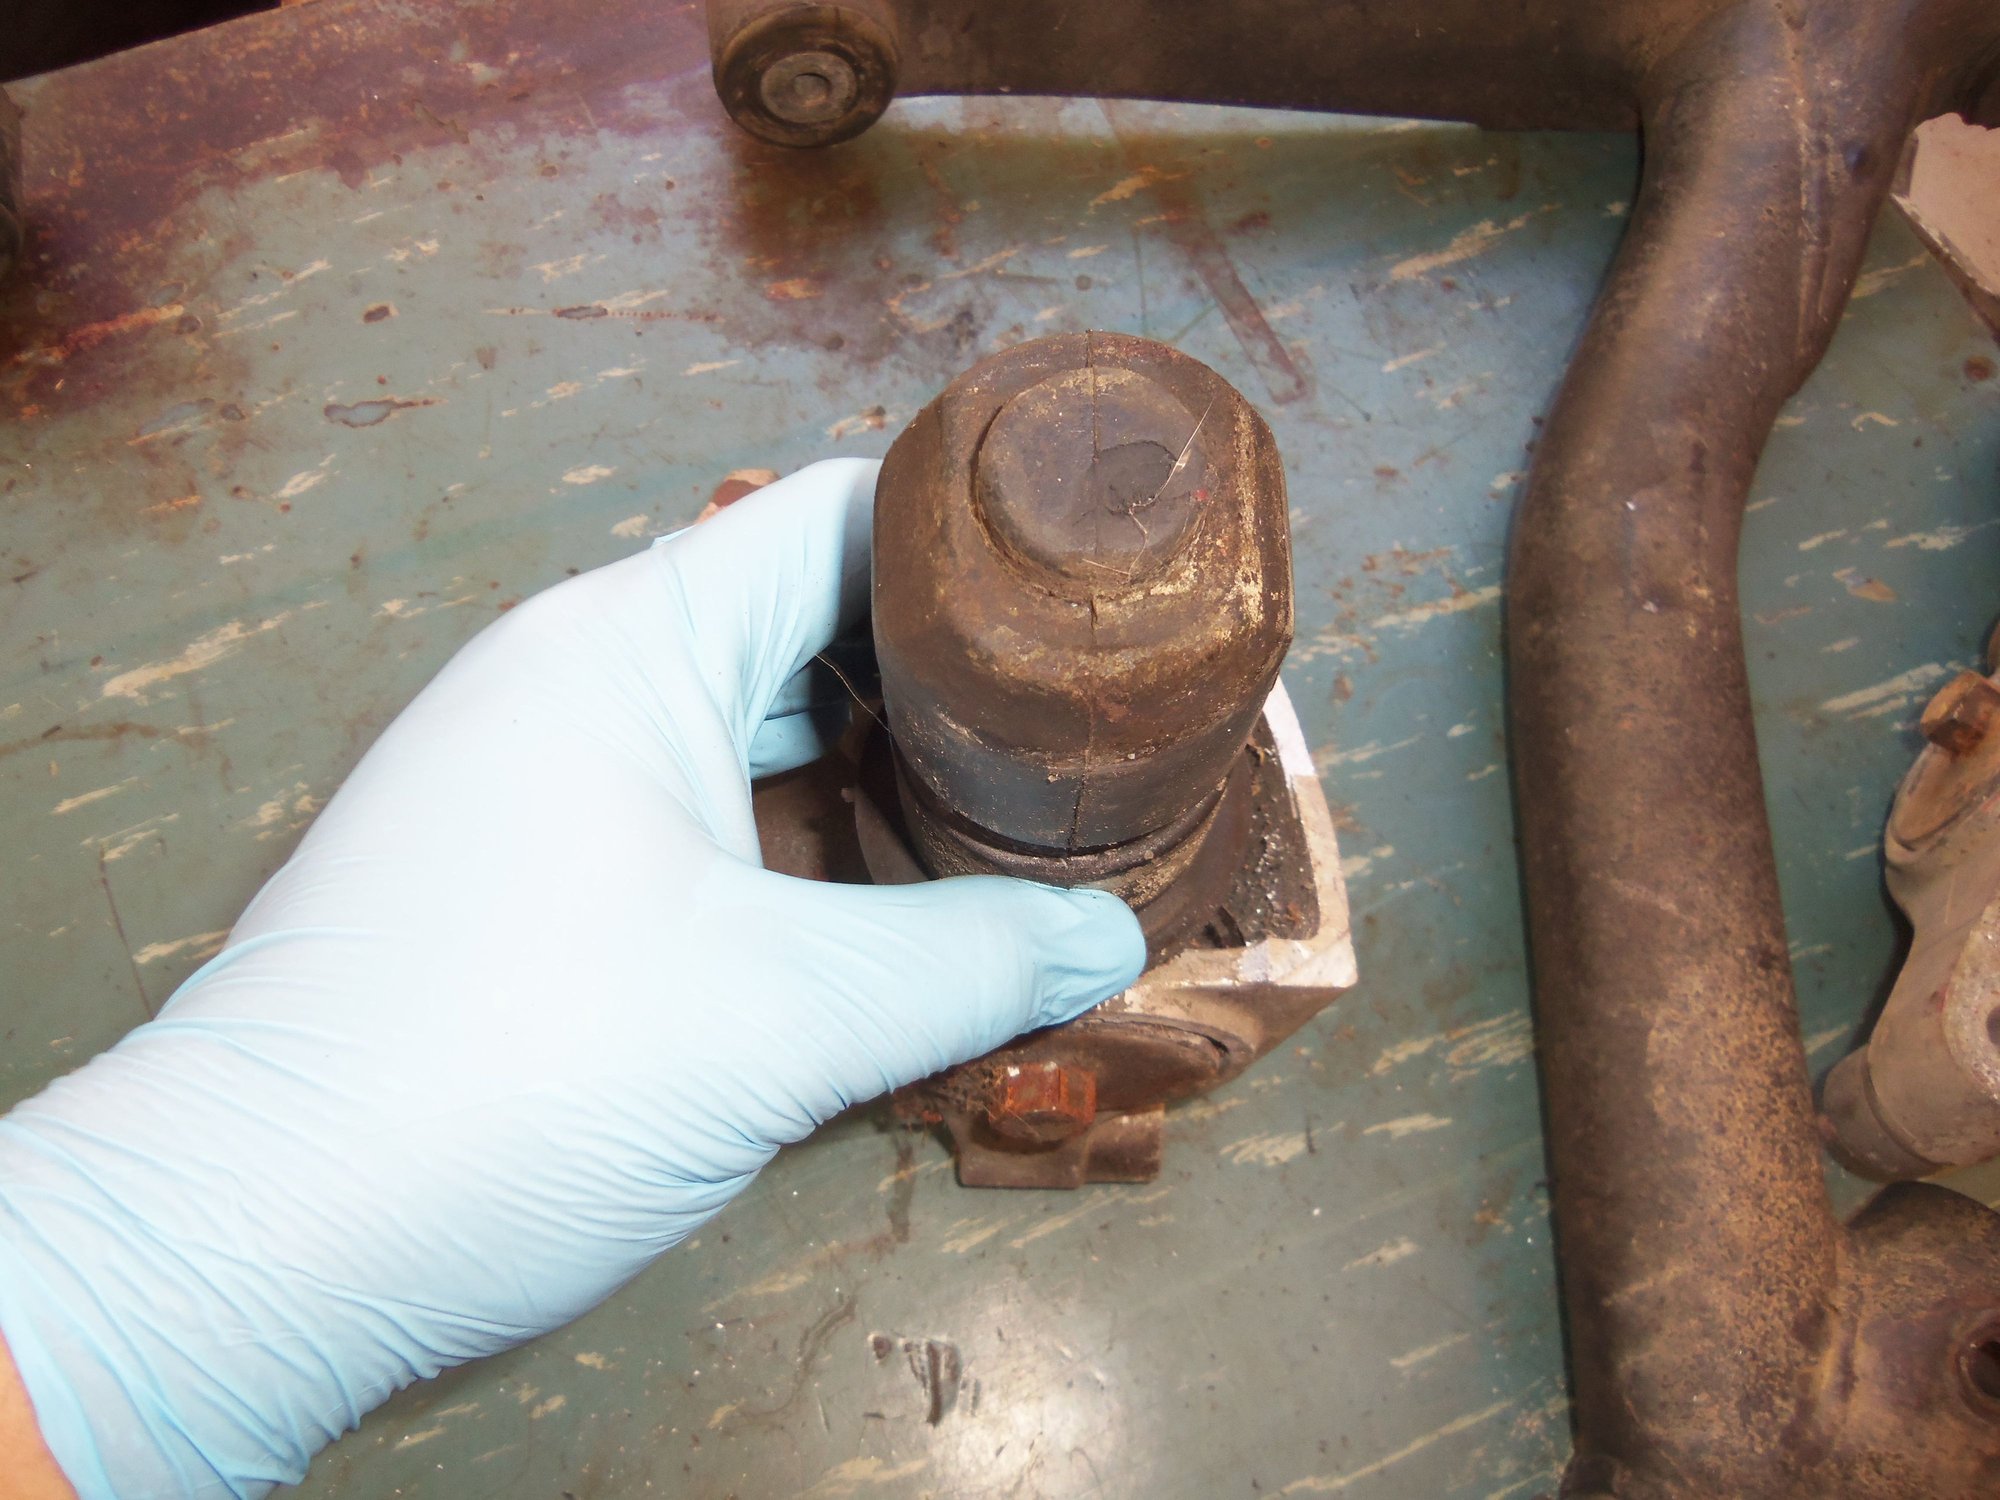
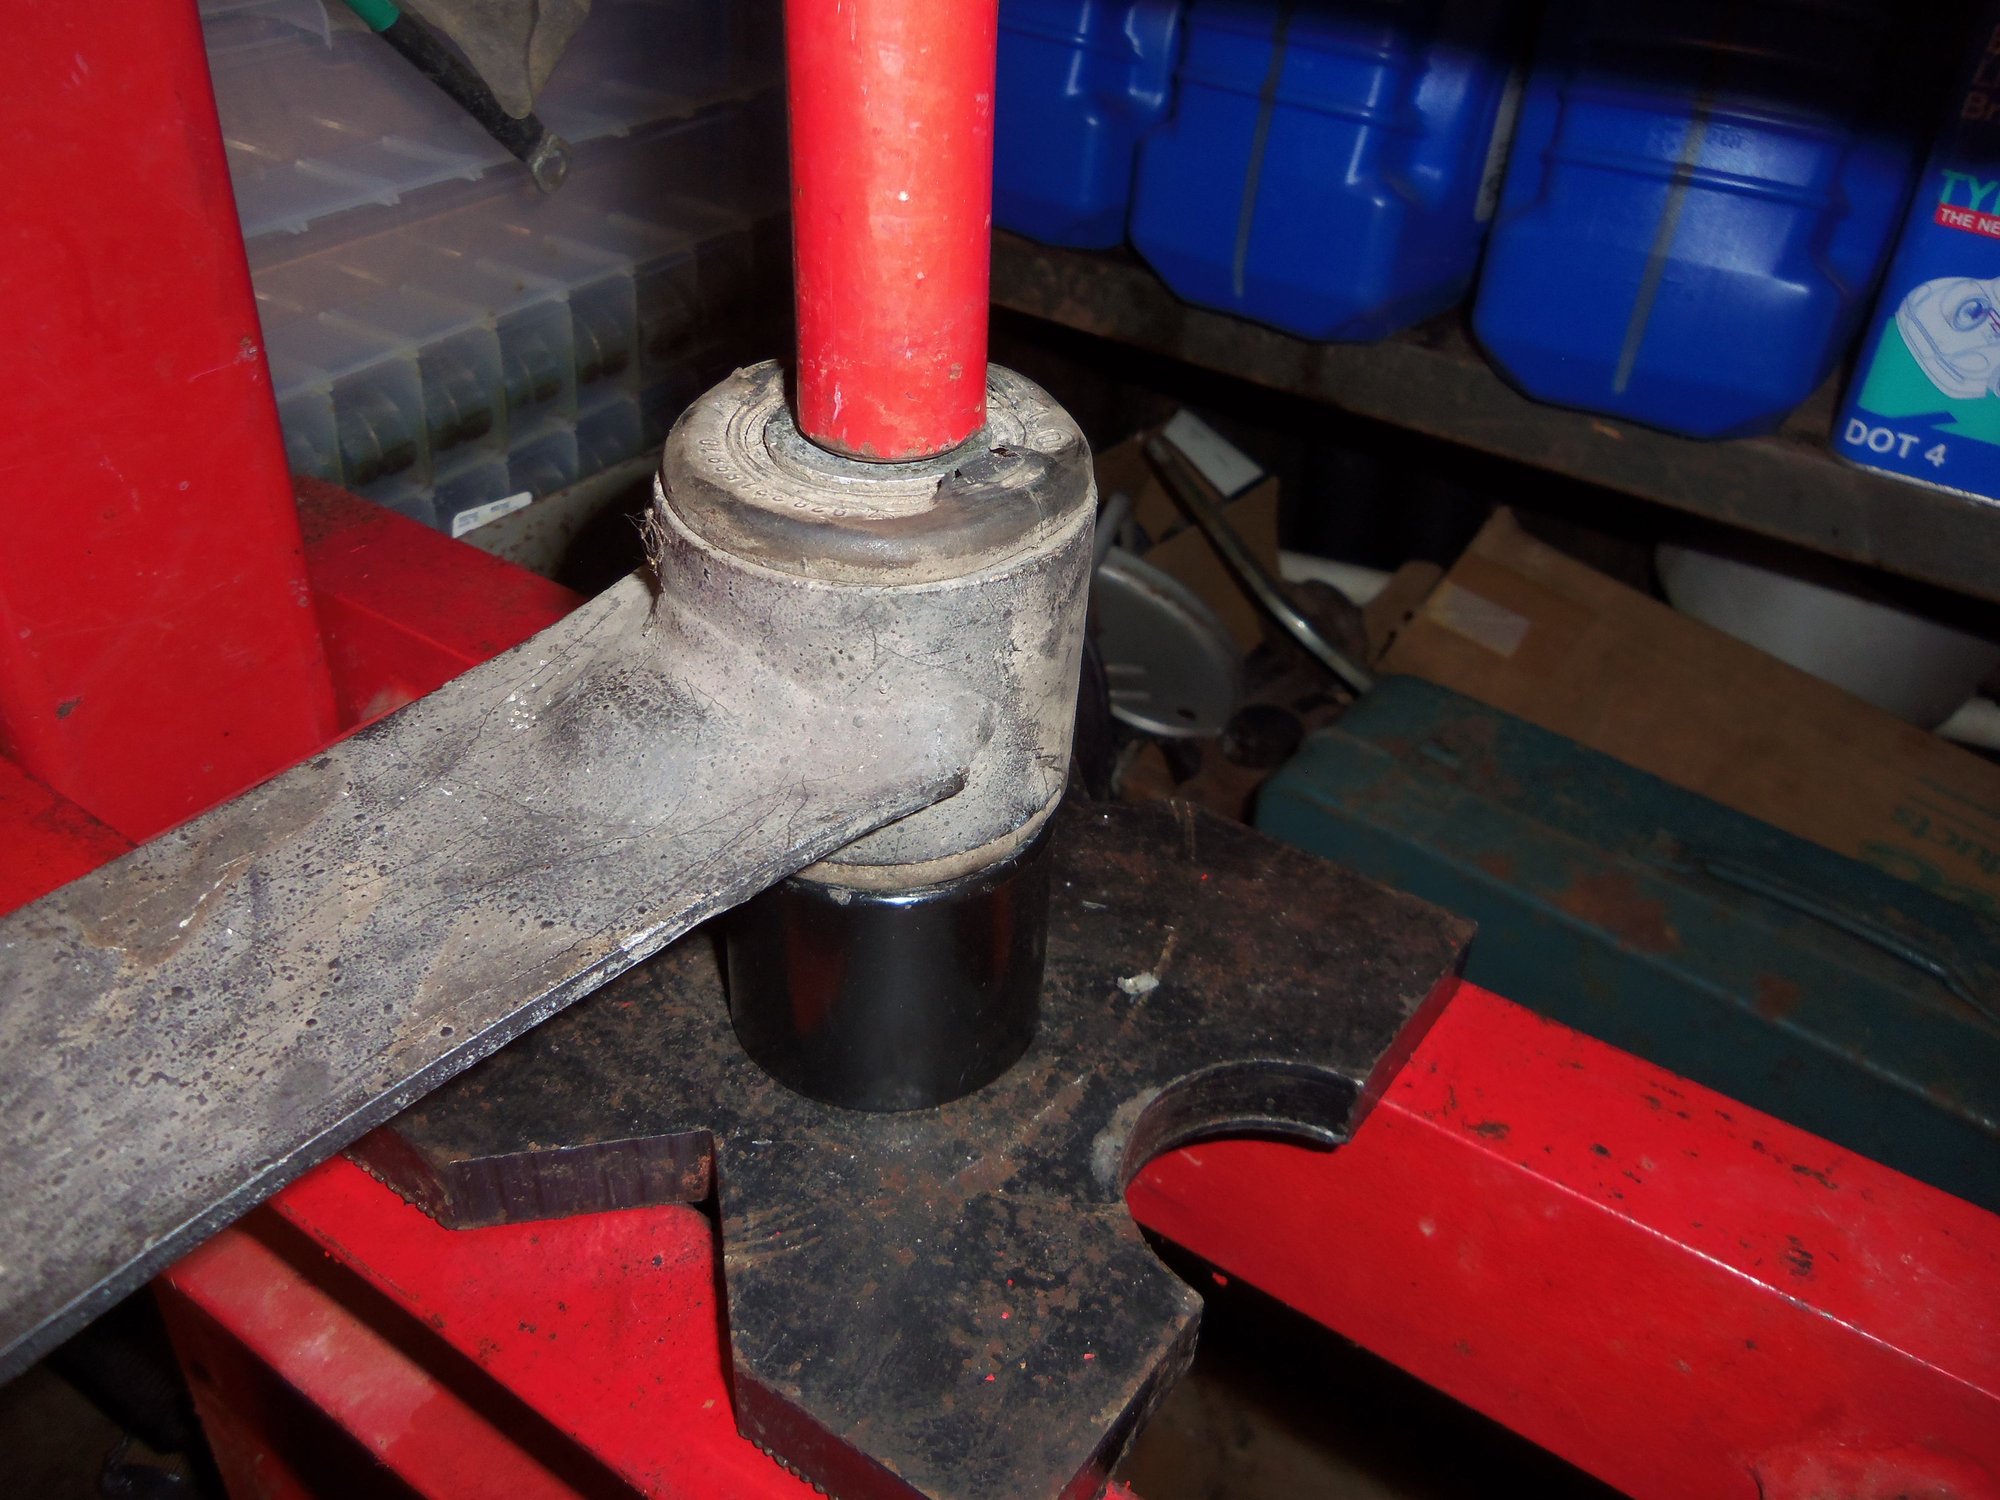
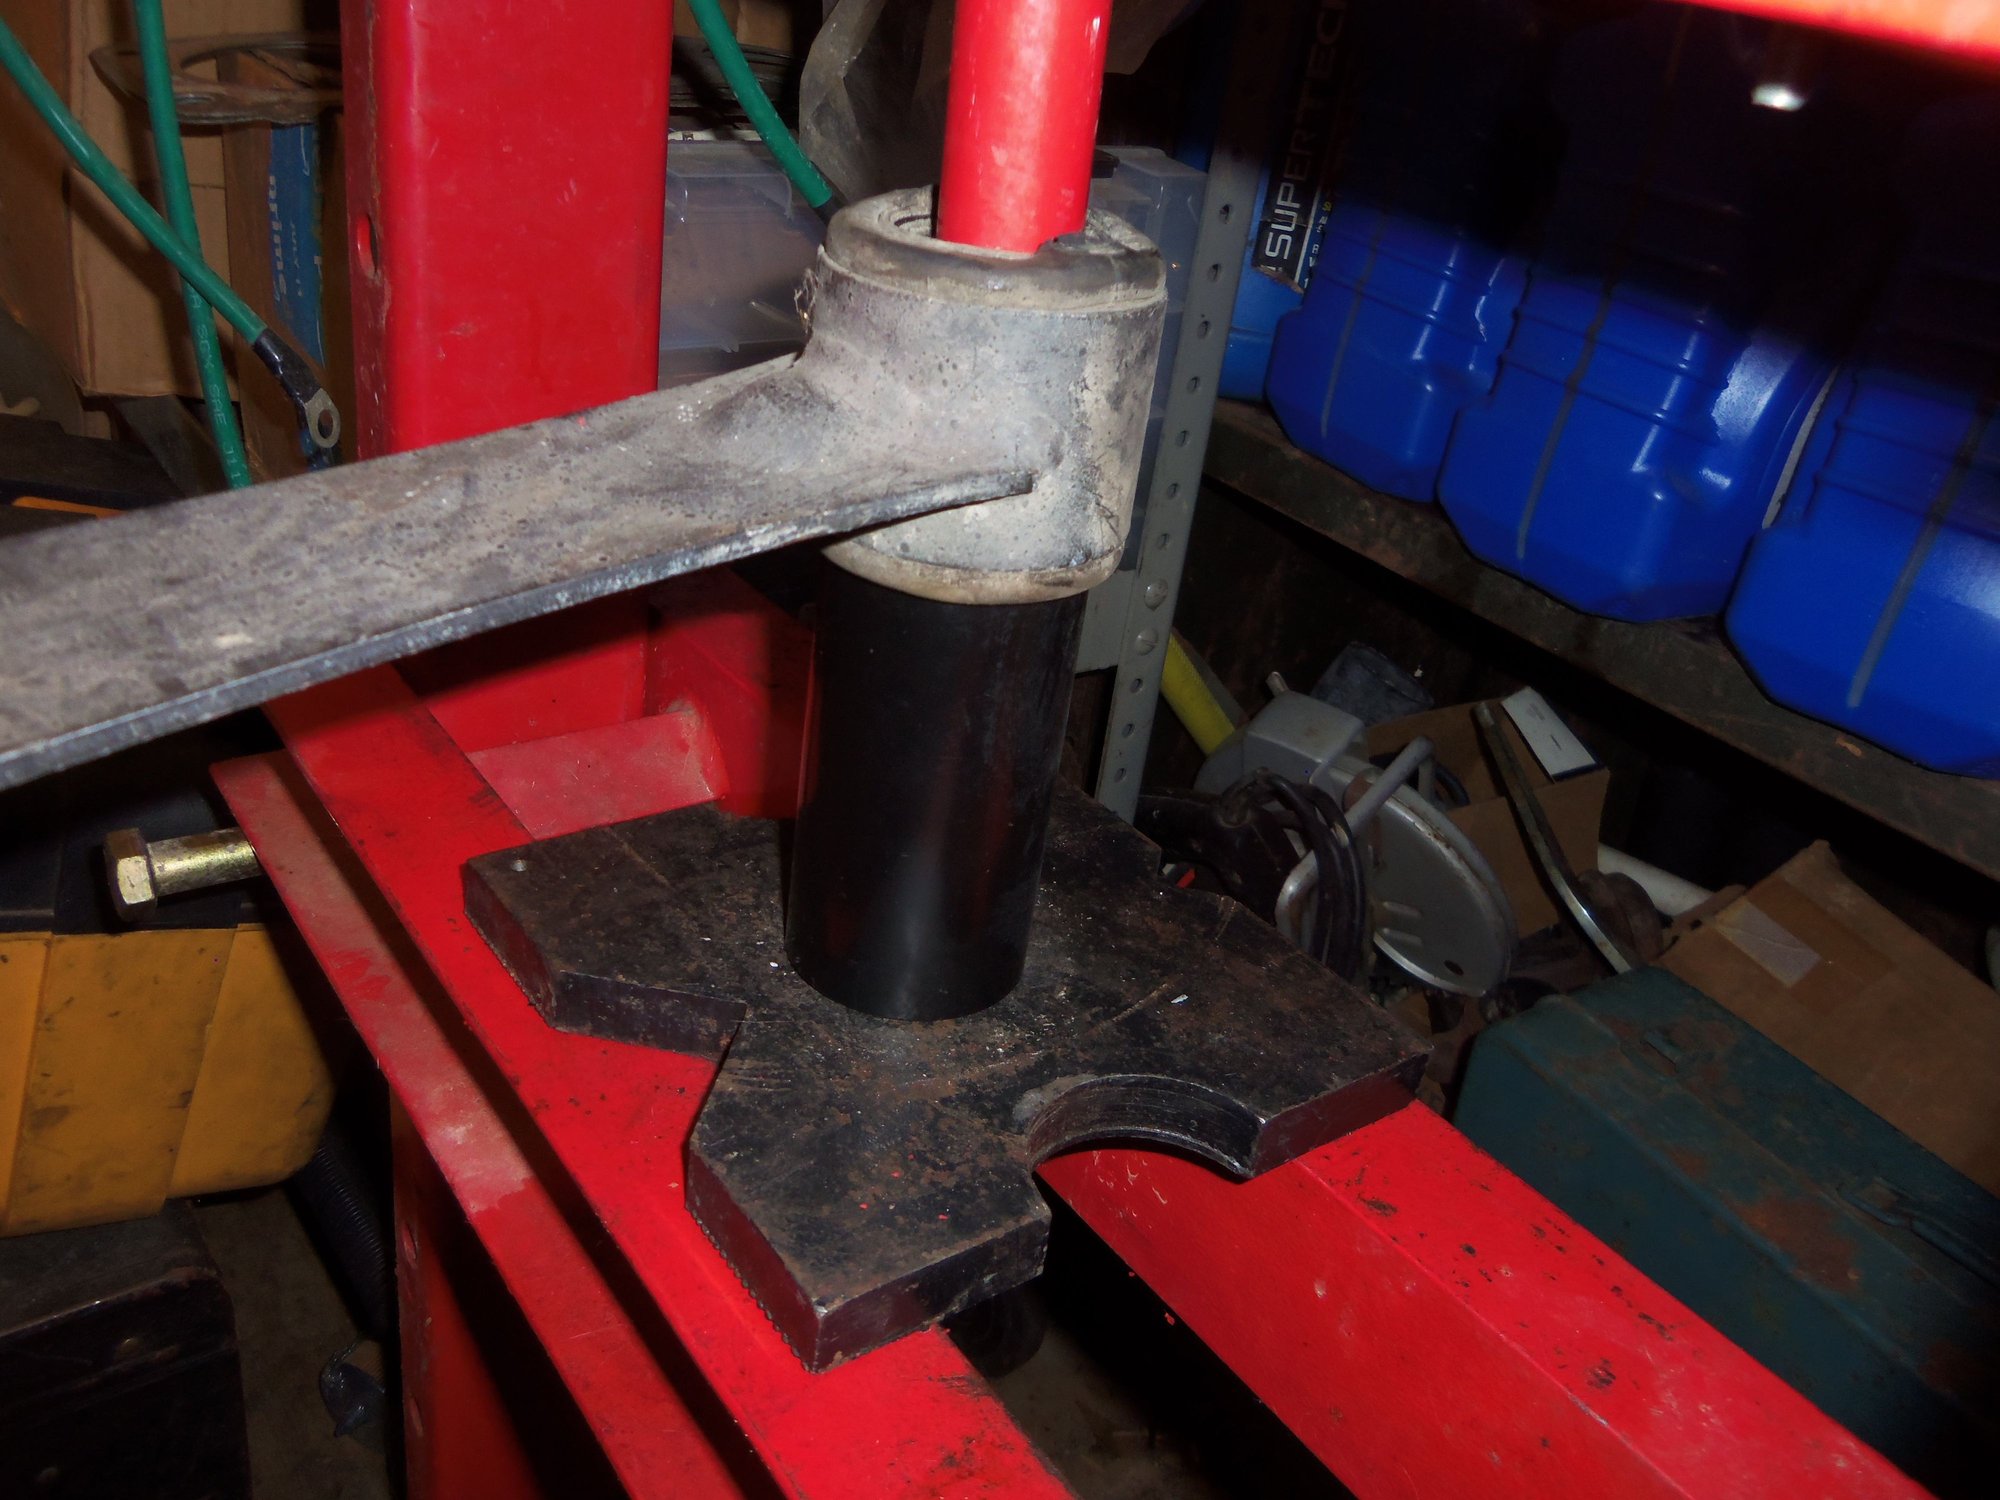
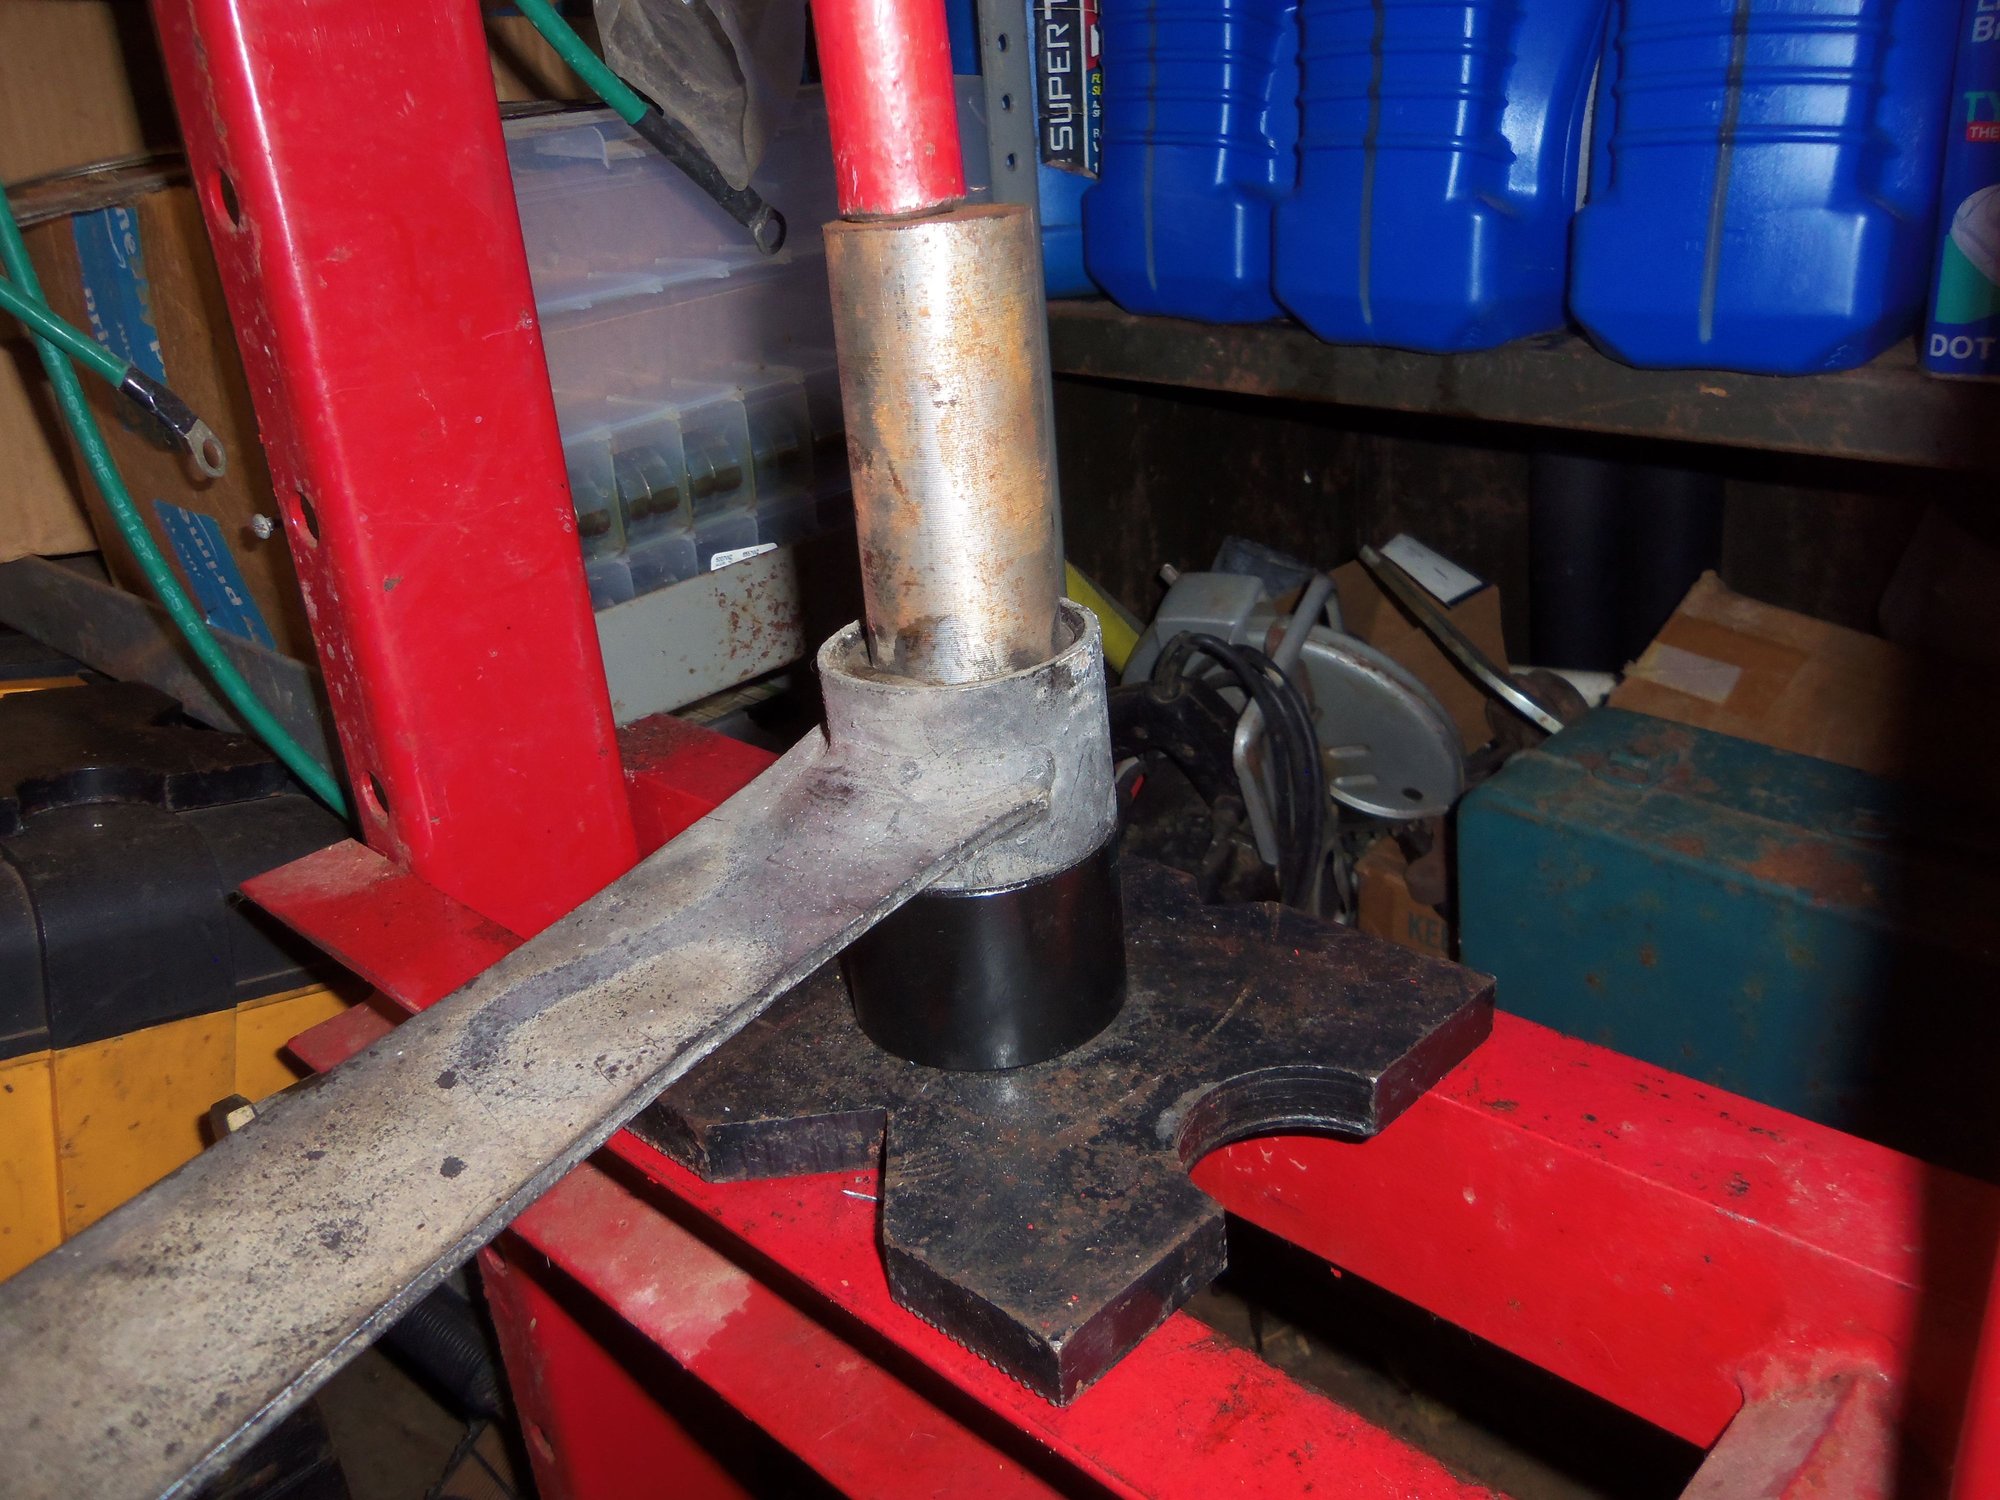
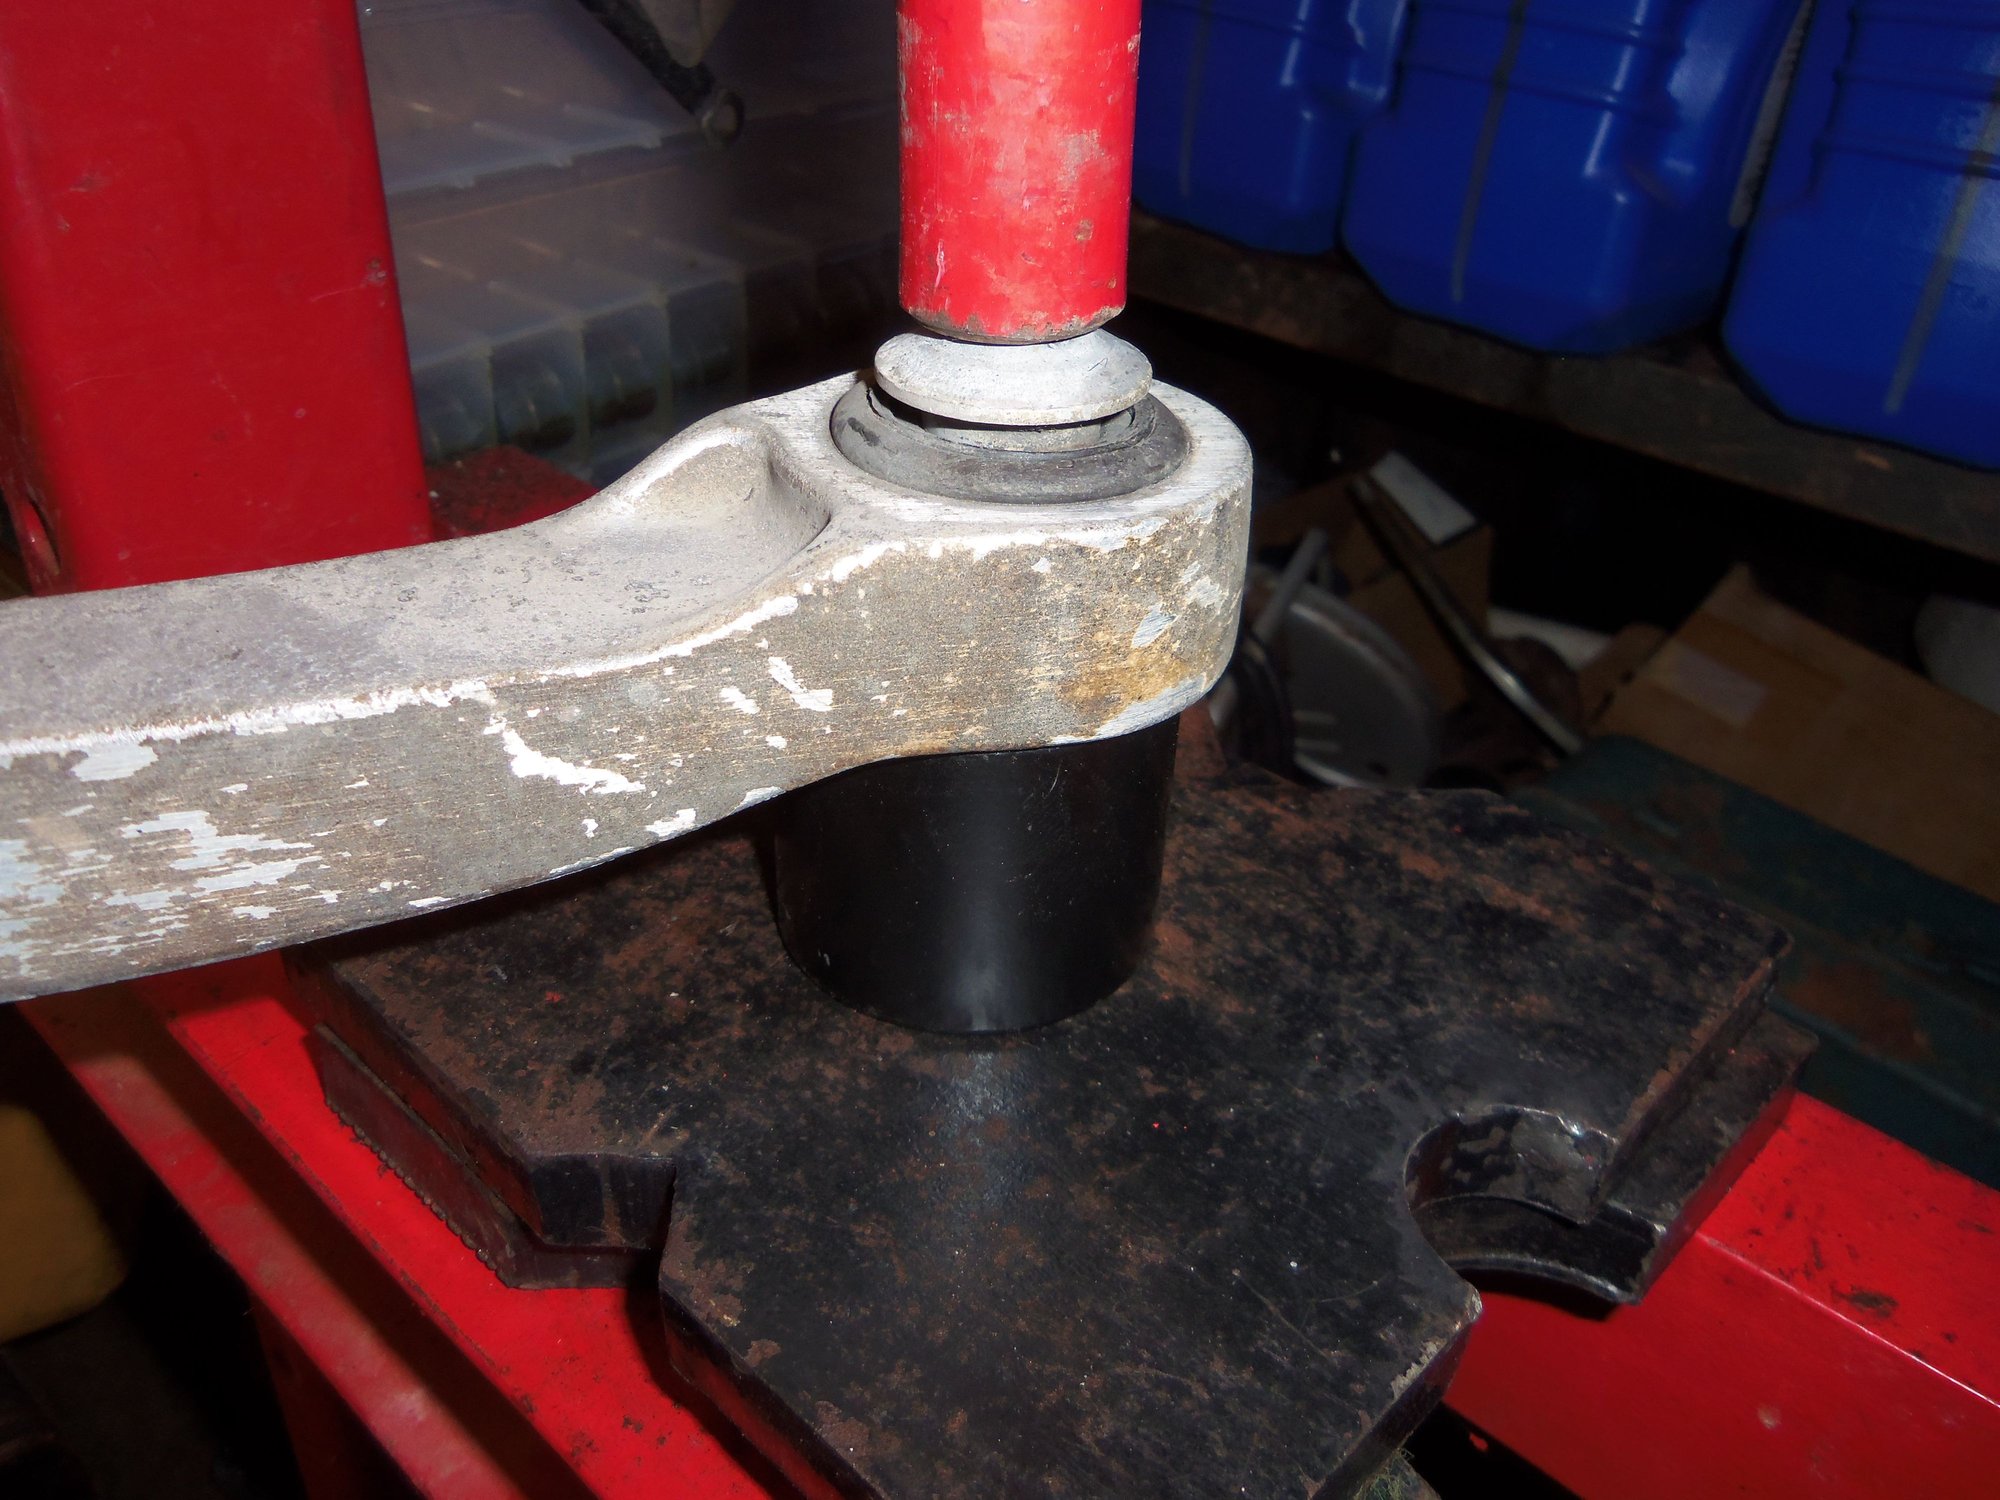
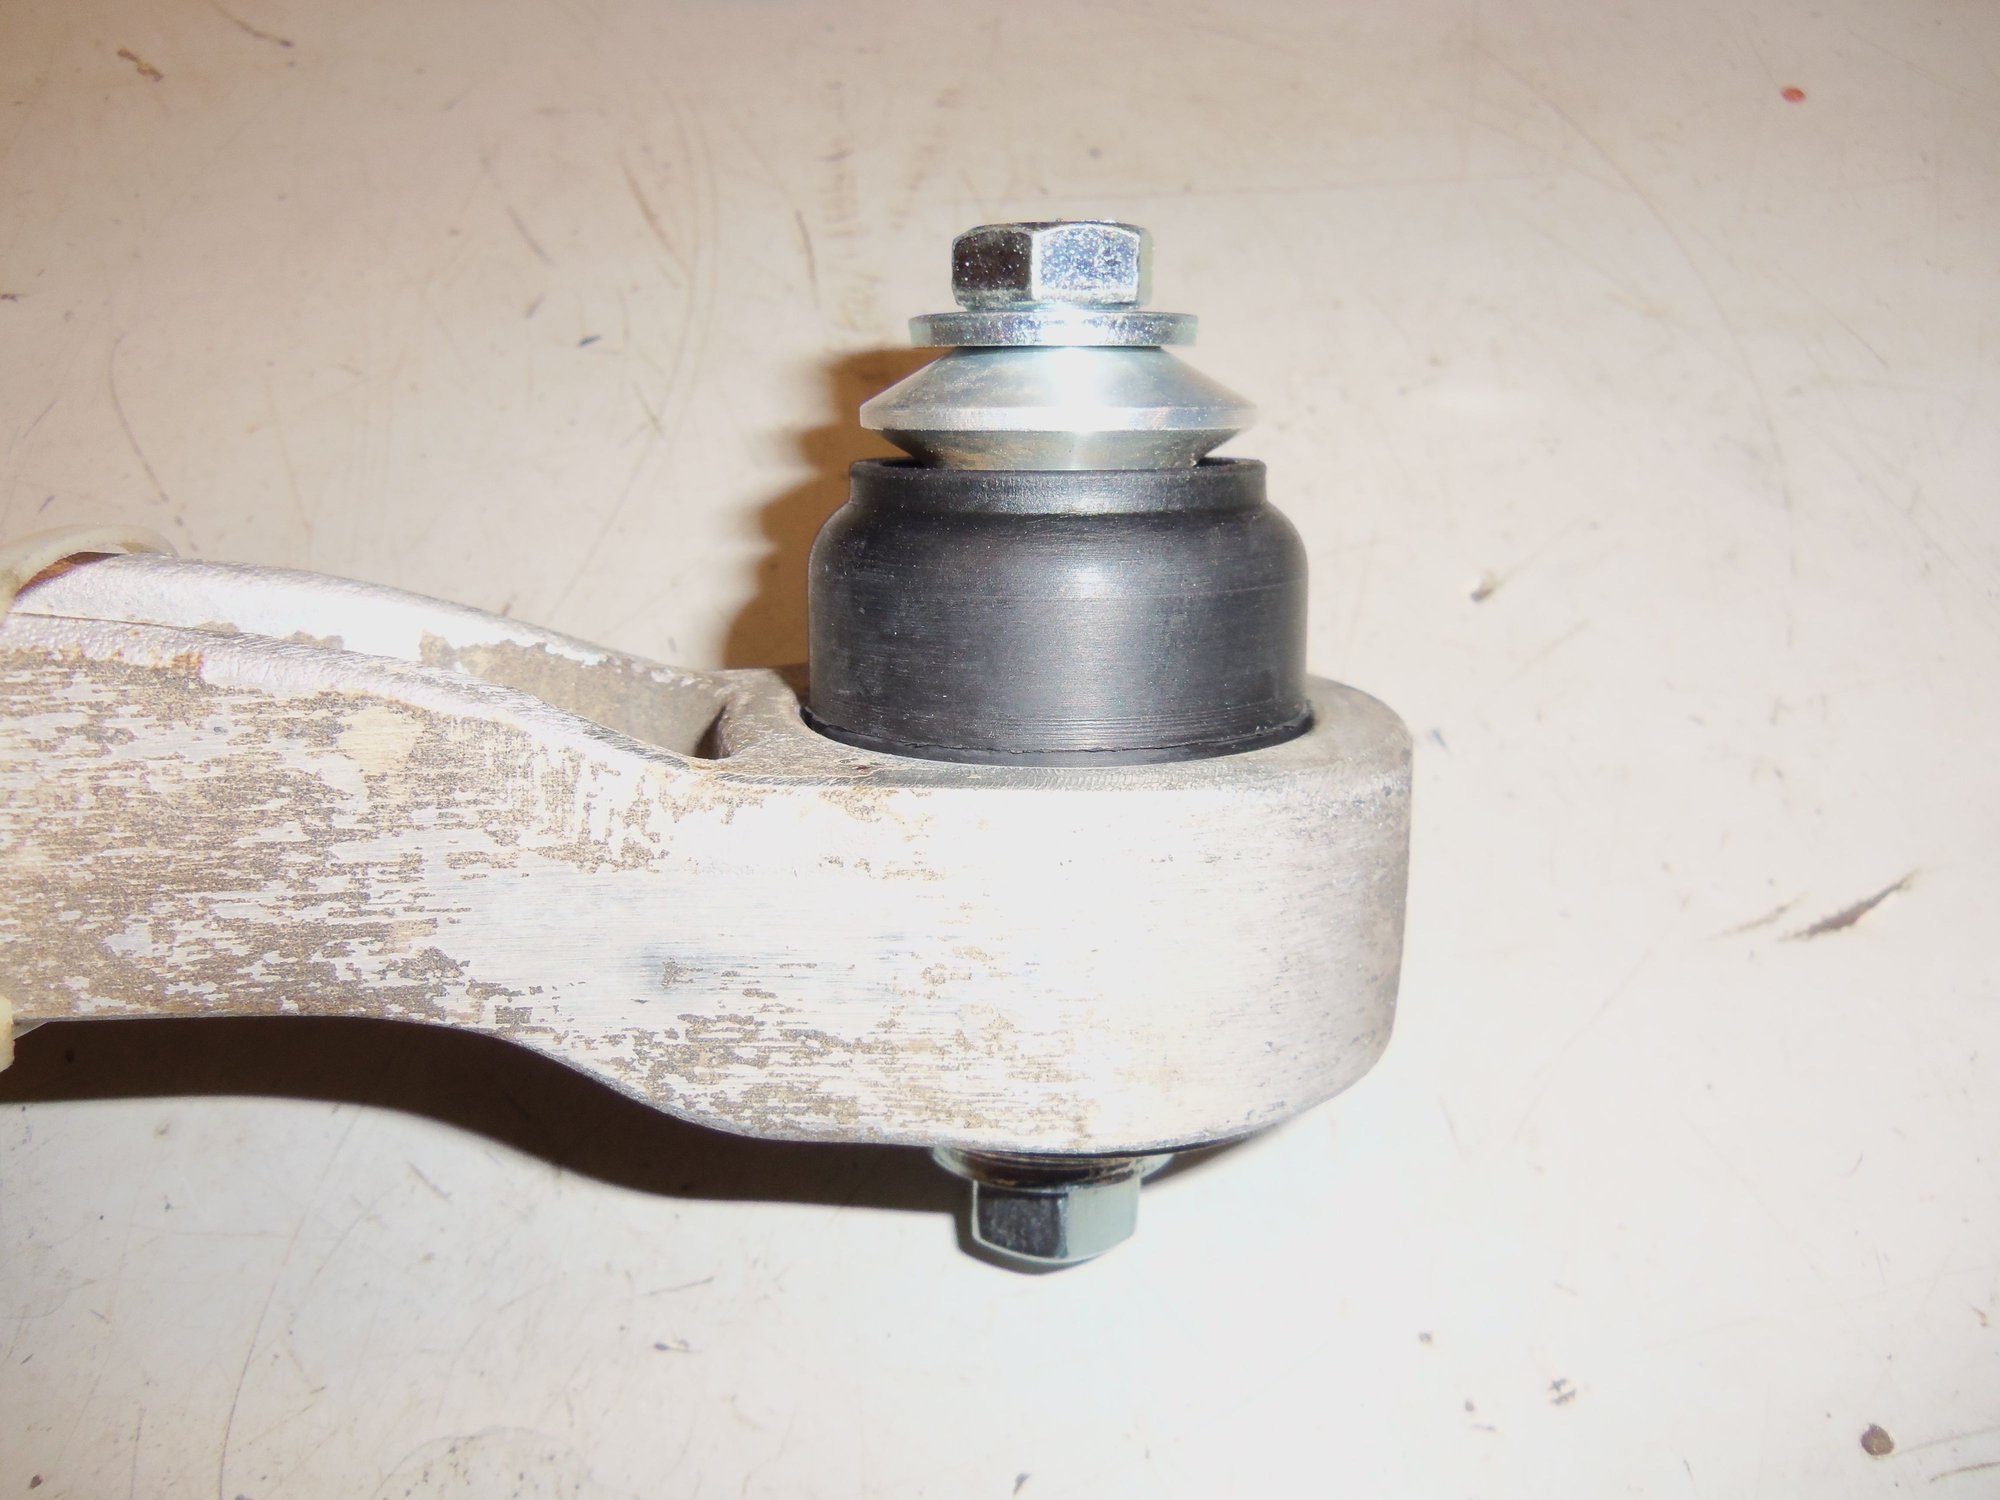
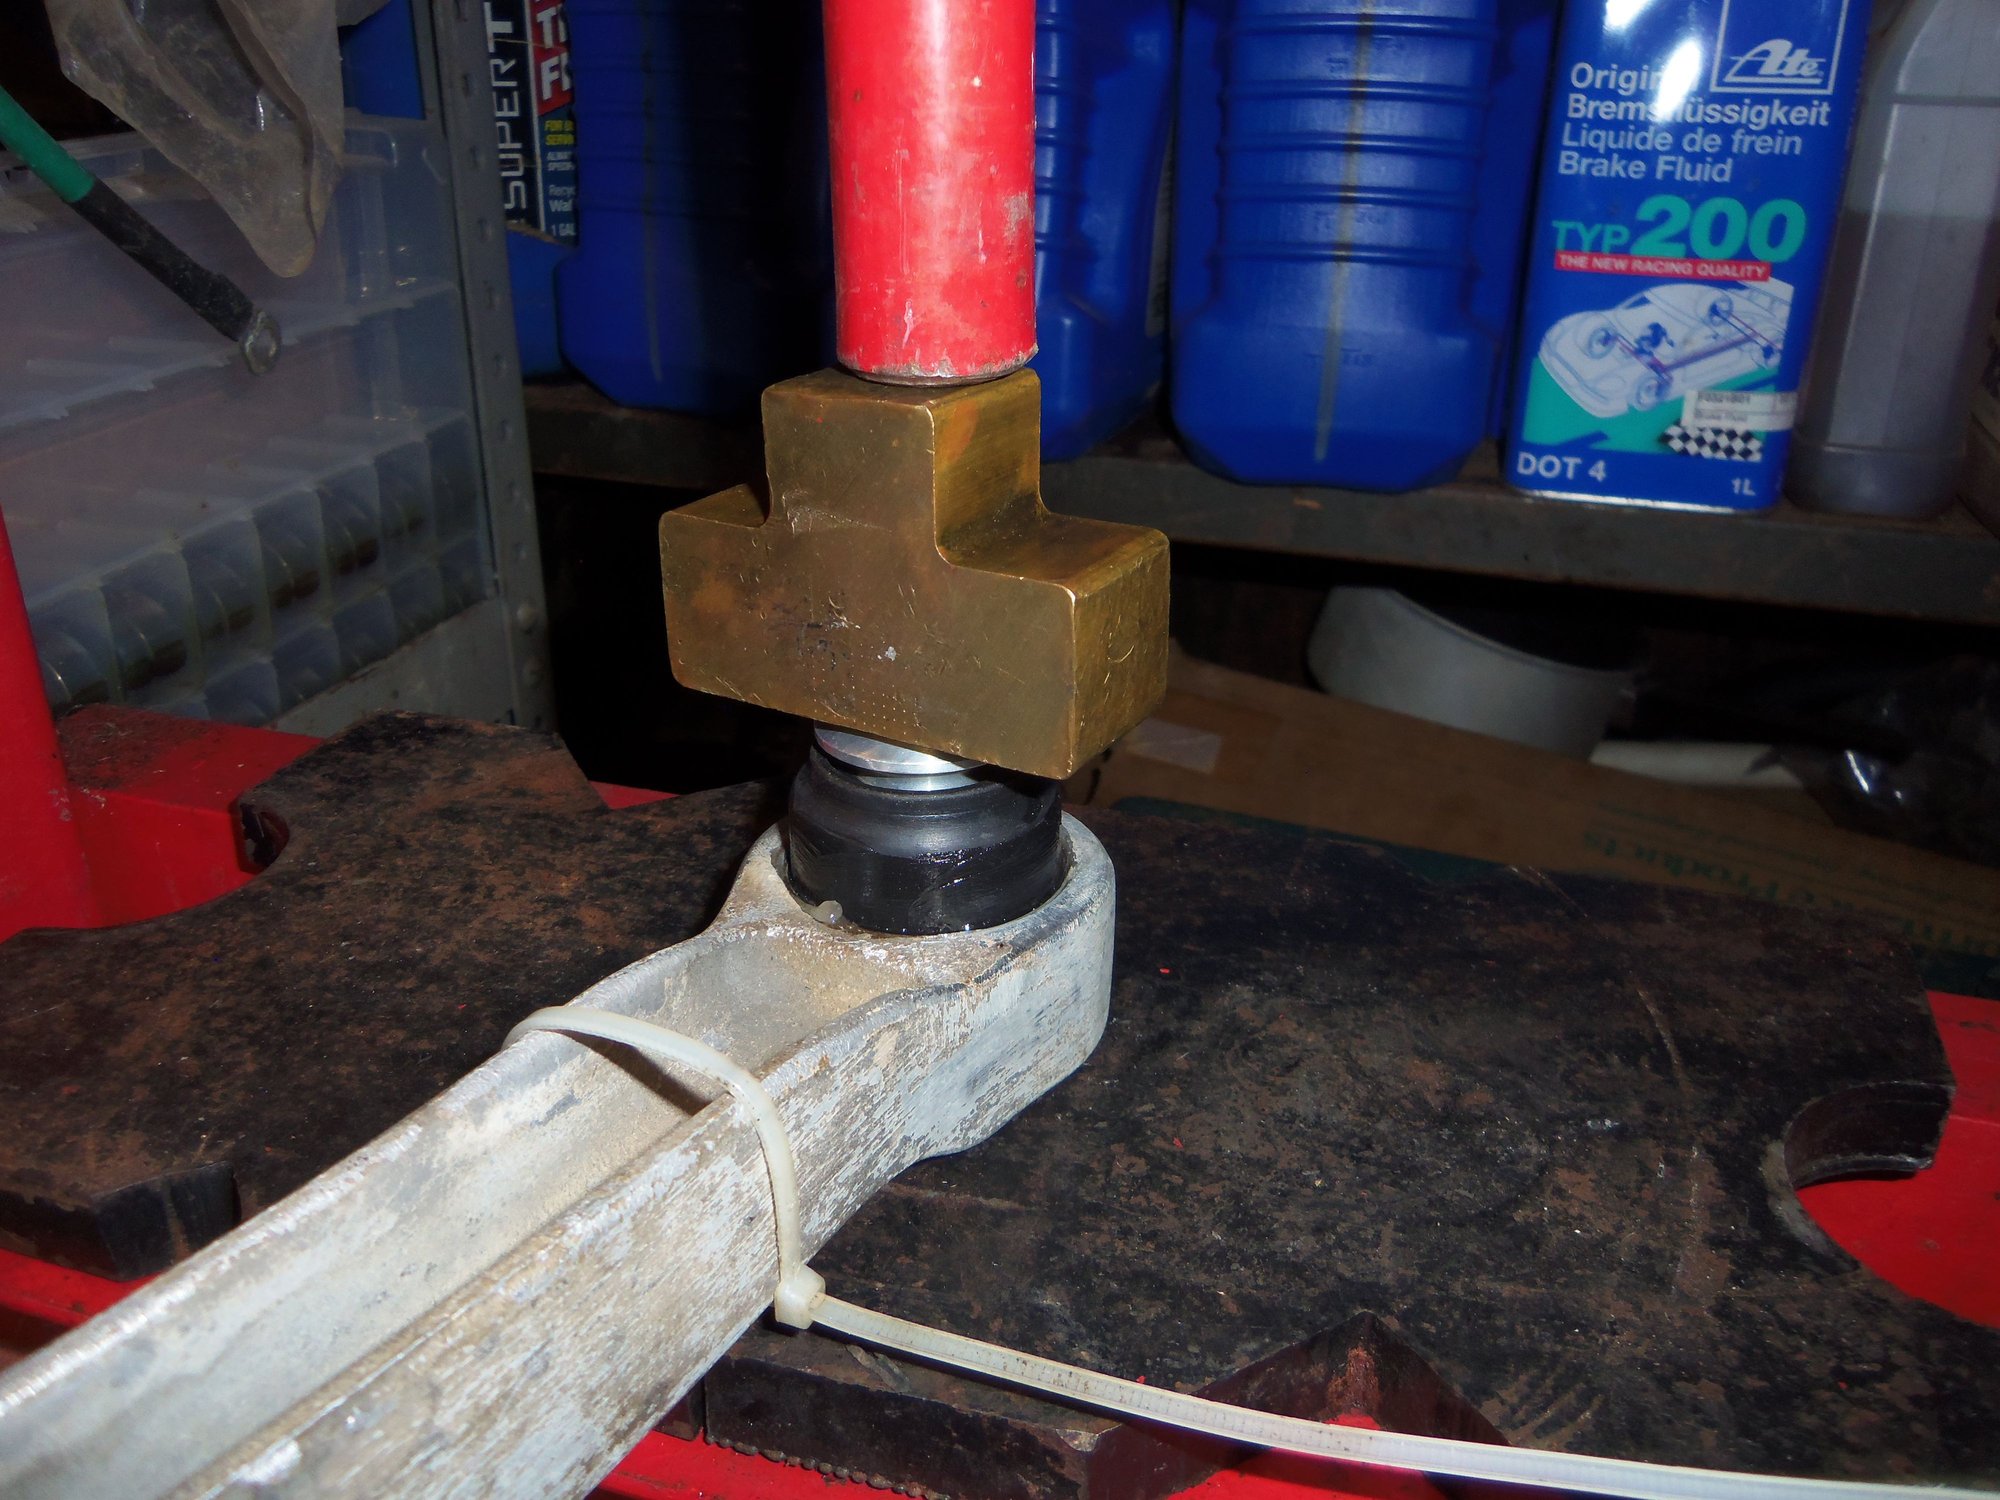
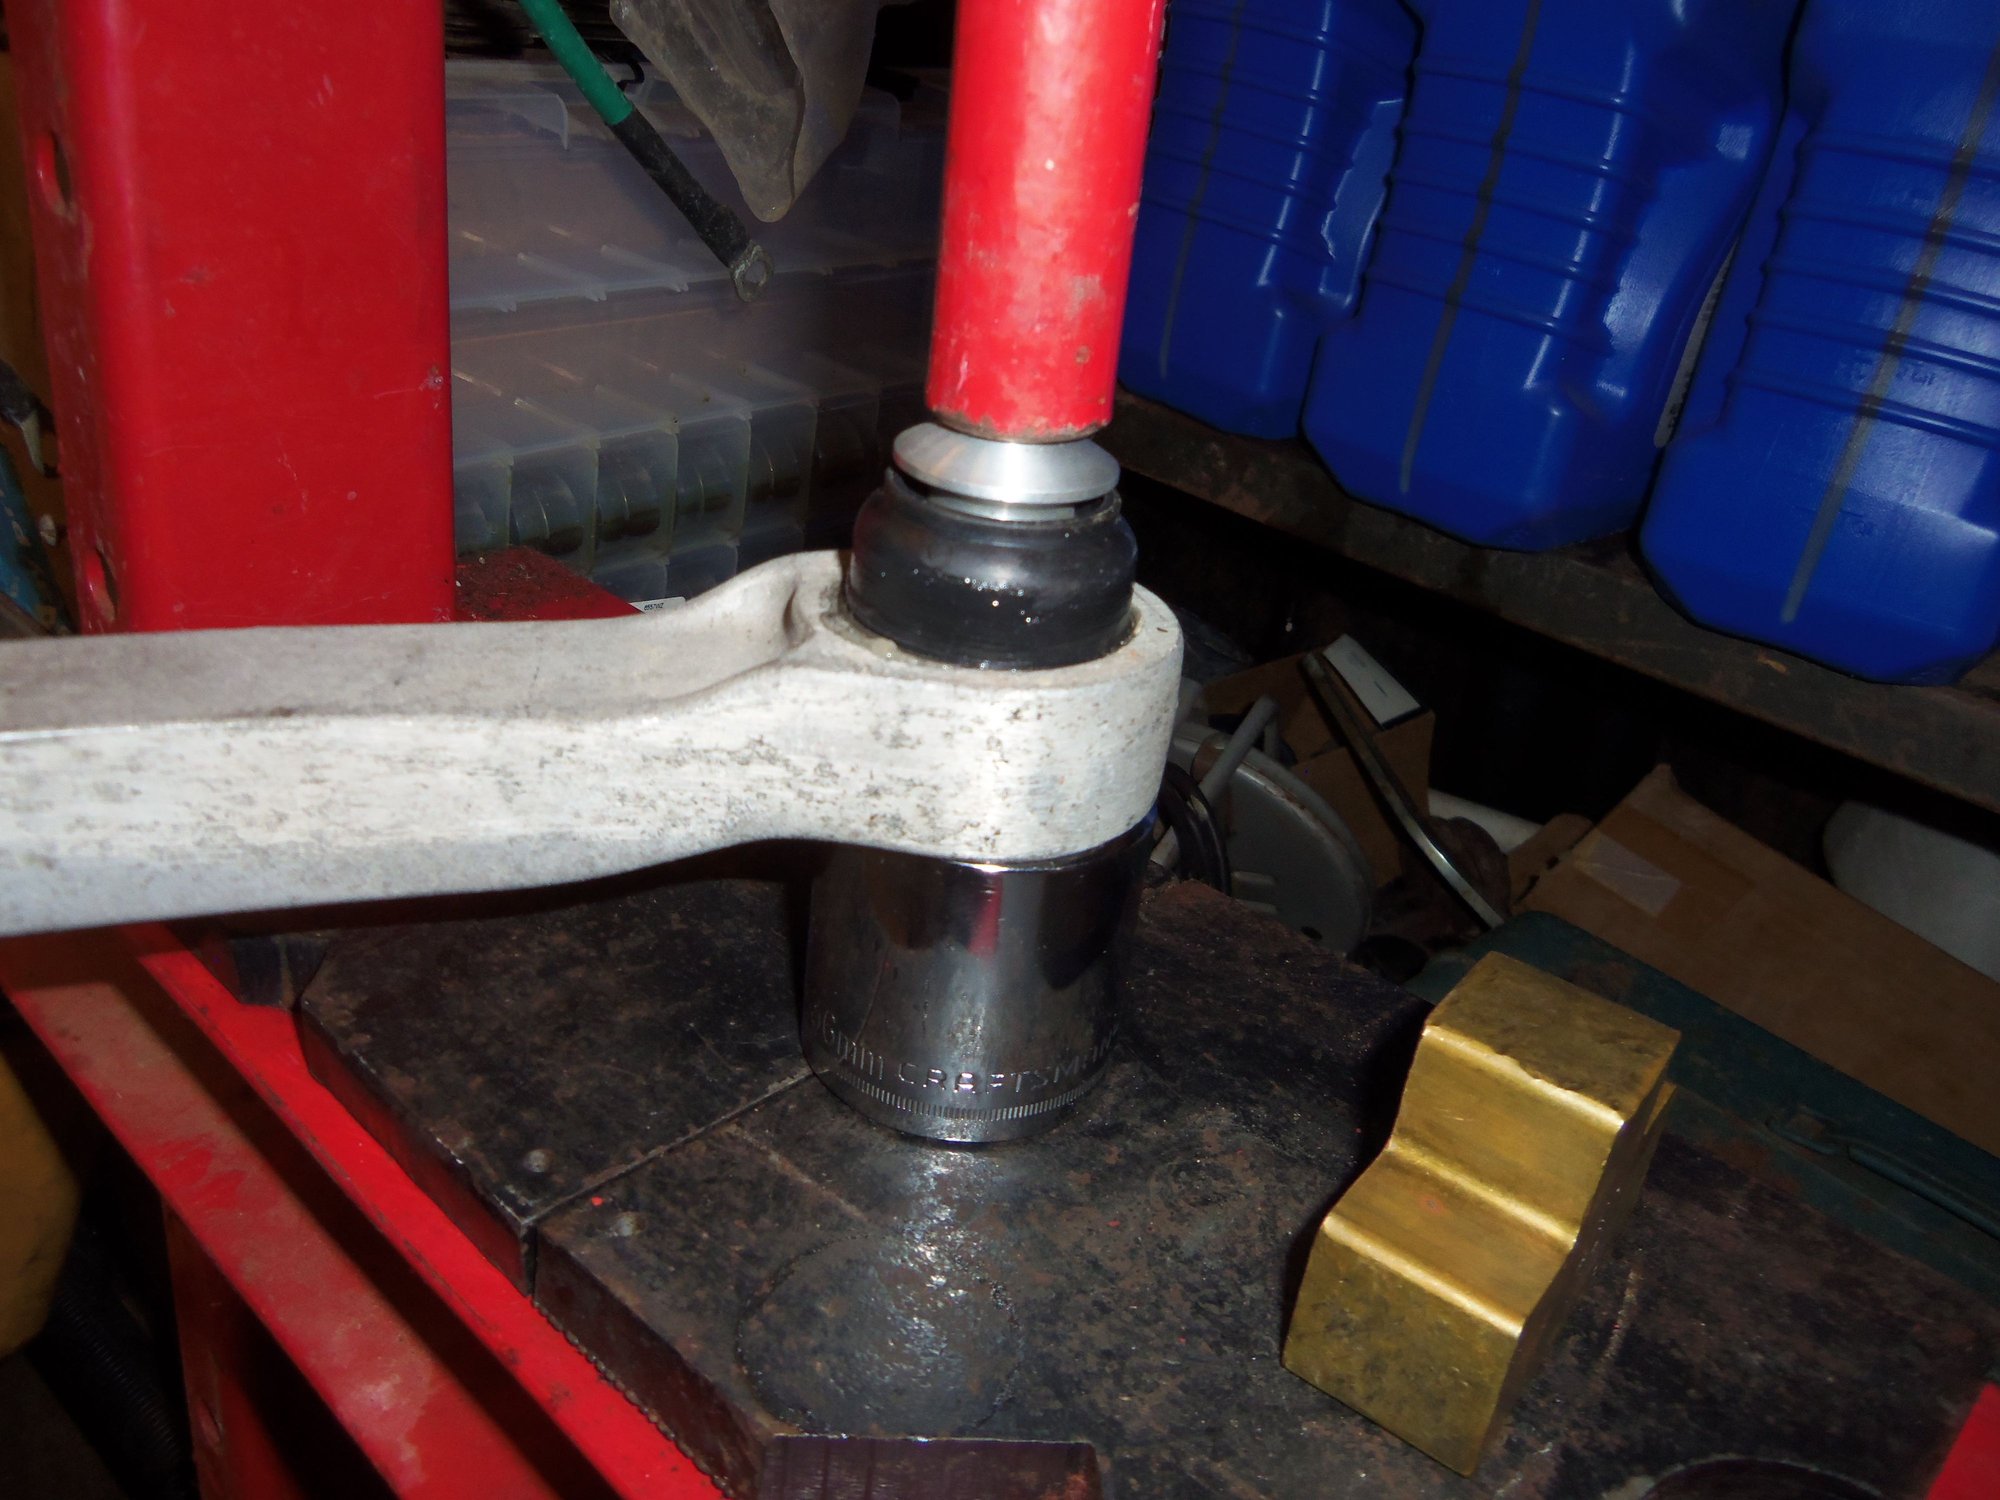
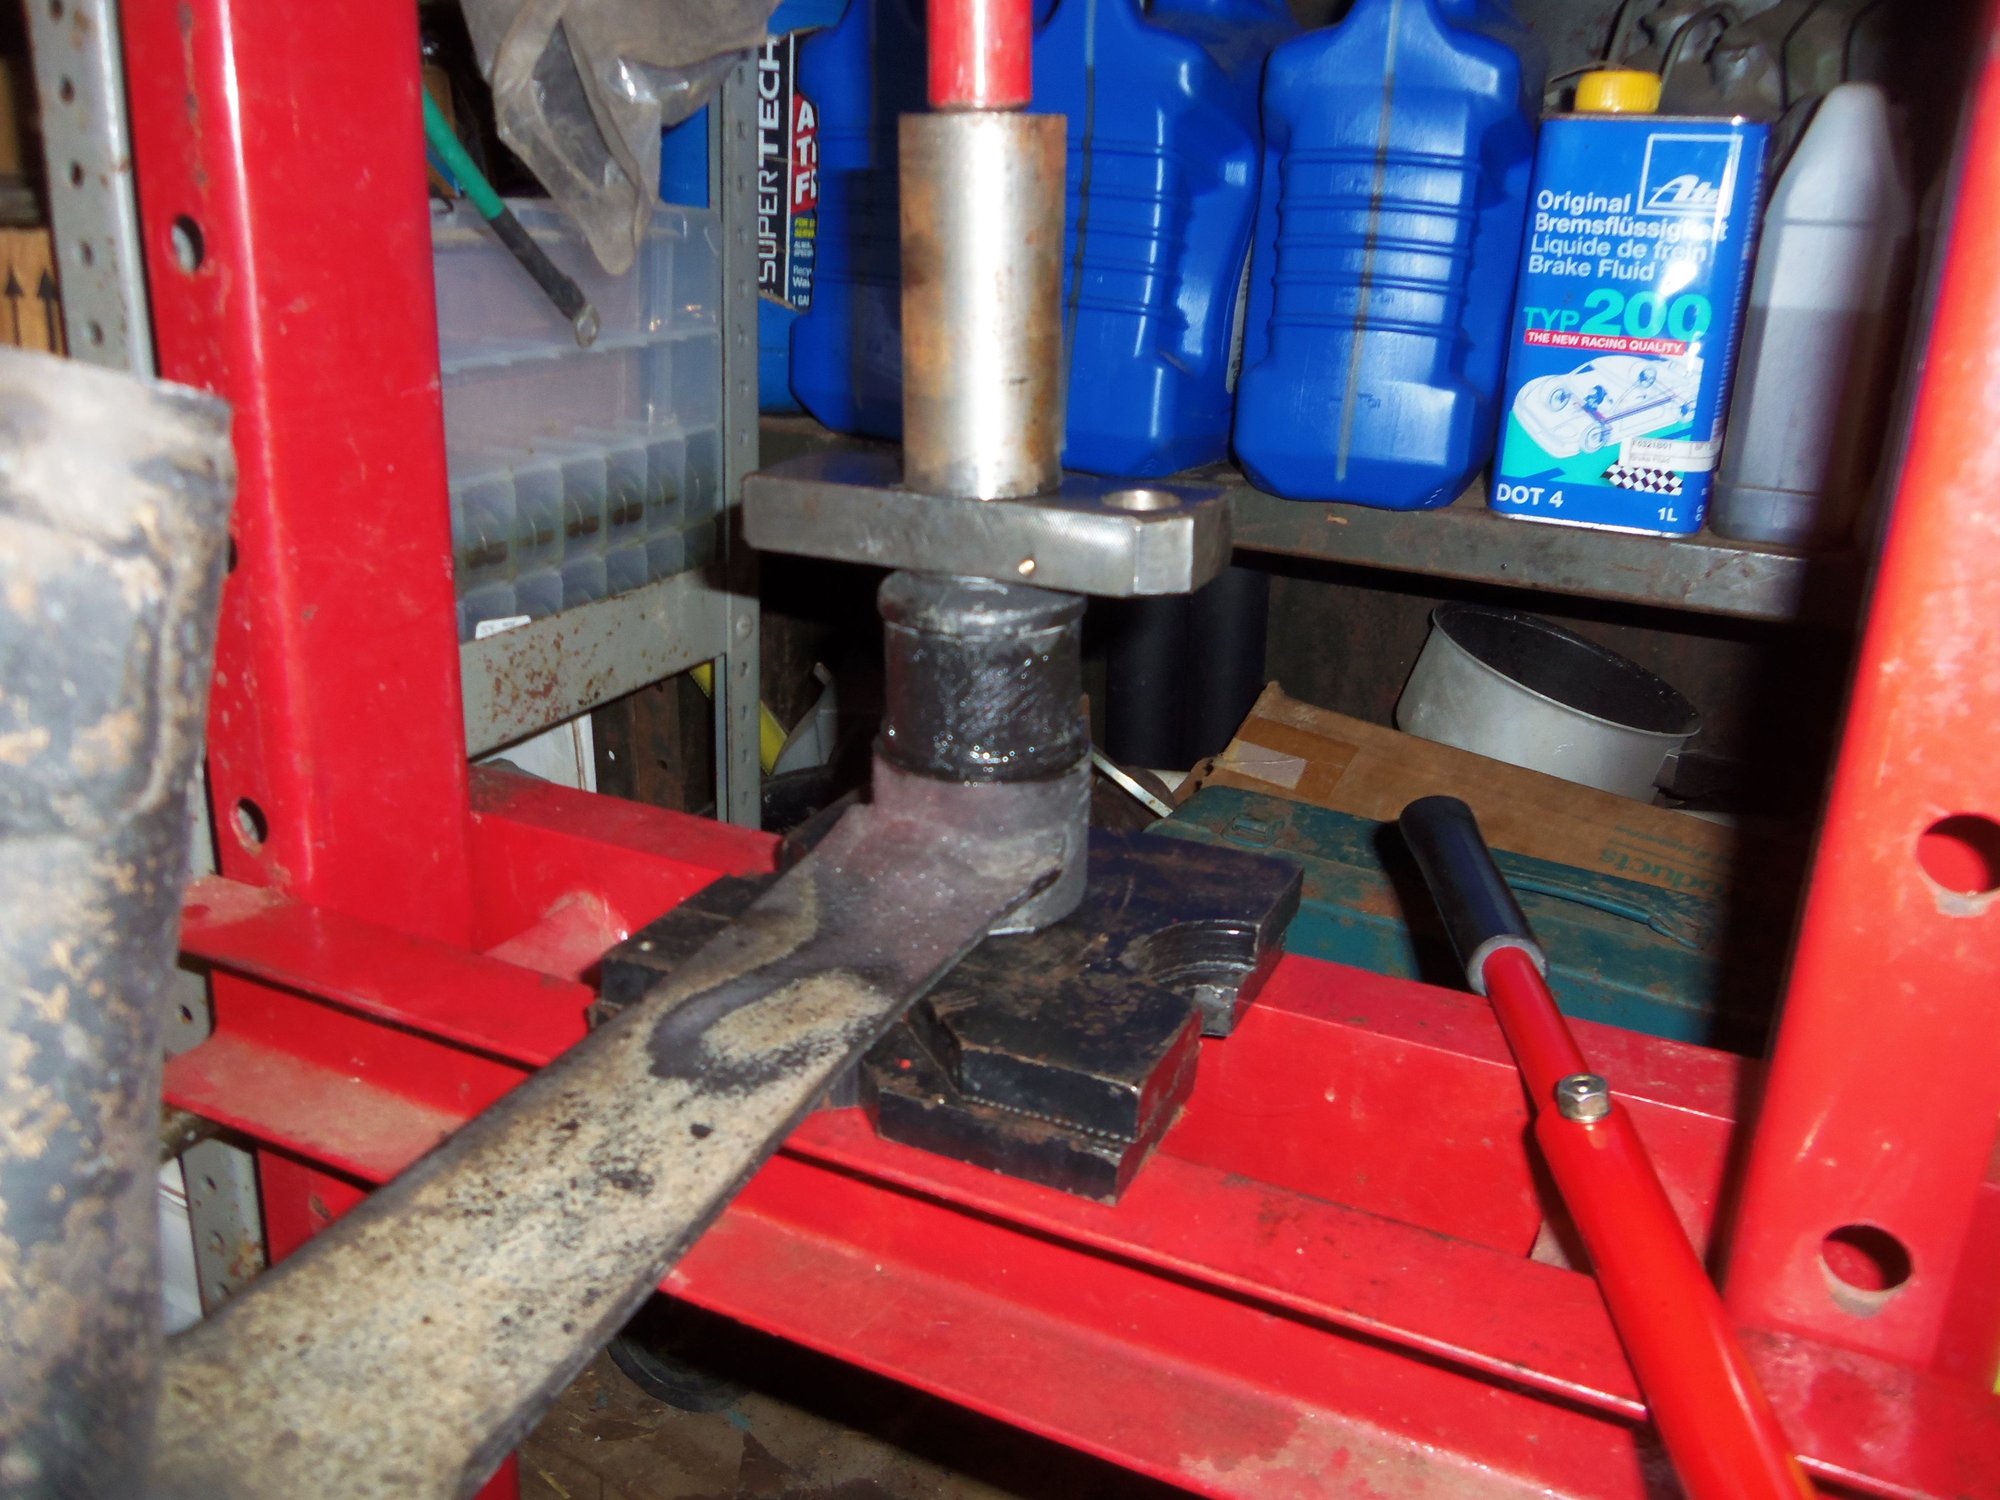
Emboldened with my success on these control arms, I went after the 1988 S4 control arms. Since there were no seized bolts, there were no mounts stuck on the rocker bars. I set the arms up in the press, but ran into a bit of a snag. There is a rubber lip that is part of the rocker bar bushing. This lip has to be pushed out of the way for the press plates to get under the control arm. Otherwise this lip would be torn off when the rocker bar is pressed out. The lip is stiff enough that I could not keep my press plates tight up against the control arm. So I rigged the bearing separator to the control arm in place of the press plates. Then I just pressed the rocker bars out as per the WSM. Only had to stop in the middle to put a 27mm socket as a spacer to keep pushing the rocker bar out.
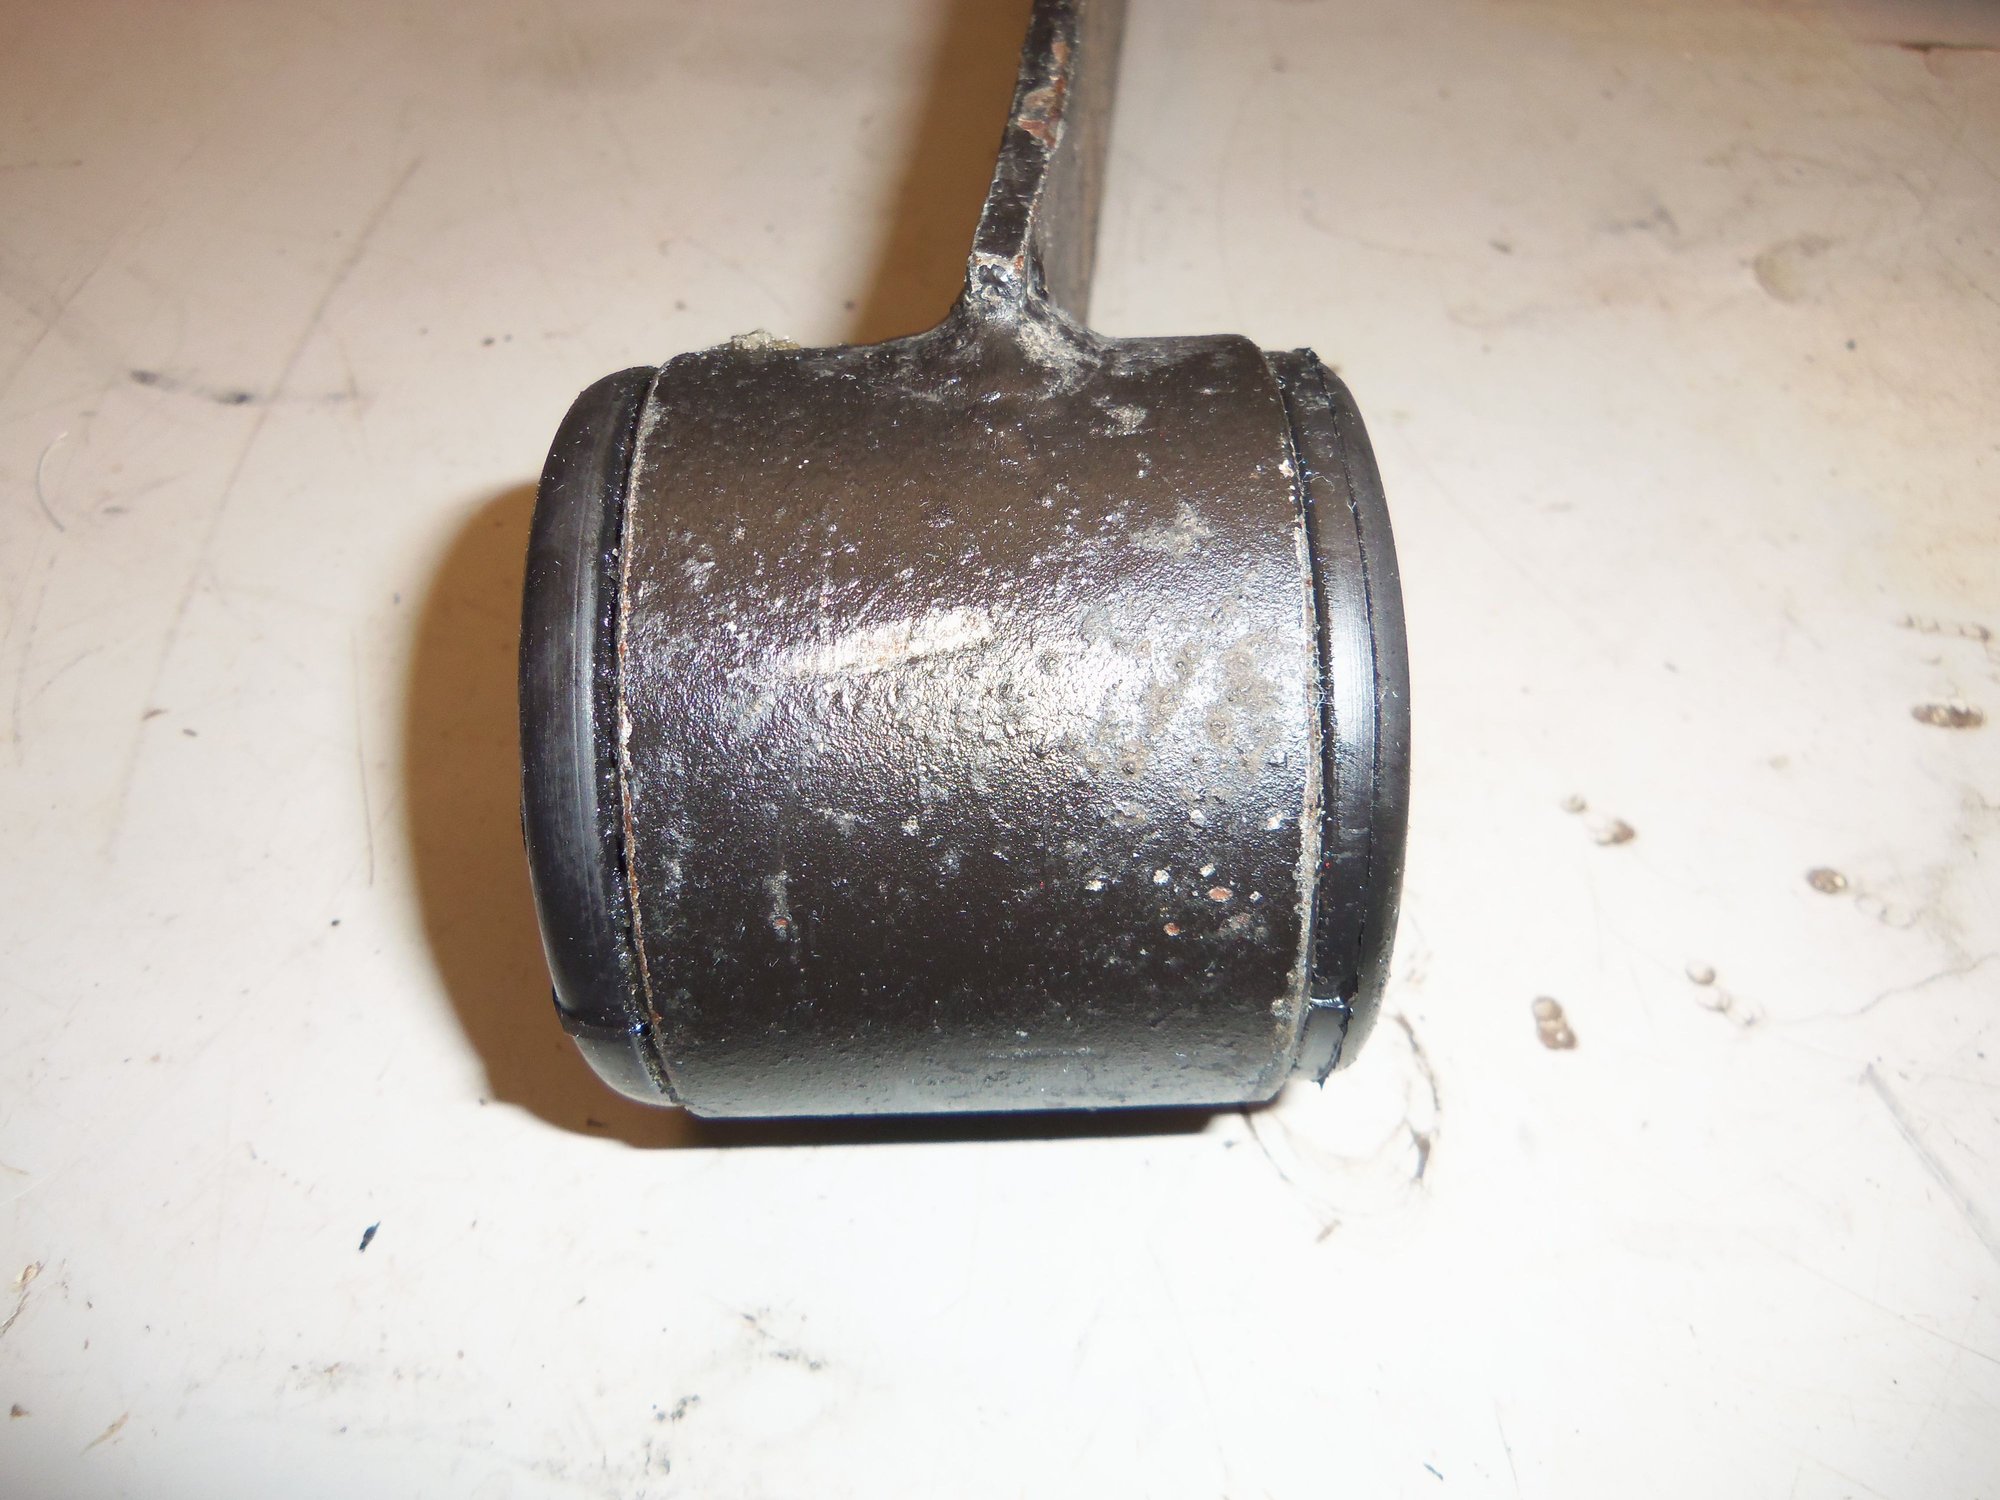
Both rocker bars were successfully pressed out with no damage to the rubber bushings.
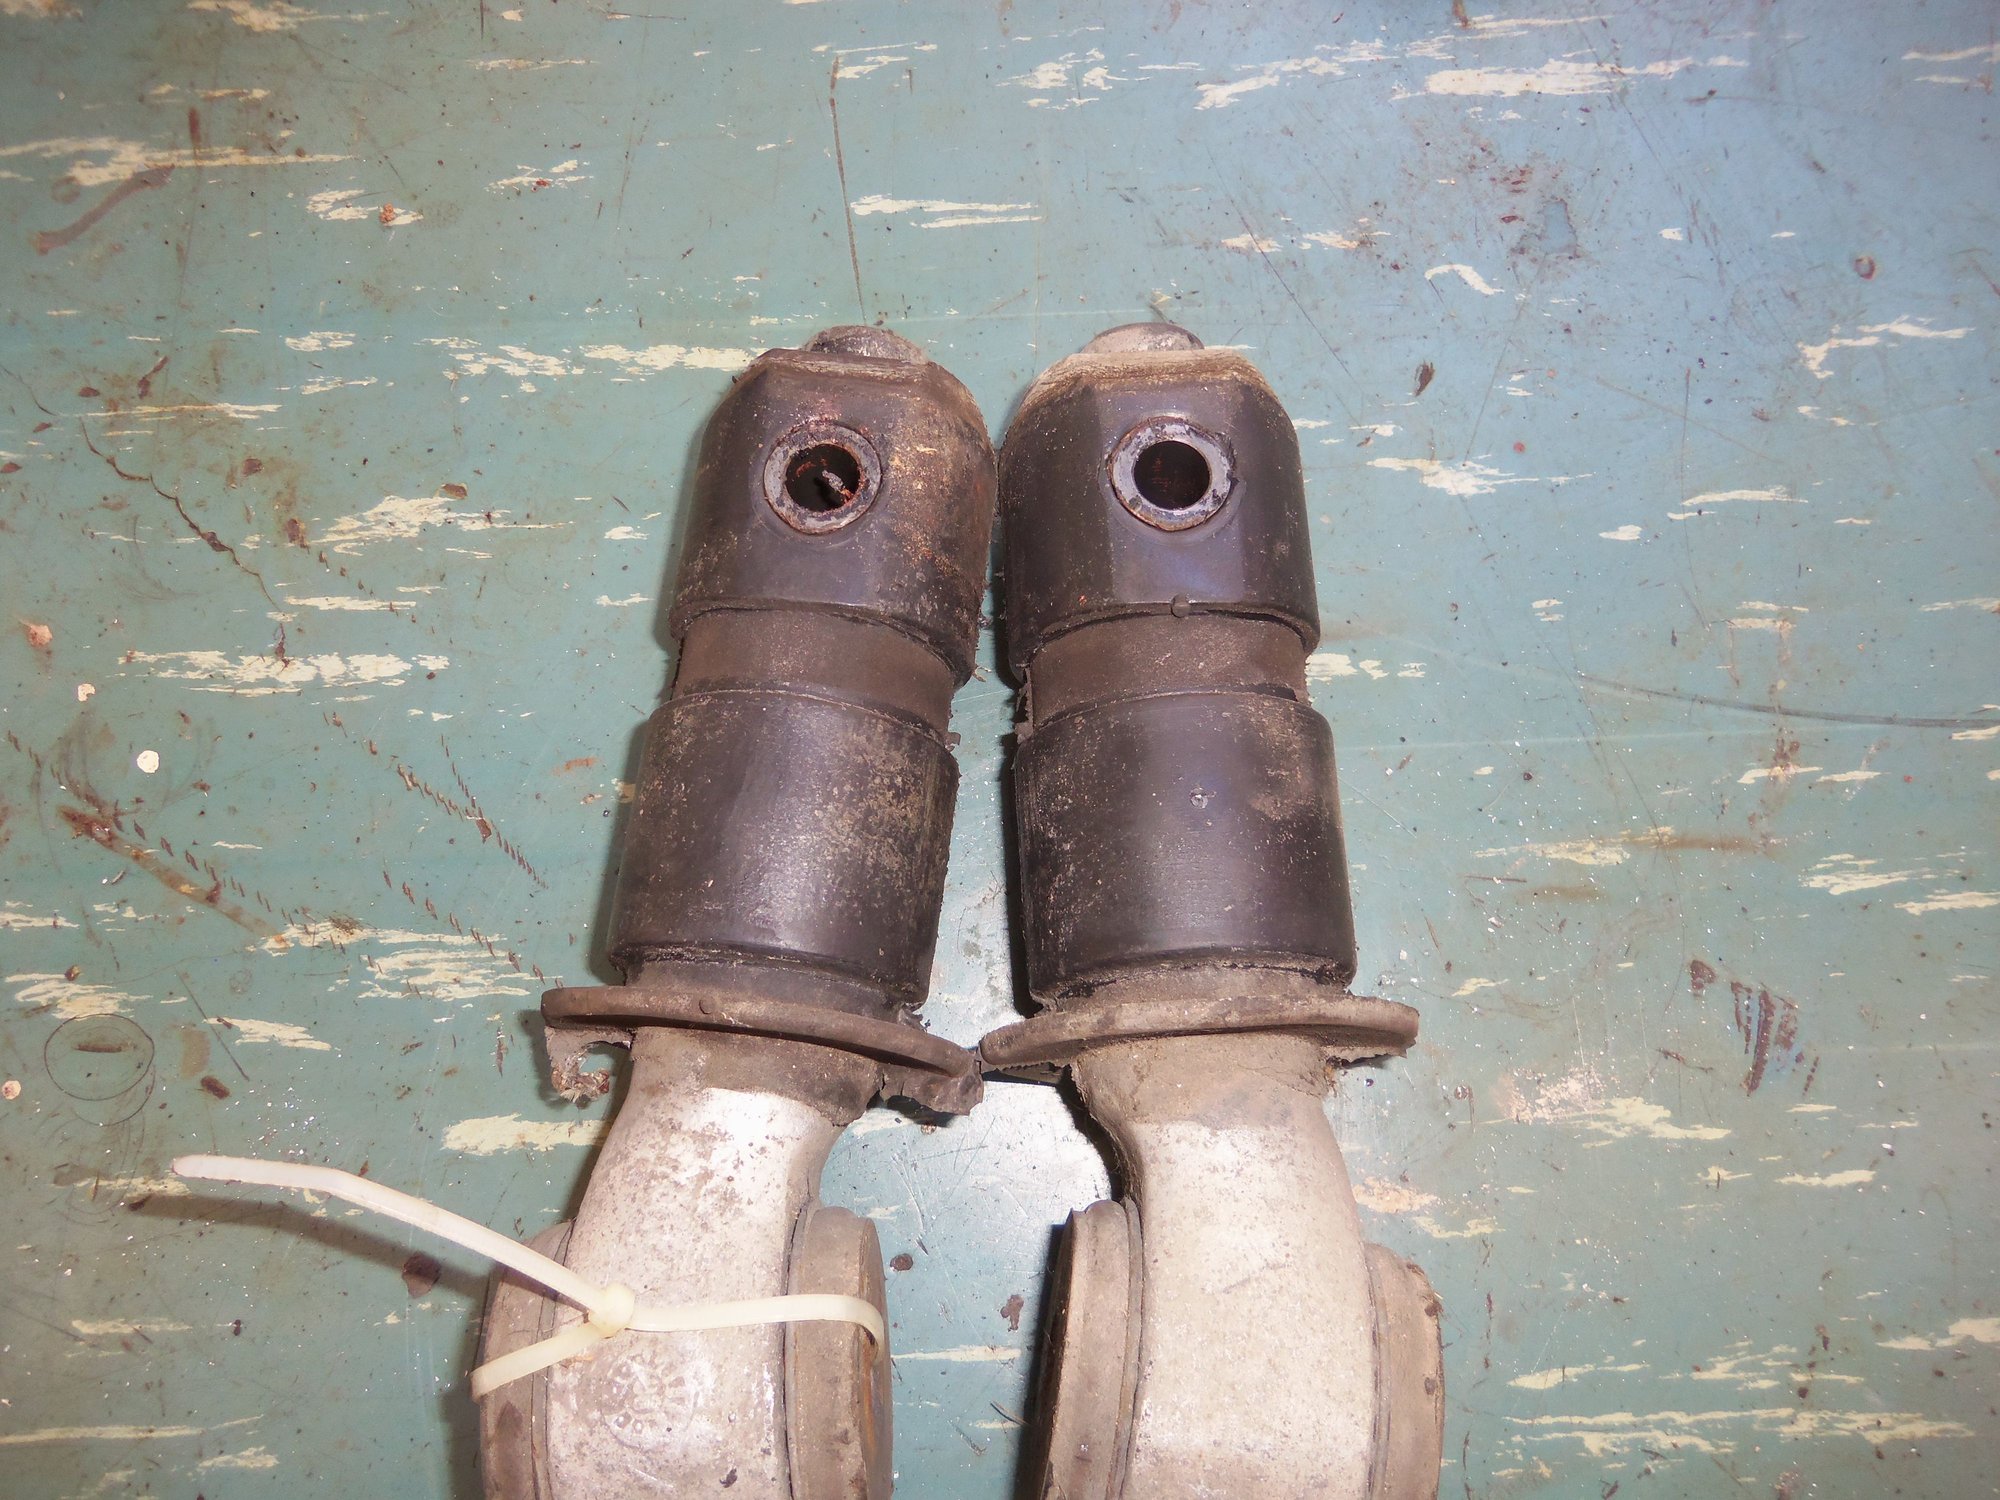
Rocker bar in passenger's side 1988 S4 control arm.
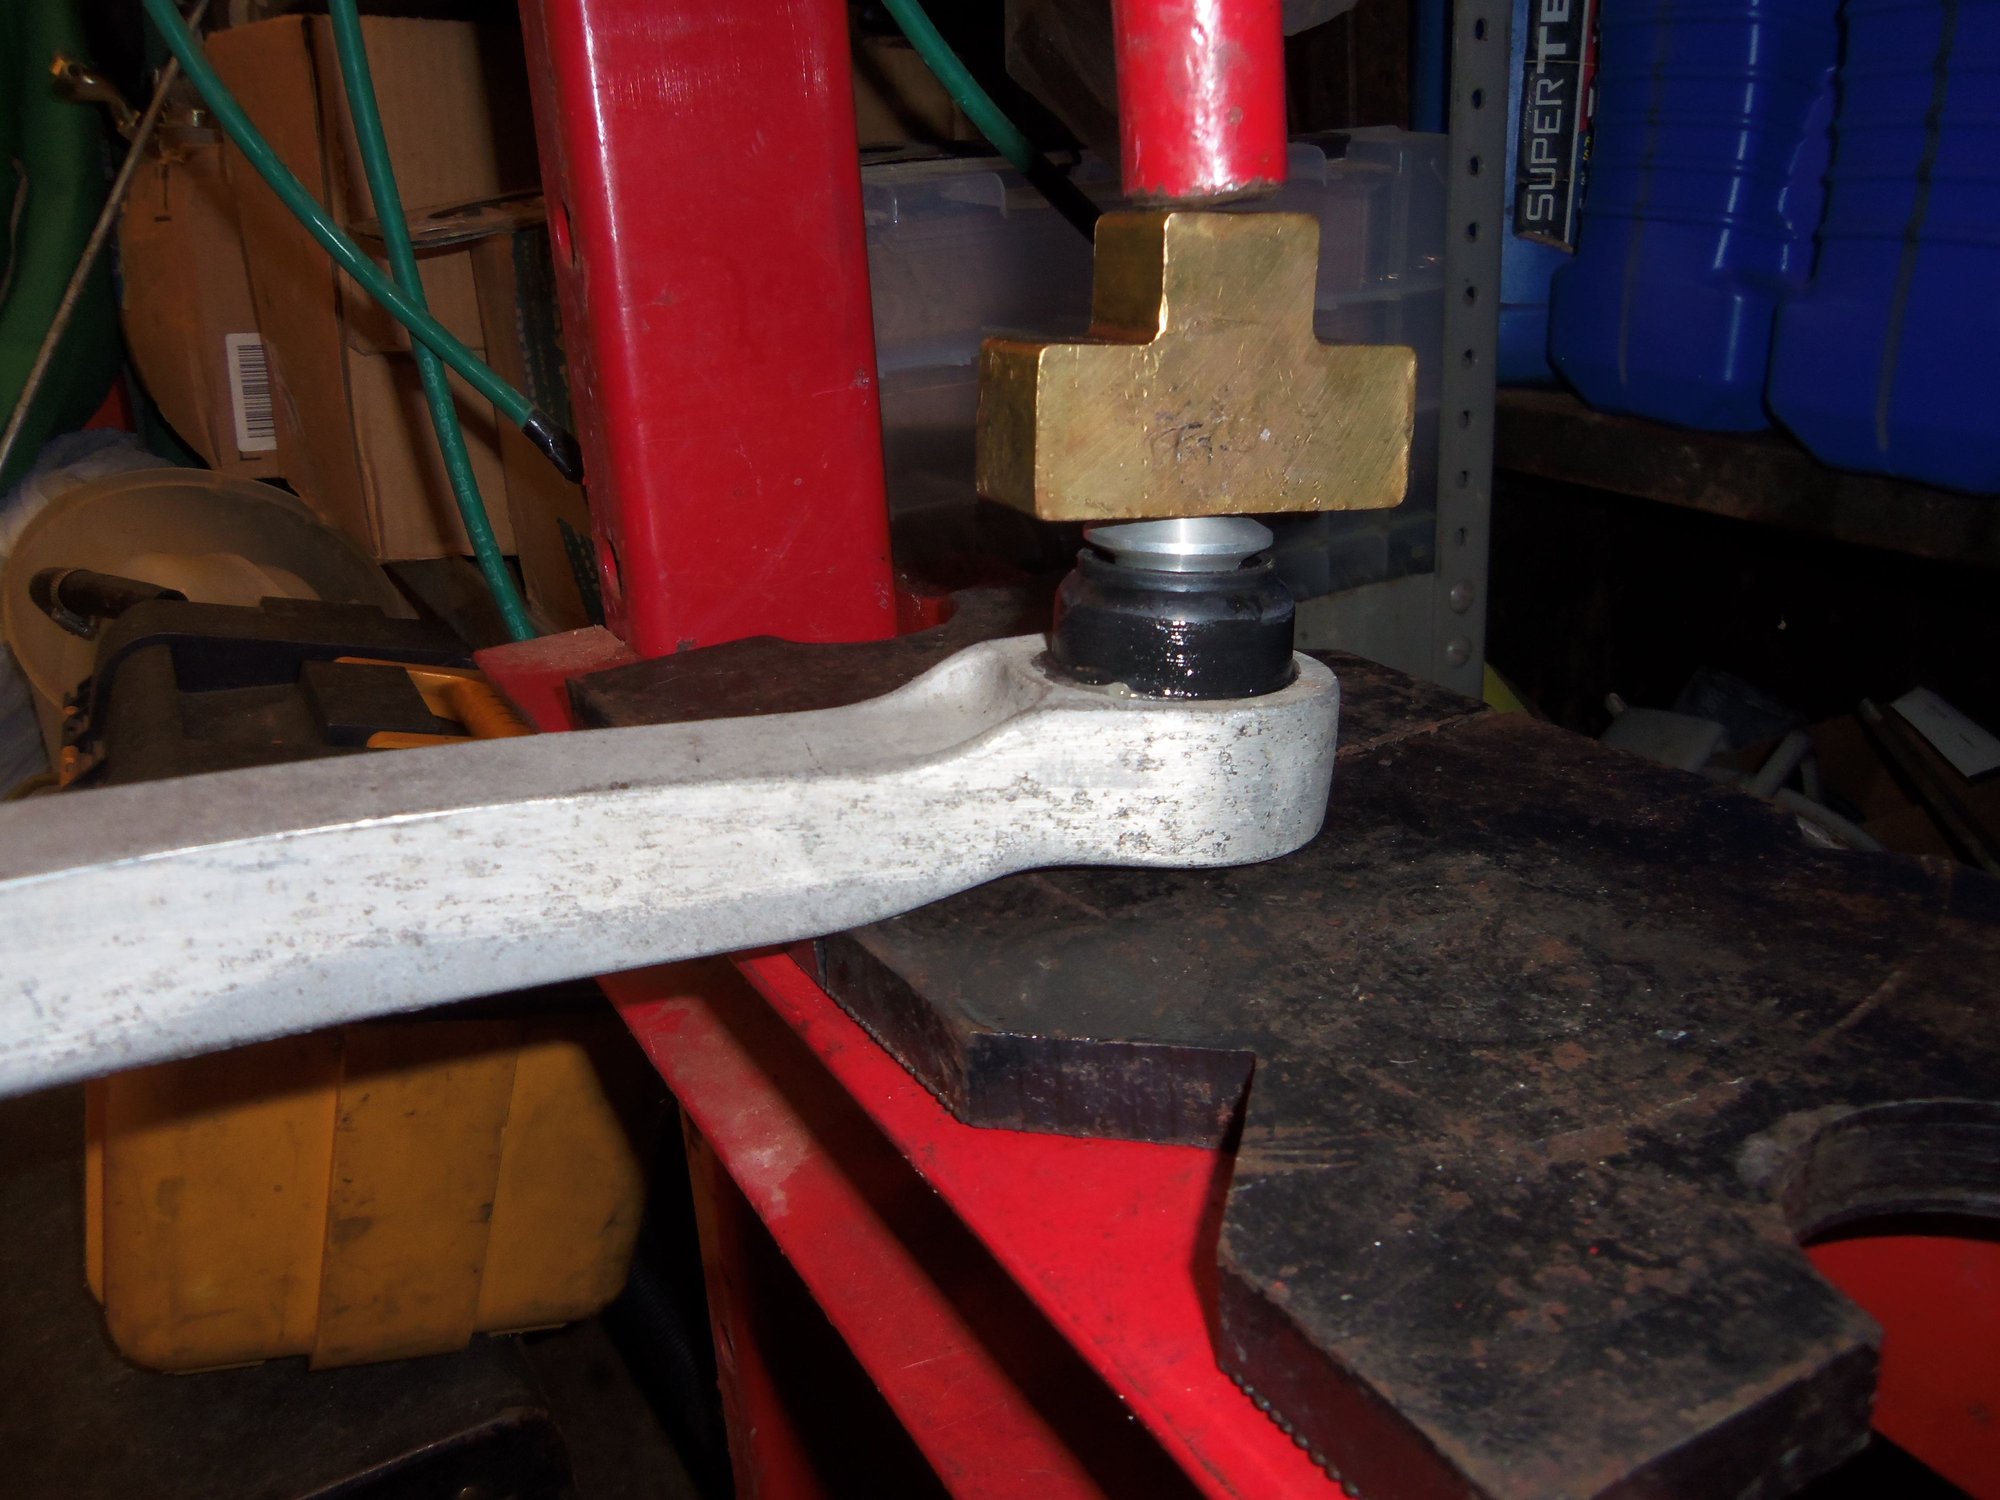
Pressing out the rocker bar.
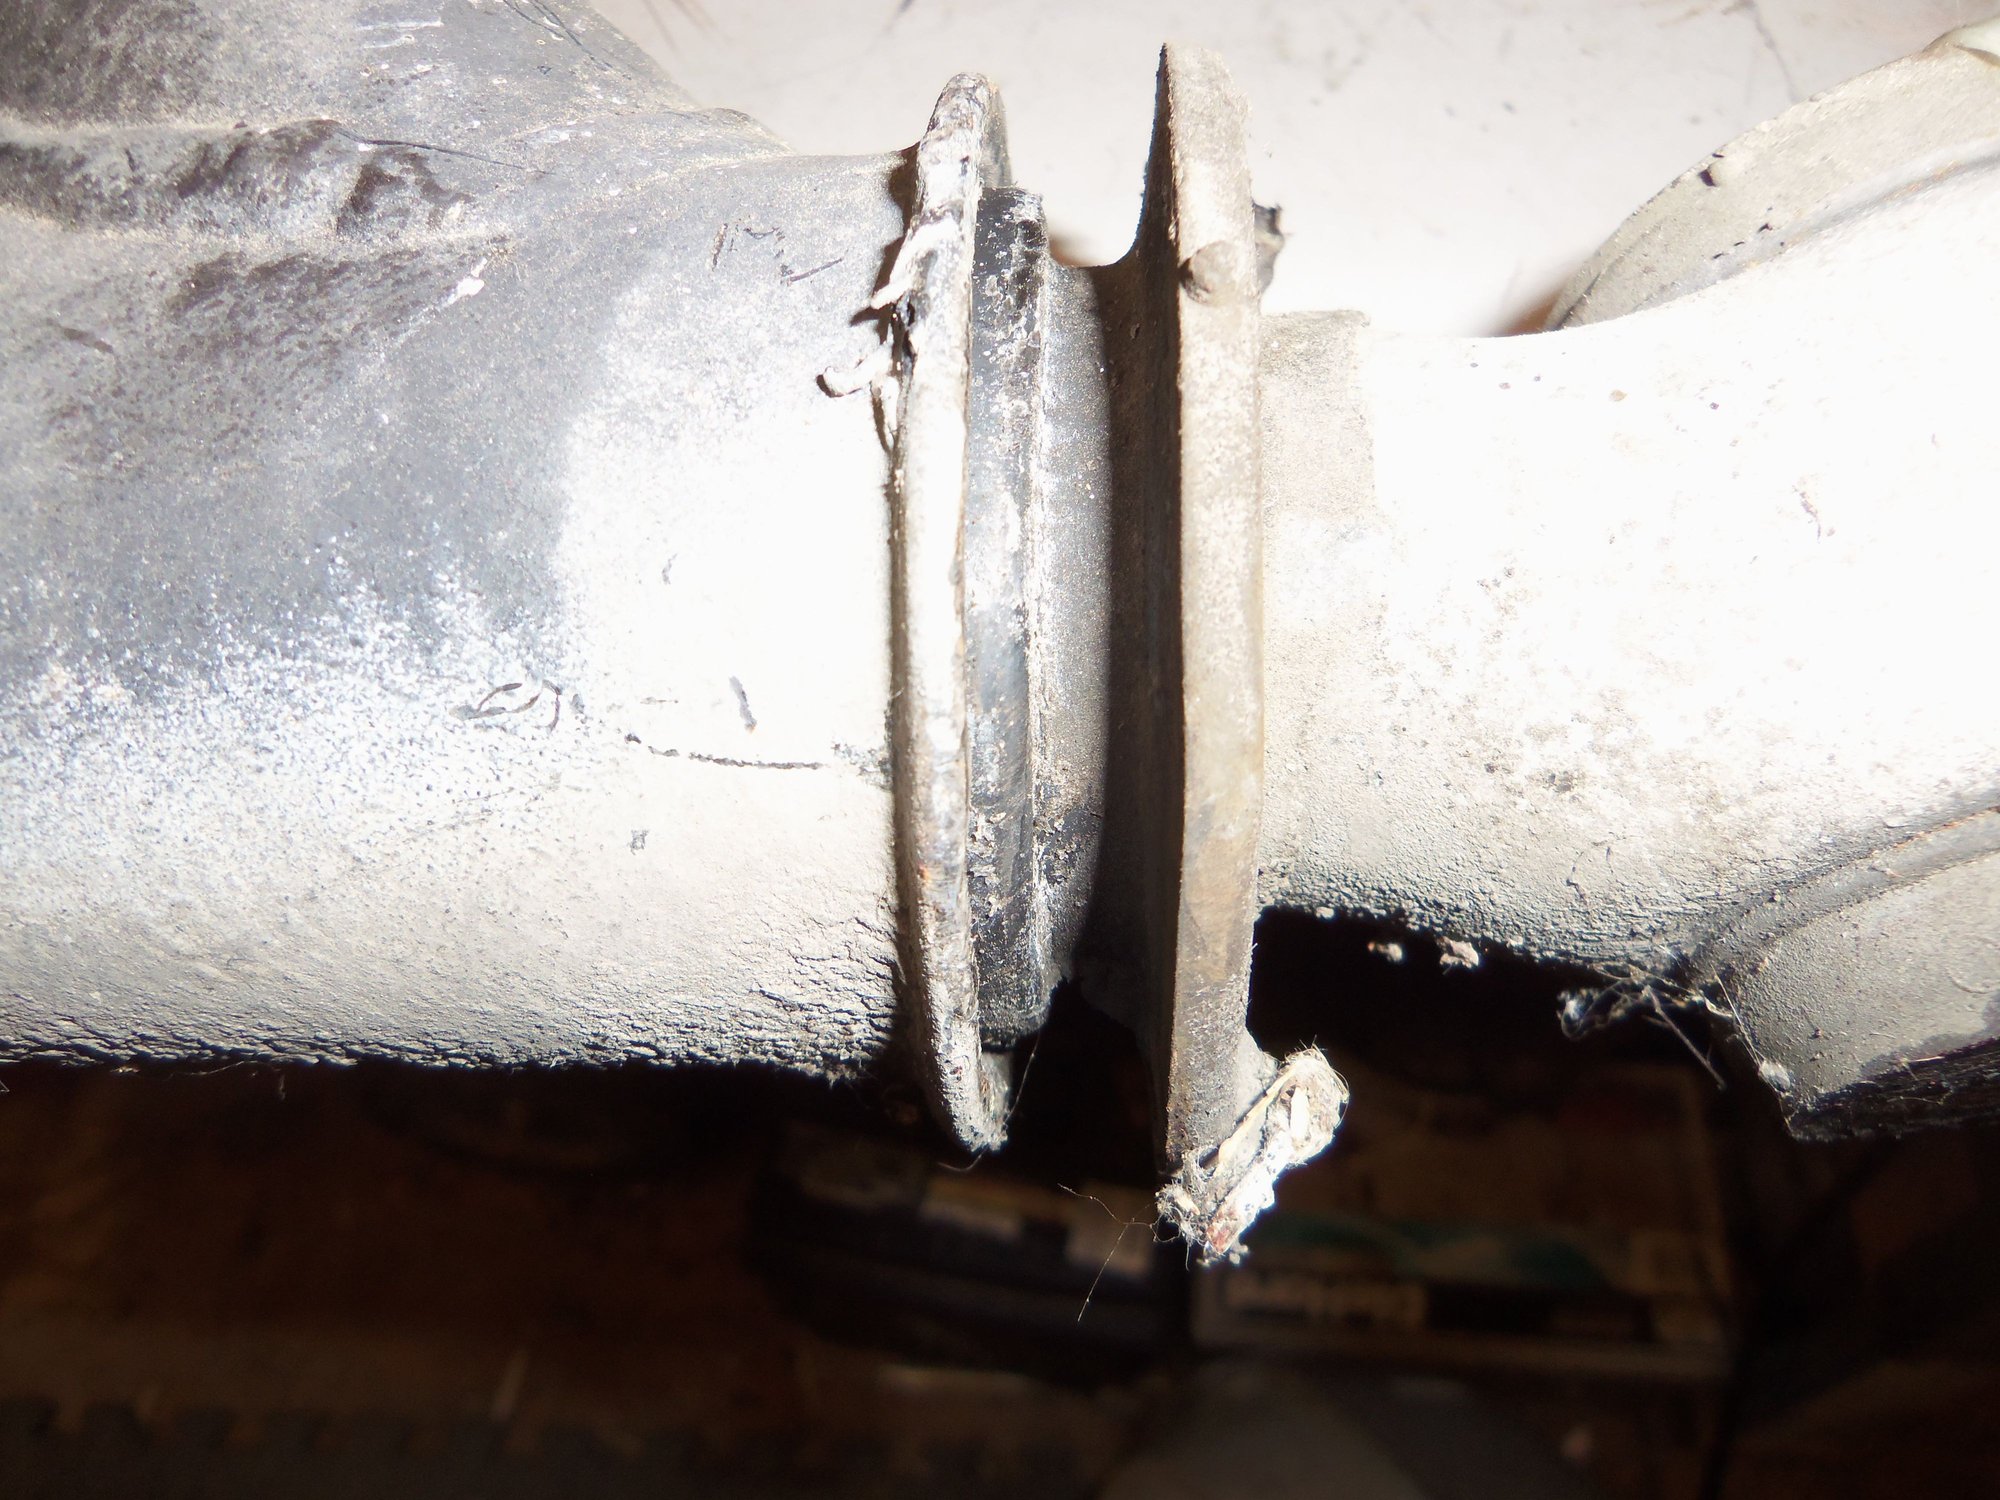
This is the rubber lip that must be moved out of the way.
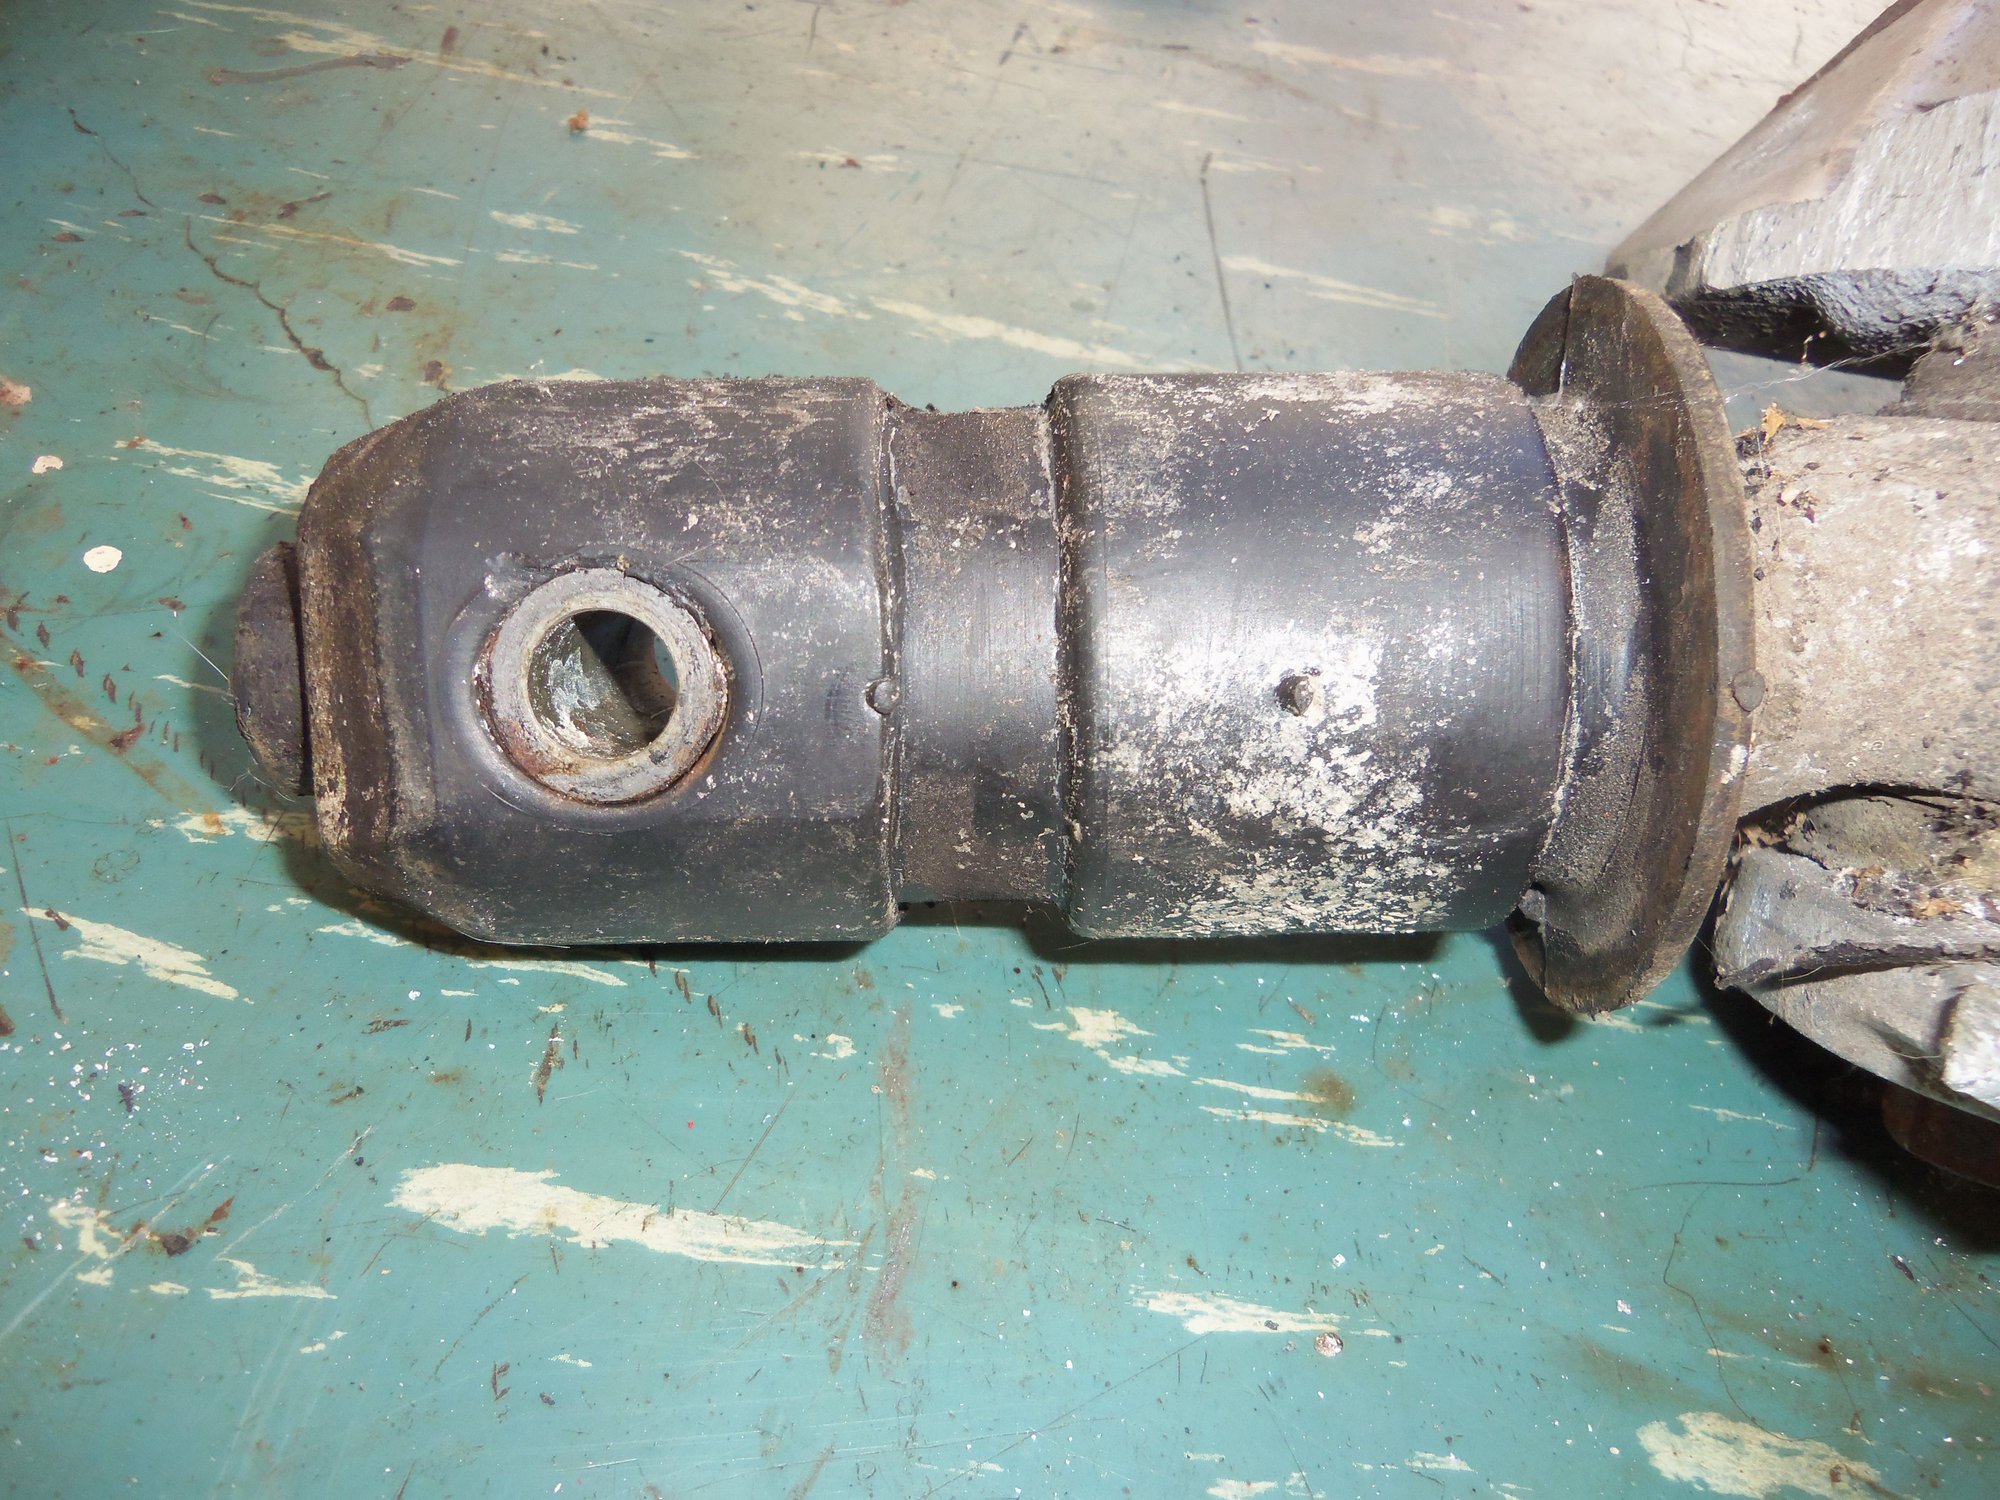
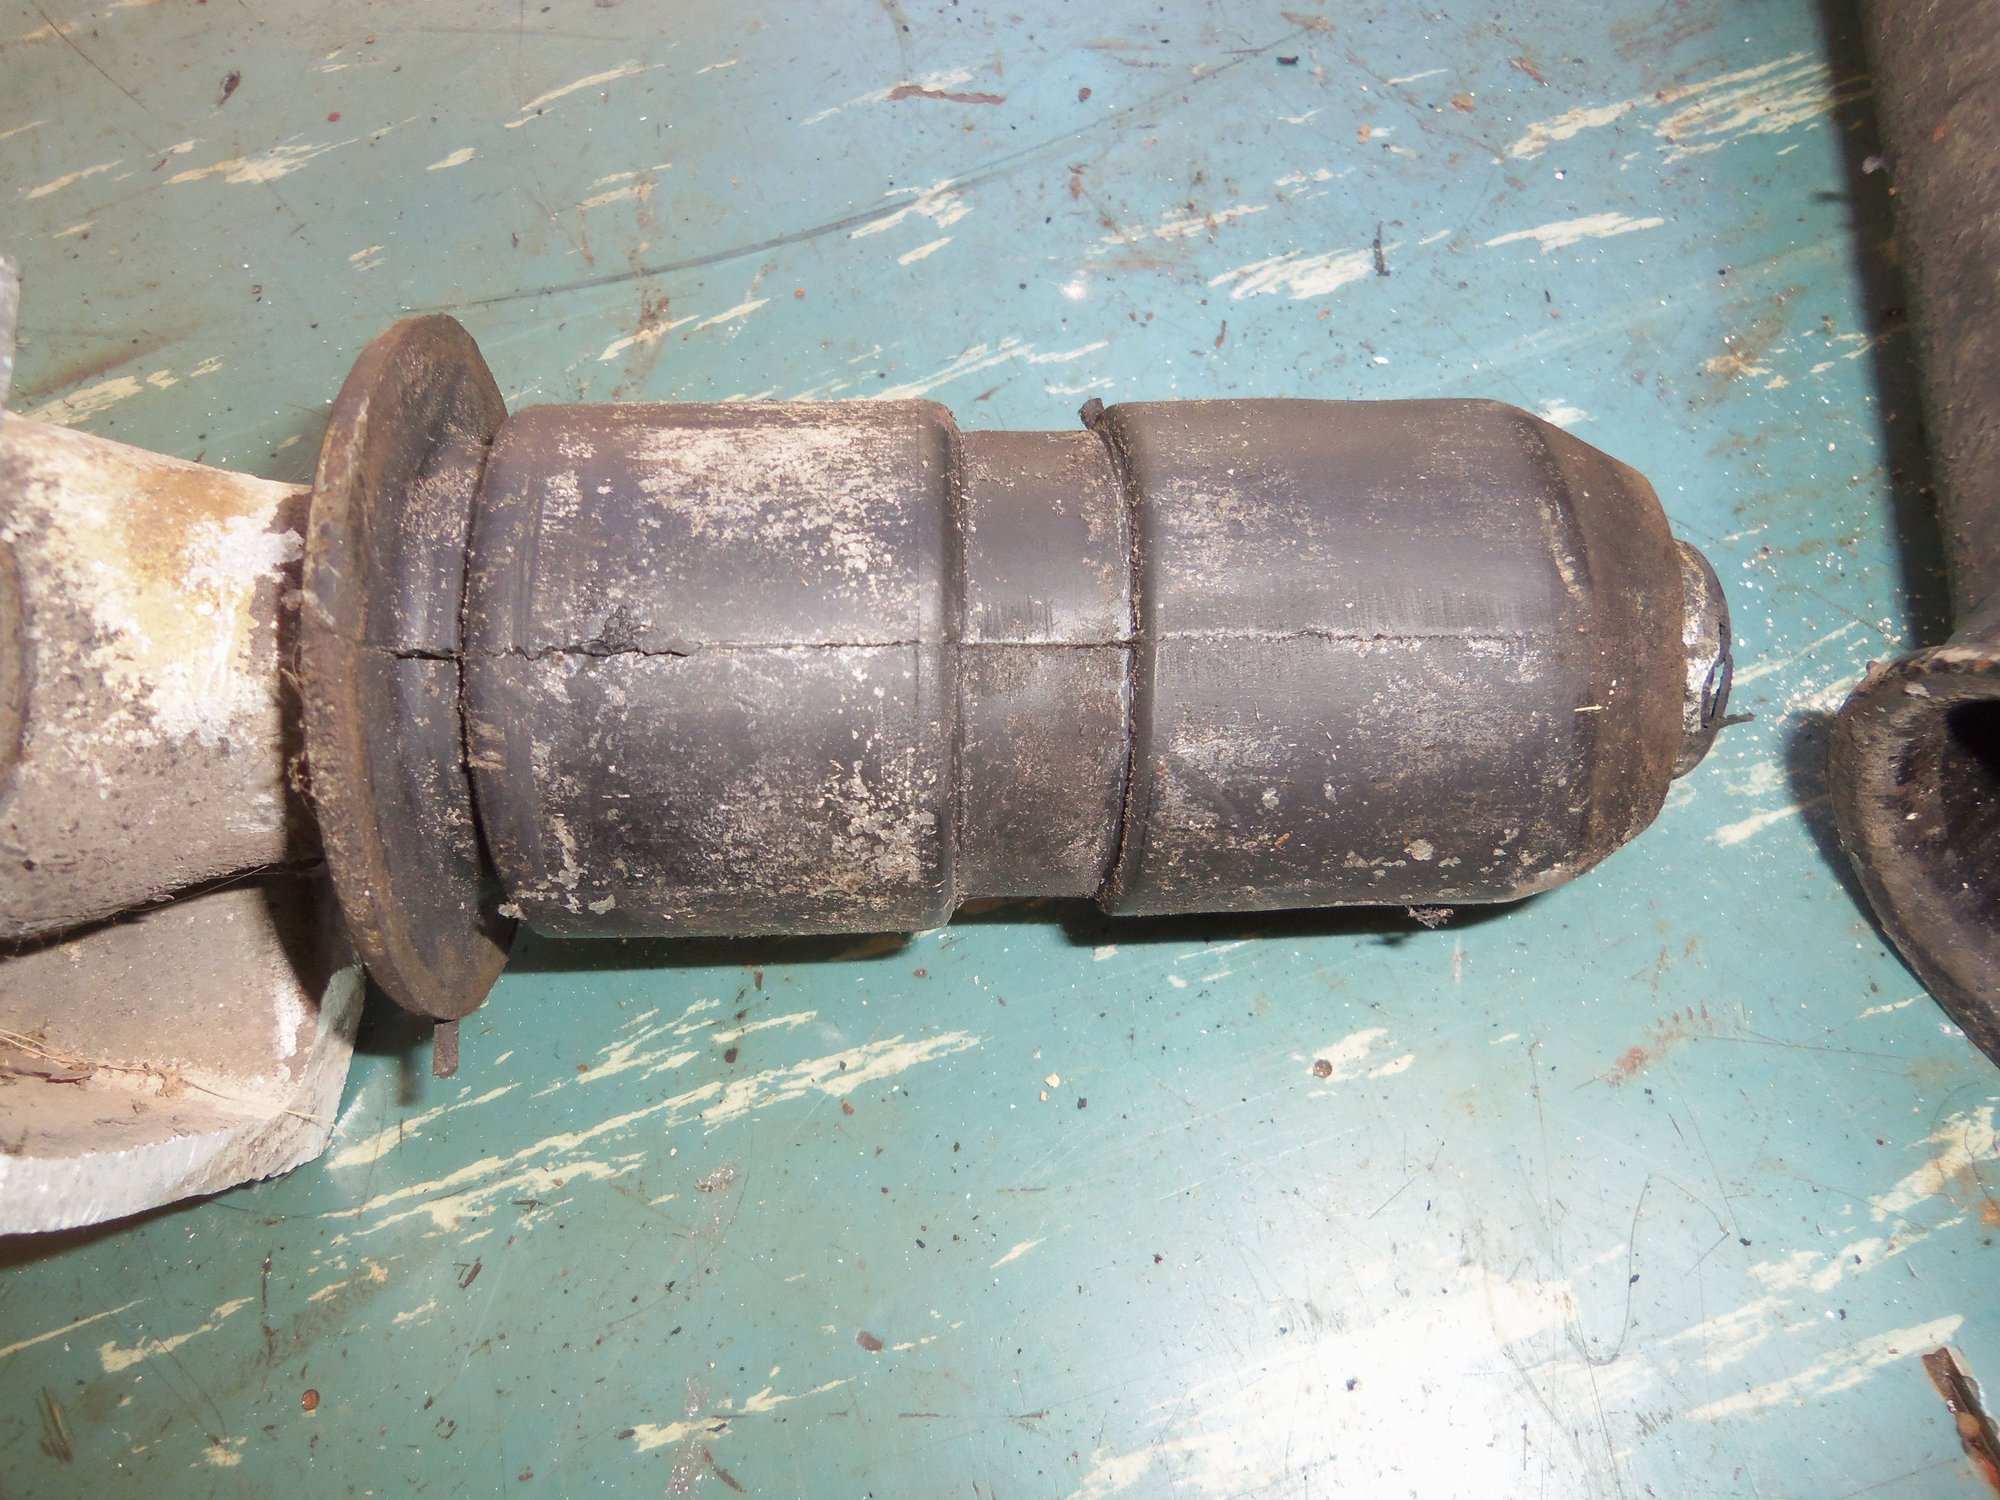
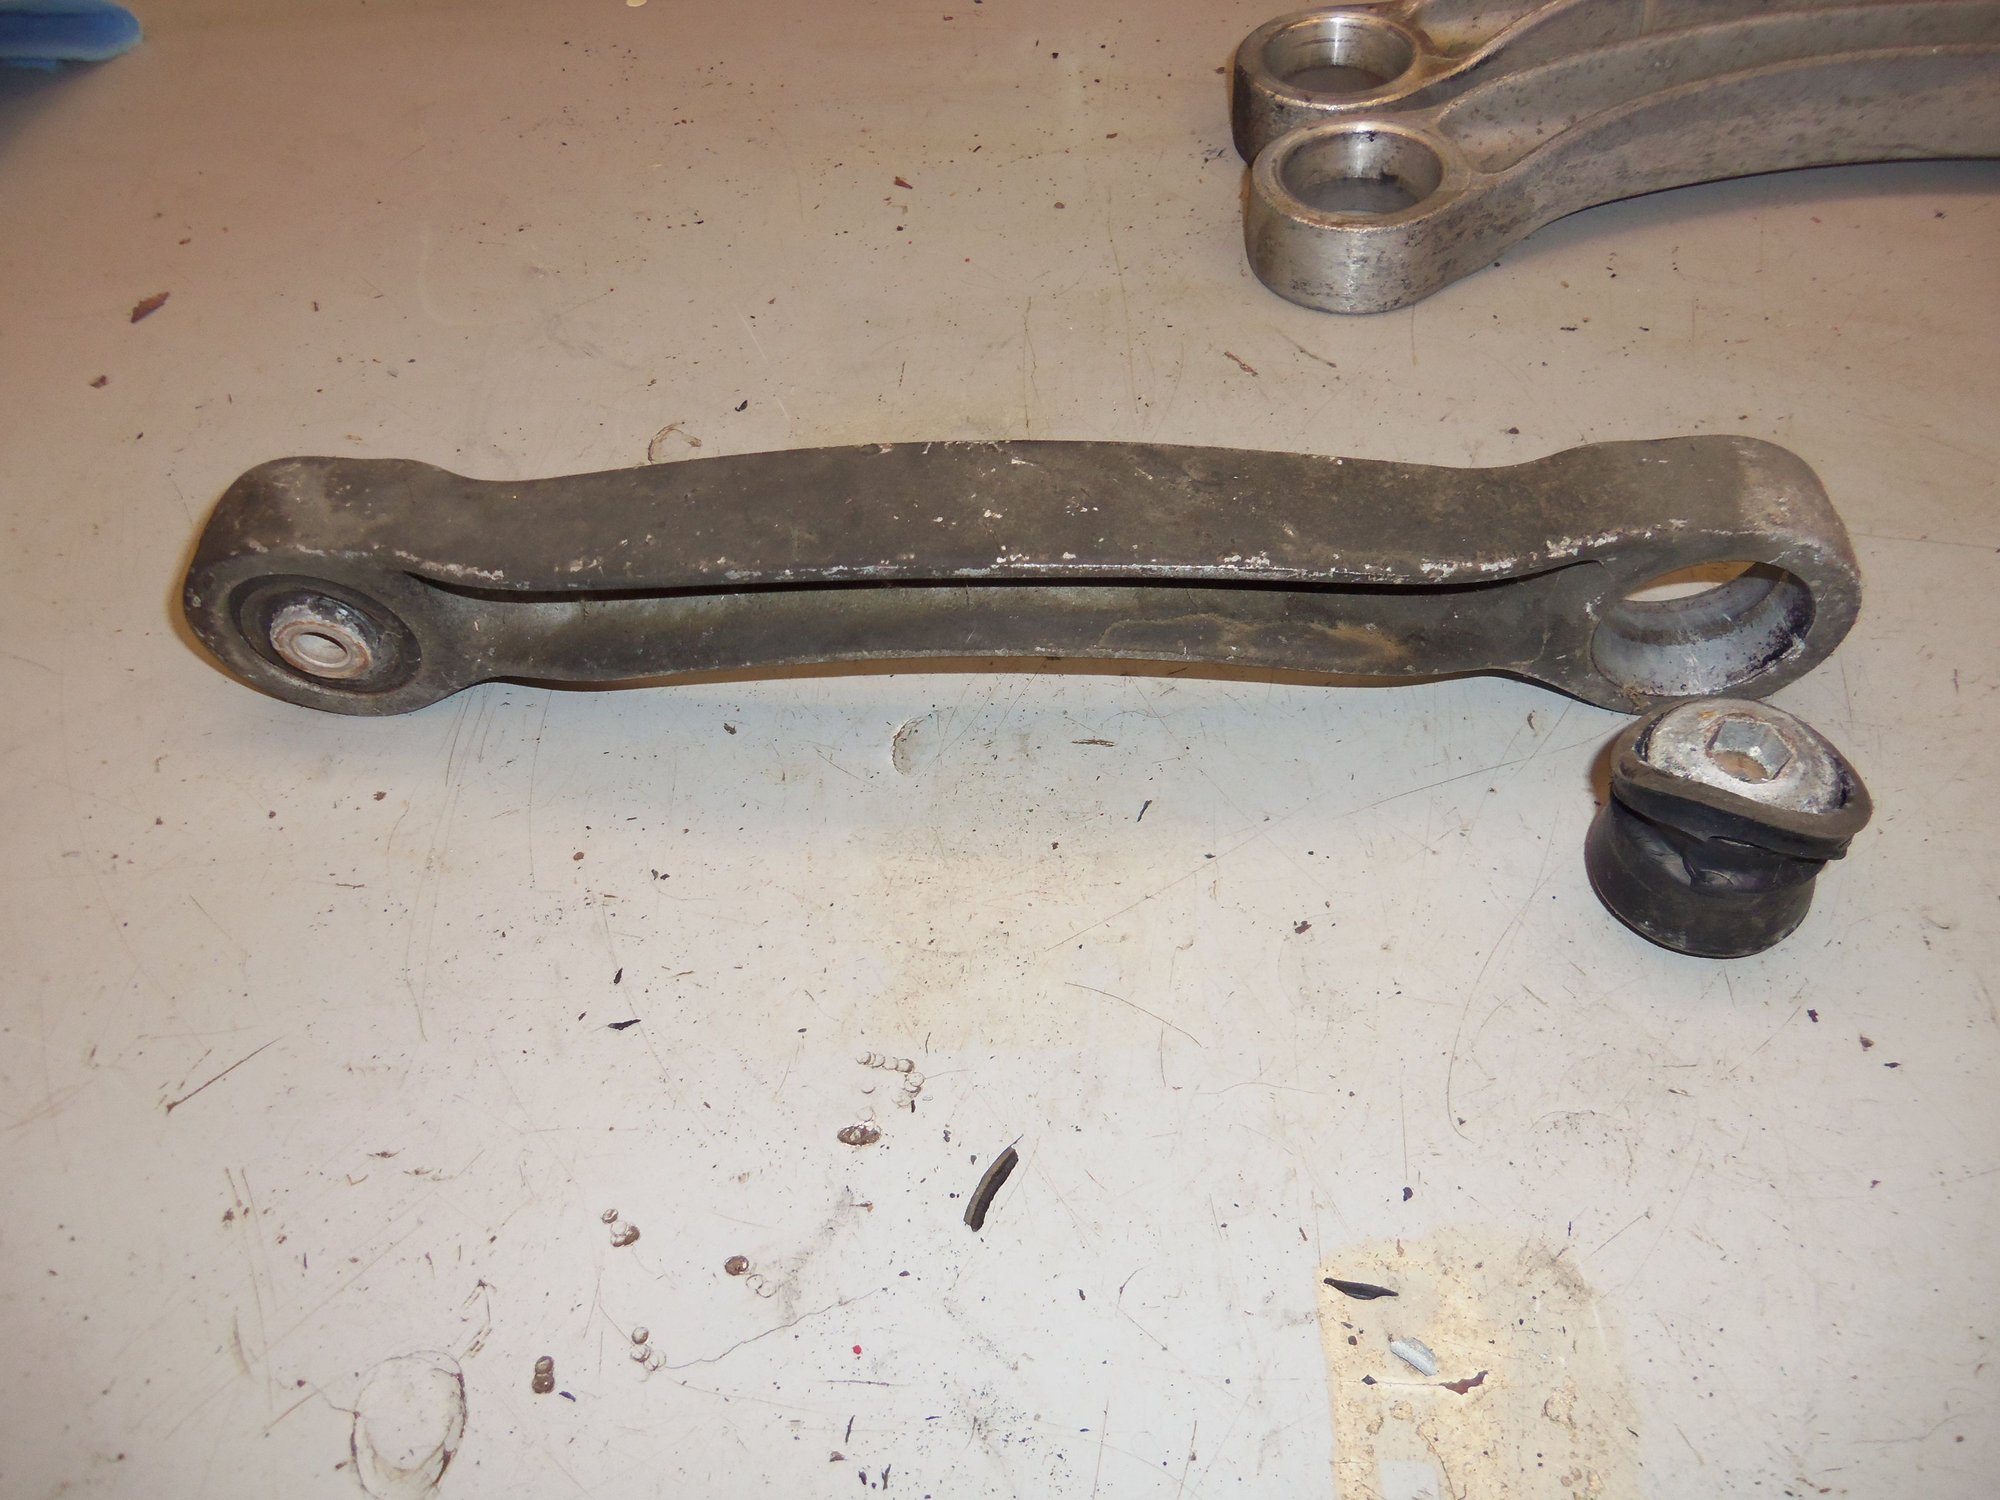
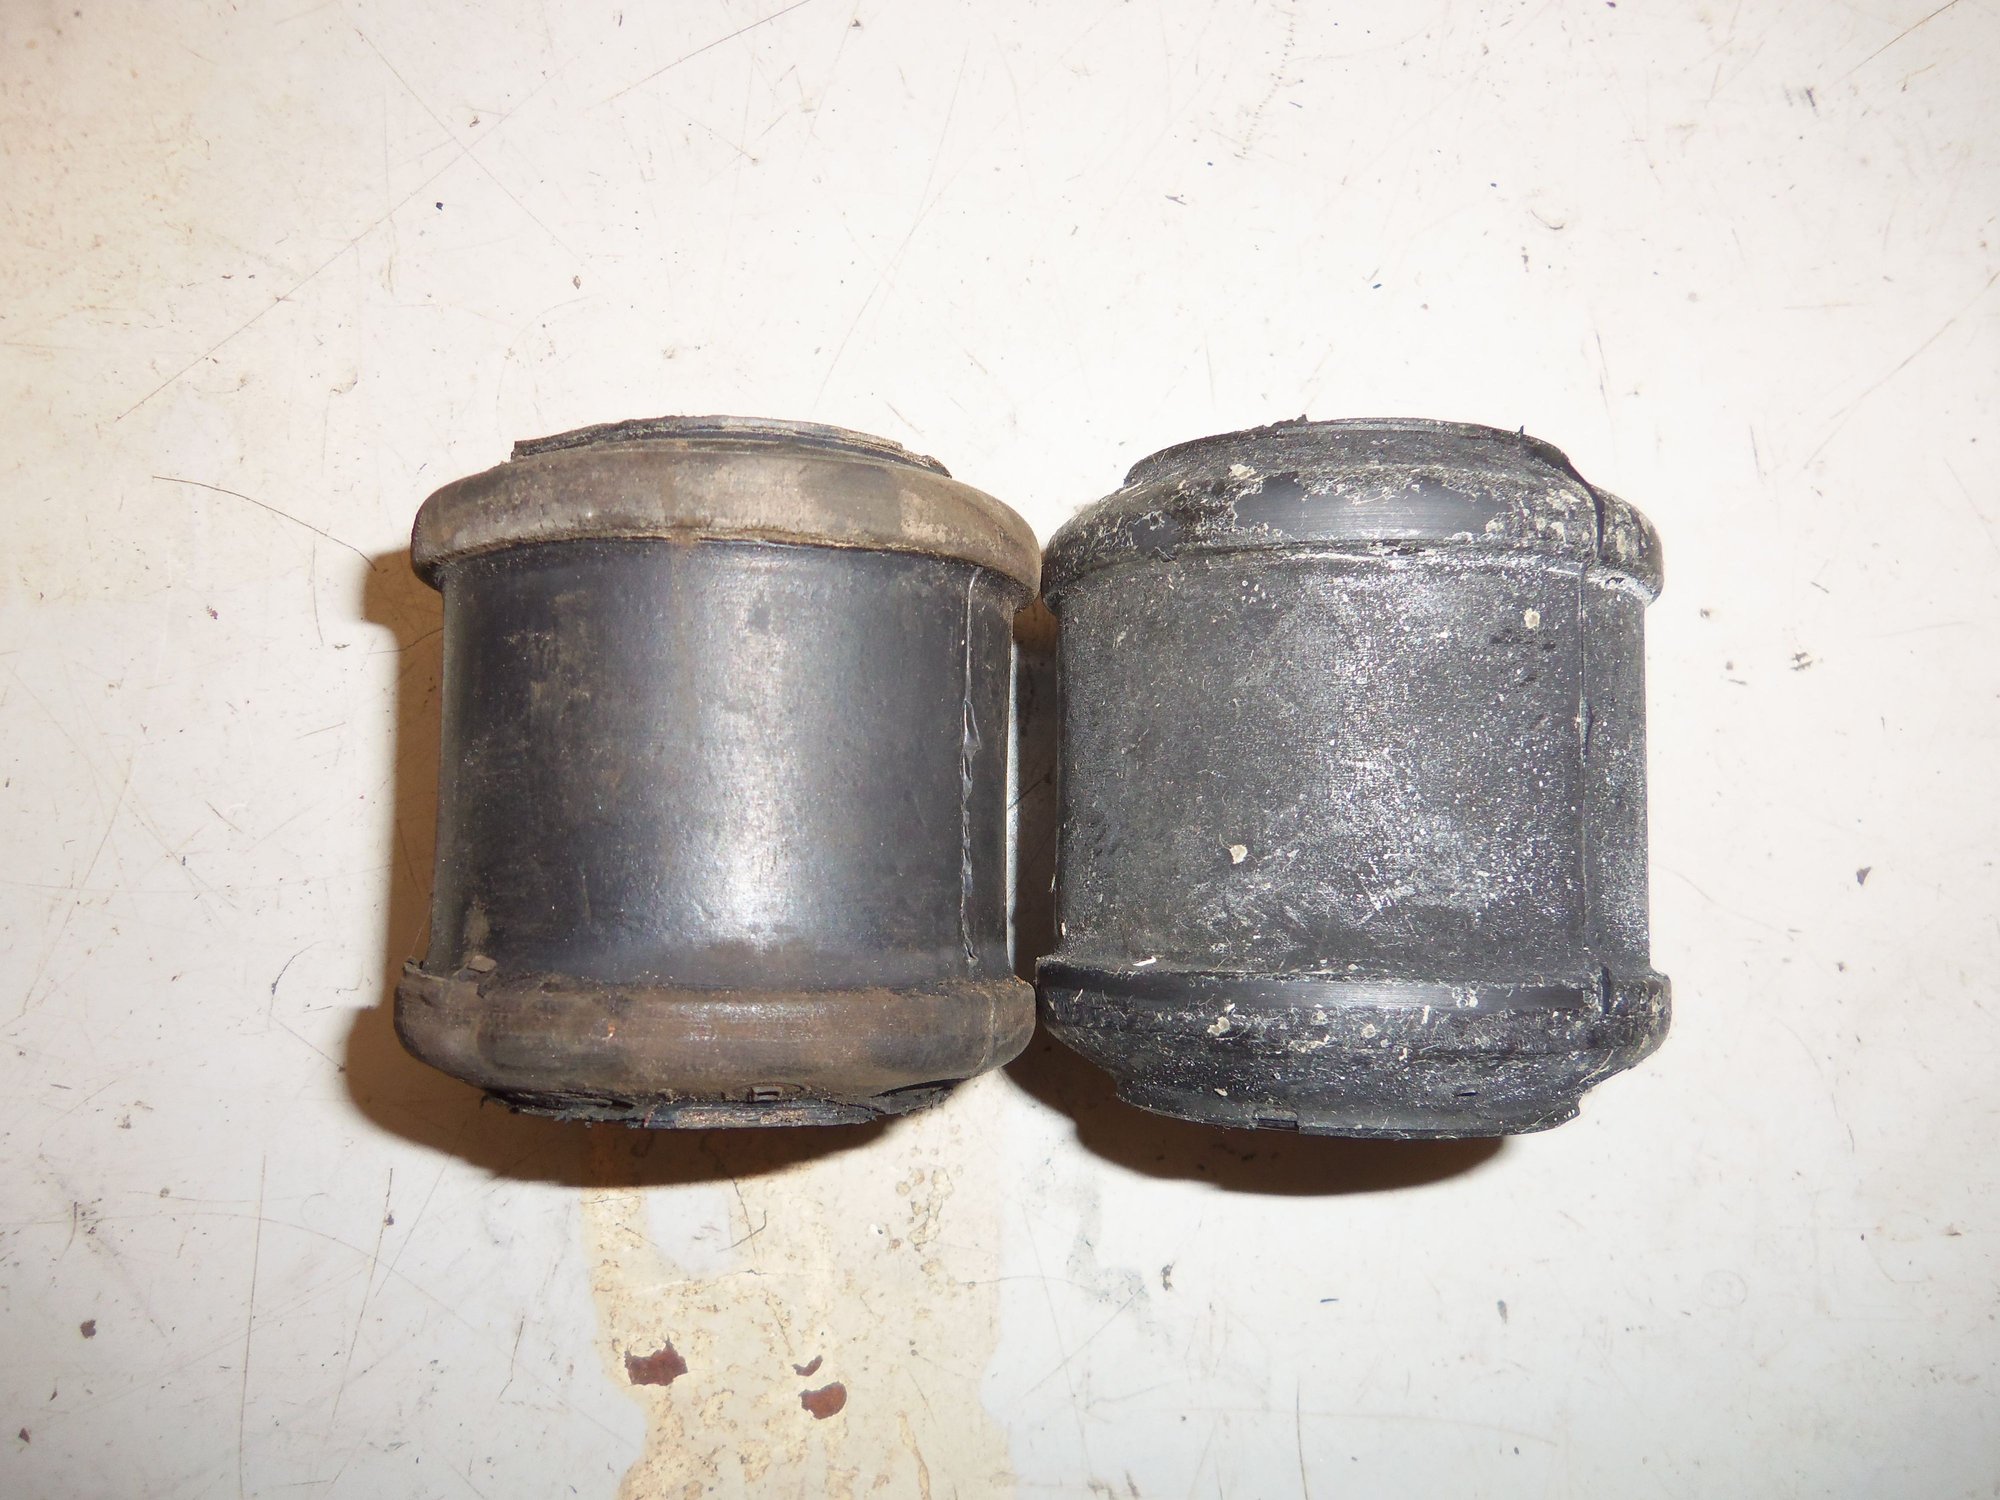
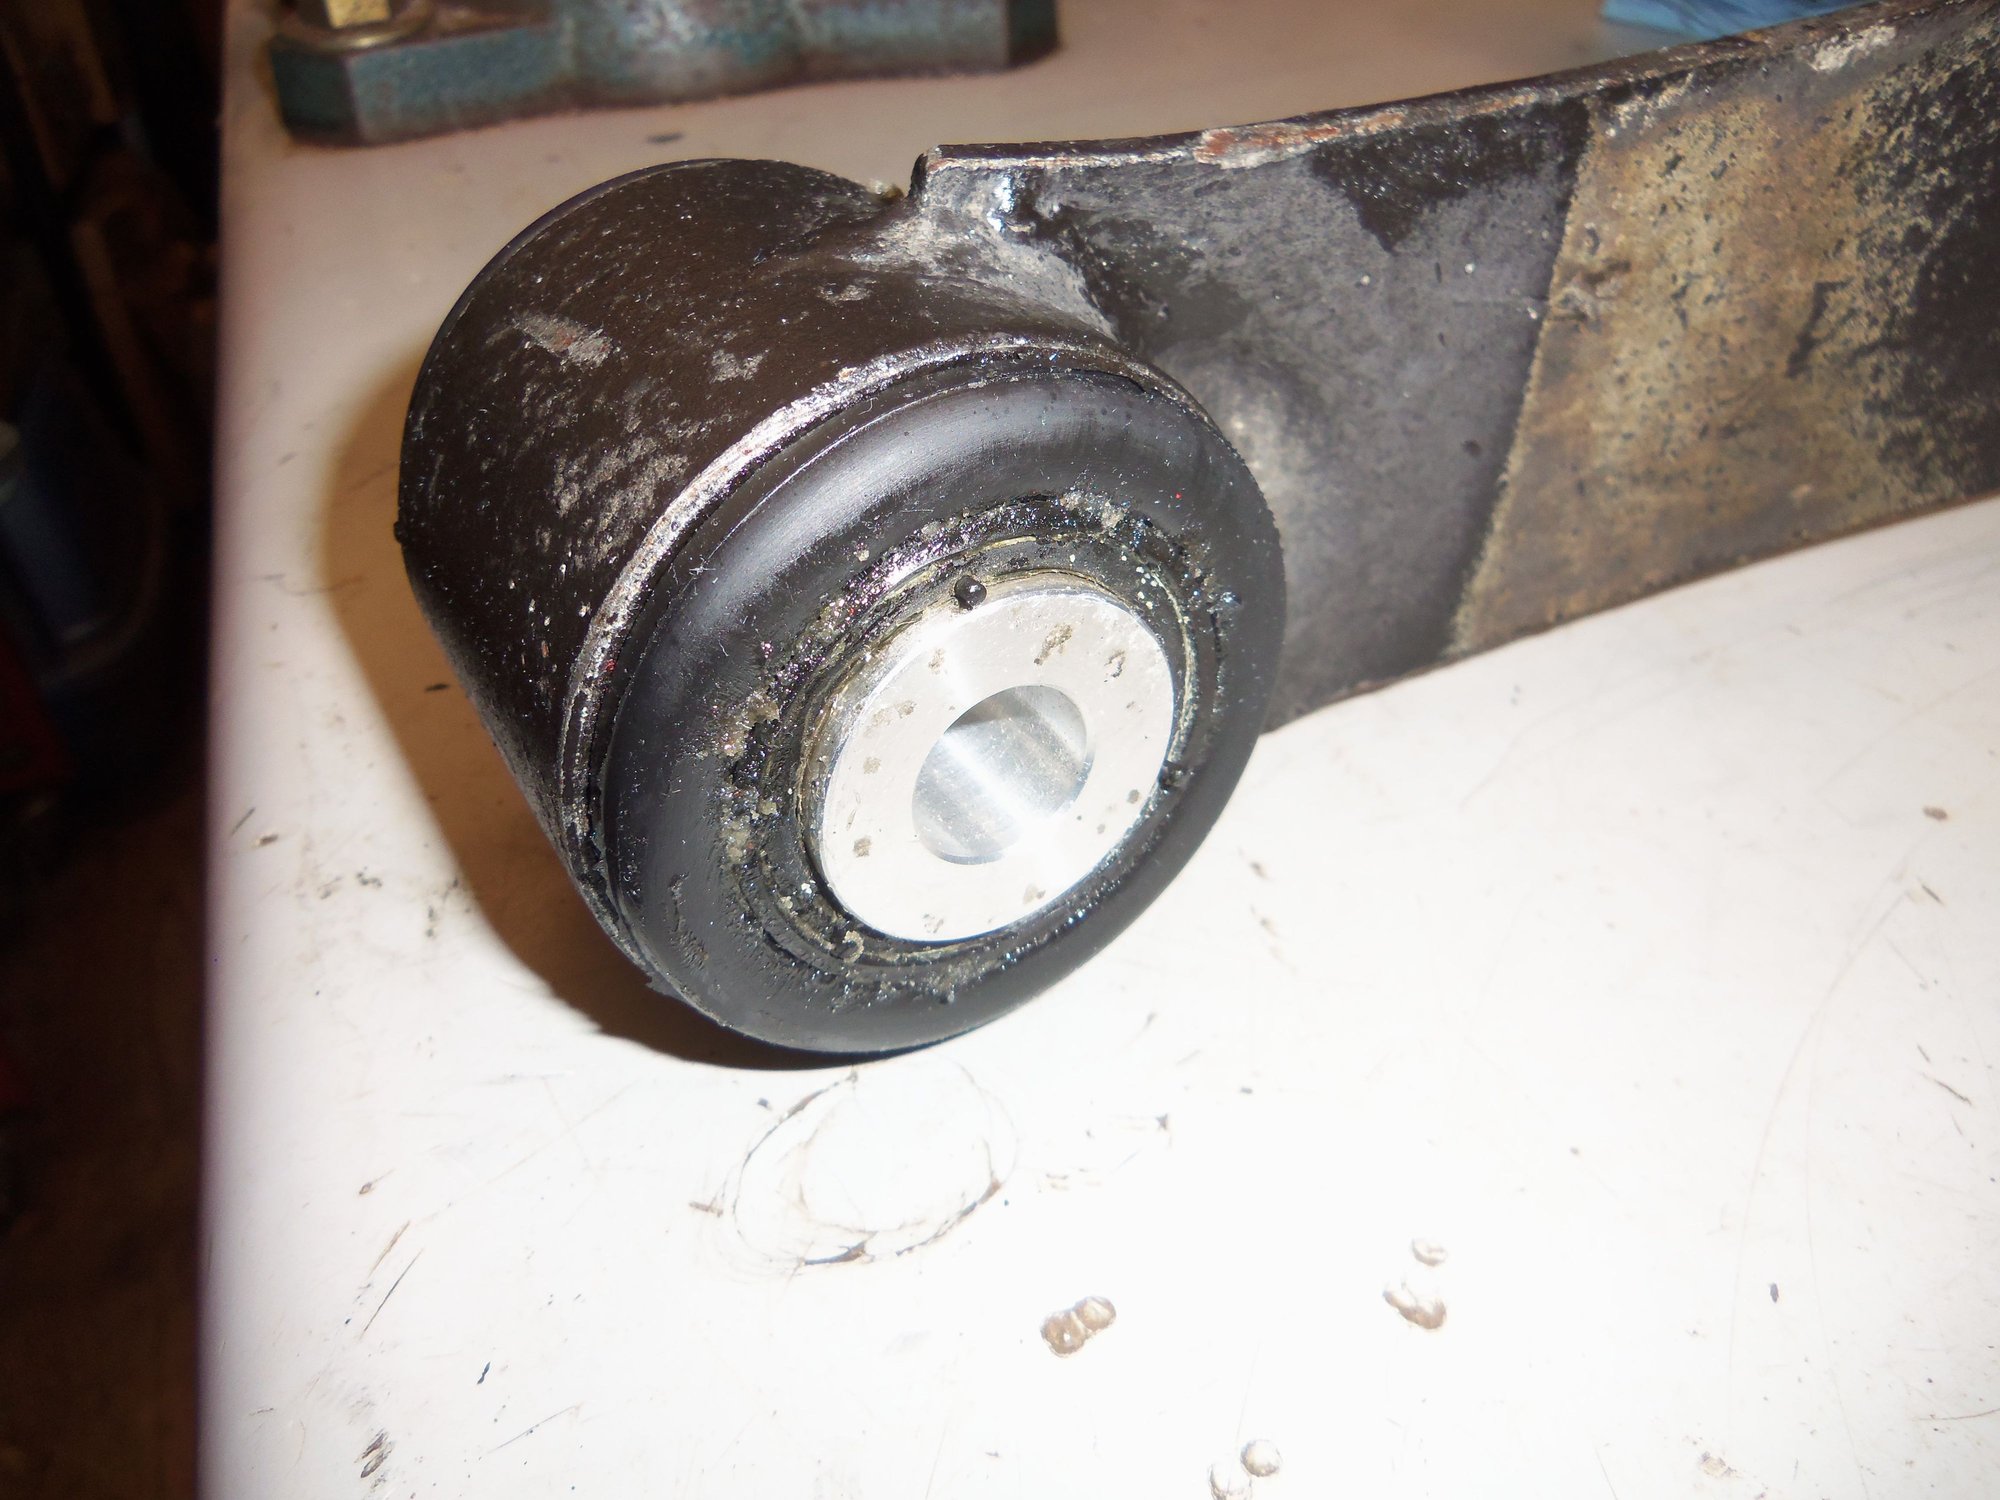
Passenger's side rocker bar bushing. Intact.
Receiver.
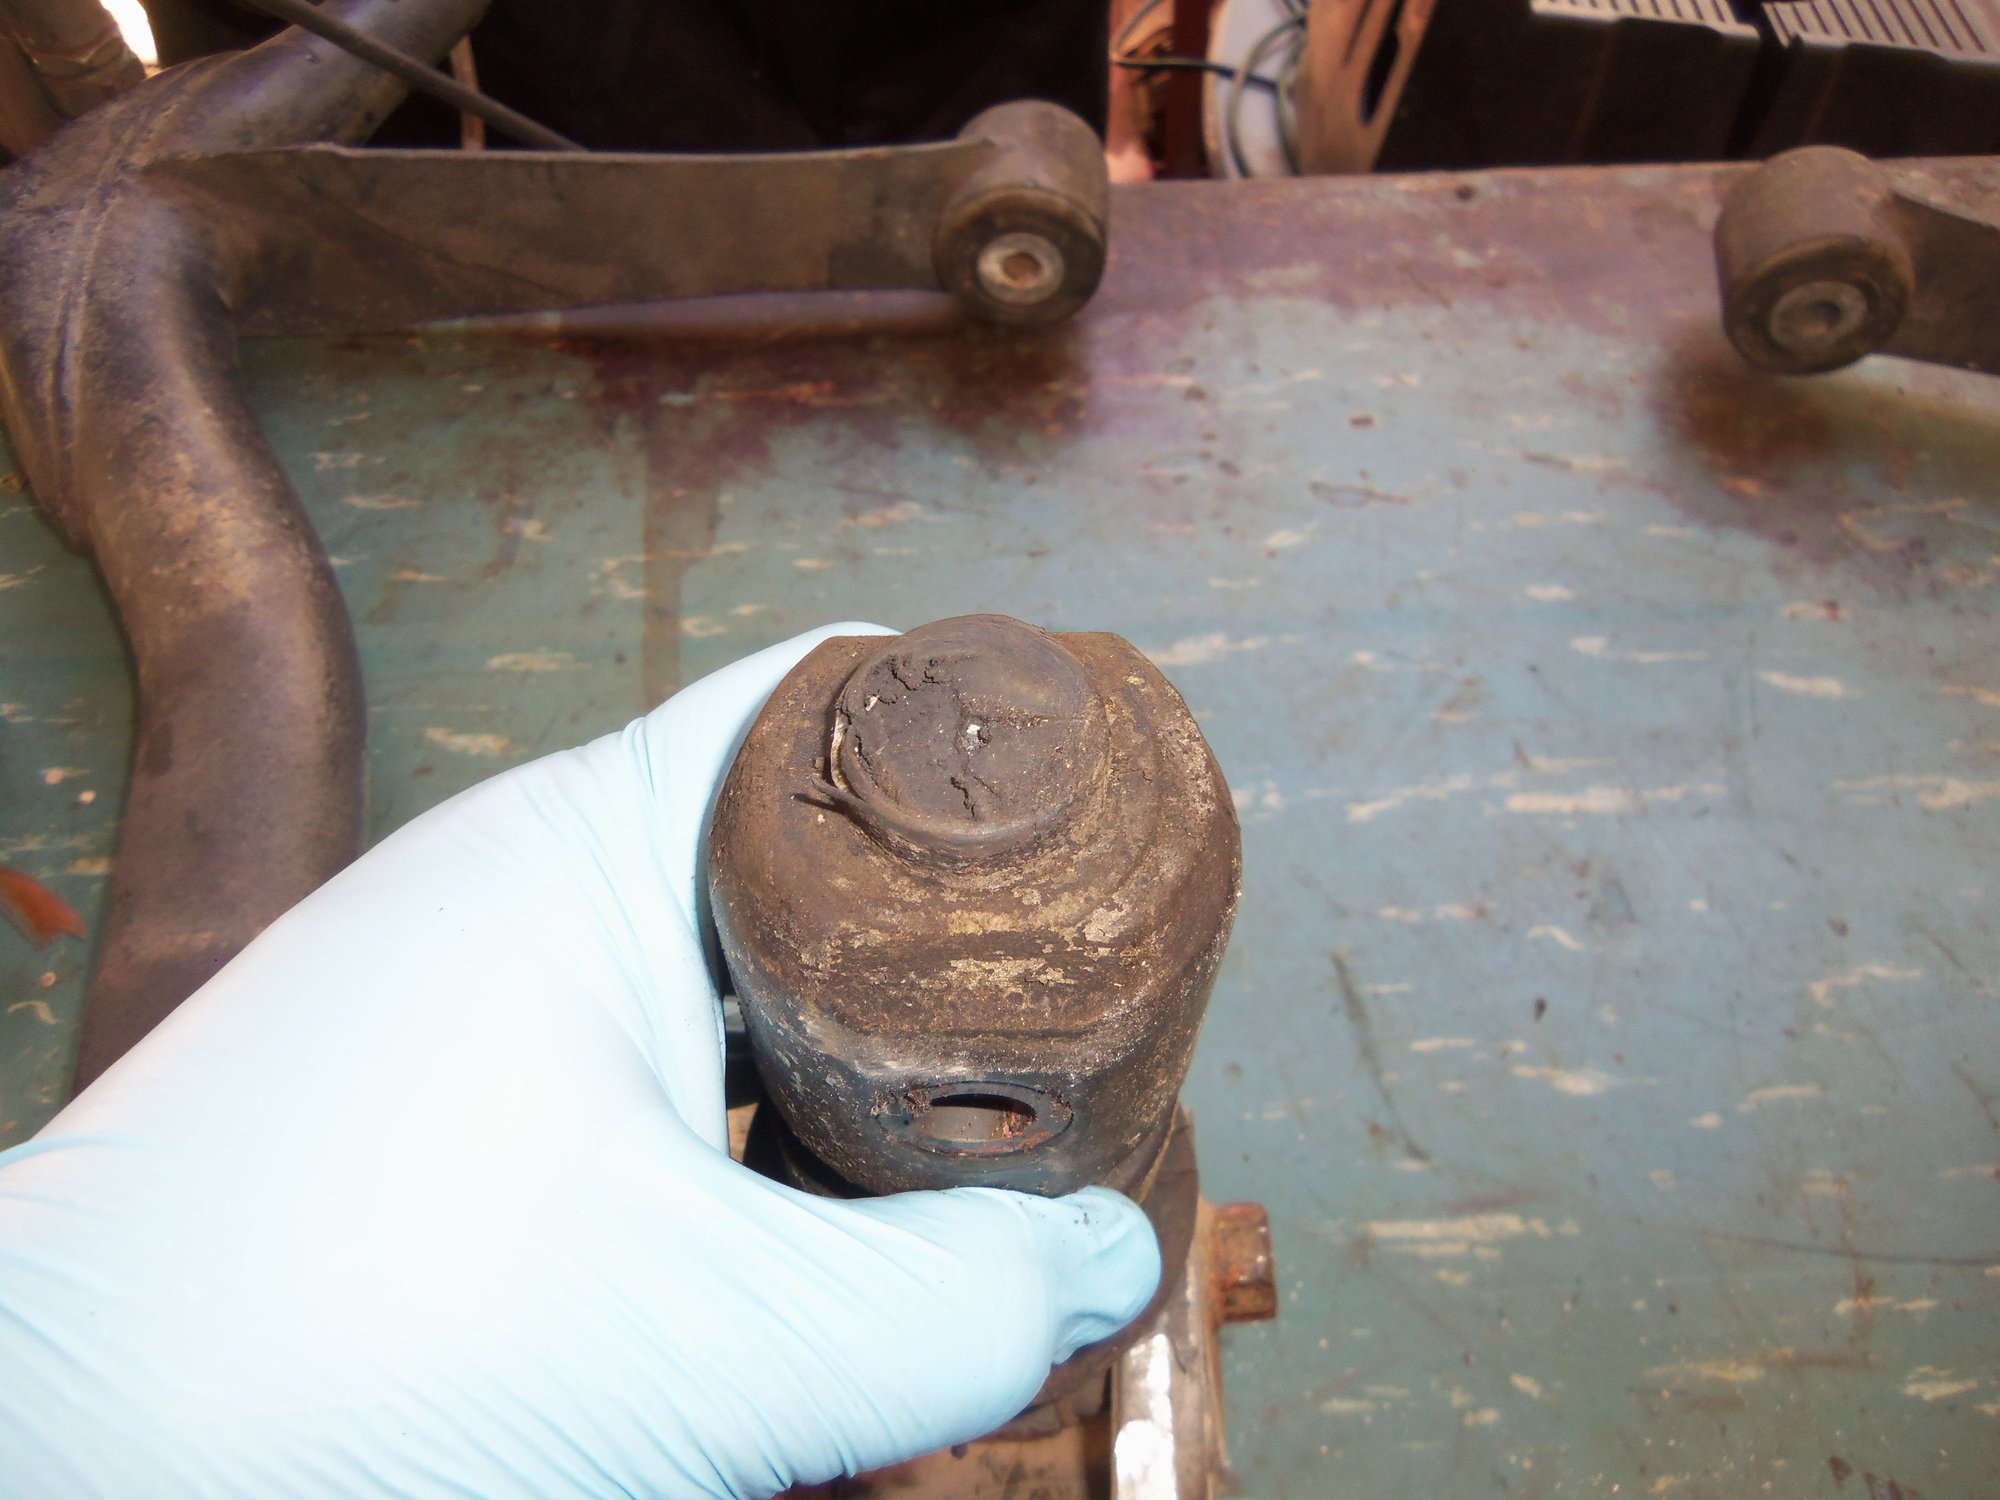
Driver's side rocker bar and receiver.
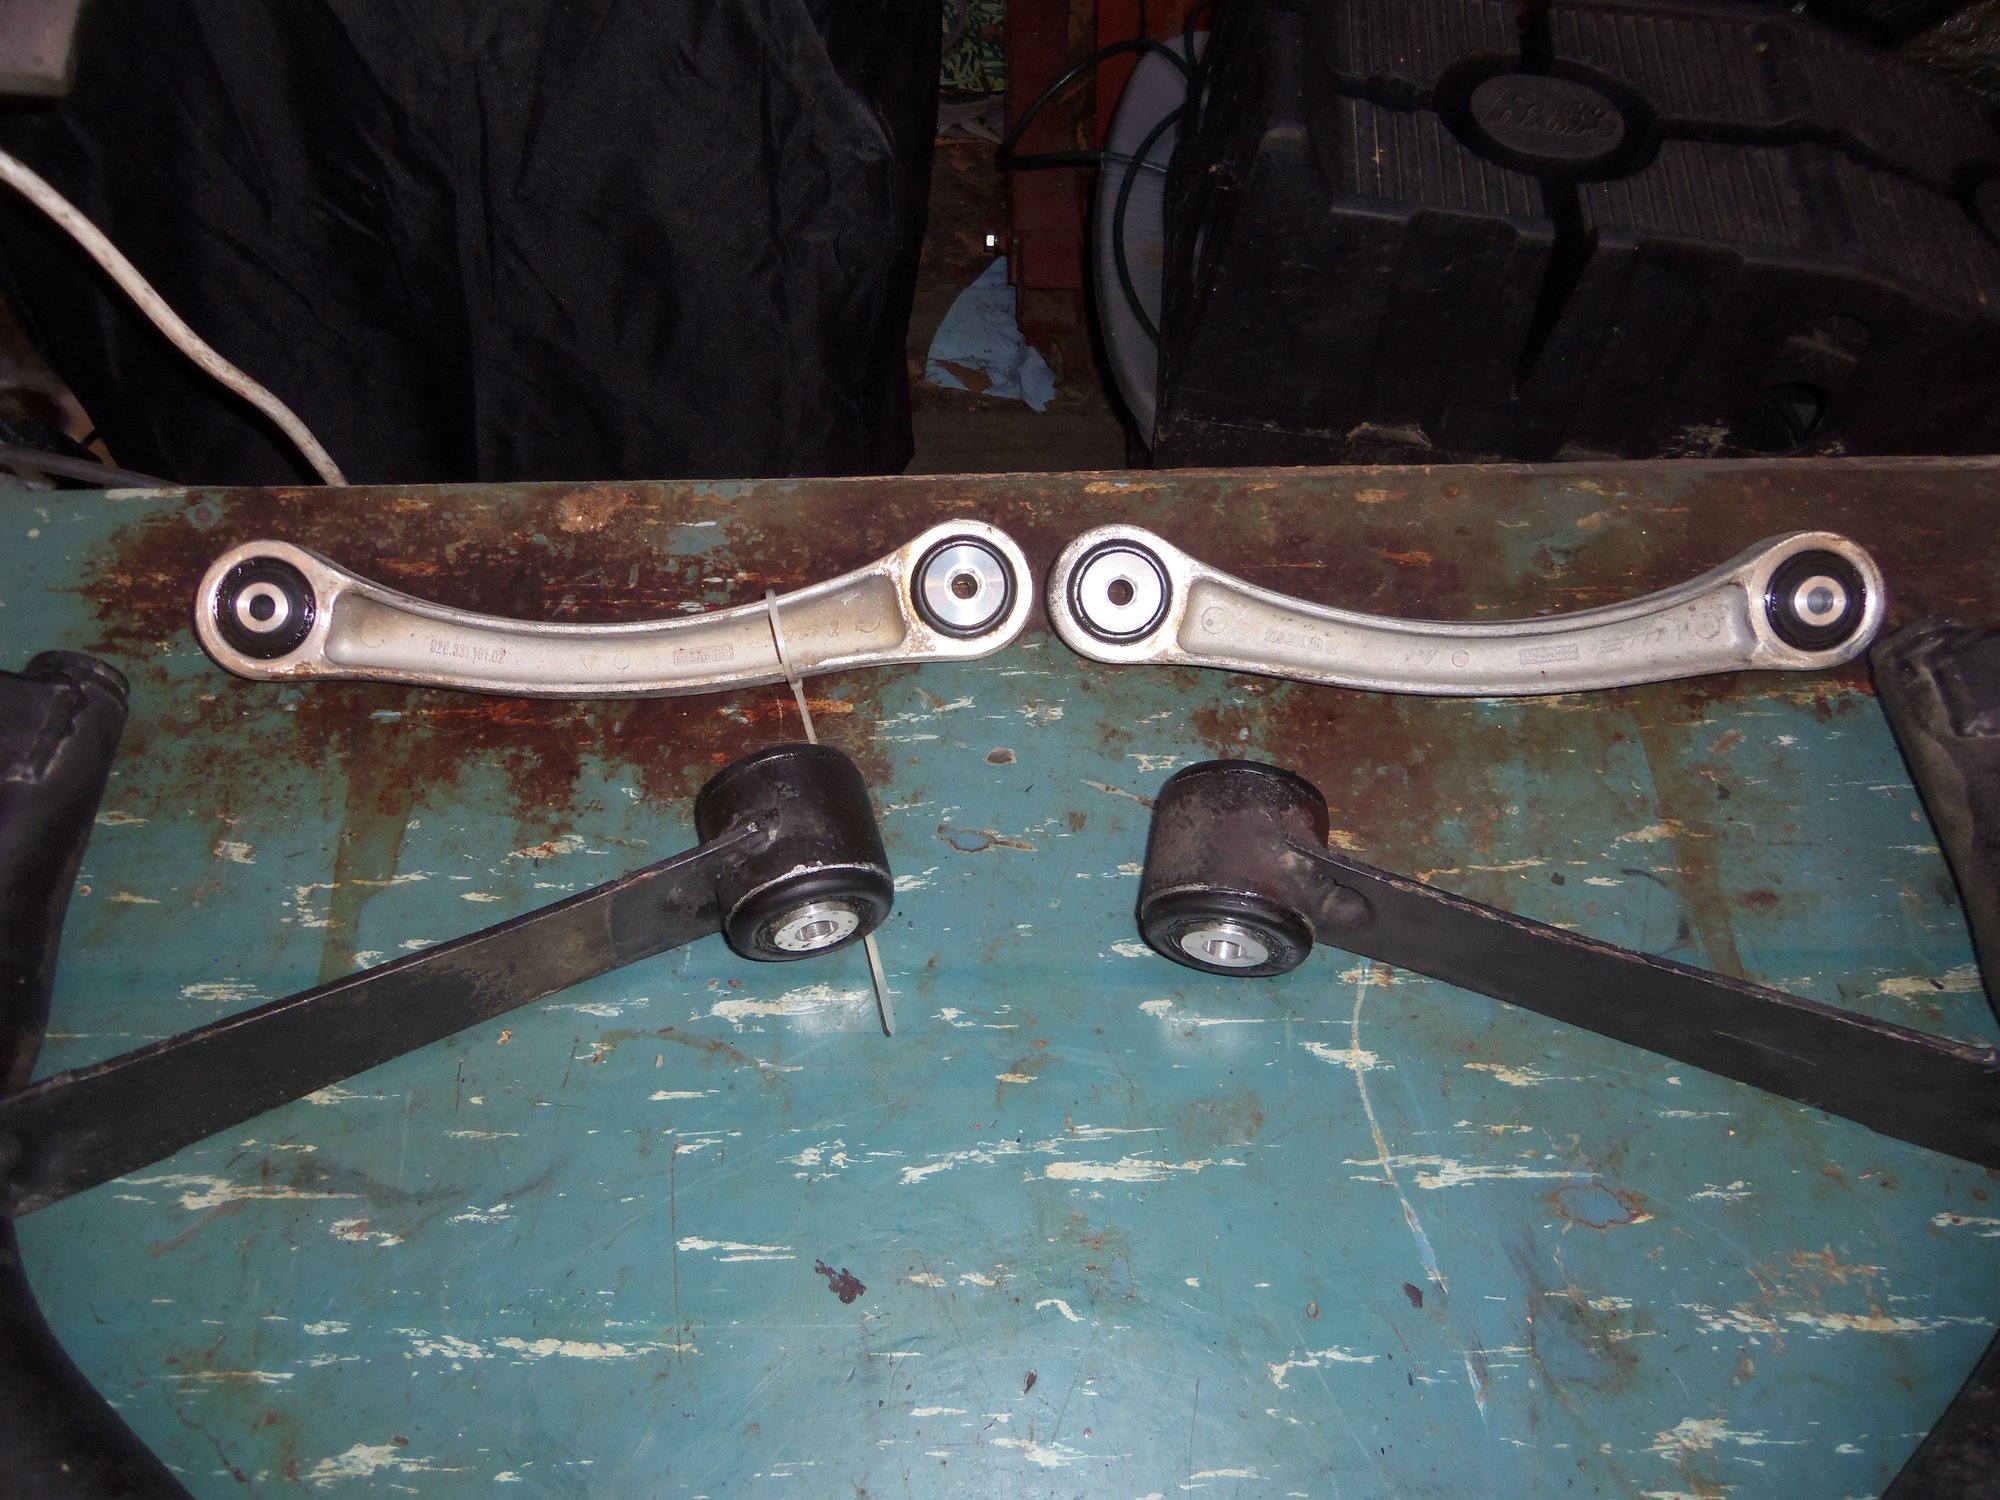
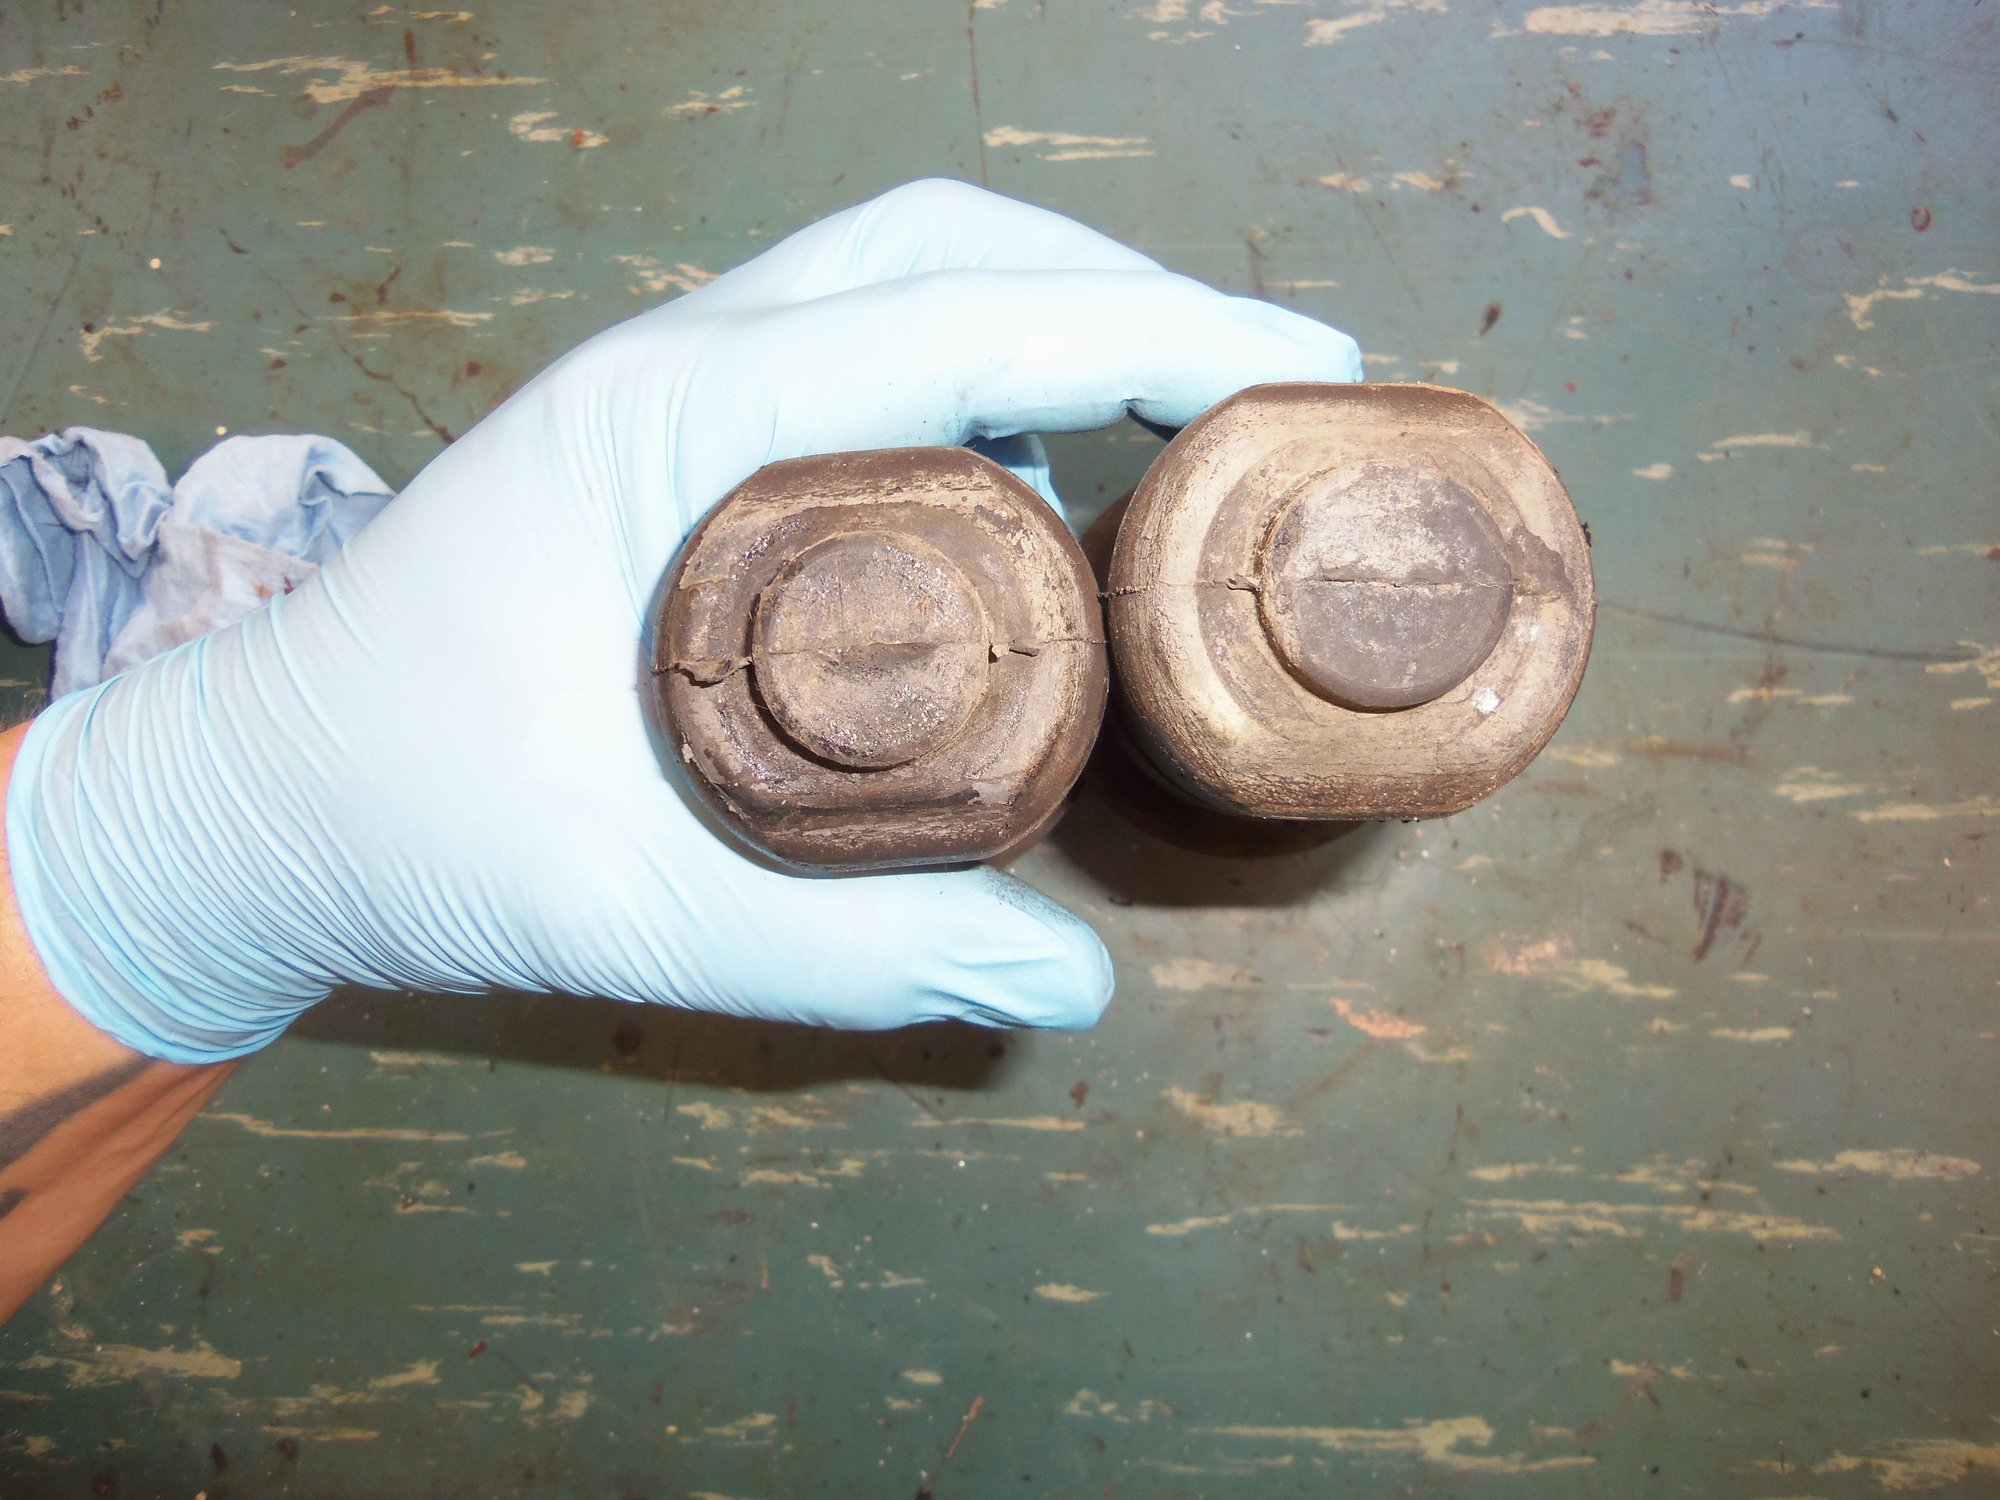
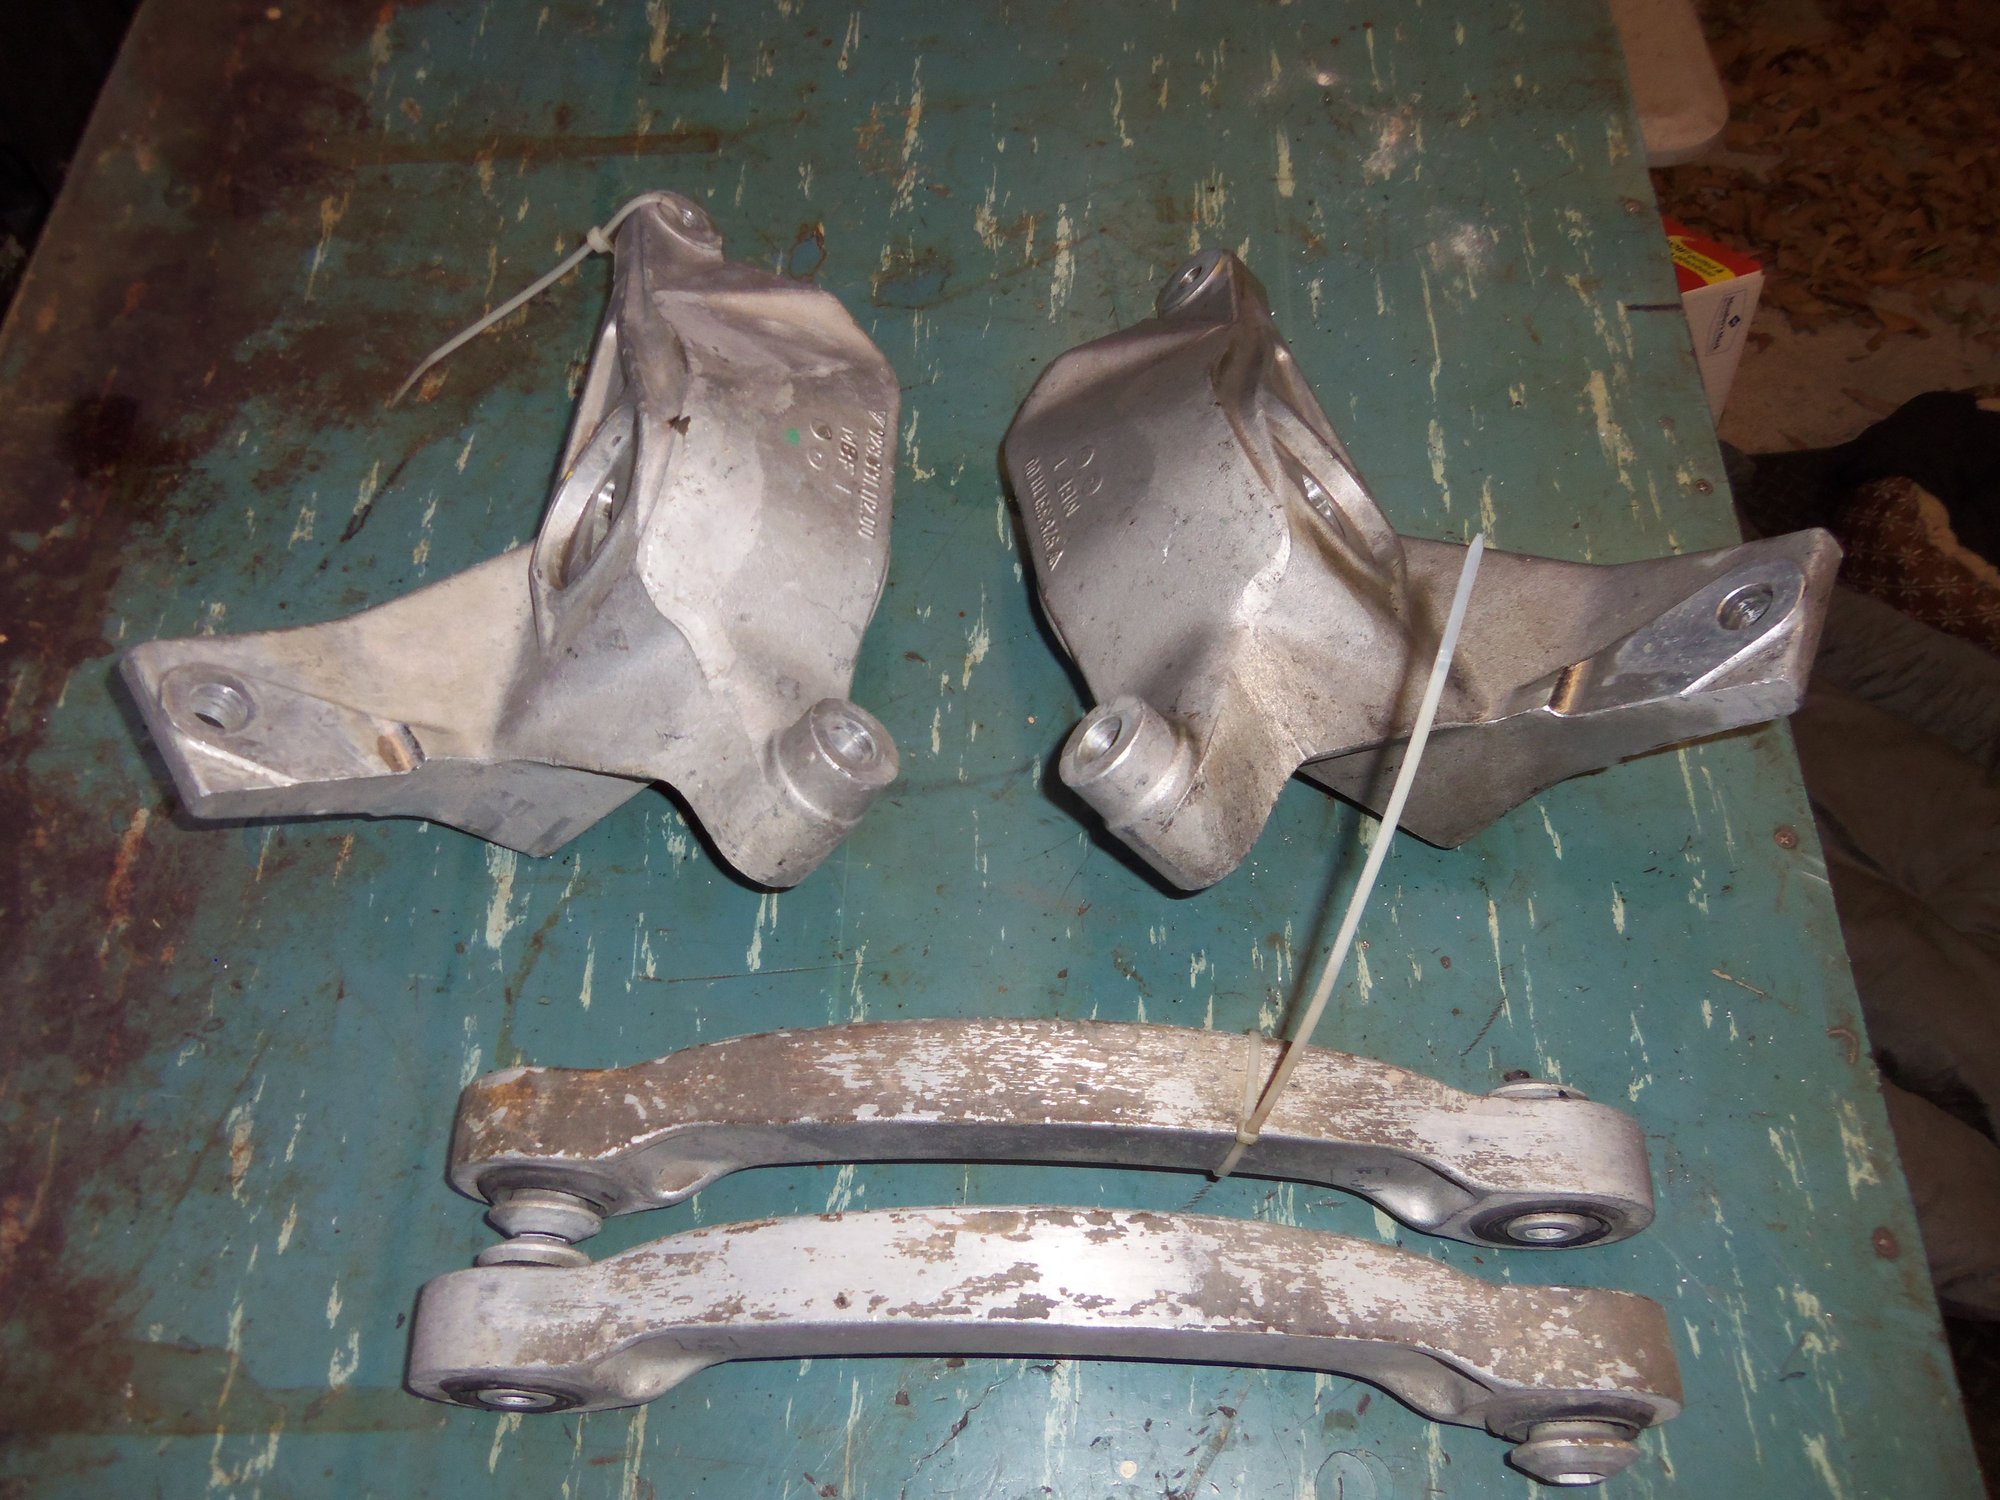
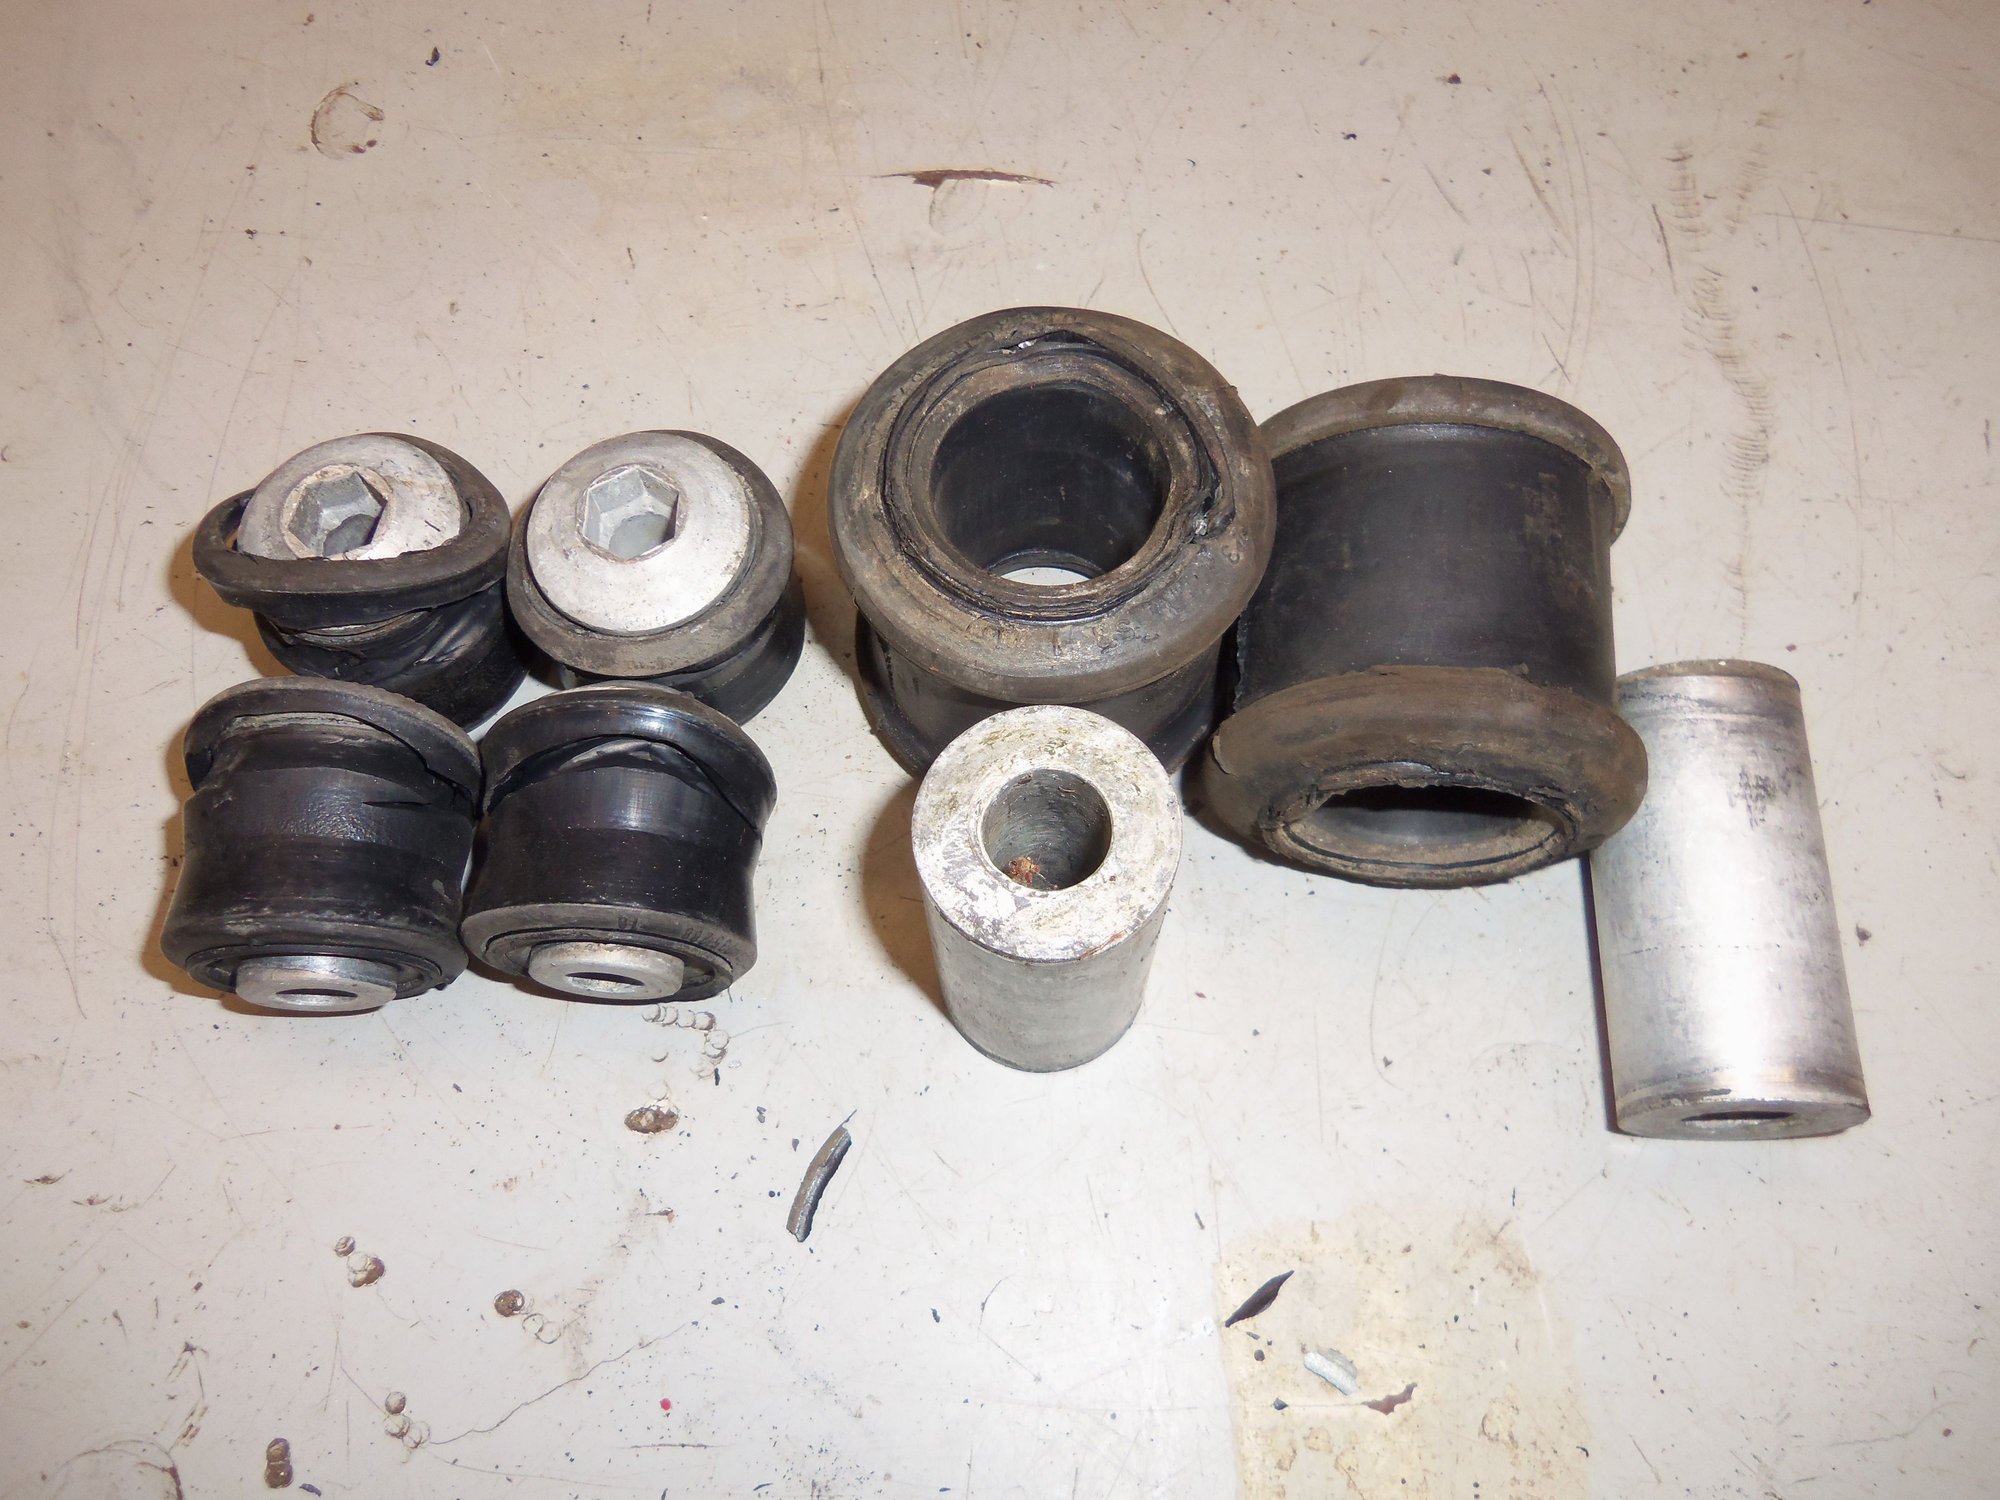
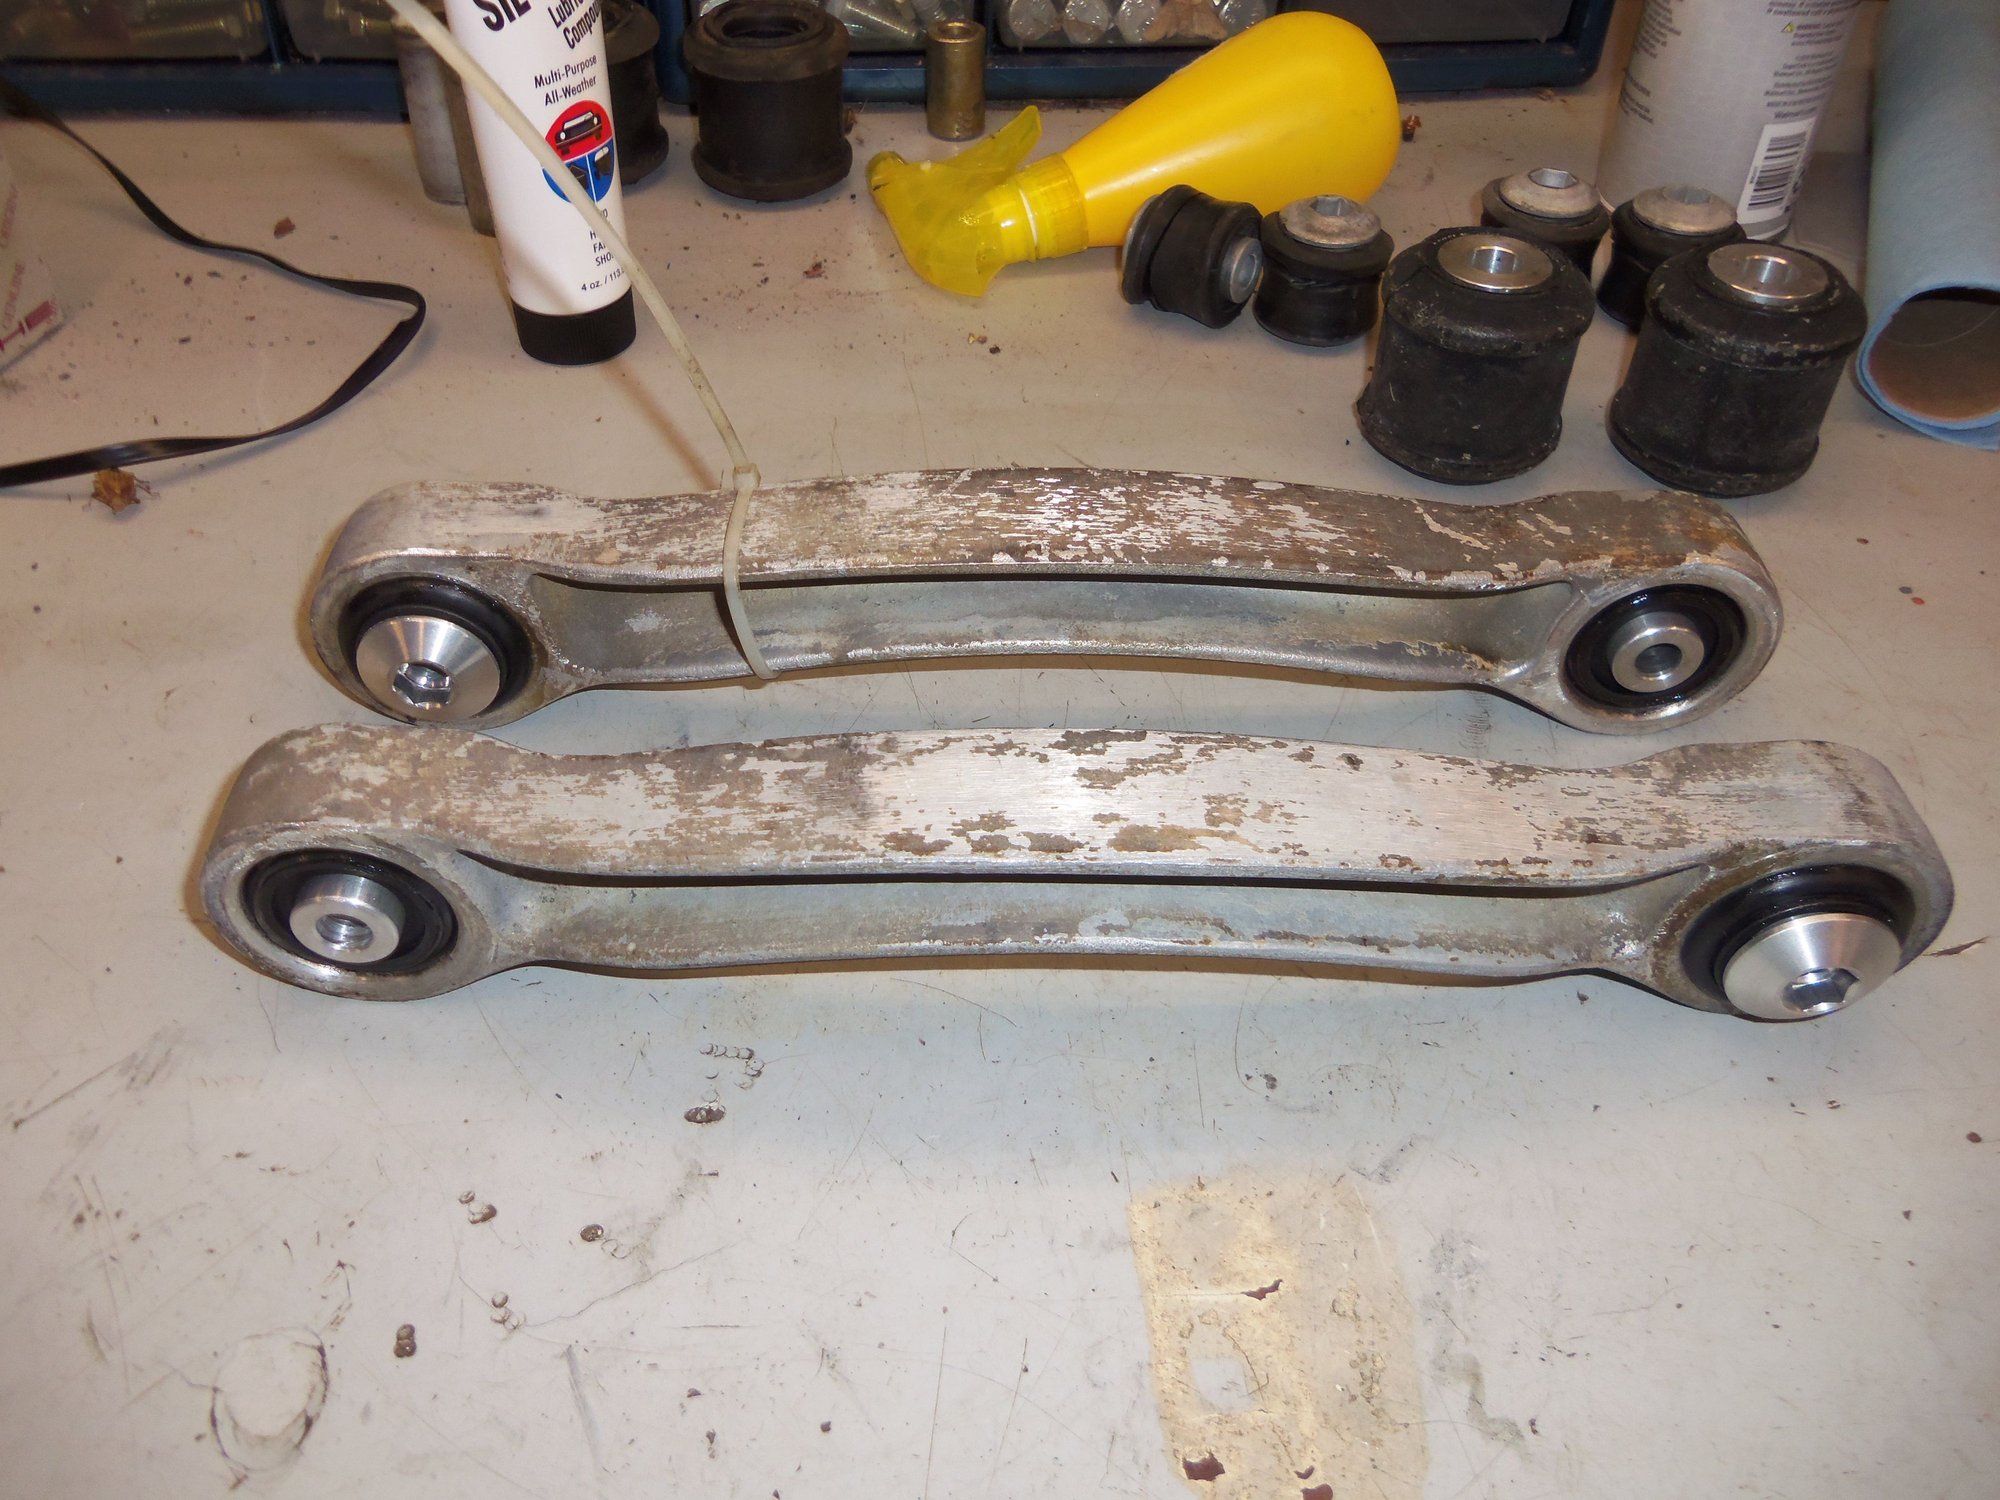
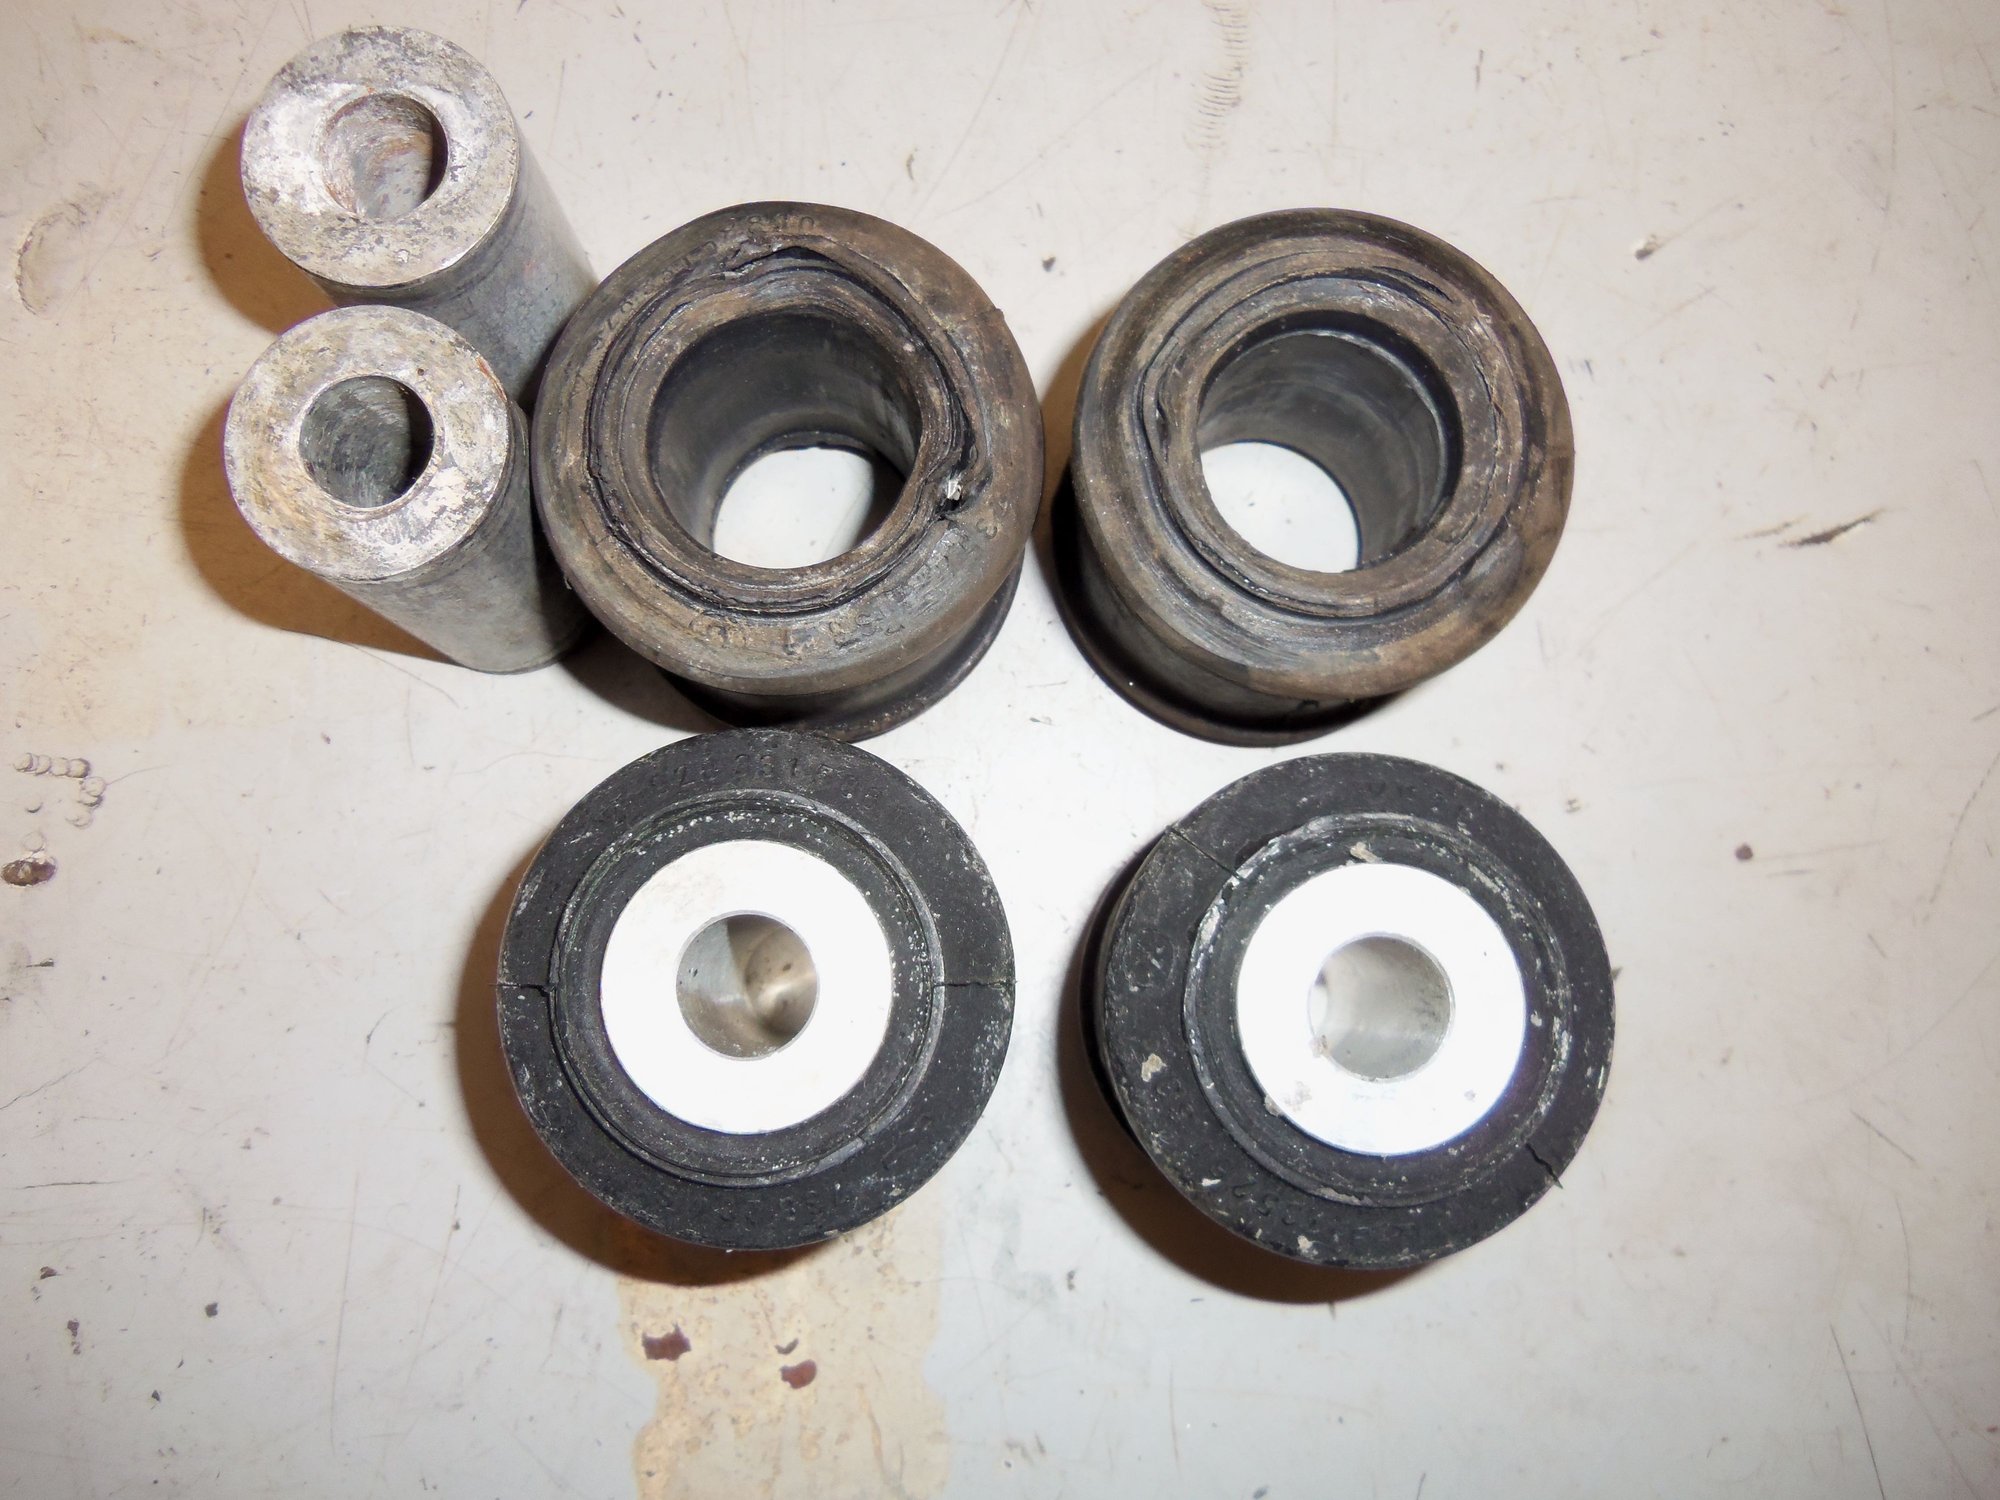
Passenger's side 1986.5 bad rocker bar.
Driver's side 1986.5 bad rocker bar.
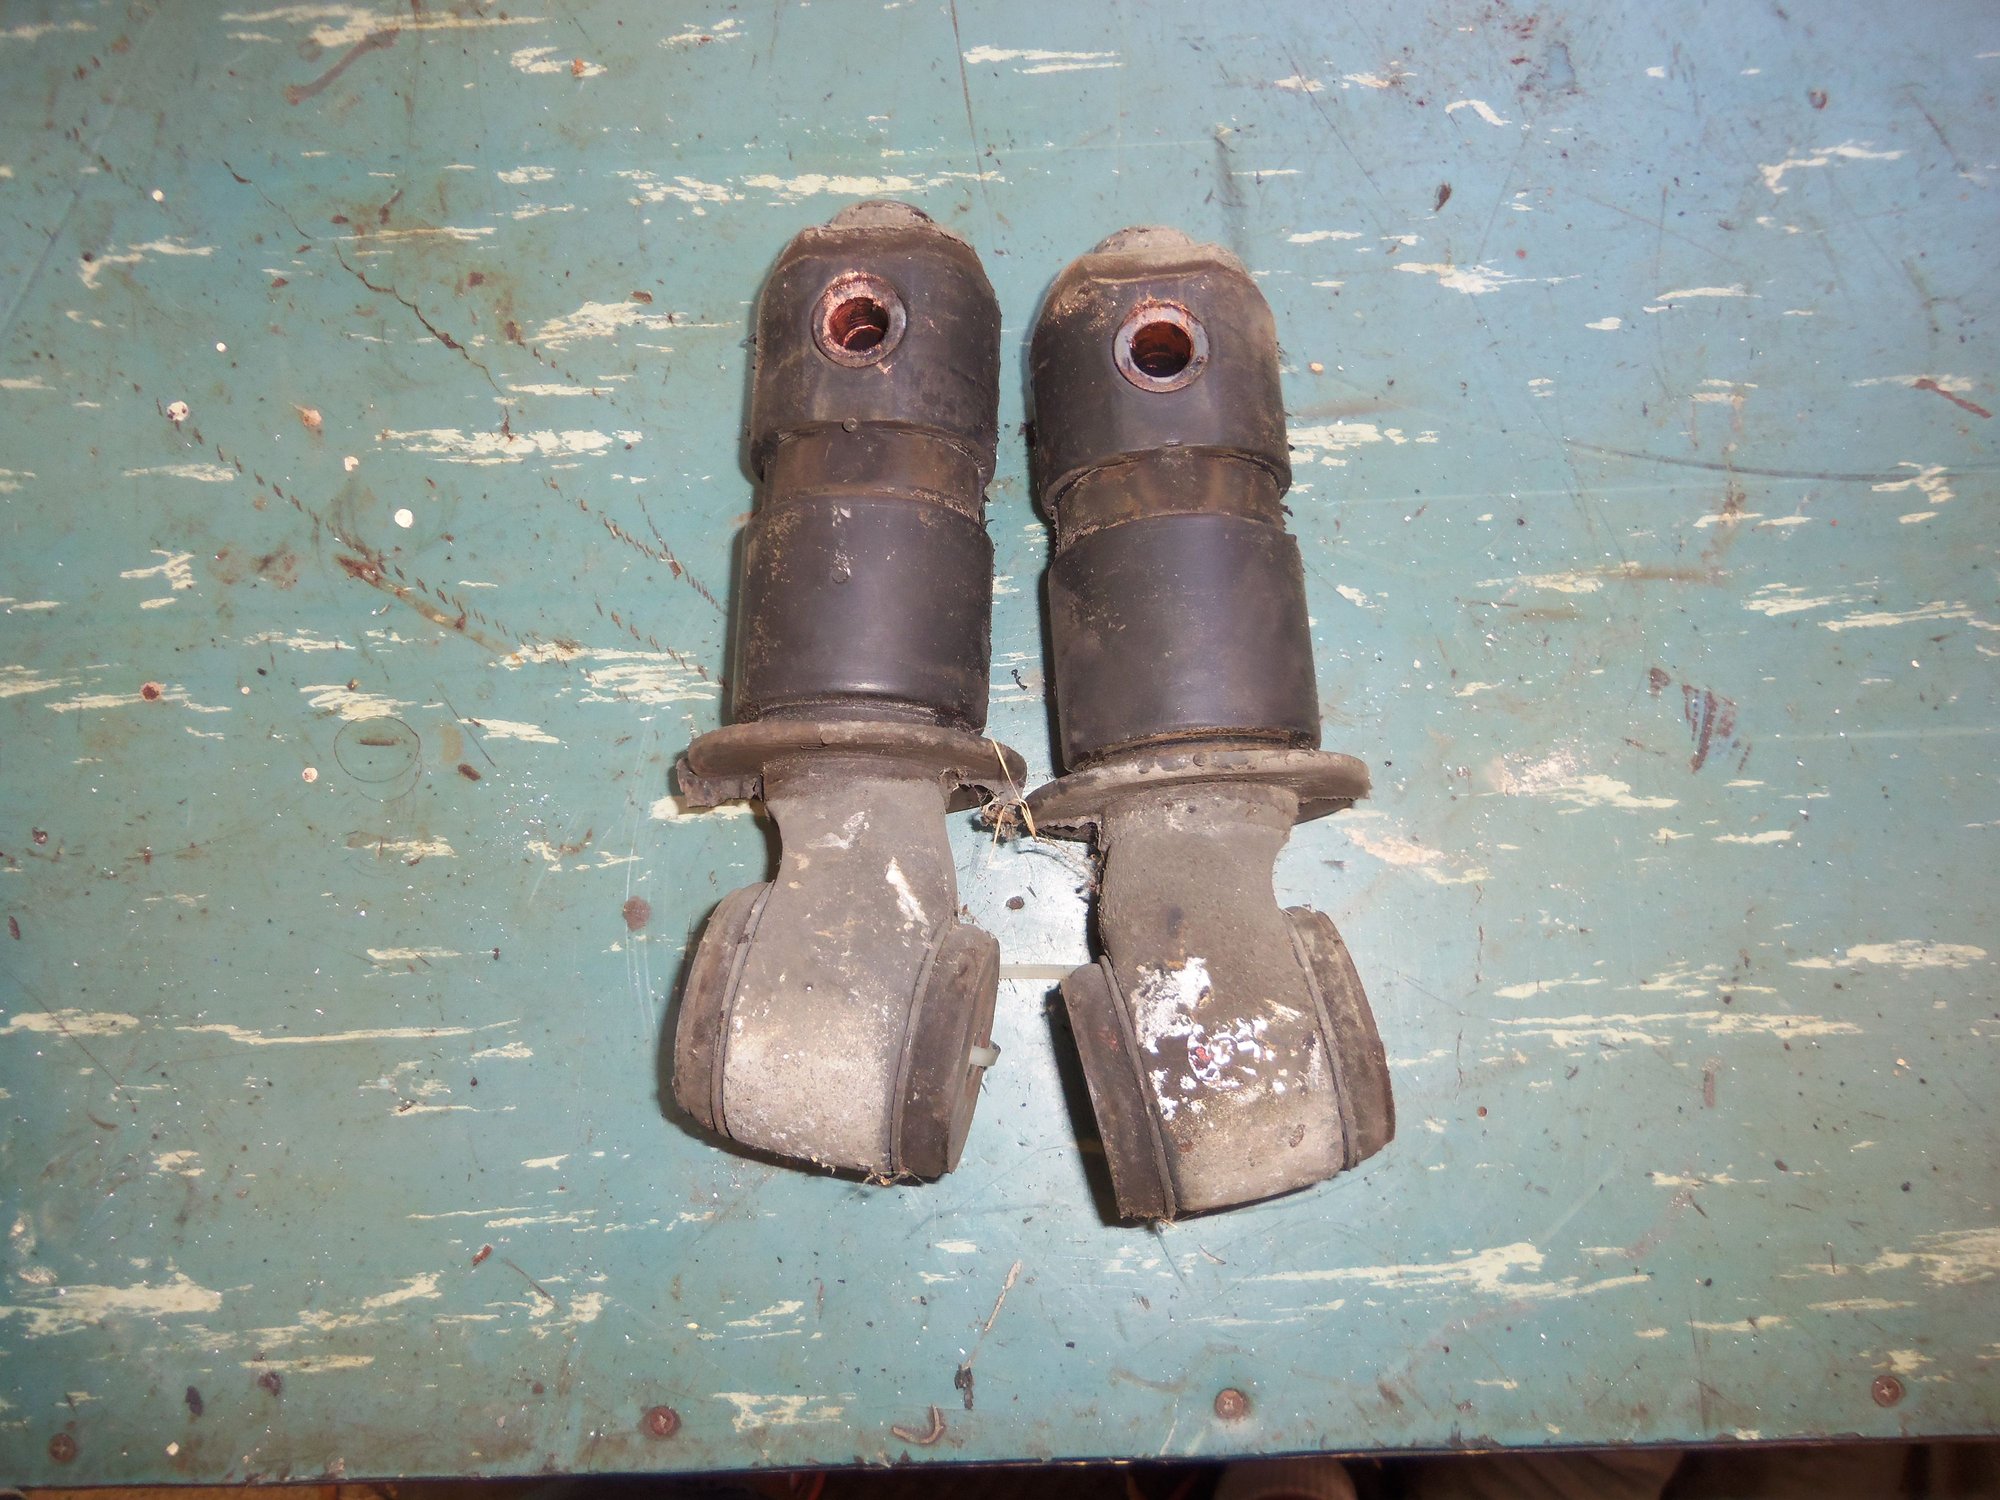
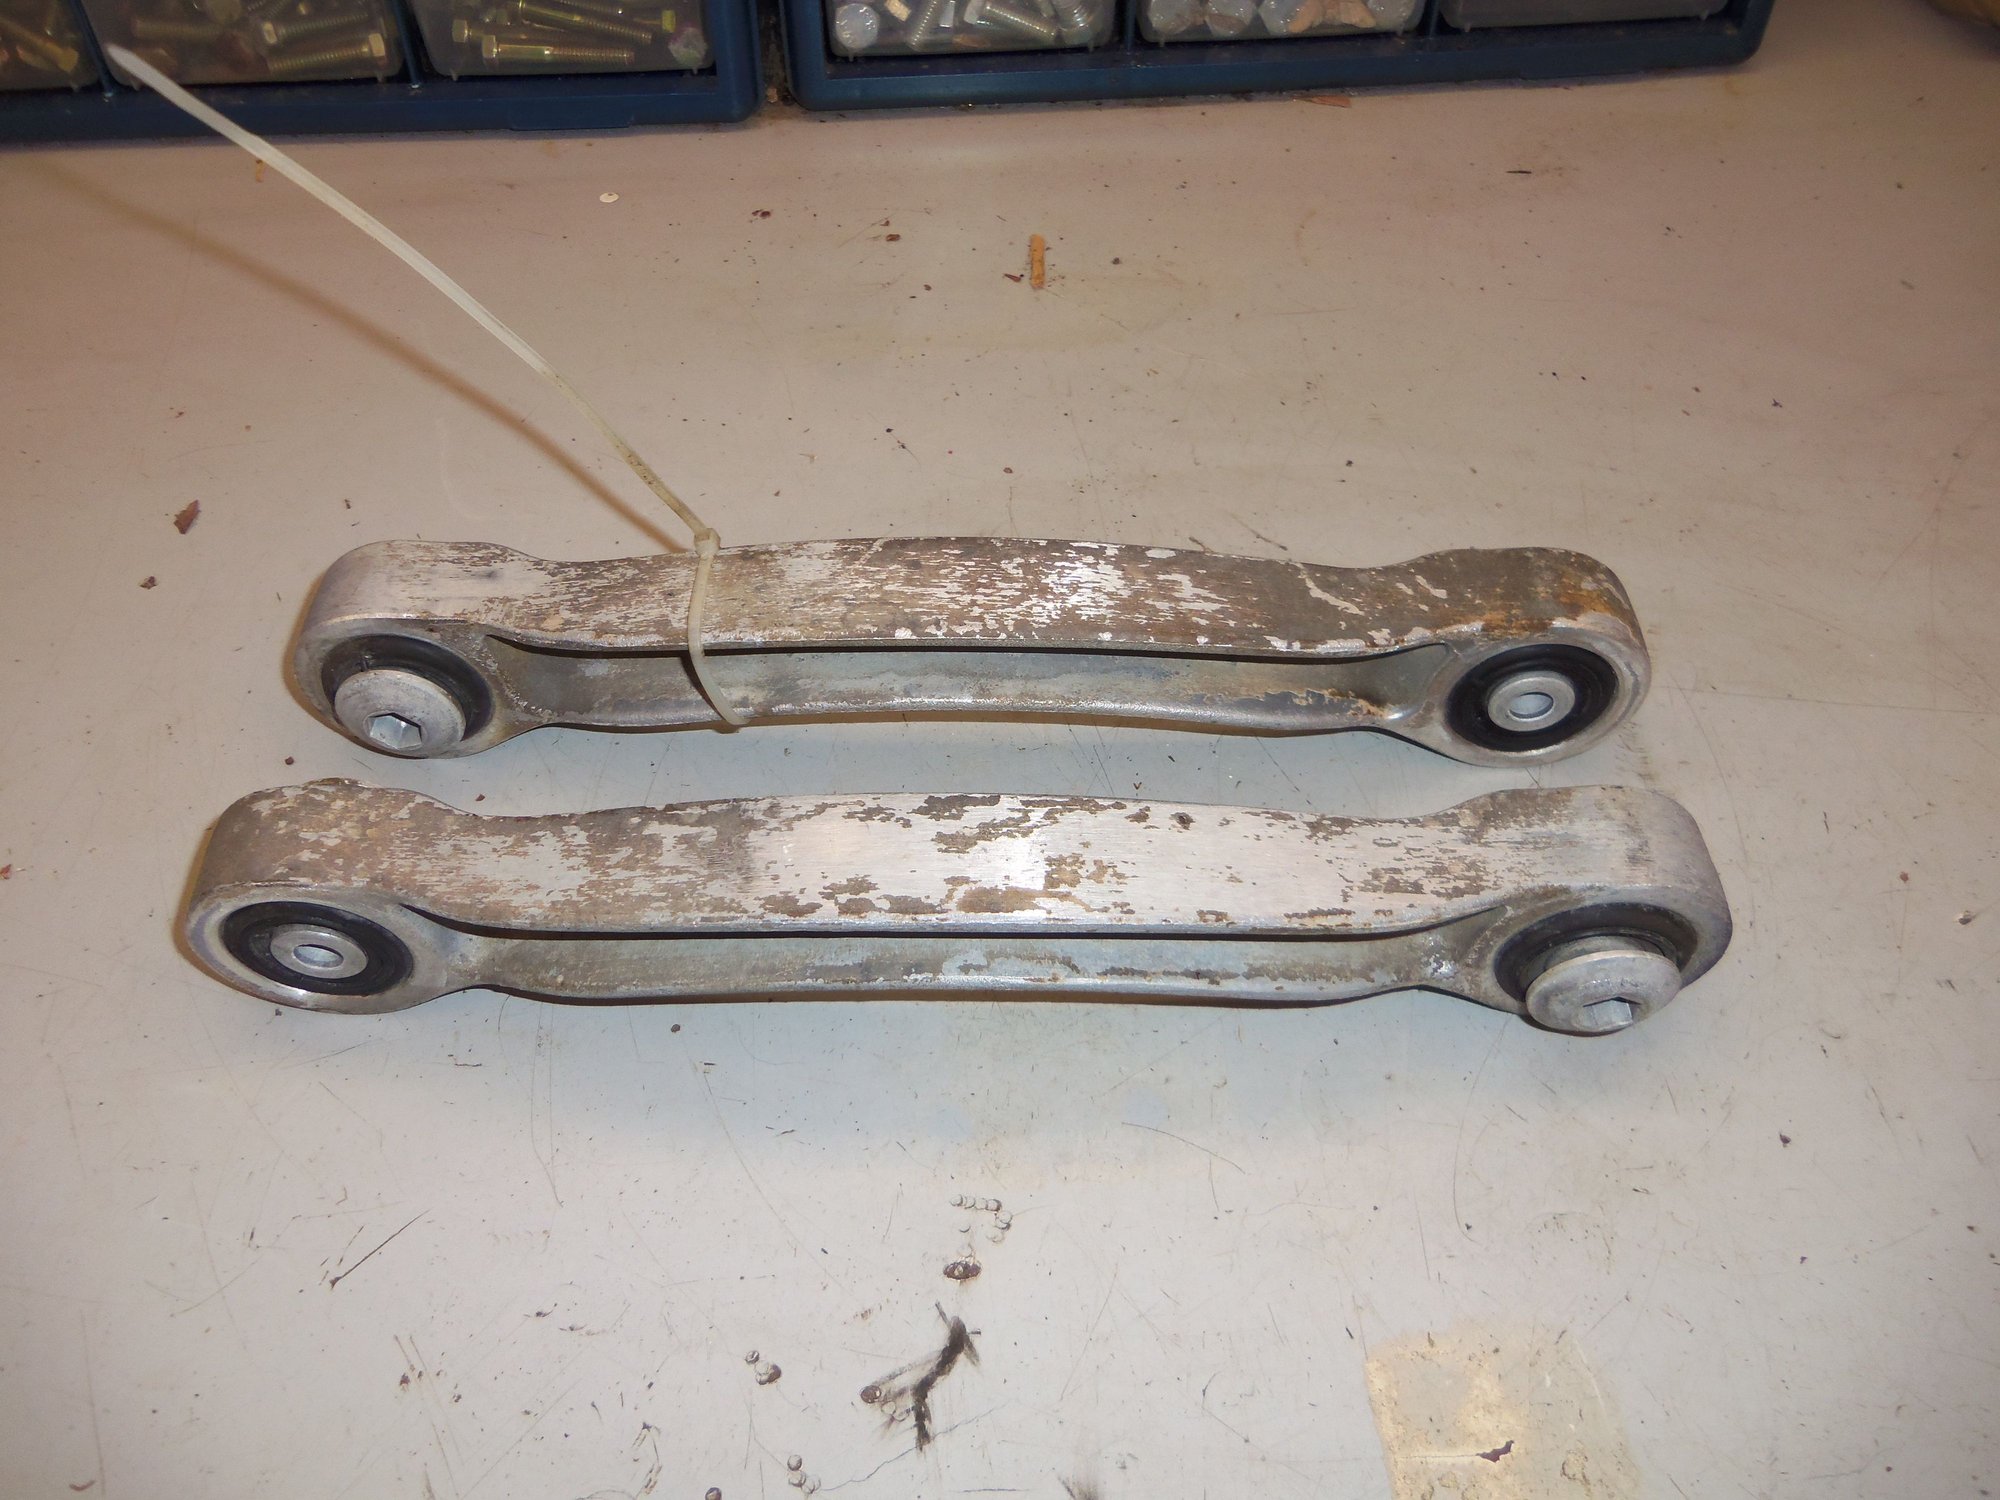
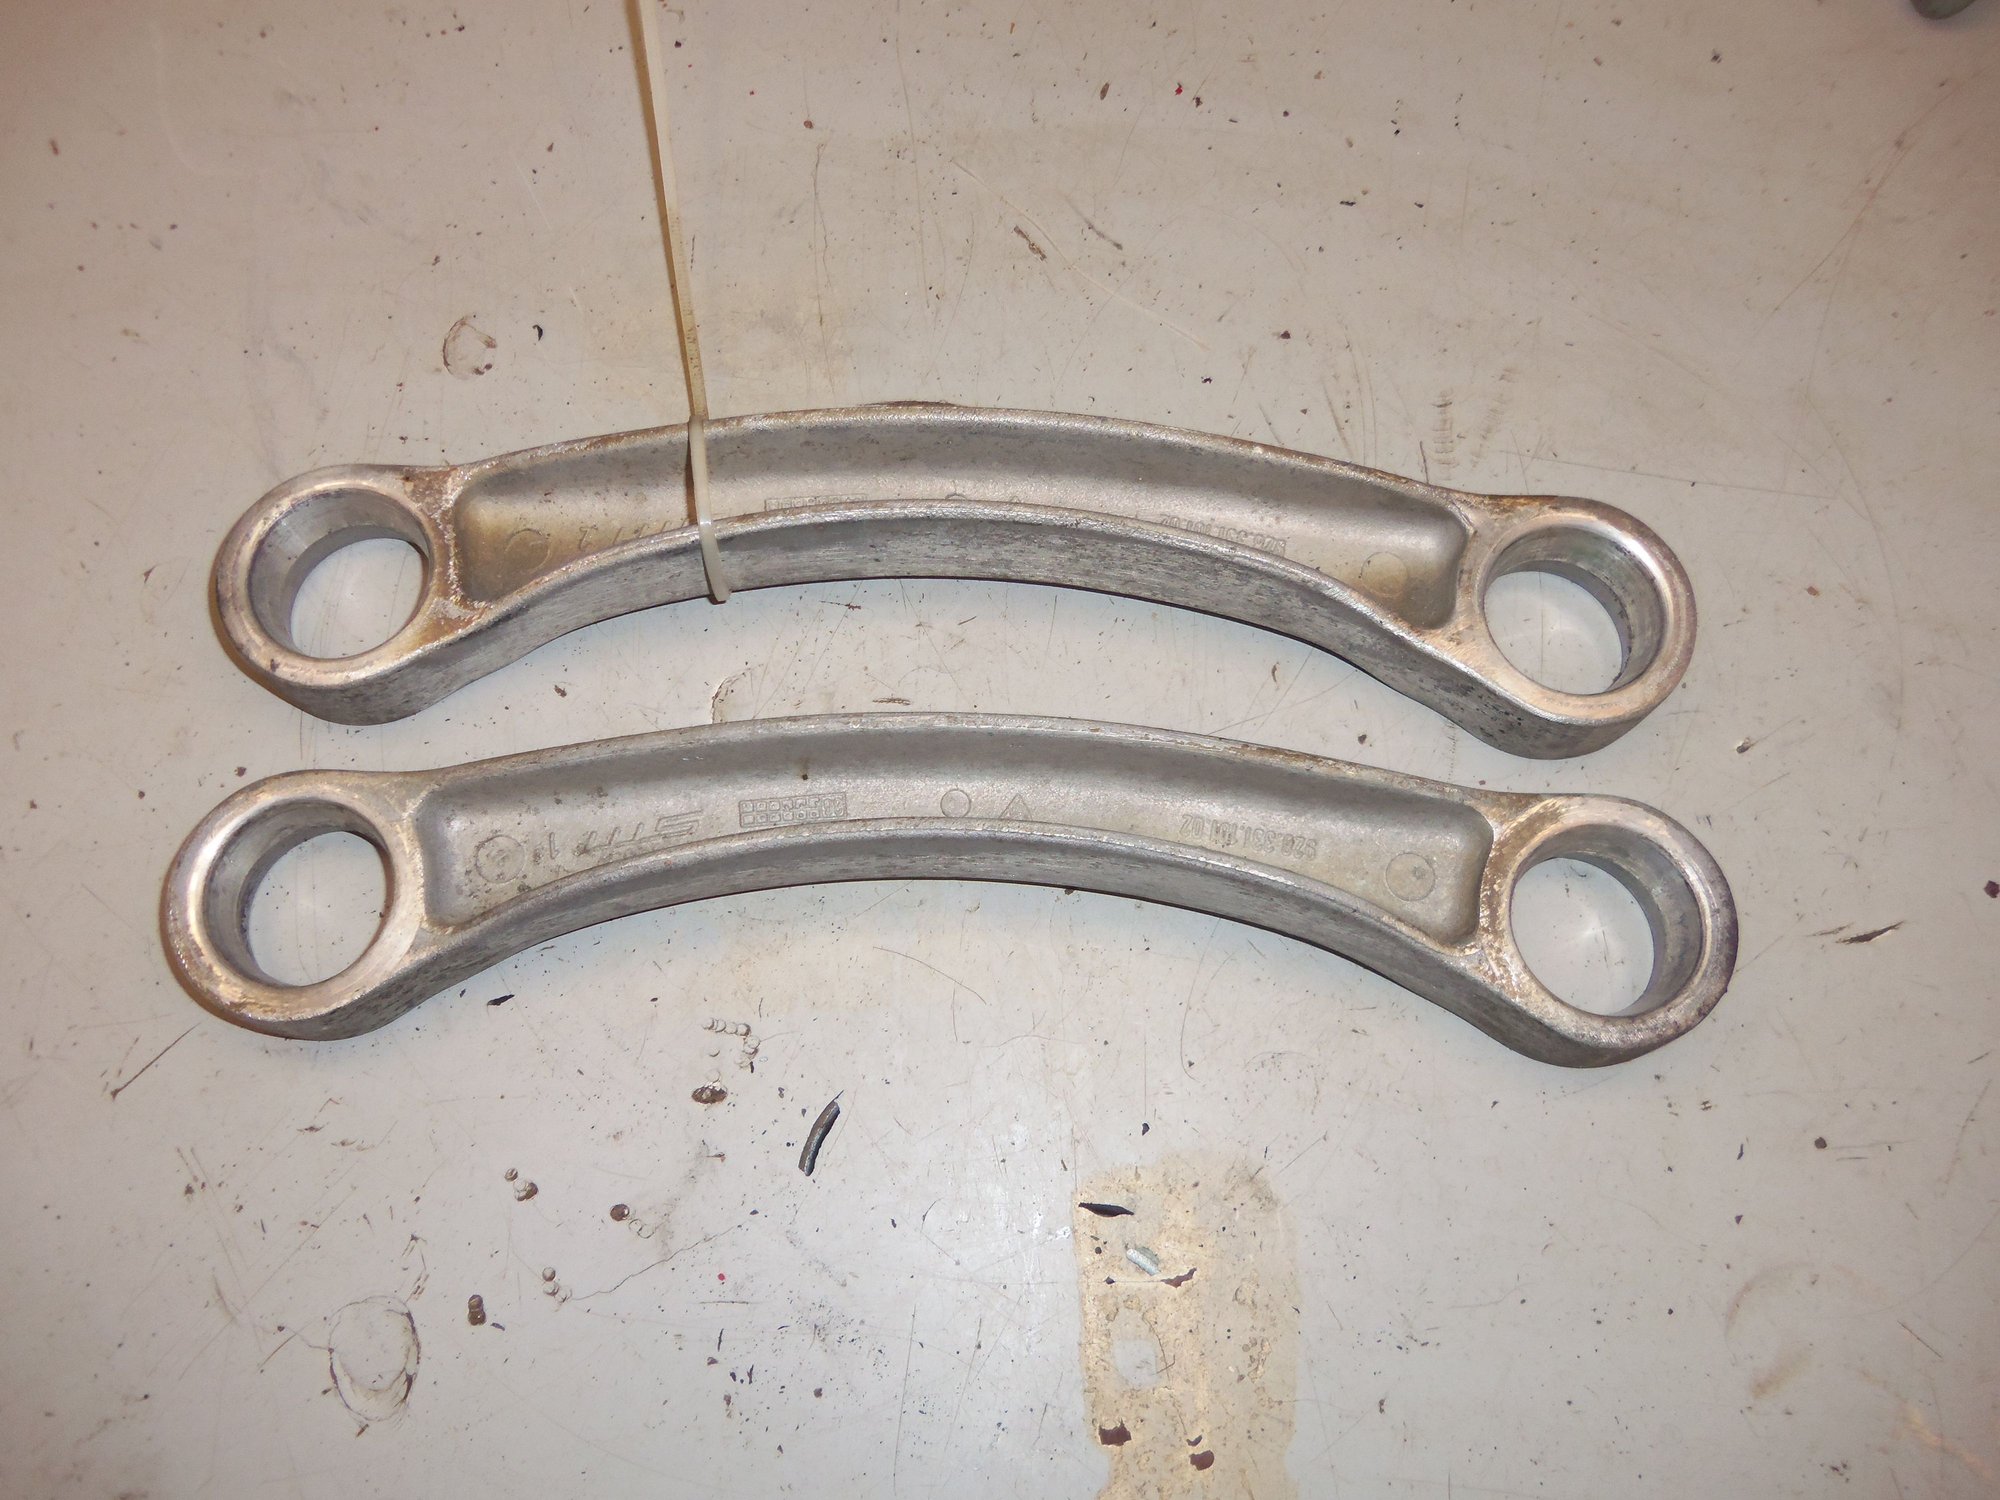
Good 1988 S4 rocker bars. Passenger's side on the left.
I have not yet pressed the good rocker bars into the good control arms. I still have to clean the bars and arms. As well, I am slightly hung up on a lubricant specified by the WSM.
For pressing in the rocker bars, as well as any other bushings on the rear upper & lower control arms, the WSM specifies: waxfree Capella B oil (Texaco). The inside of the control arm and the outside of the bushing on the rocker bar are to be coated with this oil.
I broke out my google-fu and found that Texaco Capella B oil is a lubricant for ammonia refrigerant compressors. Hmmm...even though my last job was as a maintenance tech at a refrigerated storage warehouse that used ammonia refrigeration, I do not have any of that oil on hand.
Continuing to search, I tripped over an old post from a refrigeration forum. They talked about POE and PAG 100 refrigerant oils being of the same nature. Hmmm...I have a few bottles of various AC compressor oils for my various vehicles.
Here is my way of thinking: this oil is needed to lubricate the bushings of the rocker bars as they are pressed in, but not deteriorate the rubber over time. This oil is NOT being used as lubrication for machinery. So...I think I can get away with using one of the refrigeration oils I have.
As opposed to the oil I use for my model steam engines. It is pretty much liquid wax.
Alright, for those of you still reading along, am I on the right track? Will I be able to successfully press the good rocker bars into the good control arms with AC compressor oil?
Or, have I screwed up again and need to contact Tom for another set of control arms...
Capella B is a mineral oil and the only thing special about it is that it is dewaxed to a very low temperature to prevent the oil from waxing up during low temperature operation. Why Porsche specified such for this process is beyond me as generally they keep mineral oils away from rubber.
That some of our chaps are of the opinion that the bush cannot be removed should cause some consternation. Although not my area of speciality I have never seen a pressed in bush come out in a manner that it was vaguely suitable for reinstatement but take that for whatever it may be worth.
In your situation I would be looking at straightening the S4 arms out in the manner I posted in your other thread.
I have not yet pressed the good rocker bars into the good control arms. I still have to clean the bars and arms. As well, I am slightly hung up on a lubricant specified by the WSM.
For pressing in the rocker bars, as well as any other bushings on the rear upper & lower control arms, the WSM specifies: waxfree Capella B oil (Texaco). The inside of the control arm and the outside of the bushing on the rocker bar are to be coated with this oil.
I broke out my google-fu and found that Texaco Capella B oil is a lubricant for ammonia refrigerant compressors. Hmmm...even though my last job was as a maintenance tech at a refrigerated storage warehouse that used ammonia refrigeration, I do not have any of that oil on hand.
I'm mindful that the WSM is now about 40 years old and lubricant technology has come up with some new things... or, at least, new Marketing Things.
I always prefer a lubricant that is documented as rubber friendly. There are specialty rubber lubs. IIRC, years ago @Rob Edwards posted a particular brand he'd used.
On the other hand, the Texaco stuff, assuming it was used at the factory seems to have done a pretty damn good job.
I suspect you can go either way.
Originally Posted by FredR
That some of our chaps are of the opinion that the bush cannot be removed should cause some consternation.
Anything can be removed. The question is if it's a good idea to remove it because ...
Although not my area of speciality I have never seen a pressed in bush come out in a manner that it was vaguely suitable for reinstatement but take that for whatever it may be worth.
... of this ---^
However, Seth's link pin bushings came out very nicely. Surprisingly, almost shockingly, nicely. I for one would have - and have in the past - assumed that the acting of pressing them out would have torn them beyond reuse. And since they are NLA I've never tried.
At this point, I'd be tempted to press-out the rest of the bushings, get the arms blasted and powder coated and press in all new bushings (with the '88s link pins.) But, all new bushings get spendy.
Indeed the S4 bushes came out remarkably well.
Given how deep in Seth is, doing the job once and doing right is a no brainer.
Who knows he might even finish his car one of these decades!
Gentlemen, thank you for your advice and opinions!
Fred, after staring long and hard at the WSM, I suspected that the rocker bars would press out of the control arms nicely. There were no lips to overcome such as on the #10 bushing. That is also why I started with the ruined rocker bars. That way, if I screwed them up, I would know better and NOT do the 1988 arms.
Having said that, I am not confident I can straighten the bent 'blades' on the 1988 control arms, so I am discarding them. A fool may be I, but it is what it is.
Kevin, I will keep you in mind if I royally screw these control arms up. Like Mythbusters said, "Failure is ALWAYS an option."
Dave, I have contacted Rob Edwards, and he reminded me that he prefers AGS Syl-Glide for pushing in bushings. A tube is already on order.
Dave and Fred...I had already started a long diatribe about how I have to examine everything and try to control myself. Not go off the deep end and replace all the bushings and powdercoat the control arms. You are right, new bushings are SPENDY! I was going to mention how I am not made of money and have to watch what I am doing...
I am my own worst enemy. I remembered saying the exact same thing about pulling the engine. I remember saying the exact same thing about pulling the torque tube. I remember saying the exact same thing about pulling the transmission.
We all know how that turned out.
Which is why I am taking Stan's advice and replacing all four upper control arm bushings and both of the lower control arms inner bushings #10. An order has already been sent to Roger.
I am NOT, however, powdercoating the control arms. I will clean them and go from there. It is already going to be $400.00 for those six bushings. It would be another $520 for the remaining control arm bushings, plus the cost of powdercoating. Both Sean and Stan have mentioned replacing bushings #11 and it pretty much being a waste of time. I'll pass...
You are blazing a trail here and it makes interesting reading.
Whilst you are doing all this I should mention that if you have not done so already, you would do well to check the shoulders of the rear cross member that accommodate the eccentric bolt that adjusts camber. You may well have seen how they tend to distort on many examples as happened on mine. If there is damage I can highly recommend the inserts that Carl came up with. If the flange fits tightly between the shoulders no issue but if you can see damage or daylight between the flange and the shoulder you would do well to consider these items given the stage you are at. FYI I did a thread on this a couple or so years ago.
I also did the dog bone bushes on the upper arms. I did not do the lower arm rear bushes but with hindsight not so sure that was a good decision albeit my motive was that I simply did not relish taking the task on.
Dave, it just so happens that I have some POR-15 topcoat left from a past, unamed project. It will now get put to good use. Thanks!
Fred, the Red Witch WILL be done in a decade, just not this one. I am shooting for spring of 2020...
Very good point about the adjusting cam pockets in the rear crossmember. IIRC, the pockets did not look terrible. However, I have no problem ordering the repair inserts from 928 Motorsports to fix any issues.
I will double check this Wednesday night when I am off work again.
Slow and steady incremental progress here on cleaning and prepping parts. And another couple of questions...
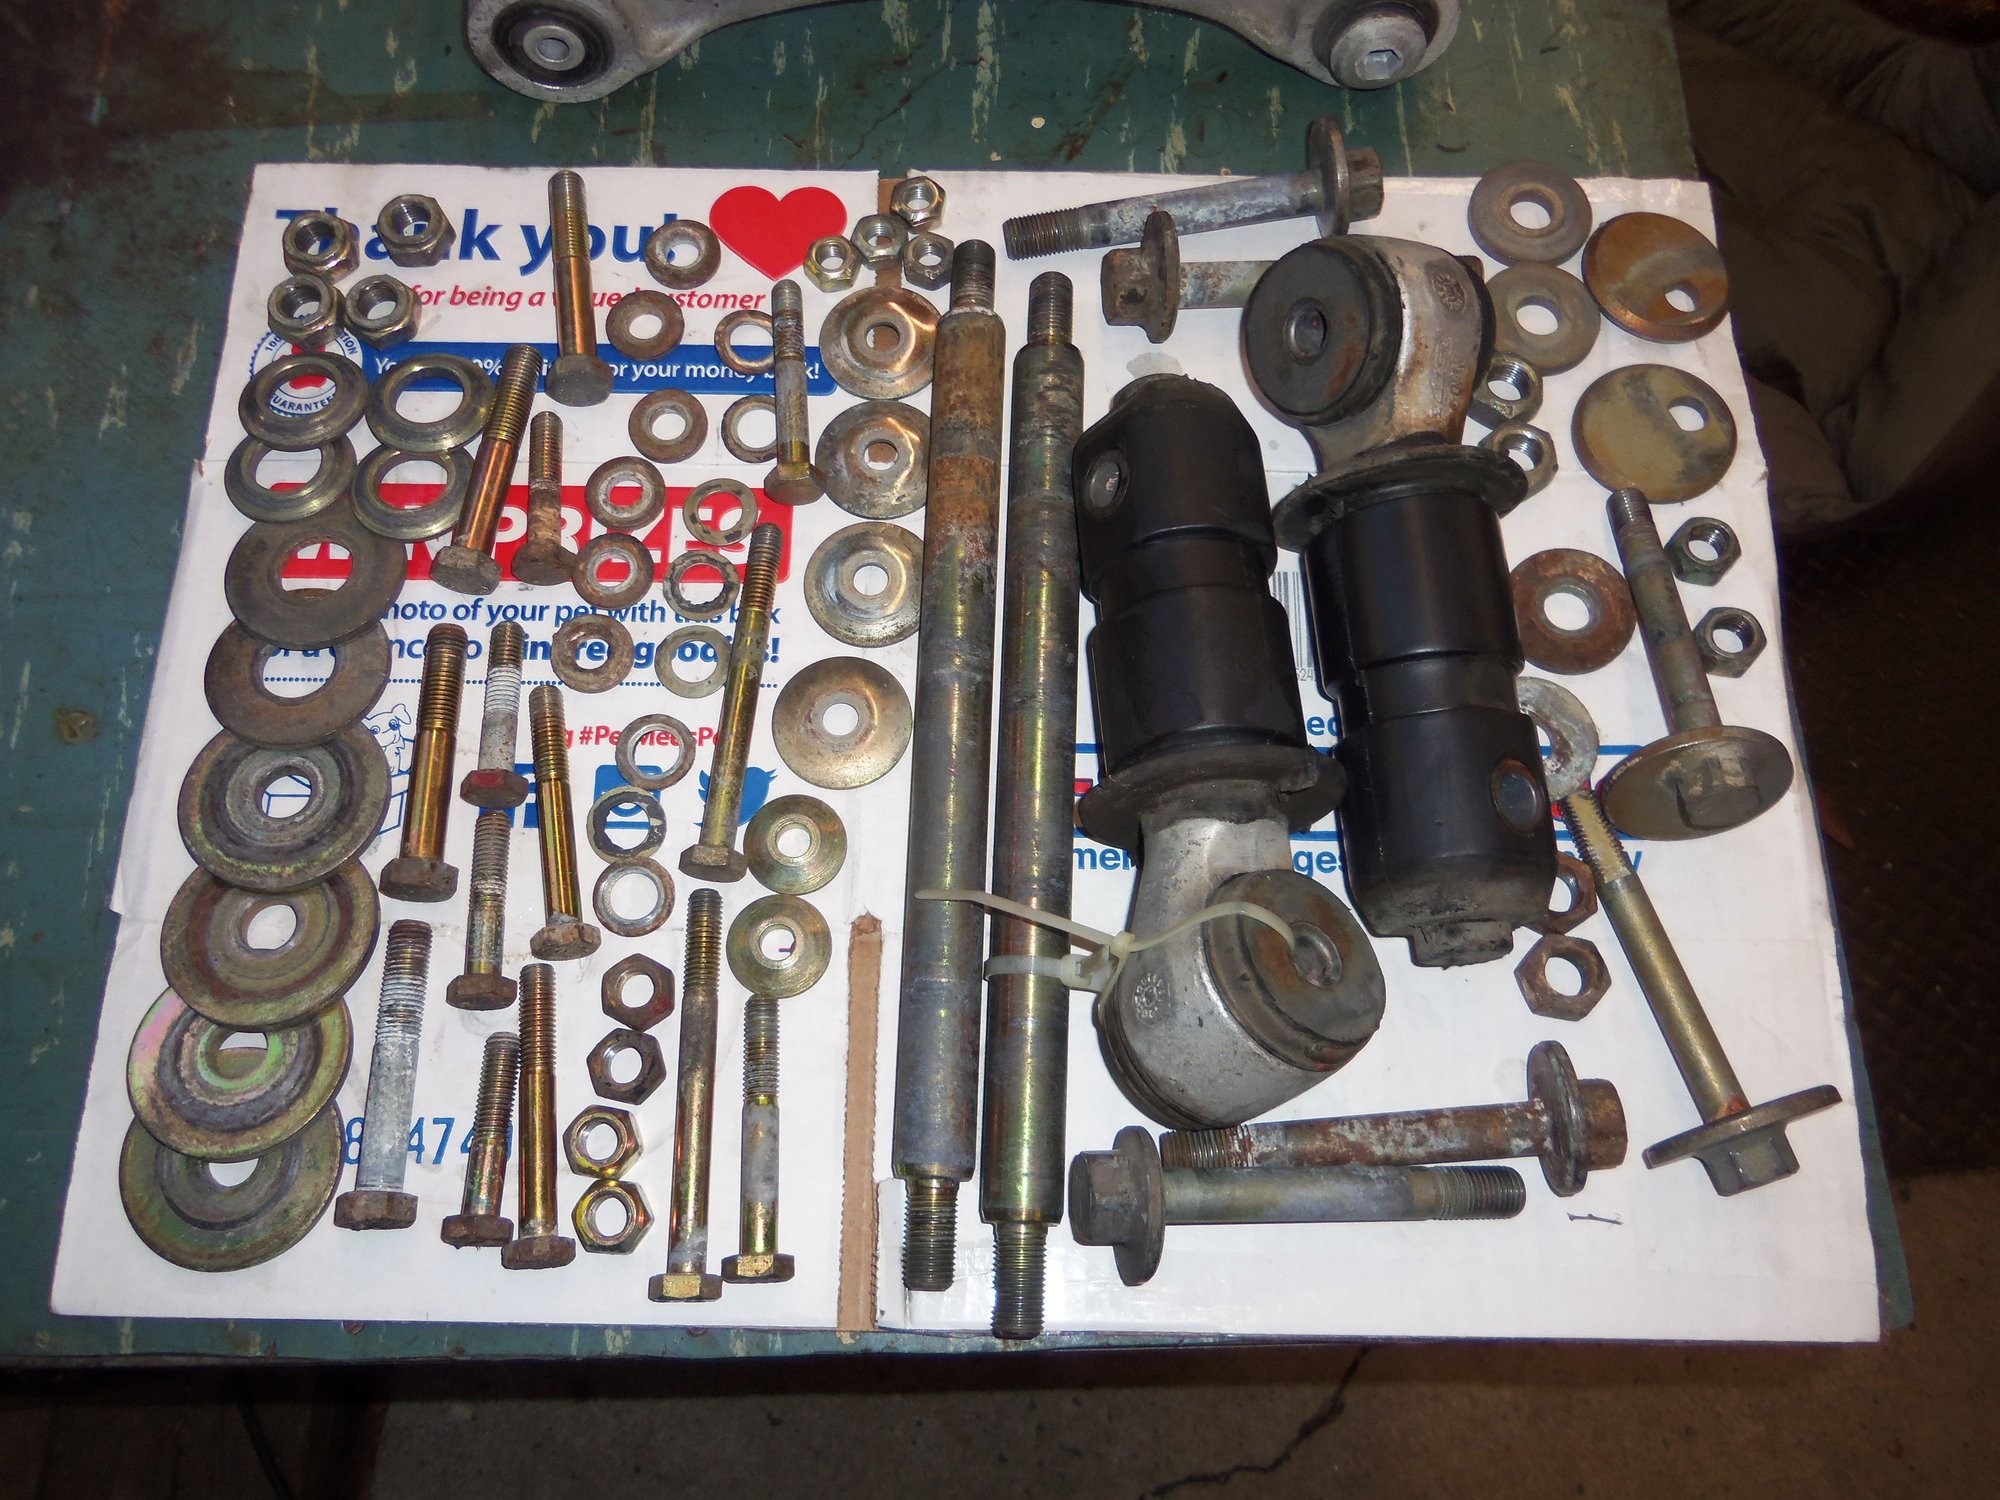
I have spent more quality time at the parts washer and have some nice parts to show for it. All the little pieces from the donor 1988 S4 rear suspension cleaned up nicely.
Clean parts, though some will need a little love from a wire wheel. And lots of antiseize...
Aluminum parts cleaned up nicely. I am not worried about the residual cosmoline.
Moving onto the upper and lower control arms, I have pressed out the offending bushings. That way I can't change my mind.
I started with the bushings at the end of the 'blades' on the lower control arms. First up was to press the sleeve out of the center. No big deal, I just picked a spacer smaller than the bushing and pushed out with the post on my press. I did have to stop and get a deeper sleeve.
Pressing the sleeve out of the bushing.
Needed a deeper spacer to receive the bushing.
Pressing the bushing itself out gave me pause. I am used to there being some sort of flange to bear against. No such animal on these. I scratched my head for a bit, and then had an idea. If I found a spacer right around the size of the bushing bore in the control arm, the lip of the bushing would likely push into it. My setup was to mimic the VW 402 and VW 407 press tools the WSM mentions using.
That worked! Though there was some trepidation and triple checking that the bushing bore on the arm wasn't being pushed into the spacer. I initially pressed the bushing with a piece of bar stock almost as big as the bushing. It worked OK enough. I then switched to a piece of bar stock a little smaller. That worked much better. I think it tended to pull the top of the bushing in and away from the bore as it started to push. Either way, it worked and there was no damage to the bushing bore on the control arm.
Pressing out the bushing.
Bushing, sleeve, and undamaged bore.
Then it was onto the upper control arm bushings. WSM Volume 4, Section 42, page 42-13 shows pressing the bushings and sleeves in and out as one unit. First, I took photos showing how the bushings were opposite each other in the control arms. Very important...
Bushings are opposite each other on the upper control arms.
I practiced on one of the upper control arms that came out of the Red Witch. And ran into my first question...
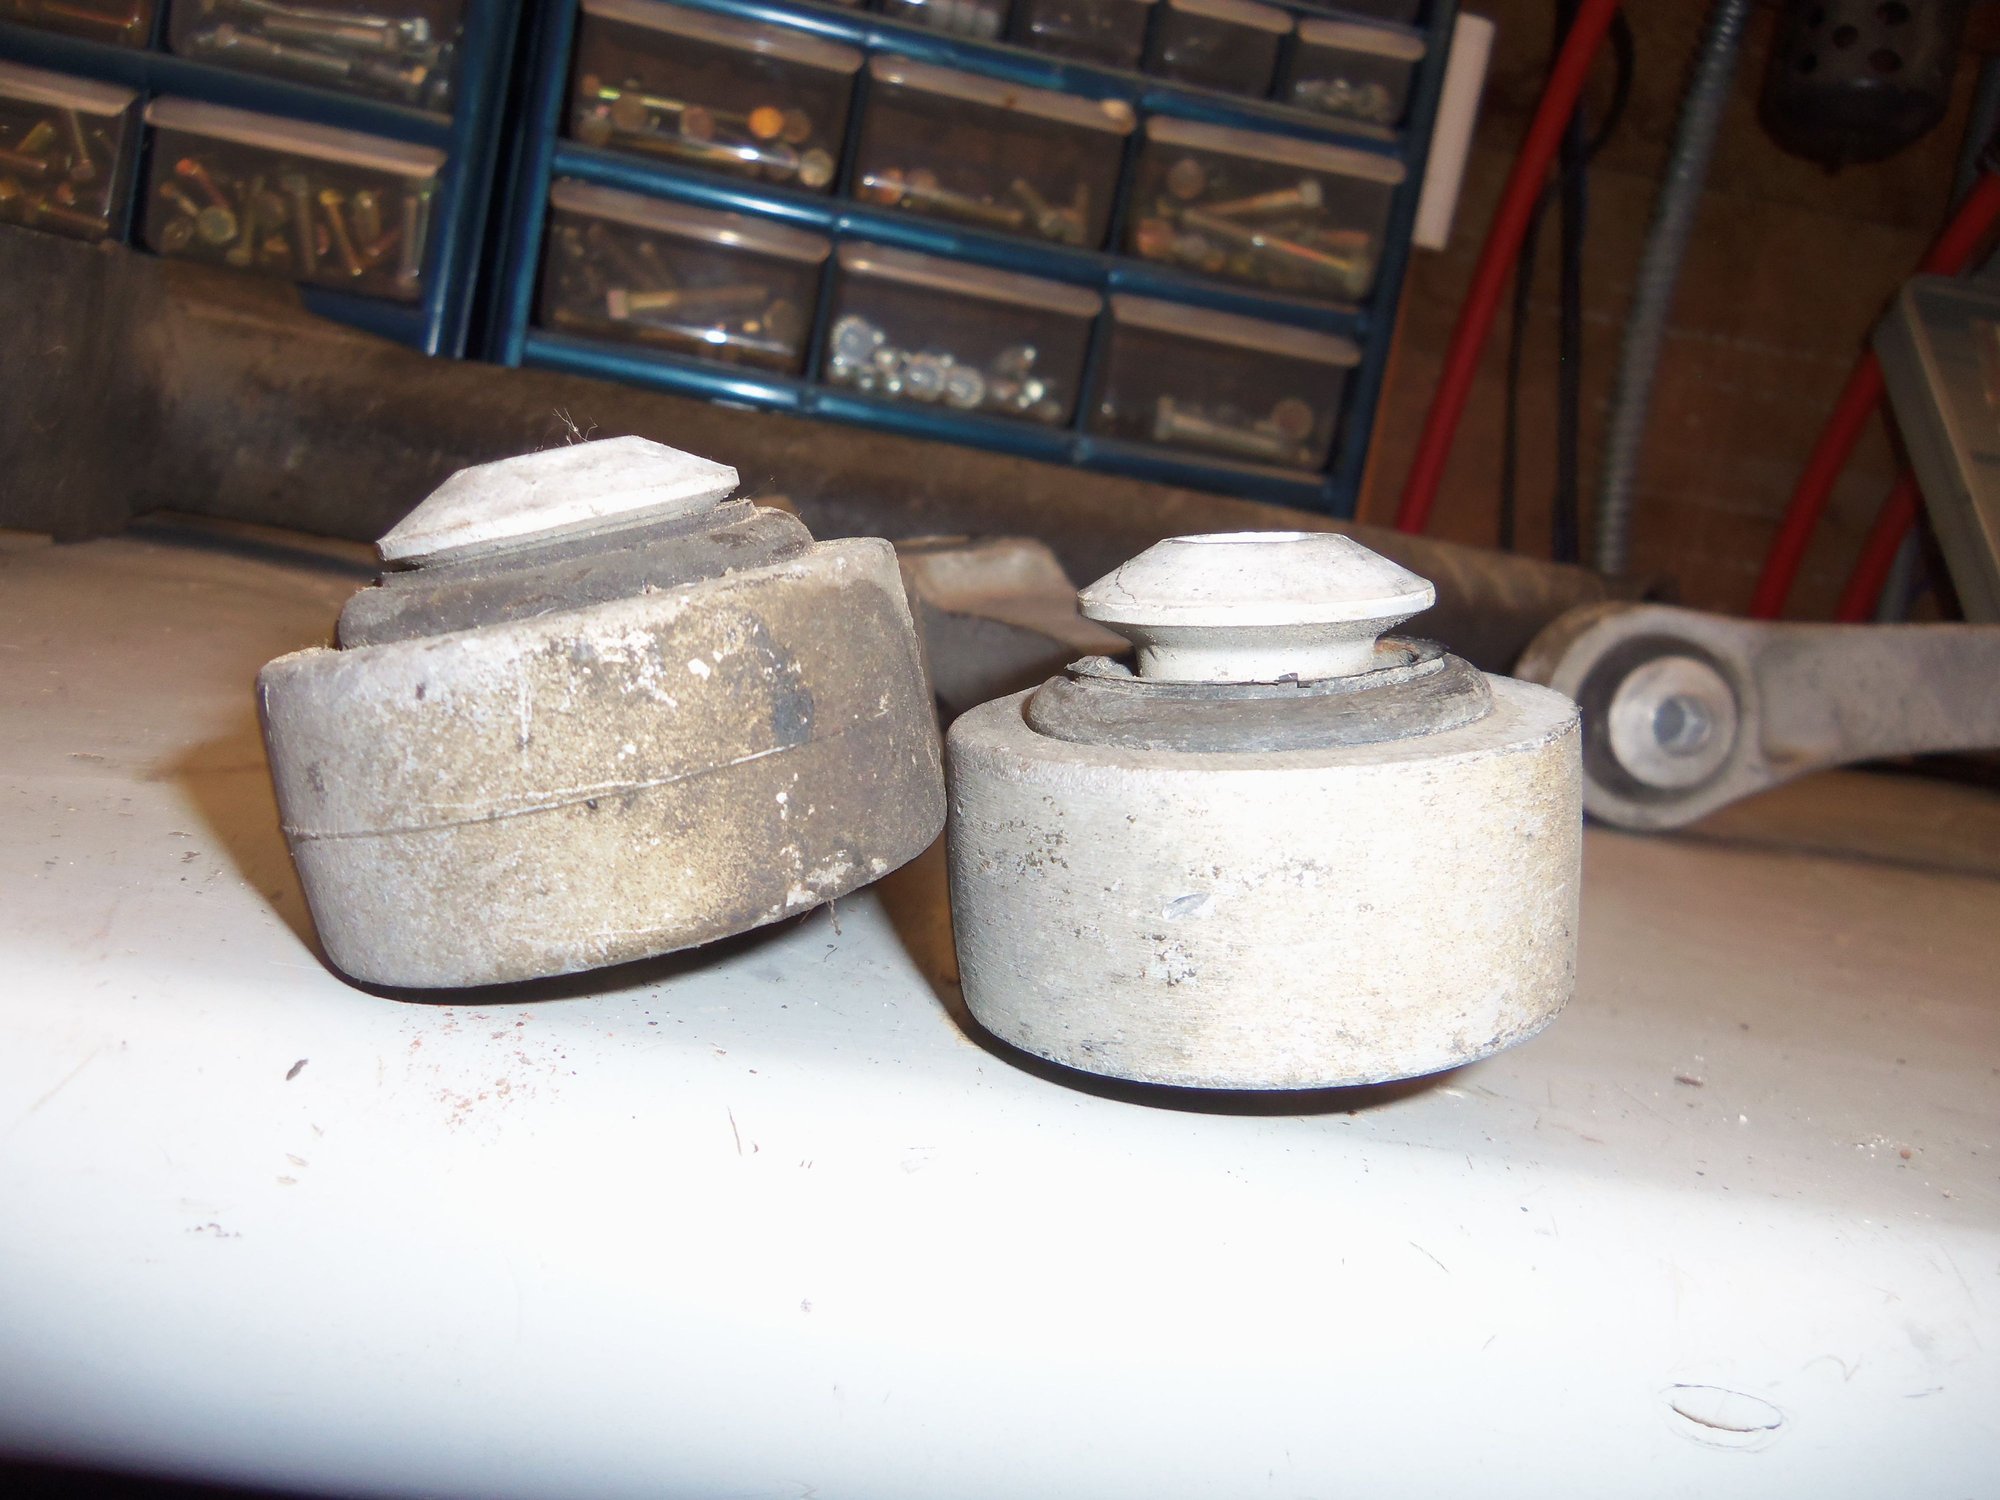
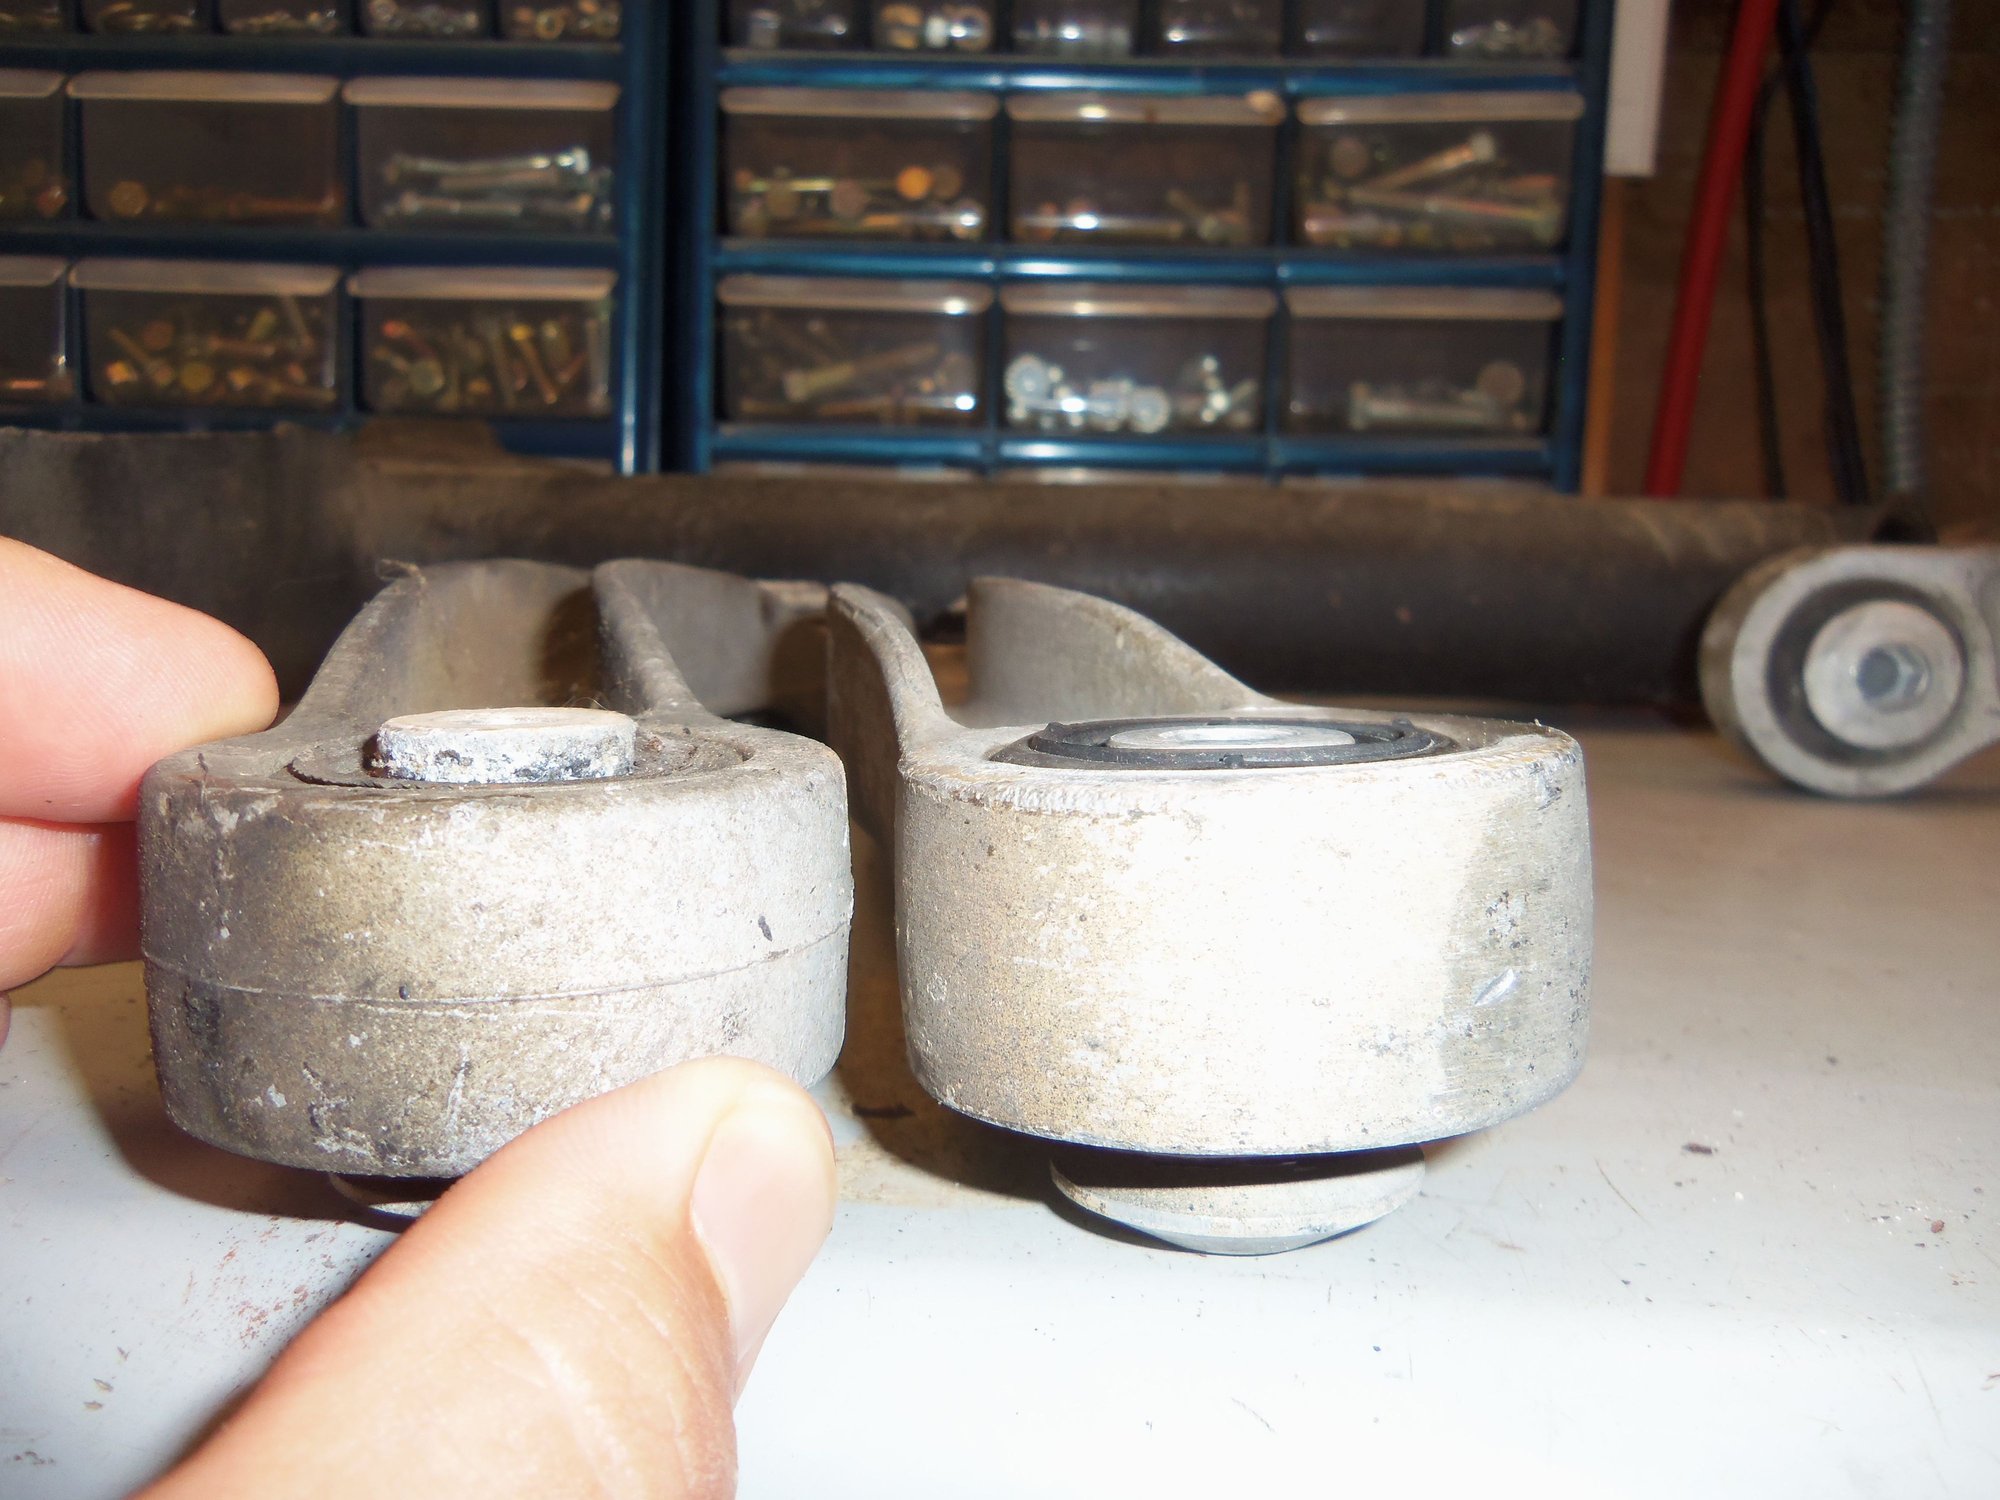
On the bushings in the upper control arms that came out of the Red Witch, the conical tops of the metal sleeves were flush with the surface of the bushing. The back side of the sleeve protruded a bit from the back of the bushing. On the bushings in the control arms from the donor 1988 S4, the conical tops of the metal sleeves were raised from the surface of the bushing. The back side of the sleeve was flush with the back of the bushing.
Which is correct?
The WSM mentions pushing the bushing in by the top of the metal sleeve to prevent changing the position of the sleeve in the bushing. The photo shows the top of the sleeve flush against the bushing.
Conical face flush on Red Witch bushing on the left, raised on 1988 bushing on the right.
End of sleeve raised on Red Witch bushing on the left, flush on 1988 bushing on the right.
I successfully pressed the test bushing out of the upper control arm, but noted the bushing tore as it came out. I am thinking that is because the inside of the bore in the control arm is a bit of a venturi shaped, and the diameter of the top of the metal sleeve was preventing the rubber from moving out of the way. Ehh...its a dead bushing anyway.
I moved on and successfully pressed all four bushings out of the 1988 S4 upper control arms. I did note that the raised metal sleeves pushed down into the bushings as they were pressed out. And, all four bushings tore just like the test bushing. I did note they were shaped to match the necked down bore in the control arm. I will definitely be using SylGlide to press in the new bushings!
Pressing bushing out of upper control arm.
Test bushing removed from Red Witch upper control arm.
Bushing successfully pressed out of the 1988 upper control arms.
Note 'venturi' shape to bushing bore.
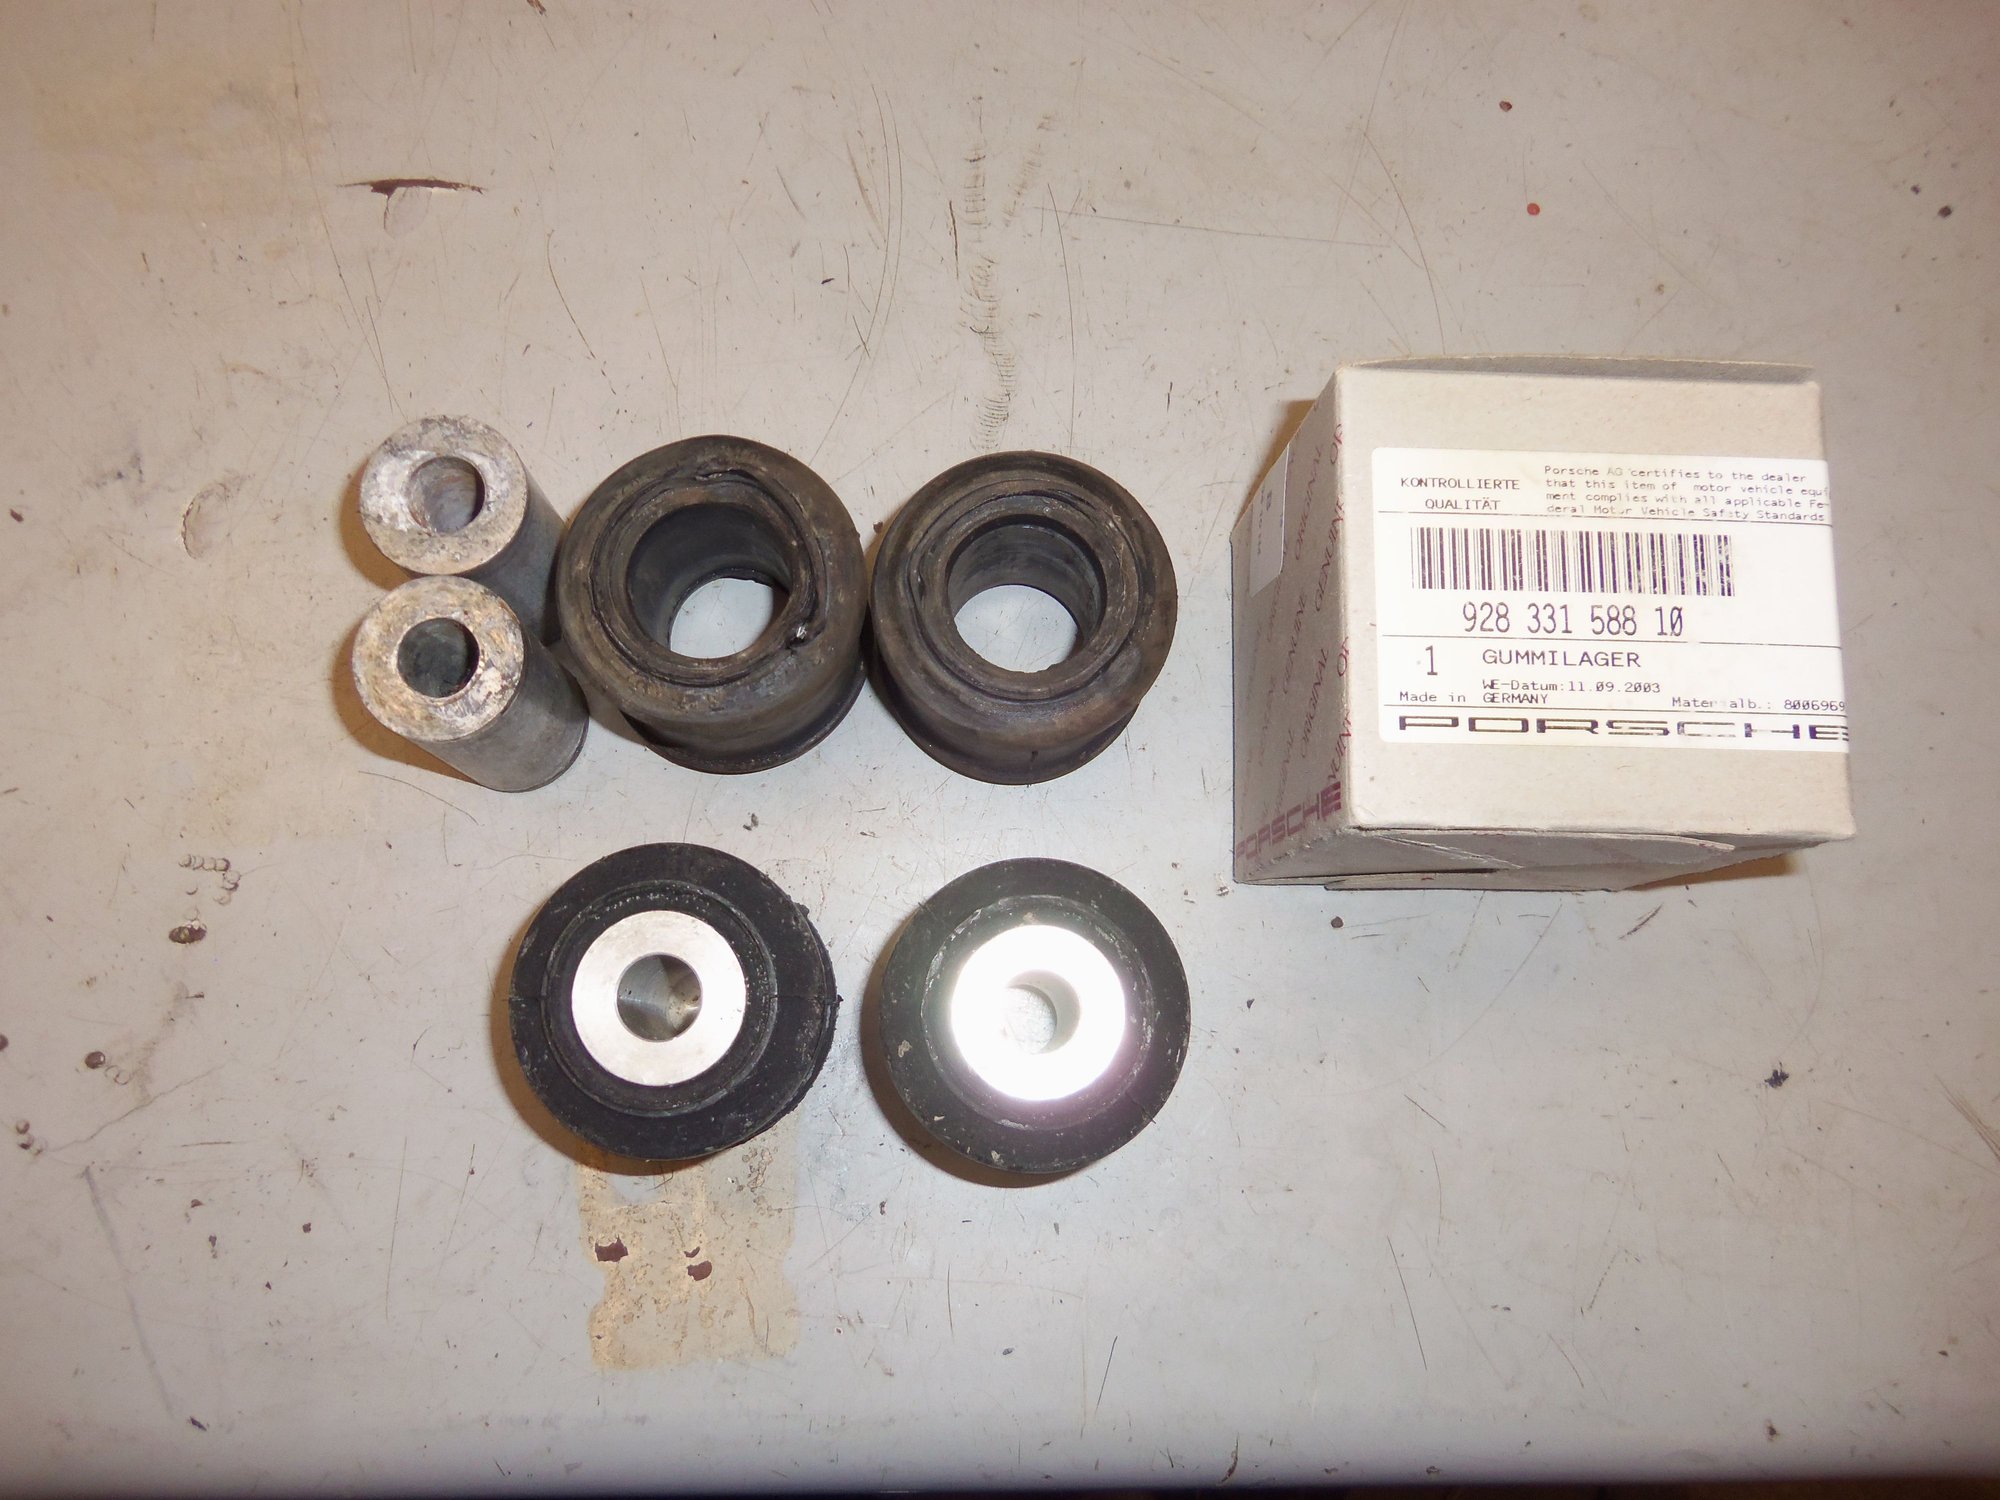
Old bushings and sleeves from upper and lower control arms.
Onto my next question about a problem that may not be a problem. On one of the lower control arms I am using, I damaged the rear sleeve for the shock pin bushing. I don't remember how or when I did it, but it must have been violent. The sleeve has a small chunk of metal that has been broken off/displaced.
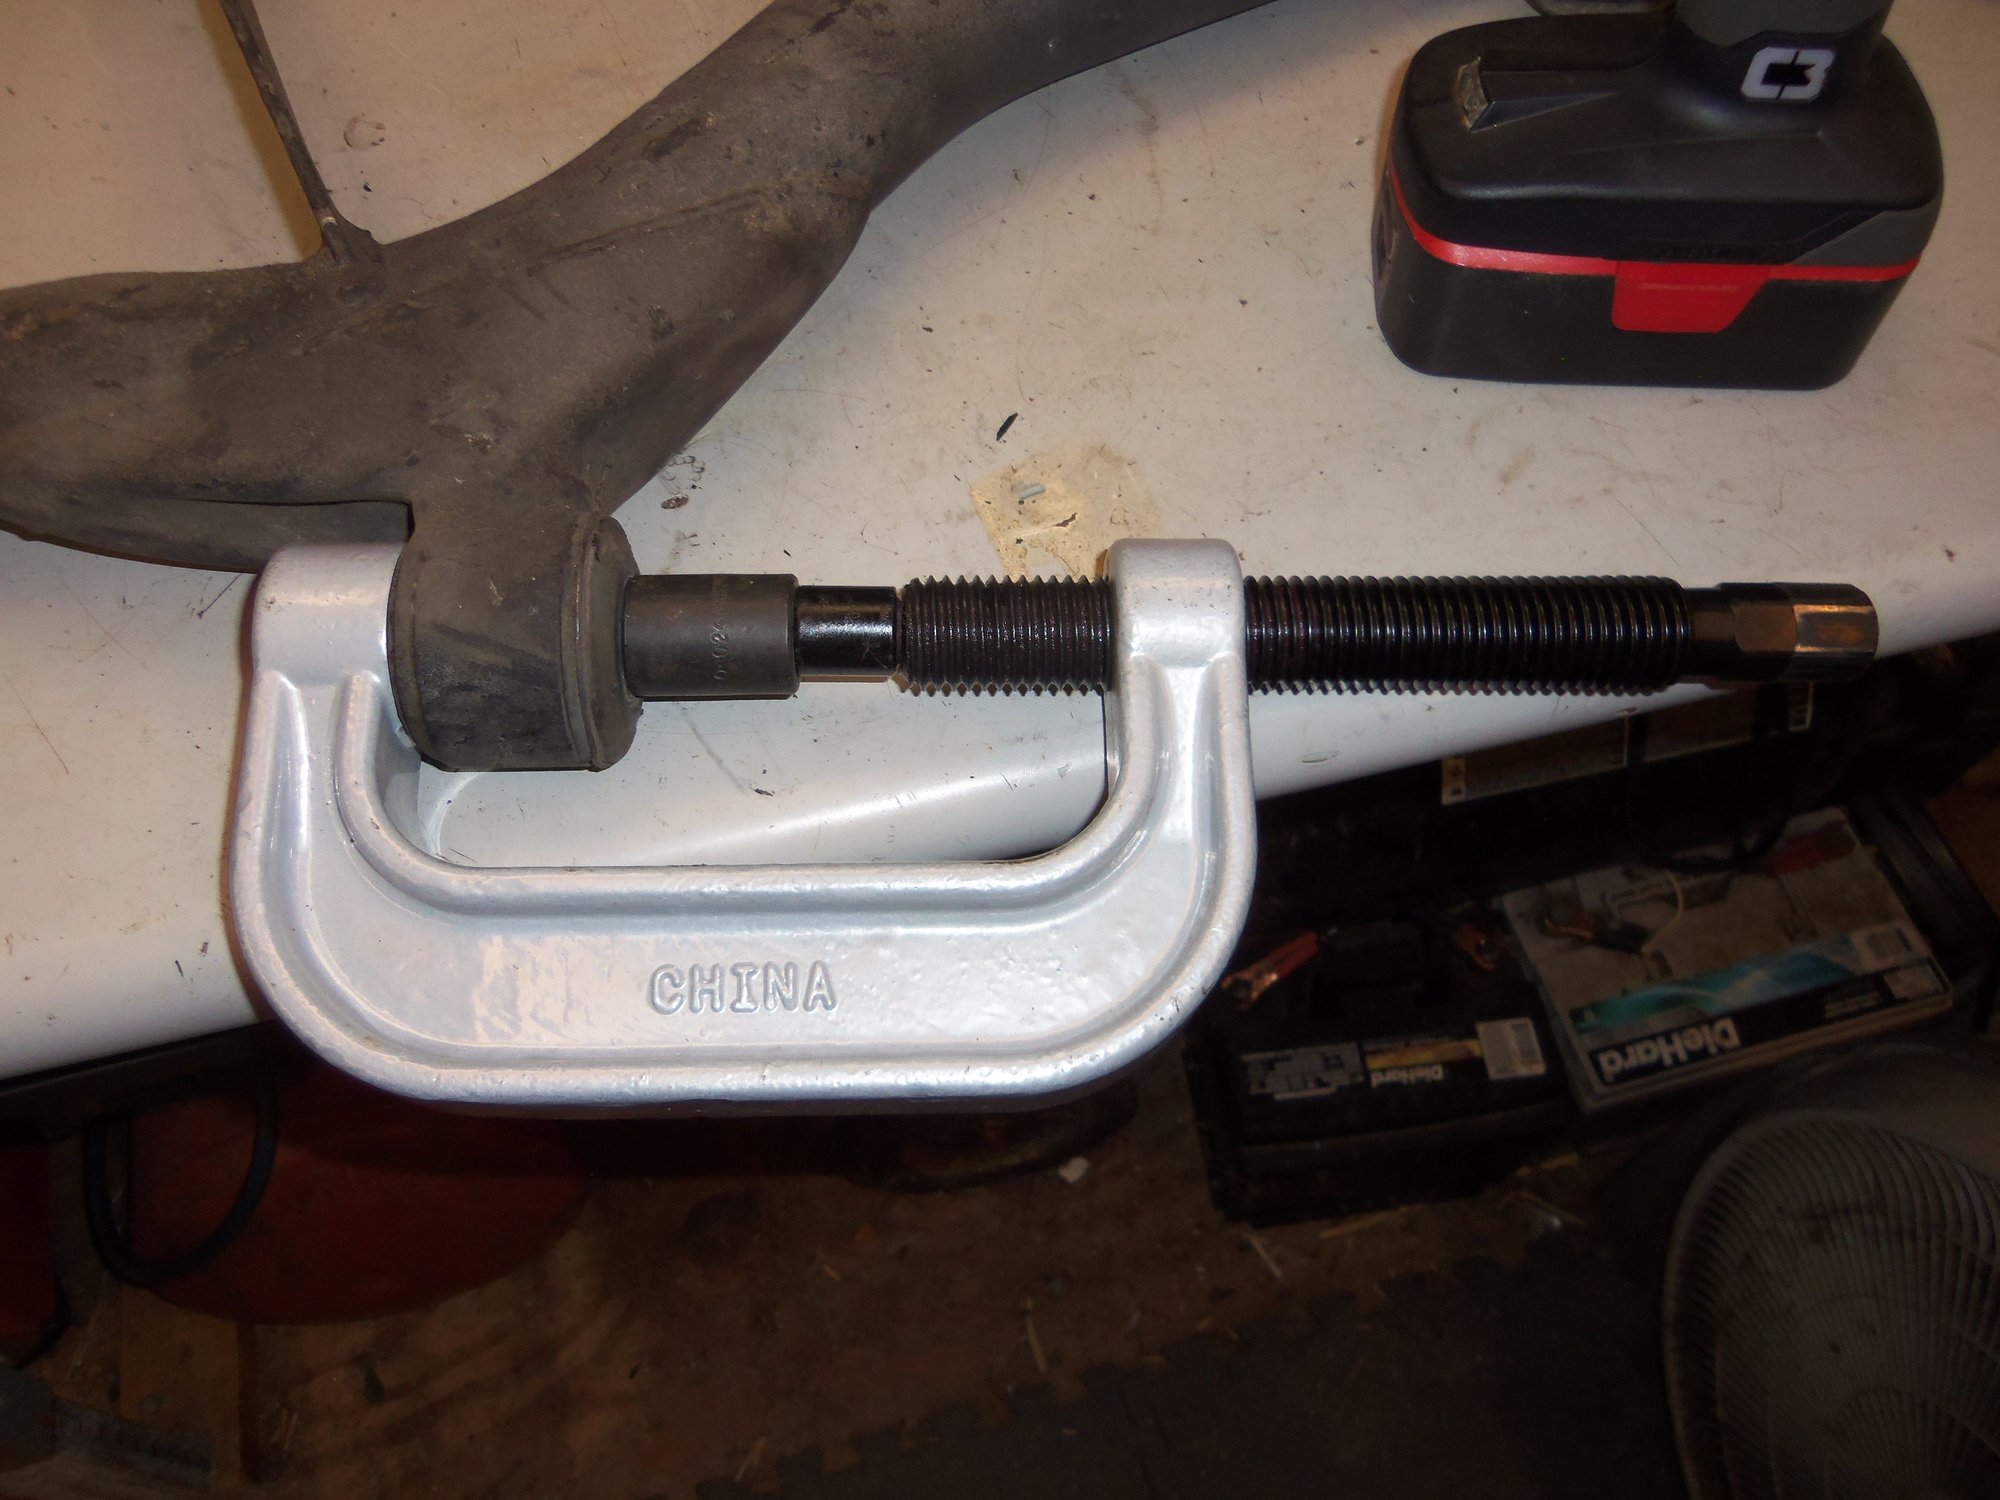
The WSM requires removal of these sleeves before pressing out the bushings, and then reinstallation when pressing in the new bushings. So, this means the sleeves will come out. I was not able to make a manageable Rube Goldberg rig in my press to remove the sleeves from the 1988 S4 control arms. So, I used a ball joint/bushing screw clamp tool. That worked quite well. Looking at the insides of the bushings, they don't seem to be damaged from removal of the sleeves. This makes me think I can successfully swap the sleeves into the bushings on the control arms I am going to use and get away with it.
I removed all four sleeves. Because I could.
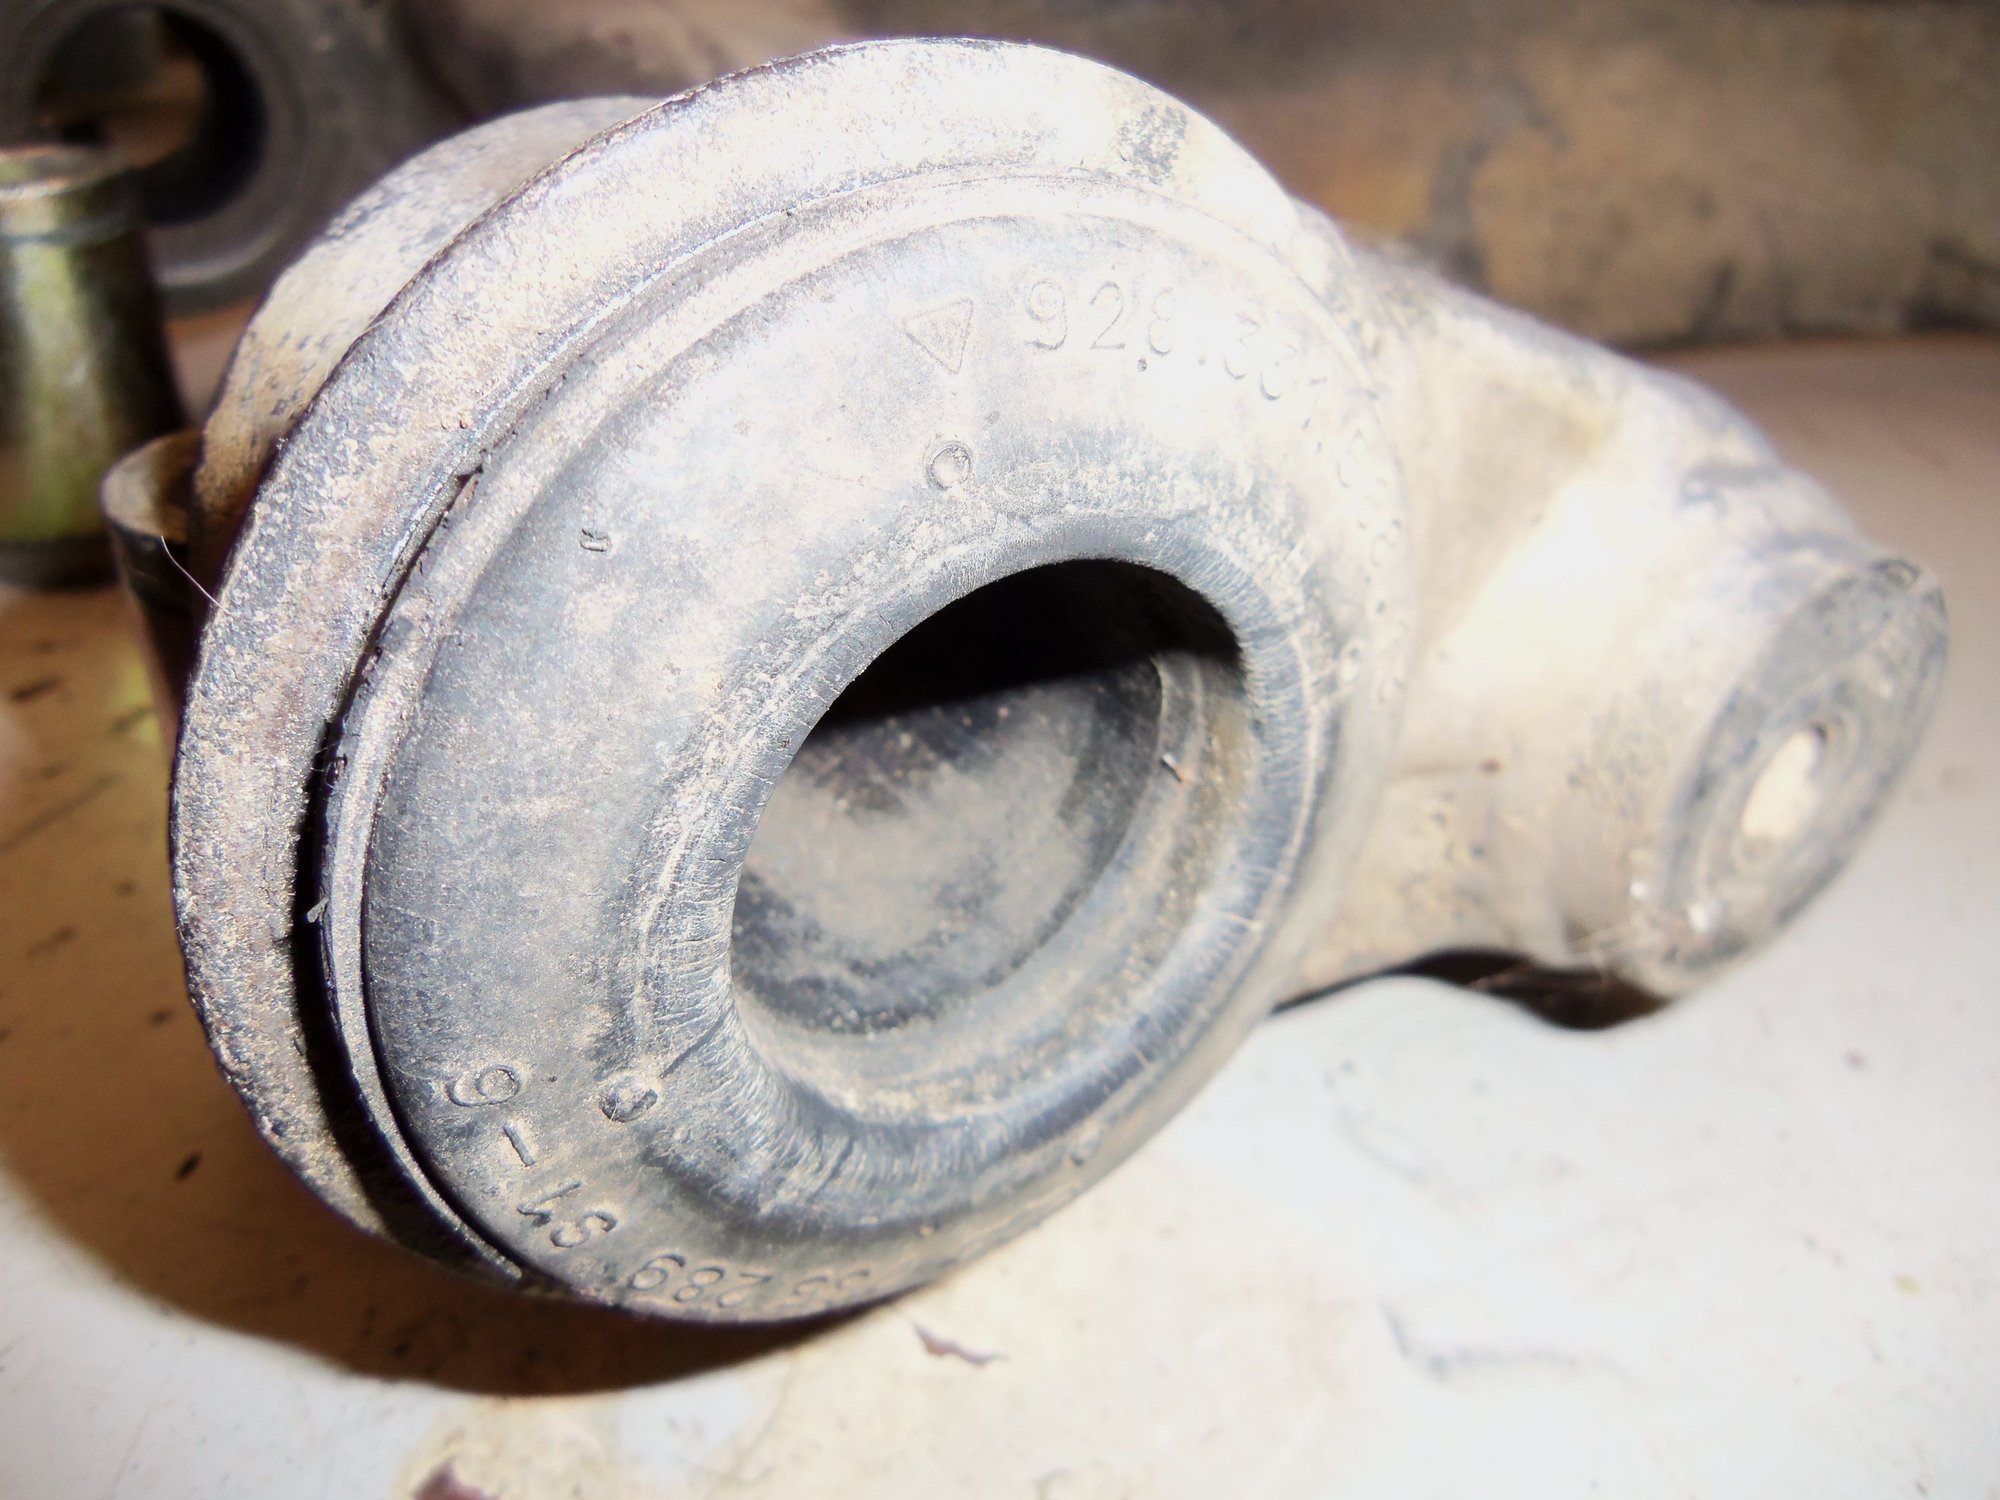
Damaged sleeve in bushing.
Damage really obvious here.
Yep...
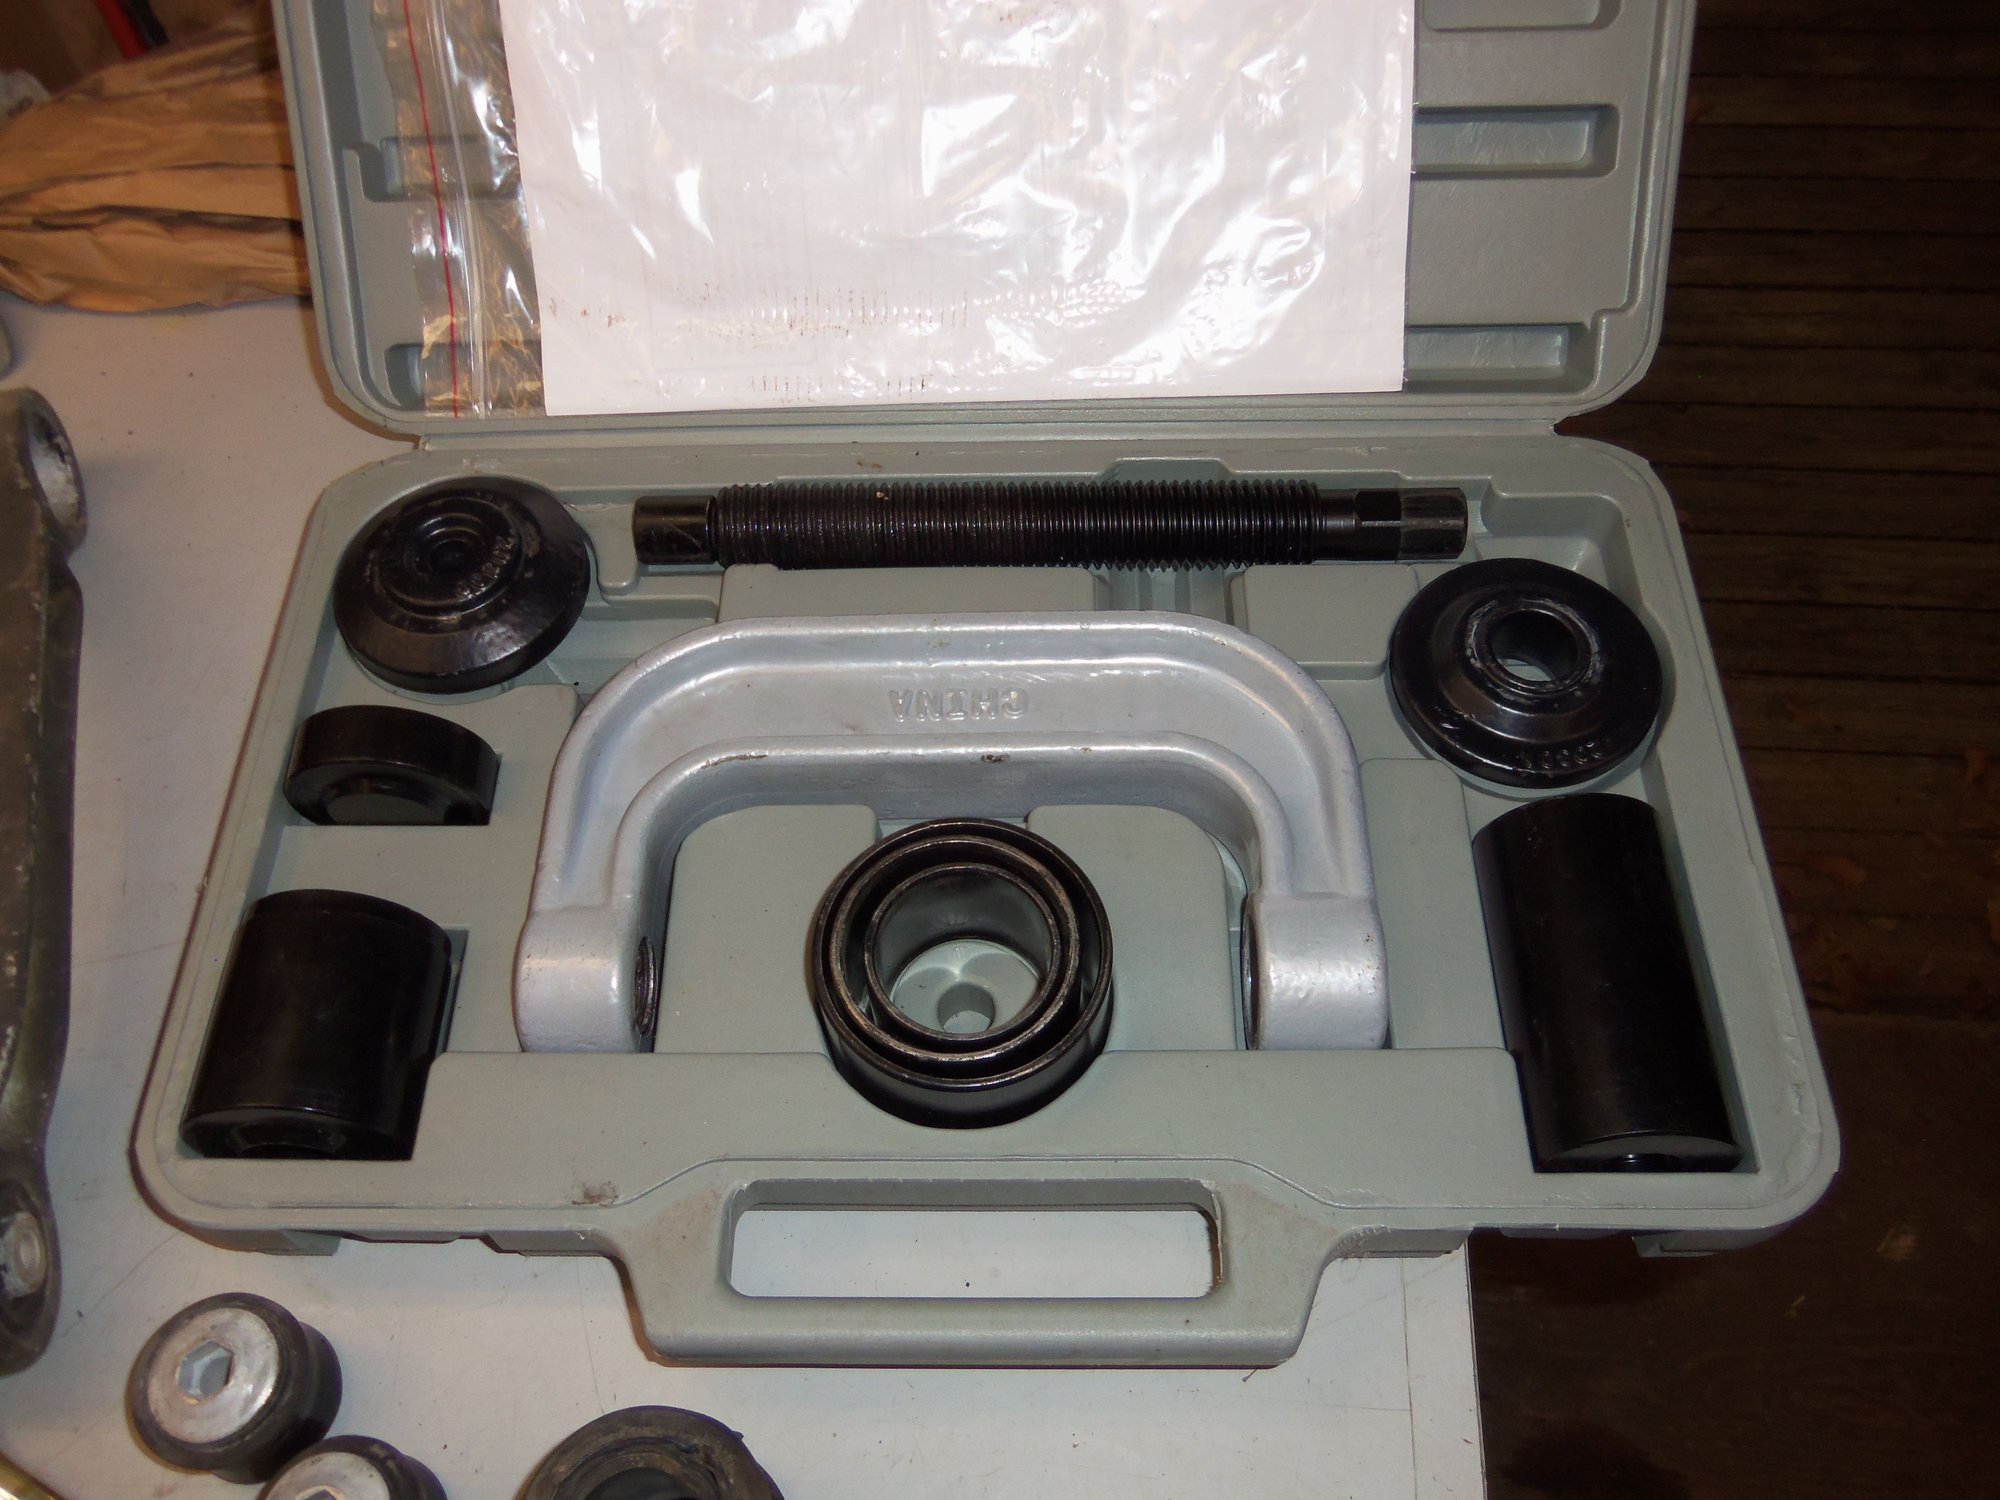
Common ball joint/bushing screw clamp tool.
Pressing the sleeve out of a bushing on a 1988 lower control arm.
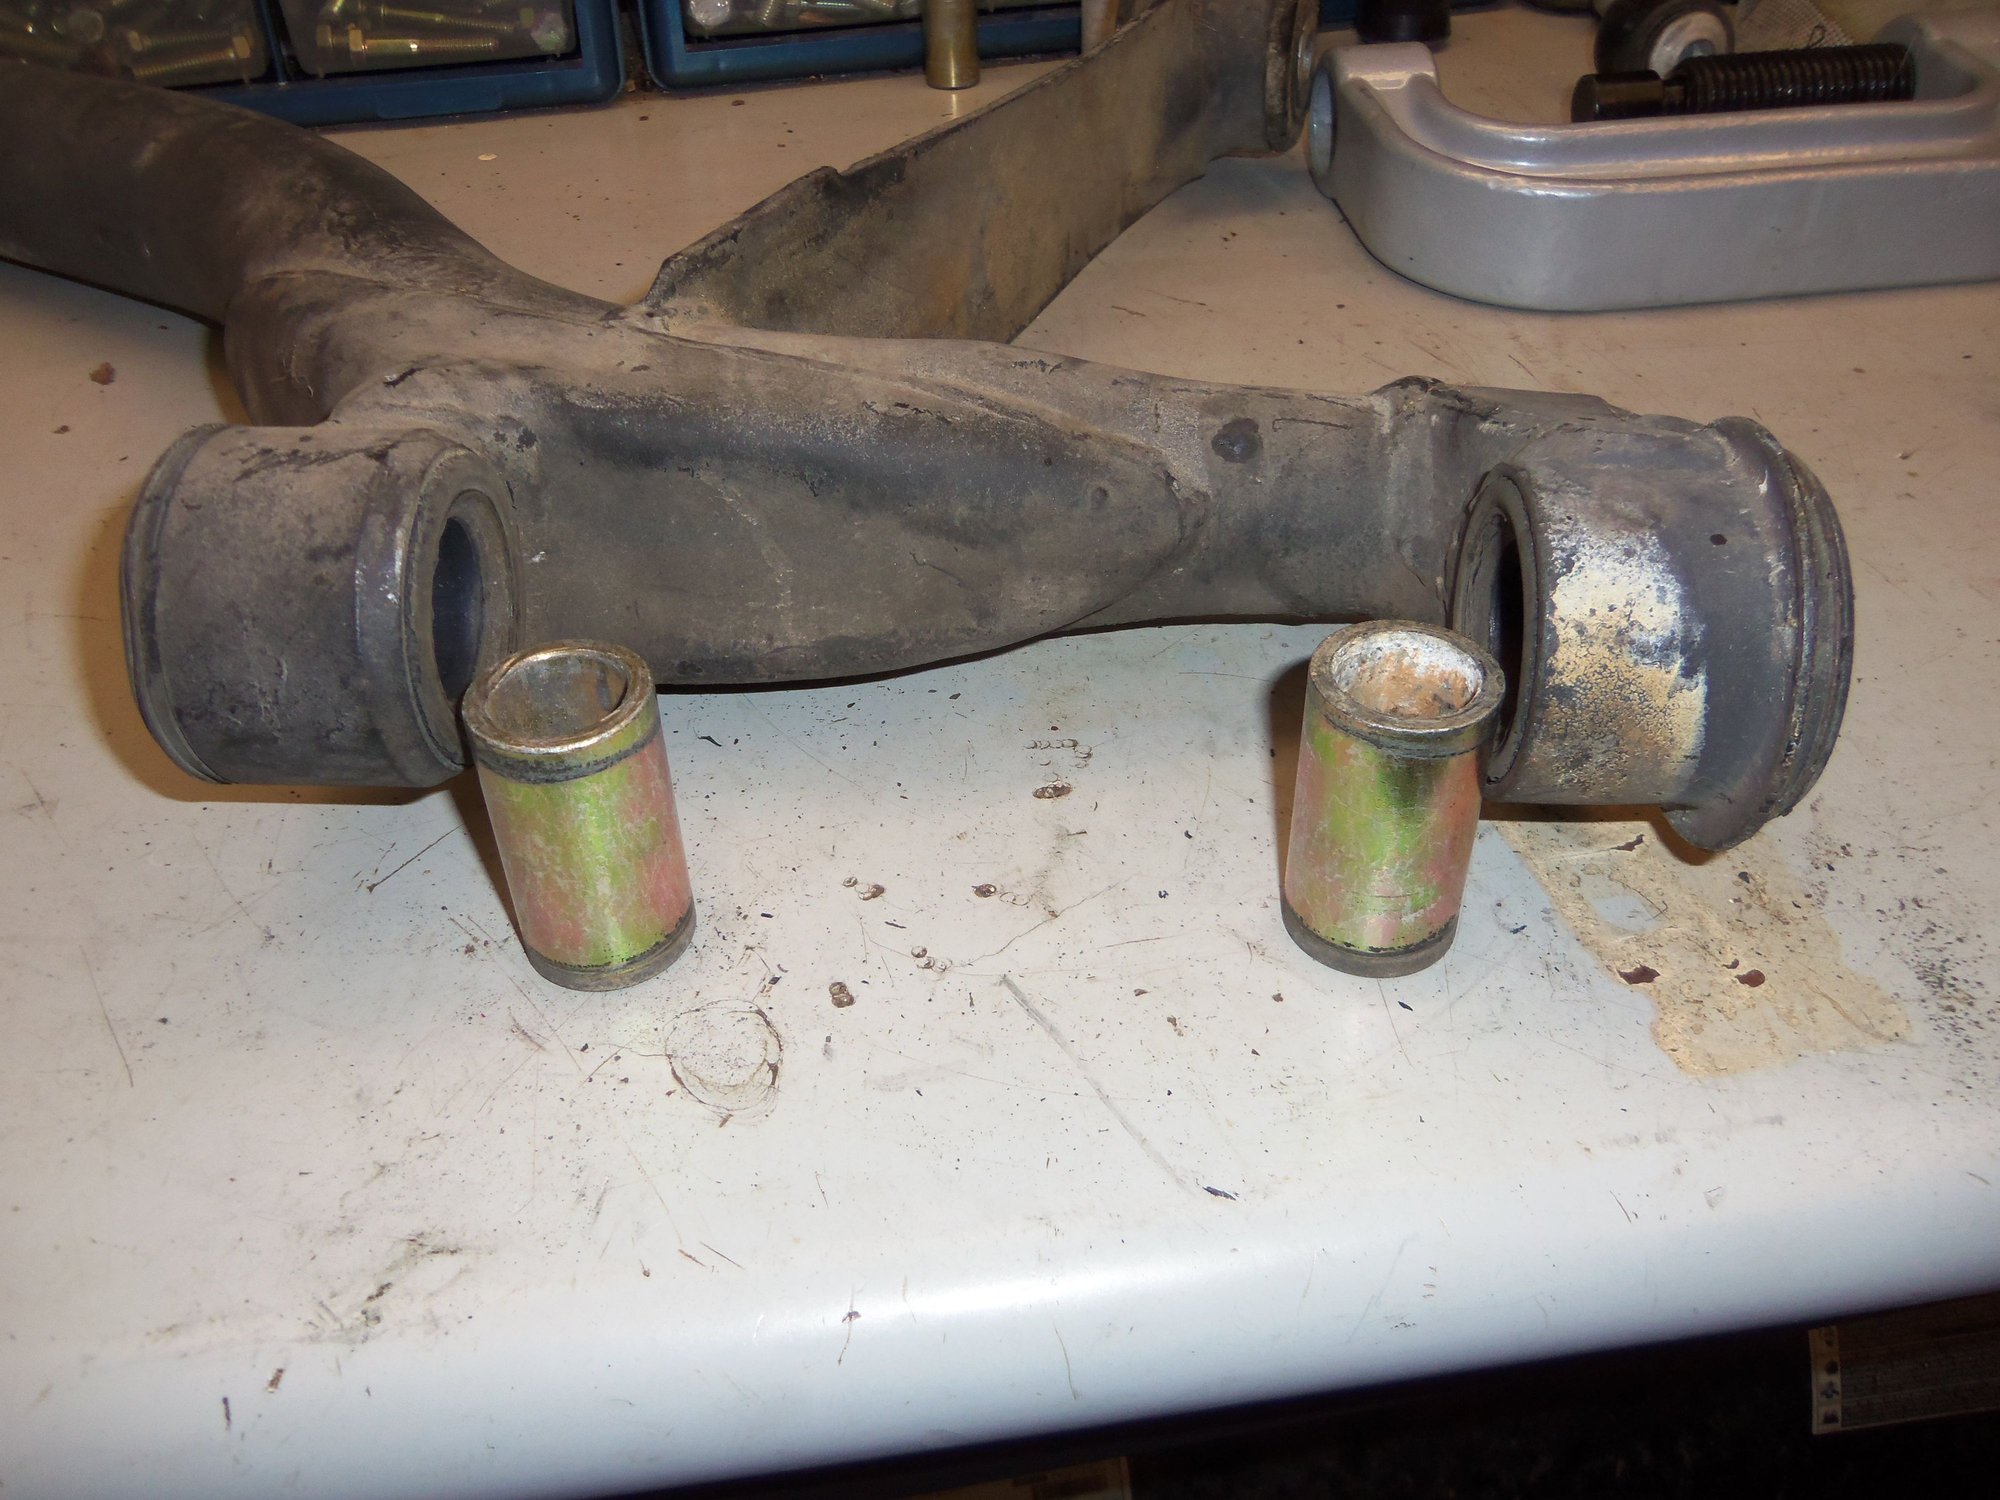
Both sleeves removed from one arm. Sleeves are in OK enough condition.
Front side of bushing after sleeve has been pressed out.
Back side of bushing after sleeve has been pressed out.
Here is my question, regarding the damaged sleeve: Do I:
-leave the damaged sleeve alone, as it is only going up against a washer and will not be a problem?
-replace only the damaged sleeve?
-replace all four sleeves so they match and because I can?
Where I stand now is waiting on new bushings and having to finish cleaning the lower control arms.
Will continue with that next time I am off work.
For that last picture,
I would strongly suggest that you only swap in the inner collars on the bushing that the link pin goes through.
If they are damaged. Otherwise leave them alone.
I did one set of link pin bushings and found them very difficult to remove,
and more difficult to install so they were square to each other ,
once you do this you will soon find out that you should have left them alone.
That said its learning process
. Keep em Flying brother !
Oh, yeah, I am taking yours and SeanR's advice. I am NOT replacing the bushings for the link pins.
I will take your advice and replace all four sleeves, though.
I added some to my post but I would also suggest that you not remove the inner collar unless its damaged.
That said if the inner bore where the link pin runs has some corrosion ,
I would put some sand paper in it to remove any loose stuff,
then coat it with anti seize grease
Those metal collars are made to pull the bushing front to back so the bushing has some give,
pressing them out could reduce the grip they have on the bushing its not much but sometimes its better to leave things alone
Hmmmm...good point, Stan.
The sleeve that has the chunk missing seems OK otherwise.
I will wire brush the insides of the sleeves and use plenty of antiseize.
I will look at the sleeve again and go from there.
I will likely leave them in place.
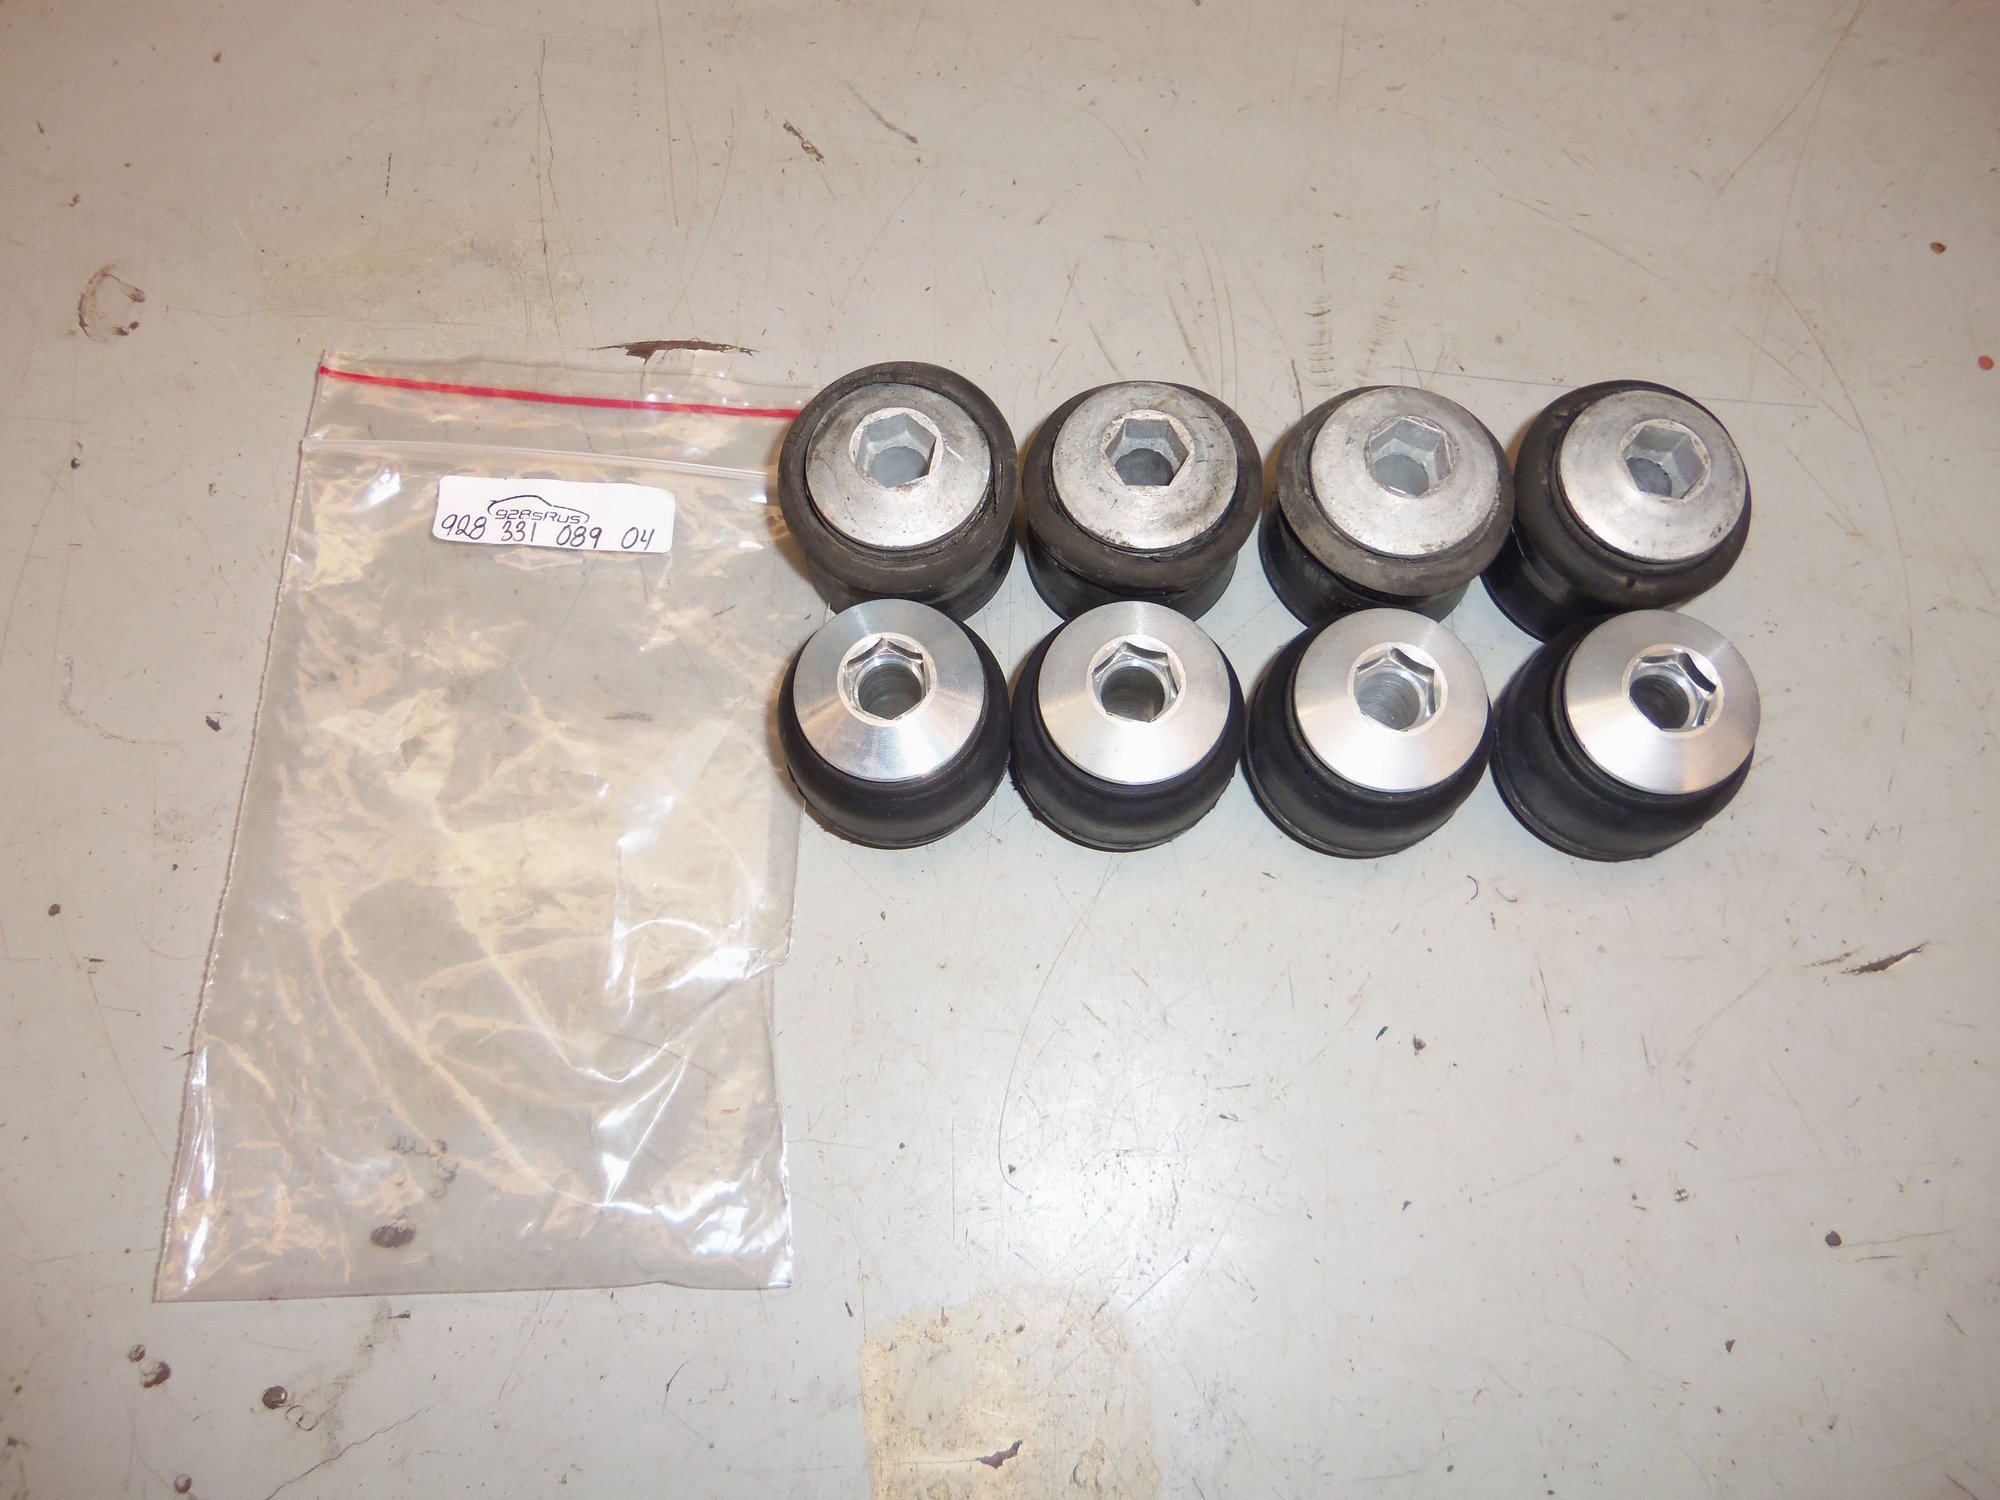
Happy Days! All 6 bushings arrived from Roger and have been pressed in. Actually, Mercedes sent them to me...
I started with the upper control arms. I was concerned as I had read a post some time ago where the OP had issues pressing in the upper control arm bushings. They wanted to move around on him. He ended up using a jack screw to install the bushings. Just in case, I set up a jack screw assembly with a long 3/8" bolt, washers, and a nut.
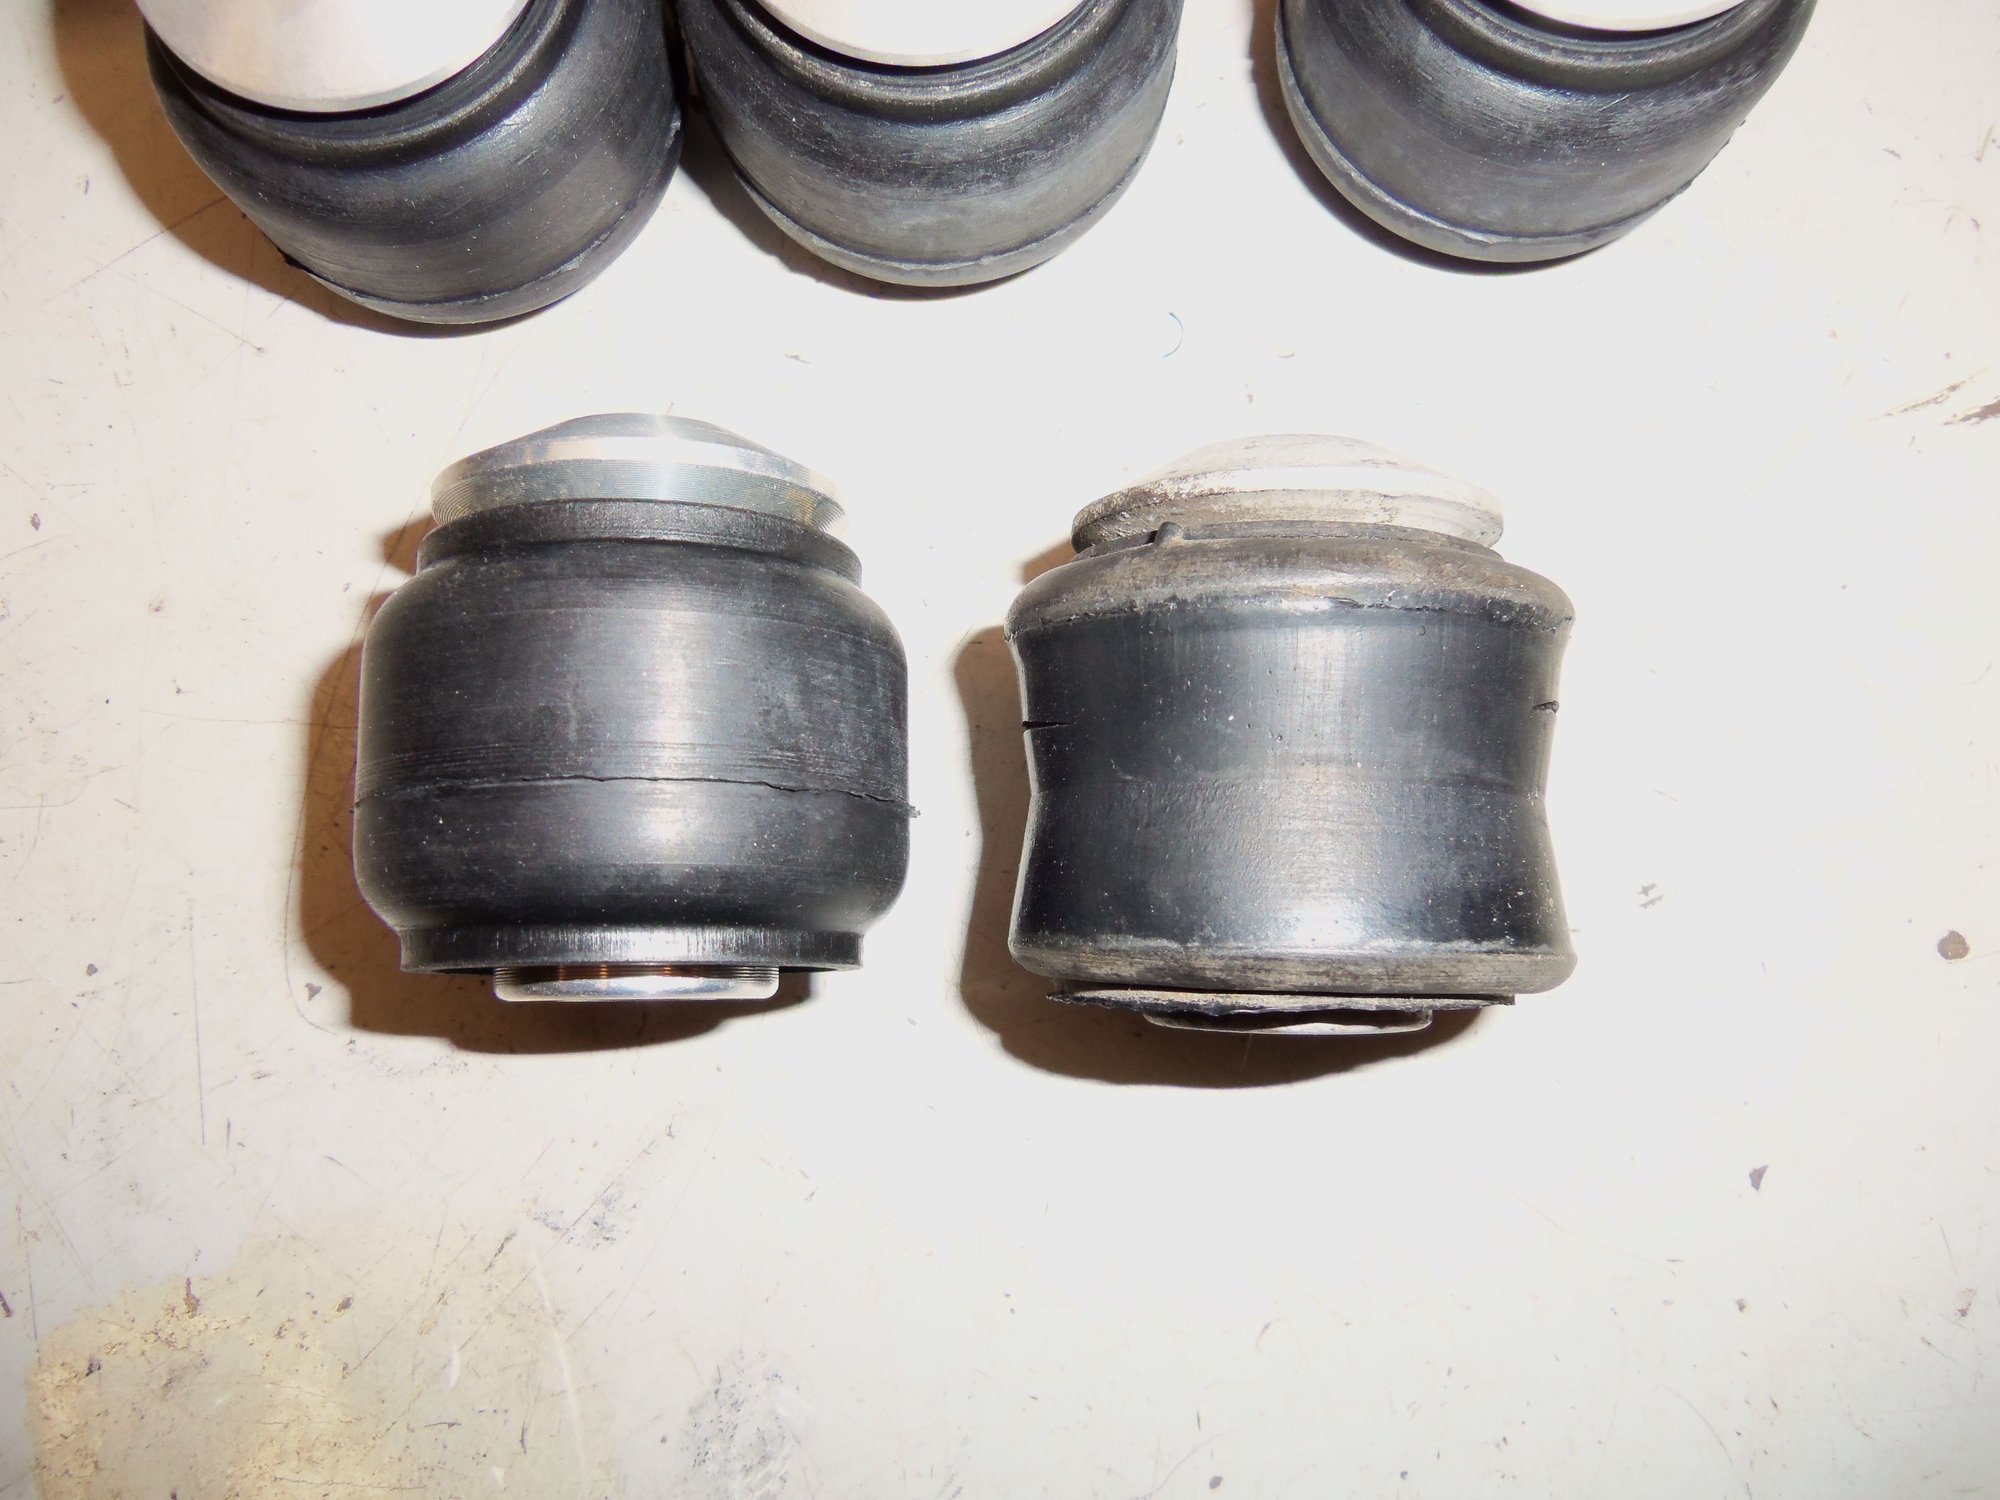
I was taken aback at the shape of the new bushings. They were barrel shape where the old bushings were tapered in the middle. Thinking about it, all I can guess is that the old bushings set to the shape of the tapered bore in the upper control arms.
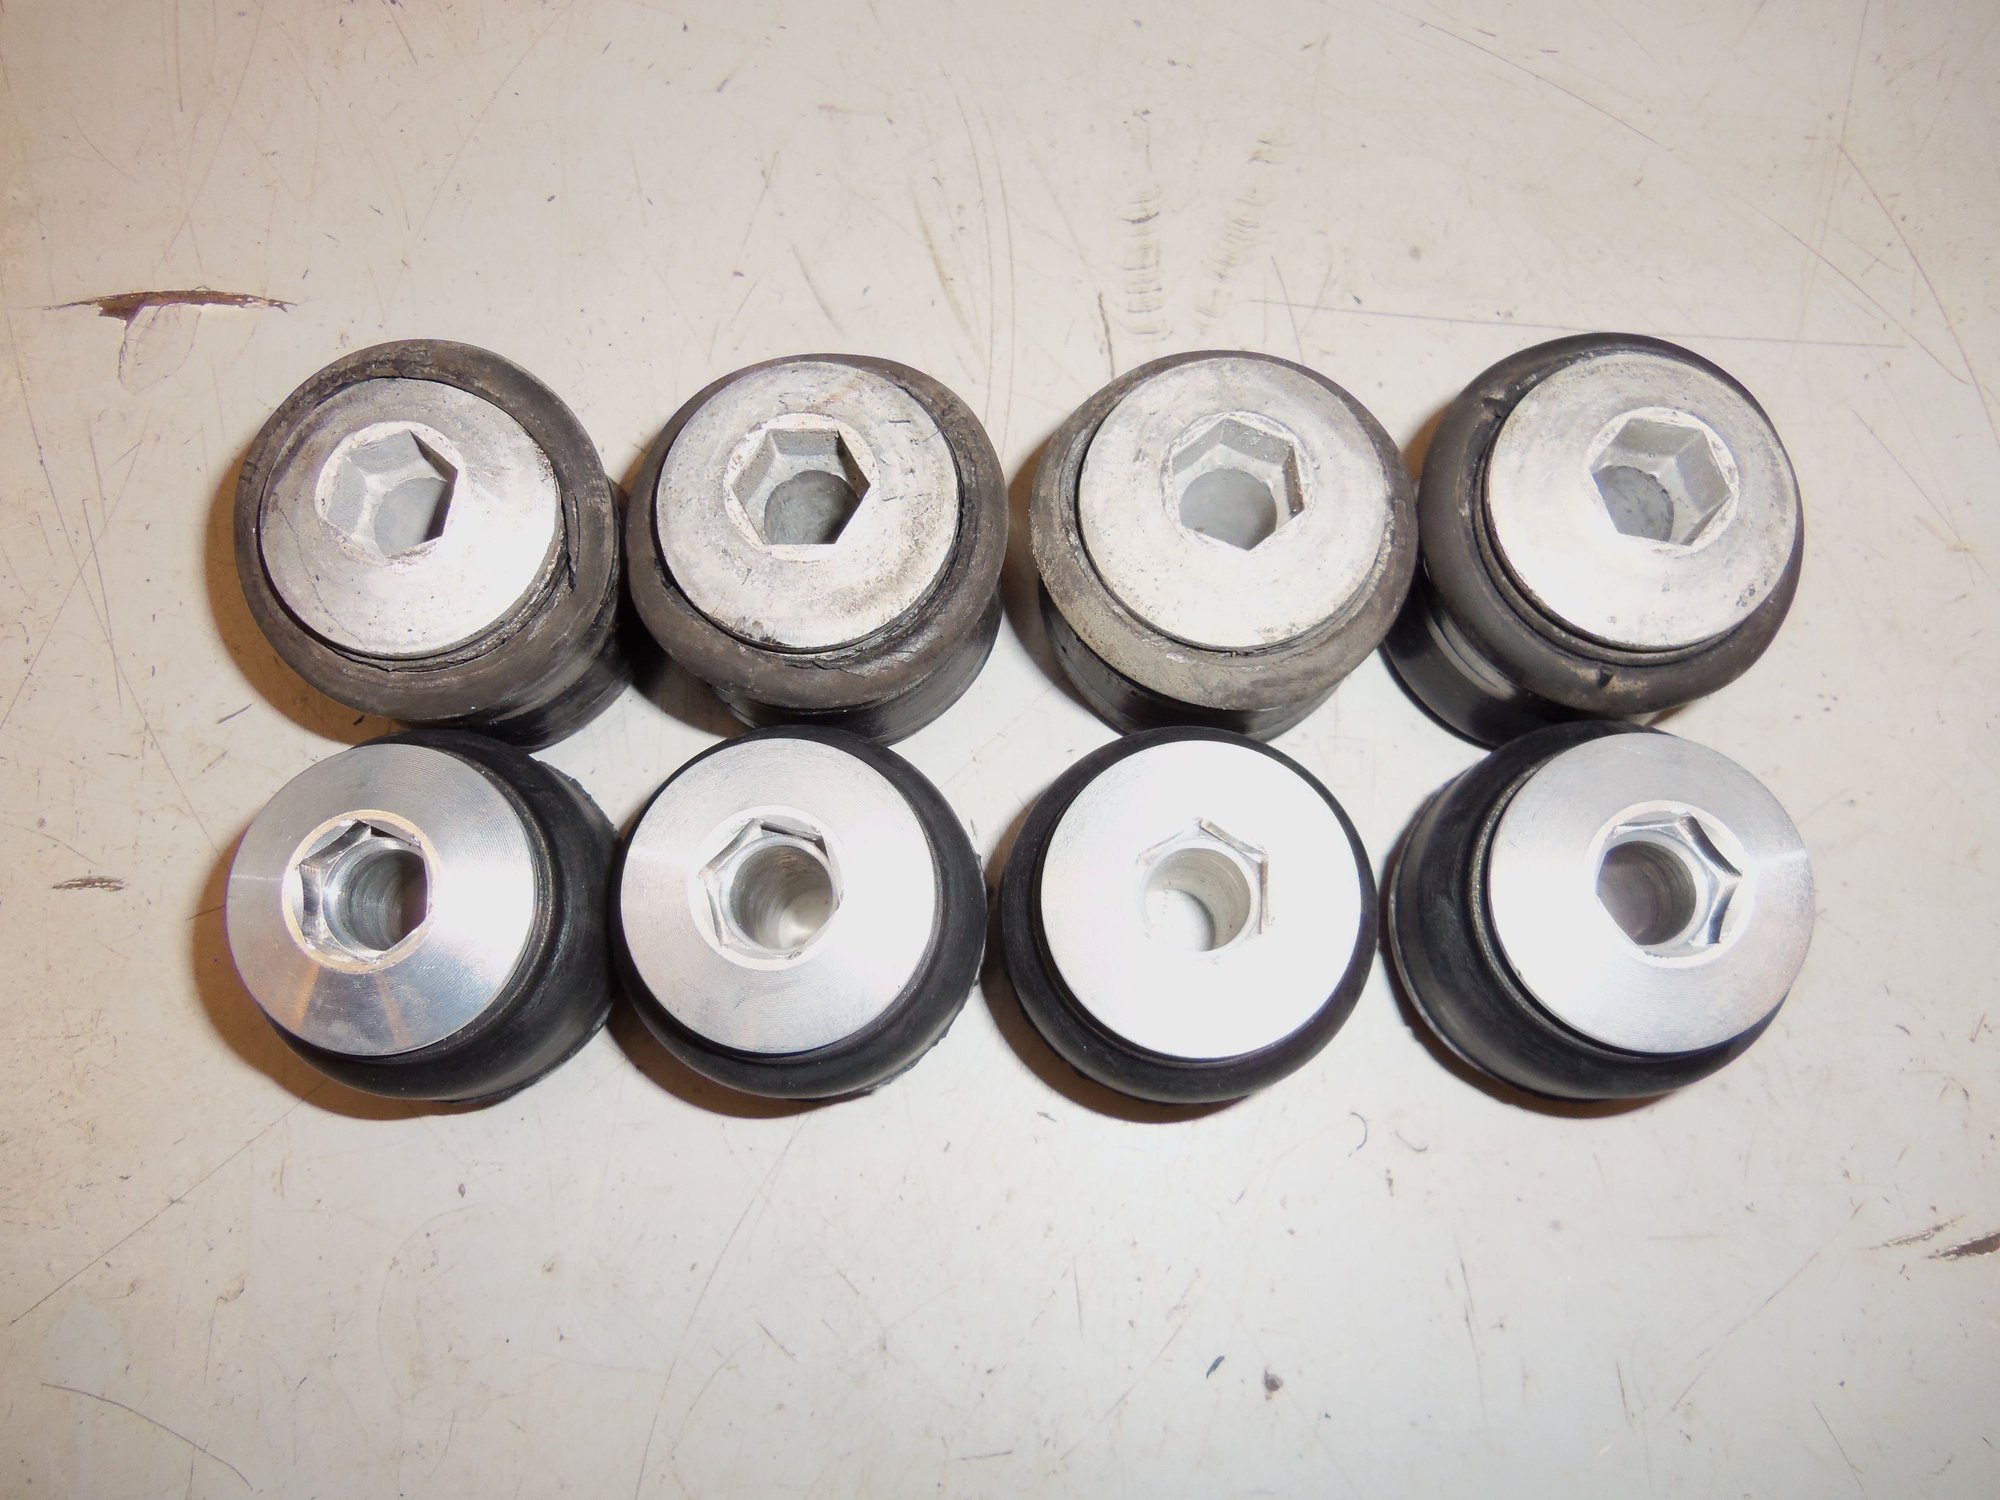
New upper control arm bushings at the front, old bushings at the back. Part number just in case.
New upper control arm bushings at the front, old bushings at the back.
New barrel shaped bushing on the left, old tapered bushing on the right.
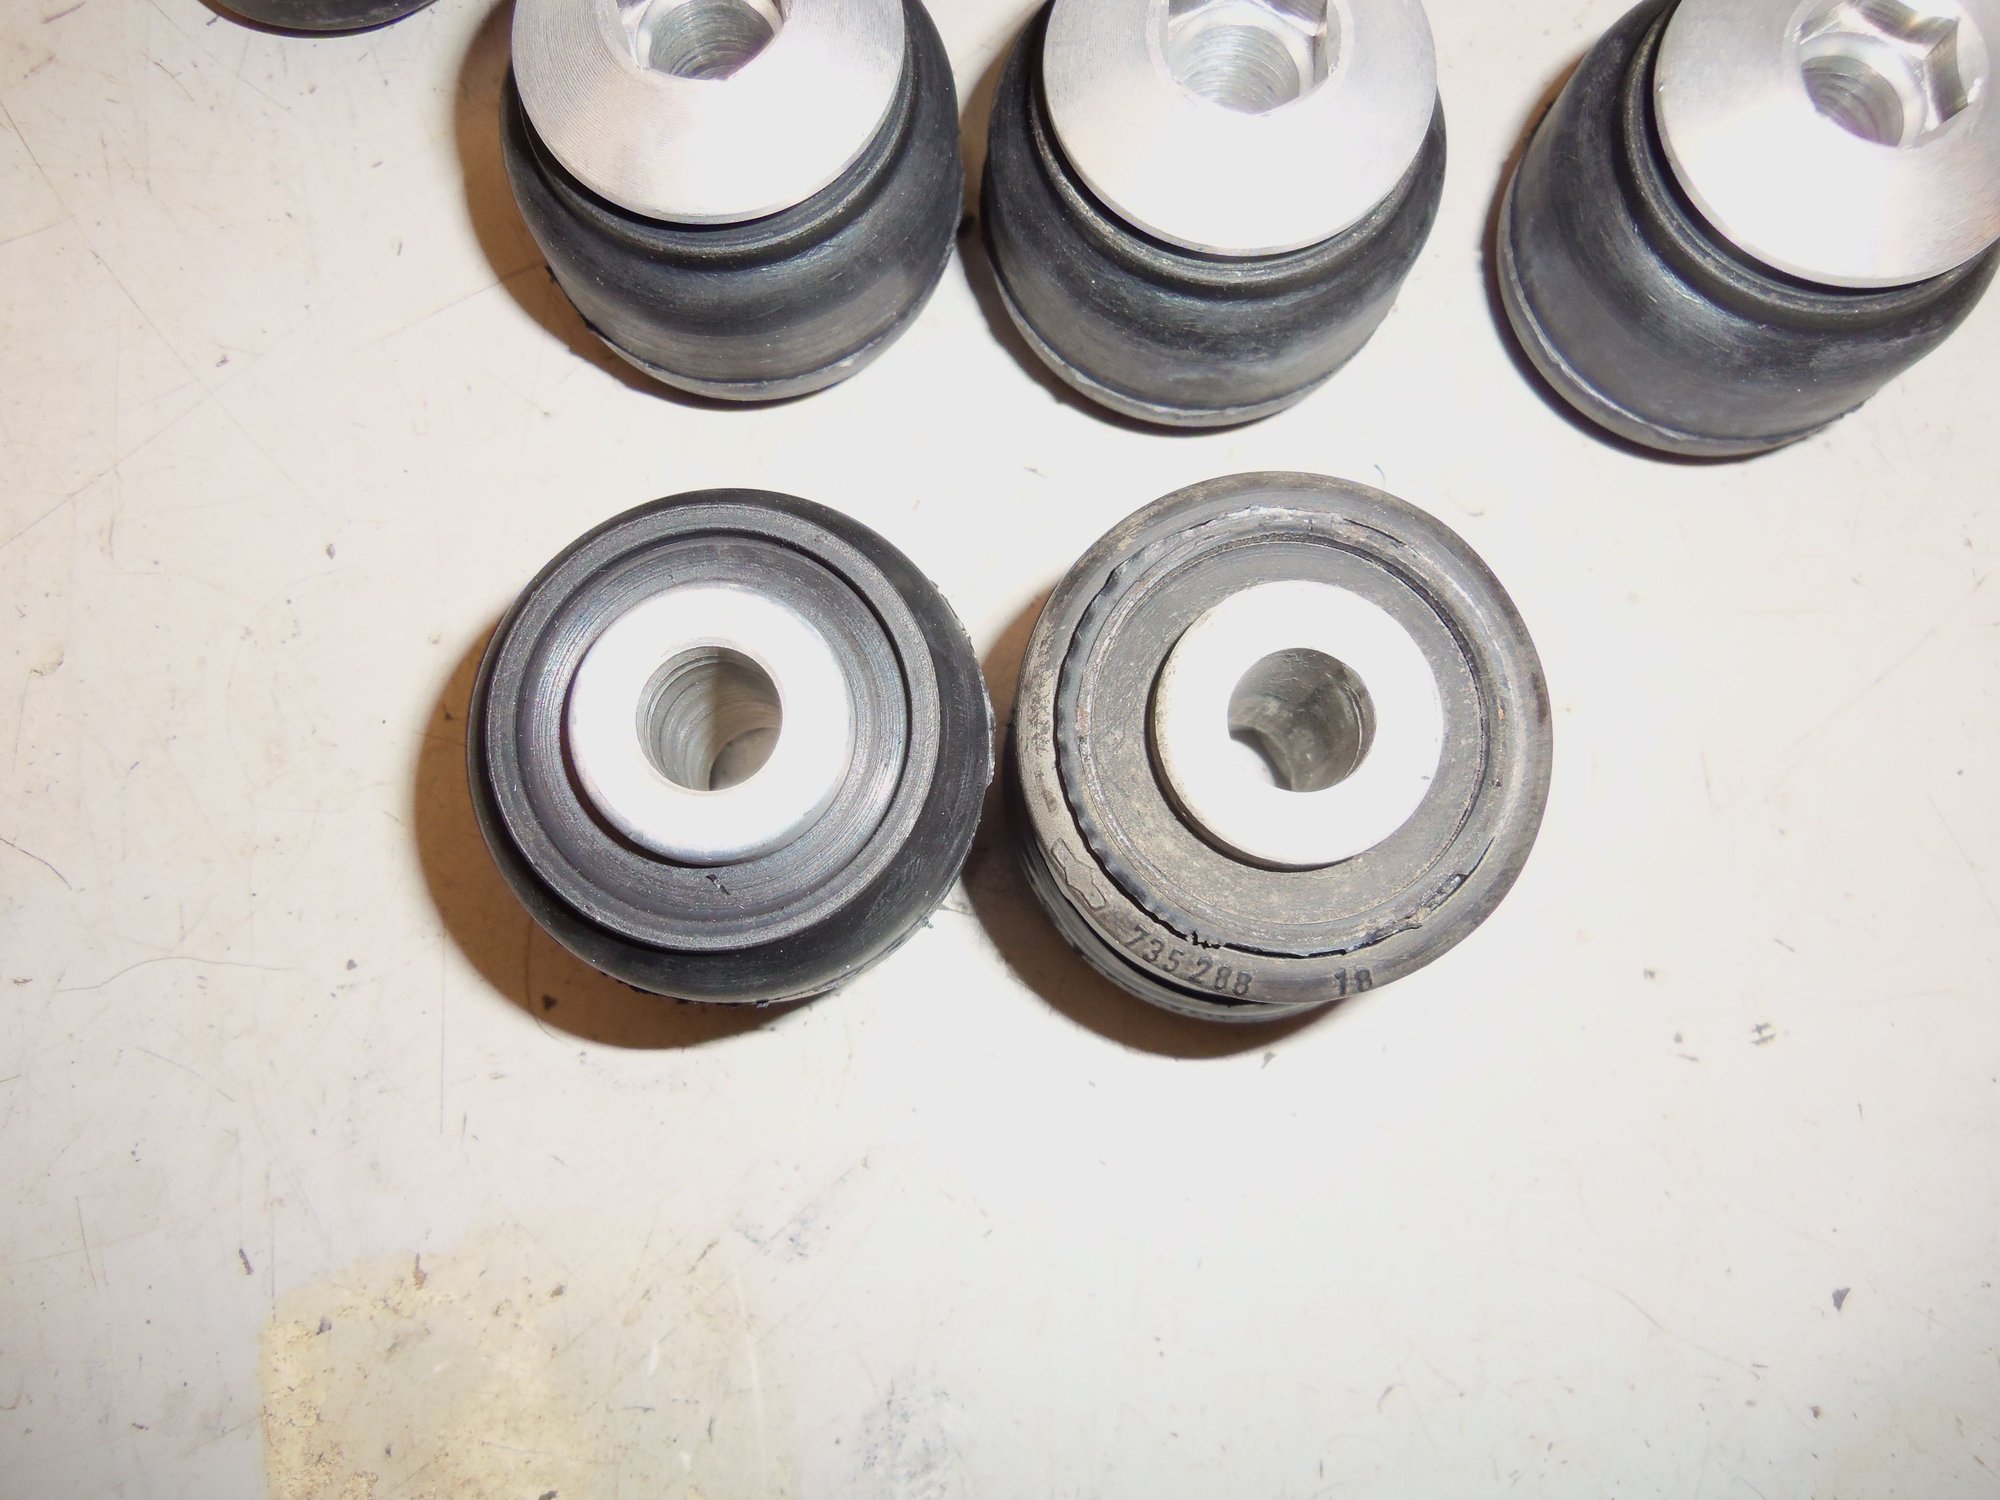
Back sides of bushings, new on left, old on right.
Jackscrew assembly in case I need it to install the bushings.
Armed with SylGlide in the control arm bores and on the bushings, I set up to press in the bushings. To my surprise, it worked a treat. I had no issues, the bushings slid right in. I did have an 'oops'. I forgot the ribbing on one side of the control arms was there. It prevented the bore from sitting flat in my press bed. I just used a socket as a spacer. I used photos and one of the original upper control arms from the Red Witch as a guide for how far to press in the new bushings. And...I remembered to orient the bushings opposite each other in the control arms.
Pressing in a new upper control arm bushing. Brass block is because I was scared of deforming the top of the sleeve.
Uh-oh...something is not sitting right here.
Socket spacer saves the day. No longer scared of the top of the sleeve.
Completed upper control arms. I took great pains ensure all four bushings were pointed the correct direction.
Random fact: white zip tie identifies passenger's side part.
Flush with my success on the upper control arms, I rolled right into the camber bushings in the 'blades' on the lower control arms. (Long time readers will see this death flag and know where this is going...)
These bushings were a bit of a b*tch. Getting them started straight in the control arm bore proved to be problematic. I launched all the pieces out of the press more than once when the bushing cocked under pressure... I tried differing diameter sockets and spacers in an attempt to push the bushing only. I didn't want to push on the center sleeve only. I was more than sure all that would do was press the sleeve out. Not what I wanted.
New camber bushings at the bottom, old bushings and sleeves at the top. Part number just in case.
New camber bushings at the bottom, old bushings and sleeves at the top.
Old bushing on the left, new bushing on the right.
What finally worked was using a flat piece of steel to press against the center steel sleeve and the rubber bushing itself. That worked and I was able to press the bushing in straight. I pressed each bushing in until it stopped against the press bed. I then used a spacer underneath the bore to allow me to continue pressing the bushing until it was even on both sides of the bore. Now, in full disclosure, I did have some back and forth pressing the bushings until I was happy with how much was exposed on either side. I will say that the pressed in bushing looks different that the free bushing. I did note that the old bushings I pressed out had the same shape as the new bushings. Rubber under compression...I am not an engineer, so I will just hit the 'I Believe Button' and carry on.
Successfully pressing in the new camber bushing. After a few tries... Note: I forgot to take a picture of the spacer used for room to fully press in the bushing. Sorry.
New camber bushing pressed into the lower control arm. Note how the ends of the bushing look very different from when the bushing is free...
Sleeve sticks out the same distance on both sides.
Last operation was to press the rocker bars from the 1988 S4 donor rear control arms into the original rear control arms from the Red Witch. I pushed a rocker bar into a control arm enough where it would stay, then mocked it up in my press to set the height of the bed. Followed by a coating of SylGlide in the control arm bore and on the bushing itself.
I started the bushing by hand with a good push so it would be lined up and stay to go into the press. And the bushing kept right on going. It went in over halfway on my first push. I gave another push and was within 1/8" of the bolt hole lining up. I set the control arm on the floor, on the end of the bushing and gave it a push with my foot. And it was seated.
So my press was unnecessary. To see if this was a fluke, I tried the other rocker bar and control arm. Same thing, I was able to push it in most of the way by hand. Then seat it with my foot.
Cleaned hardware coated with Otimoly HT installed and torqued to 55 ft/lbs and they are done.
Rocker bar in and seated by hand. And foot.
End of the bushing looks fine, other than a layer of SylGlide.
Hardware to finish installing the rocker bars.
This can be looked at one of two ways:
1 even though the bushings pressed out cleanly and looked good, I messed them up. Now they aren't a tight fit.
2 the layer of SylGlide on both the bore and the bushing allowed it to move freely. As well, the bushing may have not been that tight a fit to begin with. I don't recall it taking that much force to remove the bushings from the arms.
Regardless, it is what it is. The rocker arms are NLA, and I am not taking these back apart. We will see how they work. If driving the Red Witch shows she is 'twitchy' at the back, I will suck it up and get another set of control arms and do this again.
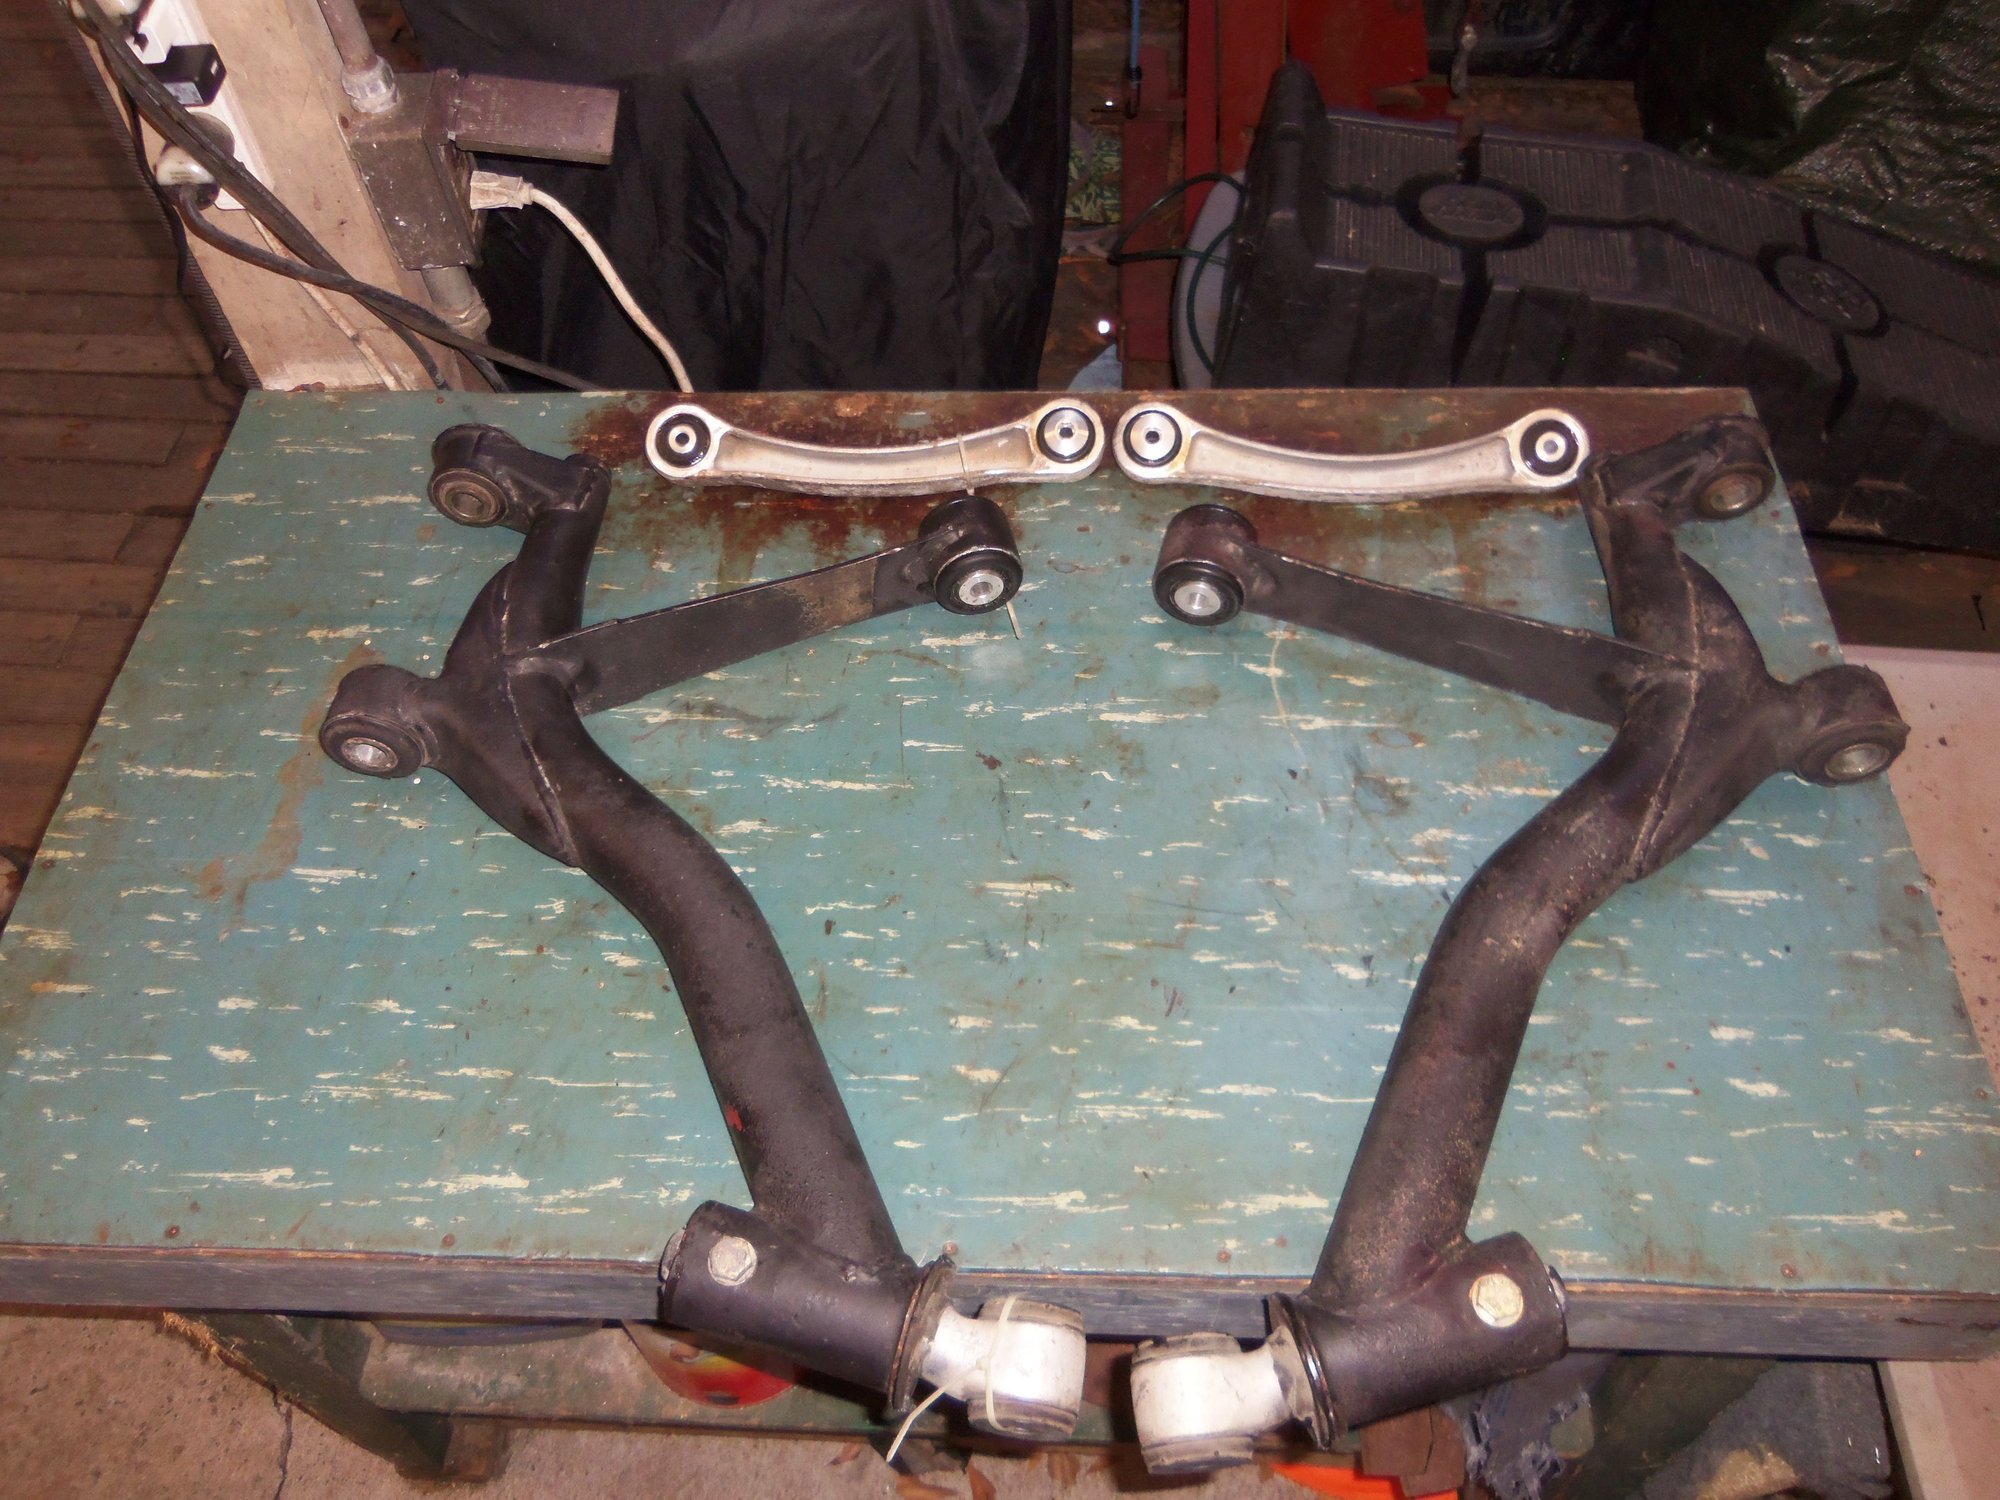
Well, I have achieved the goal of this thread. The rocker bars have been swapped from the donor 1988 S4 control arms into the original control arms from the Red Witch. New camber bushings have been pressed into the lower control arms and new bushings have been pressed into the upper control arms. I am taking Stan's advice and leaving the steel sleeves alone in the shock bushings in the lower control arms.
Completed upper and lower control arms for the rear suspension on the Red Witch.
Rocker bars.
New bushings in upper control arms and lower control arm camber bushings.
With that, I am now done with this thread, and am returning to my transmission and WYAIT thread.
Thanks very much for all your advice and interest!

 07-21-2019, 05:49 PM


 It went in over halfway on my first push. I gave another push and was within 1/8" of the bolt hole lining up. I set the control arm on the floor, on the end of the bushing and gave it a push with my foot. And it was seated.