When you click on links to various merchants on this site and make a purchase, this can result in this site earning a commission. Affiliate programs and affiliations include, but are not limited to, the eBay Partner Network.
Yes, We will be painting 01117. This will be done in three stages. First will be the engine compartment and wheel wells. Exterior repaint is a whole 'nother phase for another day.
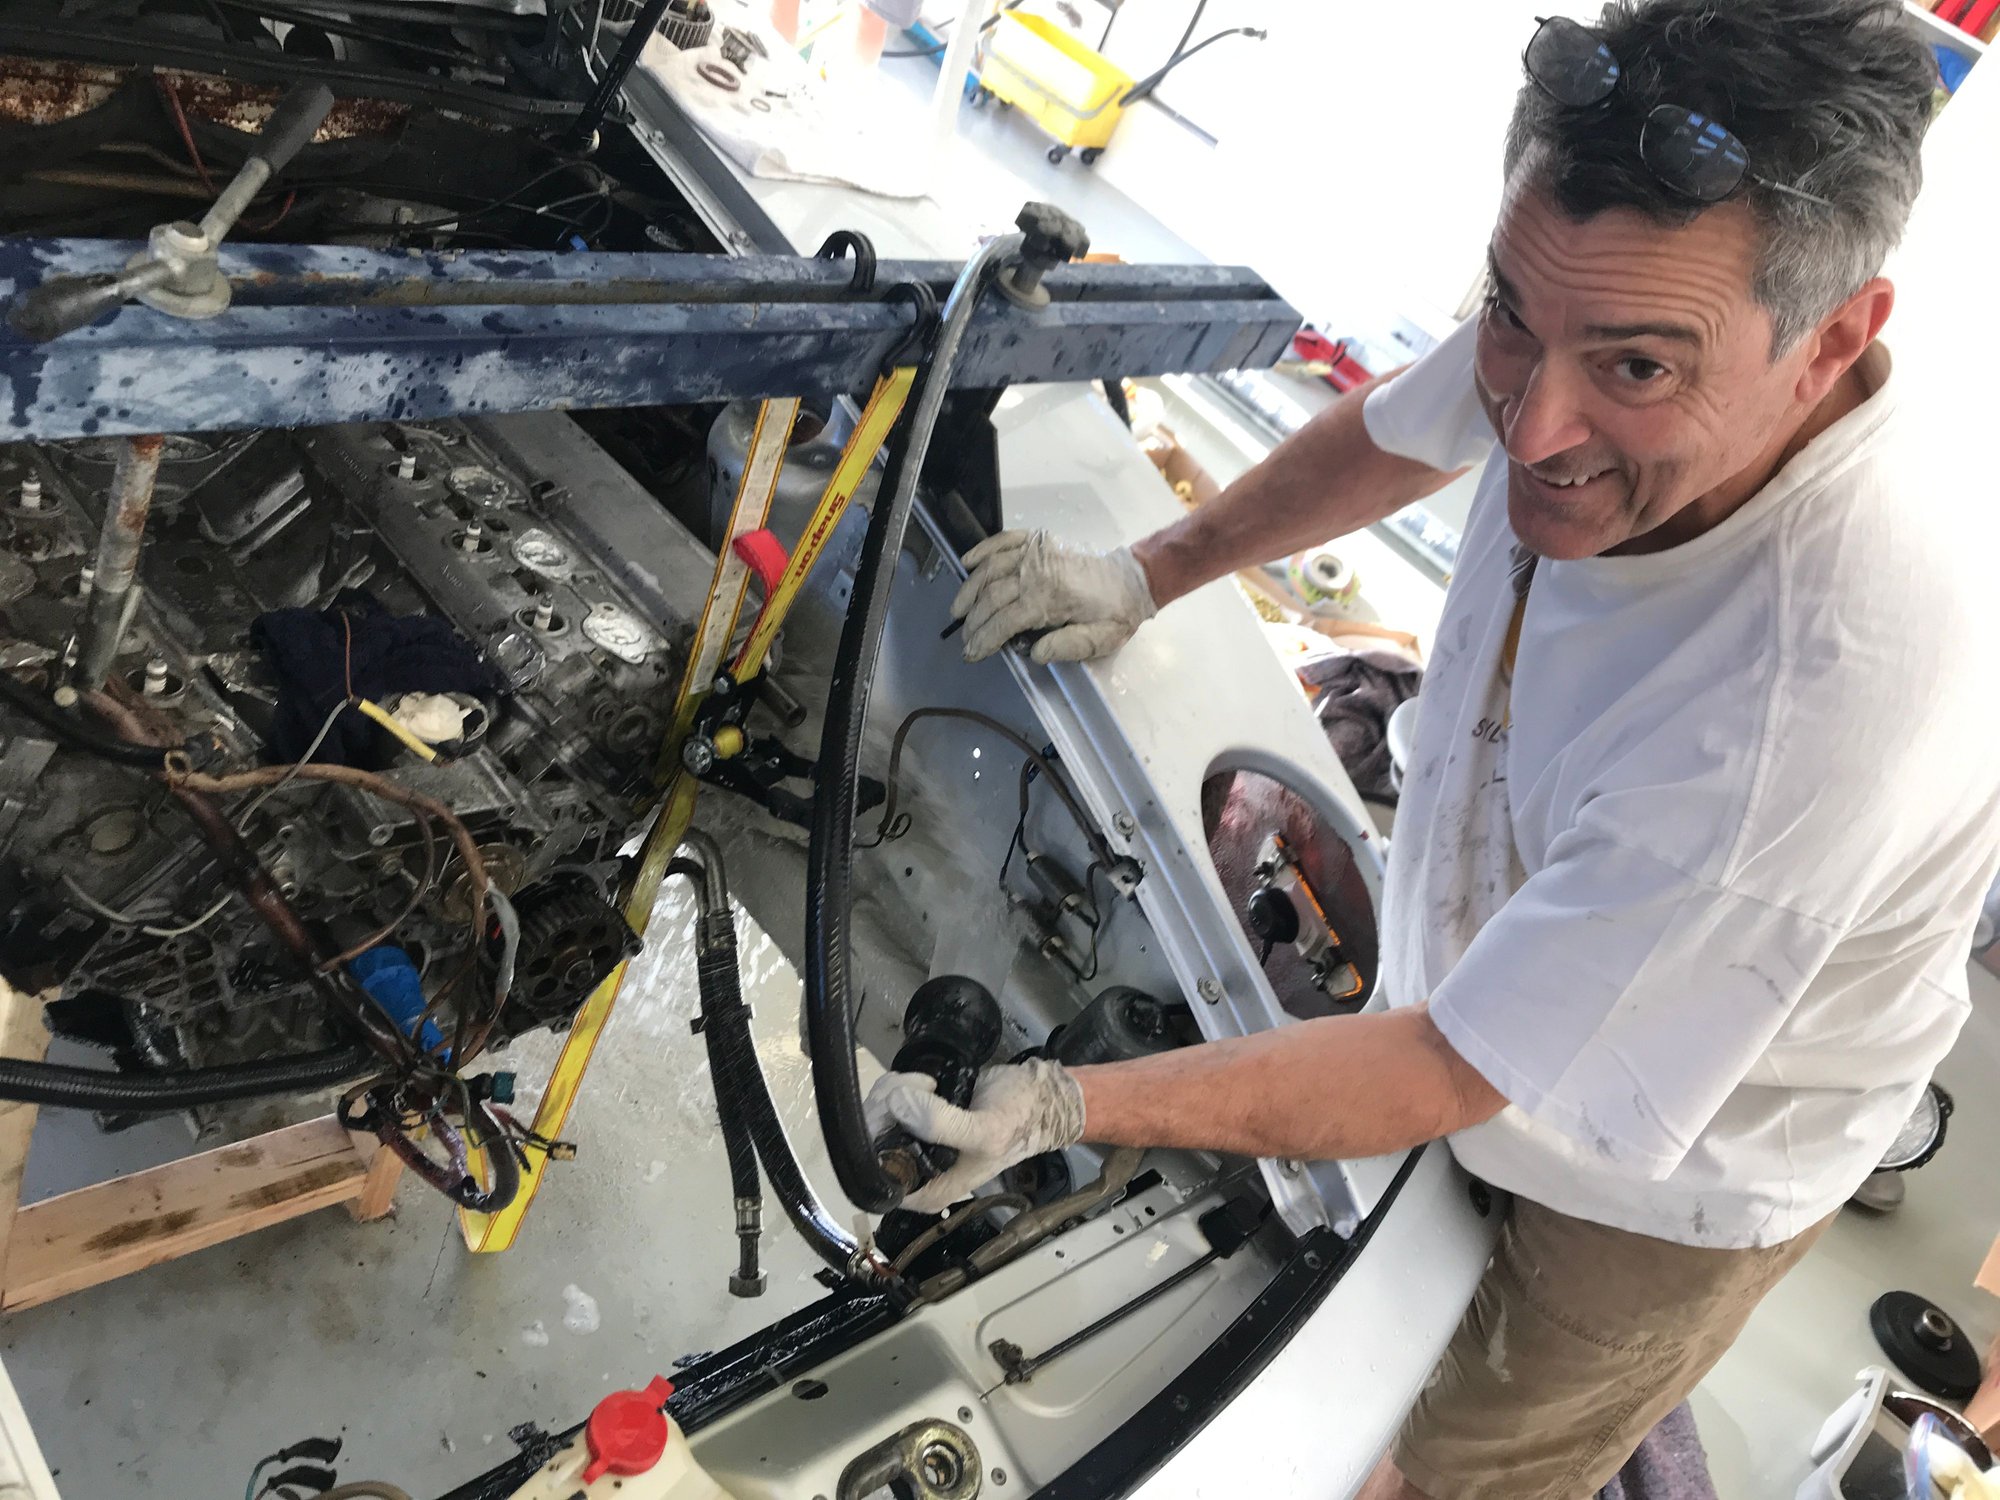
Massive weekend of cleaning the full undercarriage, wheel wells, engine compartment and engine. The TT and transaxle are out. The motor is supported by lumber downstairs and engine saddle upstairs.
Here is William after a scrub down doing a full DI water rinse.
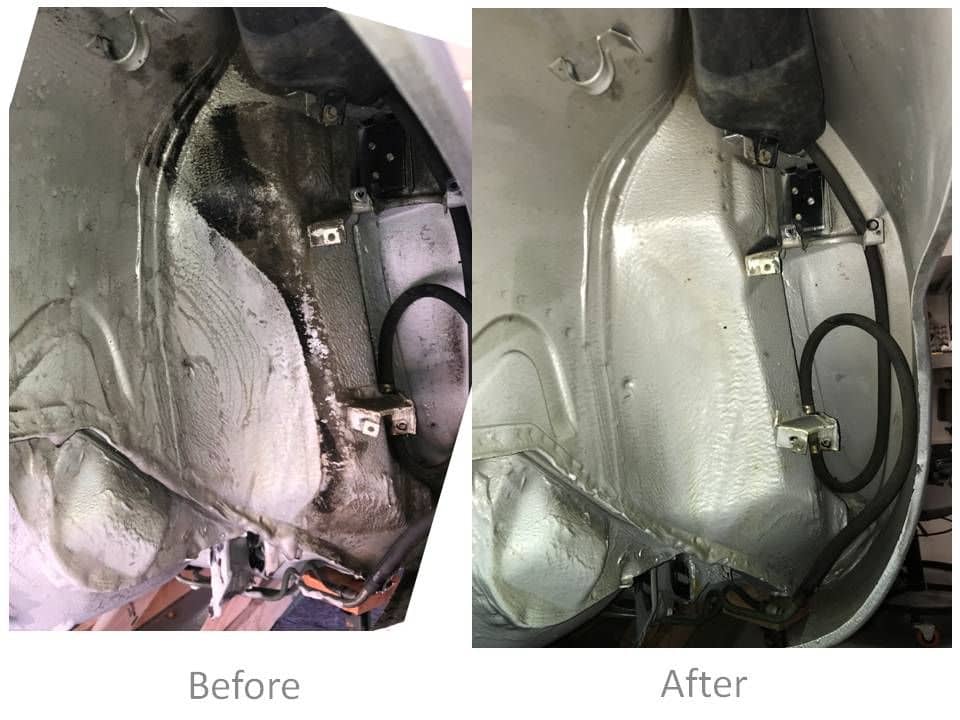
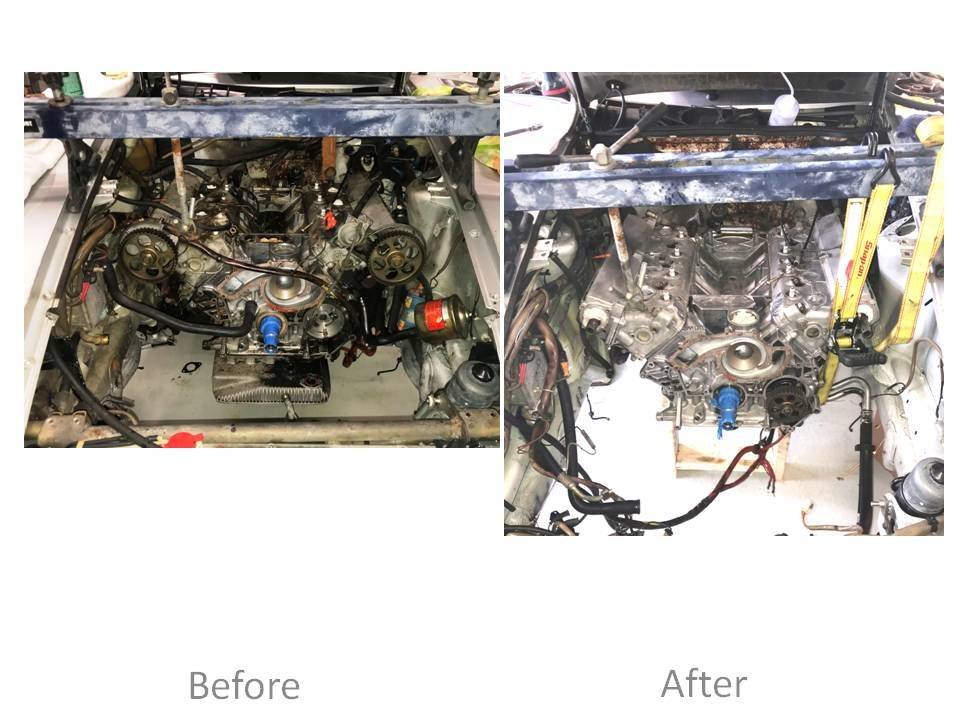
Some before and after images
Last edited by mit Wasser; 01-21-2019 at 02:03 AM.
I am exceedingly lucky that, one: I am fortunate enough to call these guys friends, and two, that the are interested enough to help guide the process. There contributions make for a massive accelerant on process. The real reason for them joining the restoration will become evident in Phase III.
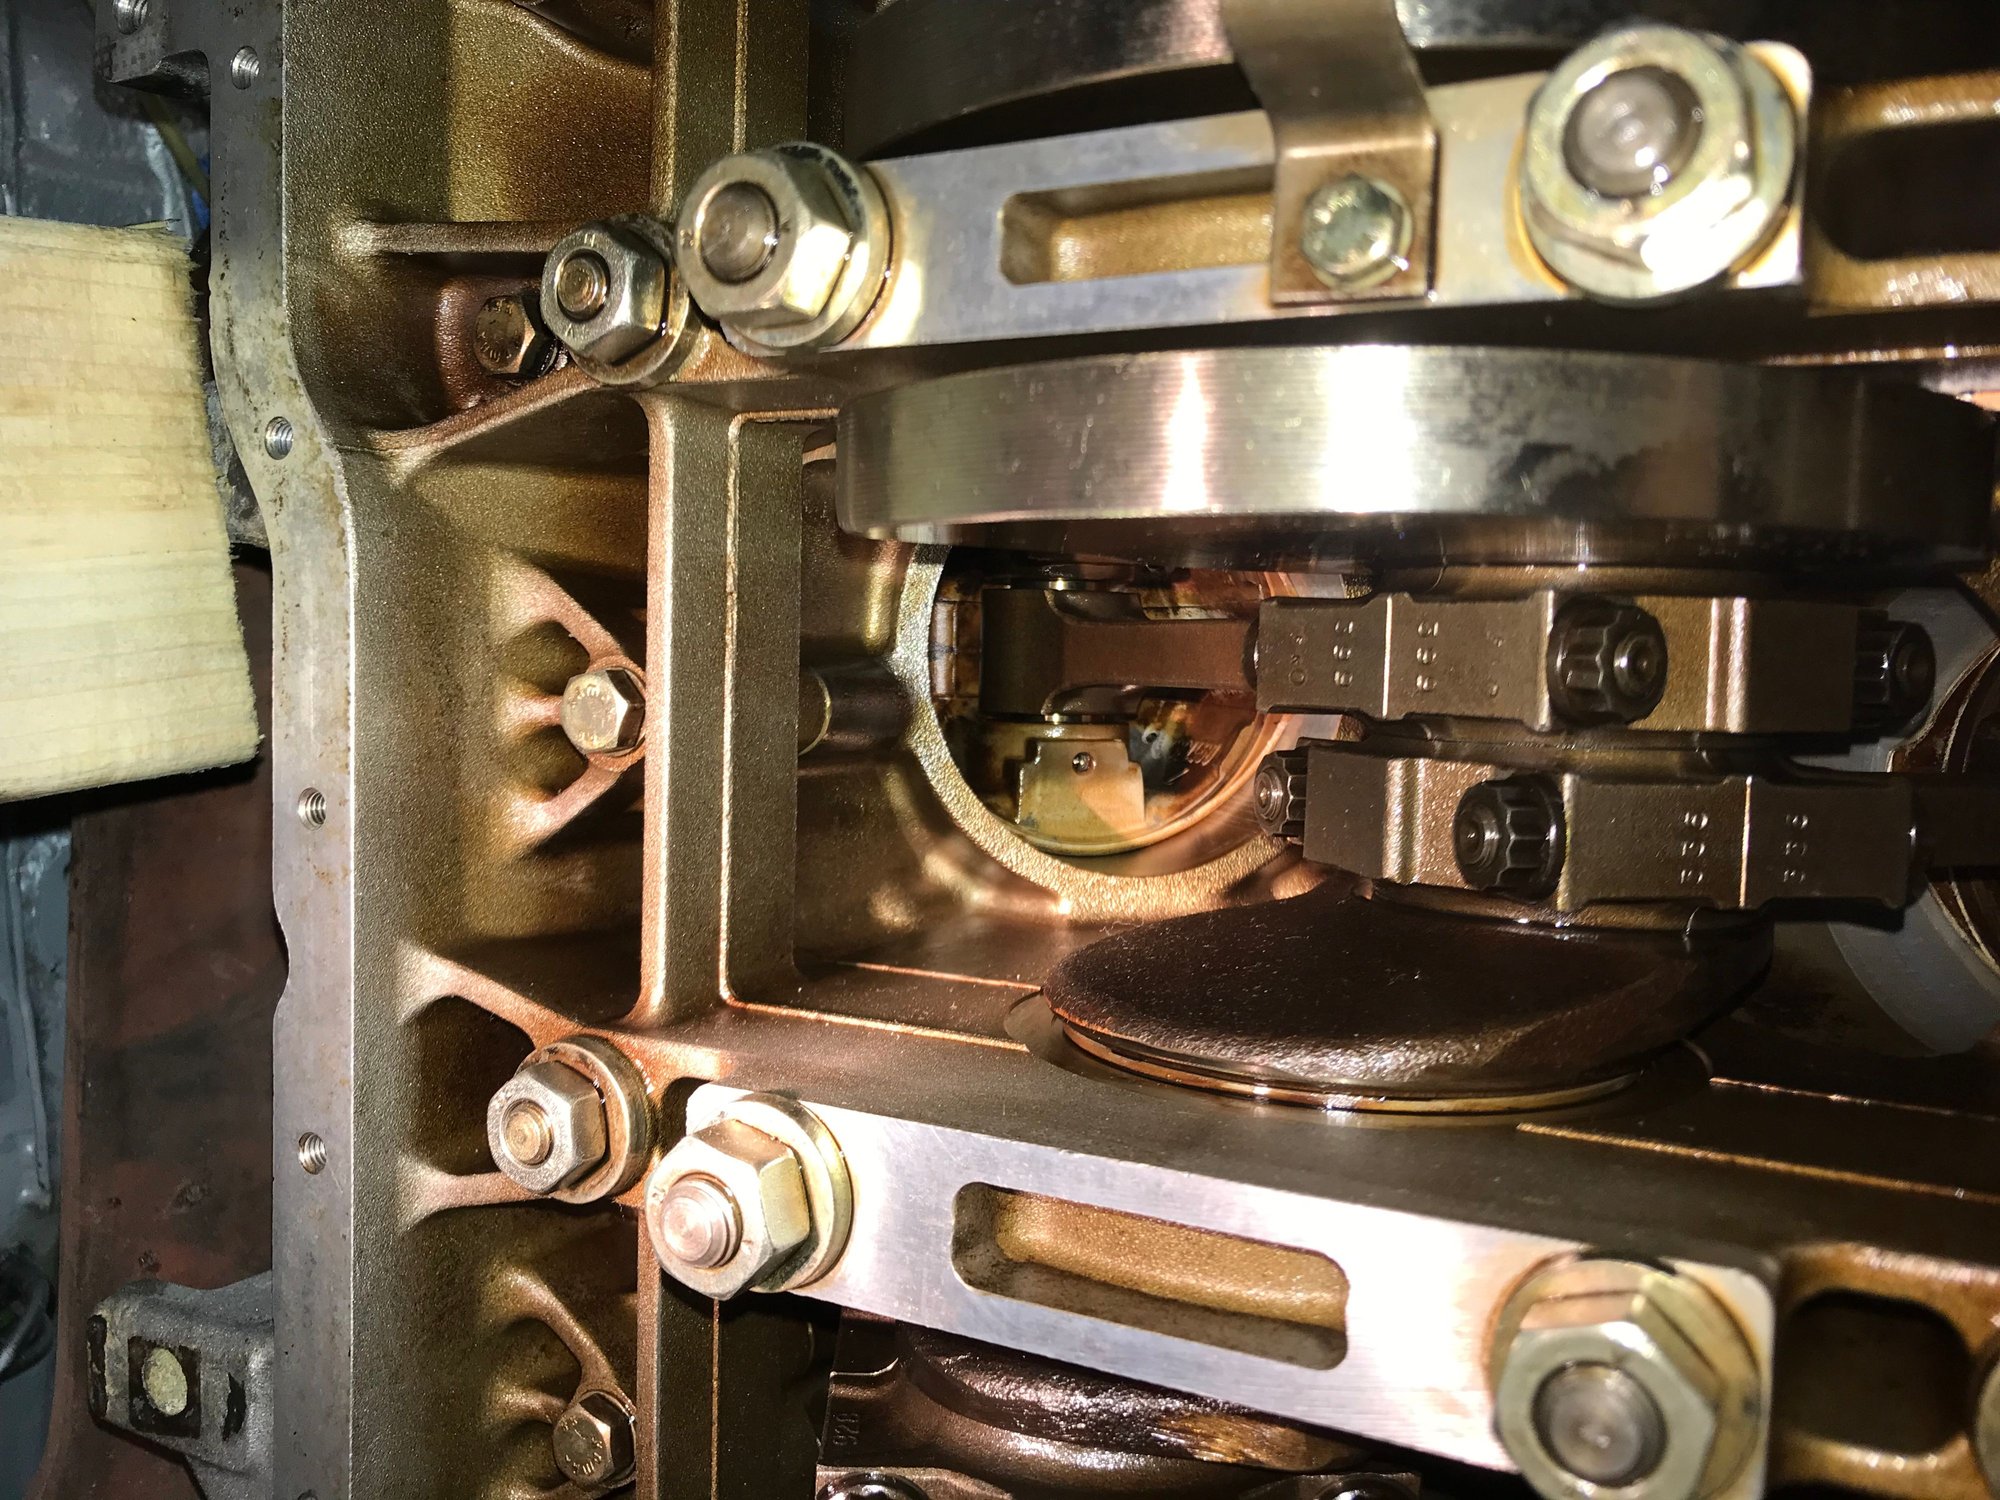
The only leak along the cam towers is/was at the passenger side front, the oring in the cam spacer tube was hard as a rock, so that of course gets replaced. The other possible leak source there is interesting- the passenger side cam seal housing takes a 60 x4 (52 mm ID) mm o-ring. The groove it fits in on the driver's side is 3.4 mm deep, while the groove on this one on the passenger side is 4.2 mm deep. Not sure how it was sealing at all.... Need to go to Mark's and measure that groove on a couple of 928 105 119 04's and see what's up.
The other likely leak source was the oft-forgotten (William and I did, the 1st time....) 928 105 184 00 seal between the bottom of the cam seal housing and the front of the cam tower.
It took William and I 3 and 4 tries to get the cam tower gaskets to seal on Minerva. If we're the 'A' team, you should probably let the A+ team handle this sort of thing.
I�m surprised that you�ve decided that you don�t want the head gaskets replaced and the heads examined/corrected for corrosion.
Dave, this is always a compelling issue when deciding how deep to go "while you're at it".
Paul has spoken for himself on this matter, and I don't propose to speak for him but to give my perspective as someone with hands on his car to date. I give Paul credit from the standpoint that what ain't broke shouldn't be fixed, and sticking to that standard. There will be those who consider not pulling the heads to be shortsighted or even crazy, and it is a supportable position considering what we have seen in past threads.
Paul's plan all along has been not to pull the engine unless something compelling was discovered that would lead to the conclusion there is a problem even though the motor ran great before. What he saw after pulling the front of the engine and oil pan did nothing but support that his motor is solid with no apparent needs. Oil analysis: CHECK, Survey that what visible water passages are pristine: CHECK.
In addition is the anecdotal history of Minerva with over 160k on the clock, lots of sludge in her oil pan and bottom end internals, and yet when we pulled the head gaskets still present from the factory, they came off in one piece like they were installed 6 months ago, and both surfaces showing the head gasket sealed perfectly after all those miles, years driven, and more than 6 years sitting idle. And this from an owner who was expecting the worst with a recent experience of a GTS with 50k on the clock and head gaskets that were a disaster (only discovered thanks (sarcasm) to a failed valve. Makes me wonder about 2 valve/2 cam vs 4 valve/4 cam motors and if one is easier on head gaskets than the other, though I can't imagine why.
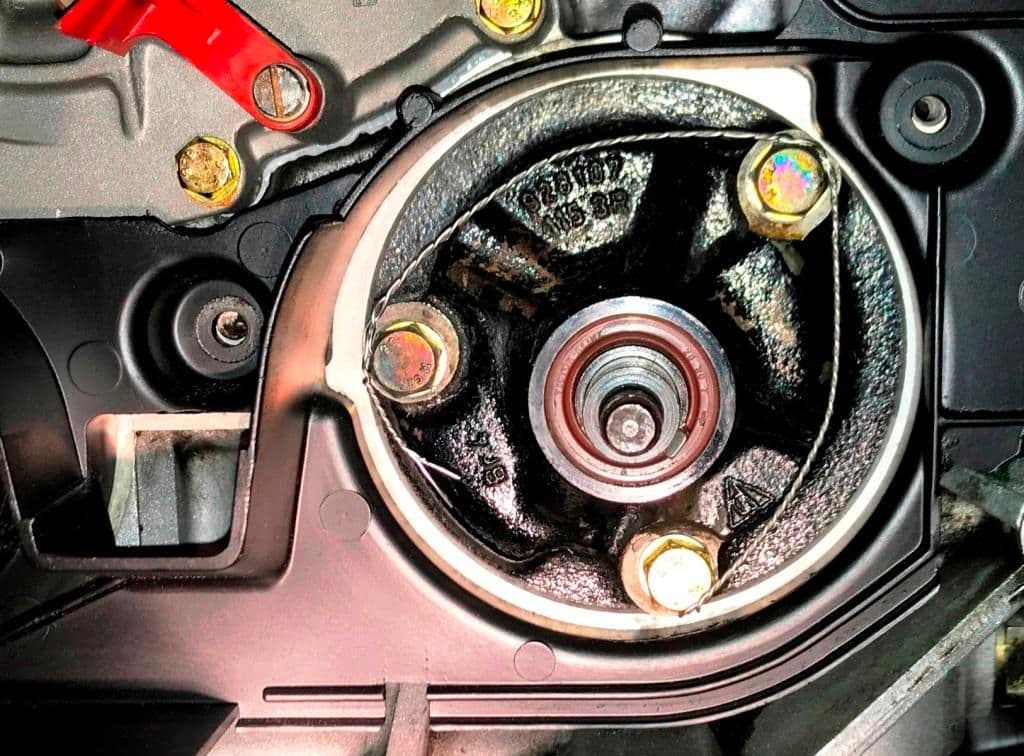
I come to the 928 orbit from vintage BMW and Jaguar. Some of the BMW older six cylinder engines have a nasty habit of losing their oil pump drive gear nut. This allows for short period of lower friction when the crankshaft no longer has the burden of having to drive the oil pump. This is usually discovered seconds thereafter when the internal friction spikes and the meltdown occurs.
I don't know the history on M28 motors, but I don't want to take any changes. So I safety wired the oil pump to the block and the gear drive nut to the pumps shaft.
Last edited by mit Wasser; 01-28-2019 at 11:48 AM.
Not sure what performance enhancing substances Paul takes, but he's utterly on fire on this project. I thought Minerva moved along well but this is mildly ridiculous.
Engine compartment repainted, after lots of elbow grease:
Right front suspension coming back together:
Paul's experience as a concours judge is showing, his knowledge of how to effect a particular surface finish is really something. Just as a random example- the center timing belt cover.
Shouldn't the safety wires be reconfigured, so the loosening of 1 screw is counteracted by the tightening of the other screw? Perhaps it's just the picture? For the sprocket, wrapping the wire clockwise around the nut and affixing as shown would more secure - just a suggestion.
There is only one reason that 0117 is 'on fire'. It is because I am benefiting from all the experiences, lessons, scabbed knuckles, part lists, assembly images, and your and William's efforts based on Minerva. Fortunately Minerva was not that long ago and it's all still fresh memories (and scabs!)


 01-17-2019, 05:57 PM