When you click on links to various merchants on this site and make a purchase, this can result in this site earning a commission. Affiliate programs and affiliations include, but are not limited to, the eBay Partner Network.
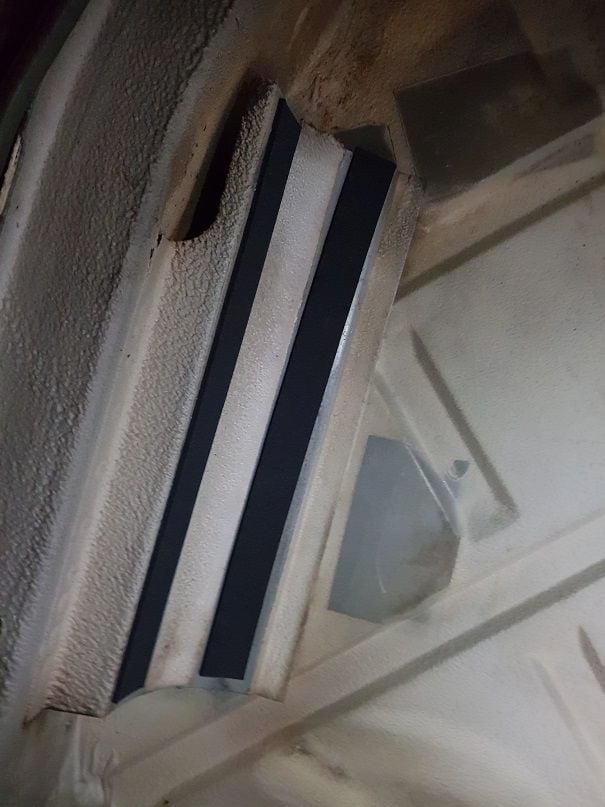
So I am attempting the fuel tank install today and when placing some vibration strips on I noticed 4 gray areas like one seen in my picture.
Are they meant to have padding as well. Looking at other threads its not evident.
Just realized I ordered the wrong fuel hose for the strainer. I knew it was different from the in tank pump version but grabbed the wrong number.
Was hoping to try and run it today. Looks like it will have to wait.
I dont recall where I applied foam cushion on the body now. Can you seen any marks on the tank where the cushioning contacted it? Your shaded area looks like it is in a hollow area, which wouldnt make sense to contact the tank. Looks more like a place where there was a label of some sort?
jp 83 S
Can only suggest you apply something wet/sticky to tank top and upper sides, push it up into place, remove and look for where it has left marks....?
jp 83 Euro S AT 57k
So a couple of Hiccups today.
First the fuel hose so I need to reorder.
Then some gorilla has rounded the connection to the fuel filter so its stuck in there.
Finally I would like to ask if the fuel sender should be so hard to seat.
Wont seem to get past the lump around the lip of the sender. I have pushed reasonably hard but wont go.
Cant quite visualize your problems from that info. Which fuel filter connection do you refer to - pump to filter or ? Note that the 'S' pipe (pump outlet to filter inlet) is regarded as consumable because they frequently get twisted and go out of round, so if that happens its not unusual. New copper washers please. You should have a new rubber seal for the gauge sender where it goes into the tank. You may need a little vaseline to ease things in, but I dont recall having any problems. The BIG nut that holds the sender into the tank goes on easier if you warm it up with hot water. If you get the sender in place, but 1/4 turn anti-clock from final position, then put the big nut in place loosely, then you can turn the sender clockwise so you can feed the return hose (clip already on) onto its pipe without stressing it. Do NOT yank on the short return hose, it can easily come off the hard return line, then you need to drop the tank to get it back on - BTDT!
If the gauge sender resists going down fully , check the white cup on the bottom is true - it goes into a weir stuck on the bottom of the tank, and may take a bit of jiggling to get it to fit. Some people have big trouble getting it out because it snags on the weir. There might be a pic or PET diagram in the thread linked above.
jp 83 Euro S AT 57k
Yeah the S pipe.
Copy the weir as pic above it falls into there fine.
I feel like I am talking about minor stuff when others are doing engine rebuilds and full dismantles.
But i guess it all starts somewhere.
I got the sender in. Wouldn't go in with thumb pressure. Put a hammer handle on it and lent on it. Also got the female off the male connection. Removed it from the filter and stuck a rattle gun on it with the other bit in the vice. Its back in but will need a new S pipe next time I do a filter change.
I feel like I am talking about minor stuff when others are doing engine rebuilds and full dismantles.
But i guess it all starts somewhere.
The beauty of this place is that you can get help with almost anything. People who get, or should get $125/hr to turn a wrench, offer their experience here just to keep these cars performing. A simple question may help some first-time shark DIYer to buy a car he wouldn't otherwise consider and save a car that was on the way down.
Well she ran today.
Only one false start and then she fired up no worries.
I hard wired the fuel pump using a switch through the relay socket and checked for fuel leaks then went for it.
Seems to idle quite nice.
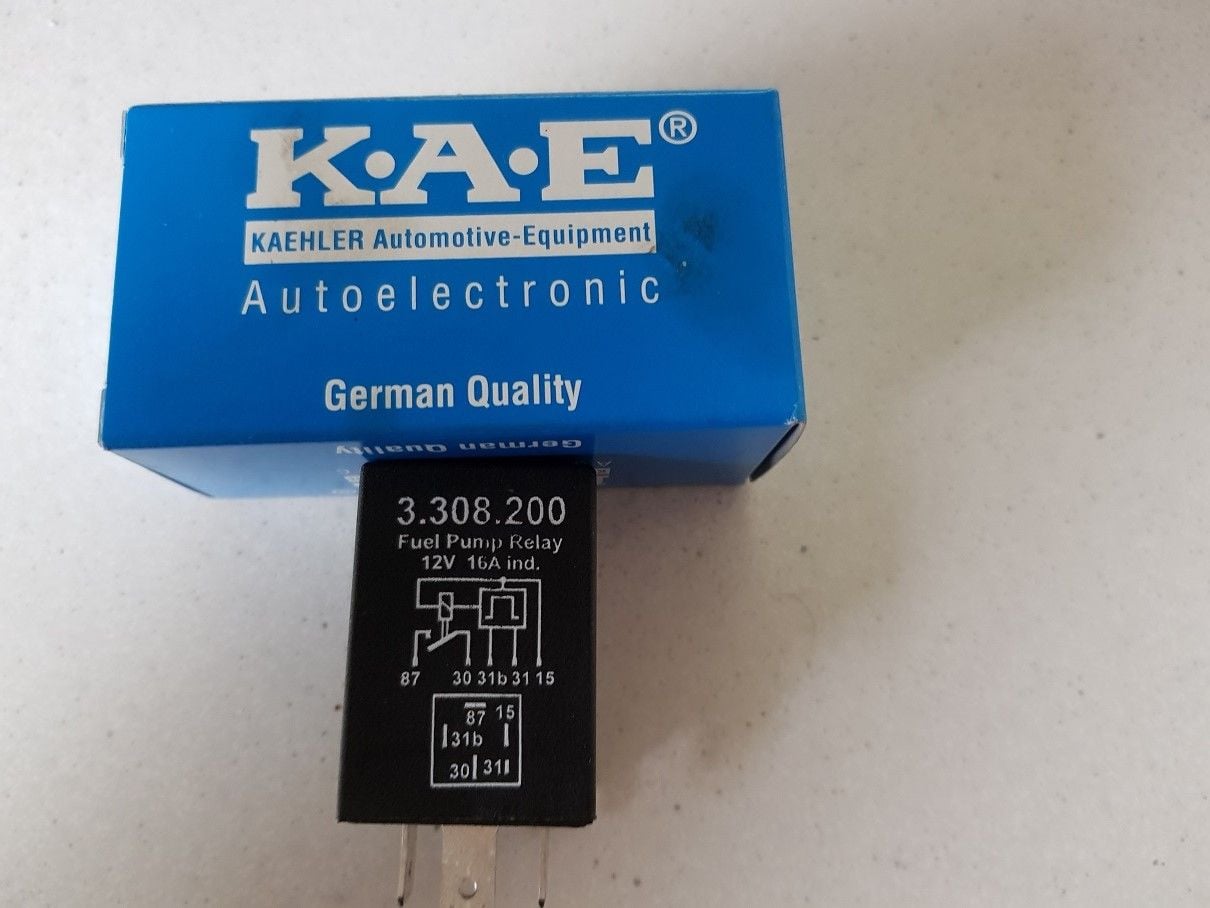
So I stuck a new Fuel relay in today to see if it would run without the jumper in.
I got nothing. Maybe its a wrong relay. Still runs with the jumper switch in.
Pic below. But it does run so happy.
Also interestingly when I removed the block coolant plugs only the first one drained.
I thought both should drop coolant from what I read.


 11-02-2018, 08:16 PM