When you click on links to various merchants on this site and make a purchase, this can result in this site earning a commission. Affiliate programs and affiliations include, but are not limited to, the eBay Partner Network.
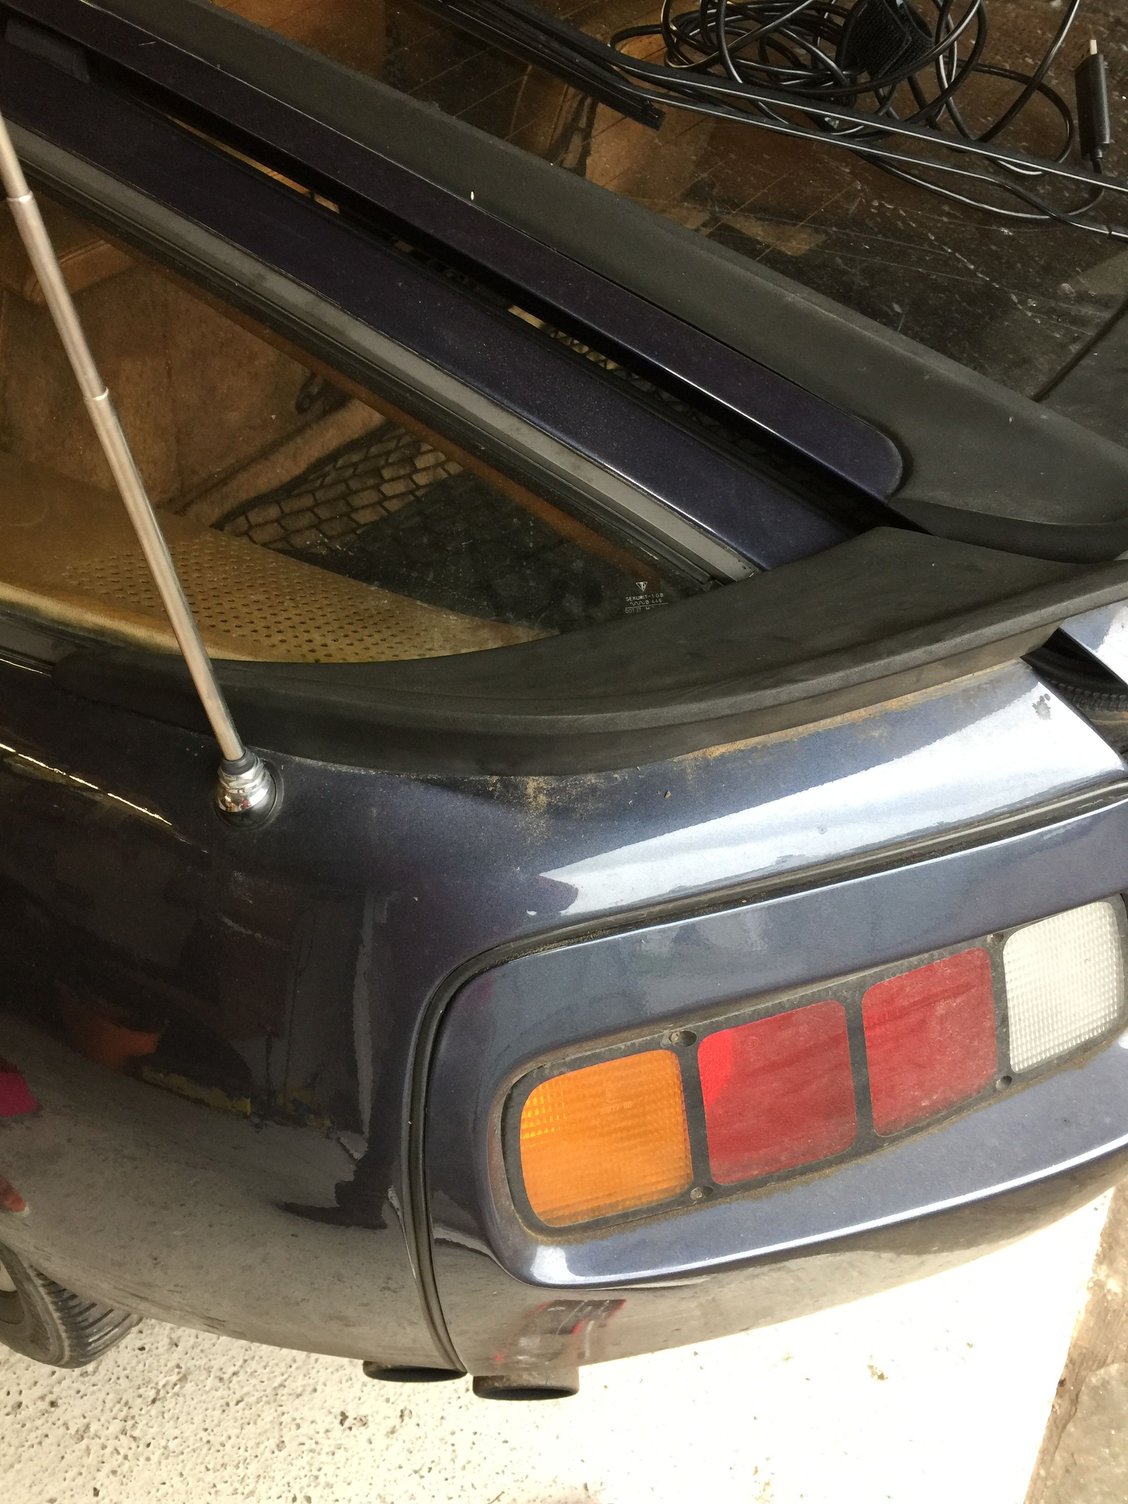
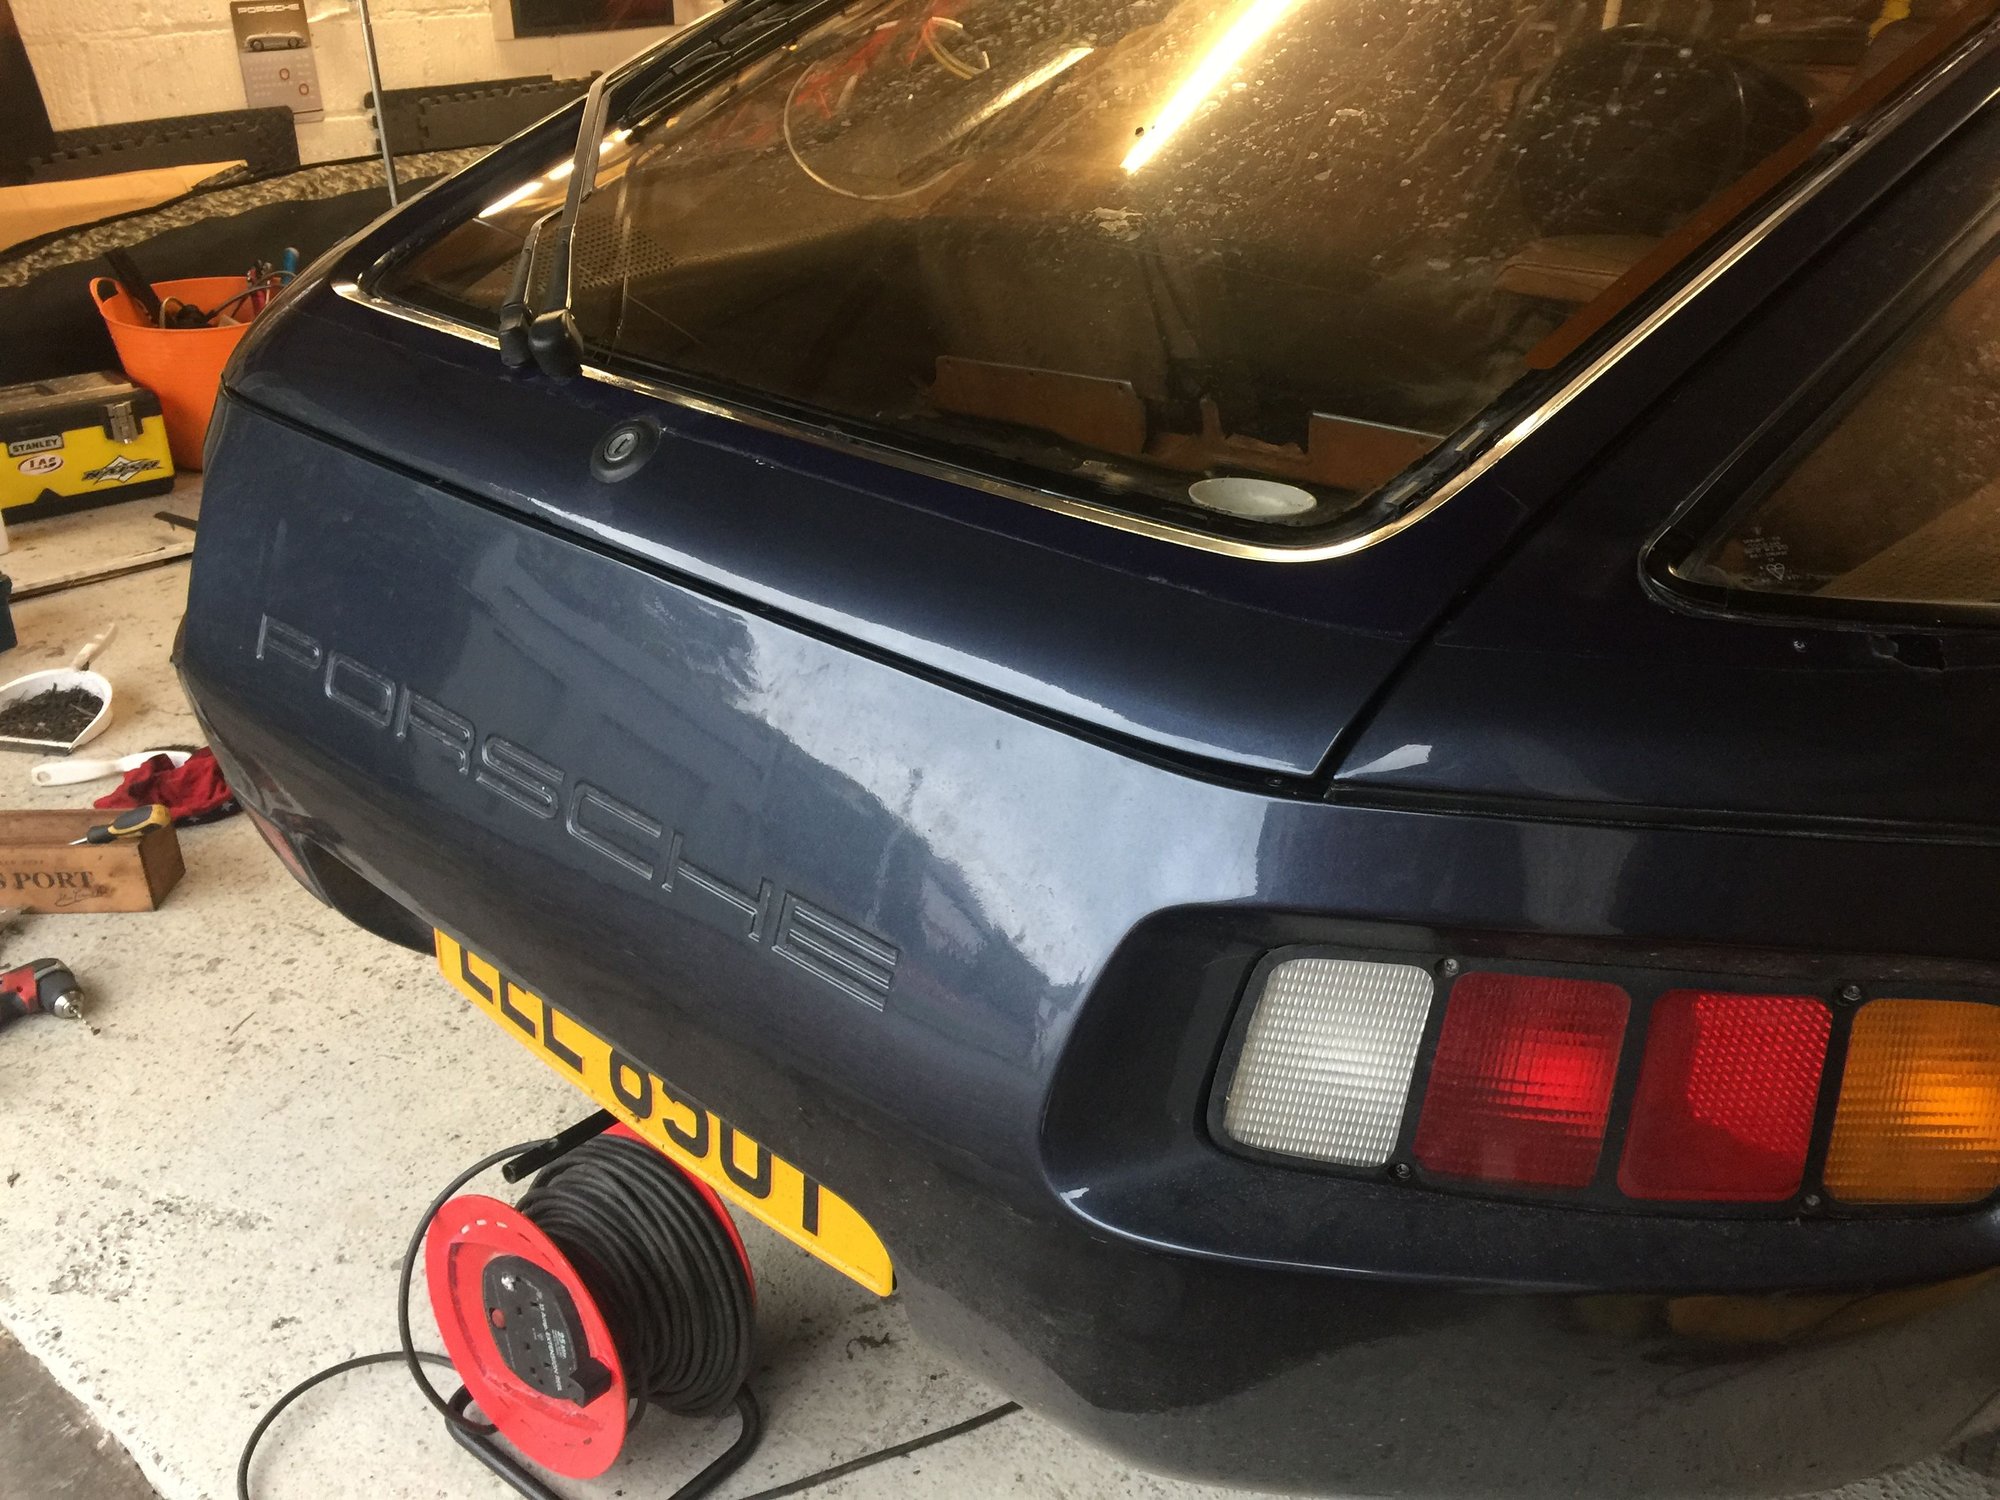
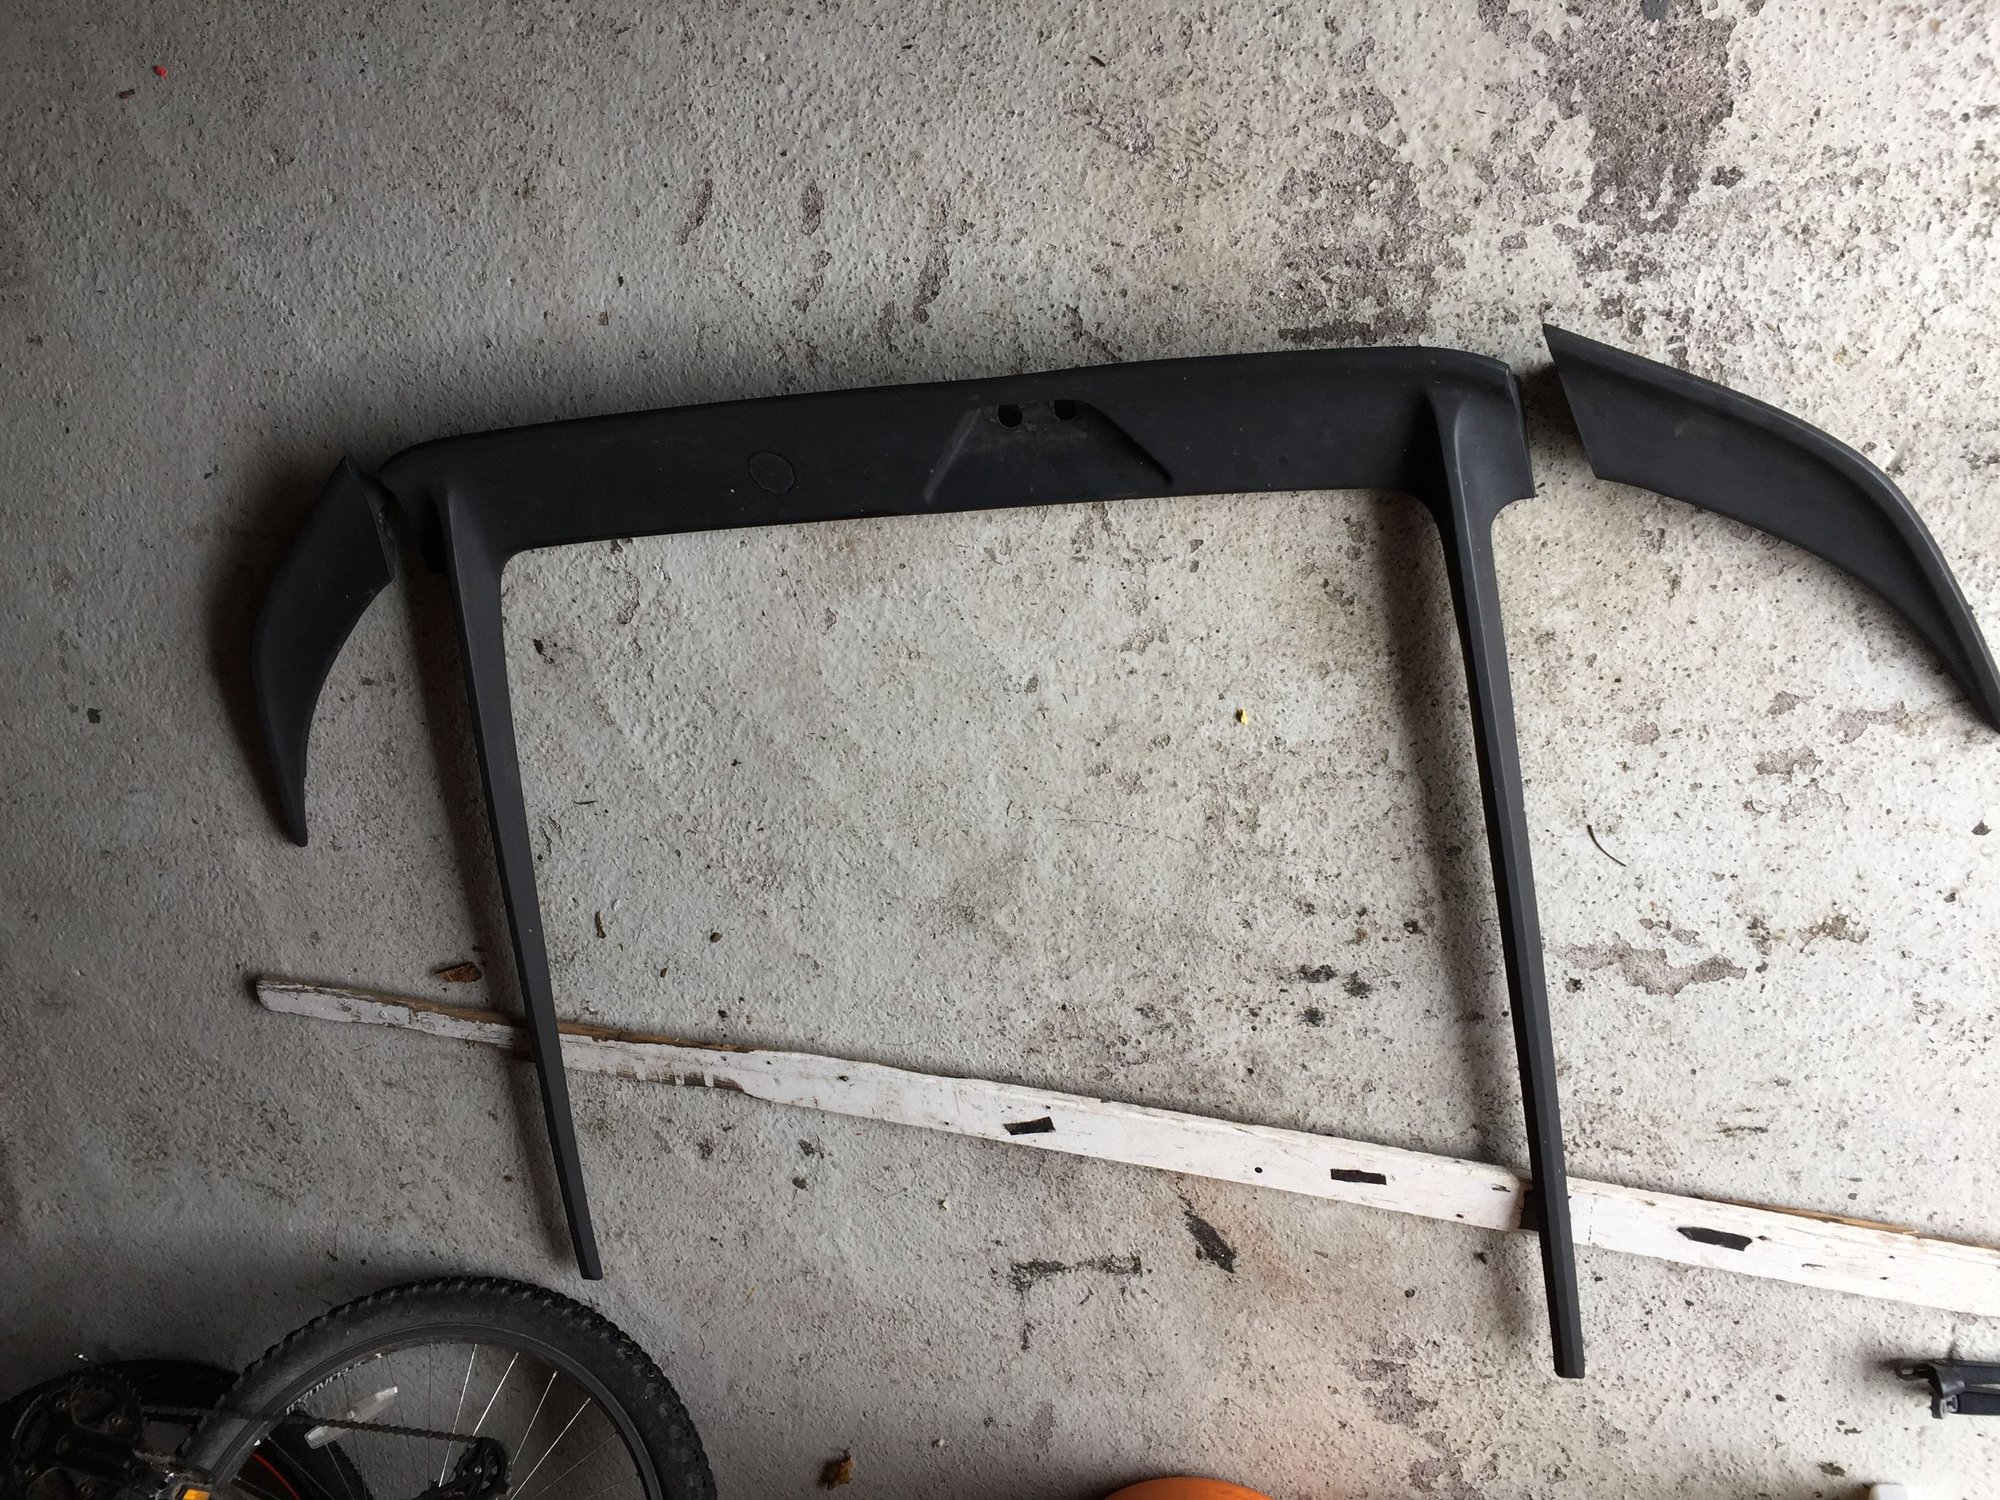
I’m a dedicated S3 guy, but, let’s face it — the S3 spoiler is clunker.
Bad material choice, integrated into the hatch window, and traps dirt and water under it!
Whether or not it contributes to the lines of the car remains a personal opinion.
Mine has been deleted.
Apparently the spoilers dropped the Cd notably, which you wouldnt expect.
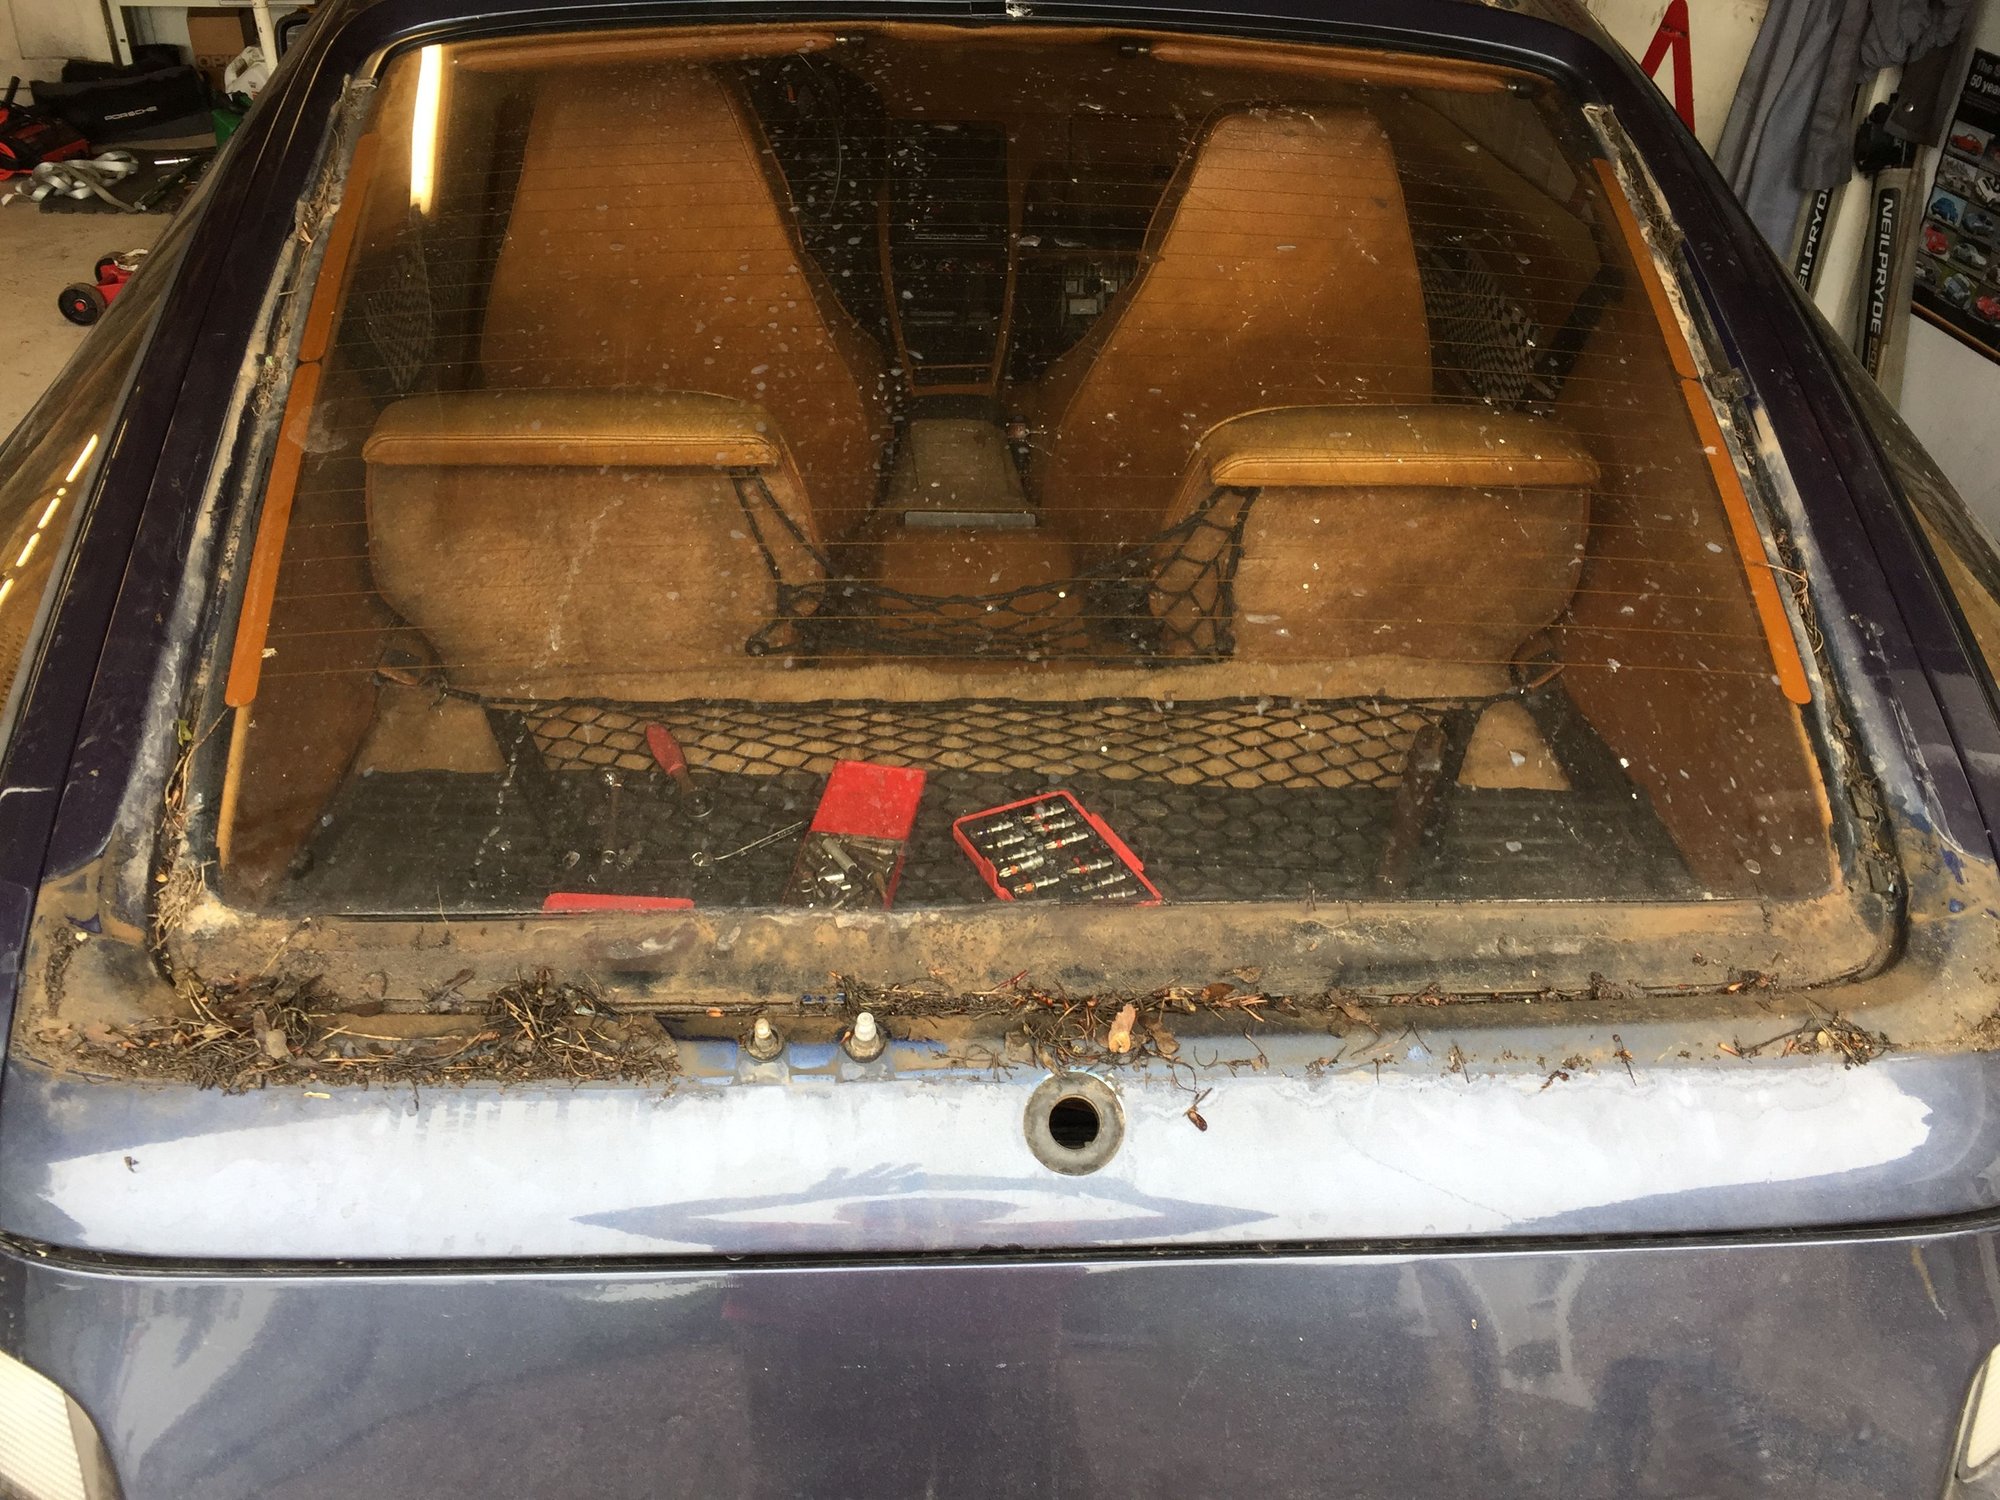
Can anyone advise the best approach to removing the forward wing attachment tabs? I have drilled out the rearward tabs which were just riveted in, but the front tabs disappear under the rear quarter glass trim. I guess the interior quarter leather trim piece needs to be removed?
Definitely an important maintenance area. My mounting tabs are long rusted away. I'm trying to figure out how to re fabricate some.
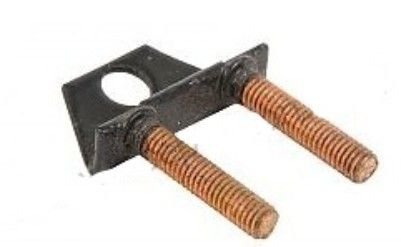
Ive just taken mine off and removed the rear qurater panel window to repair a rust hole next to the window. the mounting tabs towards the front are NLA from Porsche here in Europe but very simple to fabricate with a cutting grinder, bench vise, a metal drill bit and 2x M5 screws
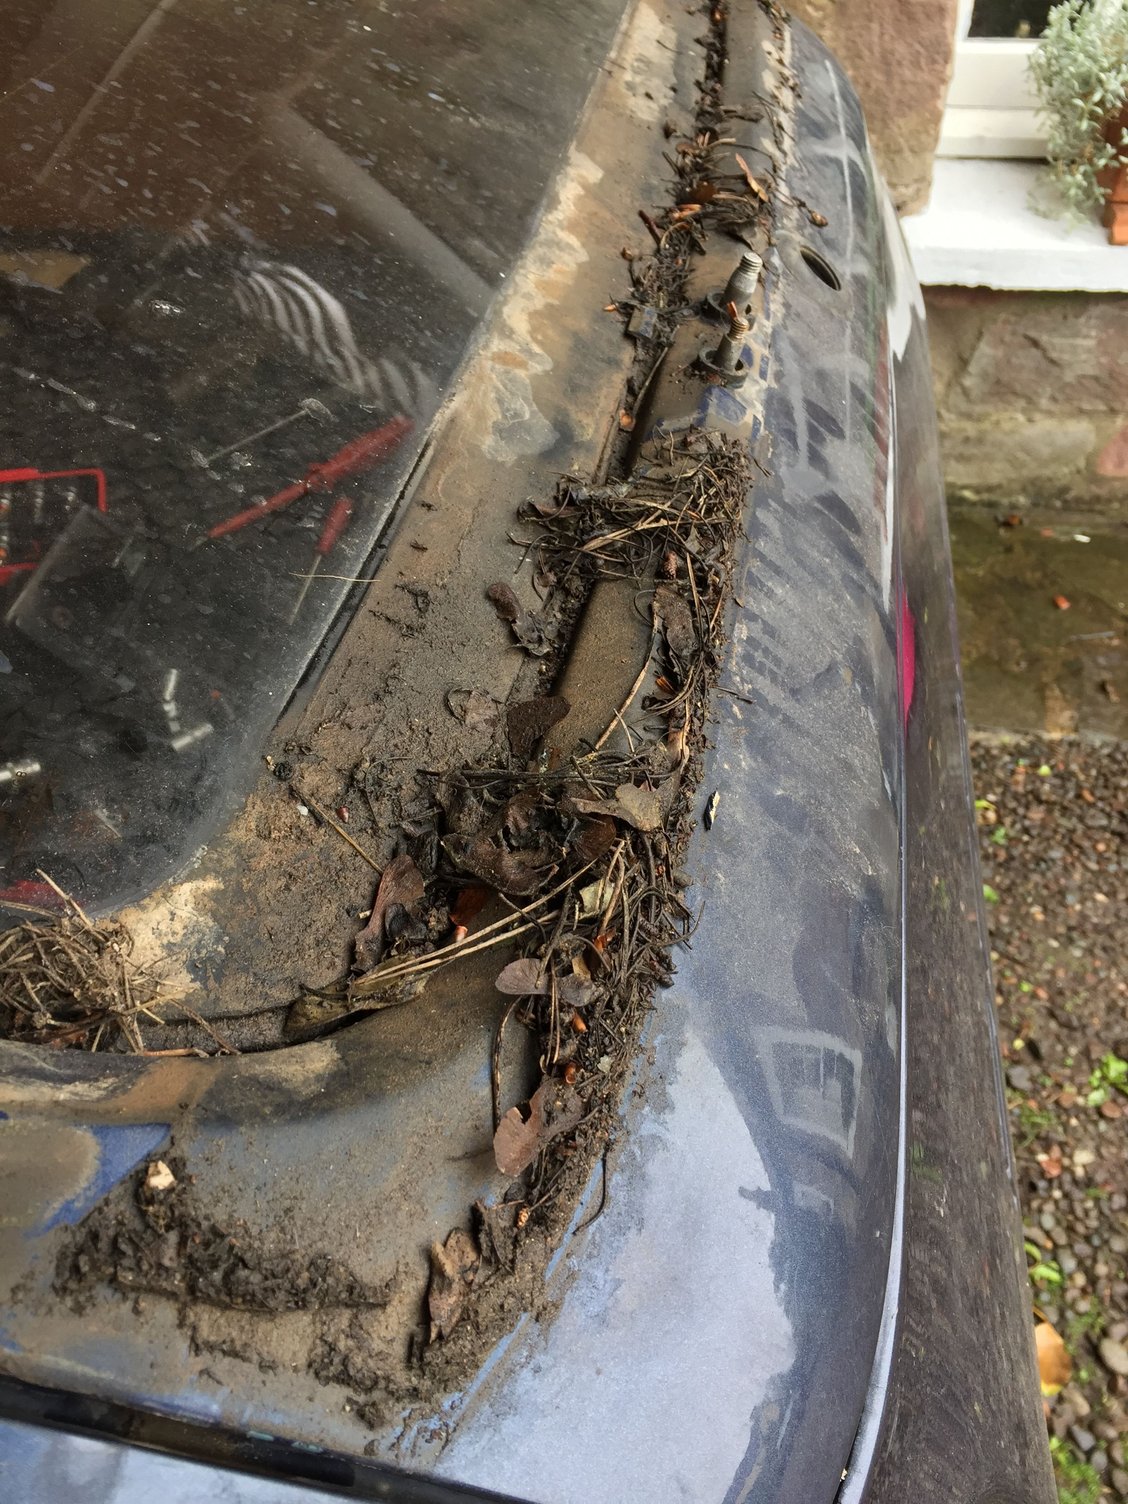
Hey, thanks. Yikes, another rust opportunity with bolt holes in the bodywork although at least the nuts are accessed inboard (and not in the wheelarch). Mine were added later and so I bet the holes werent rustproofed after drilling. :-/
sorry to be the bearer of bad news but they are in fact accessed from the wheel arch. mine were rusted to buggery and the bolts snapped with the slightest pressure. The whole area near the filler cap looks like swiss cheese and rust has also broken through just inside the rear quarter panel window. all this is on the (UK) drivers side. The other side has no rust at all. Ive cut all the rot out as per the photos and trying to figure out how patch it up. The metal is too thin to weld properly without blowing holes everywhere (I tried) so as its all non structural i plan on experimenting with metal bonding adhesive and countersunk riveting once I figure out how to contour the area around the filler cap recess.
sorry to be the bearer of bad news but they are in fact accessed from the wheel arch. mine were rusted to buggery and the bolts snapped with the slightest pressure. The whole area near the filler cap looks like swiss cheese and rust has also broken through just inside the rear quarter panel window. all this is on the (UK) drivers side. The other side has no rust at all. Ive cut all the rot out as per the photos and trying to figure out how patch it up. The metal is too thin to weld properly without distorting and blowing holes everywhere (I tried) so as its all non structural i plan on experimenting with metal bonding adhesive and countersunk riveting once I figure out how to contour the area around the filler cap recess.
The factory rustproofing was great until it started cracking and trapping moisture and dirt inside. Then it just made matters much worse. A pain to remove too so Ill scrape/ heat gun any damaged areas and coat the lot with something a bit more 21st century like self healing Bilt Hamber Dynax
Thanks, that is really helpful, I am going to check it out this morning. This is a South of France car and so hopefully I have got away lightly, it has no other rust.
Same colour as yours too, give or take. It was painted a mystery colour, which I think might be Prussian Blue.
If you want to check order a bottle of touch up paint. The paint code for prussian blue (like mine) is 33x. If you do decide to remove the inside trim to check for signs of bubbling make sure you locate all the hidden screws including the one under the rear seat and the two holding the plastic upper seatbelt bracket (took me a while to figure out)
I didn’t need to remove the window just to access the tab I just reached up the wheel arch maybe because I dropped the fuel tank and plastic compensator?
If you do decide to remove the window remove it as one assembly with the seal so you can reuse the seals as they are ŁŁŁŁ. Window pops out quite easily with piece of nylon string threaded through to push the seal lip out


 08-26-2018, 03:59 PM