When you click on links to various merchants on this site and make a purchase, this can result in this site earning a commission. Affiliate programs and affiliations include, but are not limited to, the eBay Partner Network.
The factory depends on a soft seal that fits in the screw-in nozzle fitting were the hose connects. That factory soft seal is compressed slightly between the nozzle fitting and the outside face of the plastic tank nozzle. Richard adds another seal inside where his threaded insert draws up to the inside face of that same tank nozzle. ("Seats Properly" against the inside of the tank nozzle lip) With his fitting, you have a sandwich -- his fitting, his seal, the tank nozzle lip, the factory soft seal, then the factory screw in fitting for the hose. The factory screw fitting has a groove cut in the face to help keep the soft seal from squeezing out. That soft seal deteriorates over time and eventually leaks. That's when the fitting needs to come out, but spins the insert instead of unthreading...
Originally Posted by Jerry Feather
Bob, I understand much of of what you explain, but it is pretty clear from the contents of this thread that the part of it about the seal is wrong. The inner seal is not a seal but rather a cushion, and it does not seal against the inside of the tank but rather the inside of the cup or splash guard, or whatever it is, inside the tank and that there is a significant gap between that and the inside of the tank. Th designer points out with certainty that what you think is an inner seal is not a seal but rather a mere cushion. So I still wonder what is keeping the new insert in place so it will facilitate the outer seal.
The inner seal has nothing to do with the cup inside in the tank. The new insert is held in place by friction, plus it's prevented from turning by that ear on the back. As soon as it won't turn, the factory screw fitting draws the insert the last bit towards the lip inside the tank nozzle, while compressing the factory seal on the outside against the tank. Whether the inner seal between the insert and the tank nozzle lip is needed isn't really relevant, as the seal from the factory ring gasket on the outside of that lip is what the tank used originally.
For most cars, the thirty-plus years of leak-free operation are a pretty good indication of how well it's worked. Use the new repair insert with the pieces it comes with, and you get a seal that stops flow around the outside of the insert. Install the screw fitting with a little Teflon thread sealing paste, and you easily block fuel flow through the threads. It would take 2 of those three sealing elements to fail before you'd see a leak.
Why does the designer keep posting "remember to not pull it so far through that the new insert comes past the outside lip?" That clearly suggests that it can be pulled too far through, so there is in fact no "seat" associated with the insert. My thought is that the insert is merely pulled "into place." Then the amount of friction holding it in place is still a question in my mind since the designer also says that the insert will "spin" until the finger on the inside flange comes to rest on something. That doesn't sound like much friction to me.
Here is a summary of the specifics:
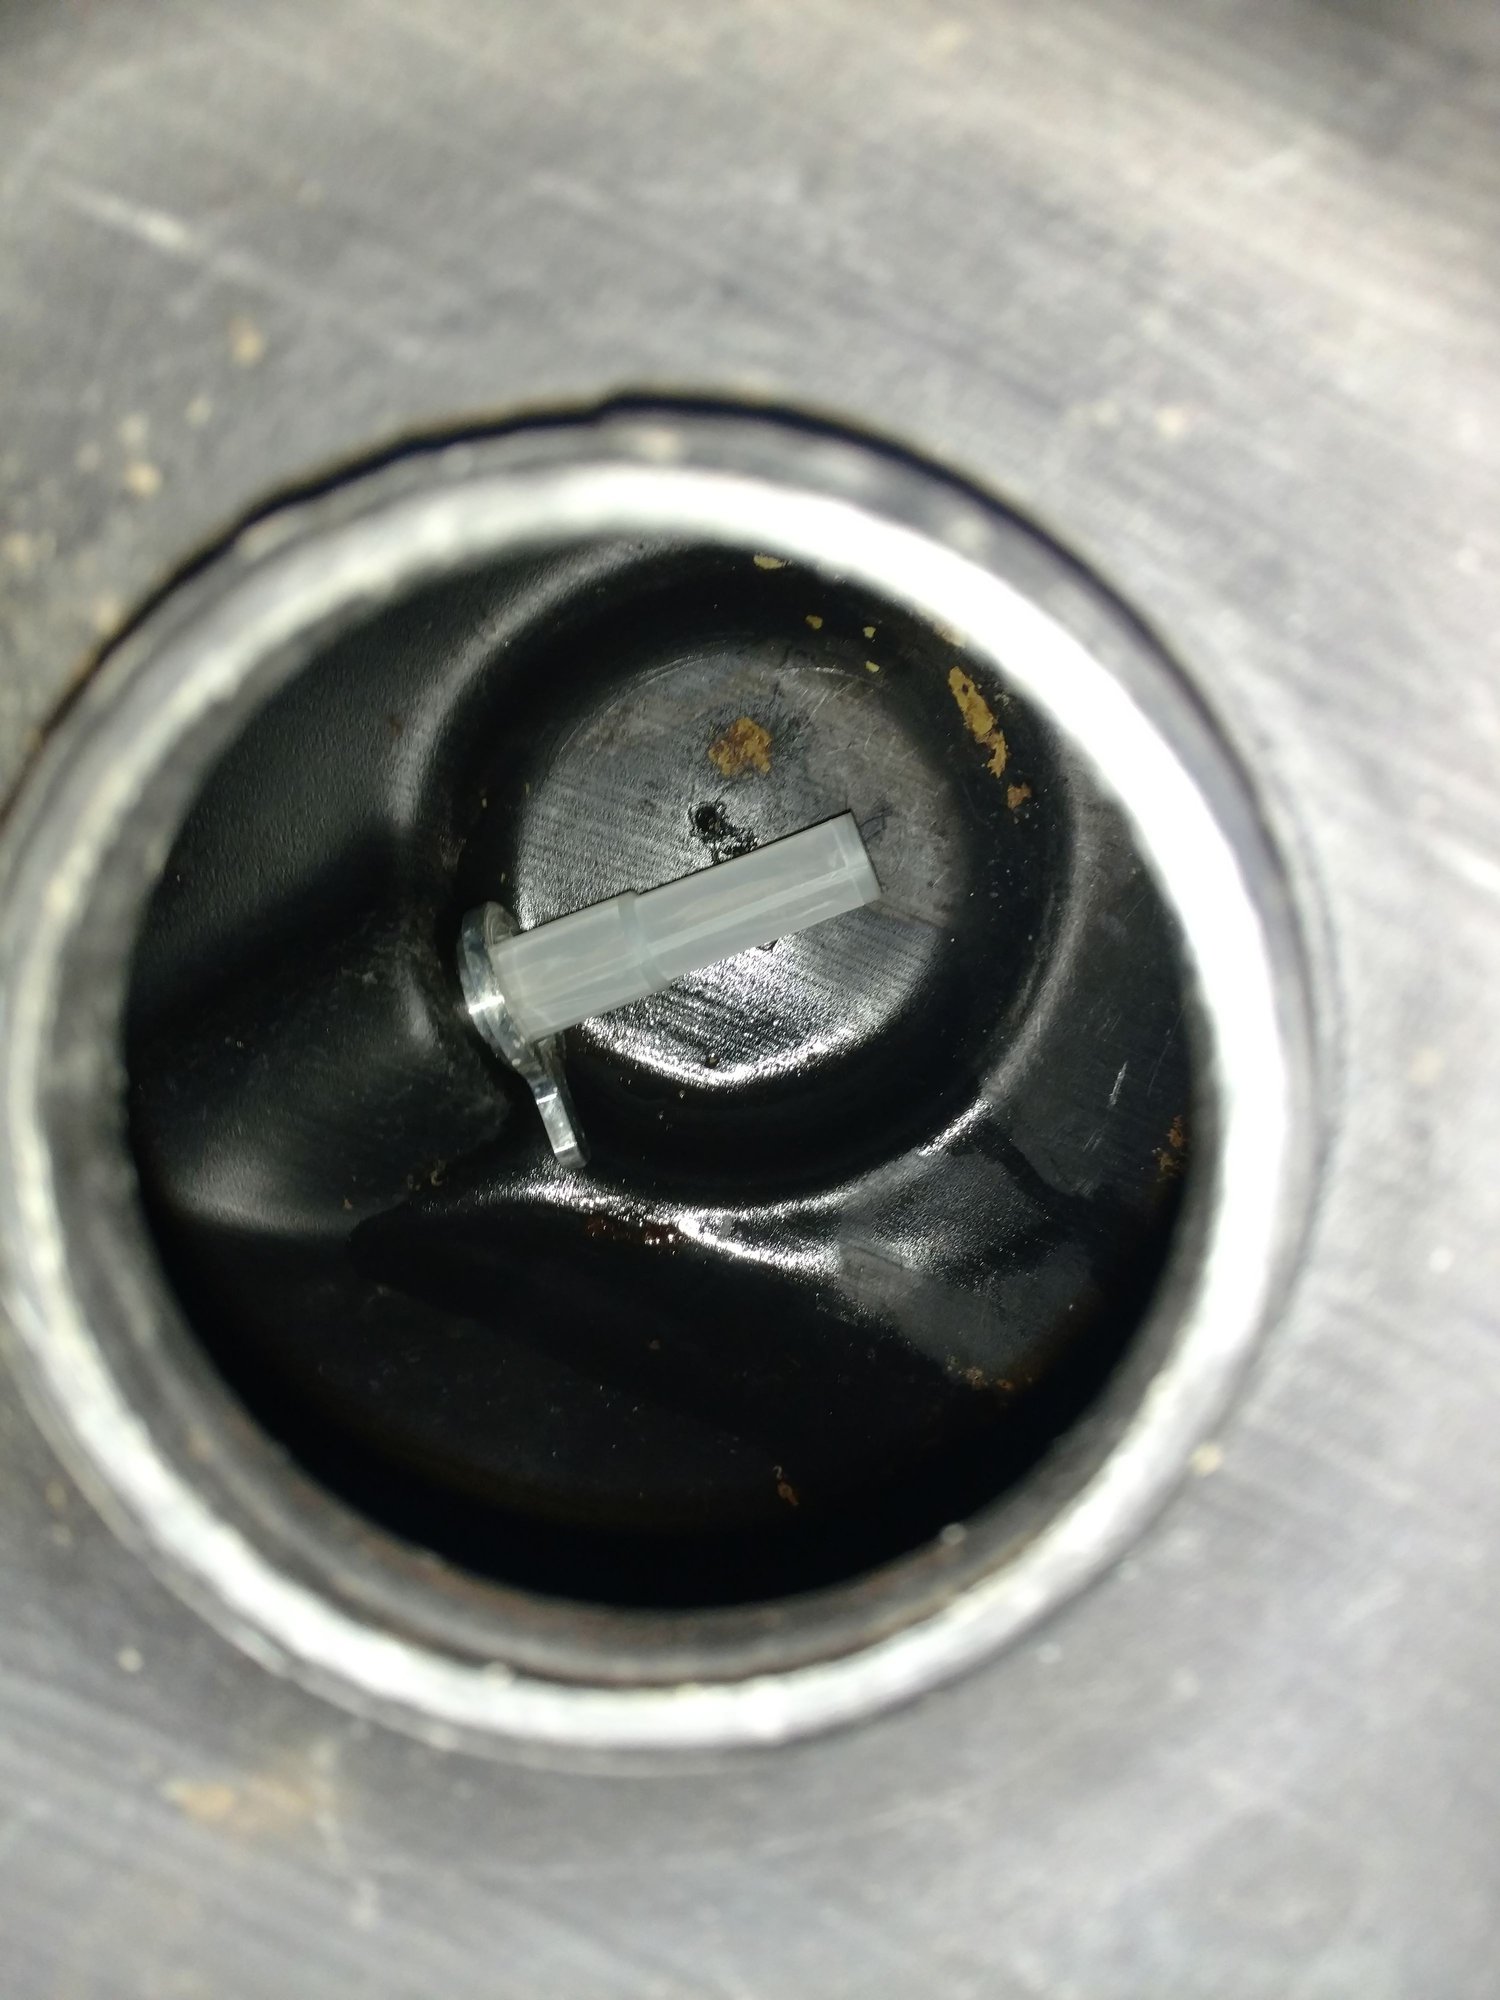
1) The Insert diameter is a few thou over-sized to allow a snug fit inside the original location. It is just slightly over-sized to prevent any unwanted movement, chafing or rattling
2) Yes, you can possibly pull the insert slightly too far into the hole if you REALLY wanted to. The rubber cushion inside can completely collapse and the insert would extend past the outer sealing lip of the tank. Preventing a good seal.
3) After threading in the screen, you will use a torque wrench to apply the final torque to send everything home. The finger will rotate inside the tank 'till it finds a fixed location. Once finger has found that location, the insert will no longer be allowed to spin and final torque can be applied.
4) The outside lip of the tank and the seal on the screen provide all the sealing properties. Just the way the tank was originally designed.
__________________
Does it have the "Do It Yourself" manual transmission, or the superior "Fully Equipped by Porsche" Automatic Transmission? George Layton March 2014
928 Owners are ".....a secret sect of quietly assured Porsche pragmatists who in near anonymity appreciate the prodigious, easy going prowess of the 928."
Why does the designer keep posting "remember to not pull it so far through that the new insert comes past the outside lip?" That clearly suggests that it can be pulled too far through, so there is in fact no "seat" associated with the insert. My thought is that the insert is merely pulled "into place." Then the amount of friction holding it in place is still a question in my mind since the designer also says that the insert will "spin" until the finger on the inside flange comes to rest on something. That doesn't sound like much friction to me.
Jerry --
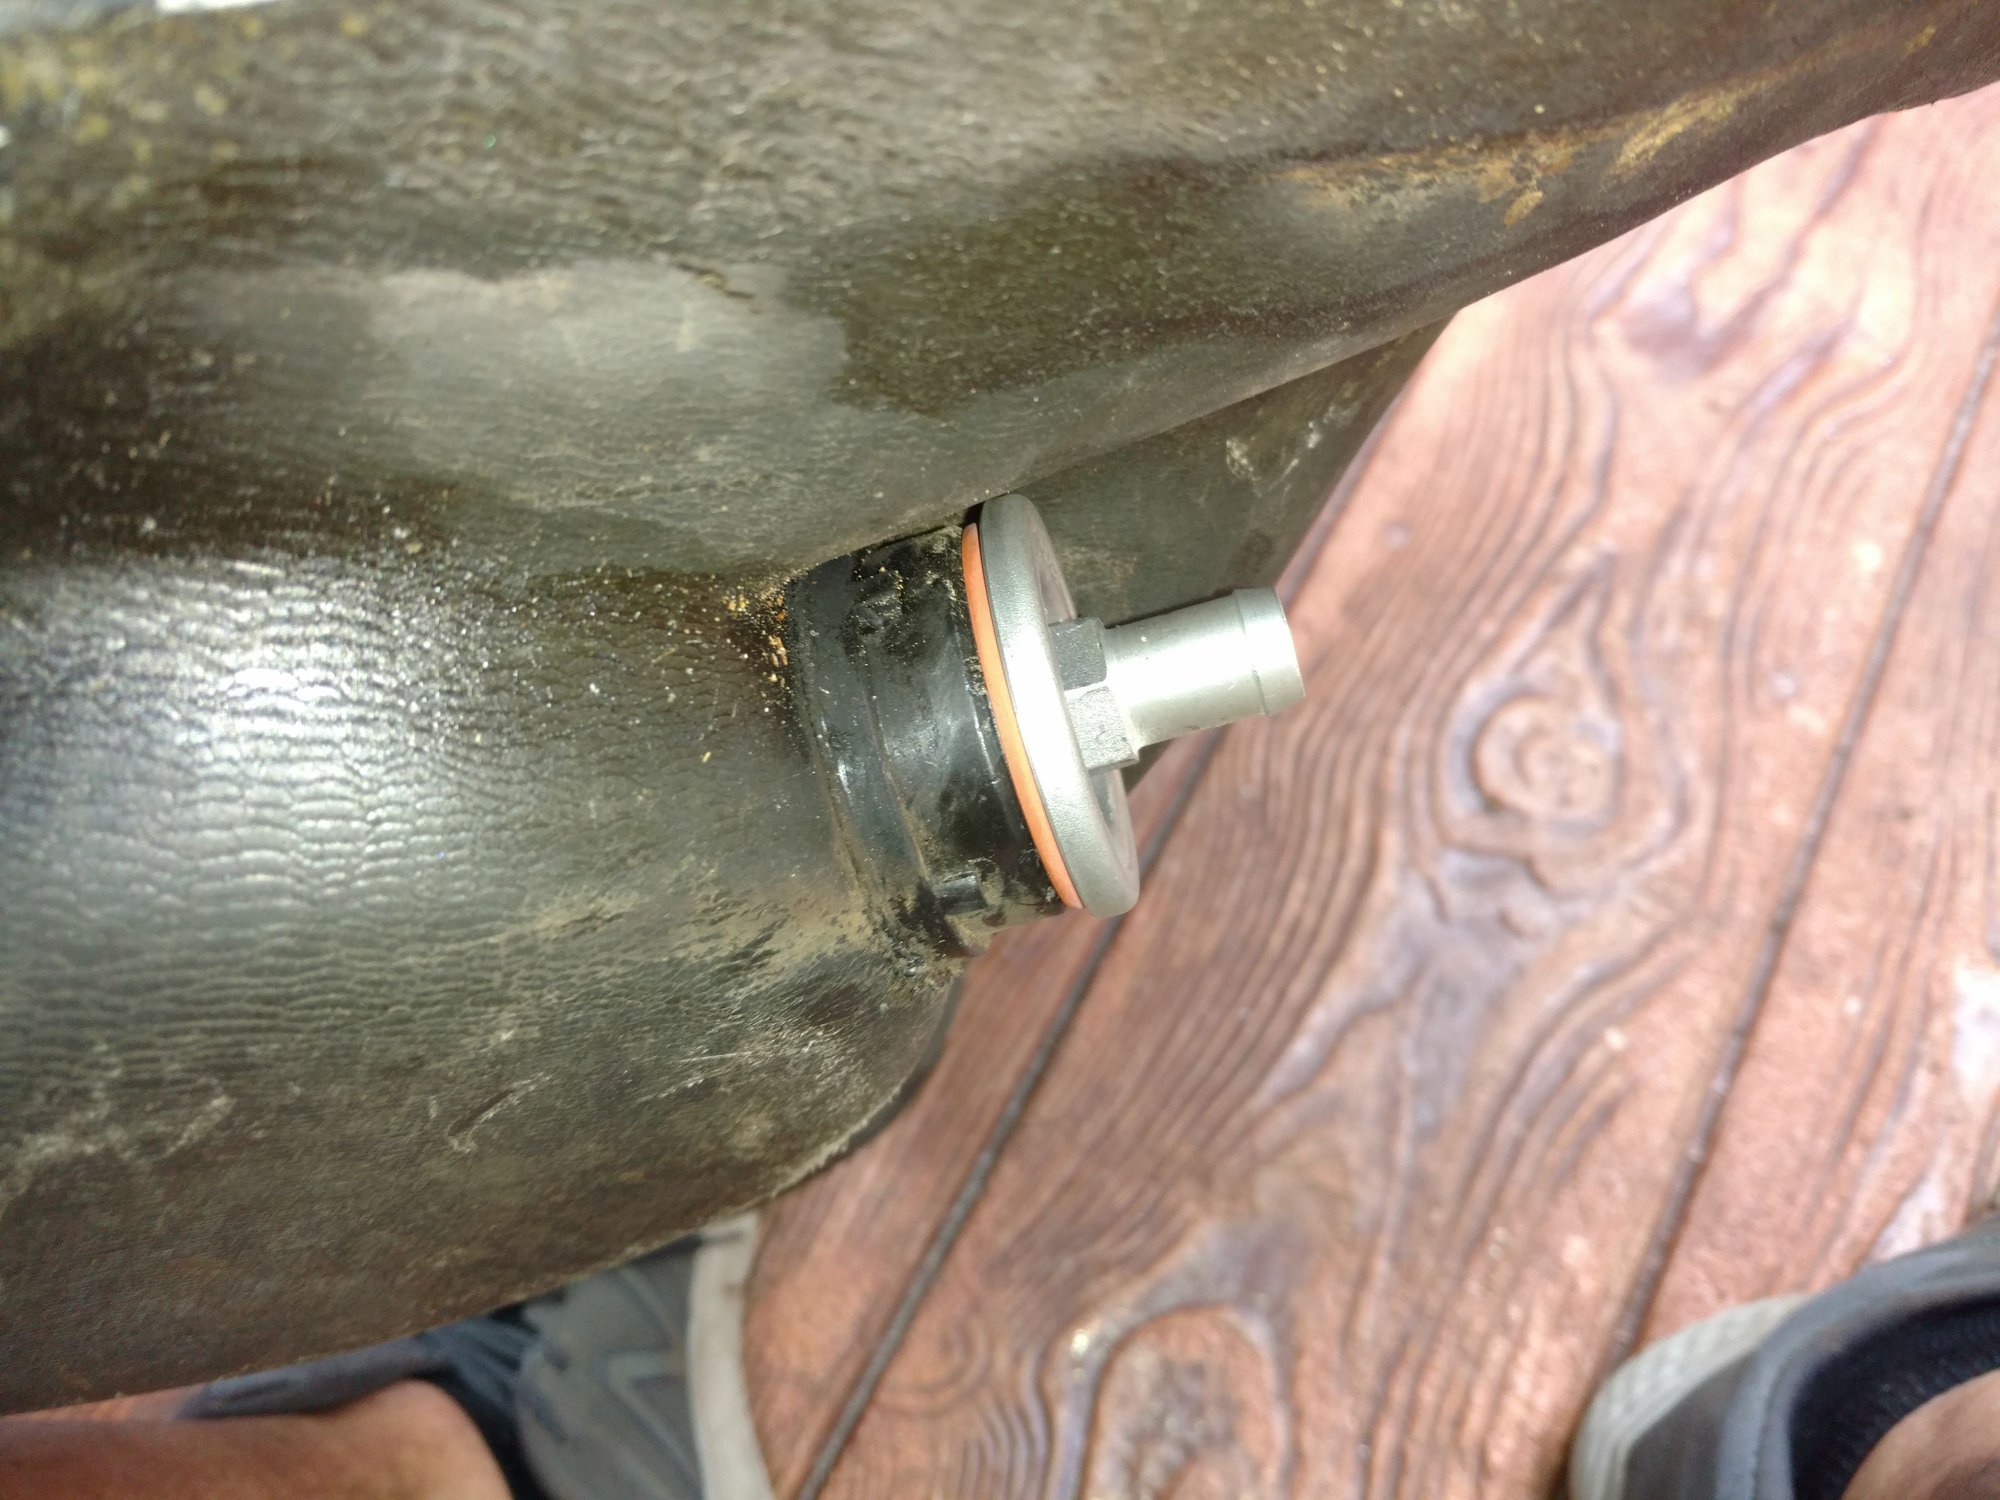
The "intallation tool" is a piece of all-thread with some washers stacked along the length to guide and pull the new piece into place in the tank nozzle. On the outside, I used a large socket (32mm crank bolt socket for 356...IIRC) that fits around the tank nozzle, so the tension is applied to the tank itself and not the sealing lip at the end of the nozzle. While tightening, I continuously monitored the position of the new insert relative to that lip. It's easily possible to draw the new piece right through that lip, risking damage. Since we are depending on the sealing both inside and outside of that lip, damaging it is not a Good Idea. Just pull it in until the insert is up against the inside of the lip, and no further. Then a little Teflon goop on the threads, and tighten the factory hose fitting as BauerR recommends. I think I've spent more time and effort typing the descriptions than it takes to install the thing in the tank with the tool. It's really easy. It works.
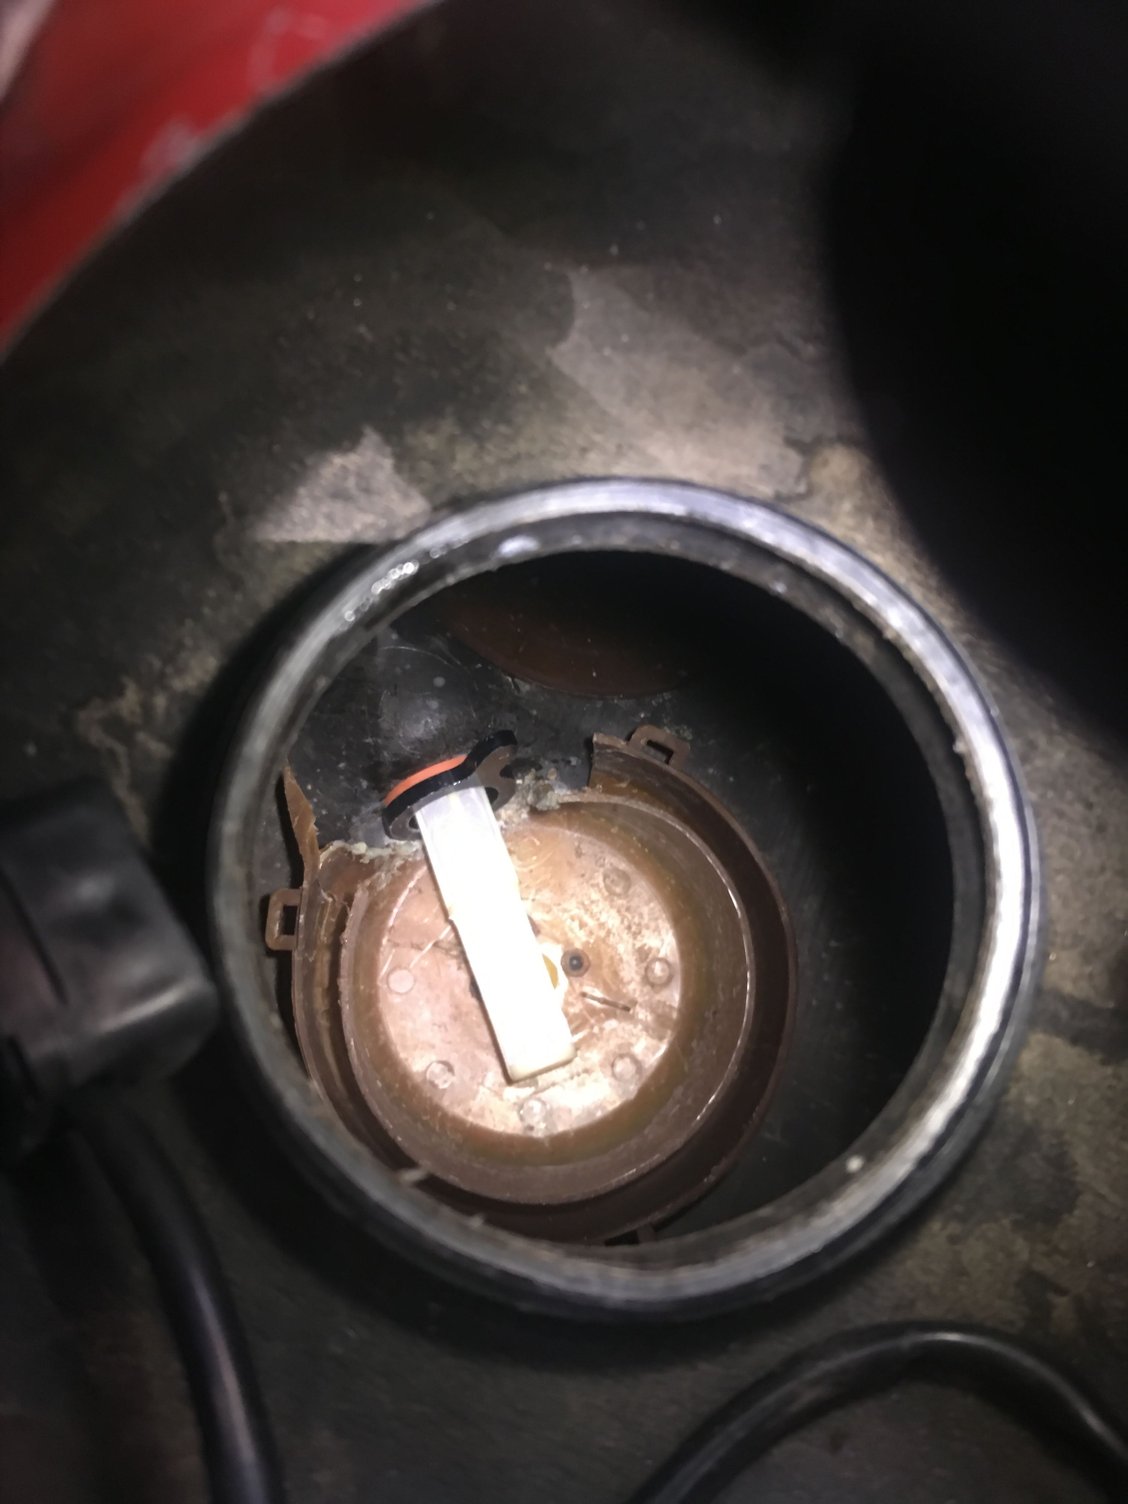
My car is back together and running nicely with Bauer's insert. I am attaching a photo of how my insert is assembled. I was the victim of a detached sump bowl. I have one other tank with detached sump, as well. I found this very common in heavily shellac'd tanks that have sat with gasoline in them for 20 years(story for another day). As the fuel turns to varnish underneathtthe bowl, it will expand and pop the bowl off.
In my case, the insert works very well DIRECTLY mounted against the wall of the tank. Then, after mounting it and installing the strainer, my 11 year old son put his arm in the tank, and slide the bowl back into position. If you have a detached sump bowl, DO NOT USE the insert to hold the bowl against the tank wall. It will move the hole in the top of the bowl off center, ever so slightly, and will prevent your sending unit from slipping down into the center of the bowl. So, in my case. Install was: Push insert through the tank opening. Screw strainer into place and tighten it down to draw insert tighter and make good seal with external seal(as intended by factory). Move bowl into place, sliding the mounted strainer through the hole of the bowl. Install sending unit tube. Sending unit tube willhold bowl securely in place and will allow NO movement, at all. I can actually flip the tank around, flip it upside down, and rotate in all directions and confirm that the sump bowl holds very nicely, between the sending unit tube and the strainer holding it in place. I now have 100 miles on the car. No leaks of any kind I initially had a "drip" at the strainer gasket, but slapping a 17 mm wrench on it, and giving it a little extra torque has resolved the leak. I will keep an eye on the strainer over the next few weeks.
Had a Rennlister reach out to me about his installation. His concern is that the insert deforms the sump quite a bit when it has been drawn into the fuel.
Are there any concerns about the deformation? He suggested enlarging the hole to allow the threaded insert to sit directly against the tank but I'm not sure how that would work with the finger.
I'm having trouble getting this to seal. Where should it be pointing when it is fully tightened? I started it at straight up position, should it rotate all the way around to the right side, looking down at it?
I'm having trouble getting this to seal. Where should it be pointing when it is fully tightened? I started it at straight up position, should it rotate all the way around to the right side, looking down at it?
Brett, it should rotate until the finger hits the tank bottom, that keeps the insert from continuing to spin so that you can thread in your strainer. The liquid seal is the gasket on the strainer against the outside of the tank.
I actually left the inner baffle in place and melted the one side of the baffle wall with a long metal band that I heated up. Pics included. Made the installation and seating a breeze.


 09-19-2018, 08:21 PM


 George Layton March 2014