When you click on links to various merchants on this site and make a purchase, this can result in this site earning a commission. Affiliate programs and affiliations include, but are not limited to, the eBay Partner Network.
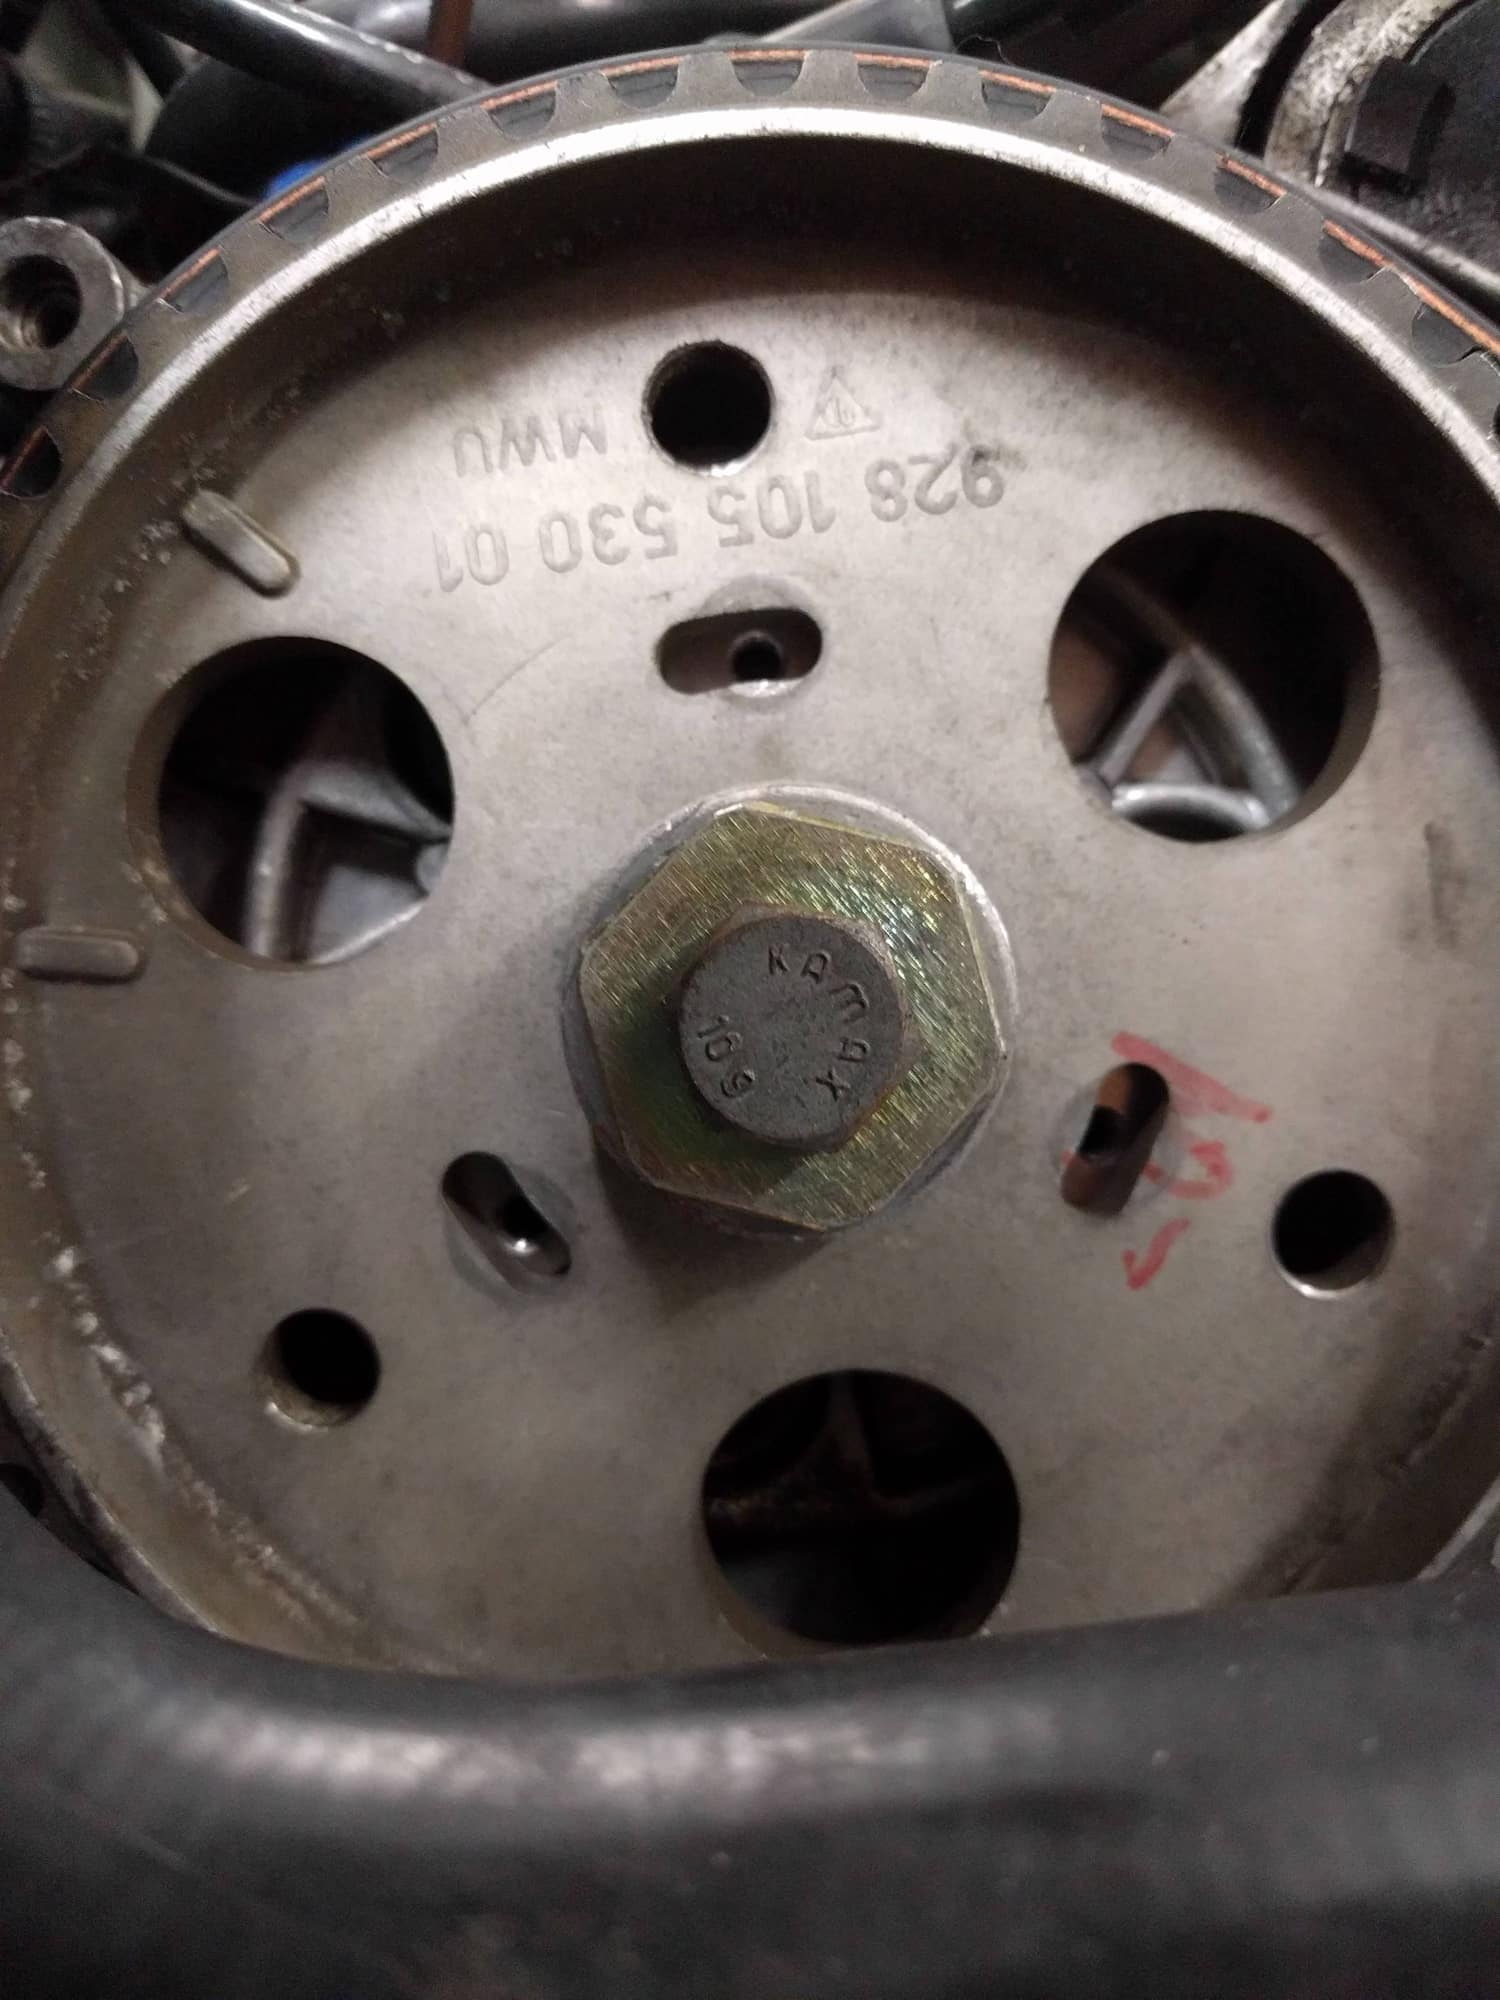
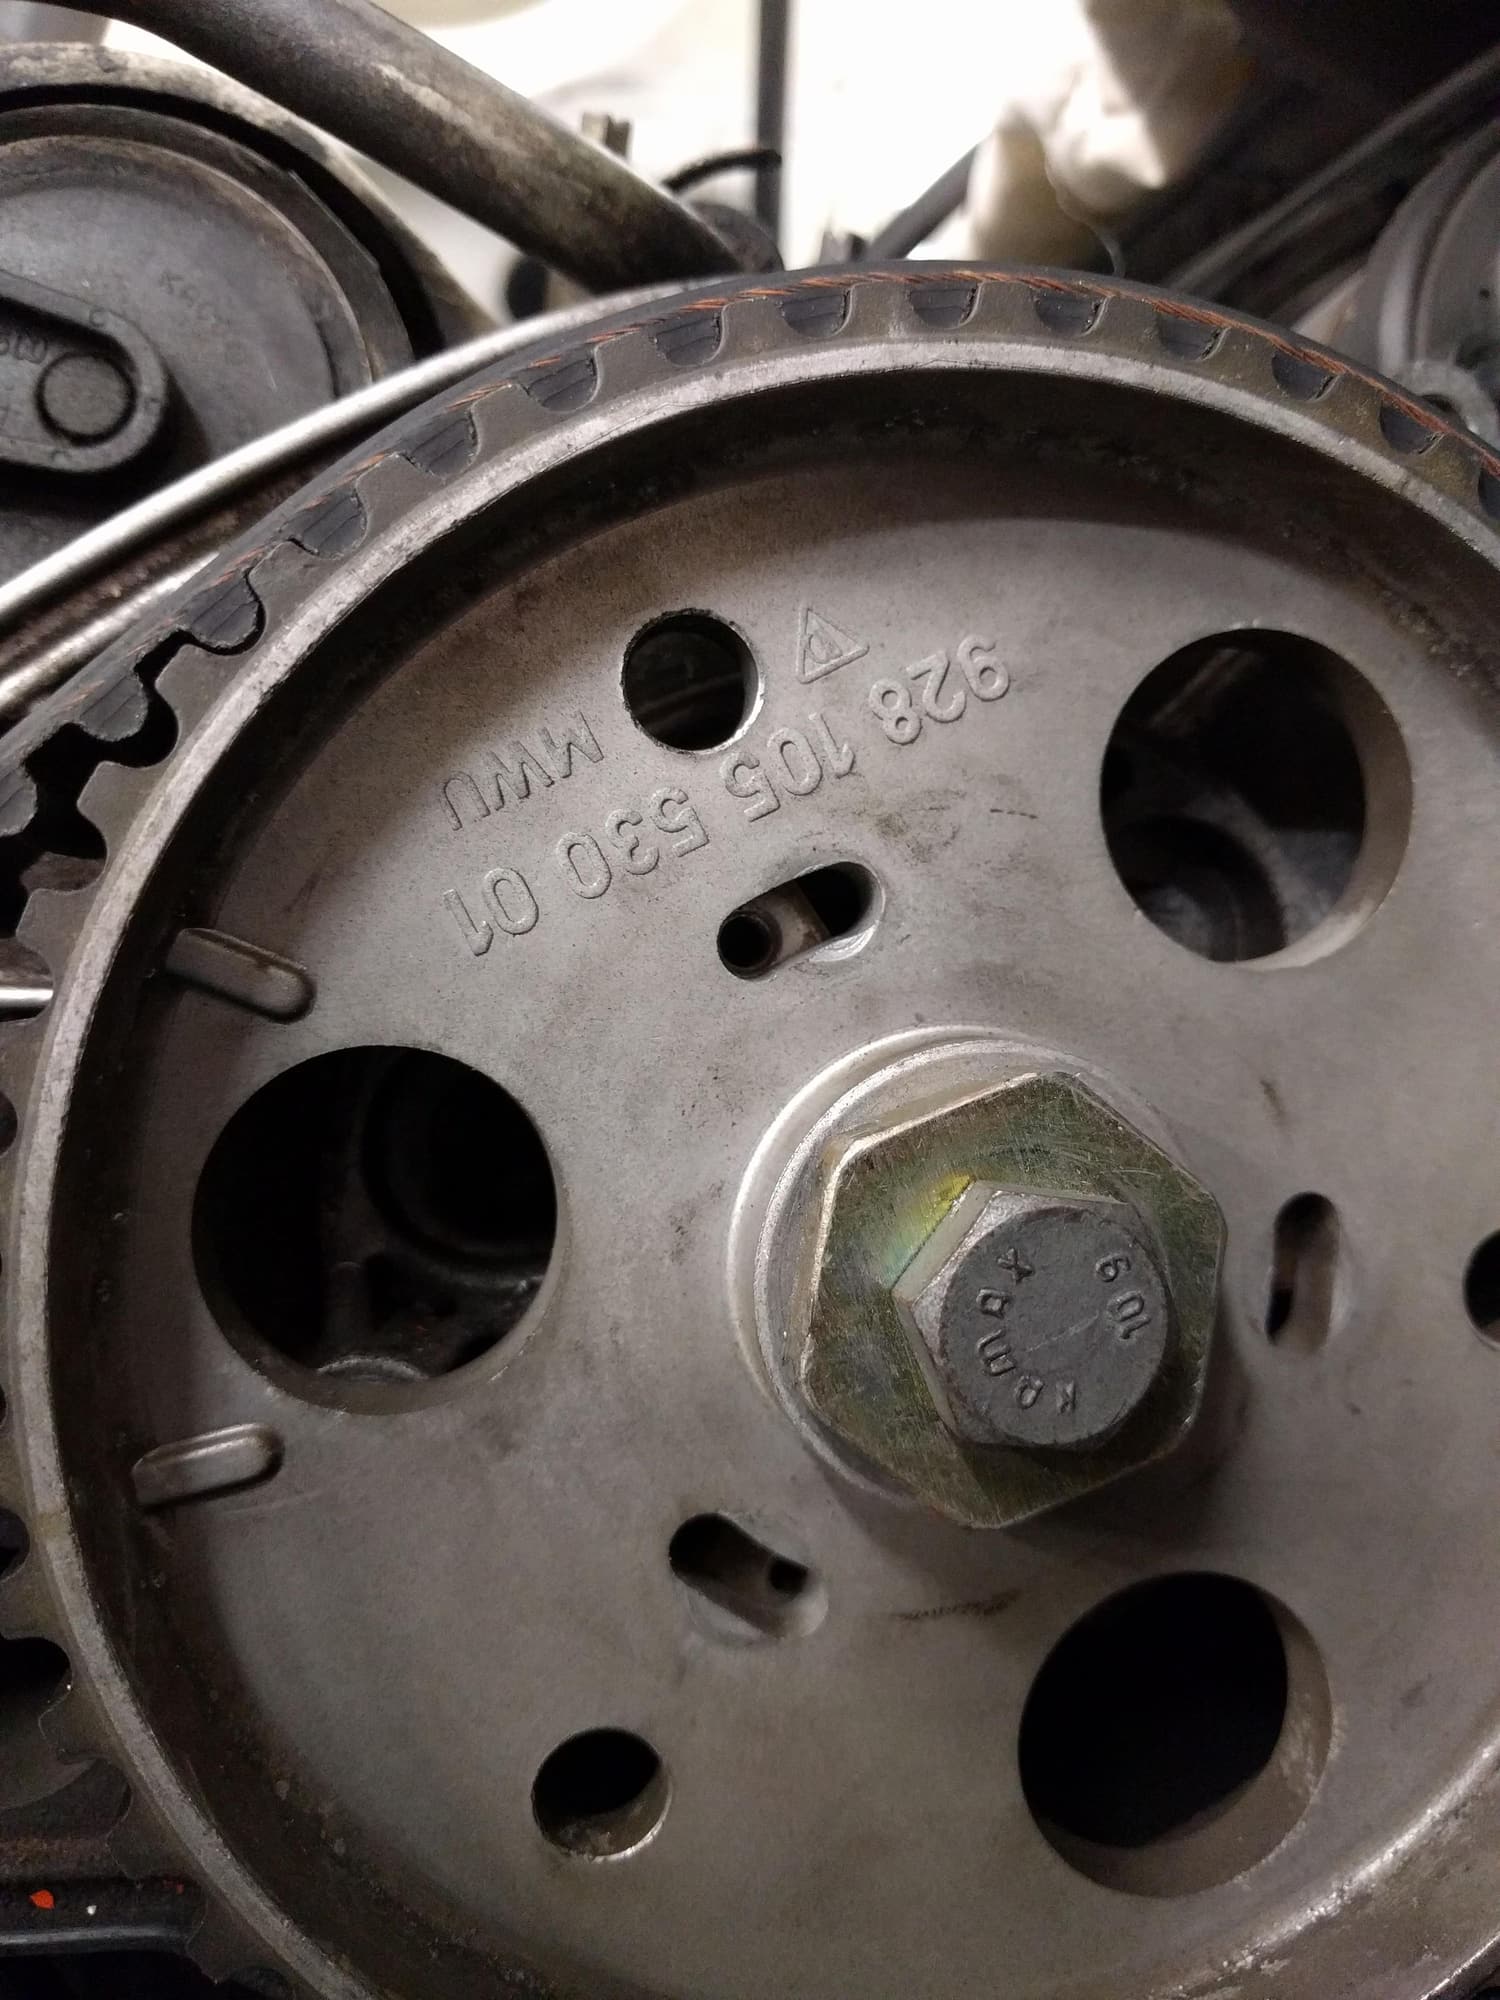
I'm in the middle of replacing the timing belt on my 1986.5 928. I took both of the distributor "rotor buttons" off so as to be able to access the wrench flats on the end of the cam gears. Now I am ready to put the rotors back on. On the 5-8 bank side of things, the holes for the small screws that hold the rotor on are not centered in the slots, in fact they are jammed off to the edge of the slot. In fact, I can't get the small screws to start in 2 out of the 3 holes. The ones on the 1-4 side are generally centered in the slot.
I can't find anything about this in the WSM. In the PET, it looks like the plate with the 3 tapped holes is a separate piece from the cam gear and is held in place by friction? If that is the case, can I simply break the torque on the bolt that passes through the center of the cam gear, shift the position of the plate, and tighten everything back up?
Pictures of the good one and the bad one attached.
Where are the timing marks on the cam sprockets relative to the timing marks on the back casing? Suggest you take a picture of the timing marks relative to the sprockets and post them.
Assuming you have not undone the sprocket bolts at all both rotor arms should go back on no problem. Beyond that, whether or not the cam timing is correct remains to be seen. When one of the sprockets is at full adjustment it often suggests that something is not quite right but nothing catastrophic.
You may need to time the cams but that presupposes the cam timing was not right to start with. Do you have access to the 32VR tool?
As Fred has referenced, you really probably need to borrow or buy PK32V'r - cam timing tool and the PKBumpStick. At http://liftbars.com/indexlp.htm from Roger at 928srus to do the job properly.
When I first got the car, and was having some issues, I checked the marks and they were spot on.
When I started the timing belt job, I went right to the step that places the crank at 45 degrees and really didn't pay much attention to the marks.
They are both spot on now but that is because I rotated the cam gear as required to make the marks come out correct, on both sides. Maybe not important, but the camshaft on this side (5-8) moved on me whilst I had everything apart so I had to manually move it back into the correct position. That is why I took the rotor off, to access the wrench flats for turning/holding the cam in position.
Is the alignment of the plate with the small holes associated with precise adjustment of the cam timing?
I am sure you remembered that the buttons can only go on one way with the contact pointing between the two marks on the outside rim of the cam gear.
__________________
Does it have the "Do It Yourself" manual transmission, or the superior "Fully Equipped by Porsche" Automatic Transmission? George Layton March 2014
928 Owners are ".....a secret sect of quietly assured Porsche pragmatists who in near anonymity appreciate the prodigious, easy going prowess of the 928."
The cam gear to cam gear backing plate timing marks do not control the actual cam timing,
You can have the gears timing marks spot on and the cams may or may not be timed correctly, and once that 27mm locking bolt is removed the cams will usually move do to valve spring pressure.
As you have noticed the gears have slots in them allowing for gear to cam adjustment, the threaded holes are in the three pointed star connection that is keyed directly to the cam,
To get the exact cam timing , you need to do one of two things,
1. follow the WSM and remove the cam covers and use a dial gauge on a cam lobe (very timely process).
2. purchase or borrow a PKen 32v'r tool (it bolts directly to those three threaded holes) thus bolting to the actual cam position regardless of the Gear position, follow the tools instructions.
With regard to the rotor arms the trick to remember is that they mount with the arm pointing to the 3 O'clock position when No 1 cylinder is at TDC on its firing stroke- as Roger said, they can only be fitted in one position. If you cannot find a position where they fit then chances are the sprocket has slipped relative to the camshaft but that is most unlikely unless the bolts are not torqued correctly.
Other relevant points to note are that the belt tension has to be set with No1 at TDC on its firing stroke [no other position as I understand] and if you need to rotate the cams independent of the crank do so with the crank locked at 45 degrees BTDC with a wrench on the 30mm washer not the cam bolt. Doubtless you will be aware of such but...?
When stringing the belt it is possible to be one tooth out and alignment compensates with the sprocket at the extreme end of the adjustment range. Whether this has happened in your case I have no idea. If you are going to play around with the timing belt and cams the 32VR tool and the PK bumpstick kits are a no brainer and make adjustments child's play.
"Looking at the photo, you can see where the nuts once were and it appears the gear has defiantly moved".[/QUOTE]
Sorry - I just re read my post, what I meant to say was that the backing plate (not the gear) has moved. The gear has a woodruff key to the cam so the gear cannot move unless the belt and in turn the Cam moves. The backing plate is held tightly with the locking nut which you commented, you had used to turn the cam with. If you went counter clockwise maybe you loosened it enough to let the backing plate slip
Thanks for all the comments. I have another issue which I need to resolve first, which is that the Porken Tensioner cylinder is extended out a little farther than Ken's directions specify. Mine is extended about 8.5 mm. Ken calls for a maximum of 7 mm. I emailed Ken directly regarding this issue. Once I get that resolved I'll move on to the timing issue. Regardless, as someone pointed out, it's a no brainer to buy Ken's tools for setting the timing precisely. The procedure described in the WSM does sound to be tedious.
For what its worth, I never moved the cam with the bolt. I used the cast in place wrench flats. Tomorrow I'll check the torque on the bolt. If it turns out to be loose, that would explain some things.
"Looking at the photo, you can see where the nuts once were and it appears the gear has defiantly moved".
Sorry - I just re read my post, what I meant to say was that the backing plate (not the gear) has moved. The gear has a woodruff key to the cam so the gear cannot move unless the belt and in turn the Cam moves. The backing plate is held tightly with the locking nut which you commented, you had used to turn the cam with. If you went counter clockwise maybe you loosened it enough to let the backing plate slip
i read this and thought a better description might help folks understand the relationships a little better.
The belt indexes on the crank sprocket, so the relationship between crank and cam gears is decided by the dimensions of the engine. Whether the notch on a cam sprocket lines up perfectly with the index mark on the backing plate is a function of those dimensions and belt stretch.
The sprocket sits on the end of the cam. The sprocket can rotate relative to the cam and vice-versa. The cam timing varies and is adjusted by moving the cam relative to the sprocket. With the sprocket held in place by the belt, you’ll loosen the bolt on the end of the cam, then turn the cam until the timing is correct. Those three screws for the ignition rotors don’t secure the sprocket to the cam, but can be good witness marks to tell you that things have moved.
If the screws are no longer near the middle of their slots, it’s quite likely the cam has slipped in the sprocket.
You can verify cam cam timing with the Porken 32VR tool. Adjustment is easier from the top if you add the “bump stick” to the mix.
Know that, once timing is correct, you must torque the cam nose bolt correctly. Or risk breaking the nose off the cam.
The drive flange on the end of the cam is indexed to the cam with a Woodruff key. The key does not engage the sprocket.
Dr. Bob, as usual you come through with a cogent explanation. My 944 based knowledge (and probably most cars) would have the cam sprocket keyed to the cam shaft. As you stated, the Porsche design for the 928 allows a small amount of adjustment of the cam timing, plus or minus. A feature for sure, but also a risk if things are not tightened up properly.
Since you threw out the bait regarding the proper torque, my approach would be:
Remove the big bolt.
Clean the threads on the bolt and internal to the nose of the cam shaft with solvent and brushes.
Test fit the bolt to ensure that it can be turned with fingers.
Reassemble backing plate and sprocket, with a light coating of motor oil on the threads. No thread locker.
Adjust the timing.
Resisting the torque using the large hex assembly and Ken's nifty tool, torque to WSM spec using my hopefully accurate torque wrench.


 08-01-2018 | 04:19 PM


 George Layton March 2014