When you click on links to various merchants on this site and make a purchase, this can result in this site earning a commission. Affiliate programs and affiliations include, but are not limited to, the eBay Partner Network.
As some of you know, I gave a pair of OEM rotors to a company a while back so they could produce a 2 piece rotor for the 335i. In November I received the 2 piece rotors and have had them on my car since.
What Company did I choose? I chose RacingBrake.
Why RacingBrake?
Becuase I was very impressed with their patented designs (which I talk about below), and I was impressed with their detail to making a quality product.
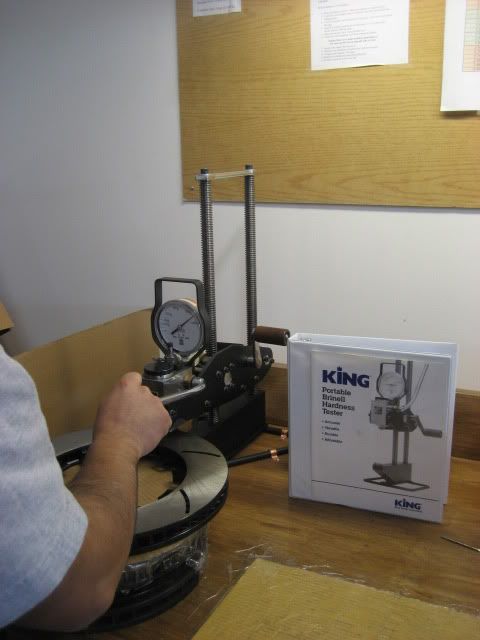
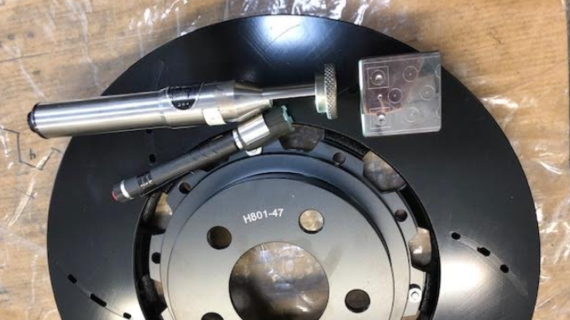
Every rotor is heat treated and gets put through a hardness test.
They use a hardness tester by applying a 2000kg load on the rotor with a 10mm ball to create an indentation in the rotor. After applying the load, they measure the width of the indentation making sure that the width is between 3.65mm to 3.15mm, which translates to 185-245 respectively on the Brinell hardness scale.
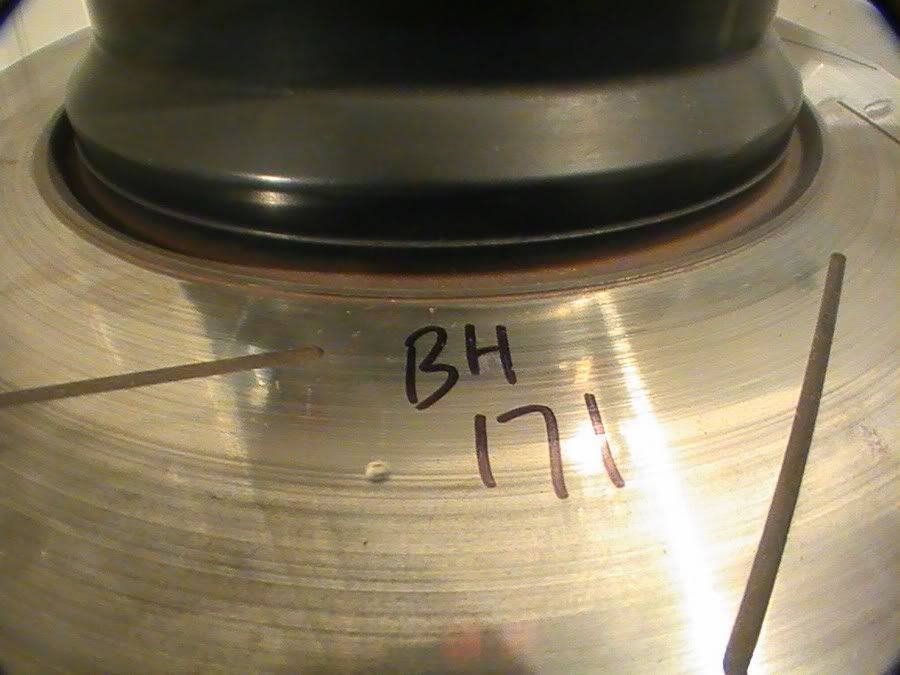
The OEM rotor was about 145 on the Brinell hardness scale and the Stoptech rotor was 171.
The RacingBrake rotors that I tested were 196 and 193.
Here is the Stoptech rotor after indented:
Why 2 Piece Rotors?
There are a couple reasons why 2 piece rotors are better than the standard 1 piece rotor.
First off, 2 piece rotors are made with an aluminum hat and a steel rotor. Since they have an aluminum hat, they are lighter than the single piece rotors and if or when there�s a time for a replacement rotor, you can purchase just the rotor and still use the same aluminum hat.
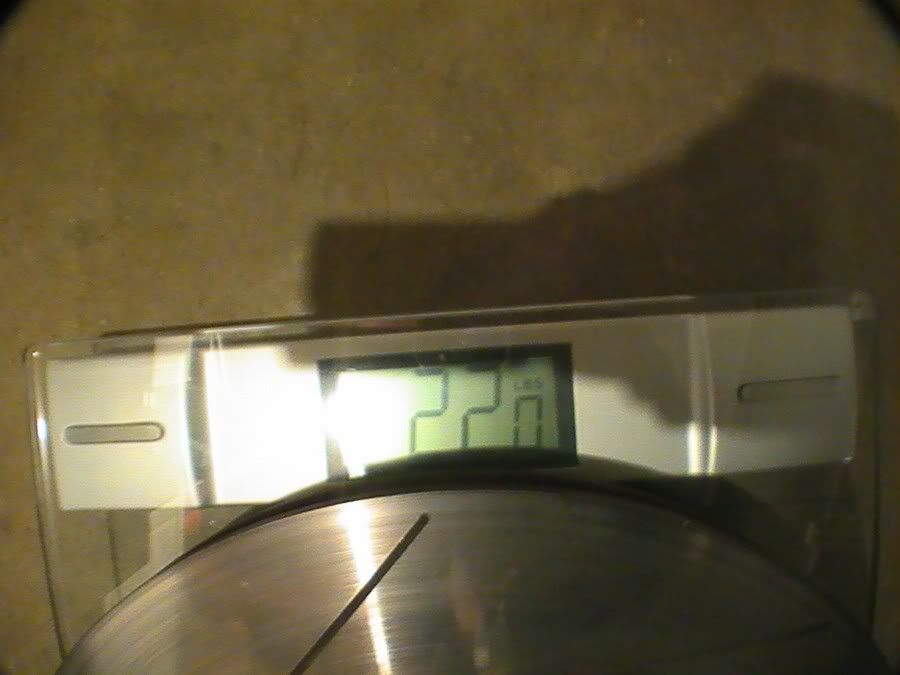
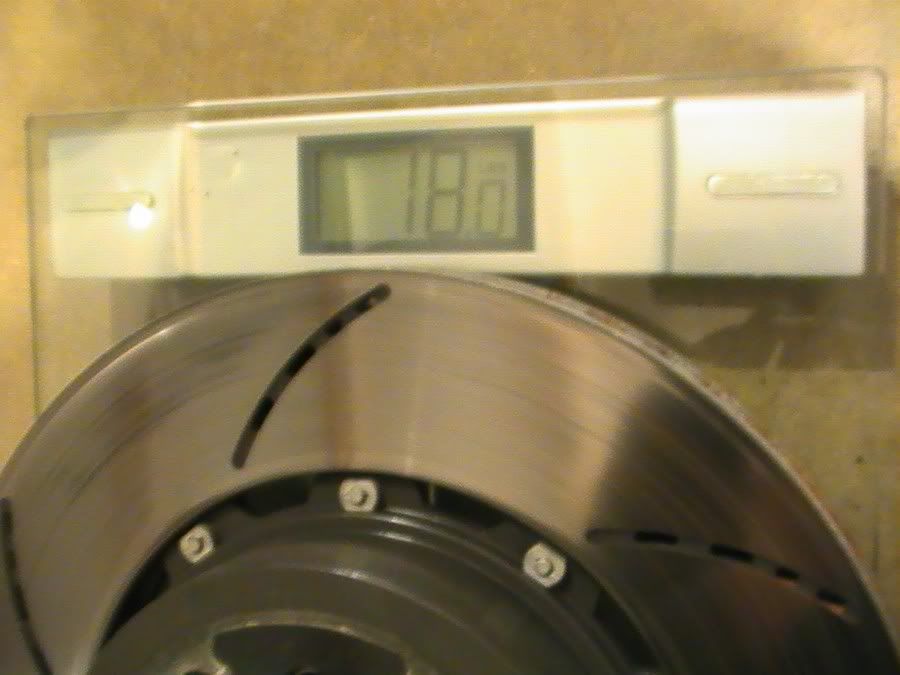
I weighed the Stoptech rotor (after a couple resurfaces) and compared the weight to the RacingBrake rotor (1 track day of use). The Stoptech rotor was 22.0 pounds (Figure i) and the RacingBrake rotor was 18.0 pounds (Figure ii). (Sorry for the bad pictures but I had to use a different camera for these pics)
Figure i
Figure ii
RacingBrake's Patented Designs
RacingBrake has a few patents and I�d like to talk about a couple of them:
2 Piece Rotors that Mount in the center of the disc
This is one of my favorites because when I saw this, I was very intrigued why other companies haven�t done this in the past. If anyone has seen a Brembo BBK rotor or a Stoptech BBK rotor, you will find that the hat bolts to one side of the rotor disc (Figure A). Most of these rotors have directional vanes so given the fact that they bolt to only one side then they can only be used on one side of the car.
Figure A
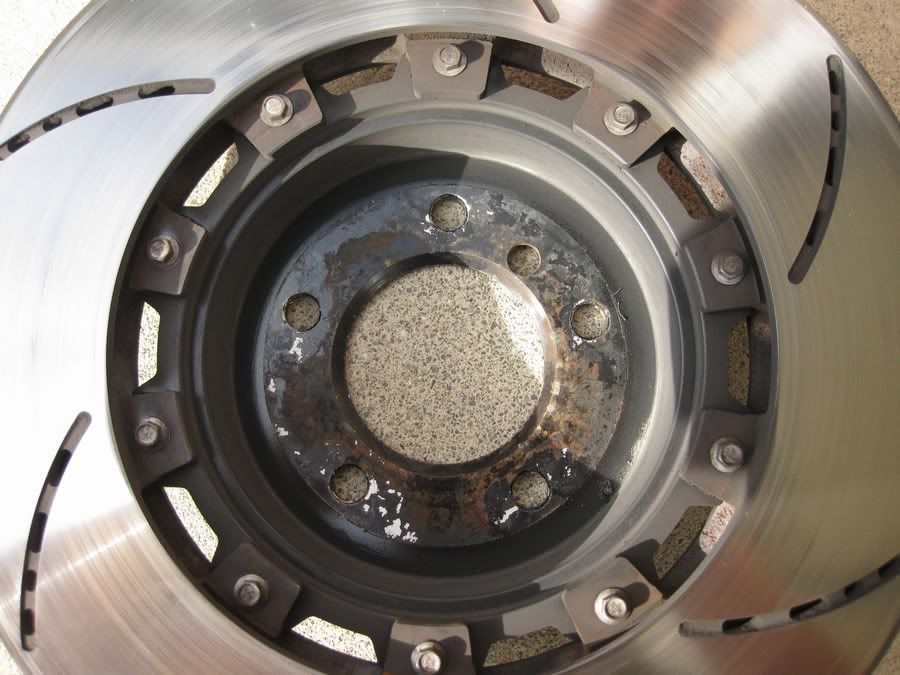
Racing Brake hats mount directly in the center of the disc and because of this the hat can be mounted on either side of the disc. This means that the rotor can be used on either side of the car (Figure B). If it is set up for the passenger�s side and you would like to change it over to the Driver�s side then all you would have to do is unbolt the screws, switch the hat over to the other side of the disc and then mount the bolts and you�re done.
Also, with the RacingBrake center attachment design, the air going through the rotors to cool can either come from the outterl side or the inner side where as the other rotors can only pull air from the inner side for cooling.
Figure B
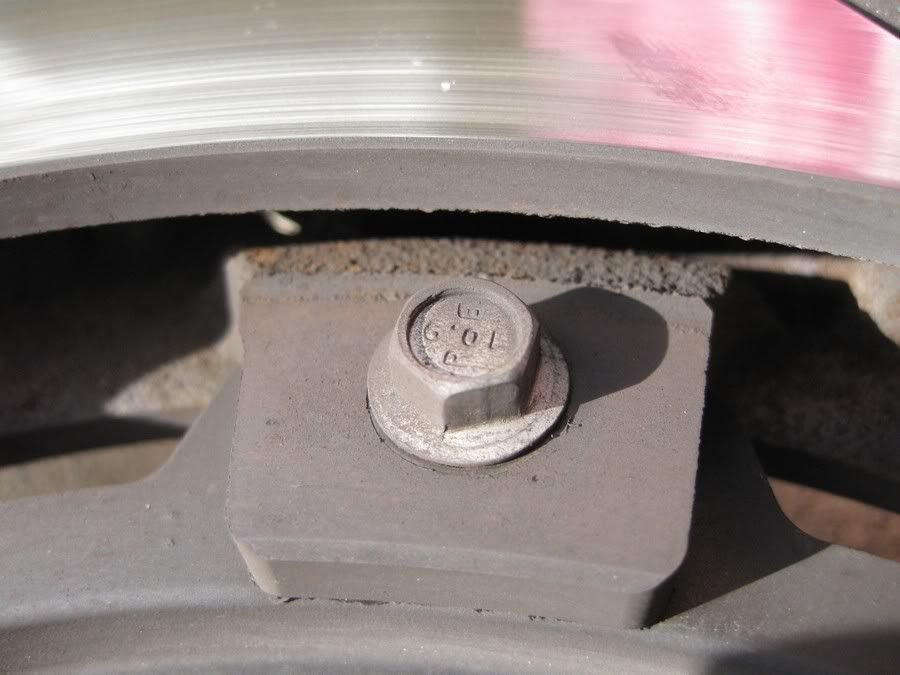
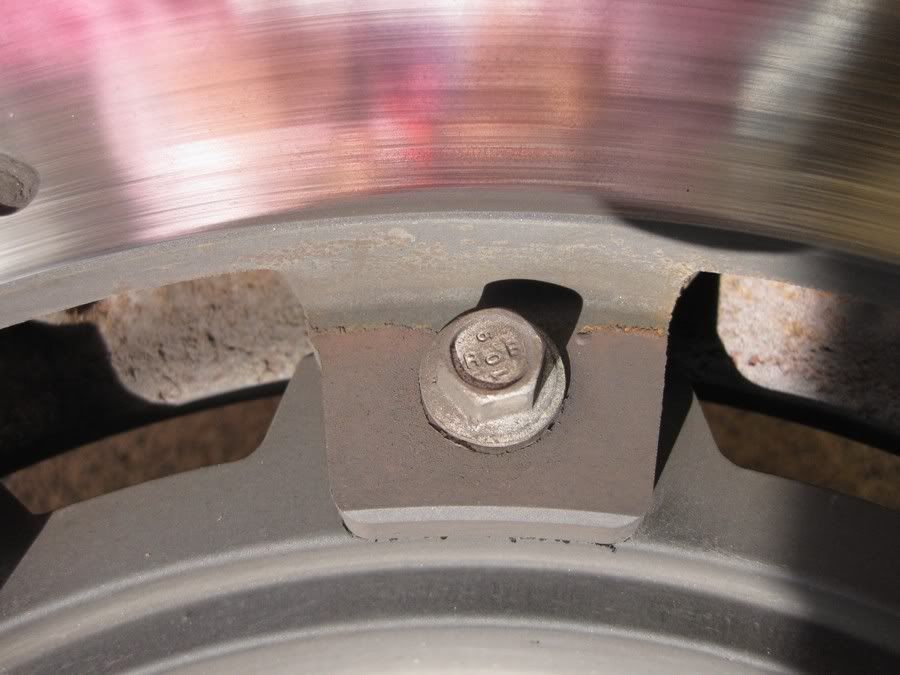
Here are some more pictures that I took to show the way the rotors attach to the hat.
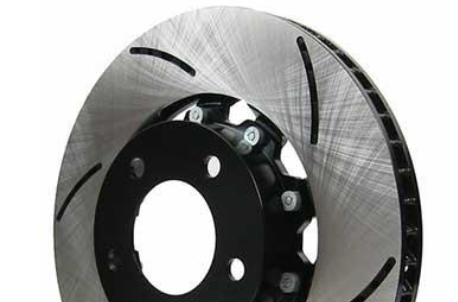
Convergent Vanes
Ever since disc brakes came about, manufacturers have done different things to try to keep the rotors cool. The vanes inside the rotor are important for cooling purposes. Directional curved vanes have been a very good design but RacingBrake noticed an issue with regular curved vanes.
Since the inner diameter is smaller than the outer diameter, vanes on other rotors have a smaller hole at the entry point on the inner diameter and have a larger hole for the air exiting (Figure C). This creates uneven disc temperature which causes warping.
Figure C
Racing Brake came up with convergent vanes, which makes the inner entry point the same size as the exiting point (Figure D). Because of this, the rotor temperature is much more even and there are more vanes which mean better structure. Some companies pride themselves on vane count, but there�s more to the number of vanes. Because of this variable vane count, RacingBrake has 36 inner vanes and 54 outer vanes.
Figure D
Open Slots
Let�s talk about some various rotor designs.
There are drilled rotors that look cool but they crack (Figure E).
There are slotted rotors but the slots build up with debris and clogs the slot.
Figure E
The open slots include the best of both worlds. The slots do a great job to help the hot gases escape and the holes provide a place for the hot gasses and debris to escape.
Testing
I installed my old Stoptech rotor to the passenger side of the car and had the RacingBrake rotor installed on the Driver�s side. I drove around and wanted to see if there was a difference with daily driving. There was no difference with driving around the street but I went through a bedding process and noticed that my car was starting to pull to the left after about the 4th bedding cycle. It got more and more noticeable the hotter the pads started to get.
I believe that having each rotor installed at the same time was ideal because both rotors are being put through the same exact experiences. I first thought of doing the test of both Stoptech rotors first and then installing the RacingBrake rotors afterwards and doing the same test but This leads to more errors since the braking conditions could slightly change between tests.
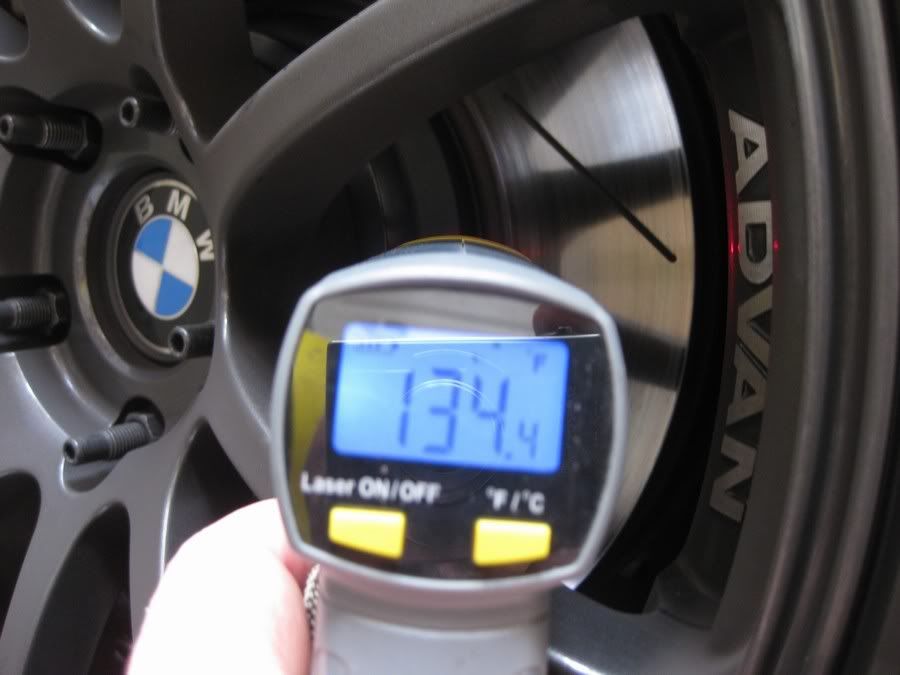
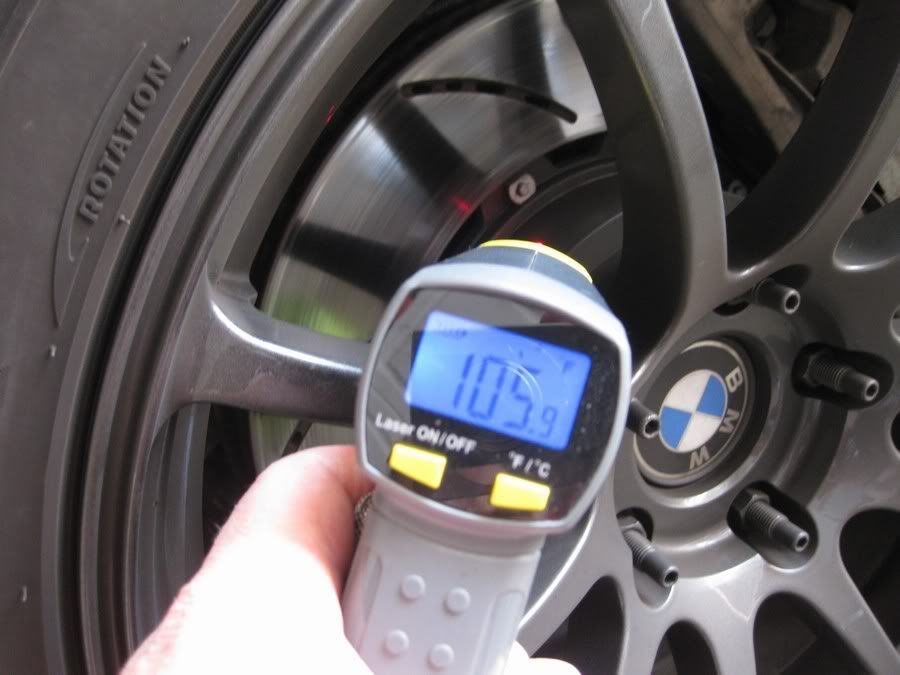
I also started to think about the heating from side to side so I got home from work one day and took the temperature of both rotors.
The Stoptech rotor had a temperature reading of 134.4 degrees (Figure F).
The RacingBrake rotor had a temperature reading of 105.9 degrees (Figure G).
This also showed me that the RacingBrake rotor stays cooler than the Stoptech rotors.
Figure F
Figure G
Track Testing
I went to Laguna Seca on Dec 31 to put these rotors to the real test. I was so amazed with how easily they cooled between each turn. I was used to braking at certain points in the past and I could have easily braked much later than what I was used to. There were actually times where I braked just before the corkscrew and had to let off of the brakes for a bit and then hit the brakes again. That�s how well these rotors cooled down.
Here is one of my videos from my track day: Conclusion
So, I think you�ve figured that I am very impressed with these rotors by now. It�s amazing to me with how well they stop and how well they are made.
There�s been a lot of thought and engineering that was put into these rotors and after using and testing them, it�s very noticeable.__________________
Very interesting brinell tester. I had a 1941 Reihle hydraulic tester it weighed 3 tons and was only a 3000kg load using a 10mm indent ball. Can you tell me how long the indent was applied, if a test block was used prior to each use and if the indent was measured at 0 & 90 degrees? I have never seen a 2000kg load used before. All of my conversion charts are either 500Kg or 3000kg. It is interesting to see the differences in hardness but there is no reference point to compare against other alloys.
Great Thread,
I need to re-read it to fully understand it, I have 14" Brembo rotors and custom built Hats by Mike Simard . I was reluctant to try to run the 964 / big red calipers with the 14" discs .I thought that combination would require extreme grinding of the caliper to clear the larger rotor radius. Has anyone run a big red caliper on a 14"/ 355mm rotor?
Last edited by justaguy; 02-14-2019 at 09:01 PM.
Reason: spellin
I am sure RB does not make hats for the 993TT stock rotor rings because they like their center-mount design better (as do I). That means the hats need to be taller, by roughly half the rotor thickness (the difference between center mount and surface mount). There is an illustration of the center-mount design at the bottom of this page: http://www.racingbrake.com/RB-Two-pi...p-9-p/2516.htm
Here's the RB 2516 setup on the front of our GT (with GTS calipers), the mounting surface is recessed to the ring center-plane. (Please pardon the dirt, it is winter and this is our "driver"):
Good observation on center mount design vs. conventional surface mount.
Advantages you can see and understand:
1.The heat transfer path (from the disc to hub):
Center Mount "Hat" is attached to the mount tab, and the path is longer (less heat gets to hub) than surface mount's "Bell" which is directly attached to the disc, the heat transfer is direct and immediate.
2.Cooling air admission:
Center mount design admits cooling air from both inboard and outboard (wheel spoke side), while the surface mount design only allows cooling air from inboard which is usually blocked by the dust shield.
Very interesting brinell tester. I had a 1941 Reihle hydraulic tester it weighed 3 tons and was only a 3000kg load using a 10mm indent ball. Can you tell me how long the indent was applied, if a test block was used prior to each use and if the indent was measured at 0 & 90 degrees? I have never seen a 2000kg load used before. All of my conversion charts are either 500Kg or 3000kg. It is interesting to see the differences in hardness but there is no reference point to compare against other alloys.
We use King's portable Brinell tester with reduced loads at 1,000 & 750 kgs applied on 5 or 10mm diameter steel *****.
The tester was recently calibrated by King to 750kg with 5mm ball. Indentation was applied instantly.
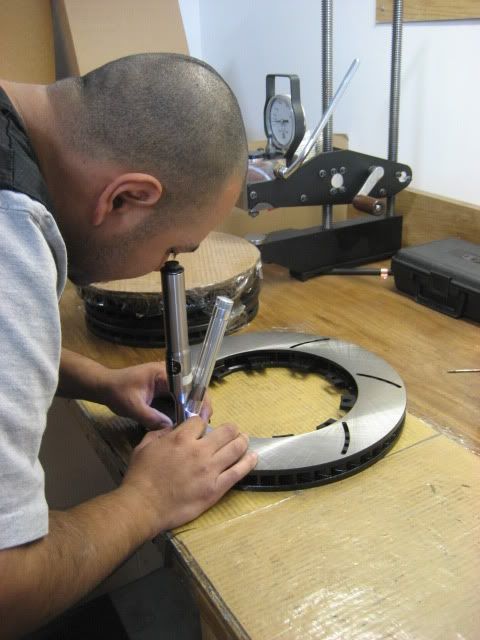
Read With This Microscope.
Test Block
Our QA follows the guideline from ASTM A159-77 and SAE J431 for Grade G3000/G3500 Automotive Gray Iron Casting on hardness / Hardness Conversion Chart (Load/Indentation):
Anyone interested in this subject can find more from King's website: https://www.kingtester.com/
Last edited by RacingBrake; 03-13-2019 at 01:33 AM.
I appreciate the charts. That helps. There should be a specified time used for the indenter as well to guarantee consistent results. Usually it is 15 seconds min I always used 30 seconds.


 12-03-2018 | 04:51 PM