When you click on links to various merchants on this site and make a purchase, this can result in this site earning a commission. Affiliate programs and affiliations include, but are not limited to, the eBay Partner Network.
I wonder why the bearings could not be pinned in place with 2 or 3 short screws through the tube into the shell next to the tube inside; or even one screw each, for that matter? Any thoughts?
As I am aware the auto tube has only two bearings given it is shorter than the manual variant- if so sounds as though the PO might have had a third bearing fitted at some stage. It will be interesting to see what the Brains Trust has to say on this one.
Originally Posted by FredR
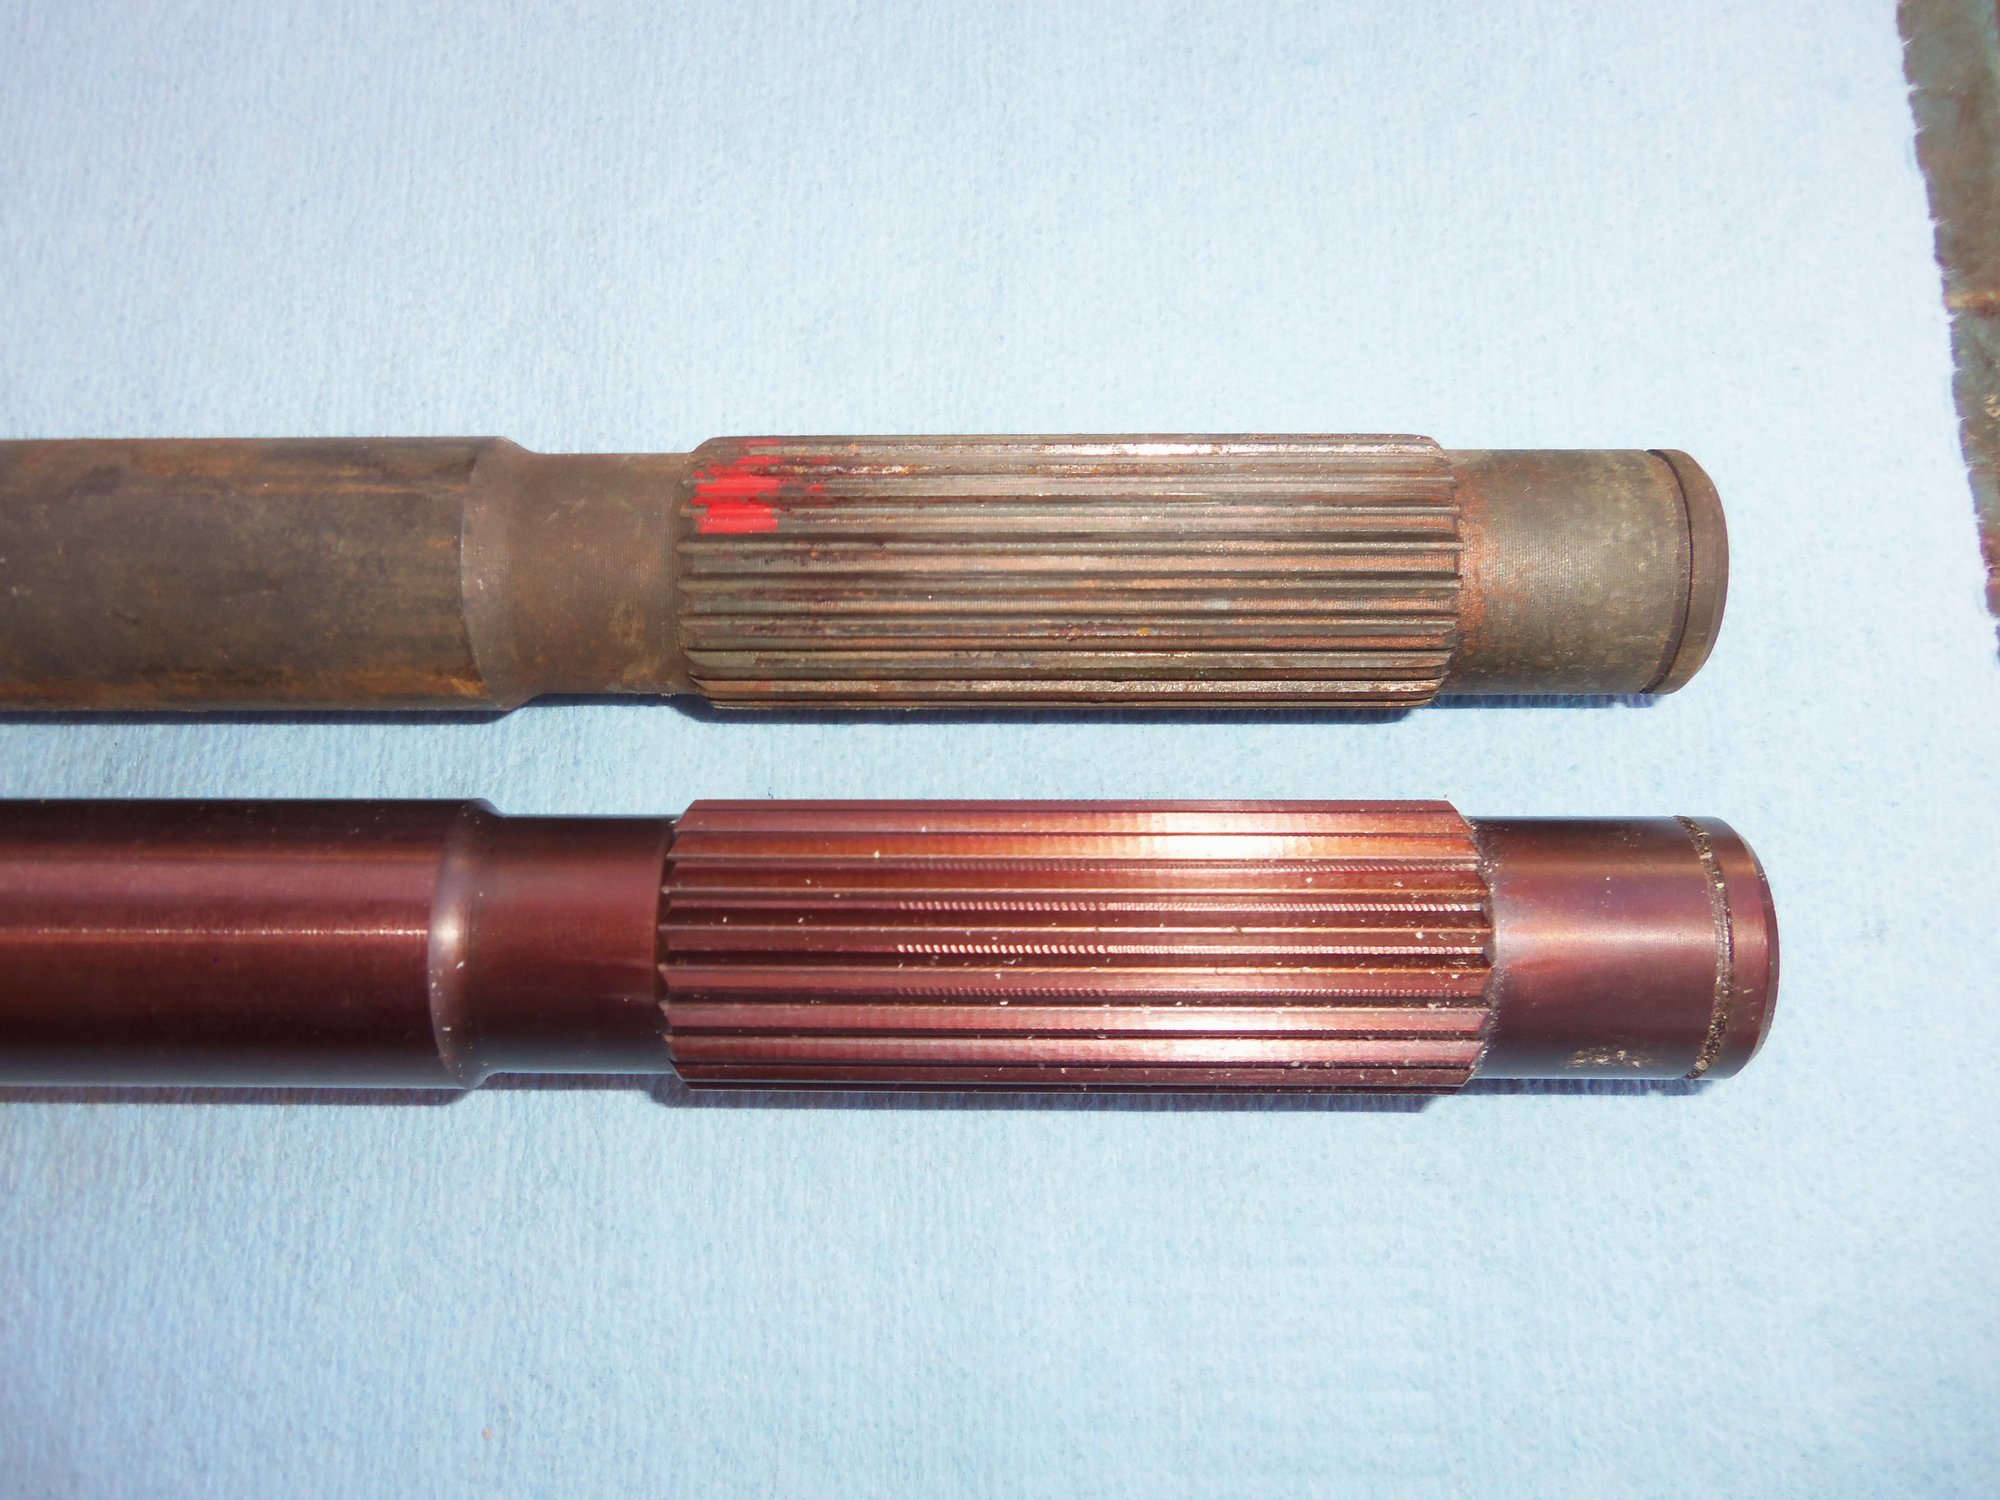
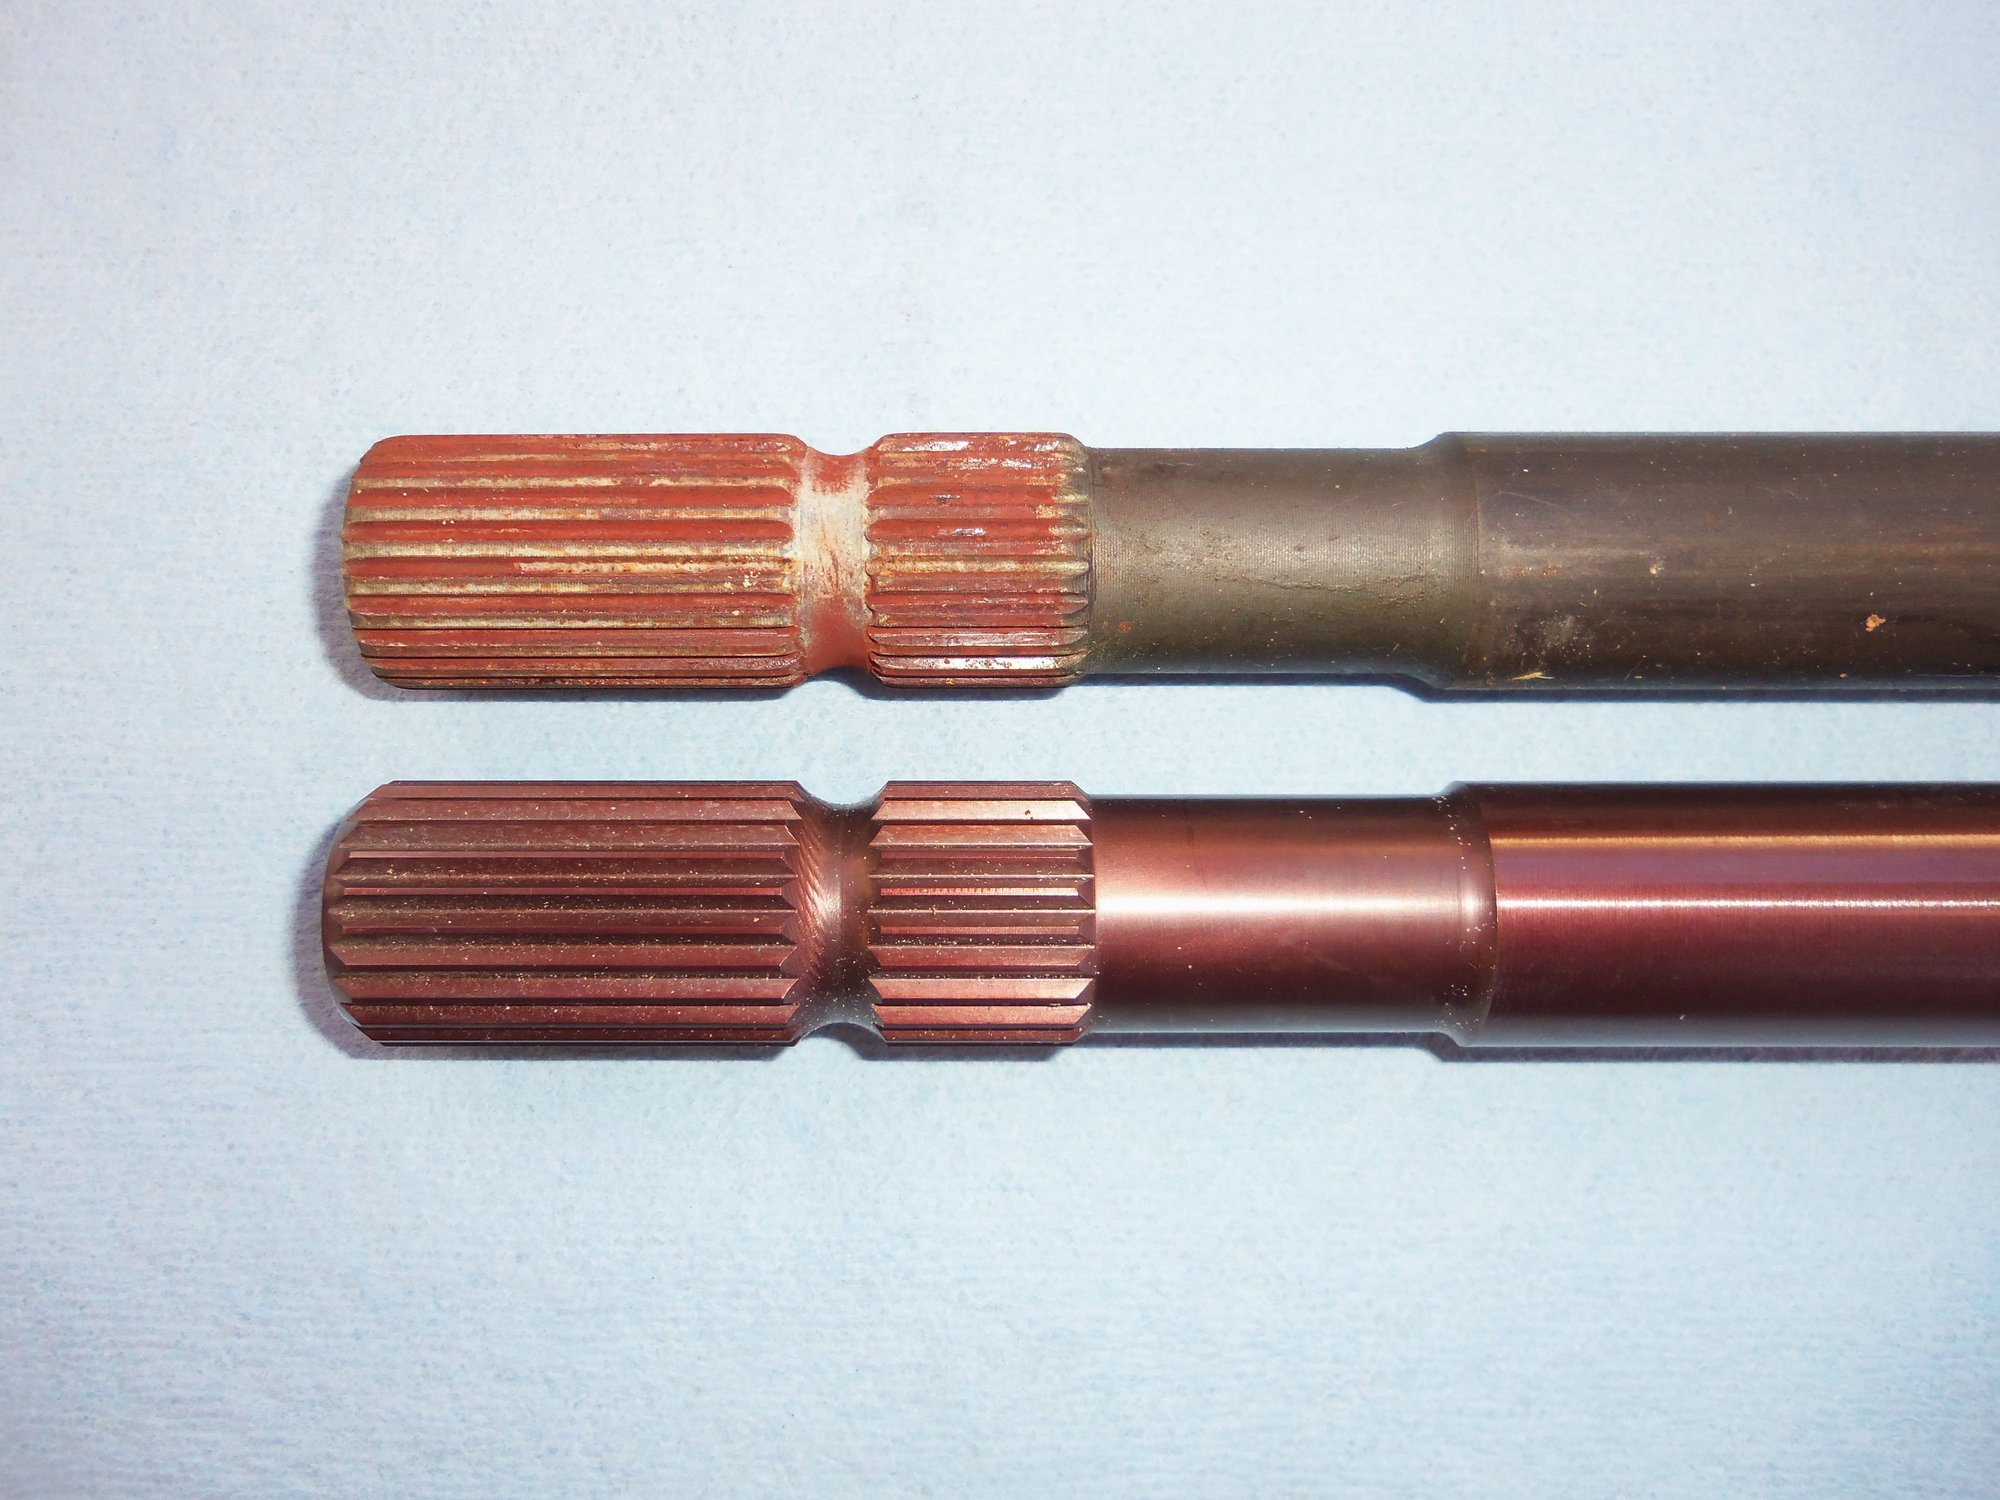
Well that explains that one! I know for a fact my sheared 28mm shaft had two bearings. Presumably someone at Porsche figured that the 28mm shaft being a bit stiffer did not need intermediate support. That snapped shafts predominantly occur on the 28mm model is a fact of life although why they fail seems to be another matter altogether.
At least Seth does not have that problem.
Fred, this is news to me as well. Learn something new every day.
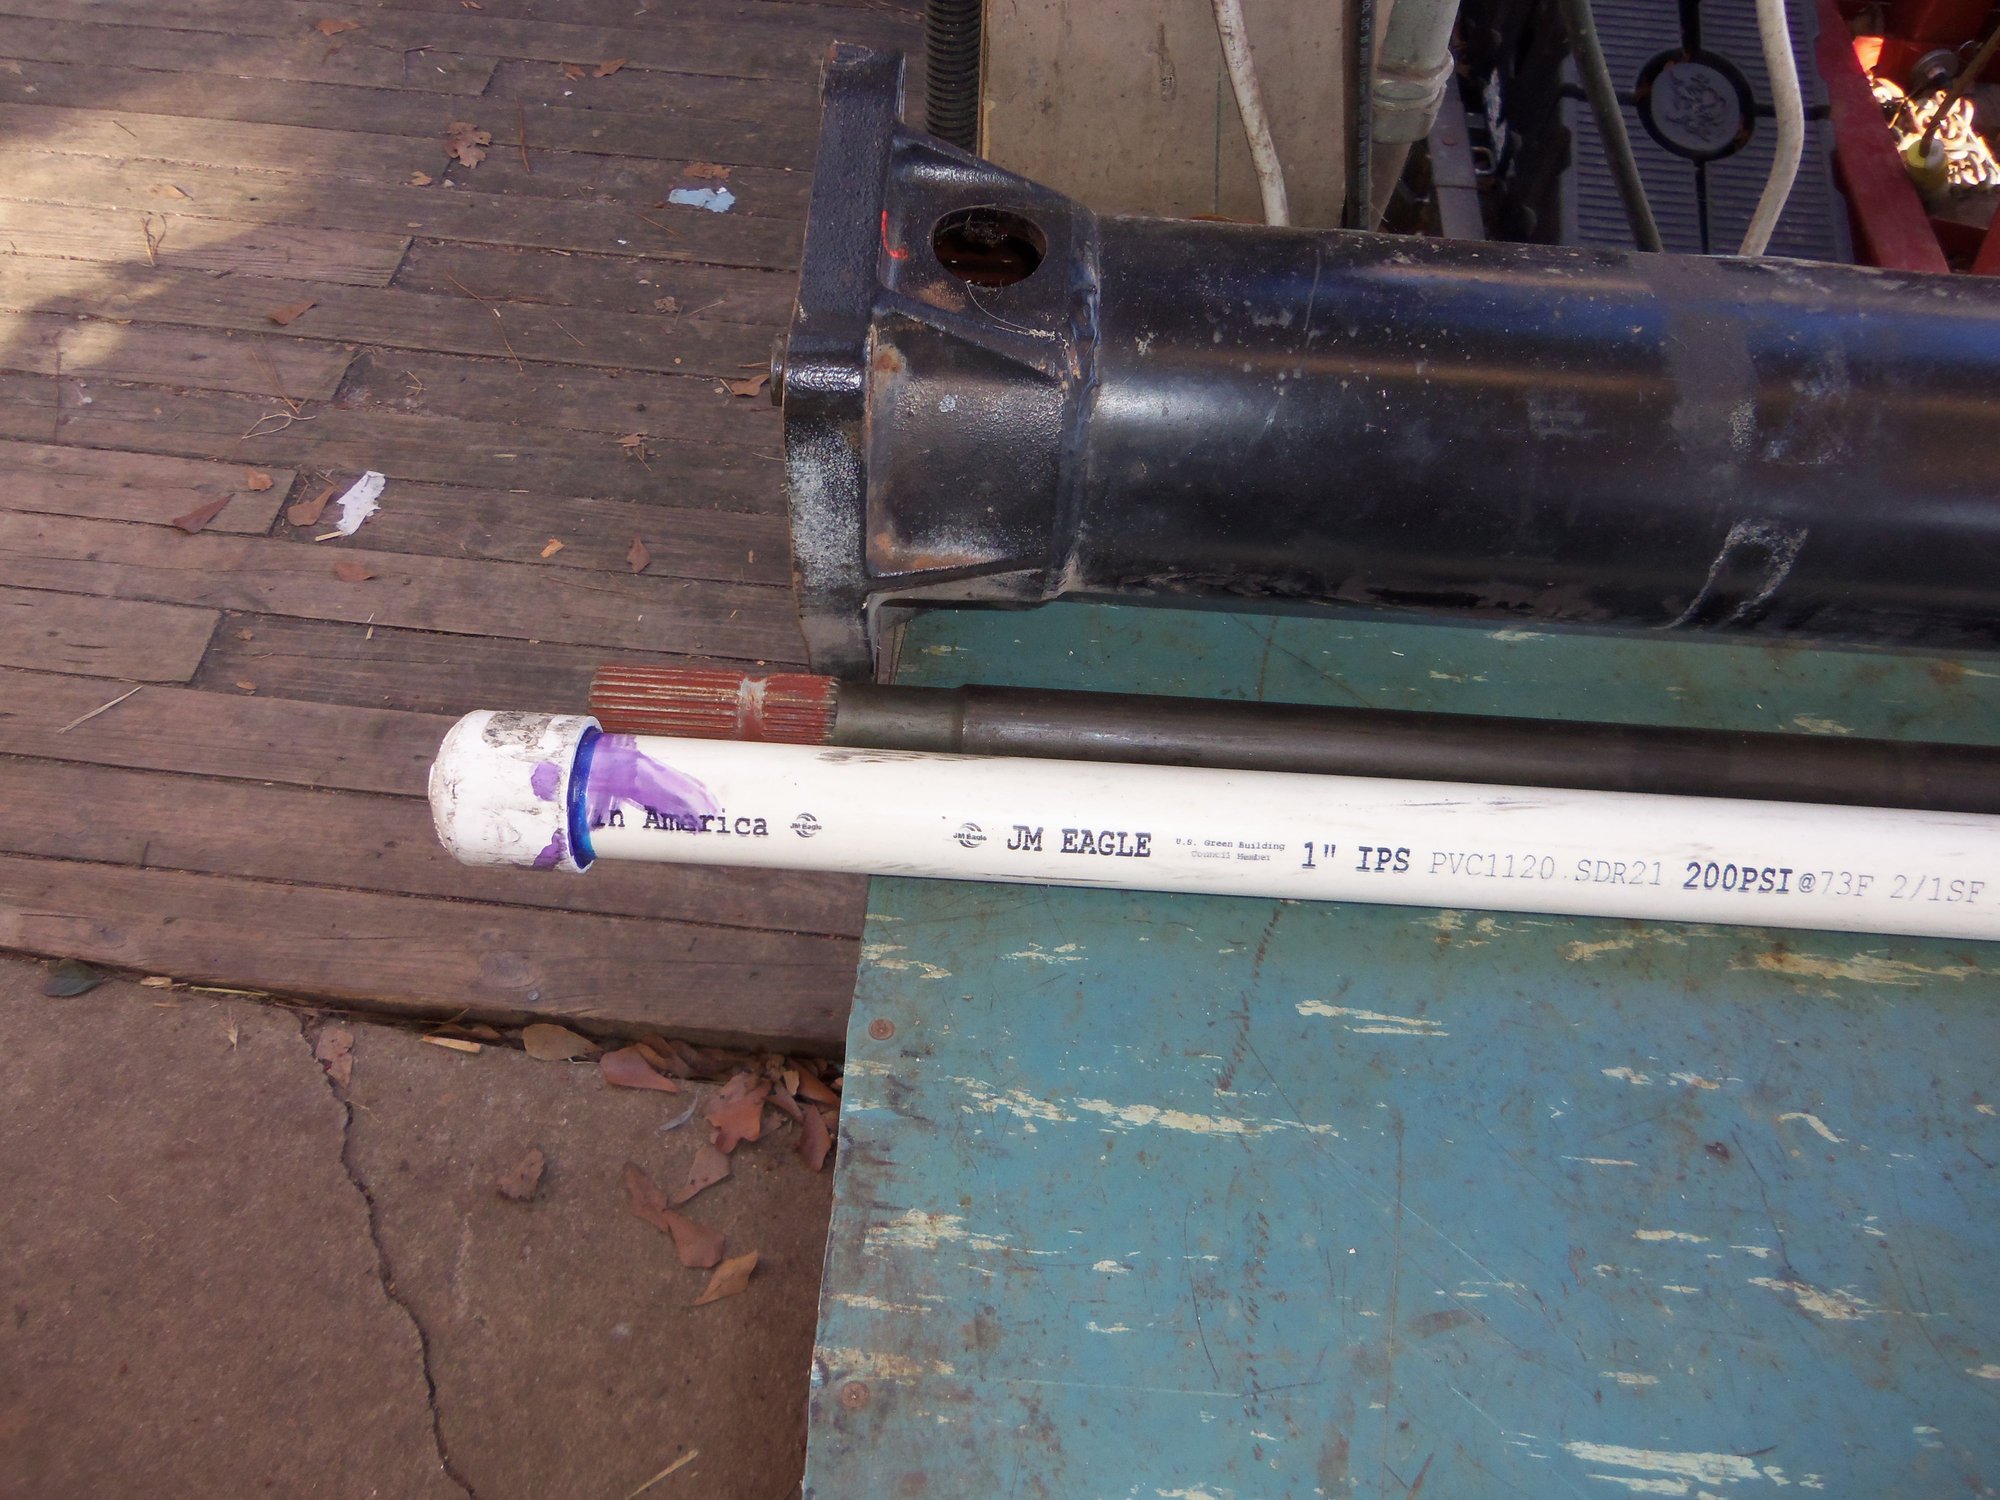
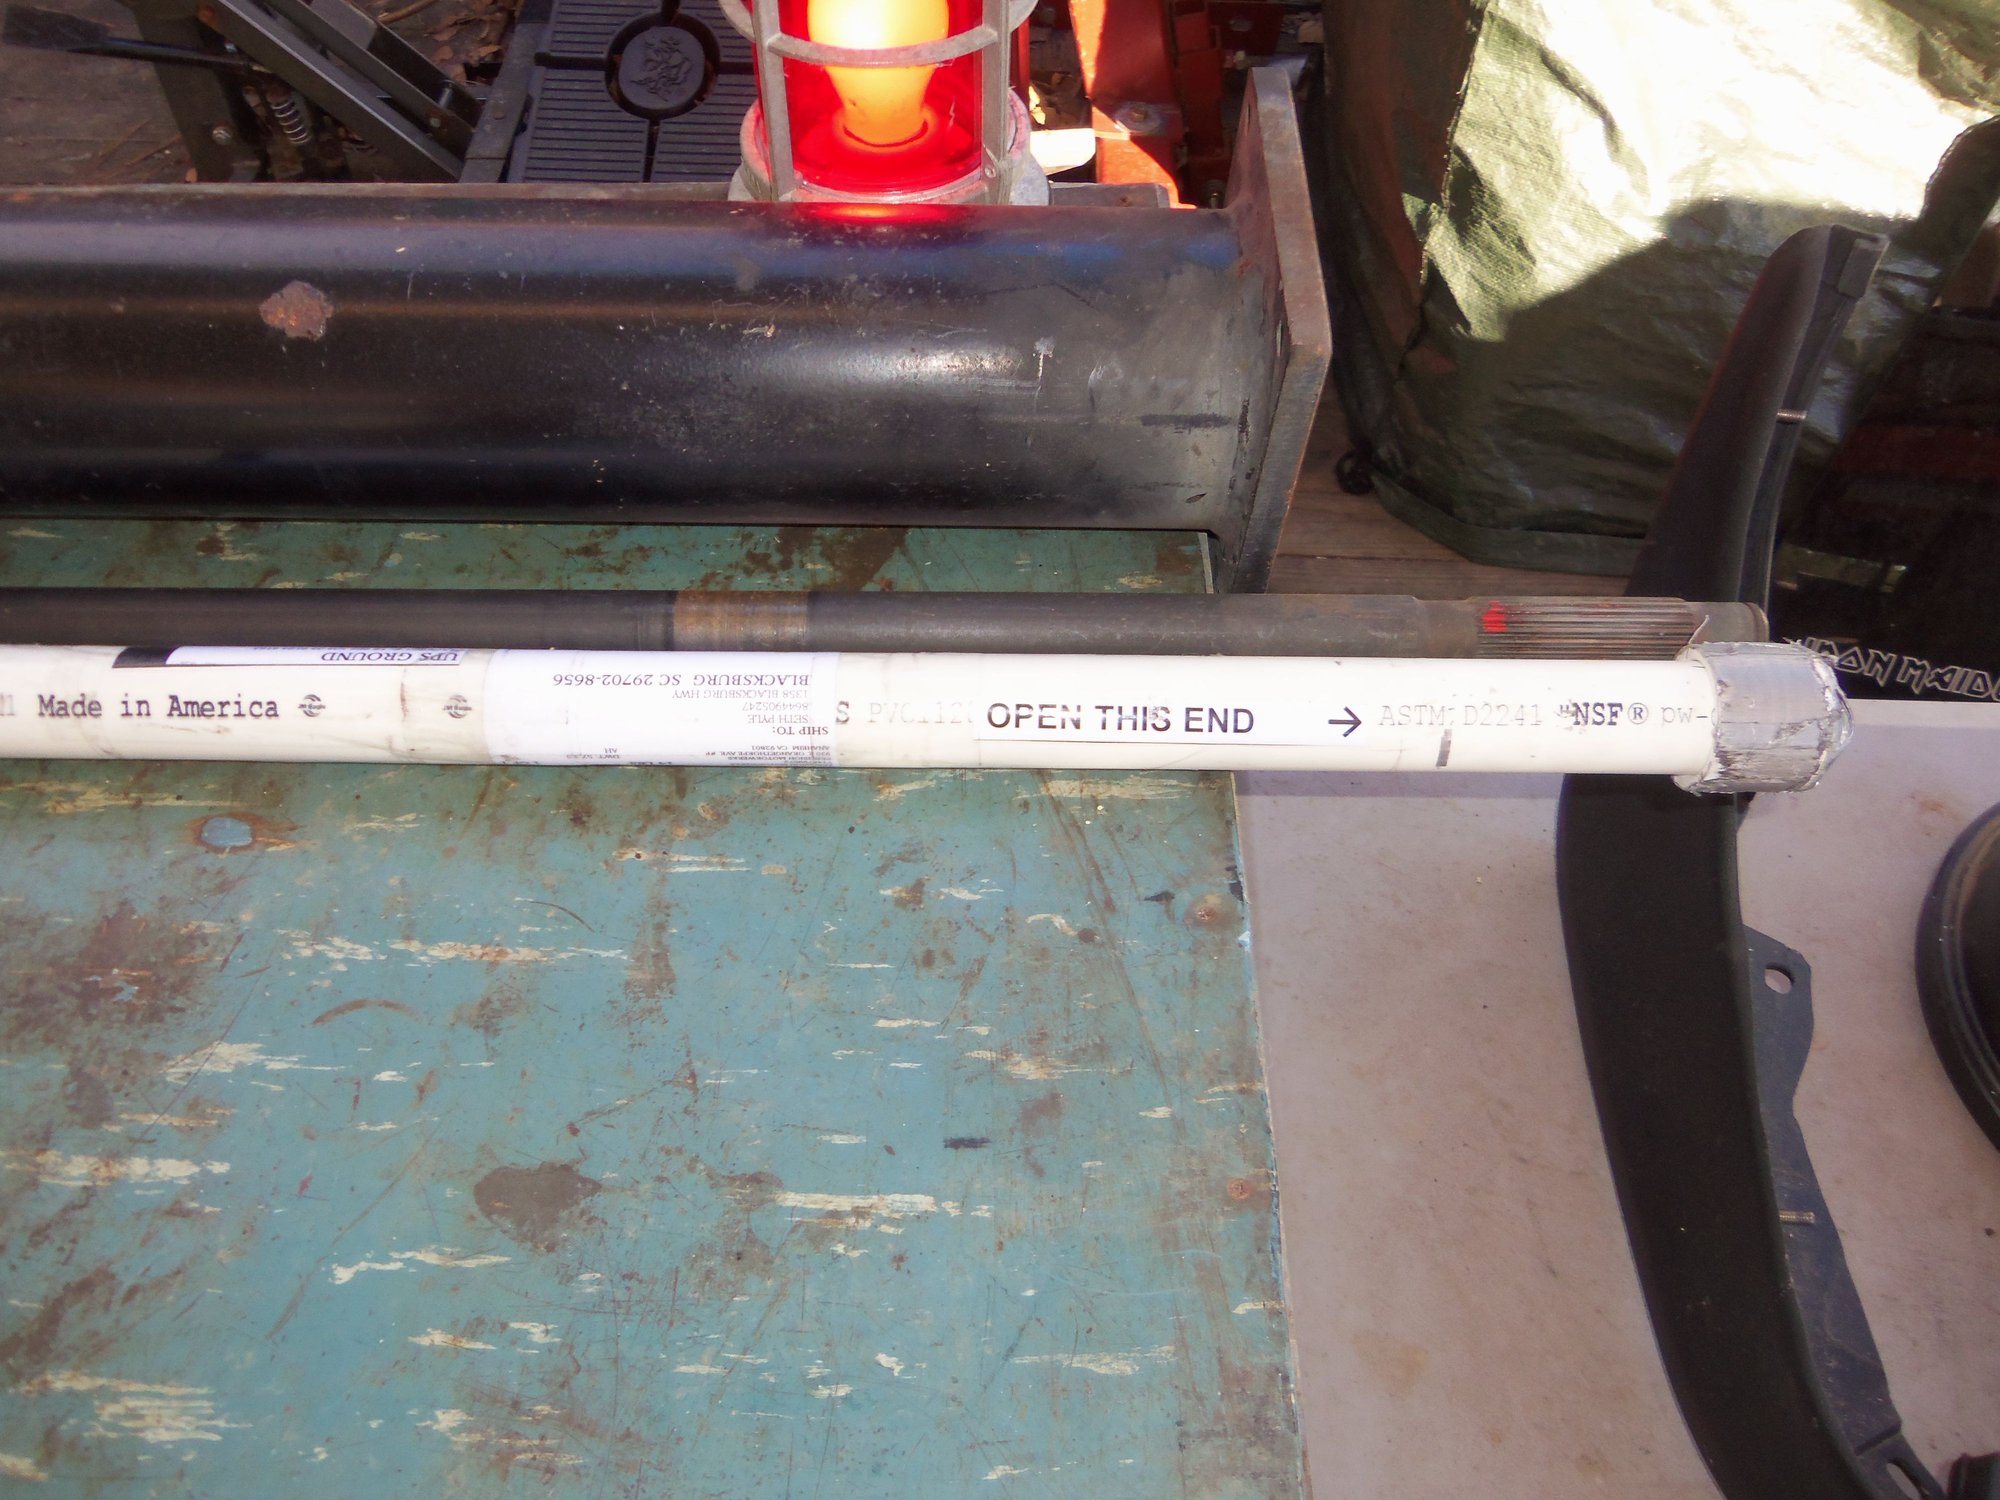
Yep, The drive shaft was 25mm, and the new GB drive shaft is also 25mm. With the three Superbearings, all will be well.
Originally Posted by Mrmerlin
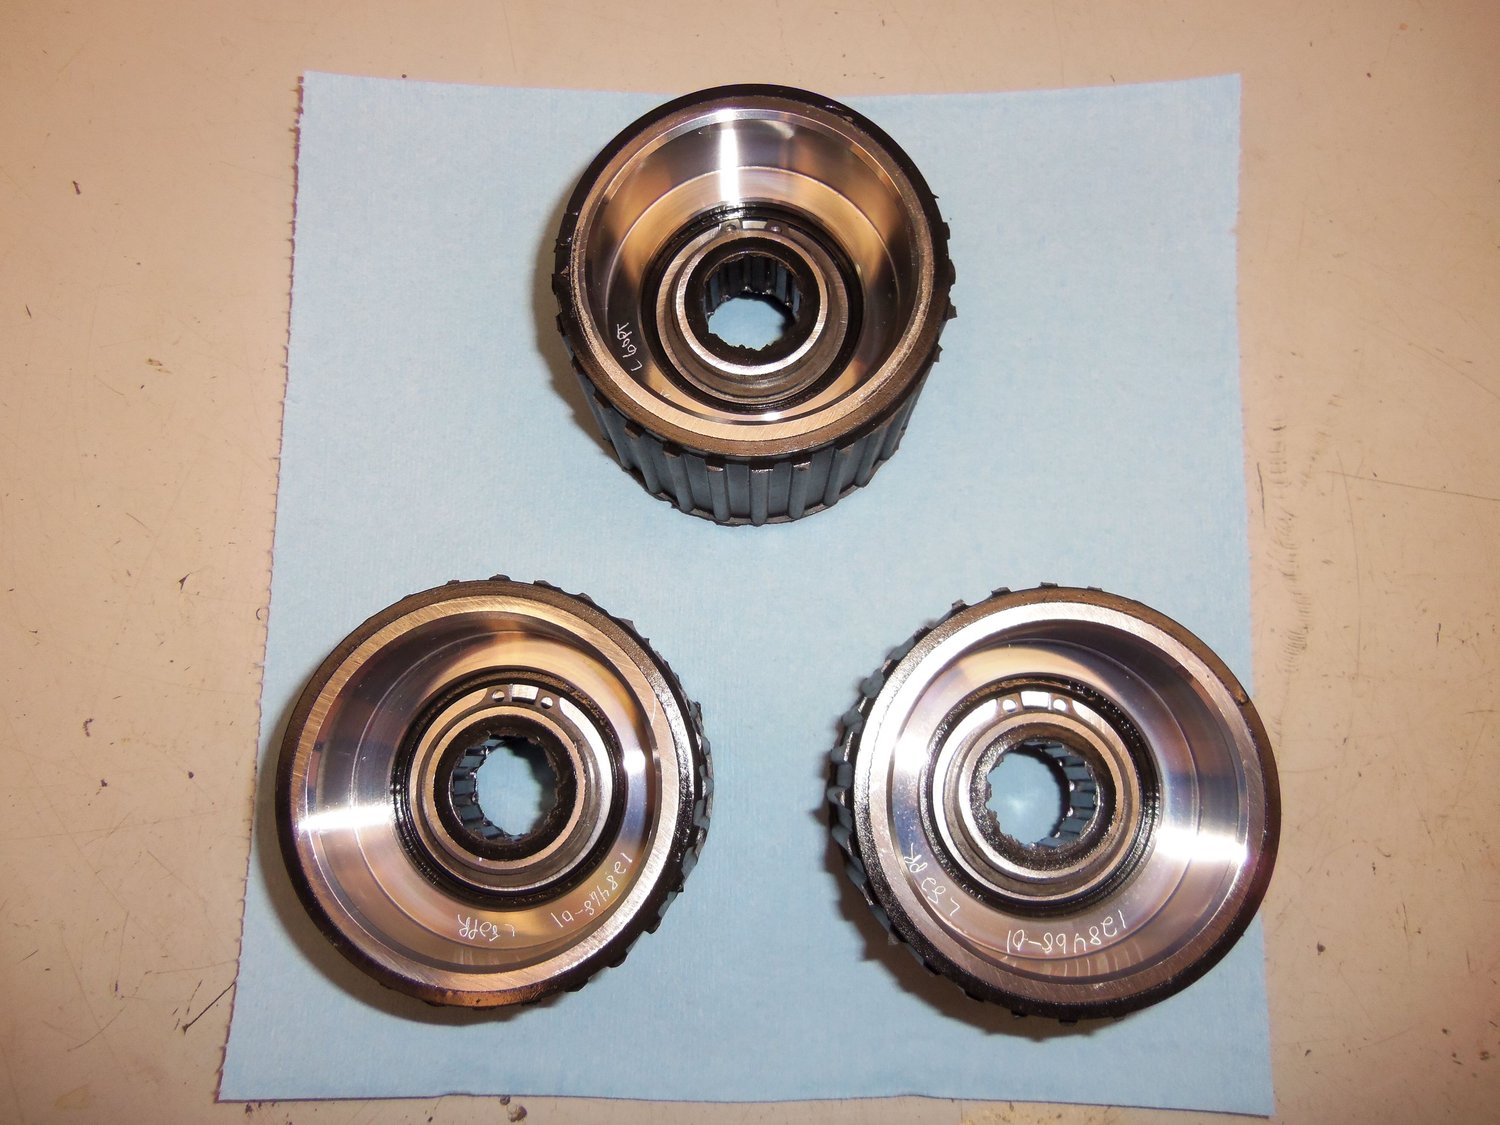
autos have 3 bearings,
the damper is known to hammer the middle and aft bearings out of position when the rubber gets weak.
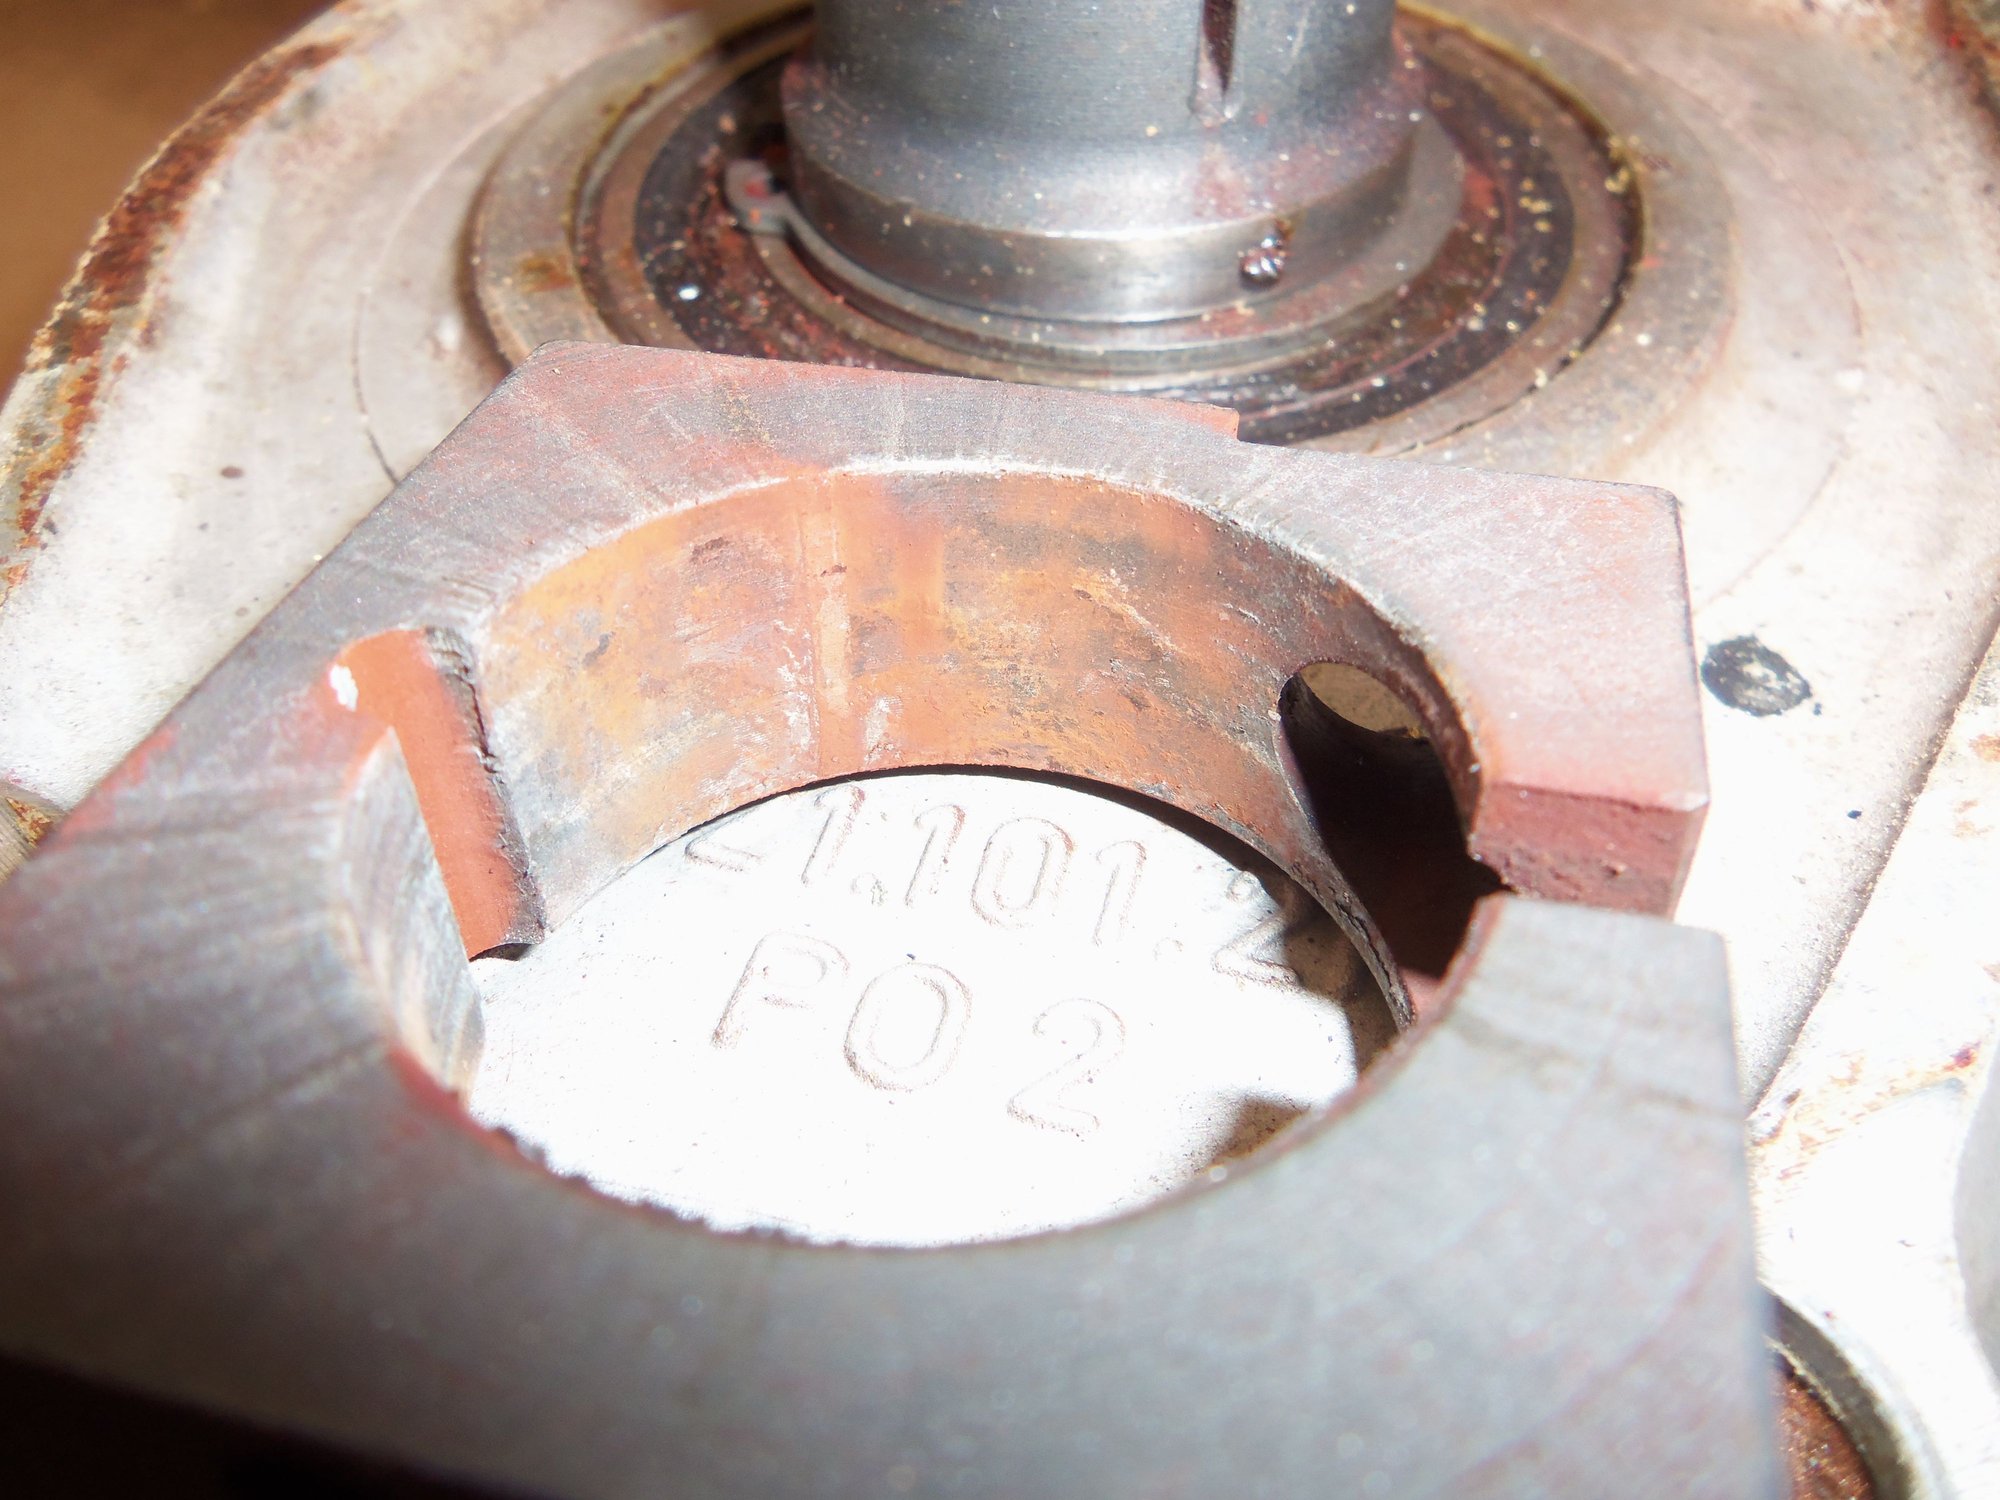
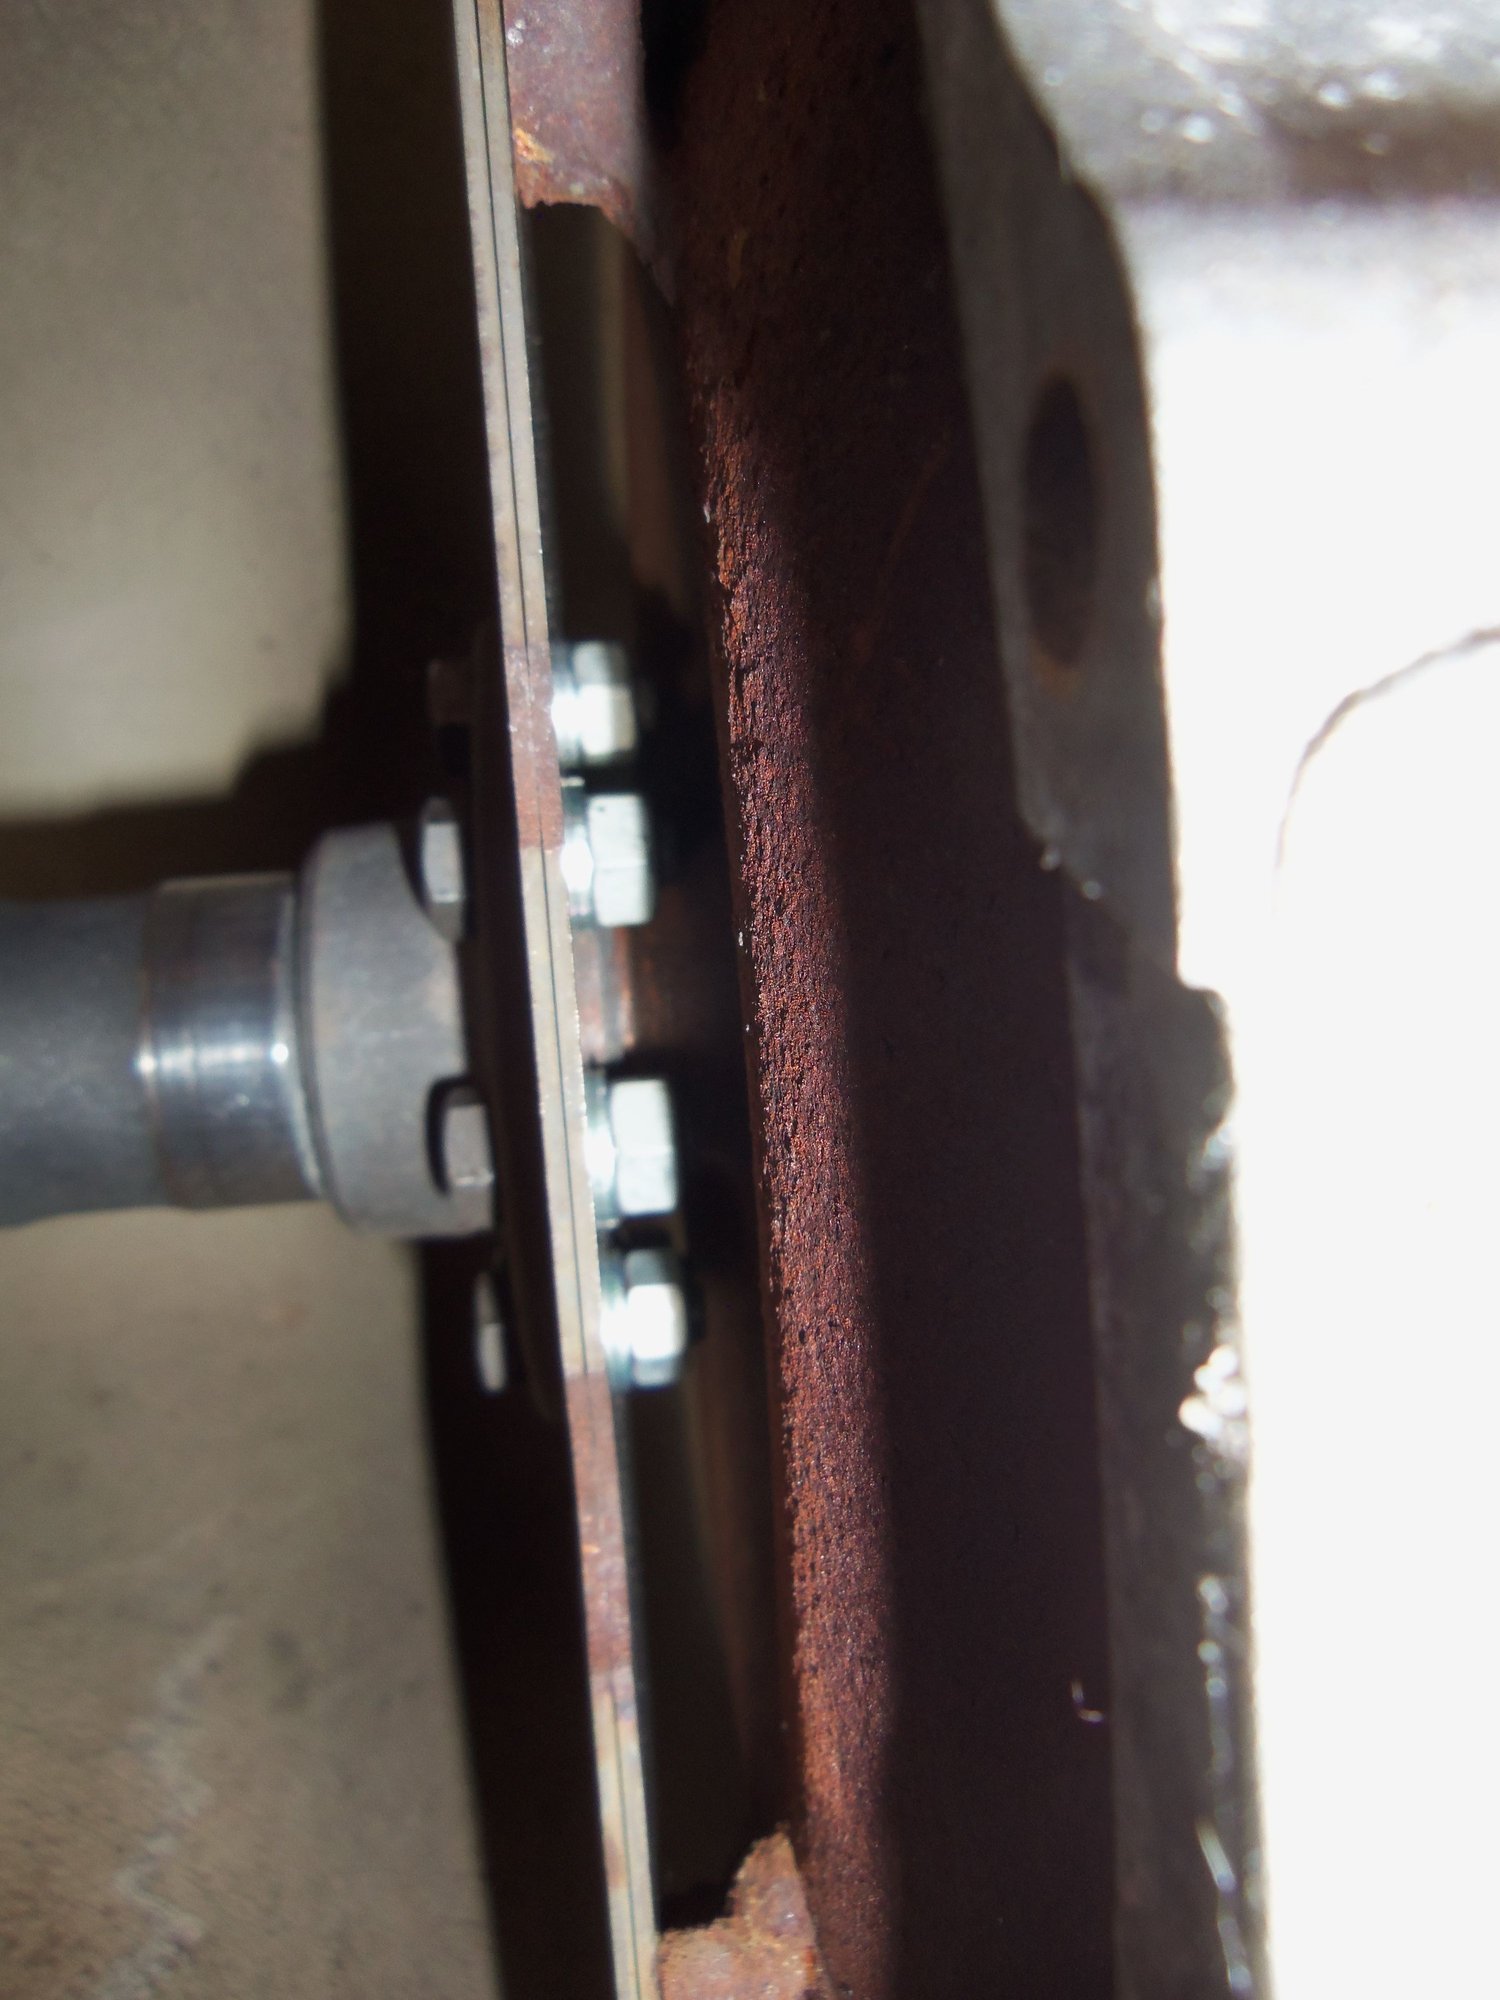
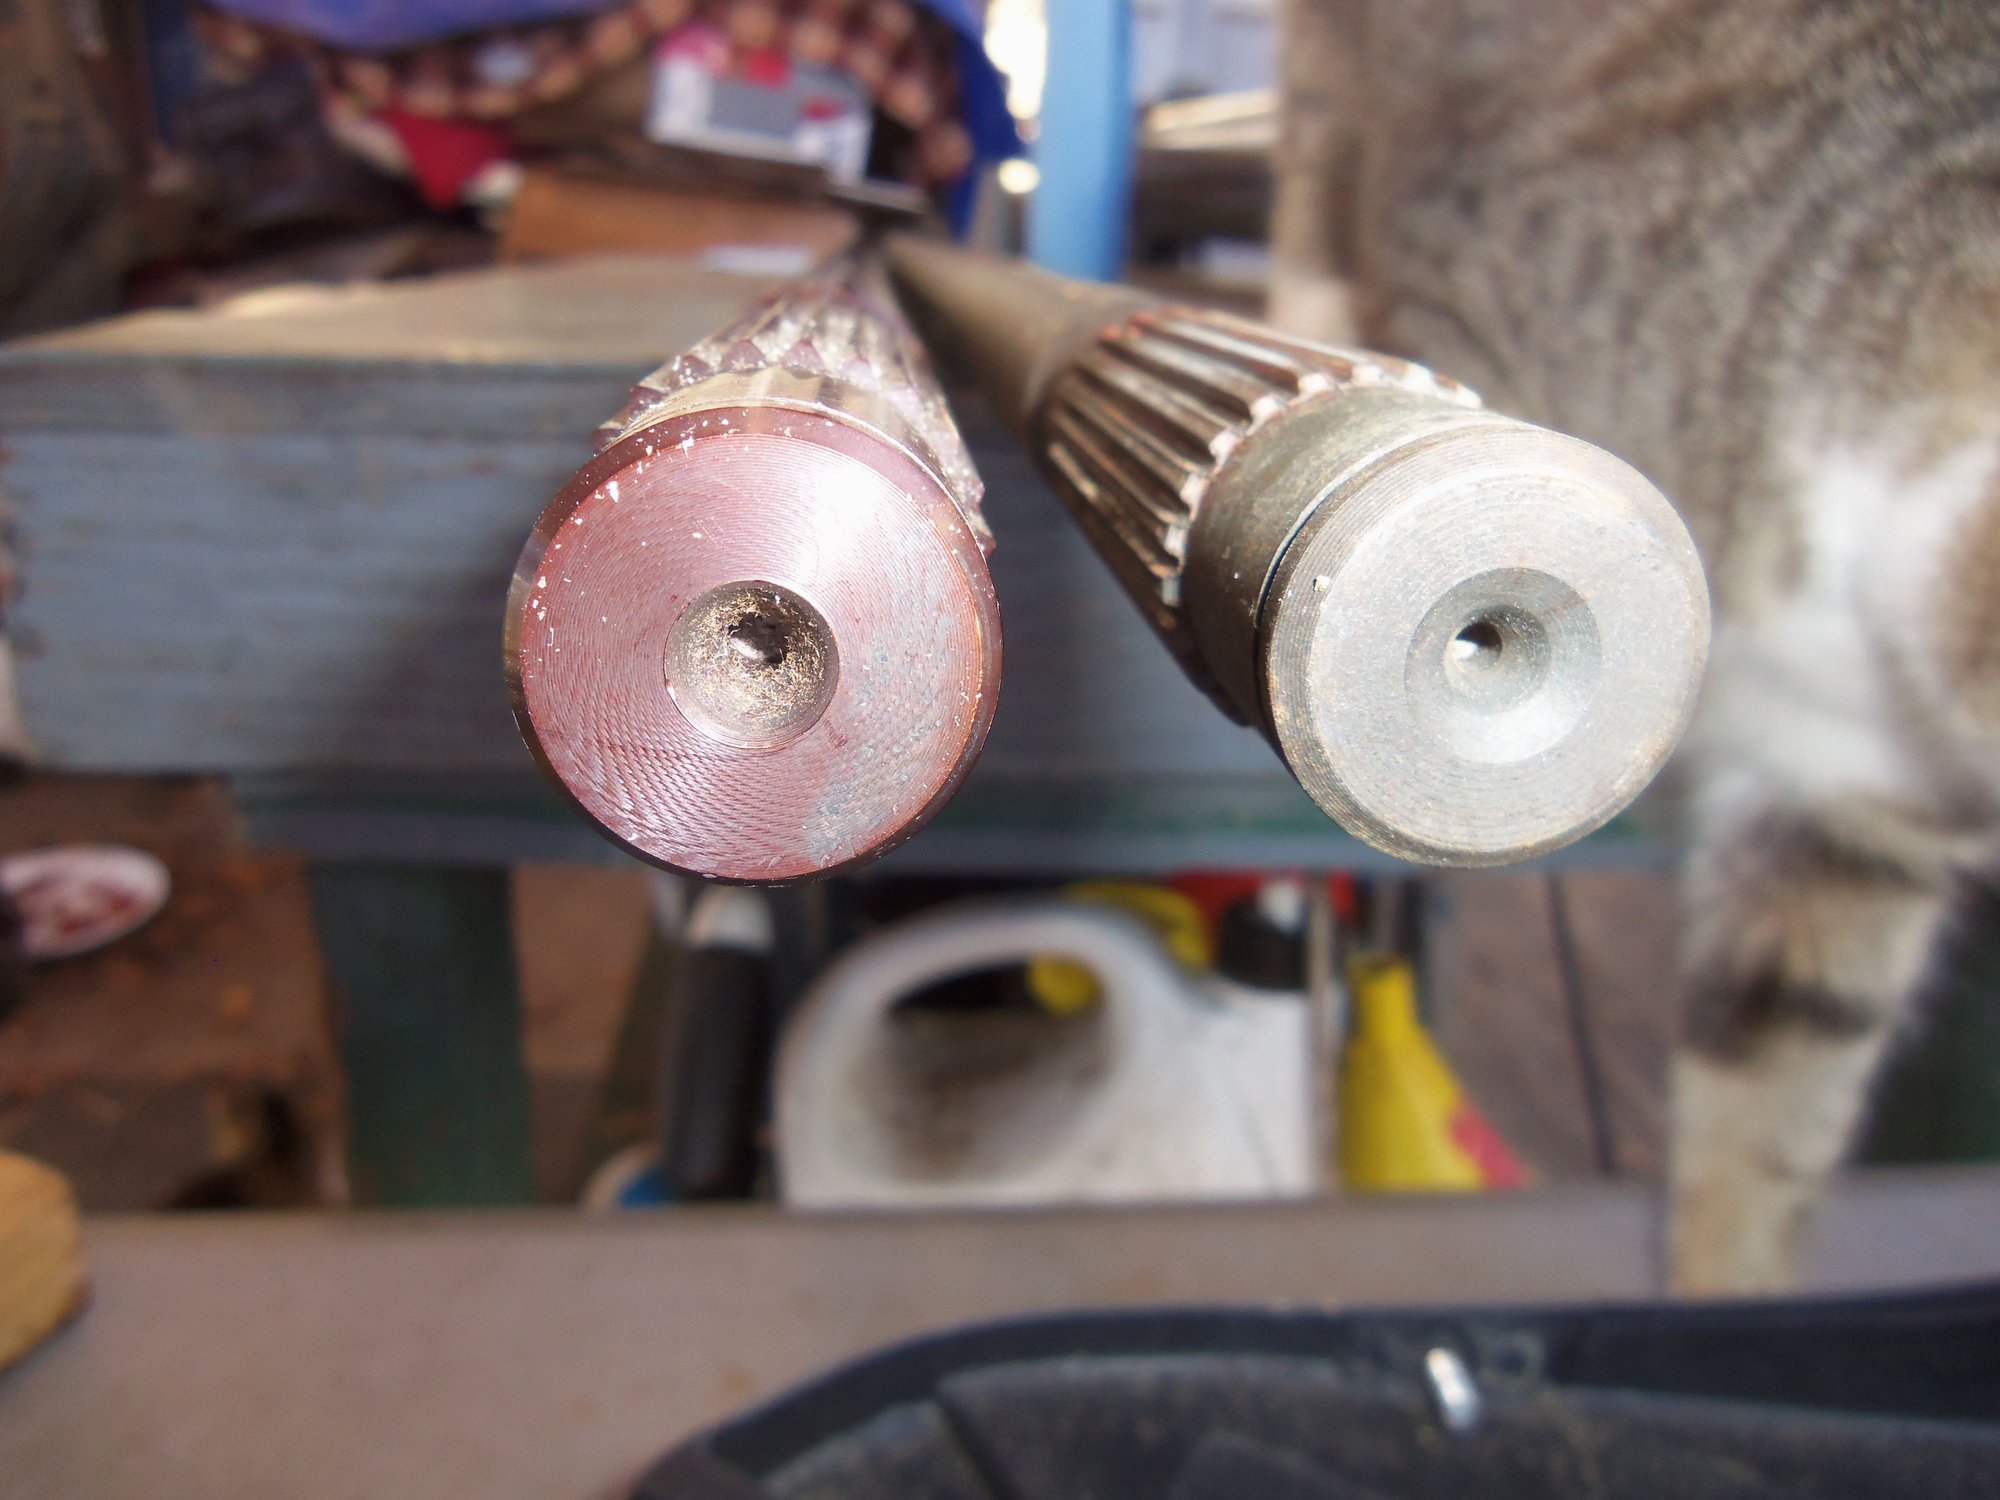
Based on the rusty dust, the rear pinch bolt has been loose for a while and the car has been parked over damp surfaces
Thanks, Stan. I had read that as well about the damper. This one looked relatively OK, but is not going back in. I will keep it as a novelty souvenir.
I agree about the rust. I am going to clean it up as best as possible in the rear splined coupler. When I reinstall everthing, I will coat the splines with copper antiseize.
Originally Posted by Constantine
Automatic TTs came with three bearing units until sometime in 1987 when they went to two bearings and also changed the 25mm drive shaft to the 28mm drive shaft.
All 5-speed TTs came with three bearings.
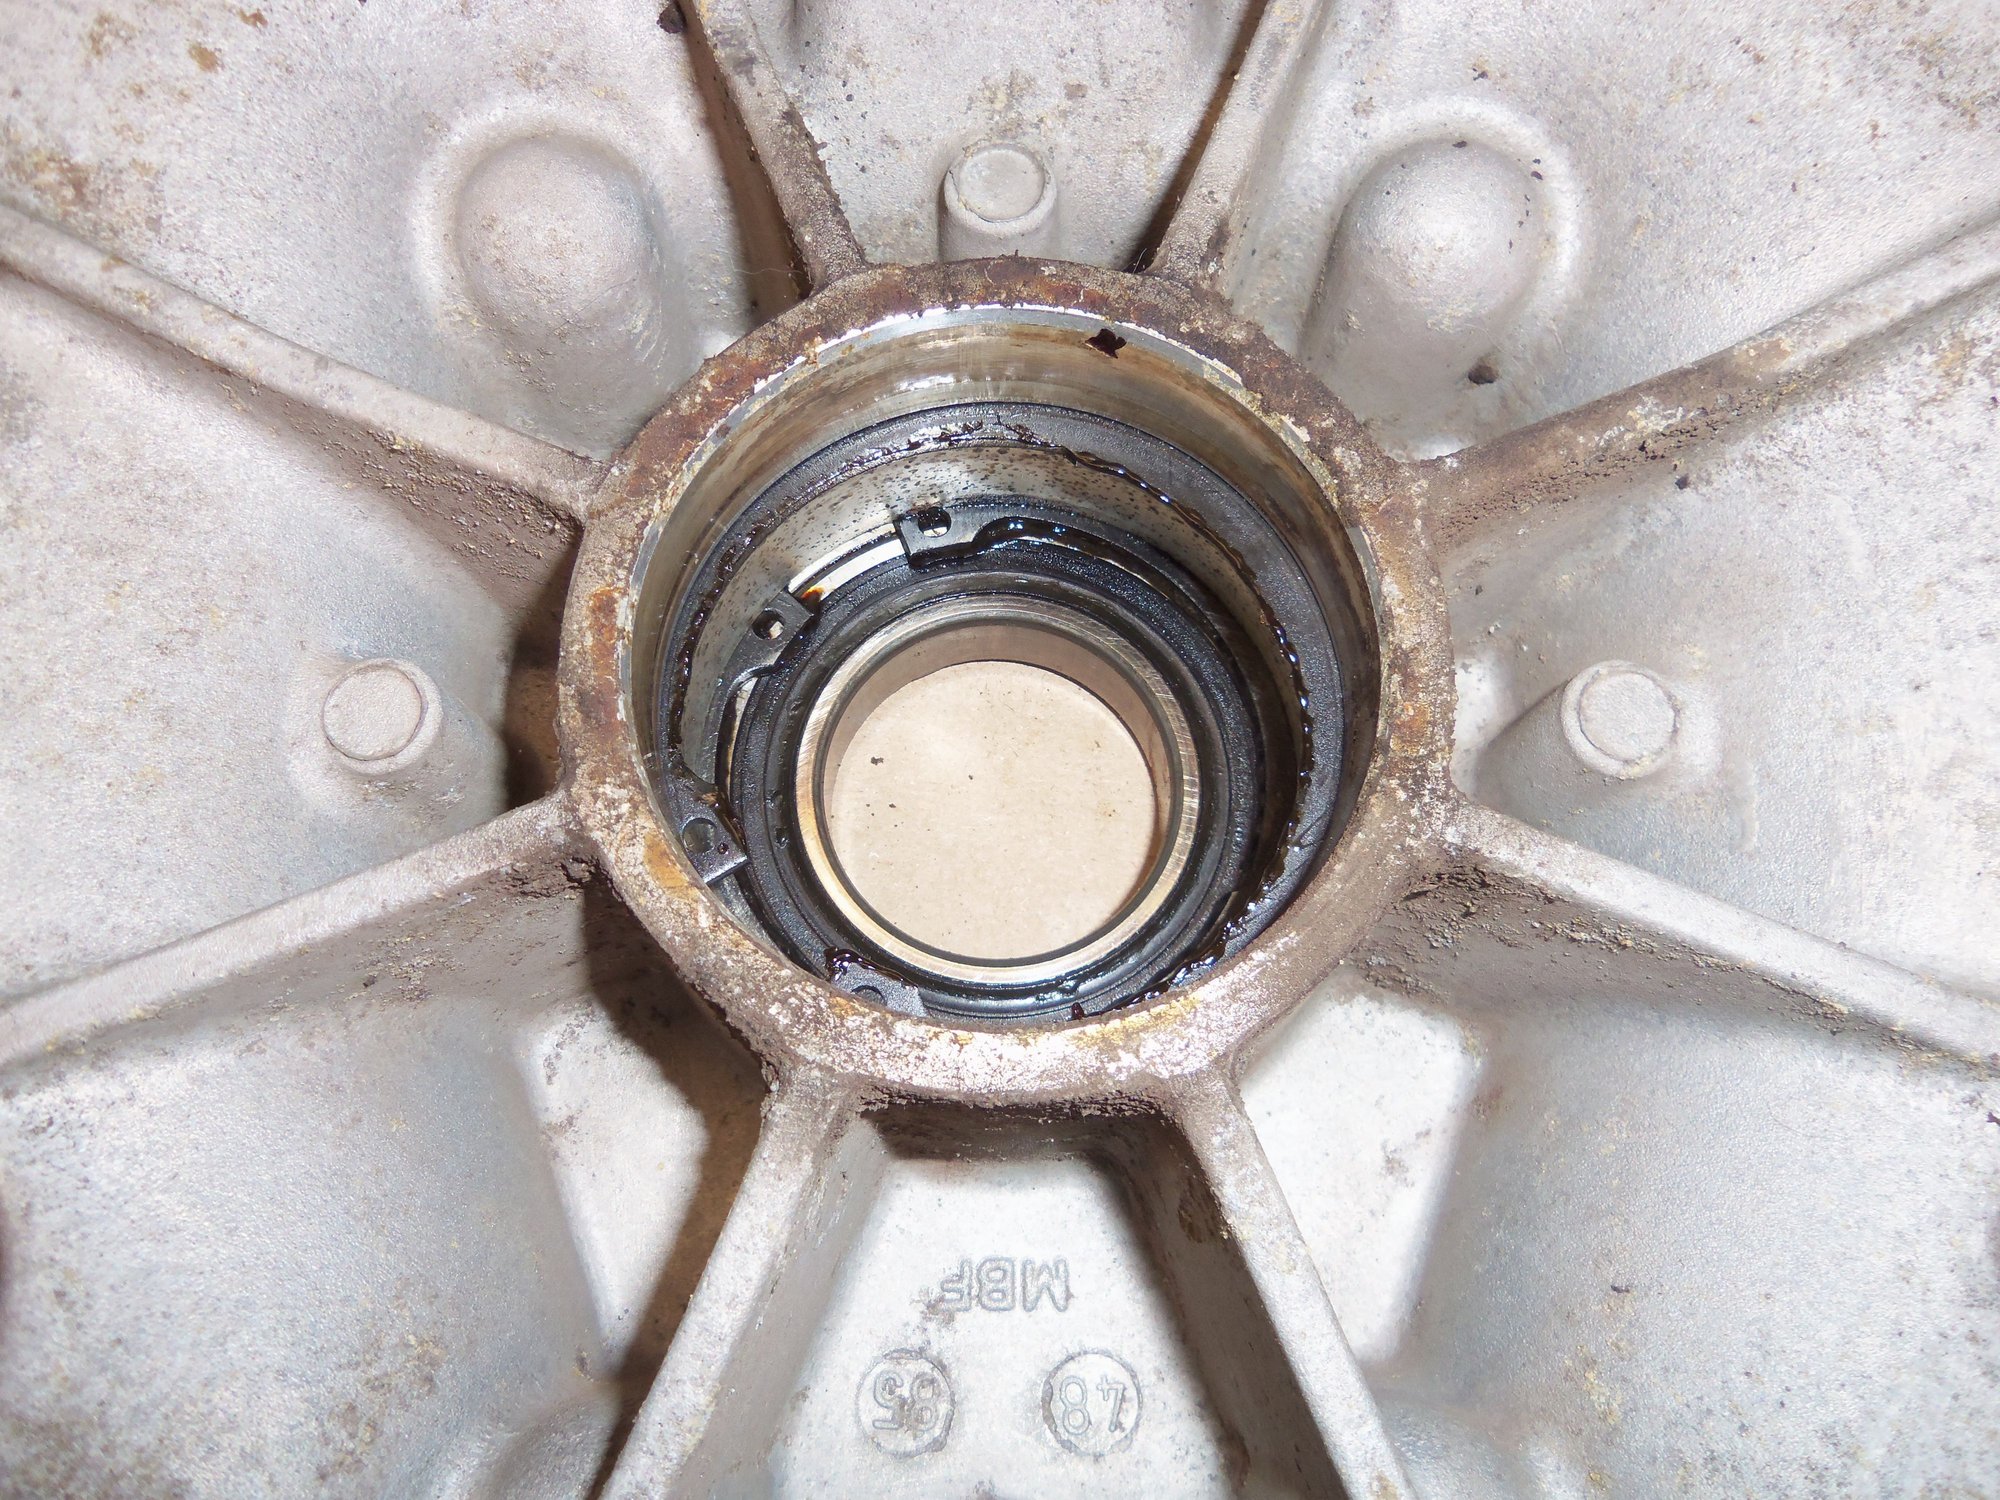
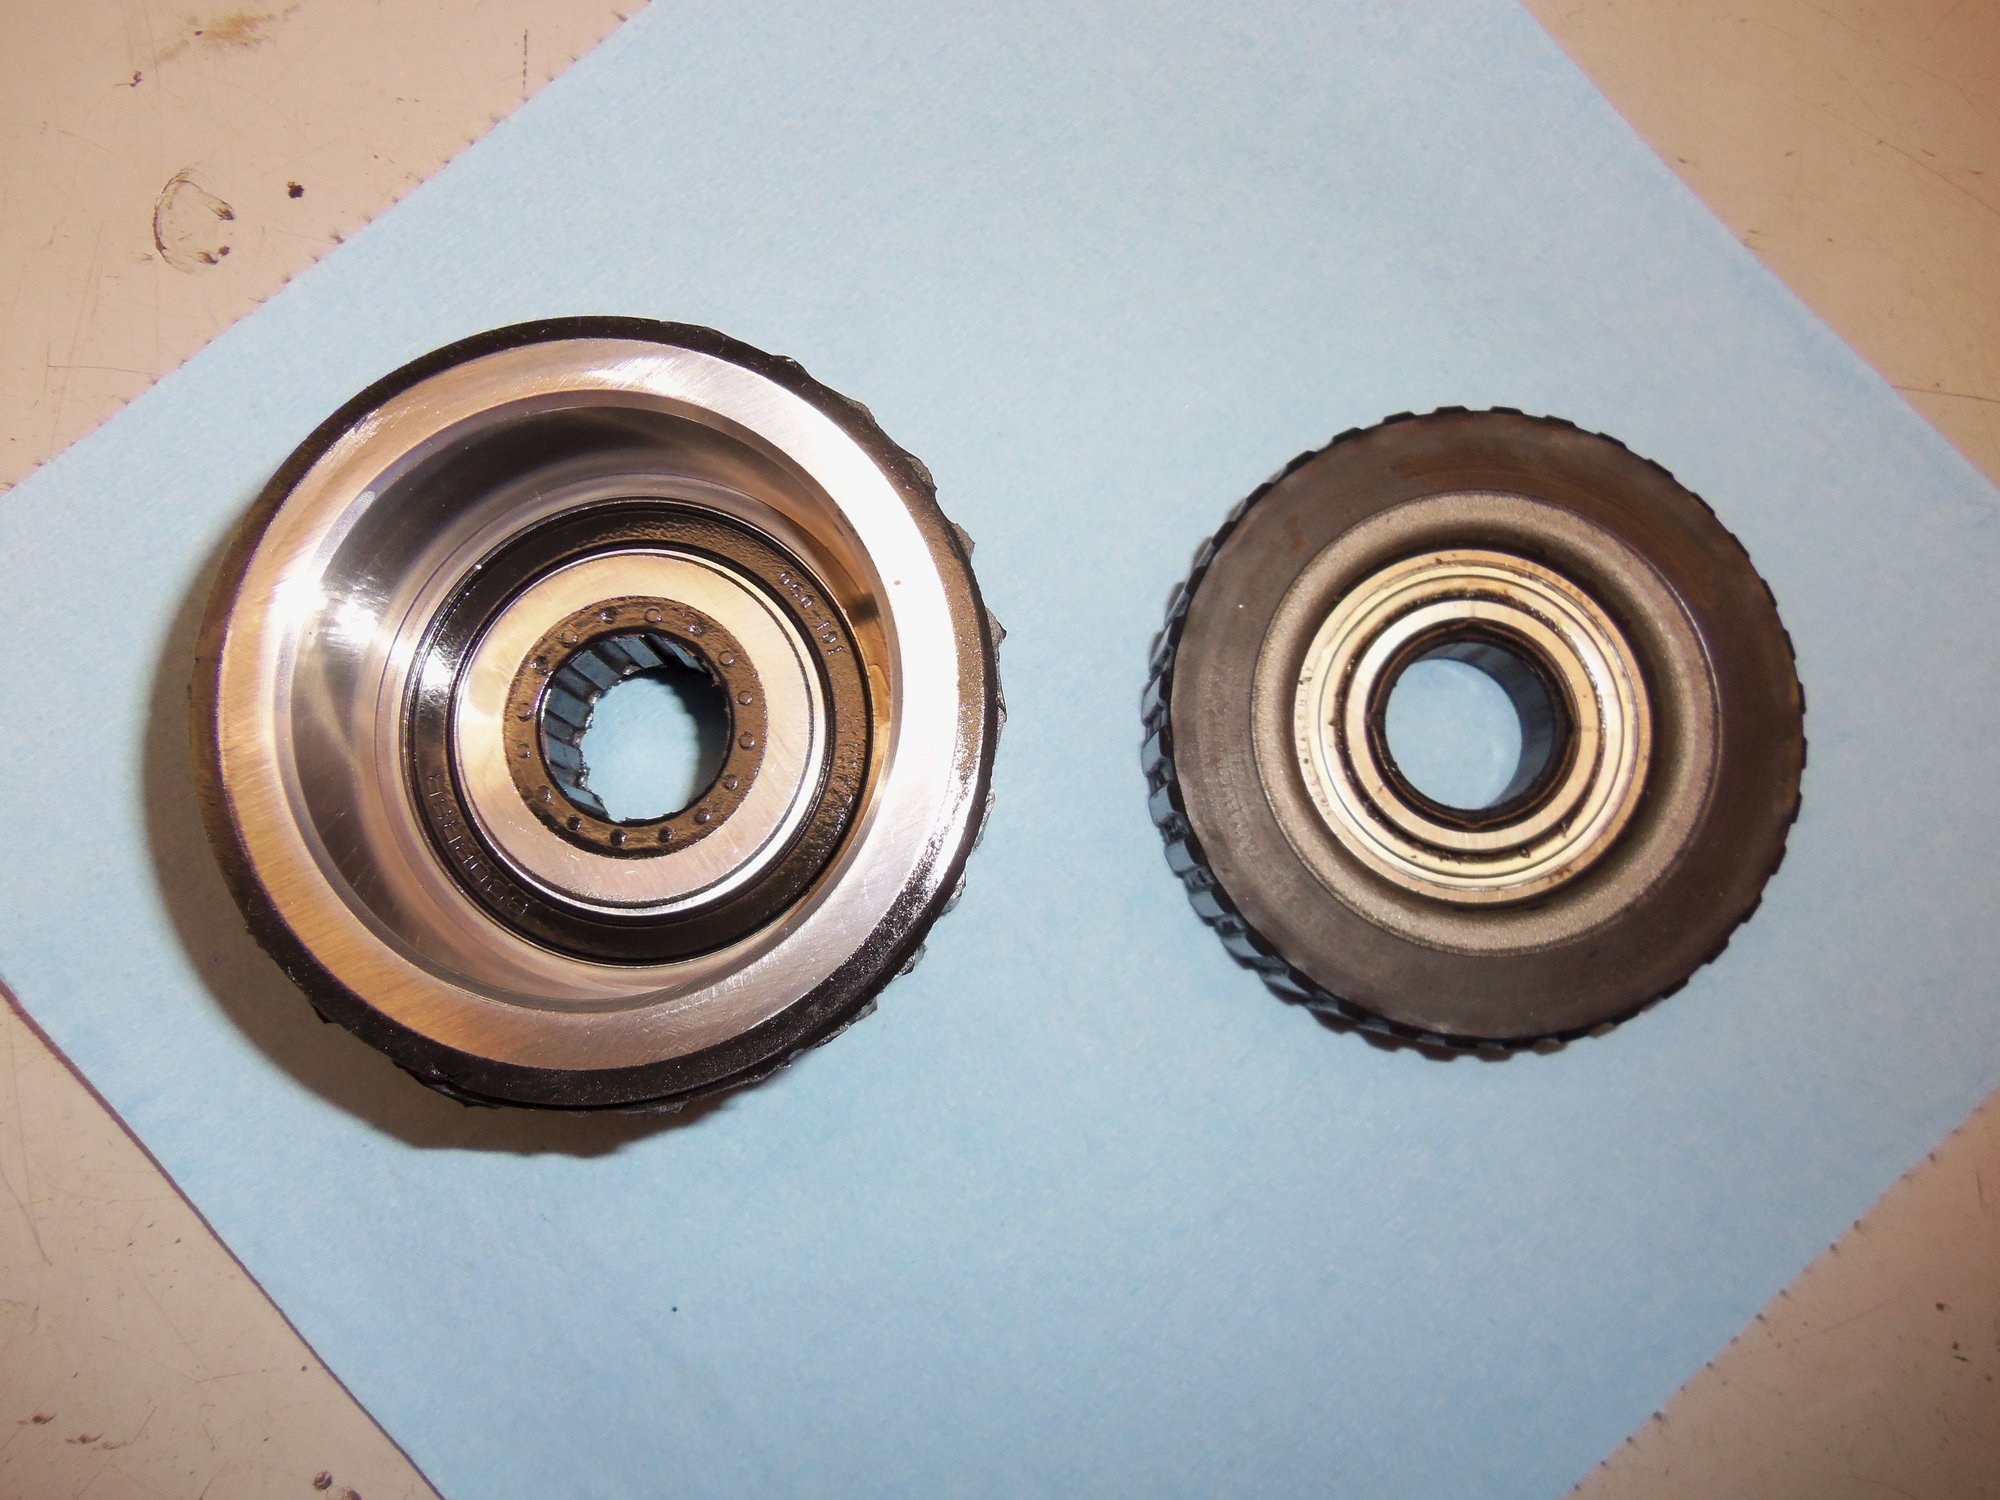
The shiny drive shaft area shown in the picture means the front bearing walked a bit backward from its original position due to the hardening of the outer rubber of the bearing unit as well as the plastic portion of the bearing insert which also burnished off the protective coating of the drive shaft. The migration of the front bearing unit is a common problem with 928 TTs both in automatic and 5-speed versions.
Thanks for the clarification, Constantine! Makes sense about the front bearing. I have read the information on your website about the effects on the drive shaft of the bearing inserts failing. These bearings and inserts are going into the trash.
You will be hearing from me in the near future about ordering a set of Superbearings for this torque tube.
I wonder why the bearings could not be pinned in place with 2 or 3 short screws through the tube into the shell next to the tube inside; or even one screw each, for that matter? Any thoughts?
I wonder why the bearings could not be pinned in place with 2 or 3 short screws through the tube into the shell next to the tube inside; or even one screw each, for that matter? Any thoughts?
Originally Posted by Imo000
Many have done this, including myself.
Good question, Jerry.
Imo000, exactly how did you pin the bearings?
Originally Posted by Mrmerlin
I would clean the splines and put it together without any anti seize,
The joint will move with a lubricant.
Just some blue loctite on the bolt threads
OK. I was trying to do my due diligence and researched it in the WSM.
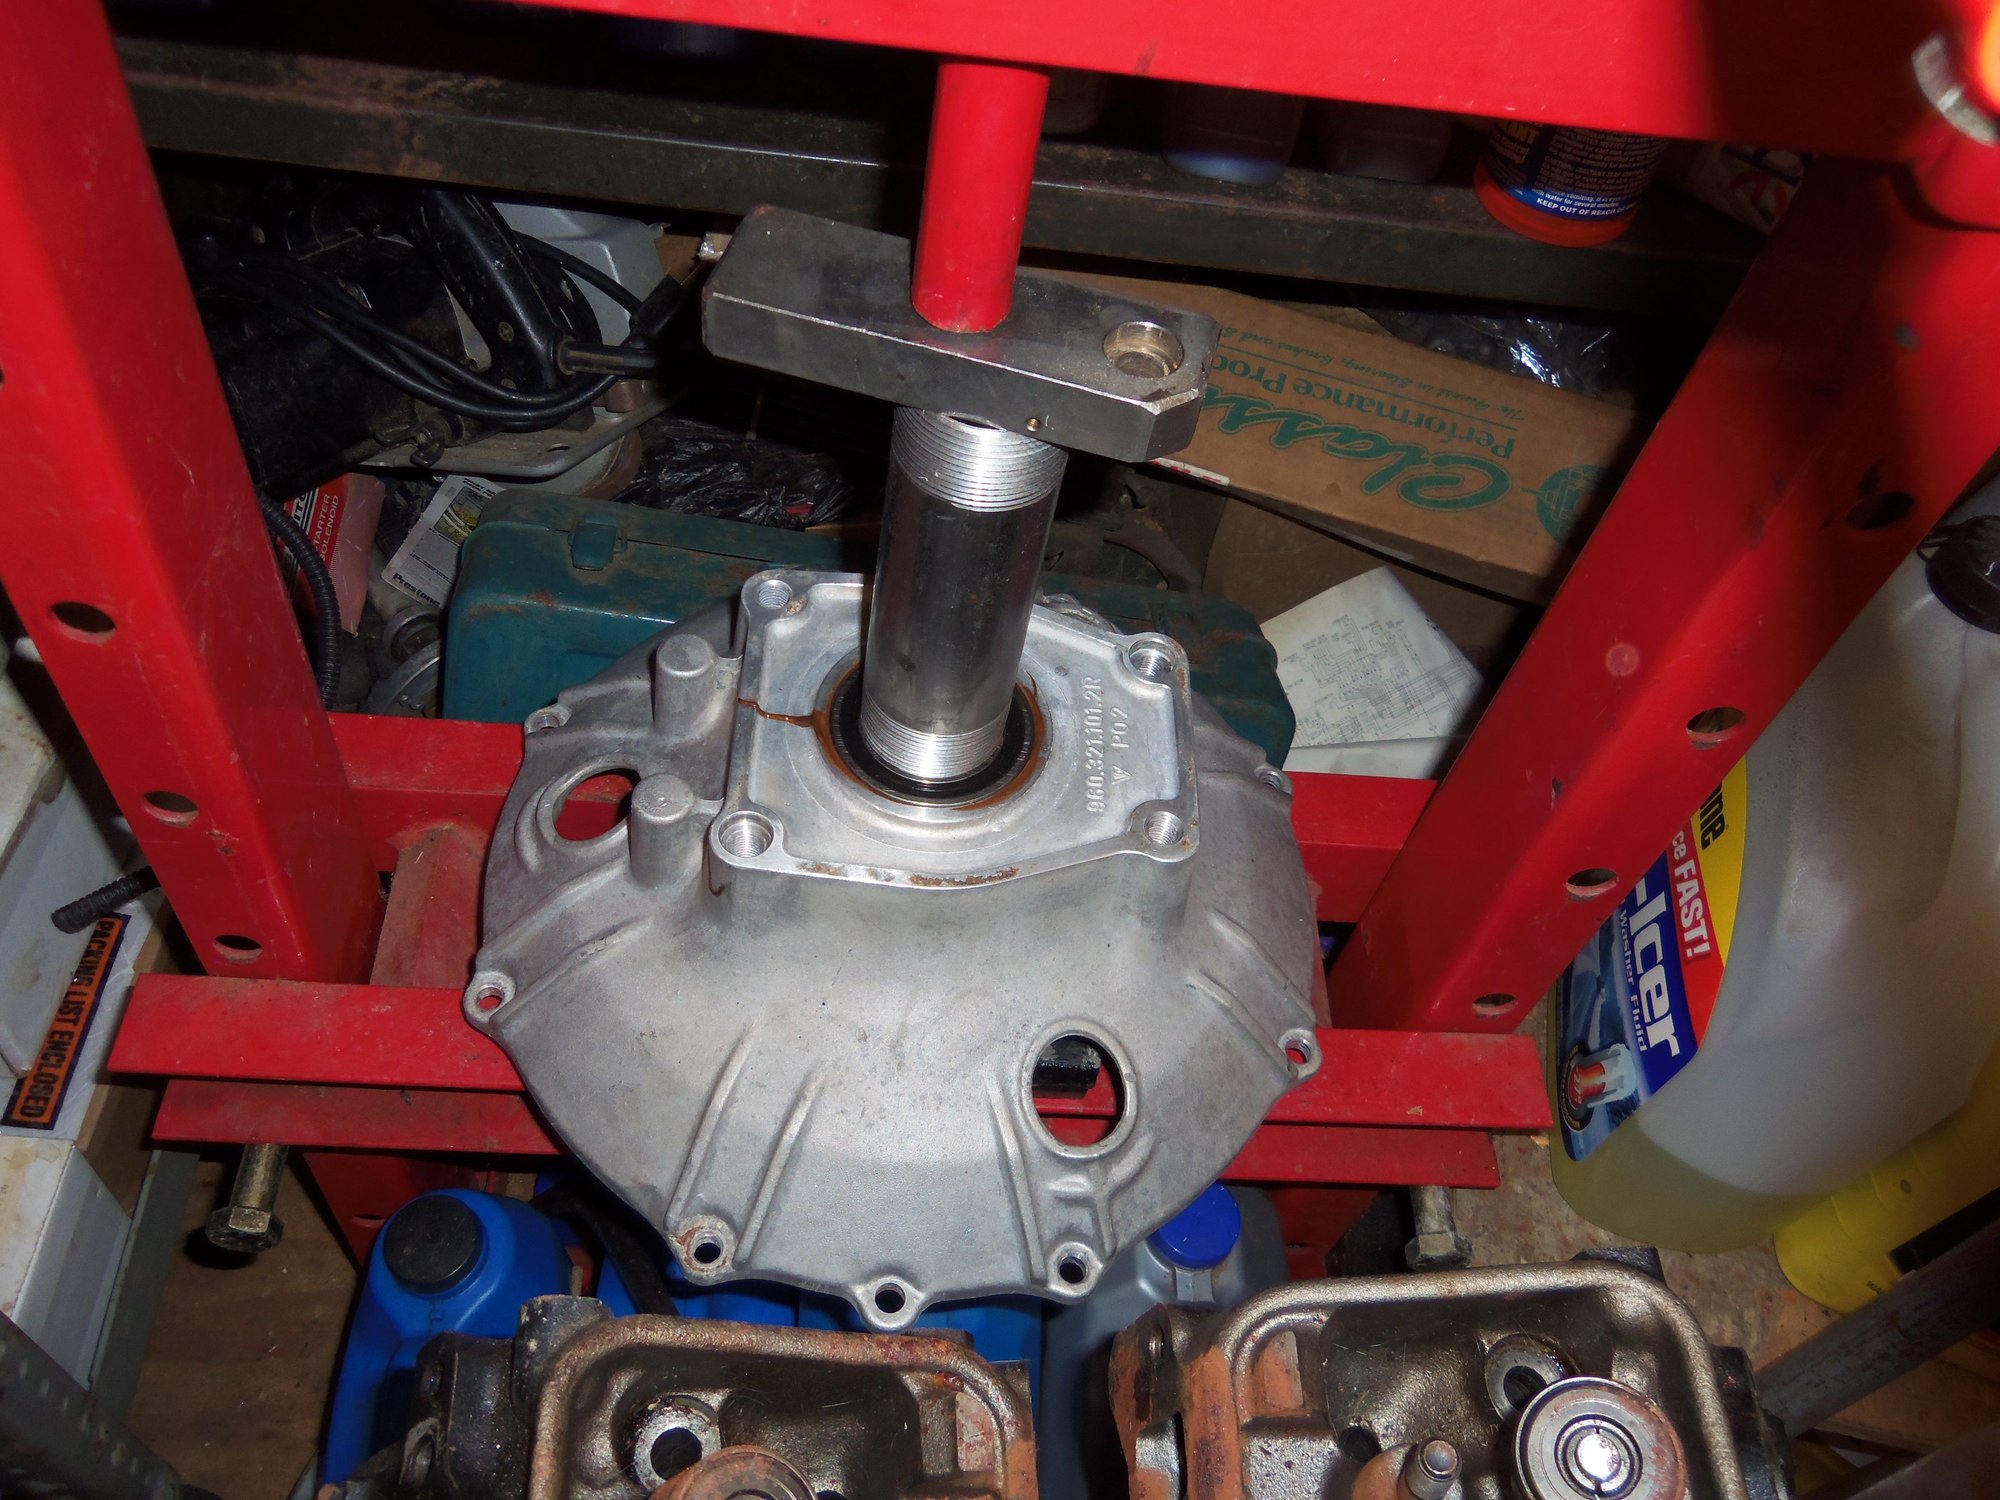
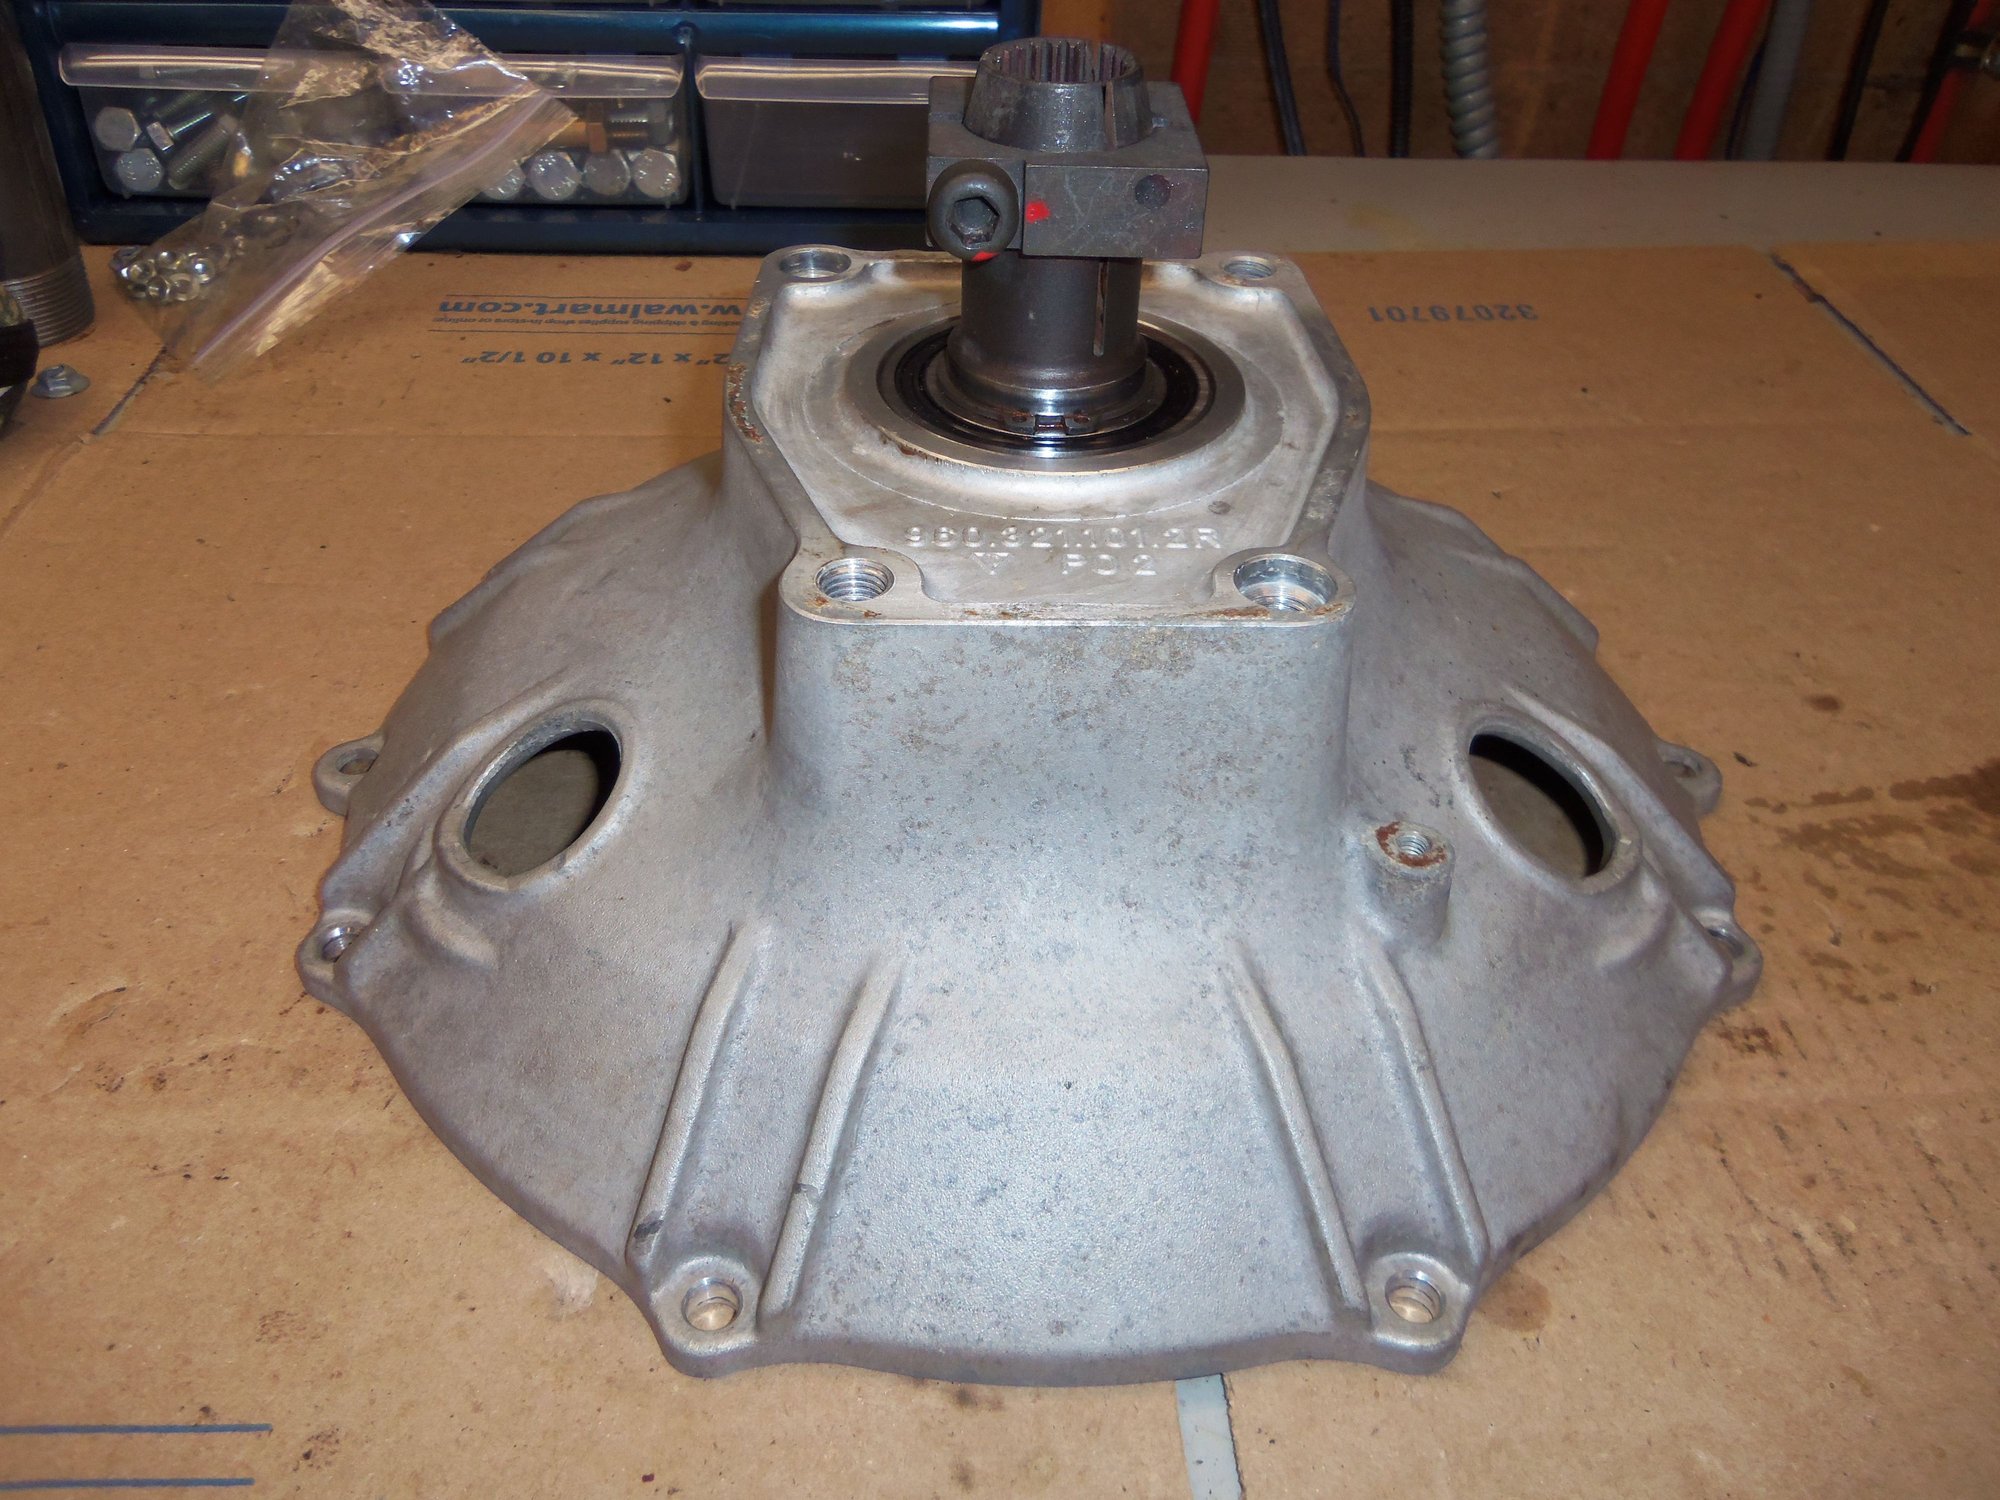
Disassembly was reasonably straight forward. I checked the WSM, Volume 3, Section 37, starting on page 125 for specific instructions. Good thing that heat was not needed for disassembly. However, heat is needed for reassembly. I will have to wait until the missus is not home to heat the cover to 250 F in the oven.
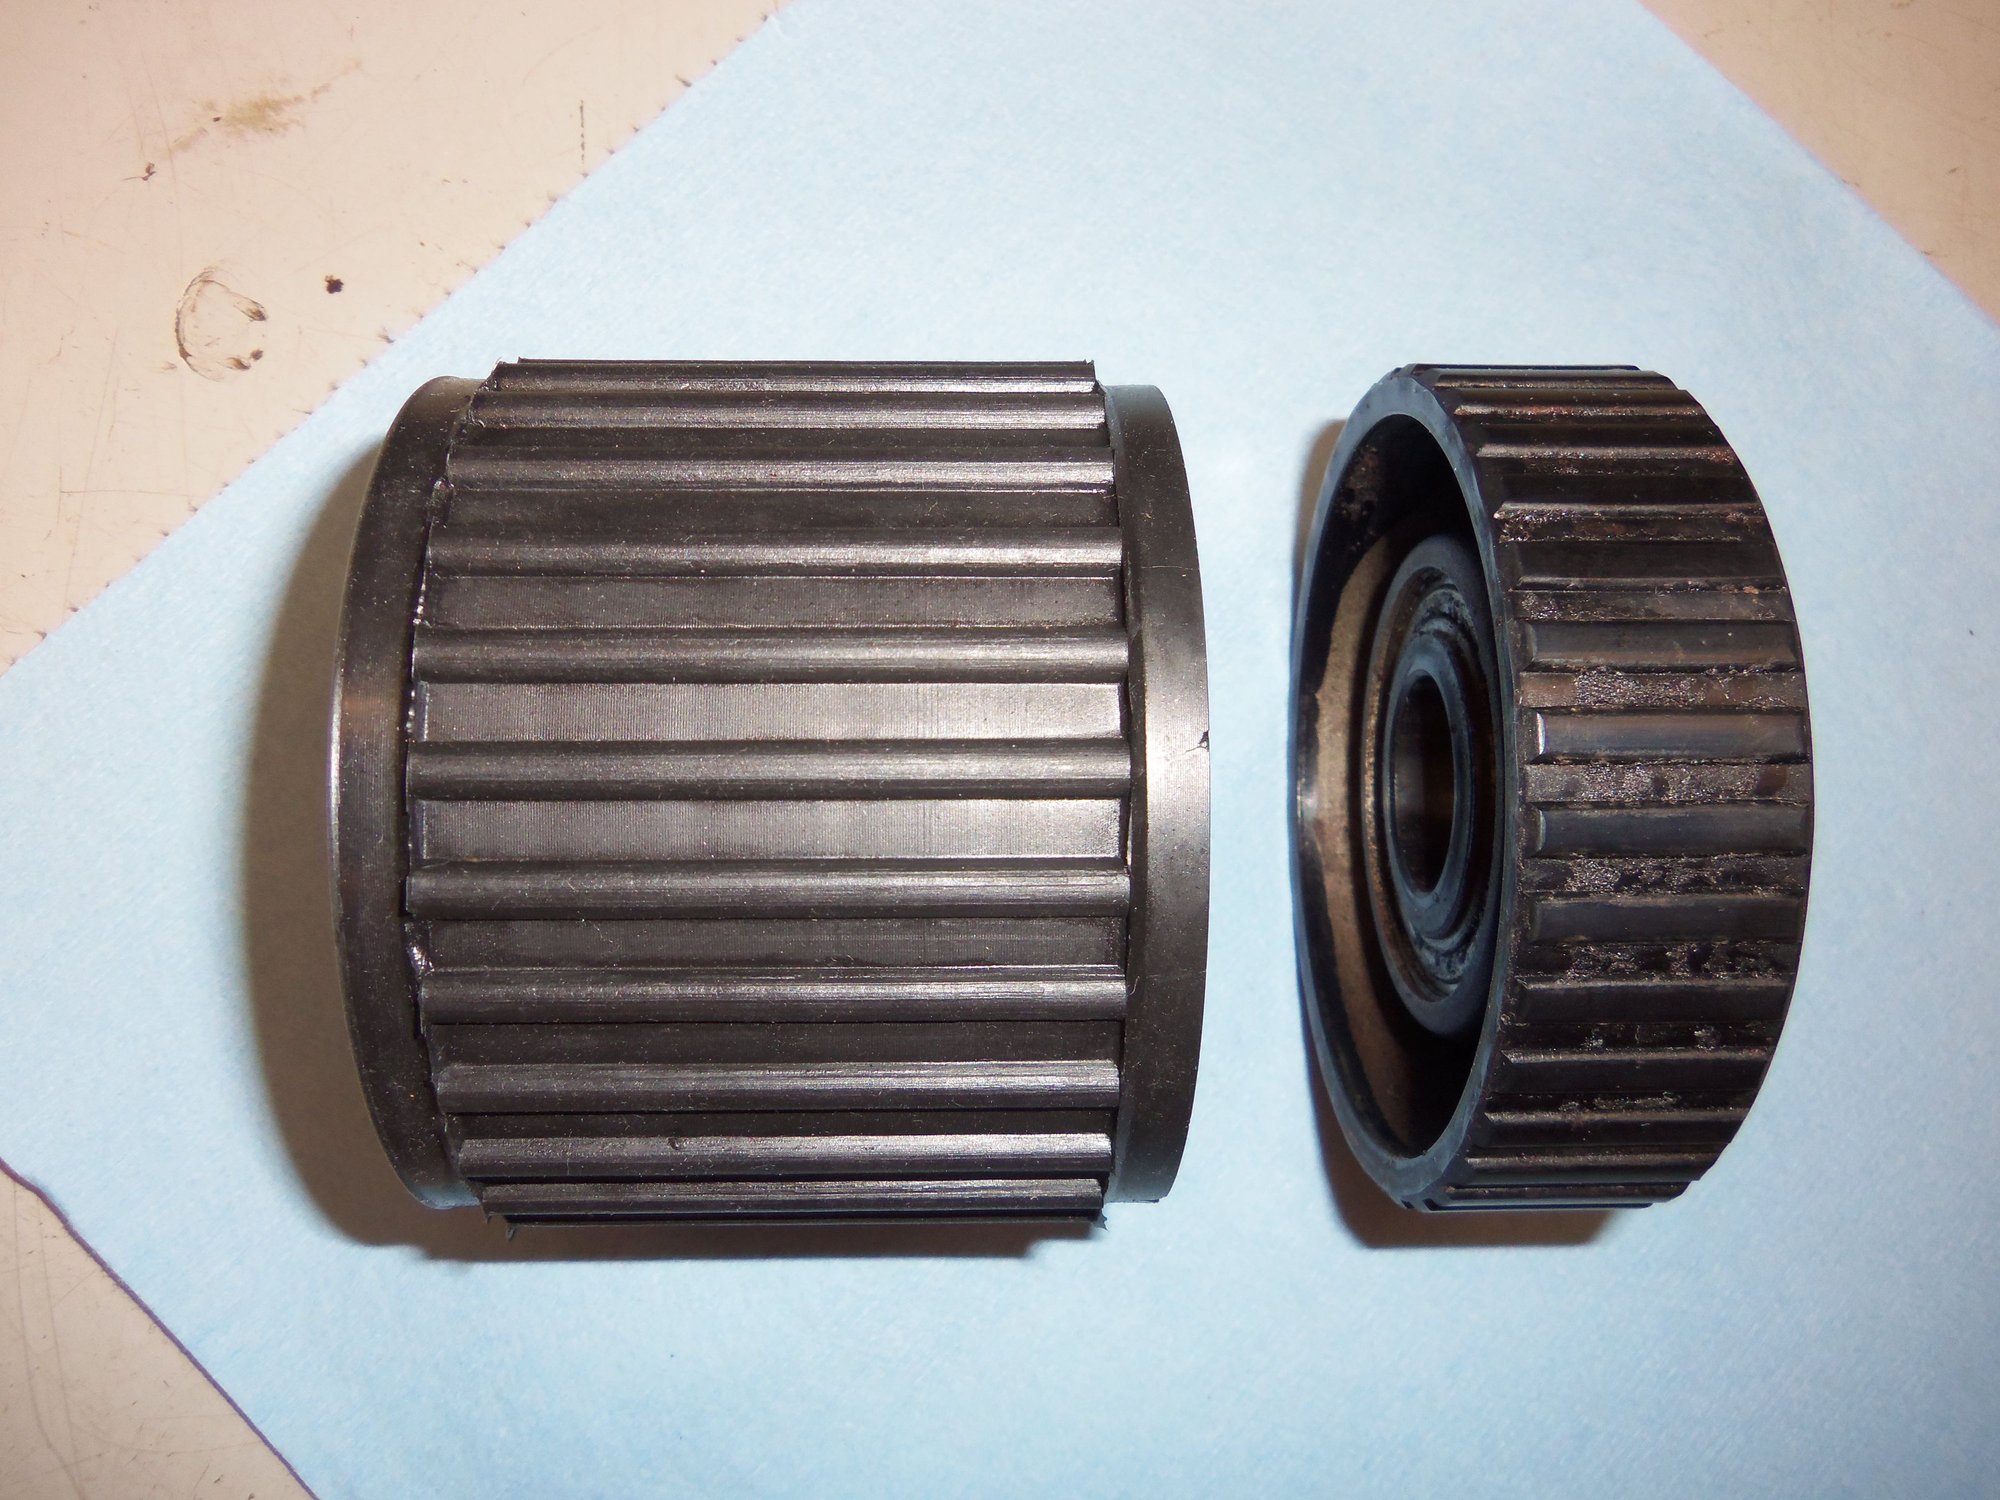
I used my hydraulic press to push the drive plate and bearing out of the cover, then to push the remaining bearing out of the cover. I then used my split bearing puller to remove the bearing from the drive plate shaft.
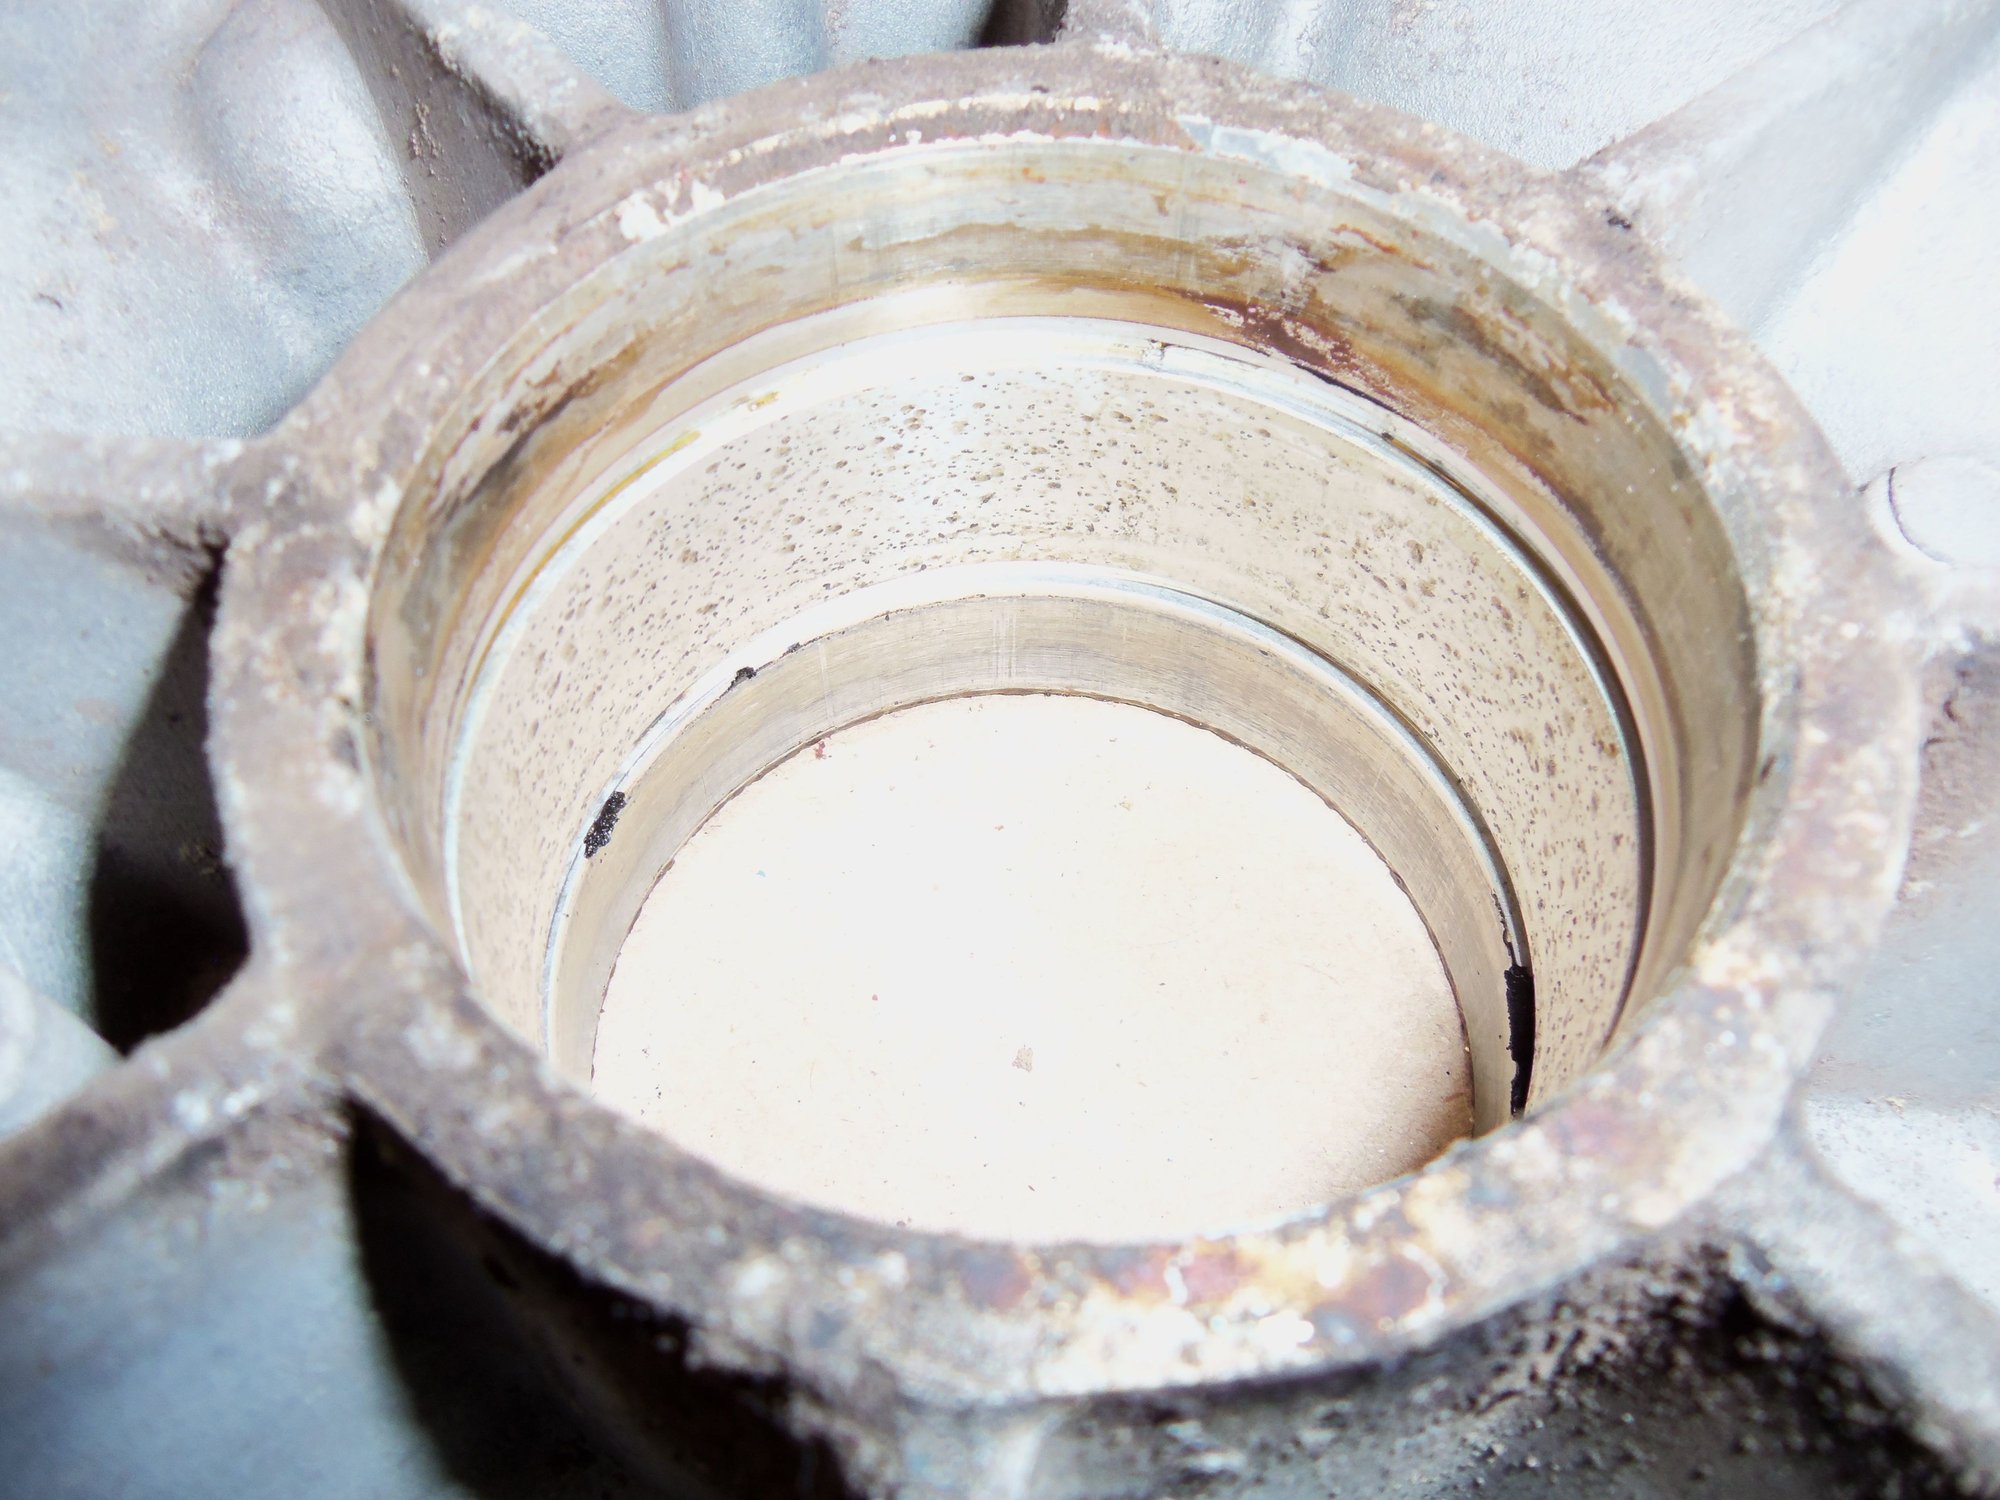
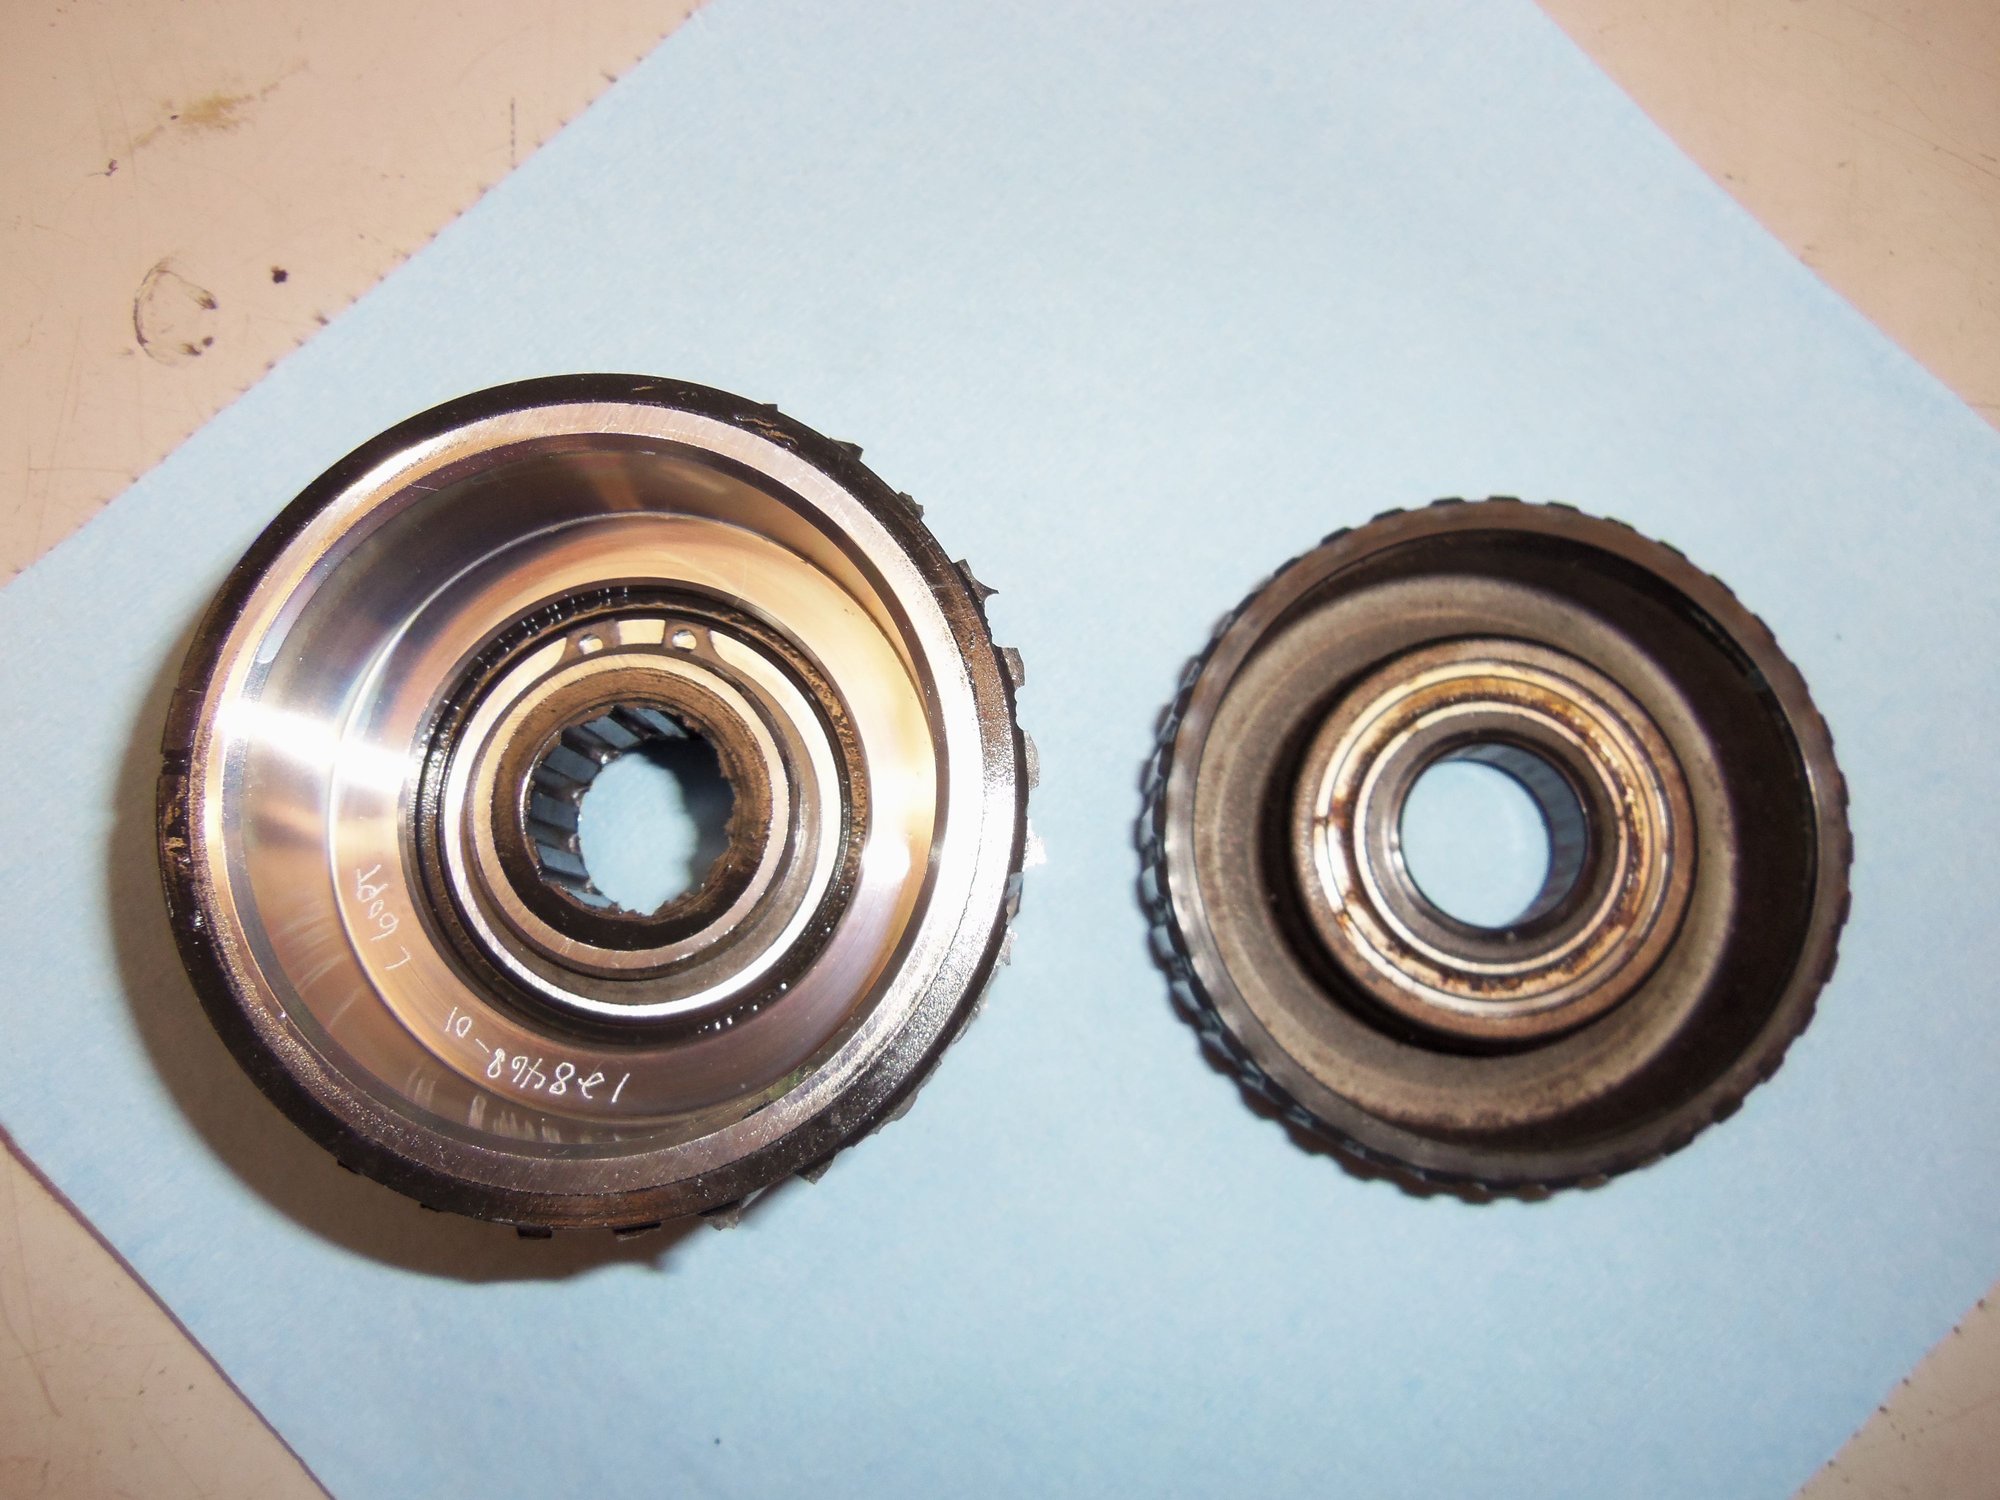
Everything was in decent condition. There was a little surface rust on the inside of the pinch clamp, but nothing to worry about.
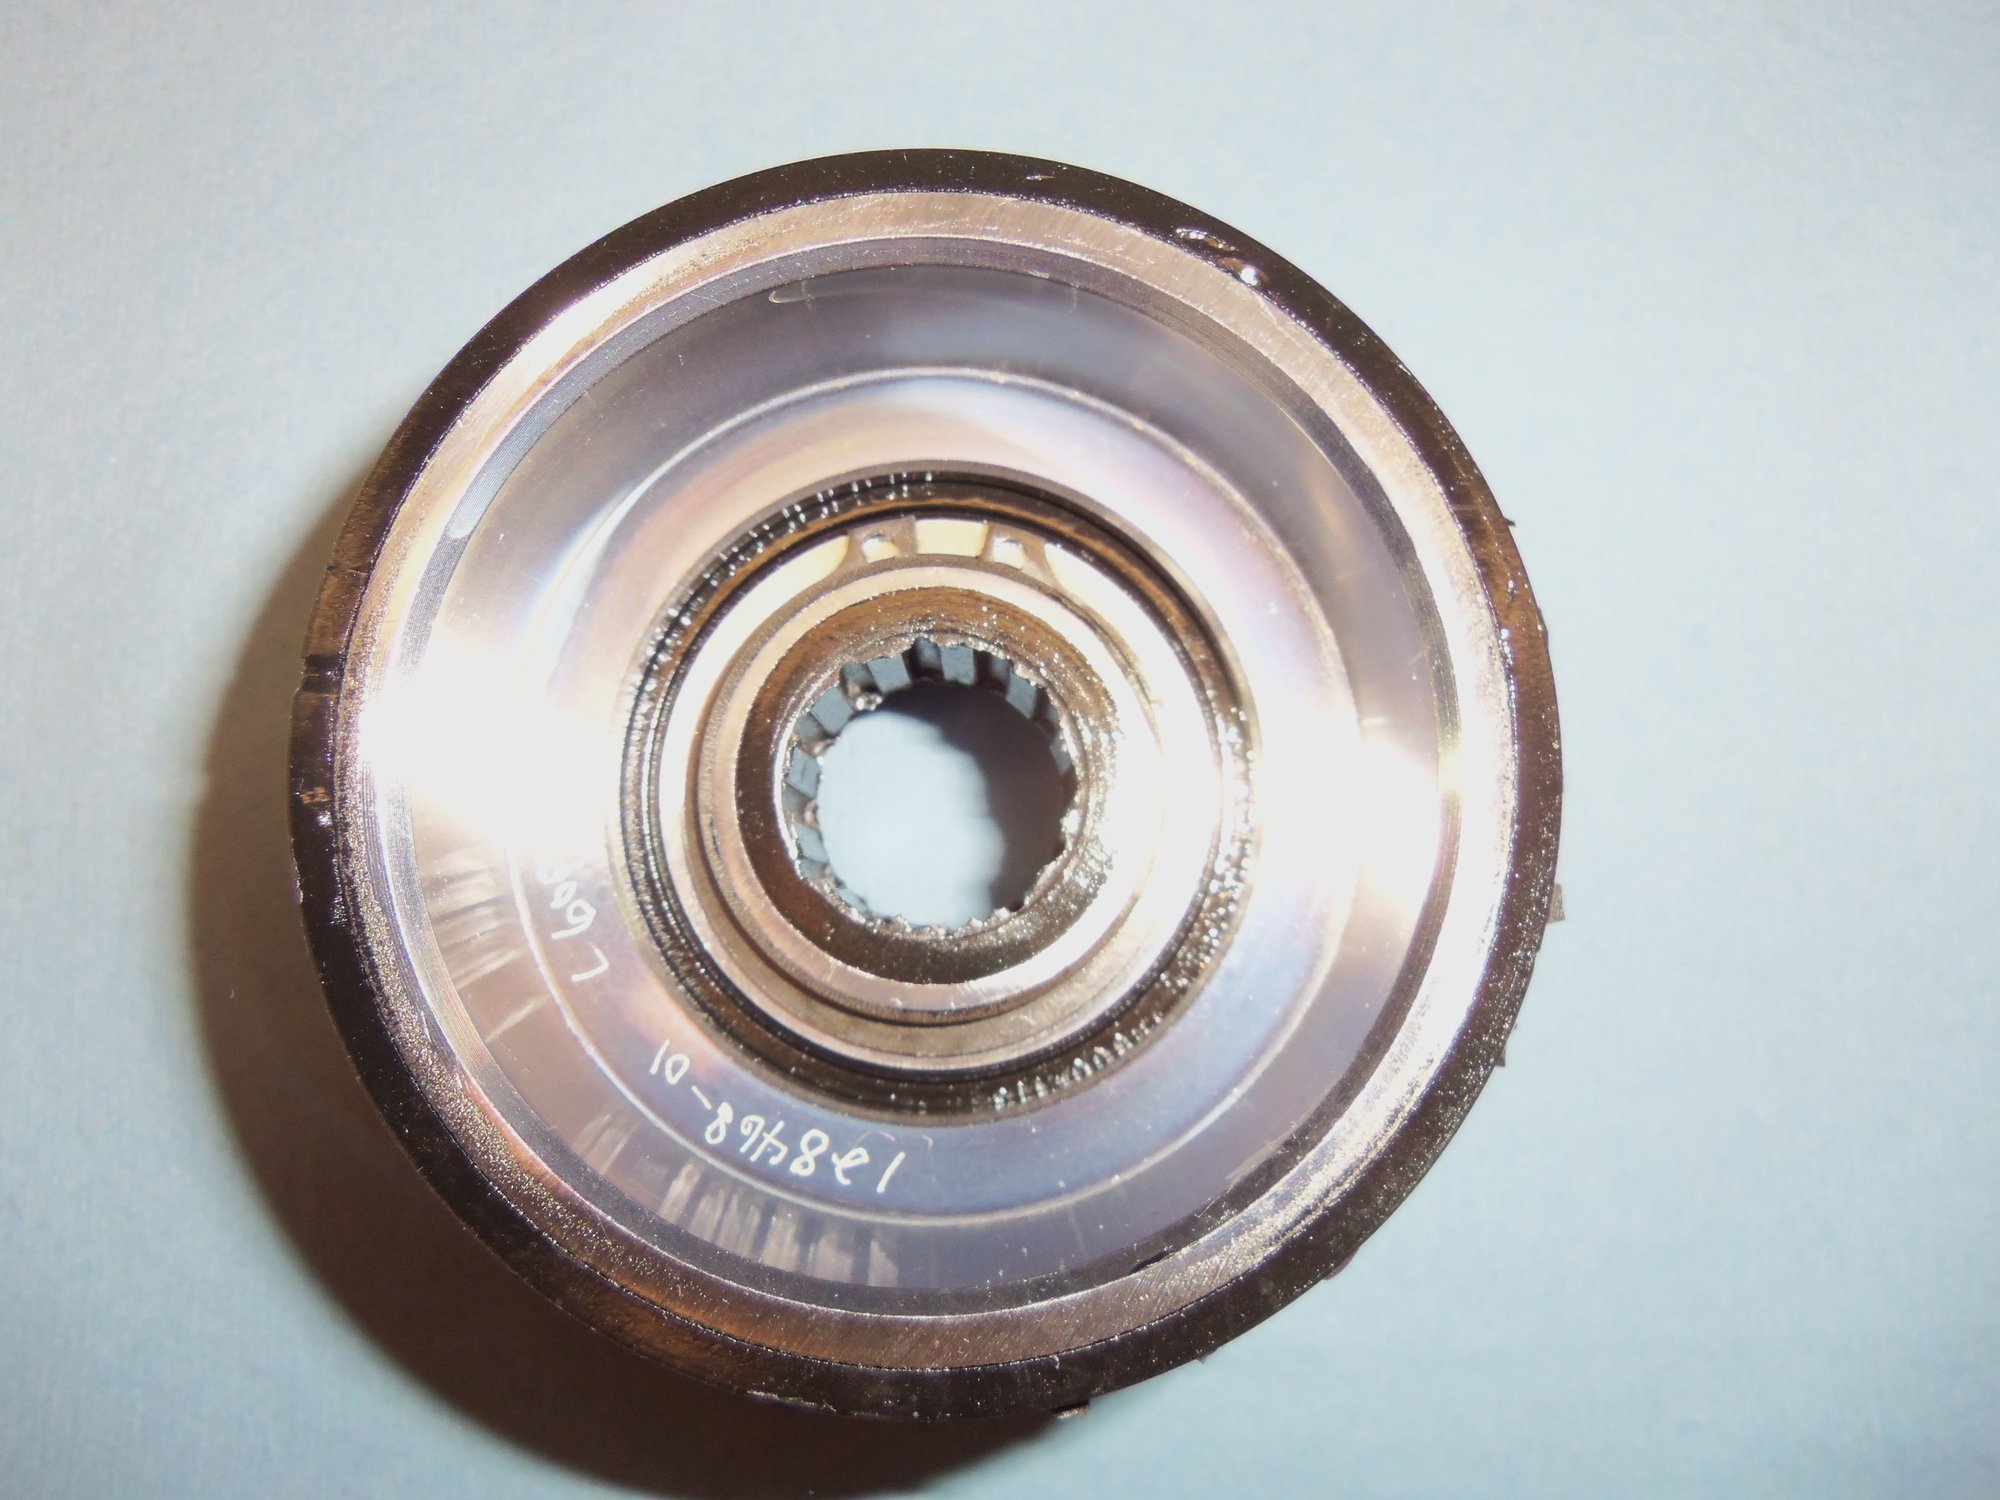
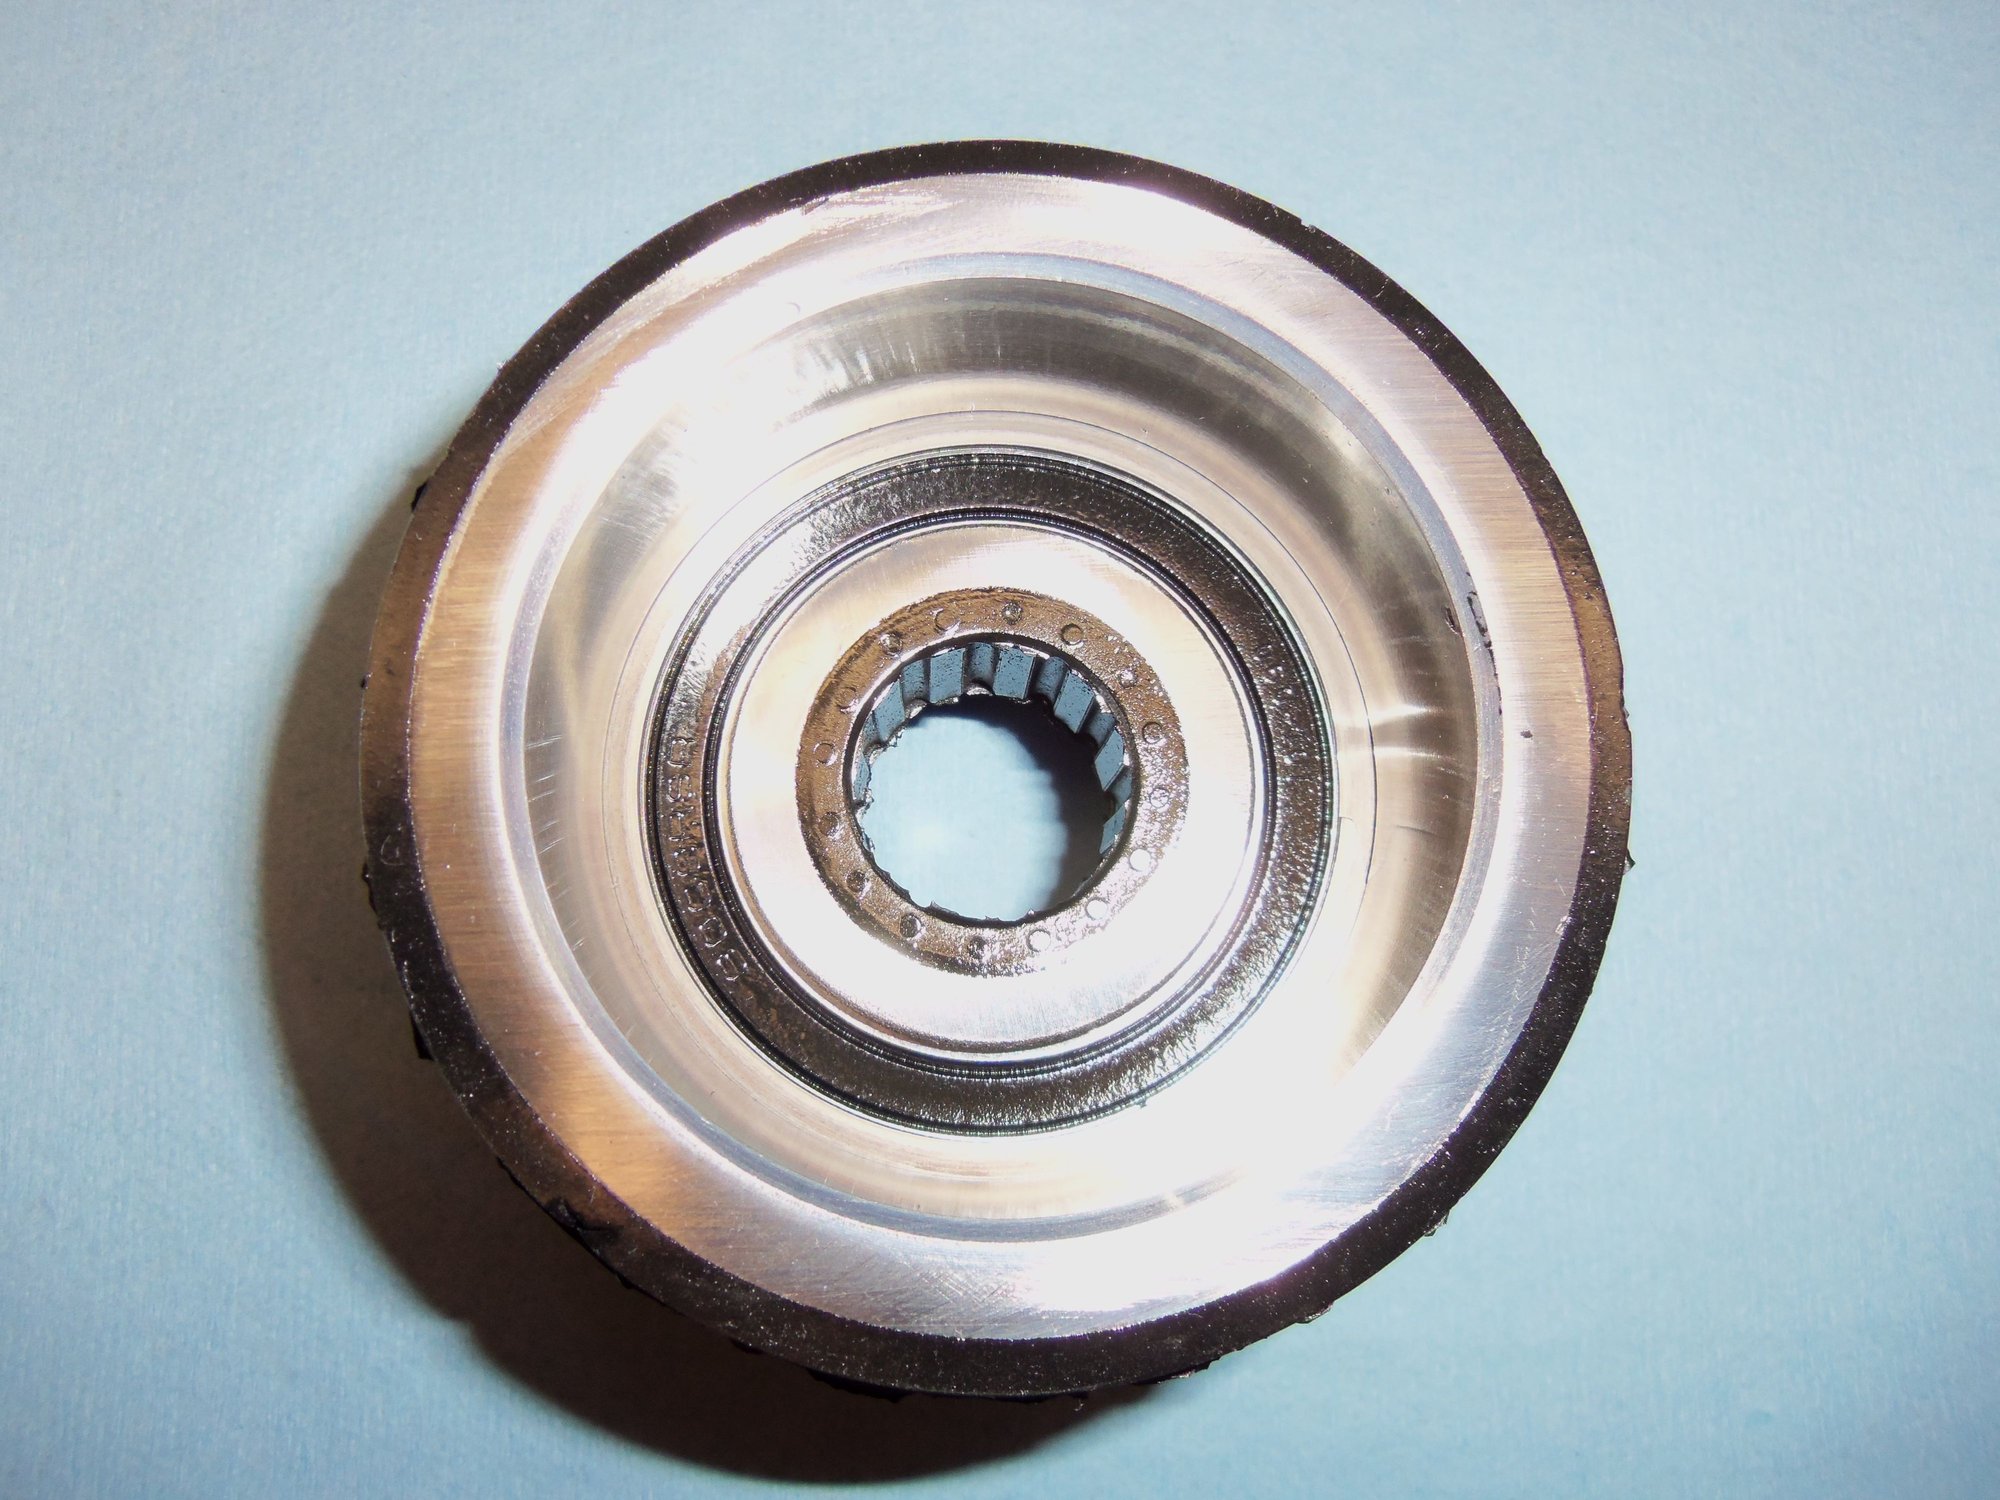
The converter bearings didn't feel too bad, but definitely were not new anymore. New bearings are ready to go in. After I clean everything. On that note, I was glad to see no corrosion in the bearing bores in the converter cover.
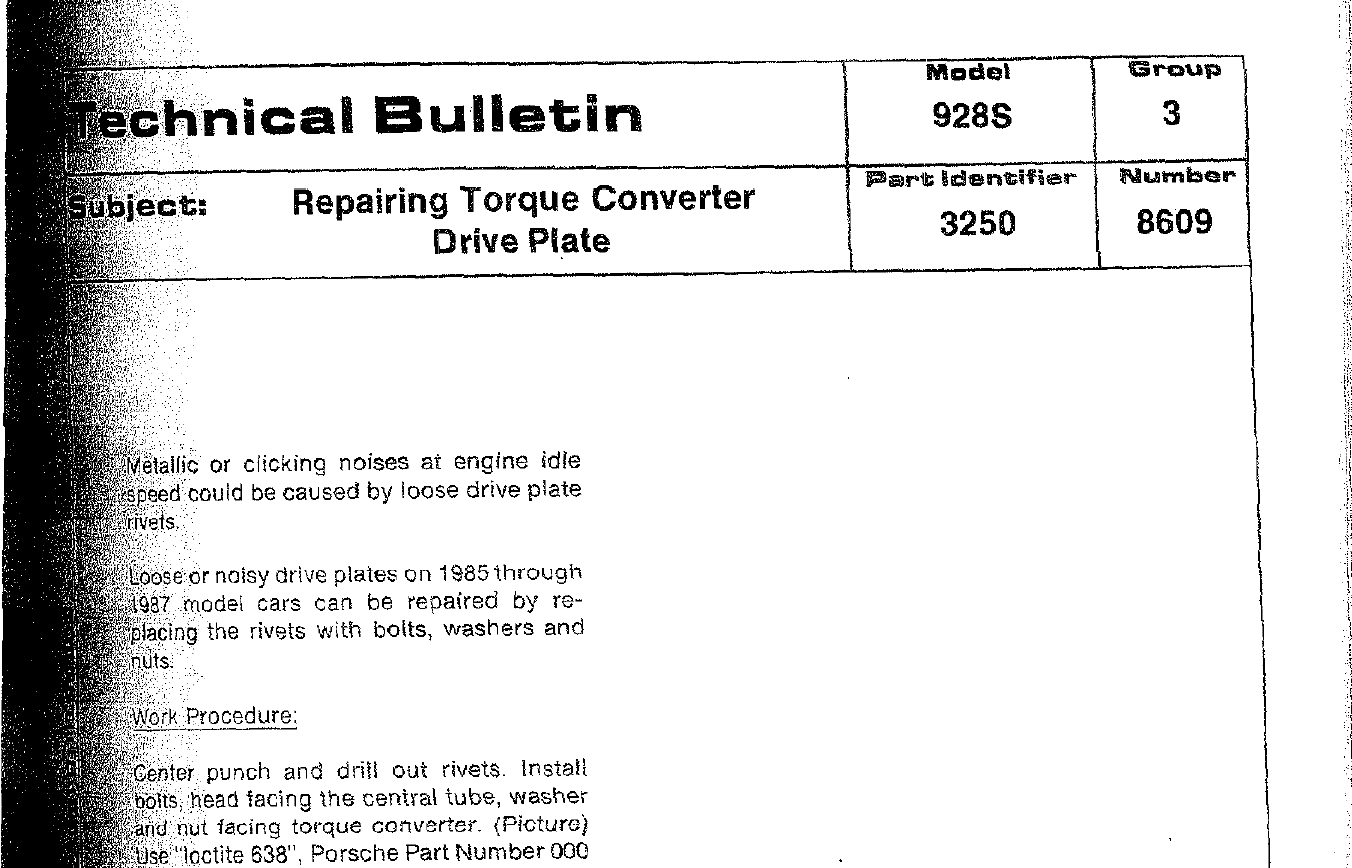
My next step is to drill out the drive plate to hub rivets and replace them with bolts. I will be following TSB 1986/3/8609 for this. I am using the hardware recommended by the TSB and will use red loctite upon installation.
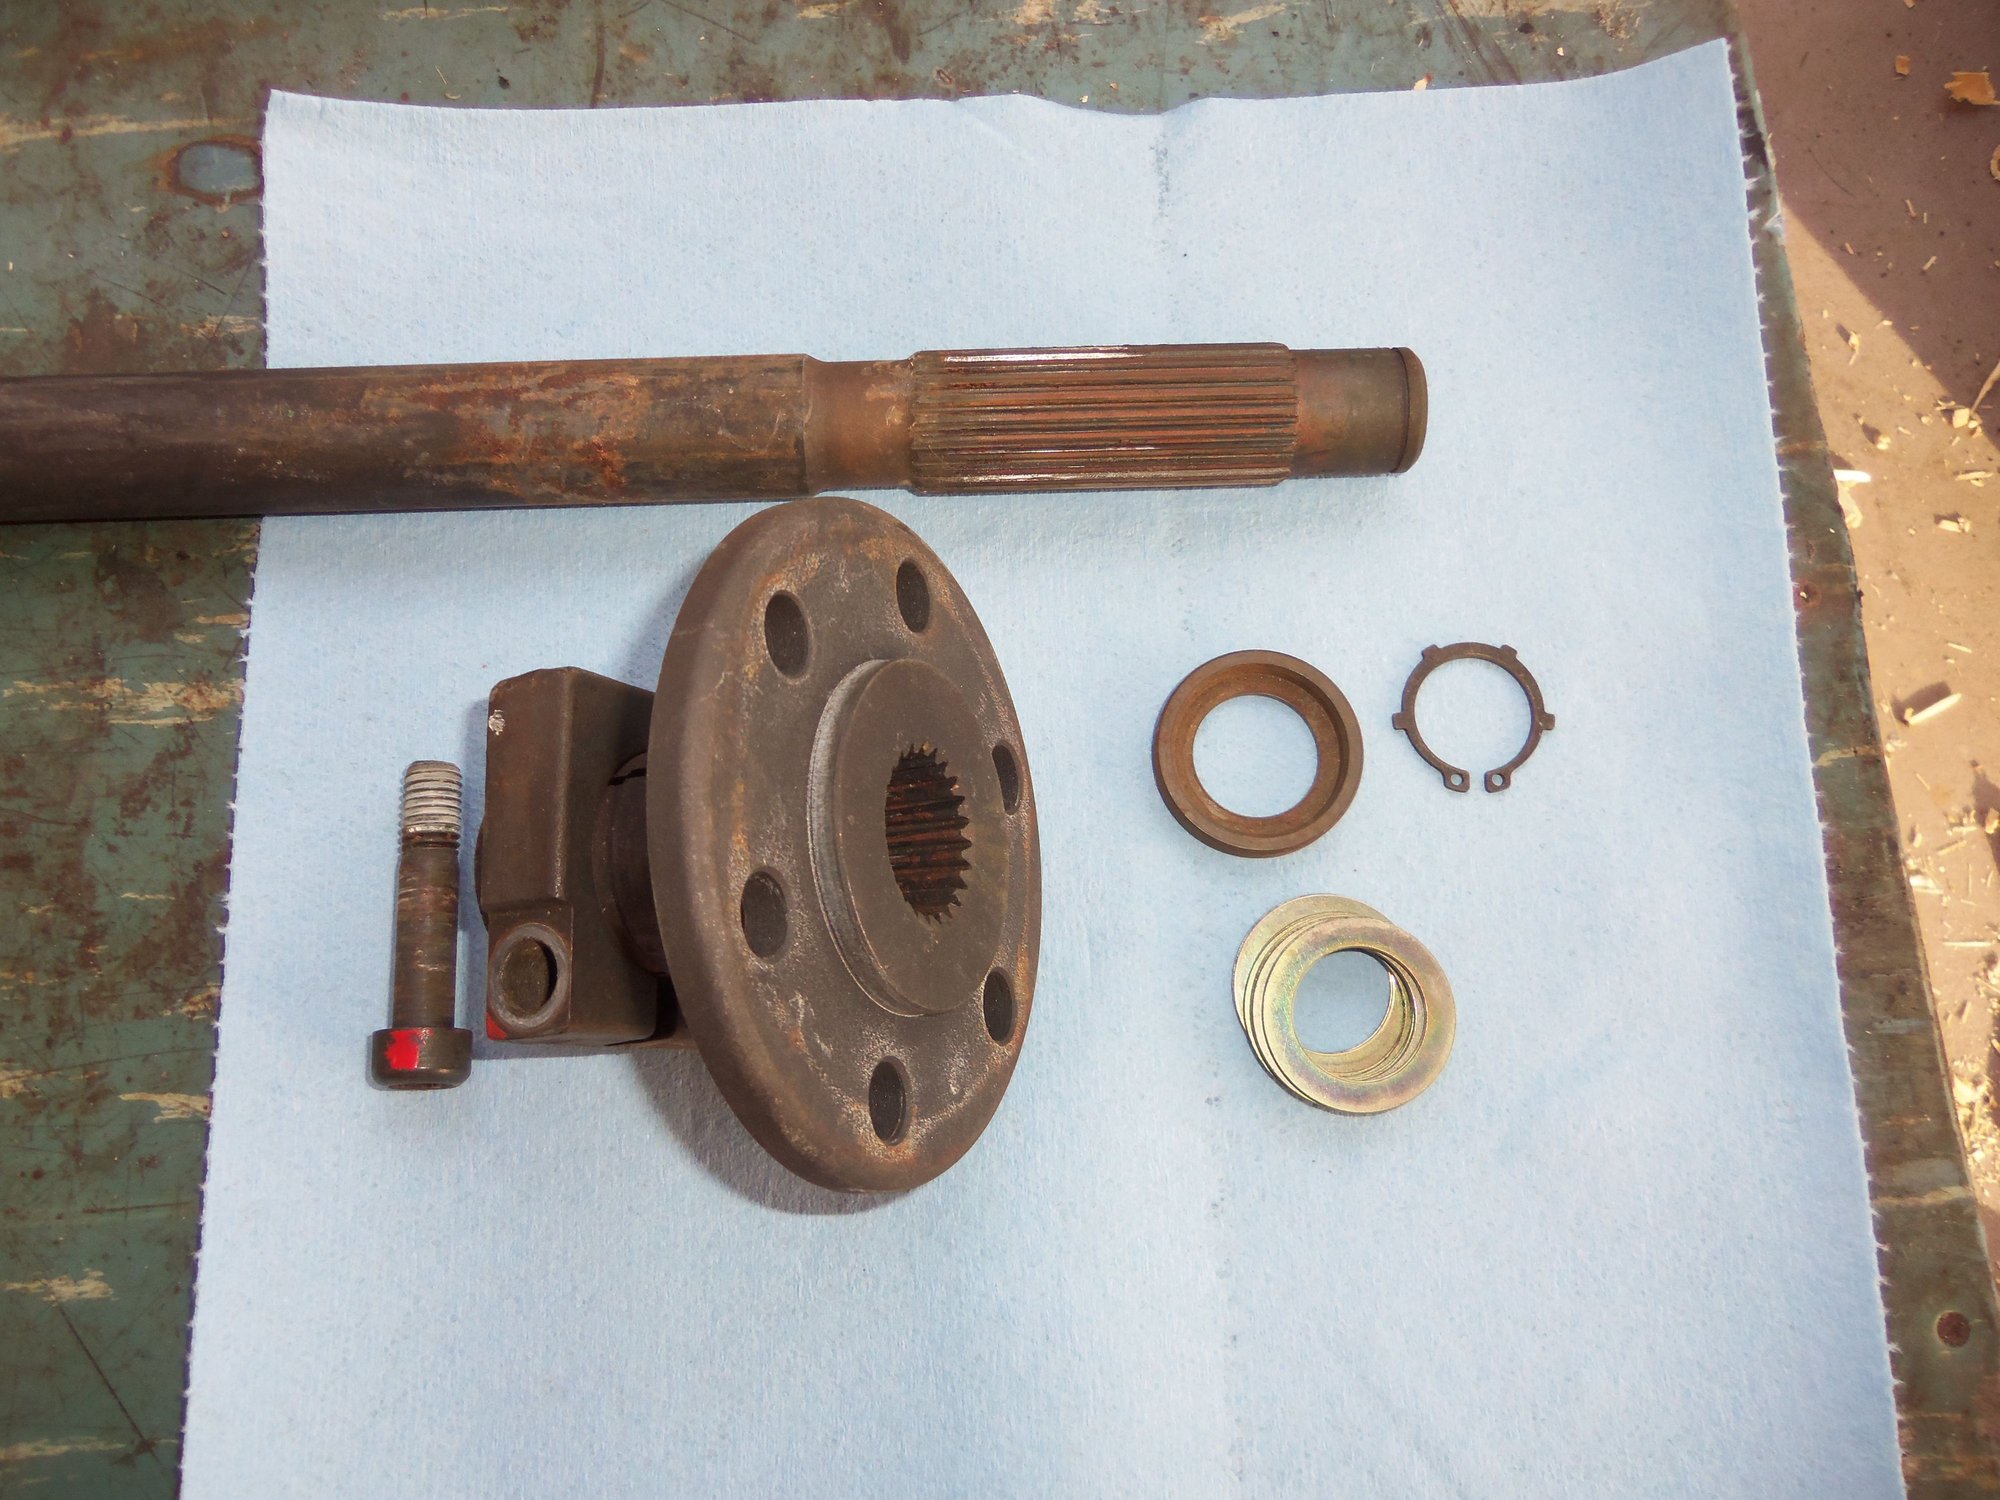
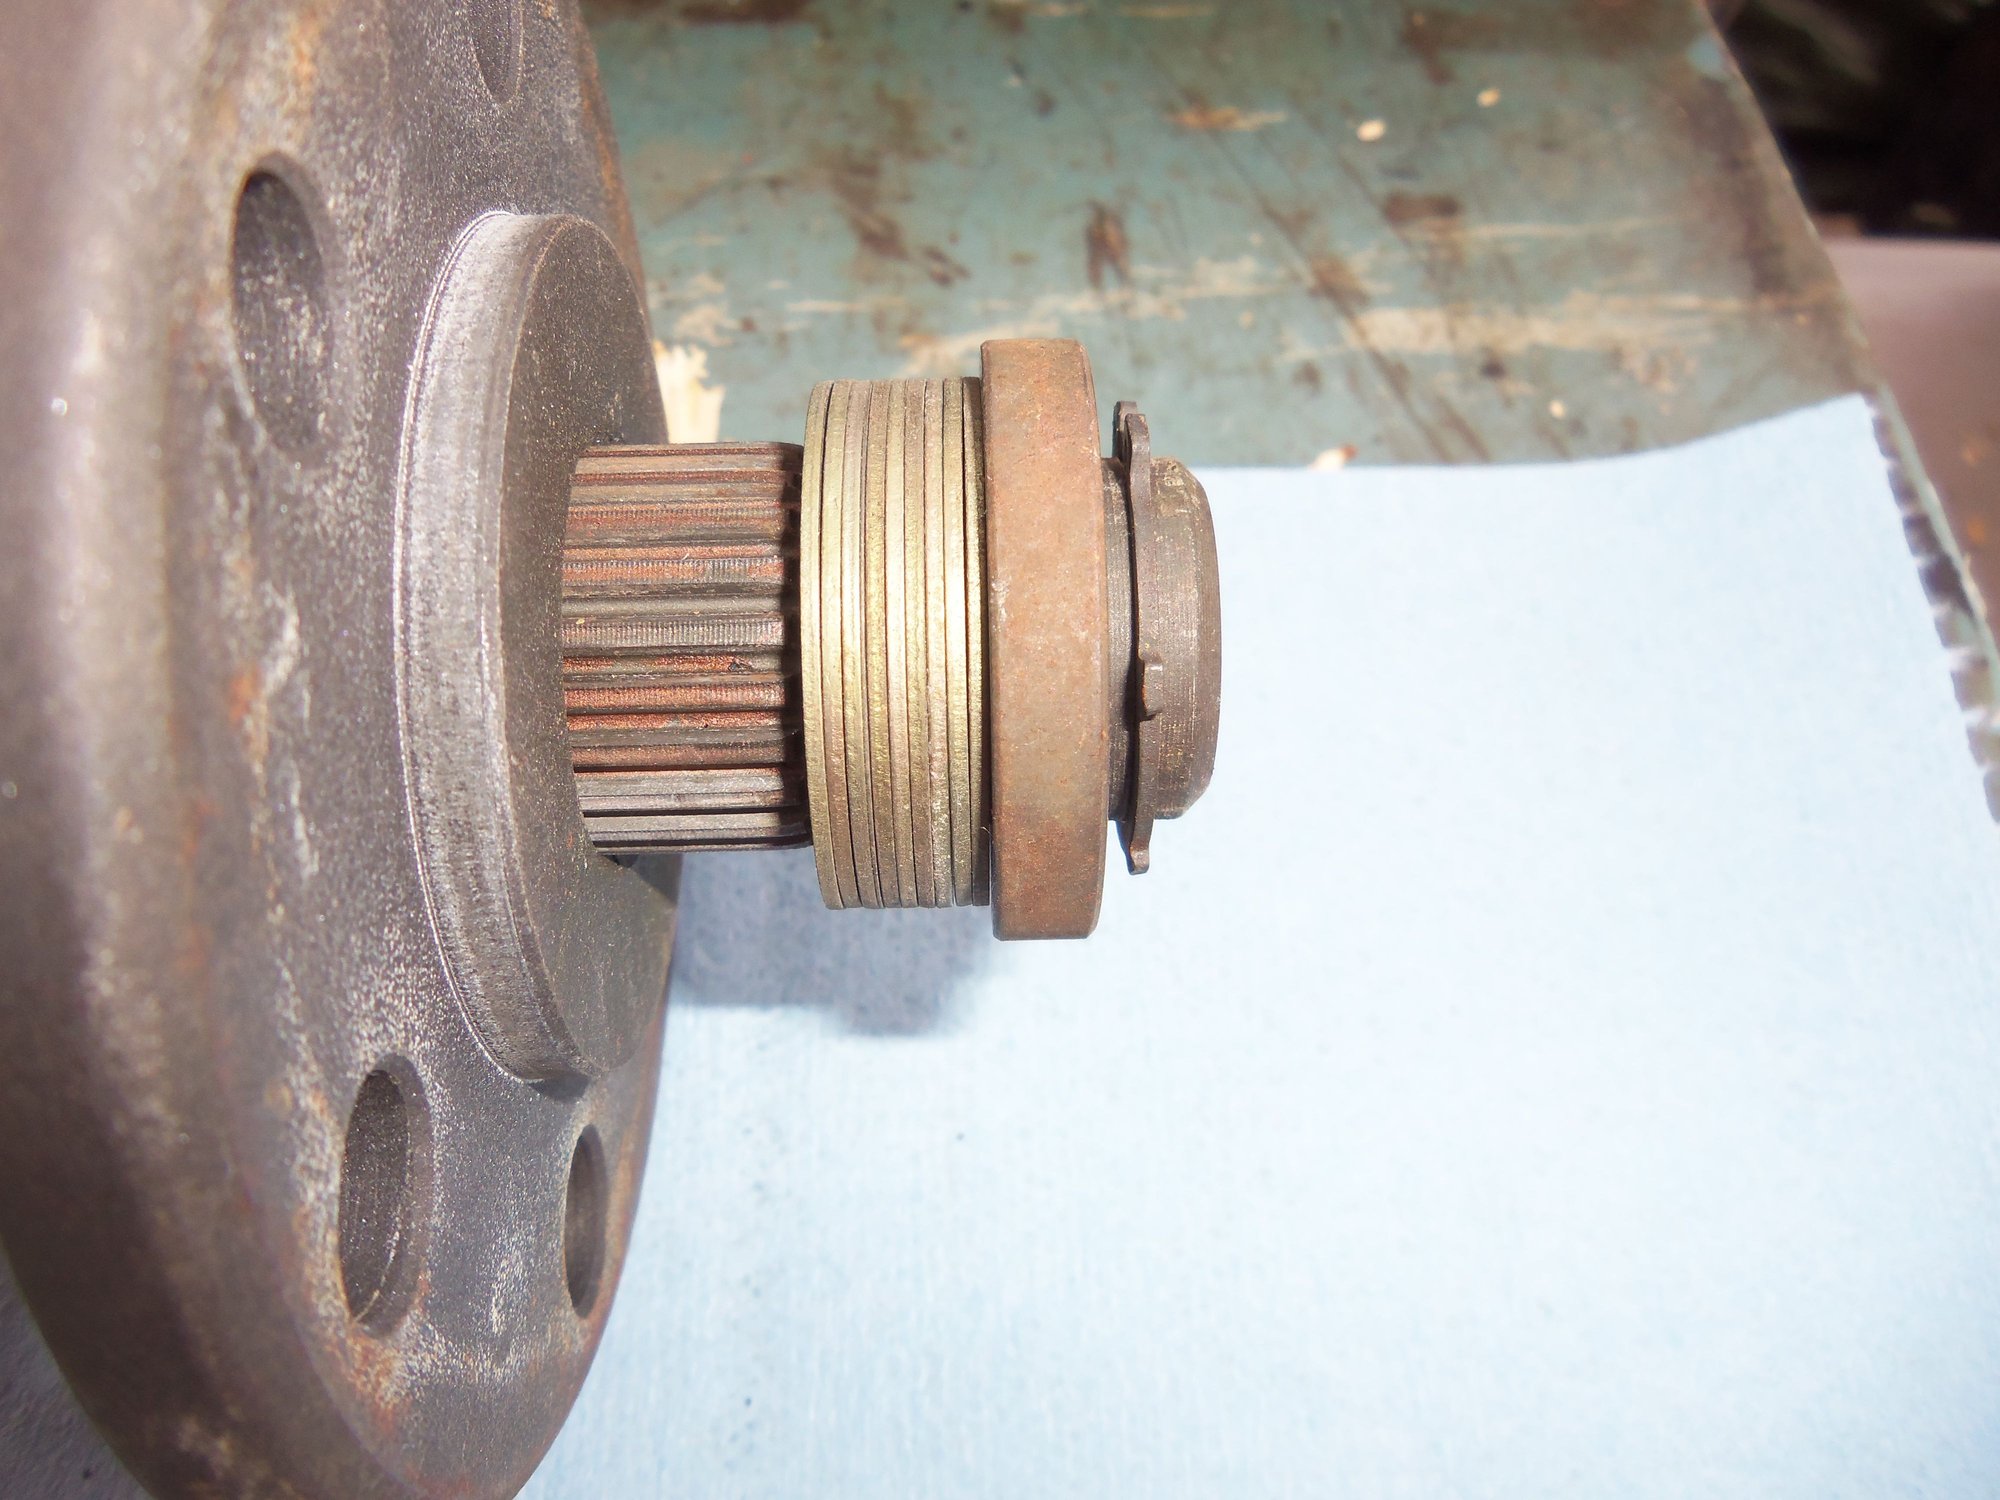
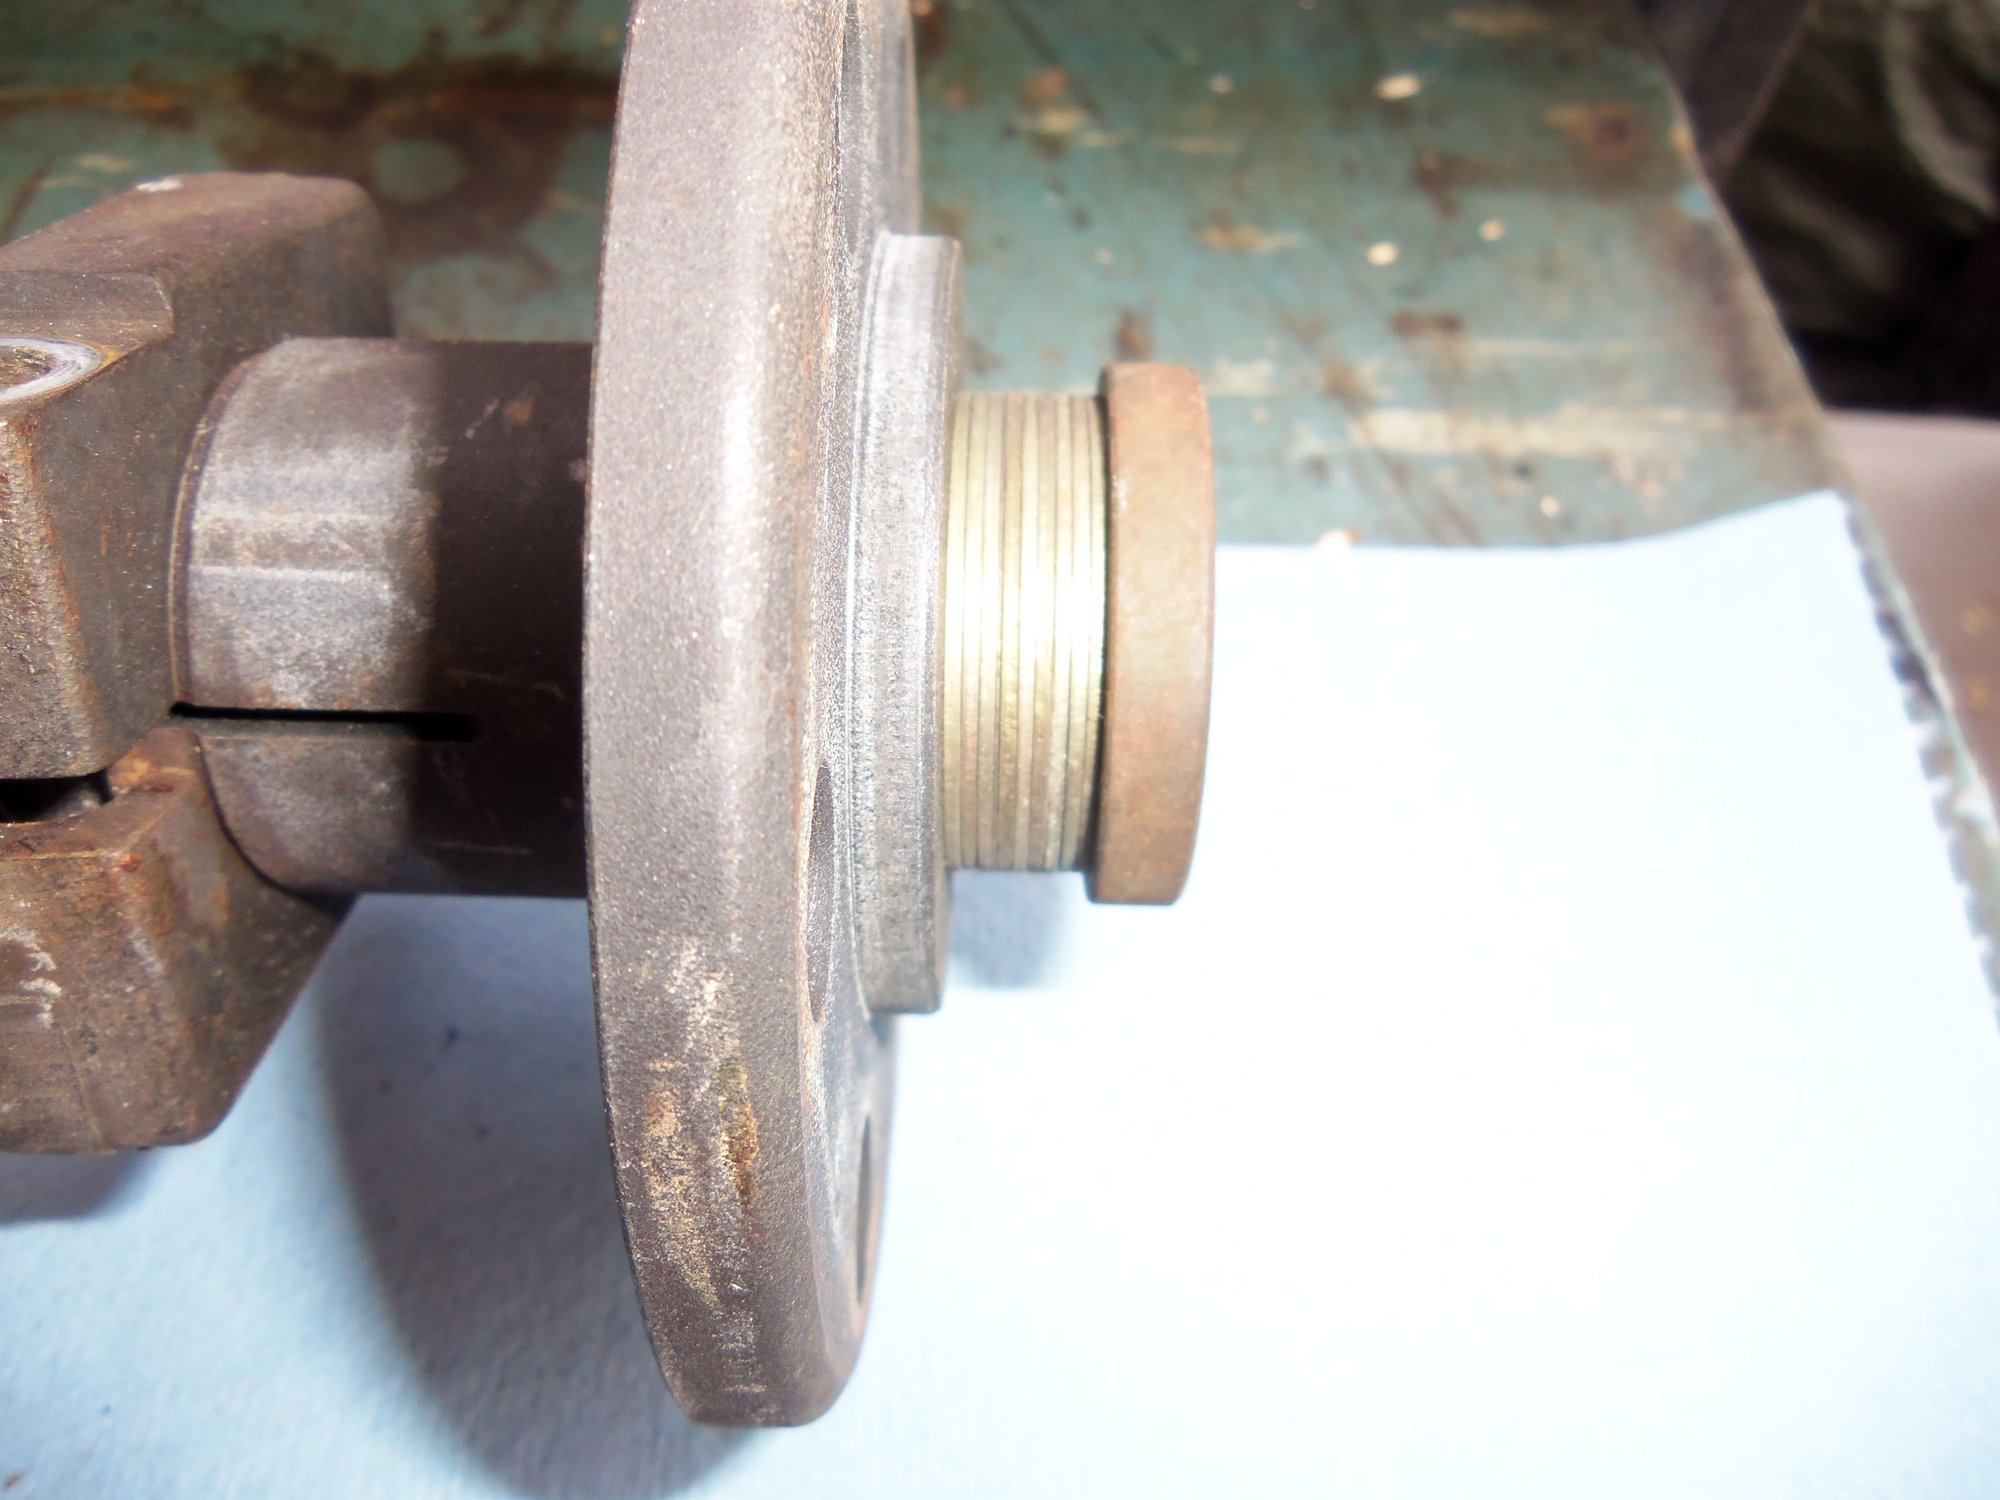
I am deviating from conventional wisdom with the next part. Rather than fit a Superclamp as expected, I am replicating the factory shim pack, bushing, and circlip used on pre-85 automatic torque tubes. I picked up the shim pack, bushing, and circlip from 928 International. A complete shim pack from a disassembled torque tube will get me in the ball park. I will get any other shims I need after taking the appropriate measurements. I am following the WSM, Volume 3, section 39, pages 141 - 143, 'Adjusting Drive Plate.'
I cleaned the cover and the drive plate assembly in the heated parts washer at work, then scrubbed them with mineral spirits. Not surgically clean, but quite clean.
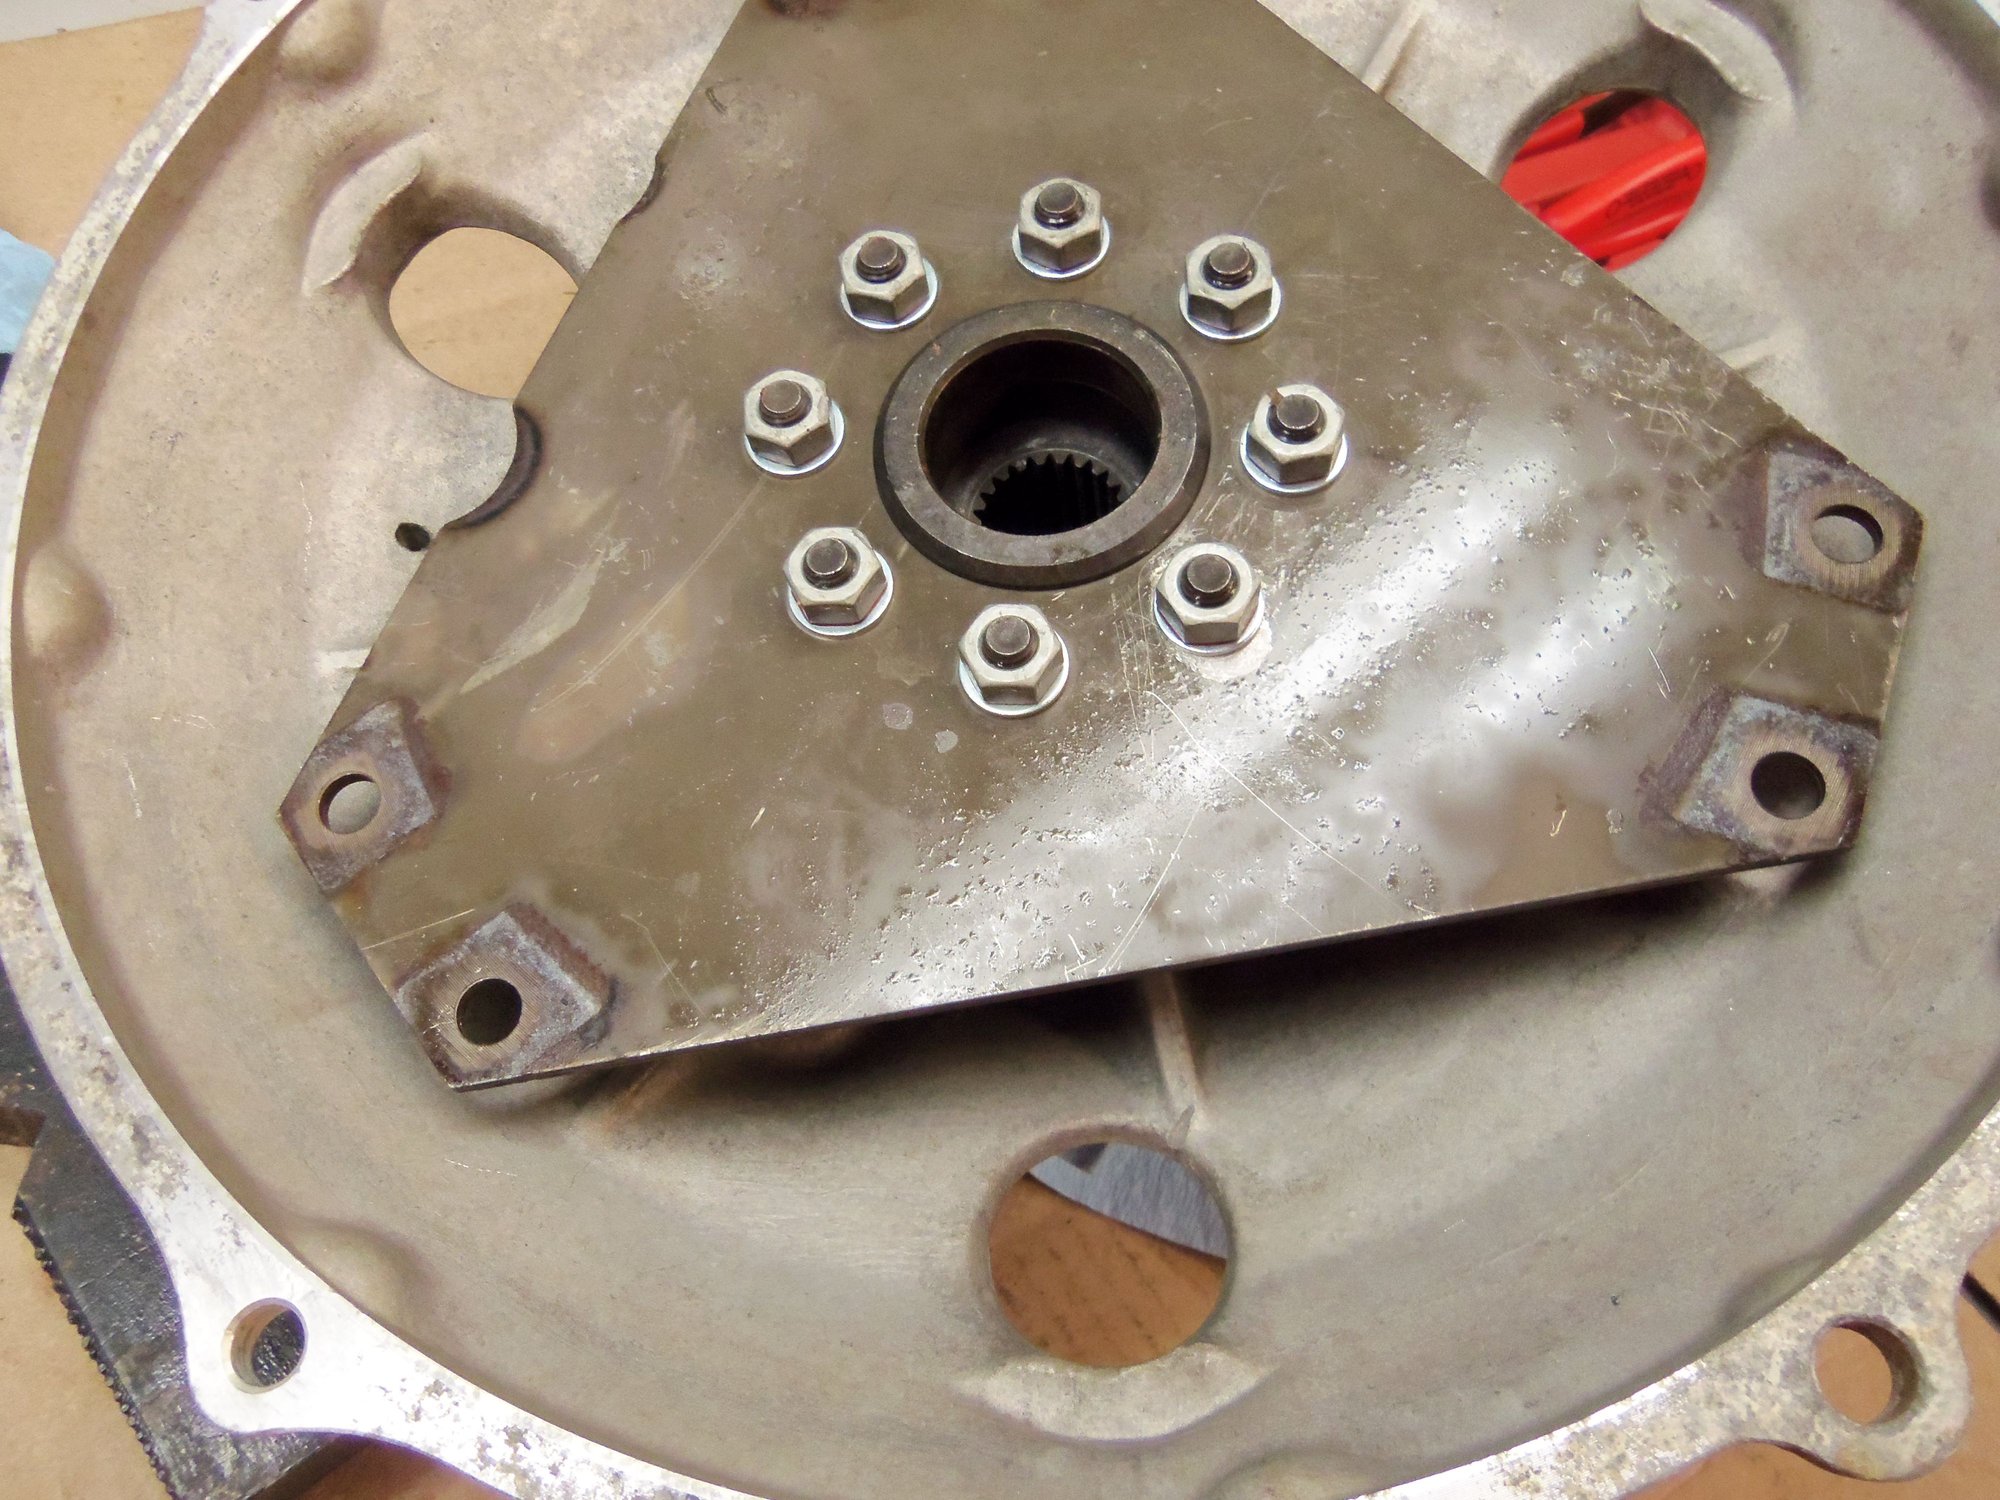
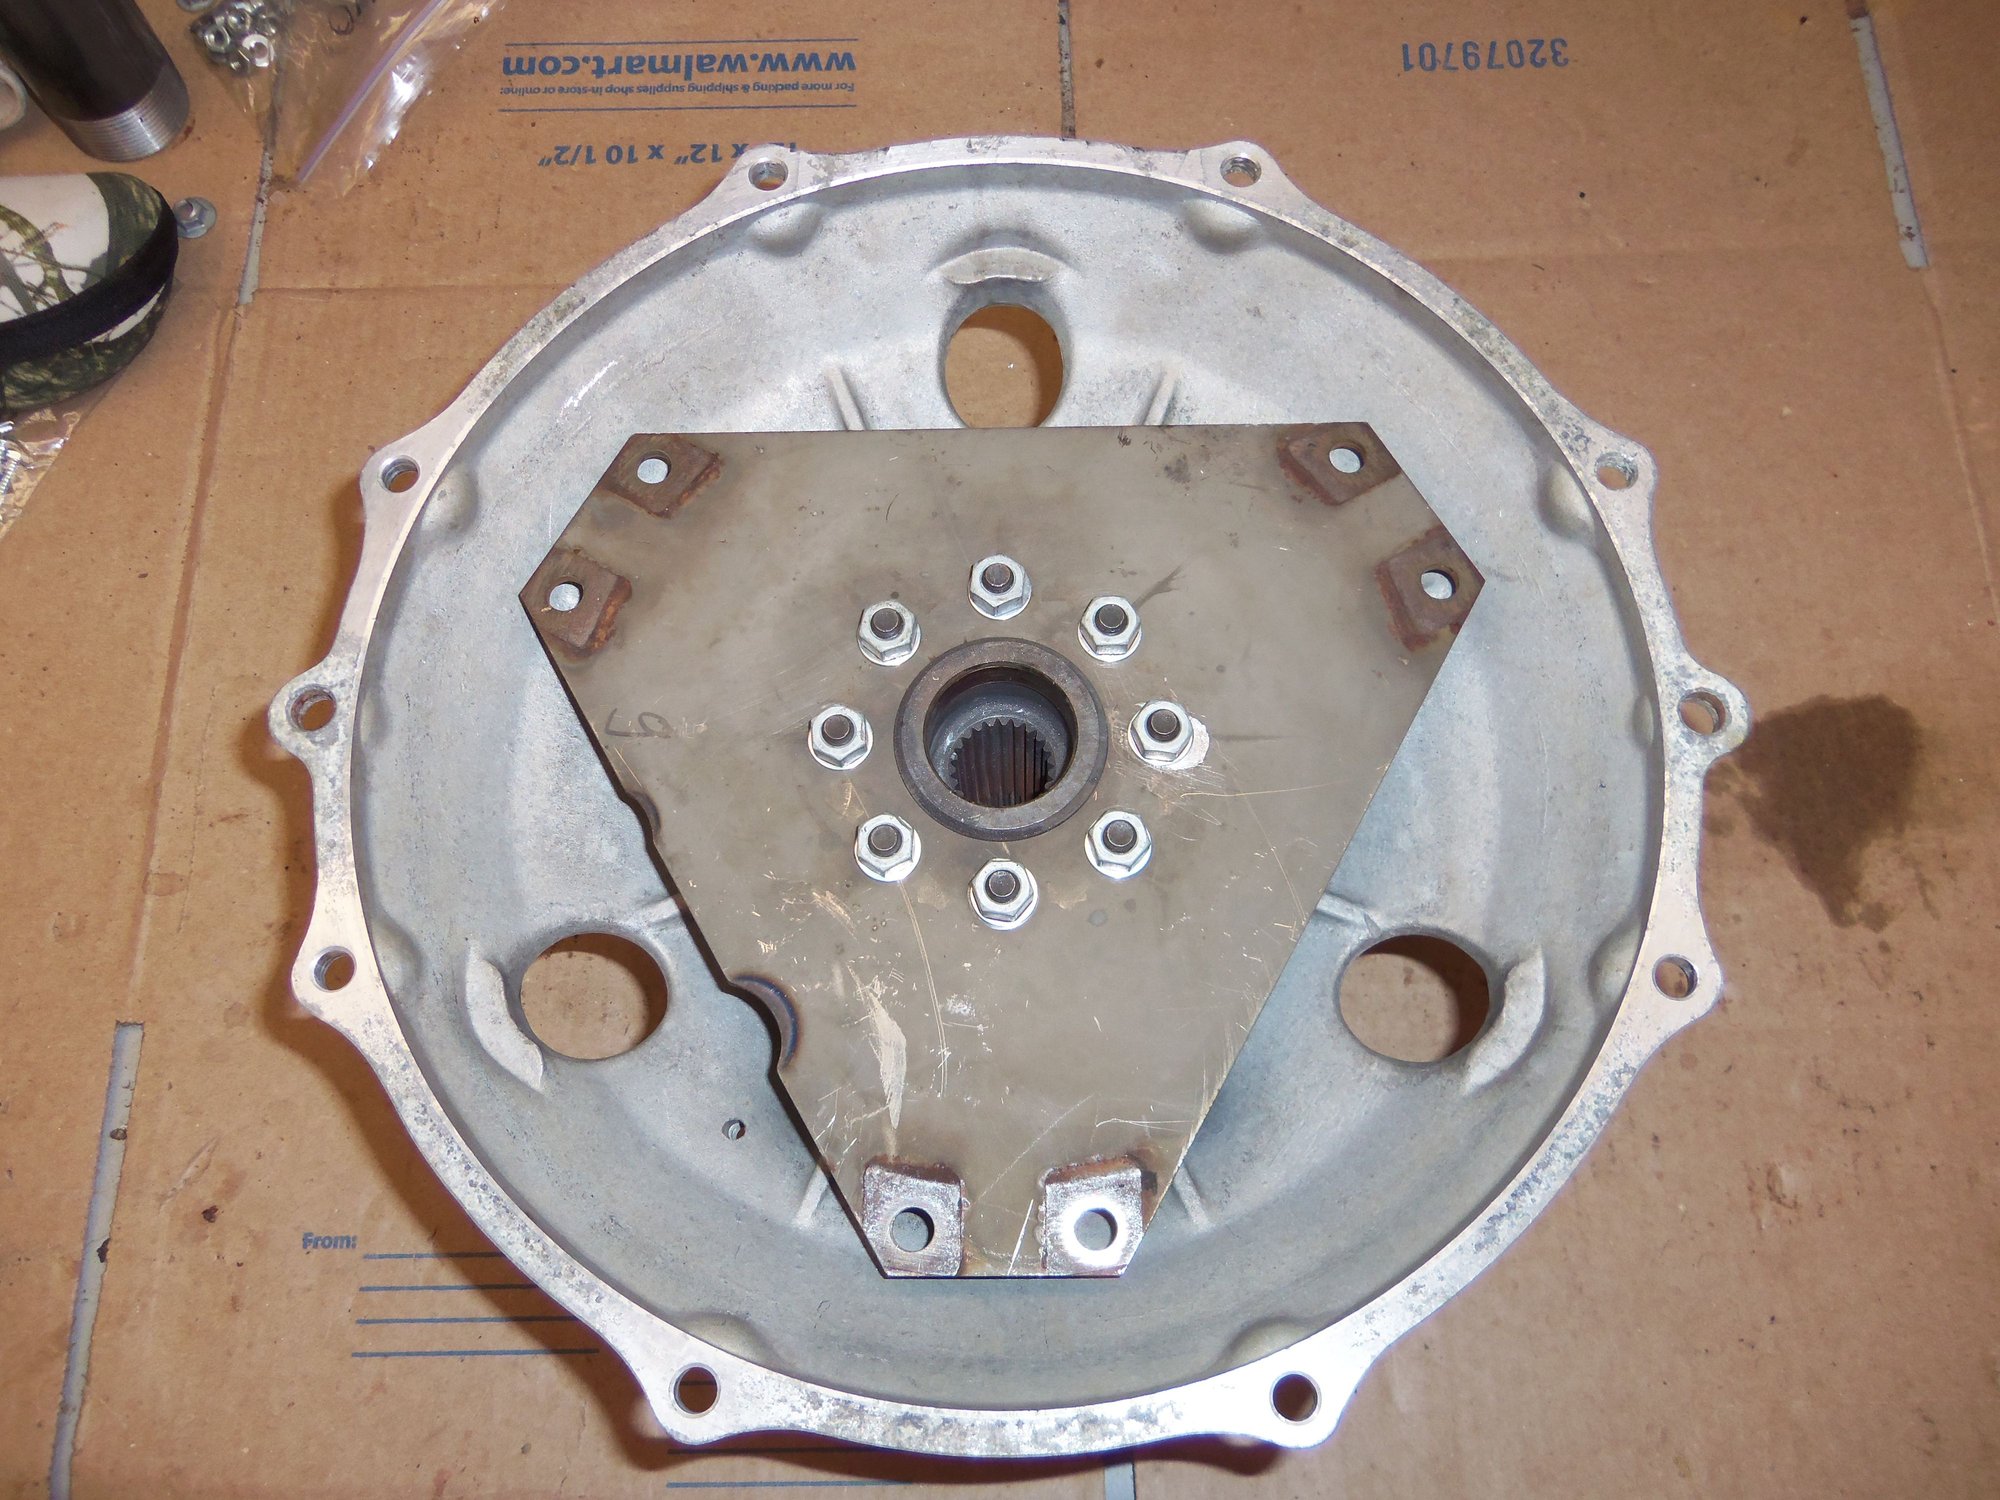
I removed the rivets holding the hub to the two drive plates by drilling off the heads, then drilling through the bodies of the rivets. Most fell right out after drilling, a couple had to be tapped.
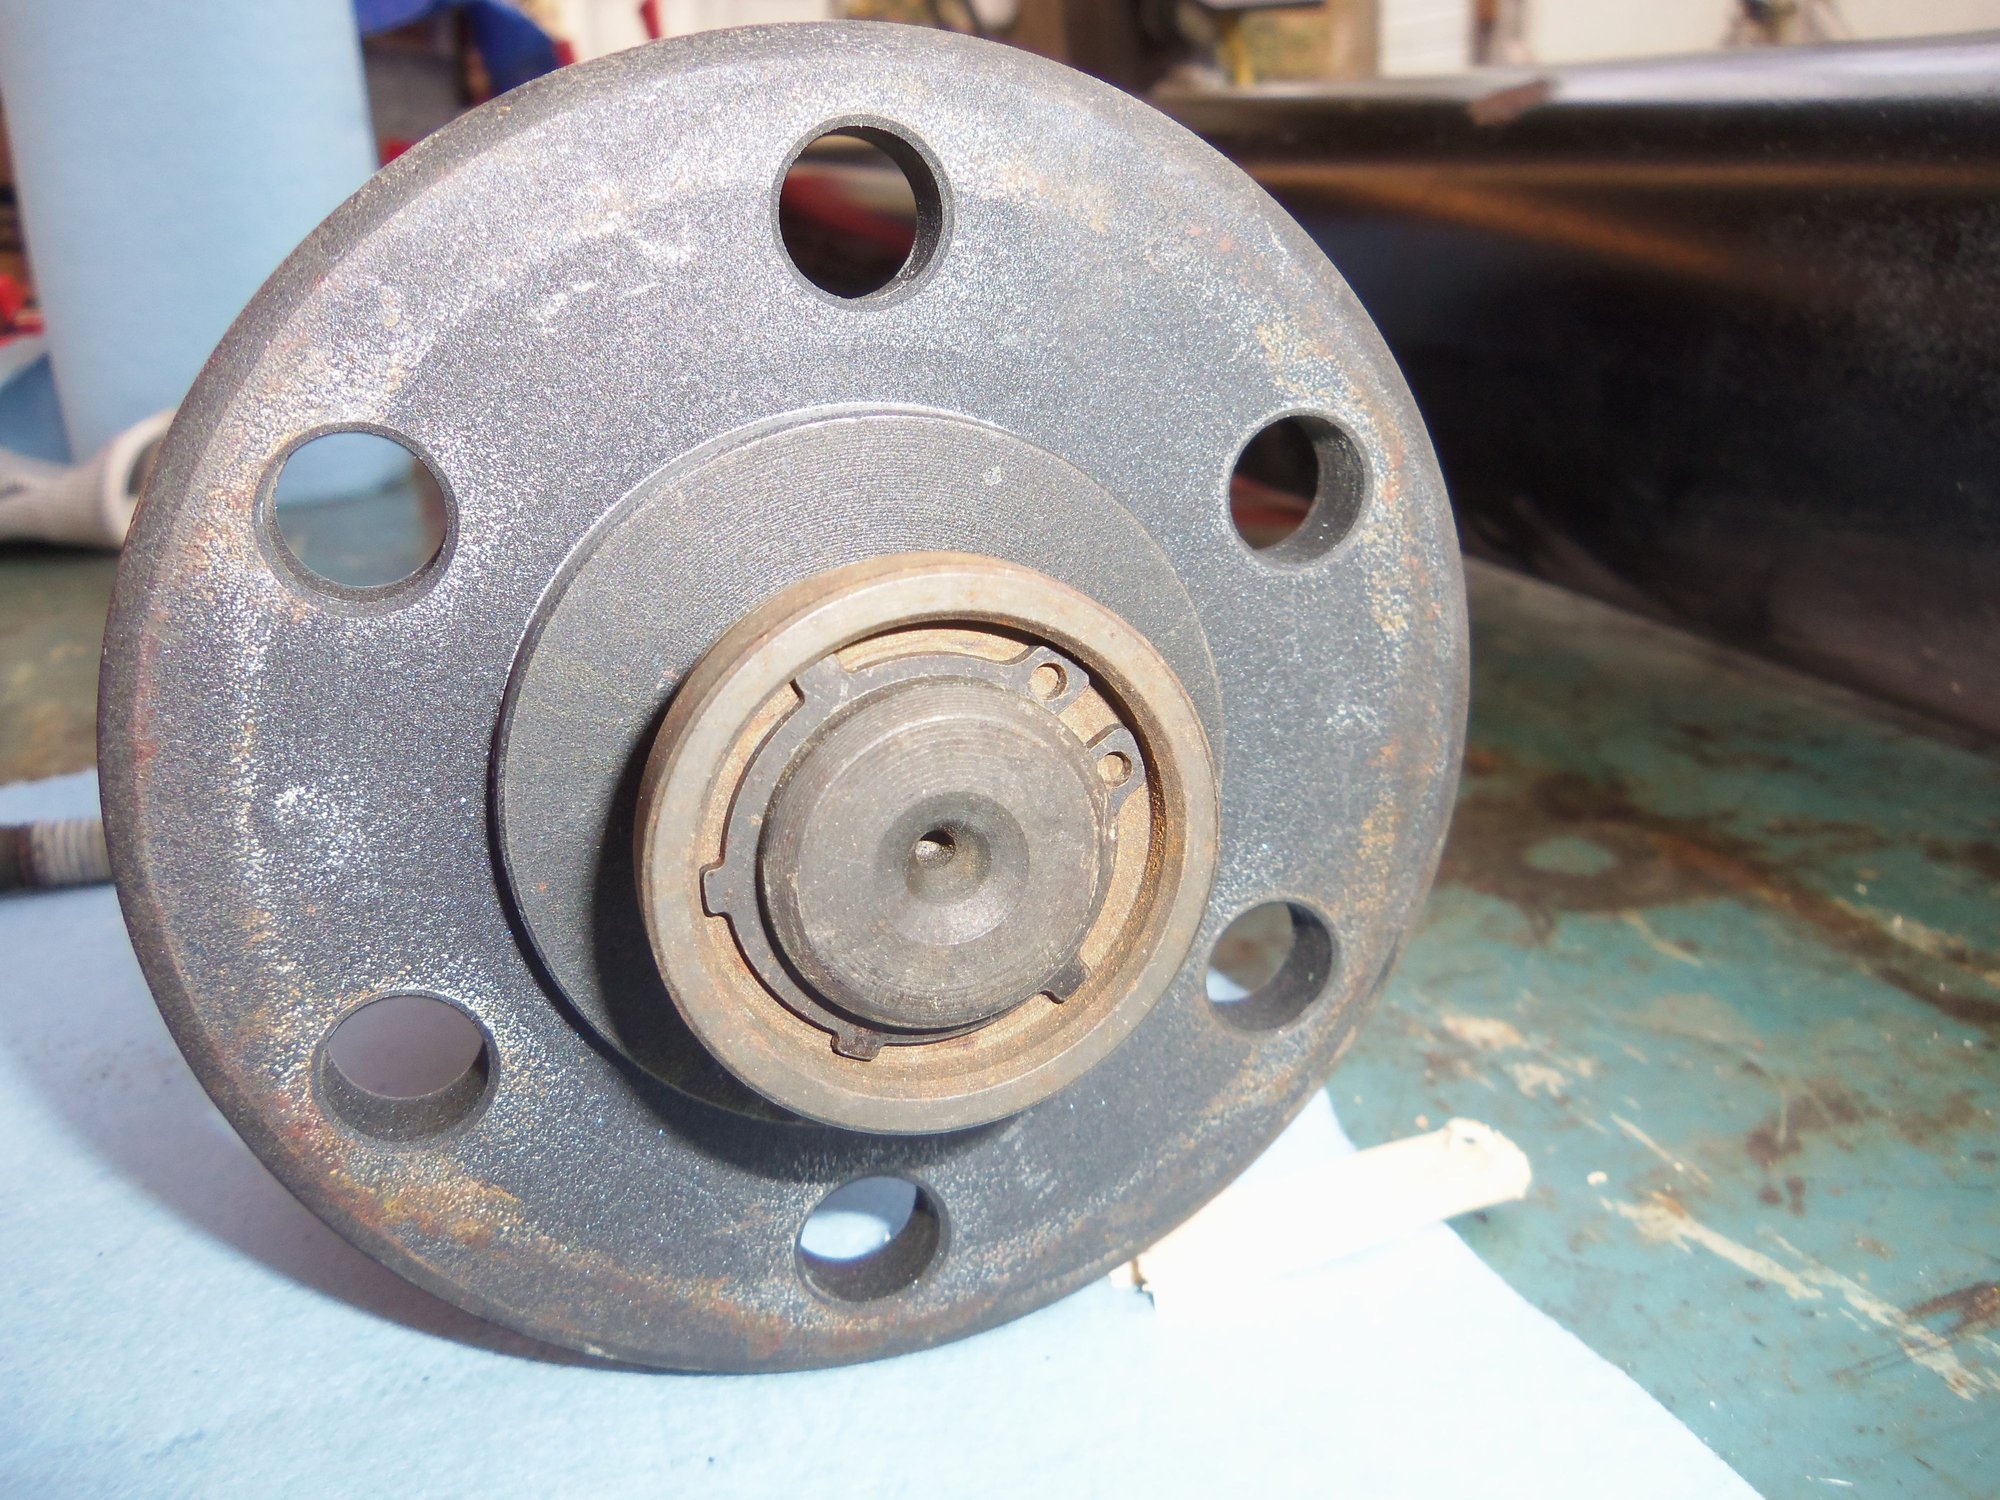
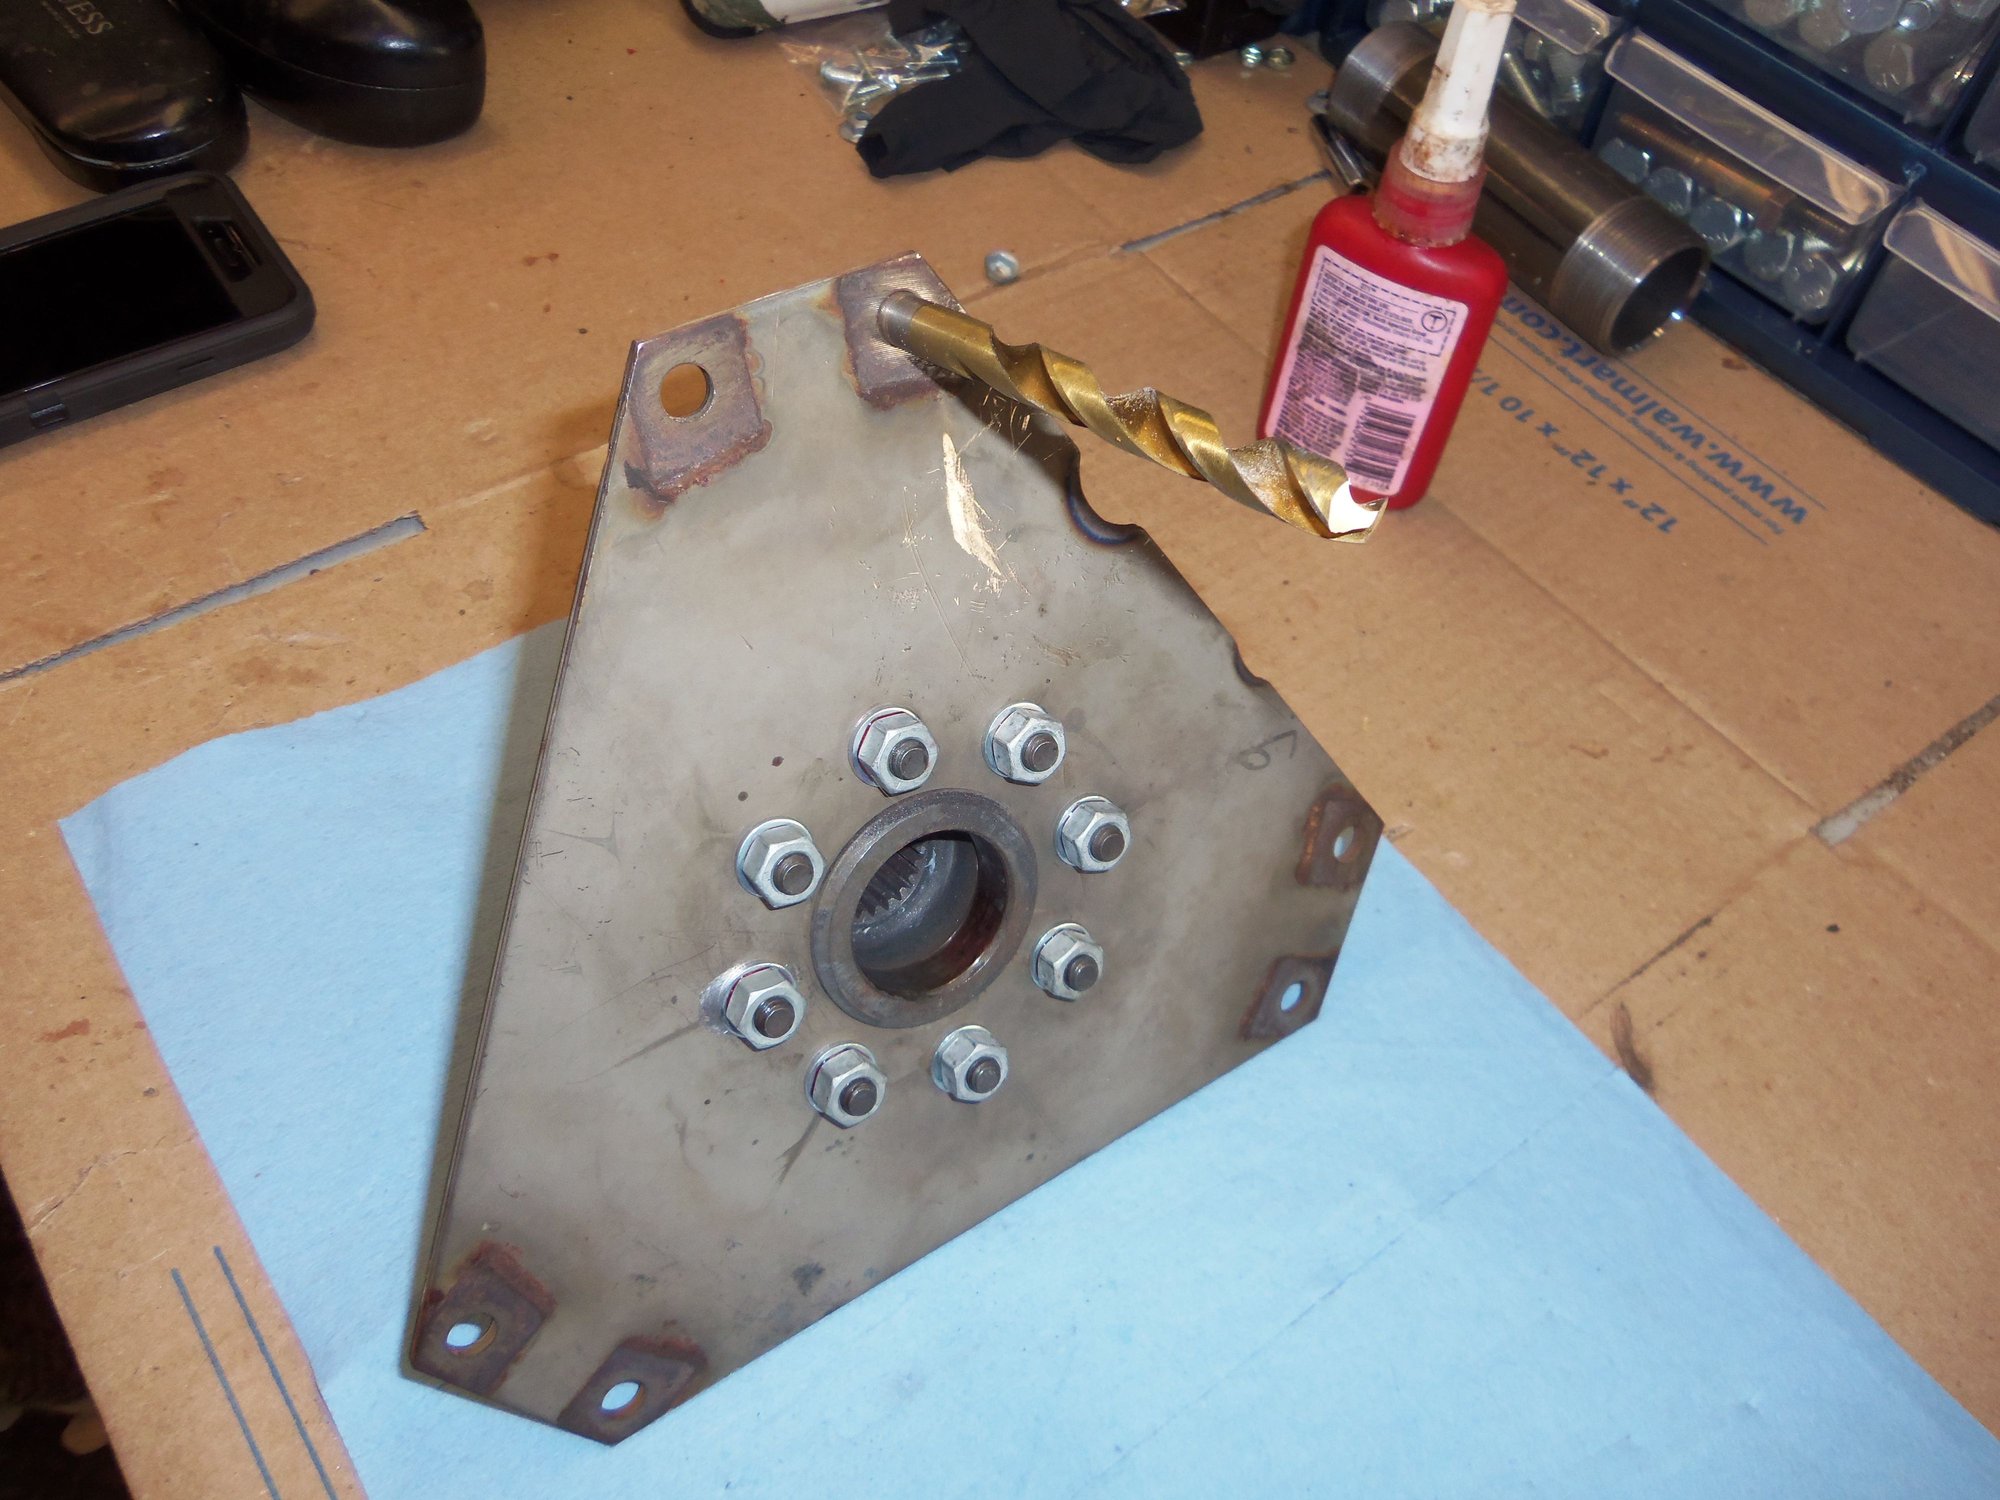
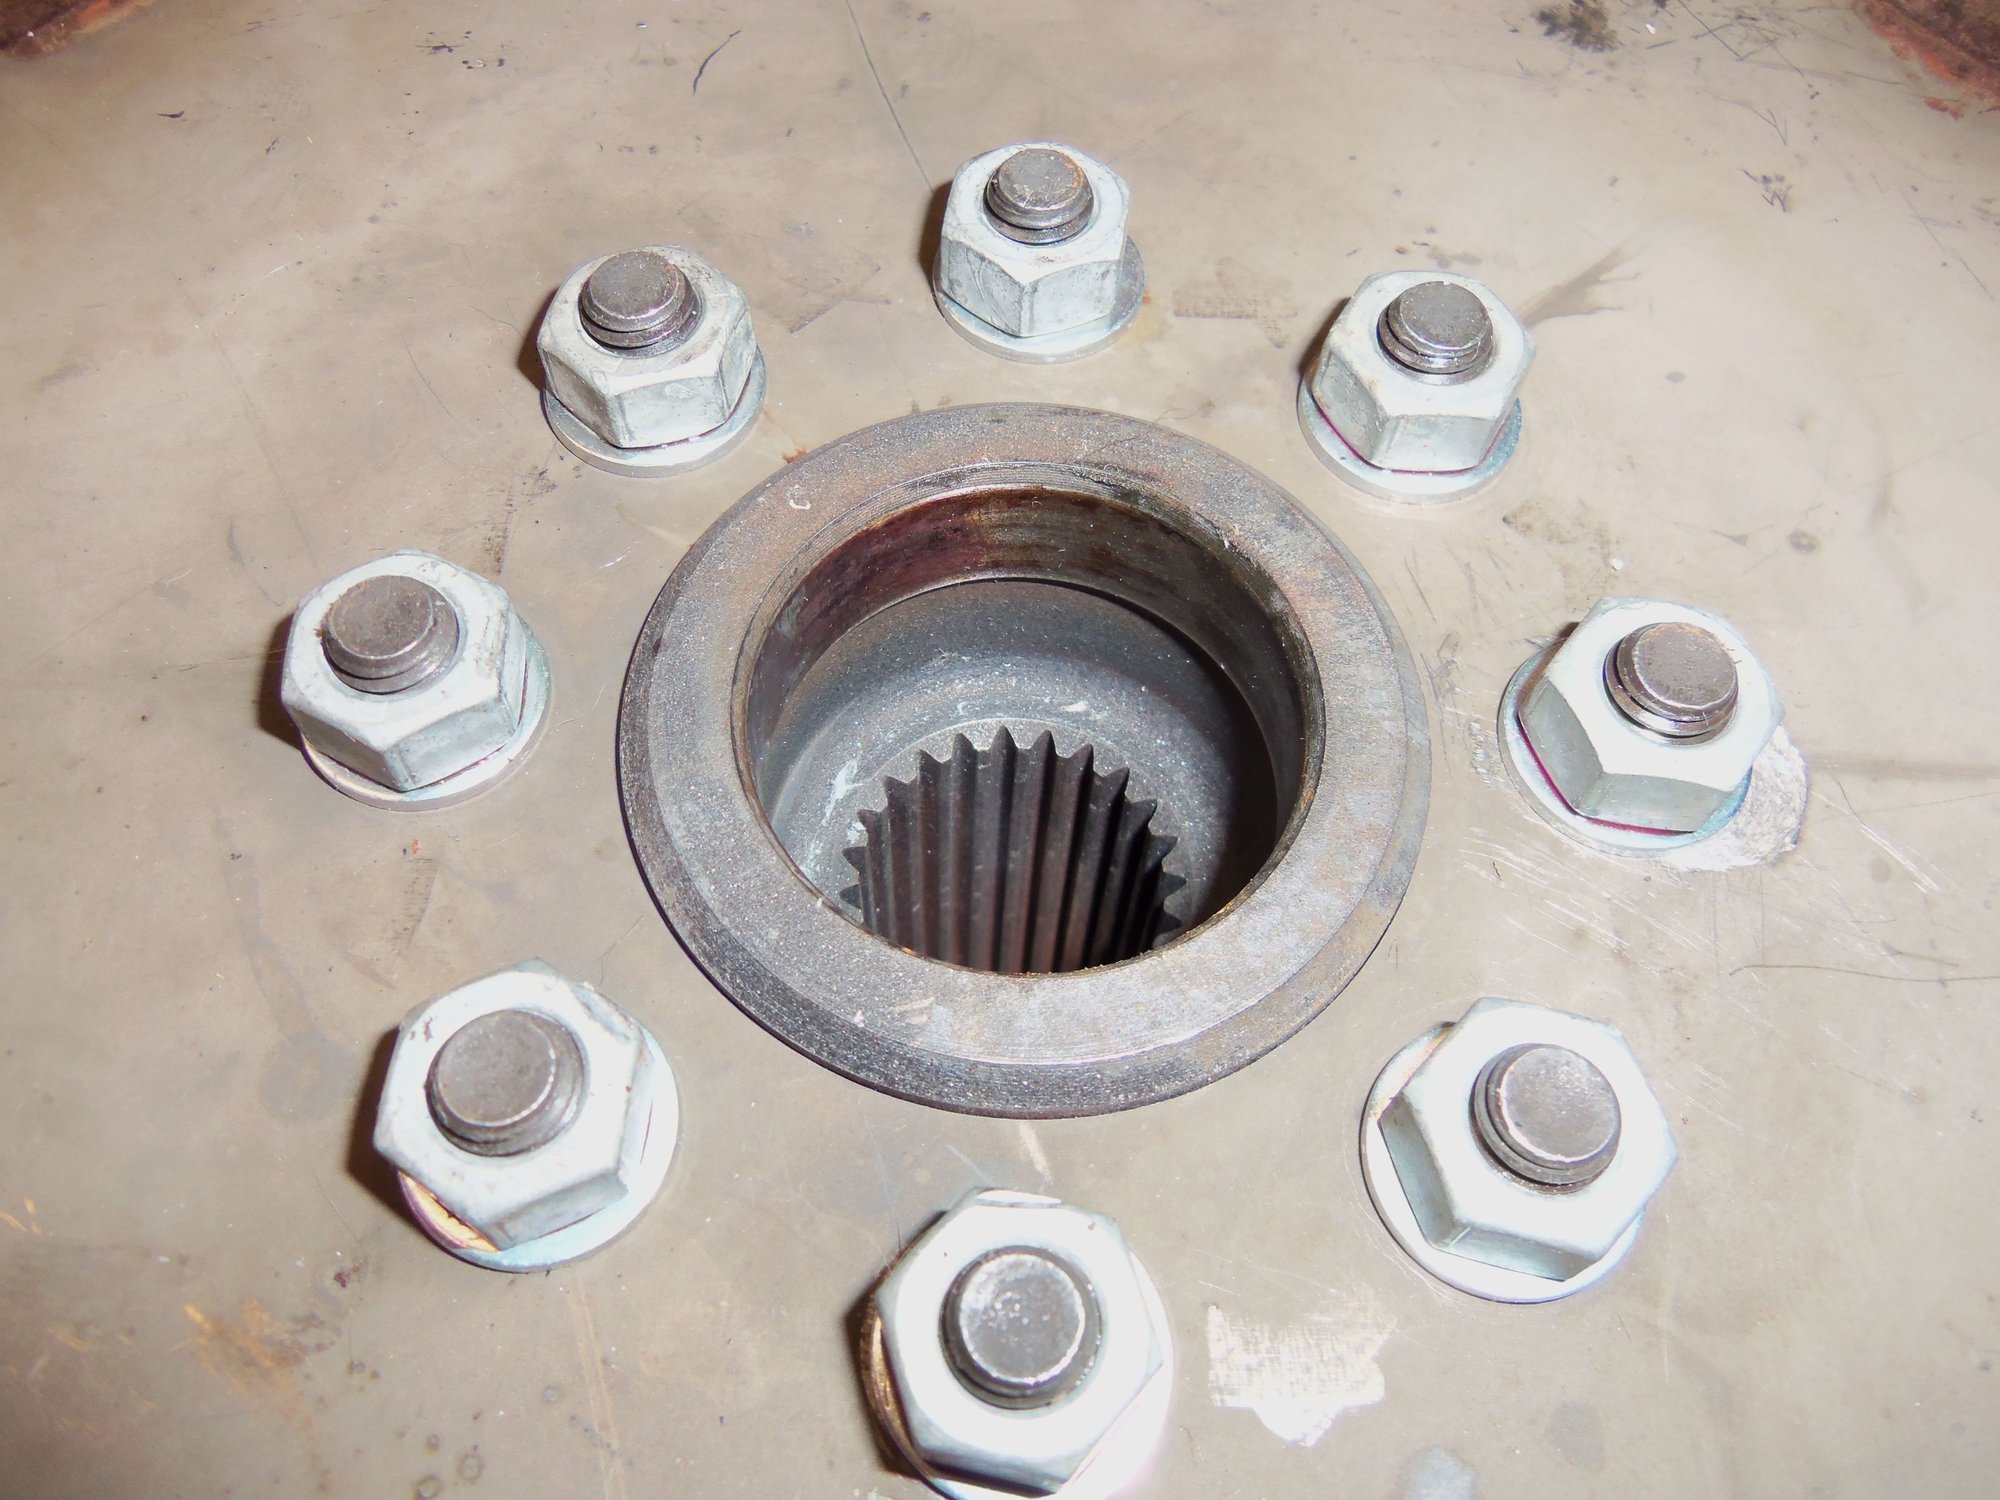
I reassembled the hub and drive plates with the hardened M8 hardware specified by the TSB. I oriented them so the bolt head was against the hub and the nuts/flat washers were against the drive plates. This was also in accordance with the TSB. Just in case, I mocked up the hardware and installed the drive plate assembly onto the nose of the torque converter. The nuts did not foul against the front face of the torque converter. There was plenty of clearance.
After putting red Loctite on each bolt, I torqued them to 23 ft/lbs, in a criss cross pattern.
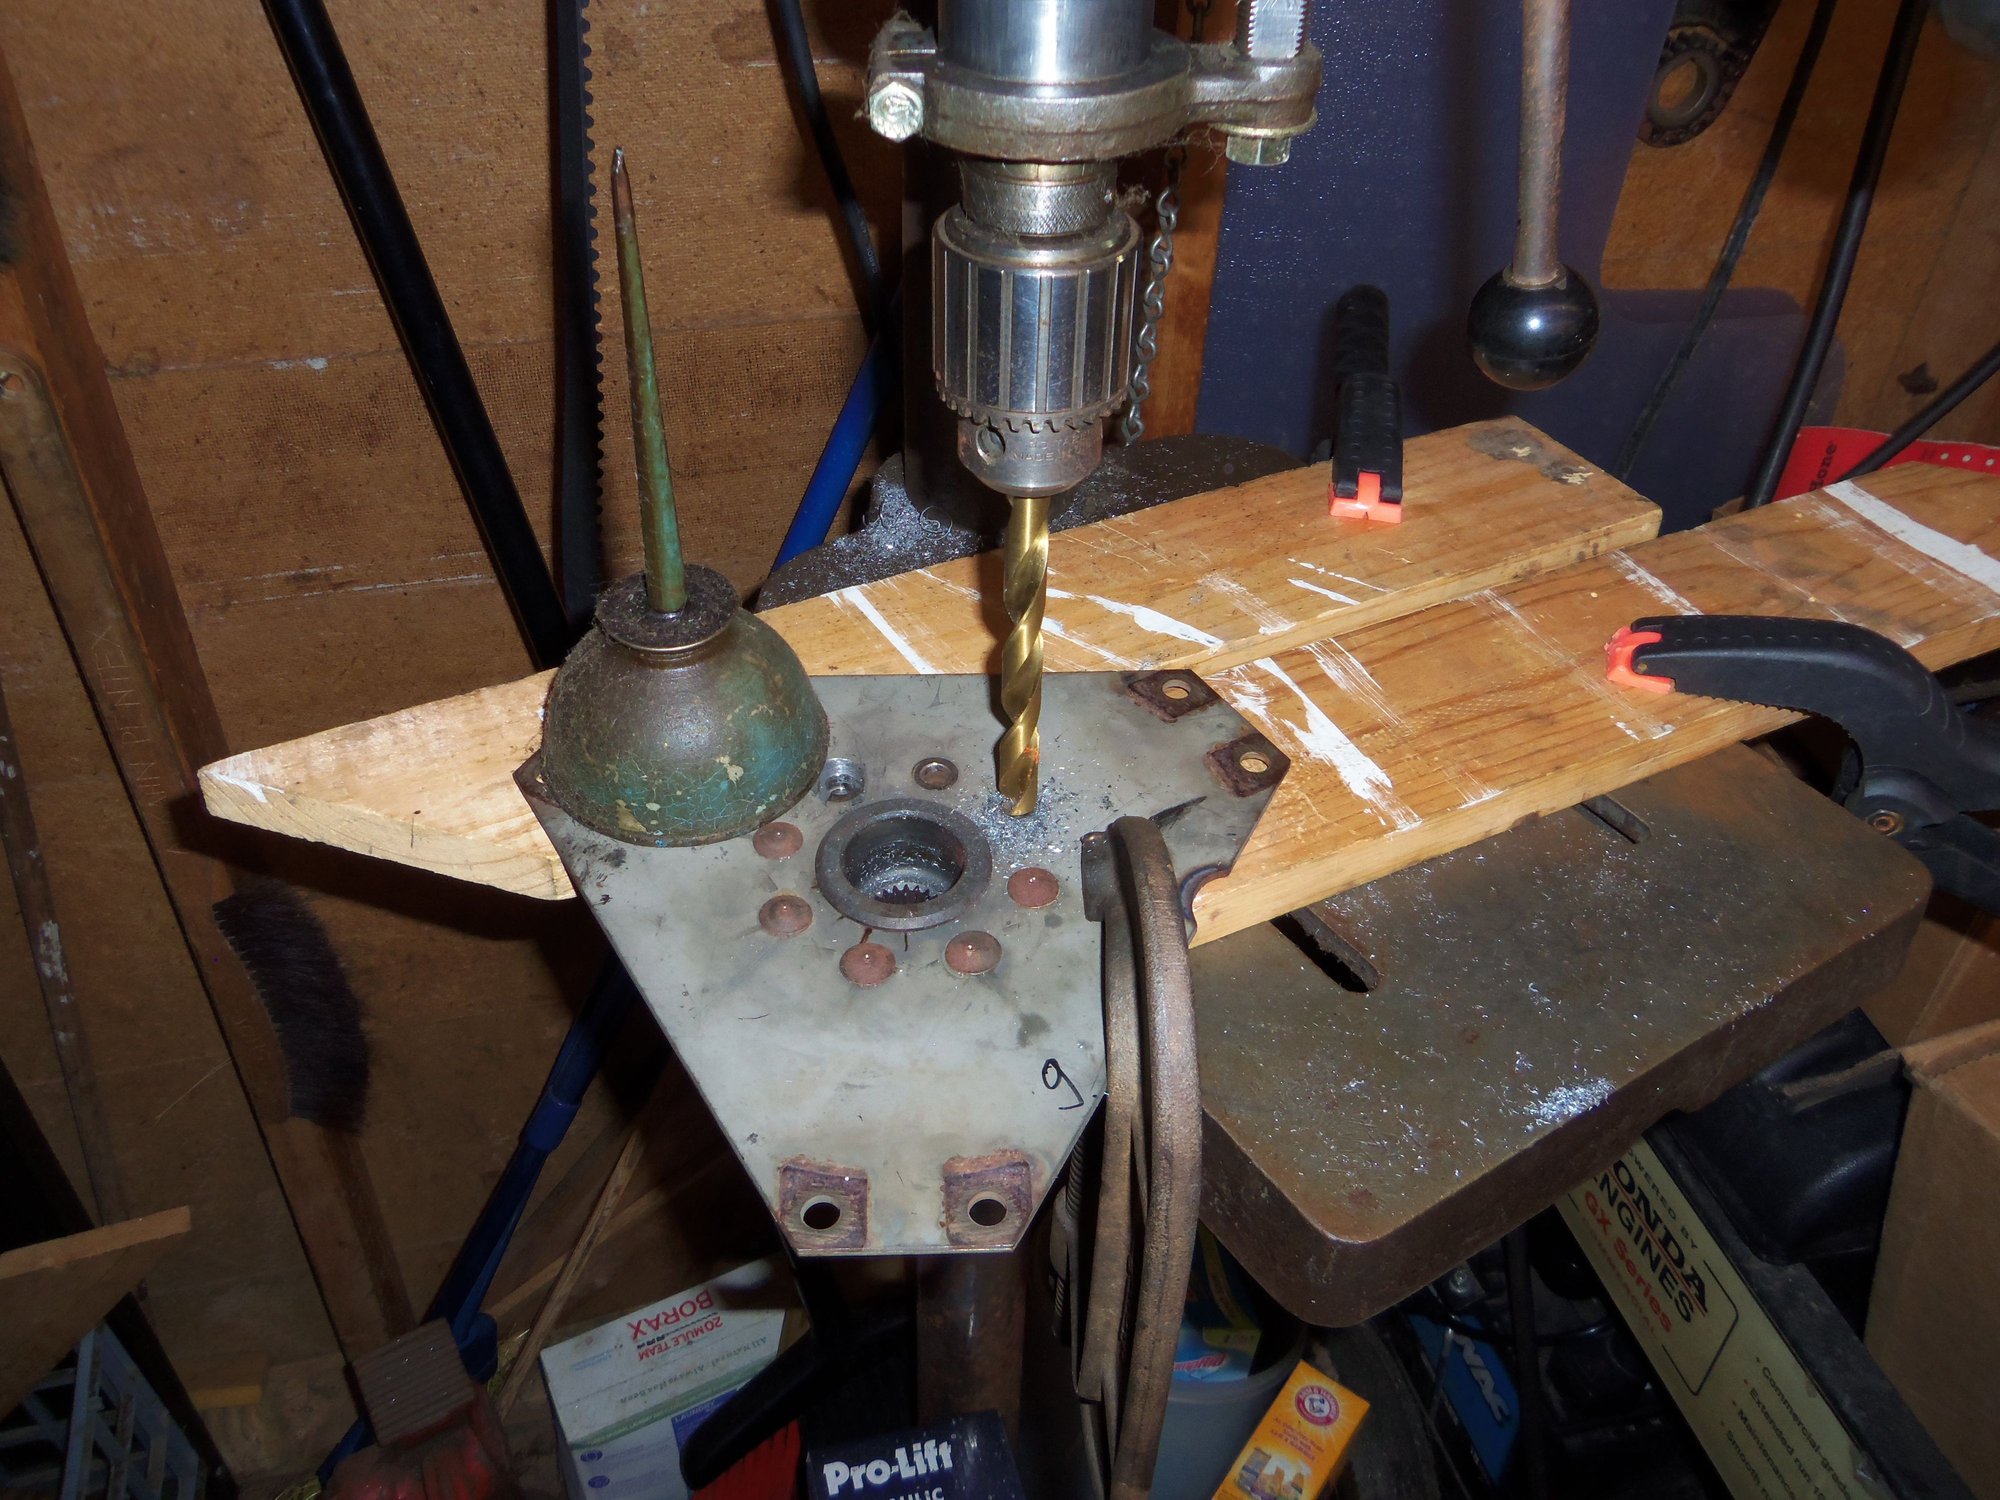
I showed a surprising(for me) amount of forethought and used my ancient drill press for this work. Yes, the clamping was pretty sketchy, but it worked.
Verifying clearance between the nuts and the torque converter.
Drill bit keeps the two drive plates aligned while torquing the fasteners.
Nuts and flat washers on drive plates side.
Bolt heads on hub side.
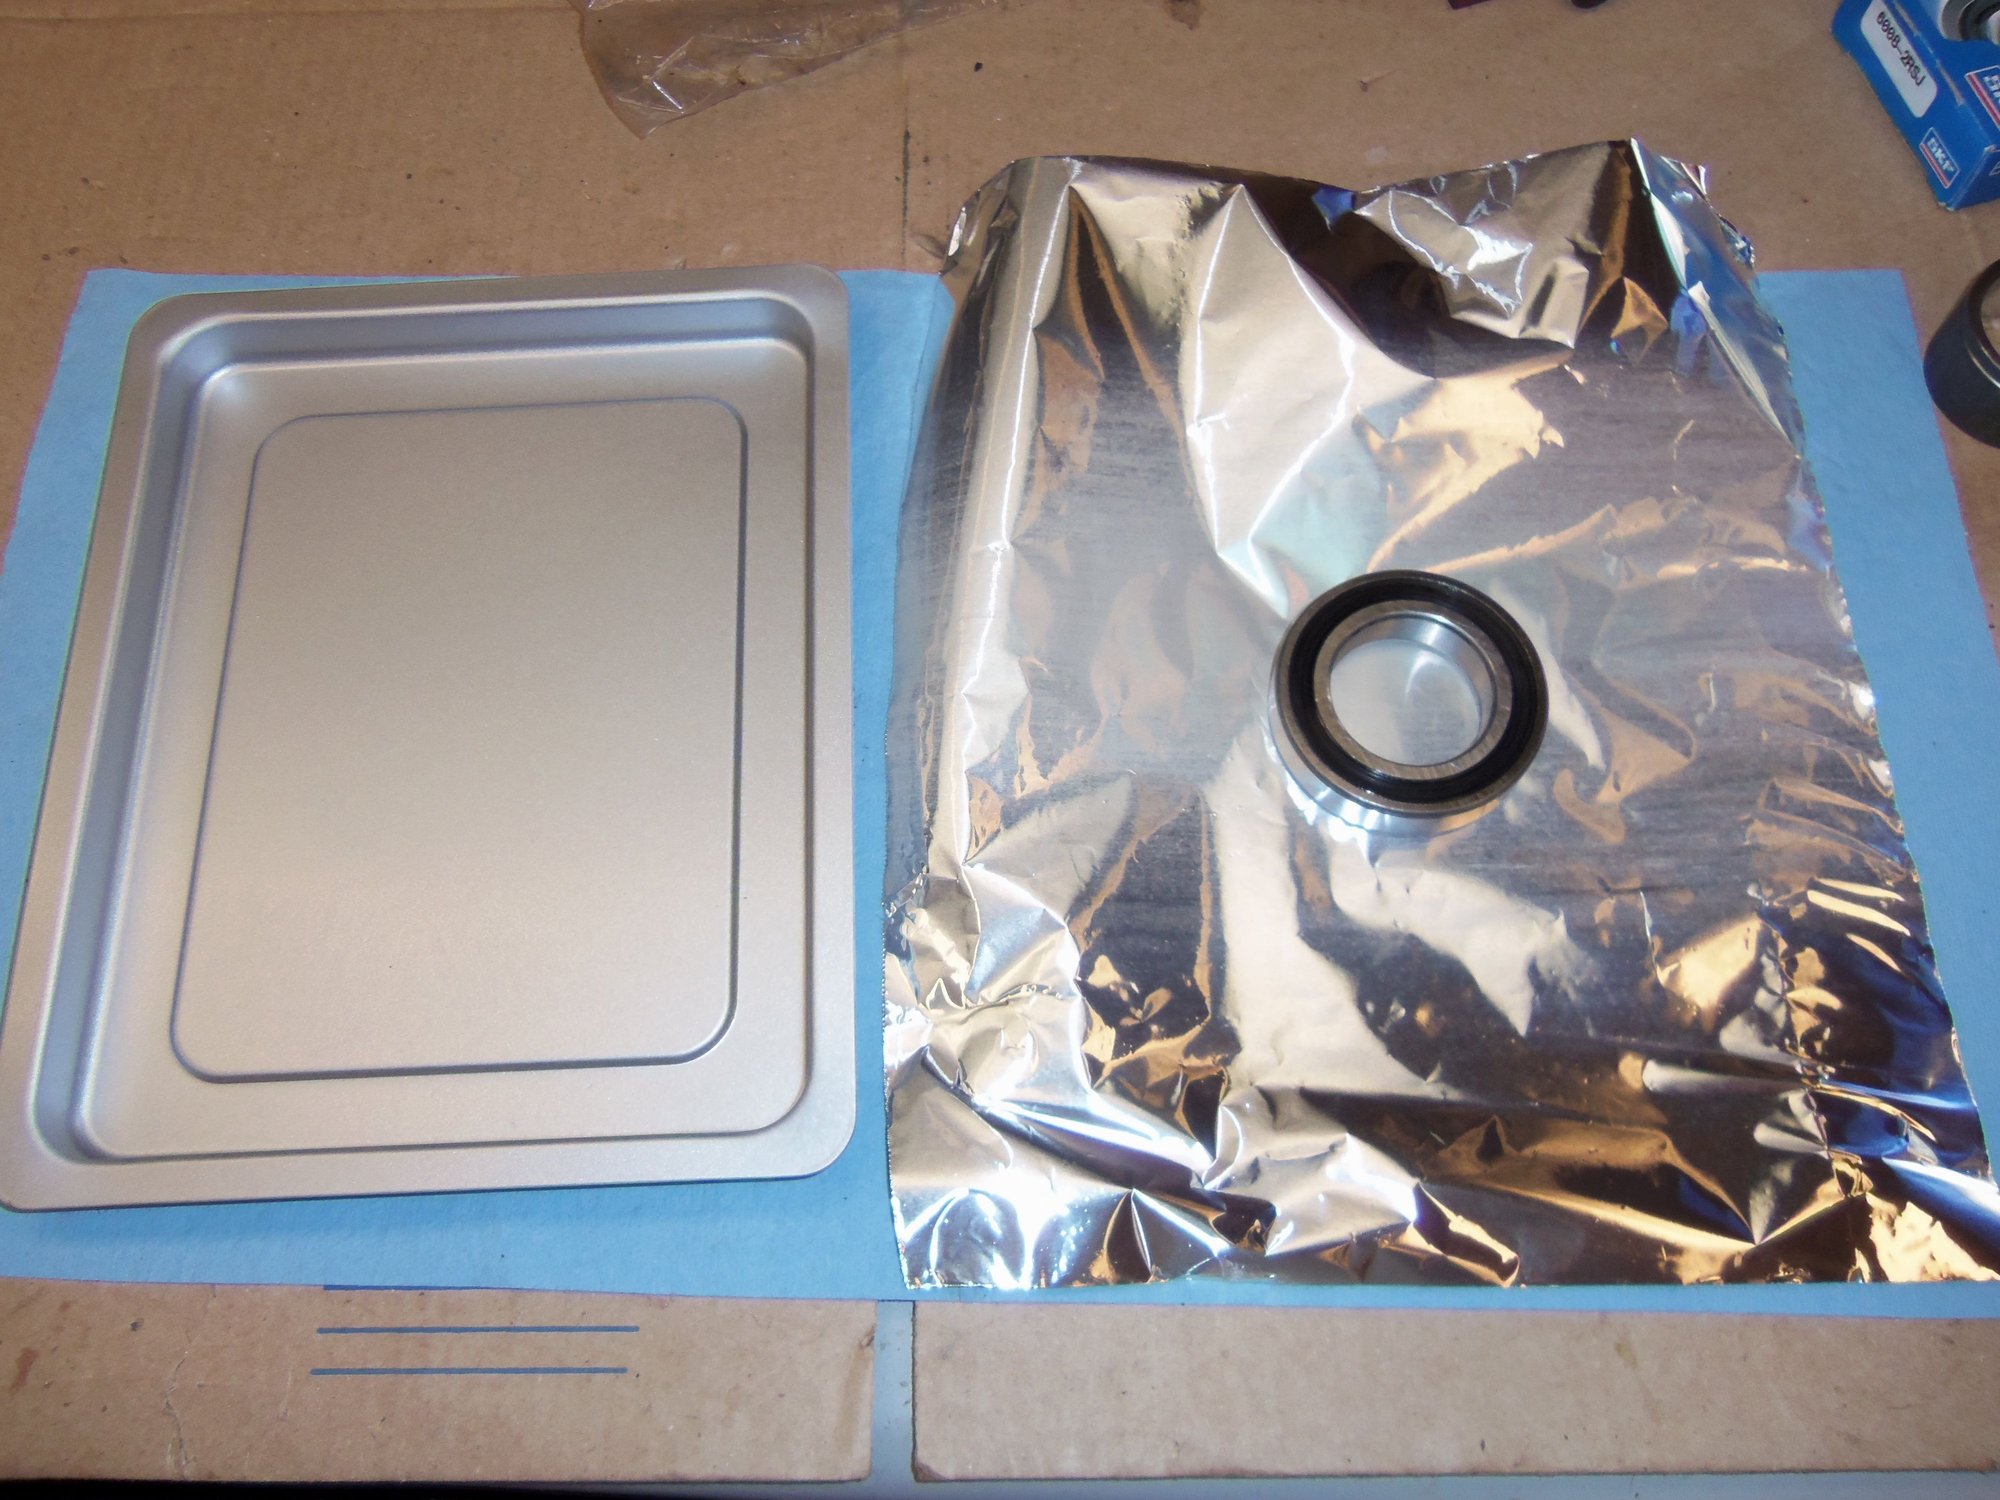
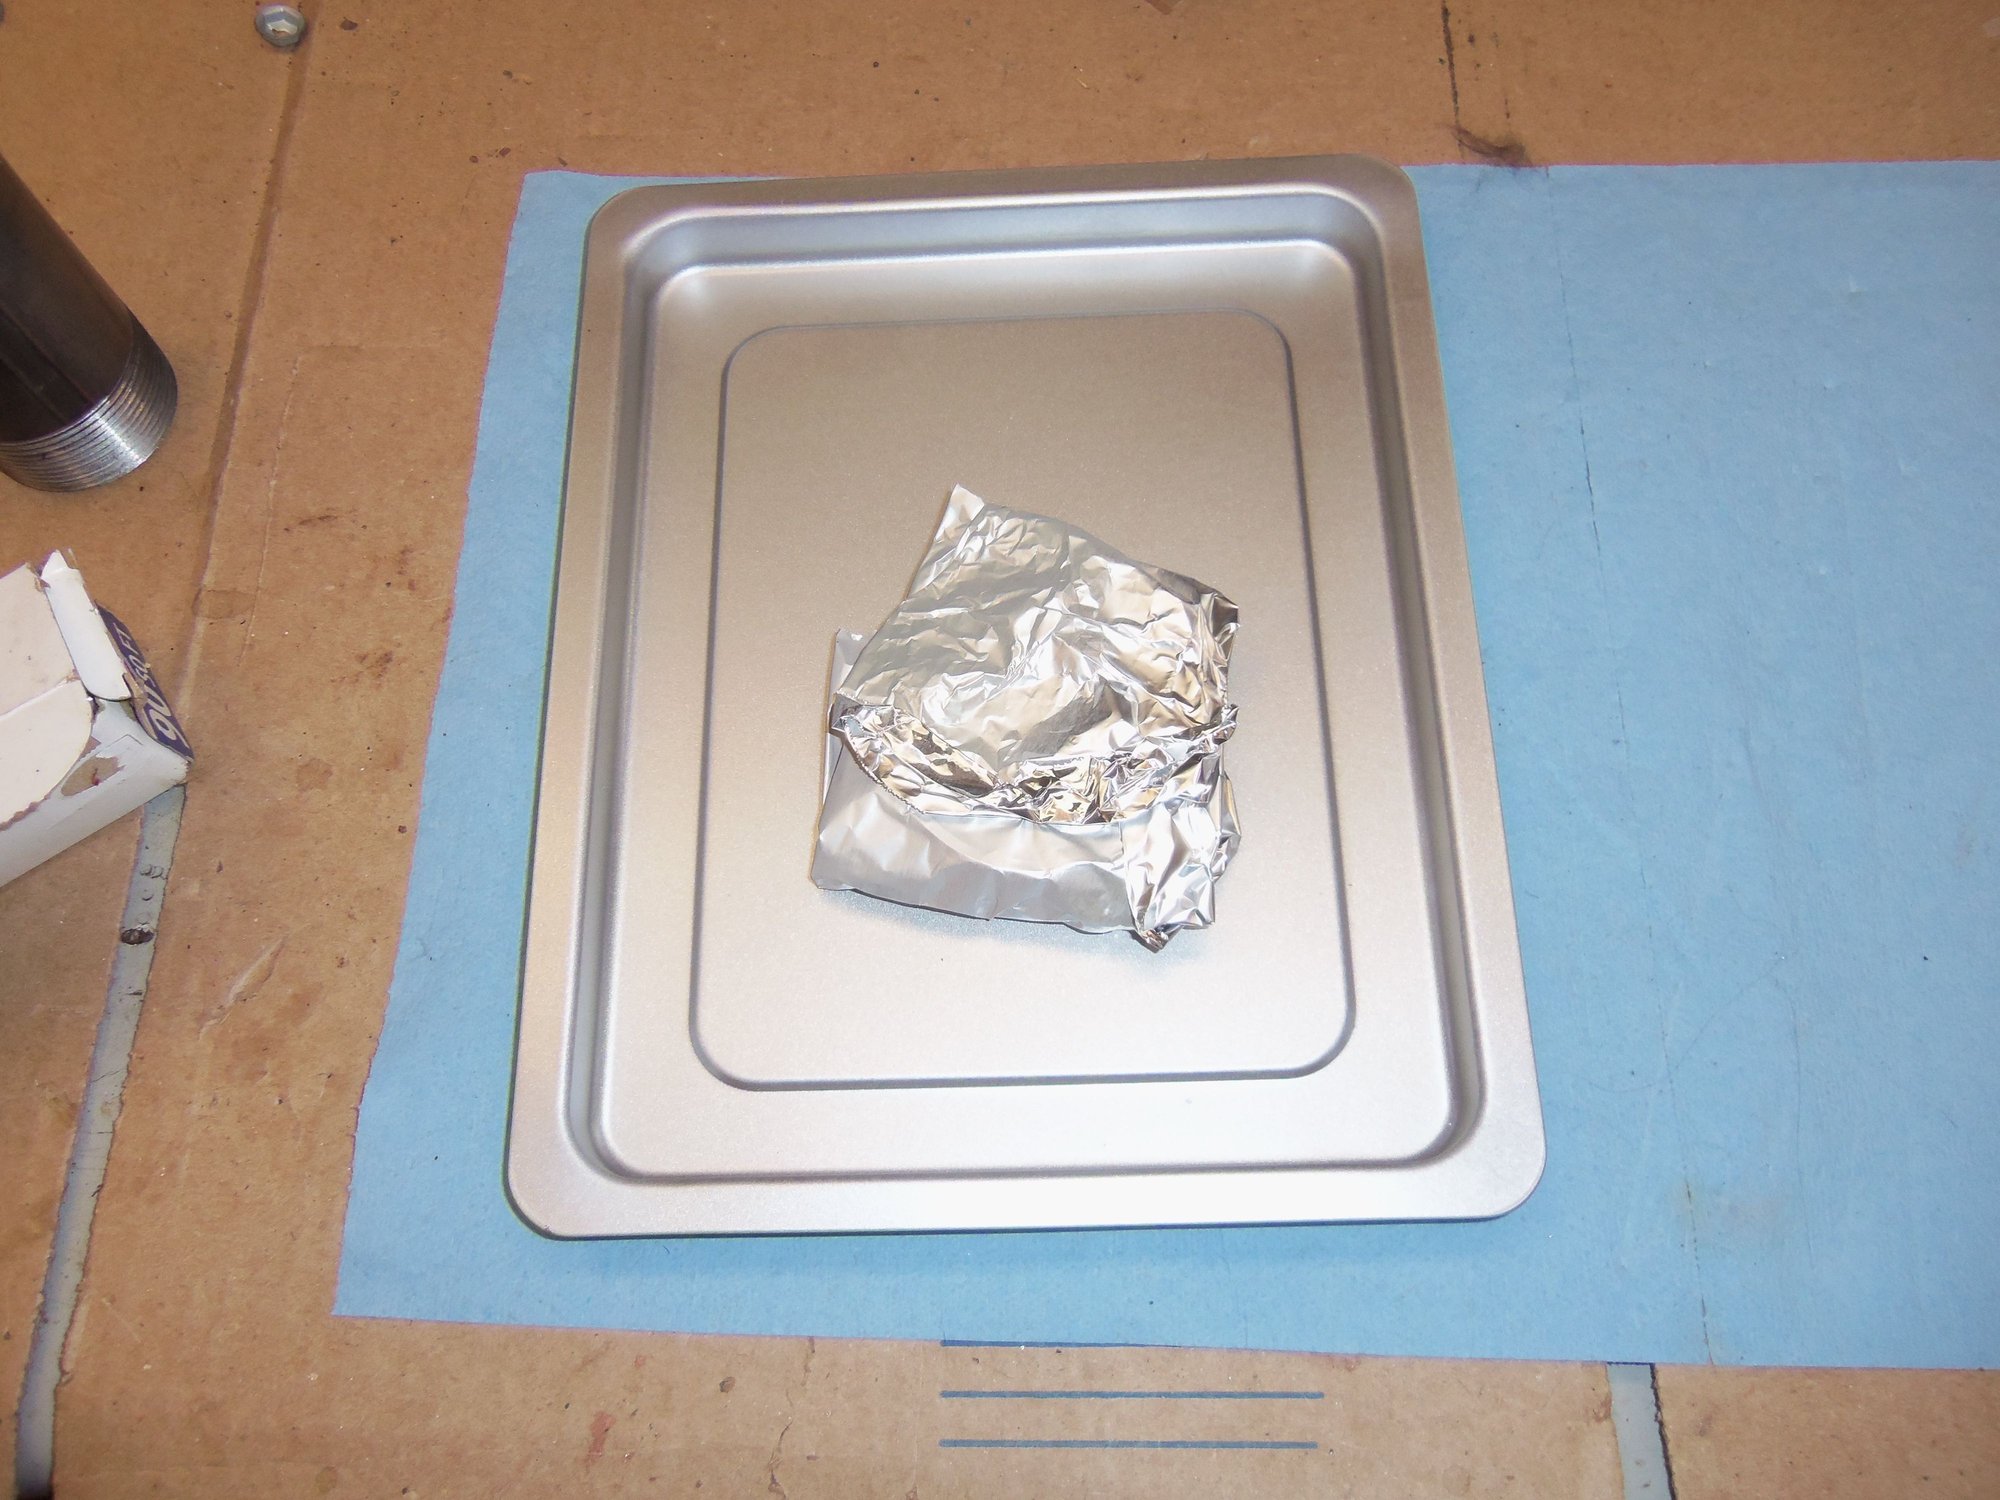
I put the completed drive plate assembly in the freezer for a few hours. I wrapped one of the new bearings in aluminum foil, and put it in my shop toaster oven at 250 degrees for 30 minutes. Flip and season as required. Oops, wrong recipe. I was using the WSM, volume 3, section 37, pages 128 and 129 for this work.
While the parts were cooling and heating, I set up my hydraulic press and the 6" length of 2 1/2" pipe that I was going to use as a spacer to press the bearing on. Once it was time, I moved quick. Cooled drive plate assembly onto the press bed, heated bearing onto the stub shaft, and apply pressure. The bearing went on with no fuss.
Aluminum foil may have been unnecessary. I don't heat that many bearings, so my experience is limited.
Bearing is seated. Note the frost on the drive plate hub bolt heads.
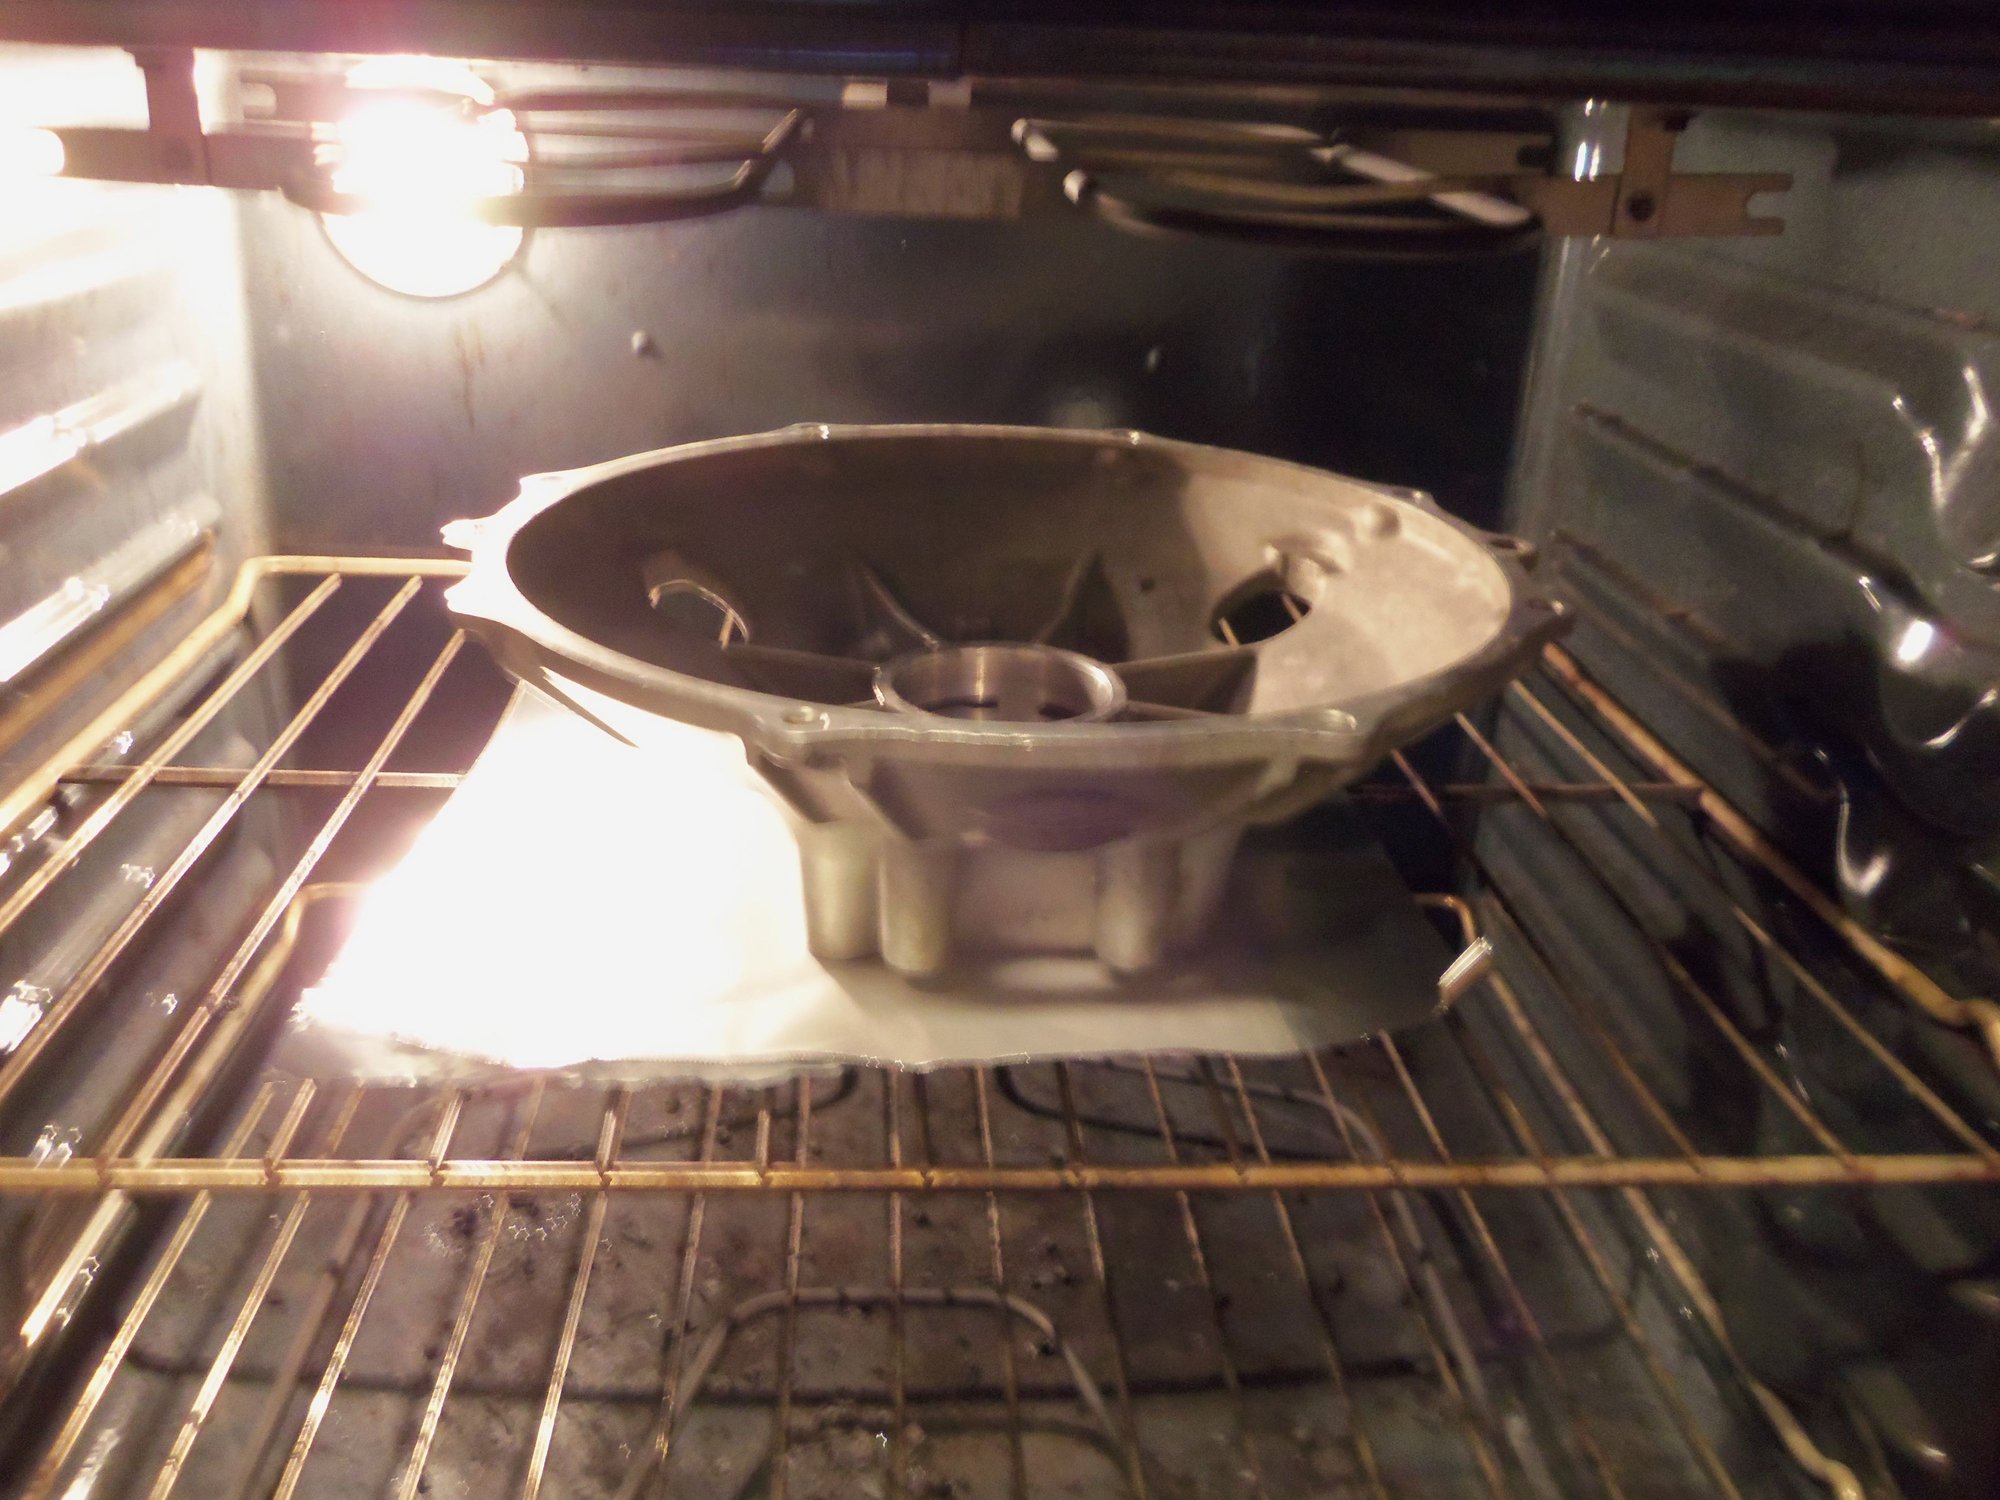
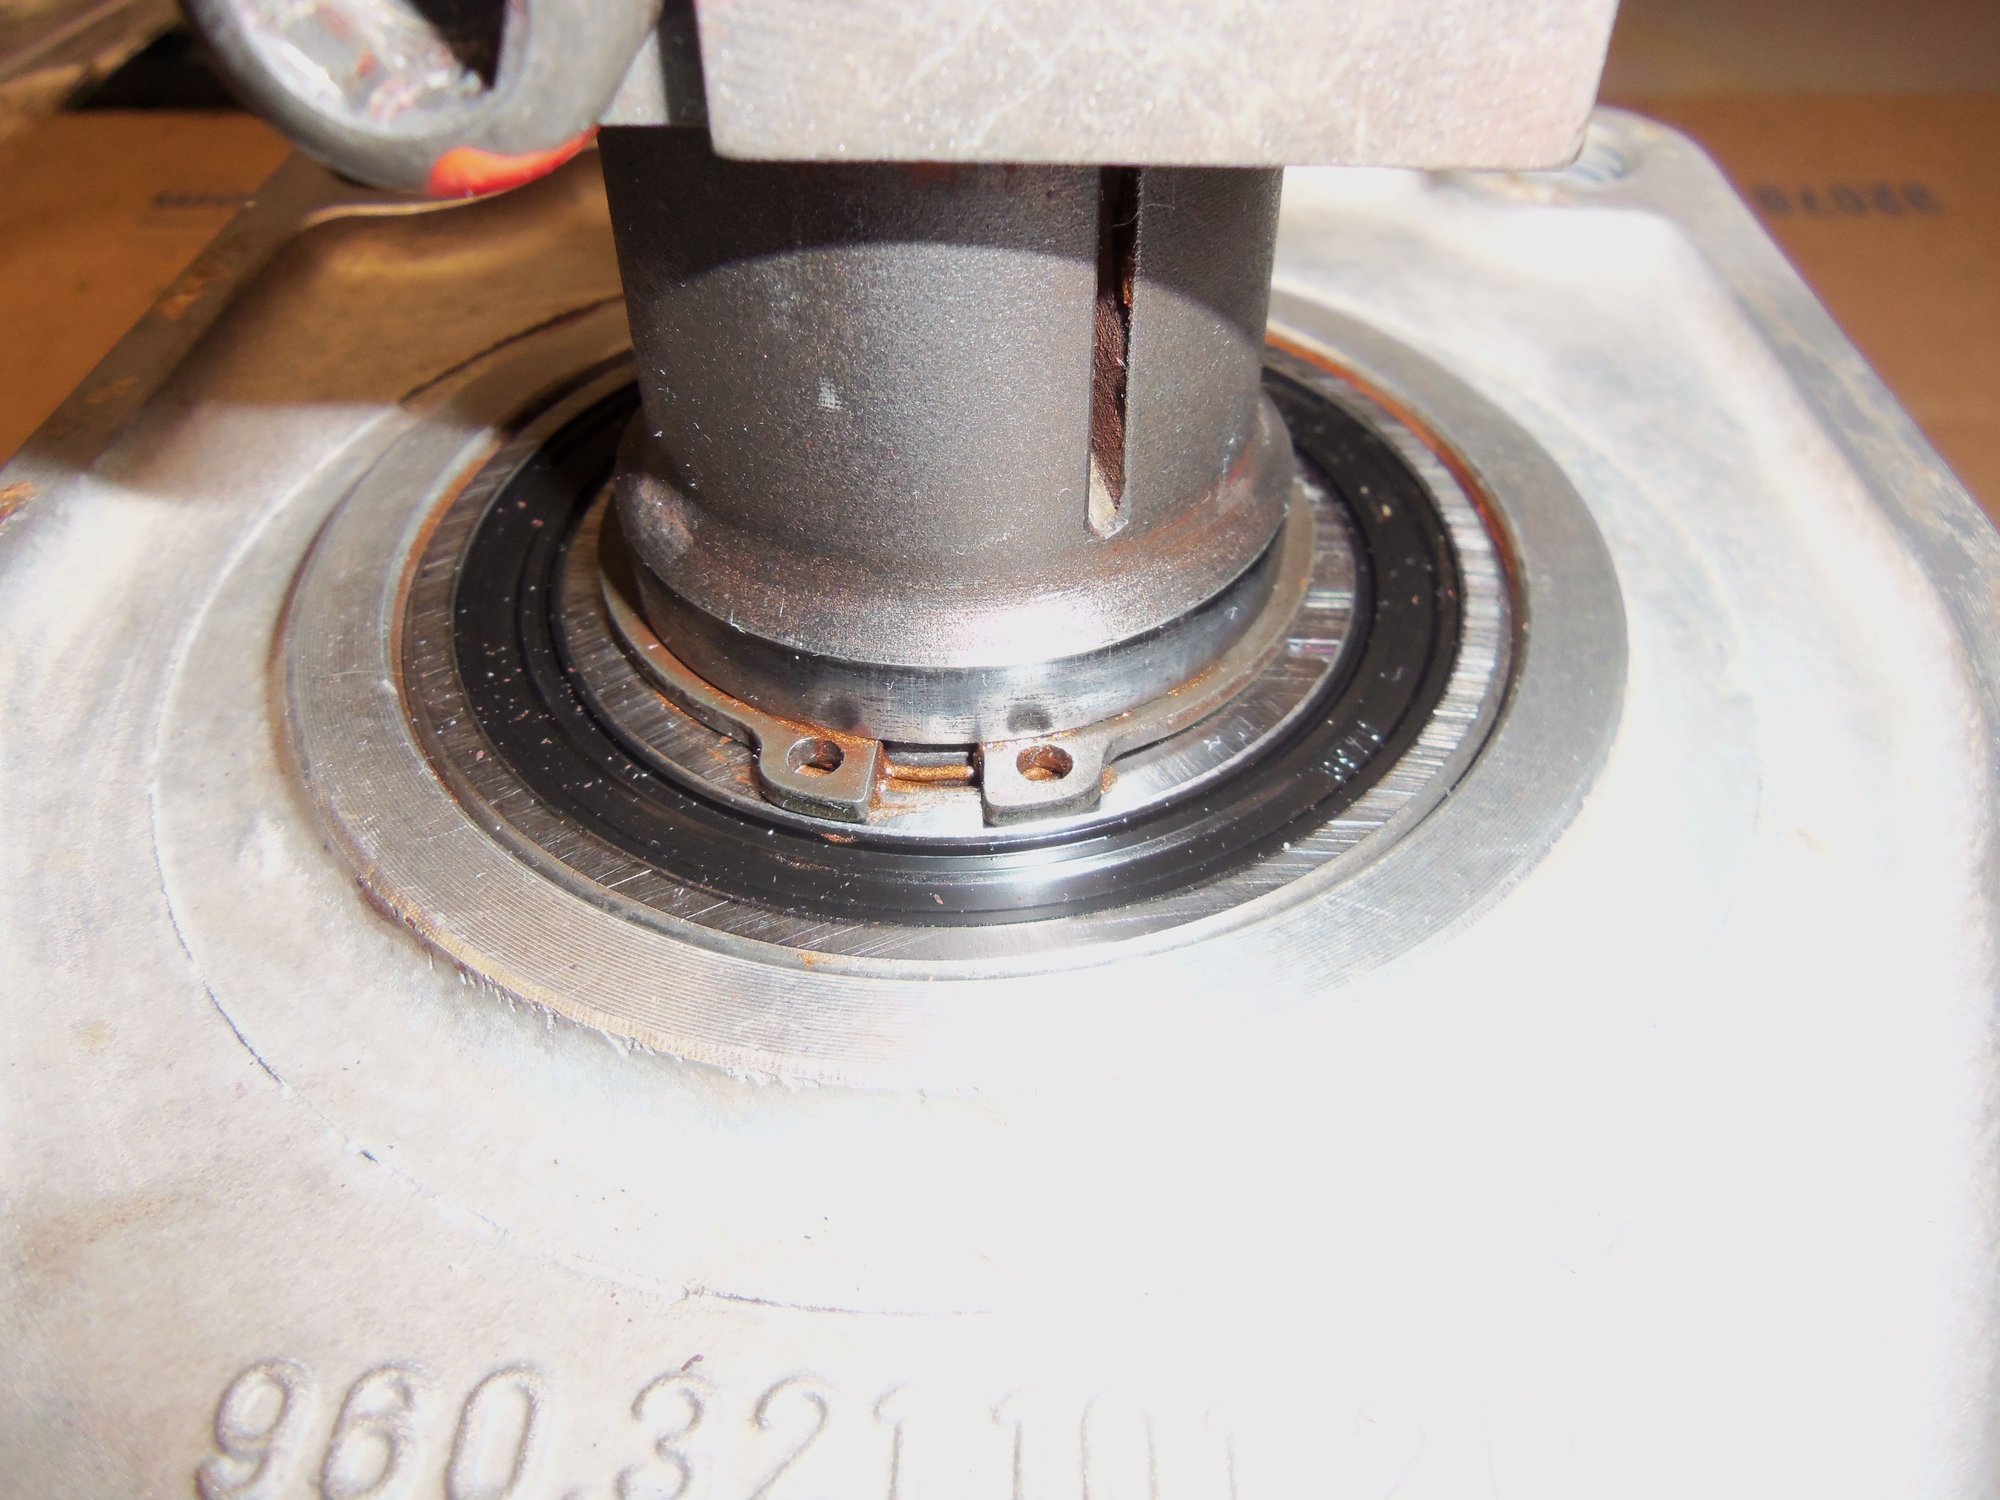
For the next part, I had to wait for my wife to go to work. The night before, I put the drive plate assembly back in the freezer. I installed both large snap rings into the torque converter cover. As soon as I woke up the next morning, I set the oven to preheat to 250 degrees F. I put the cover into the oven for 45 minutes. Again, got my act together while the parts were heating and cooling. Press was ready, as was the various pressing blocks and such I would need. Again, once it was time, I moved quick. Cooled drive plate assembly in one hand, heated cover in the other. At the work bench, quick smear of copper anti seize in the bearing bores in the cover, then into the press bed with the cover. The cooled drive plate assembly fell right into place, the bearing dropping right into its bore. No pressing was necessary.
I flipped everything over and supported the drive plate on a spacer. Bearing spacer went onto the stub shaft. I then pressed the remaining bearing onto the stub shaft and into the cover. Wiped off the excess anti seize and called it good.
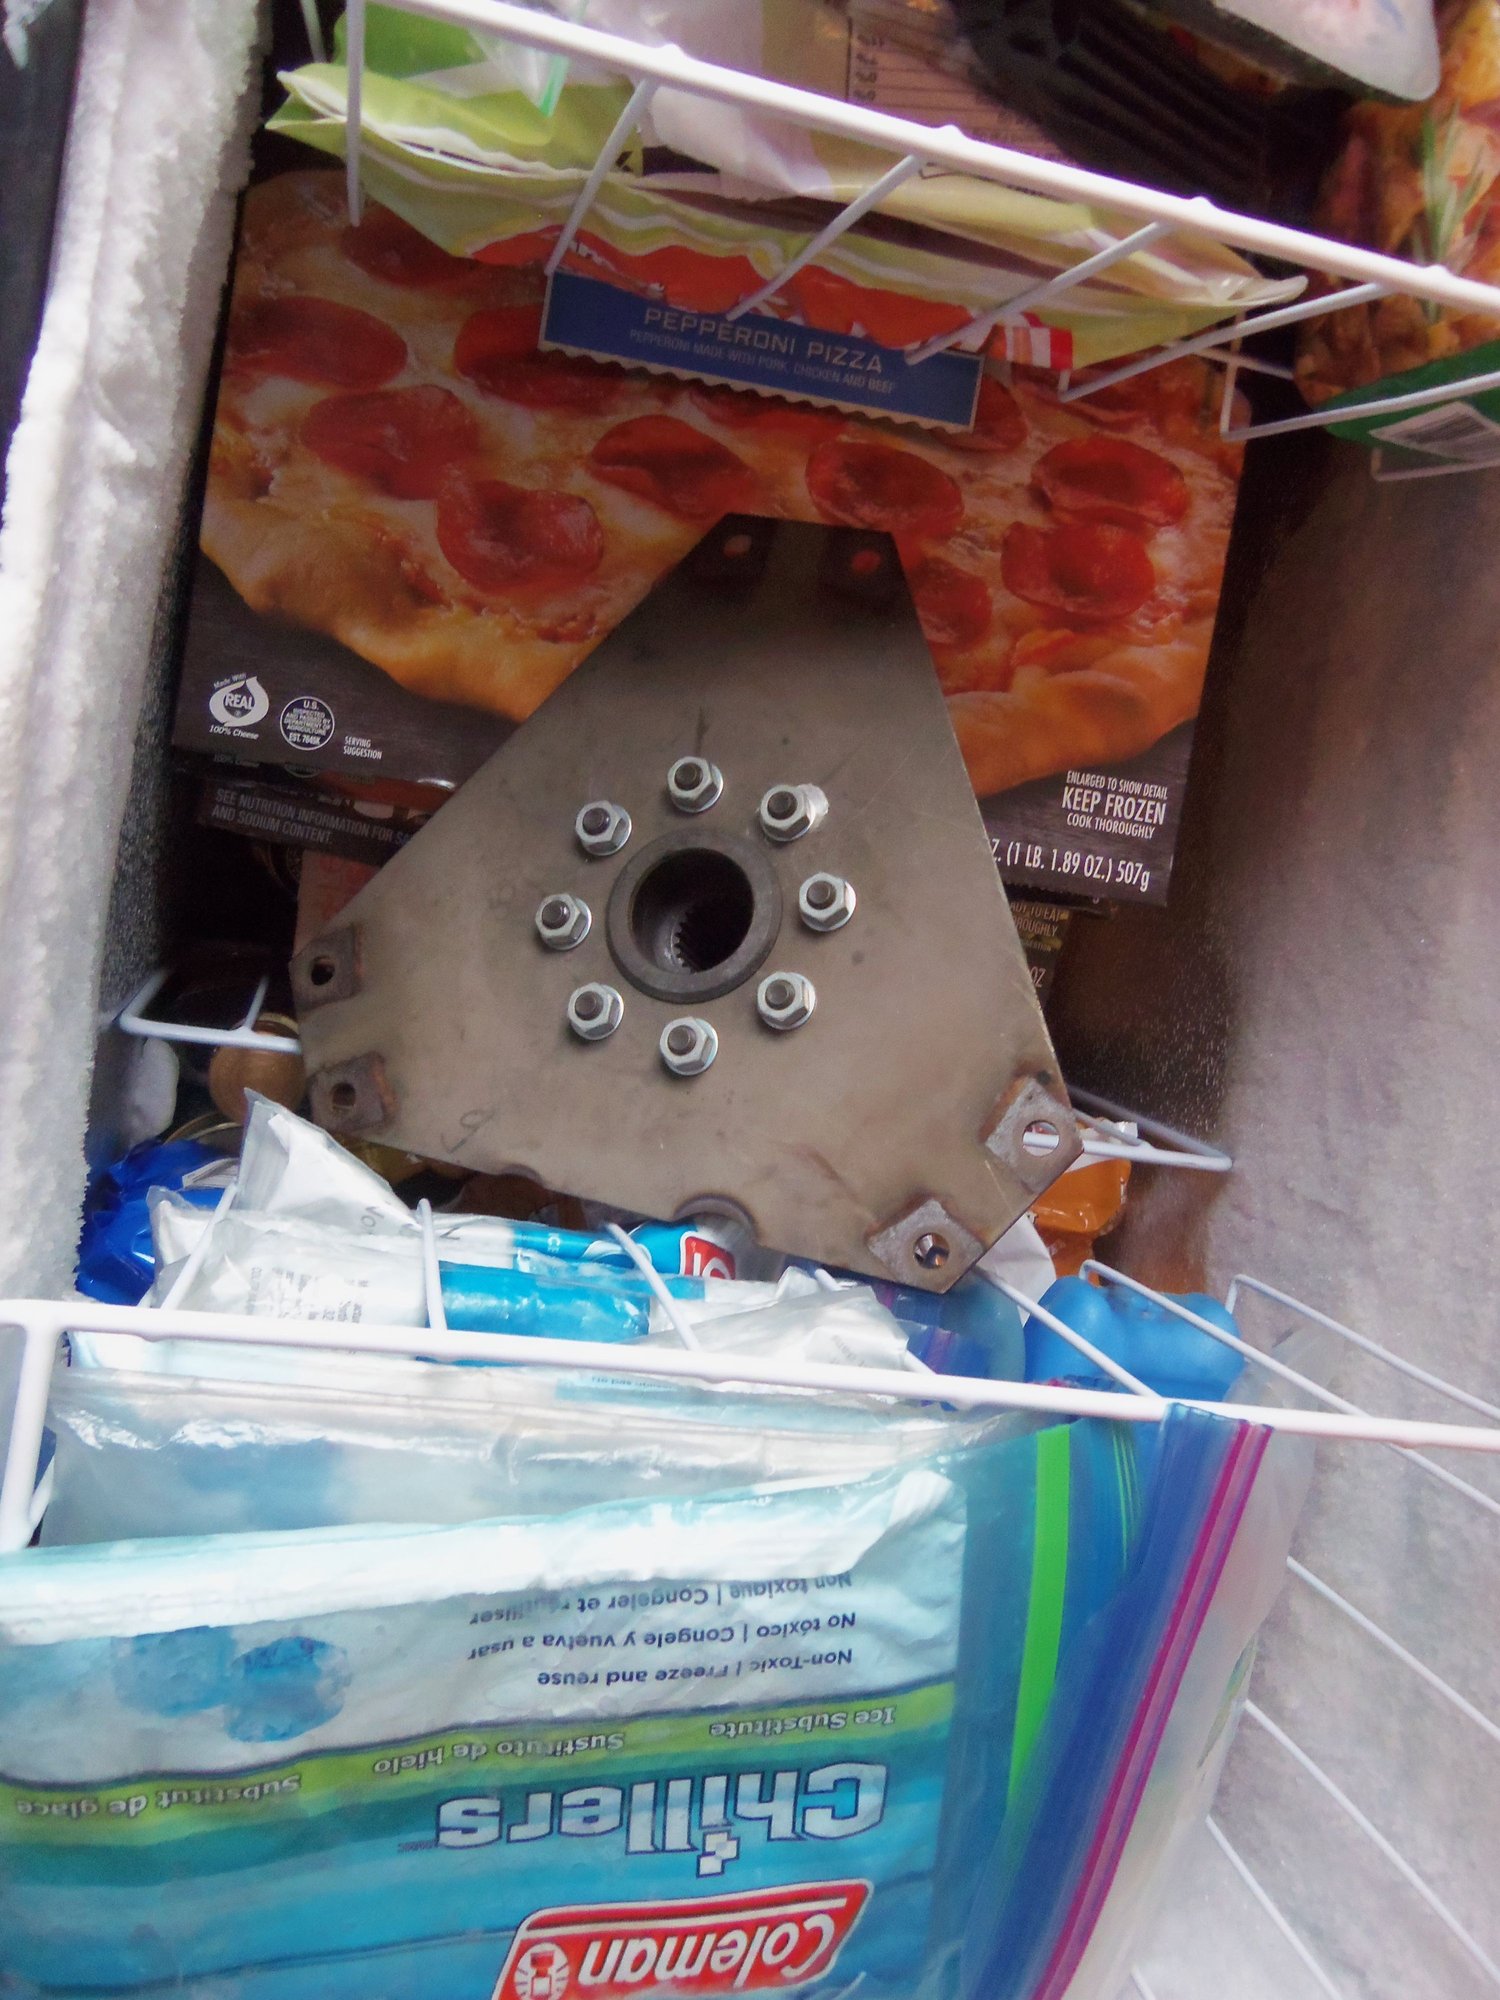
Drive plate and frozen pizza always go well together.
Had to wait for the missus to leave before I could get his shot.
Both large circlips installed in the torque converter cover.
Pressing the outer bearing onto the stub shaft and into the torque converter cover.
Note the condensation on the drive plate.
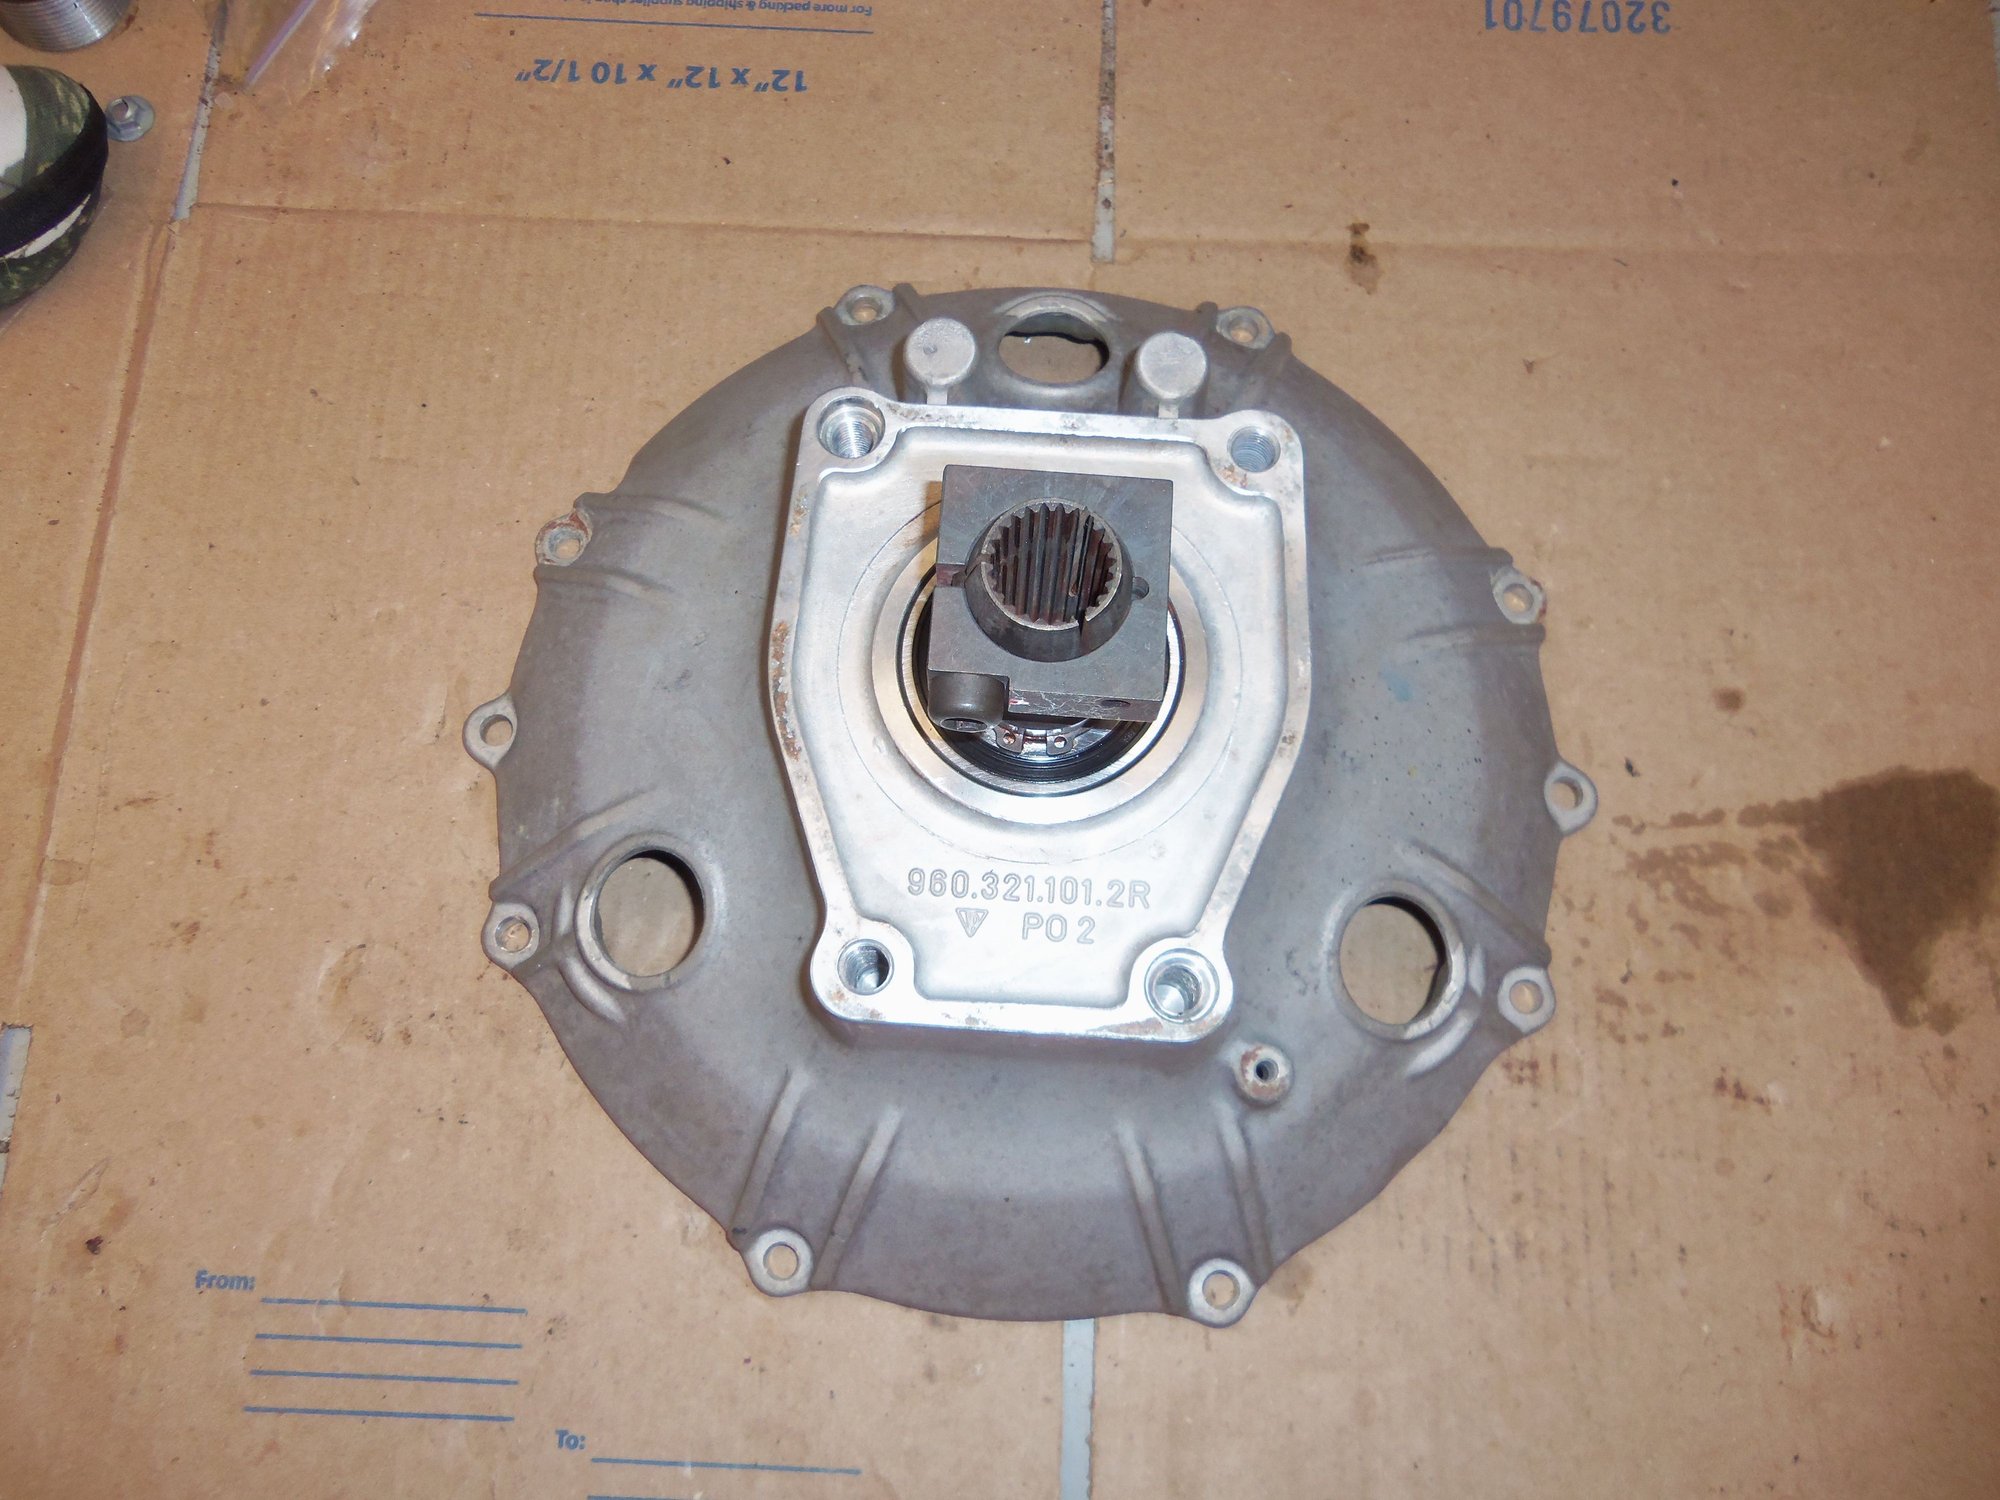
Last circlip installed.
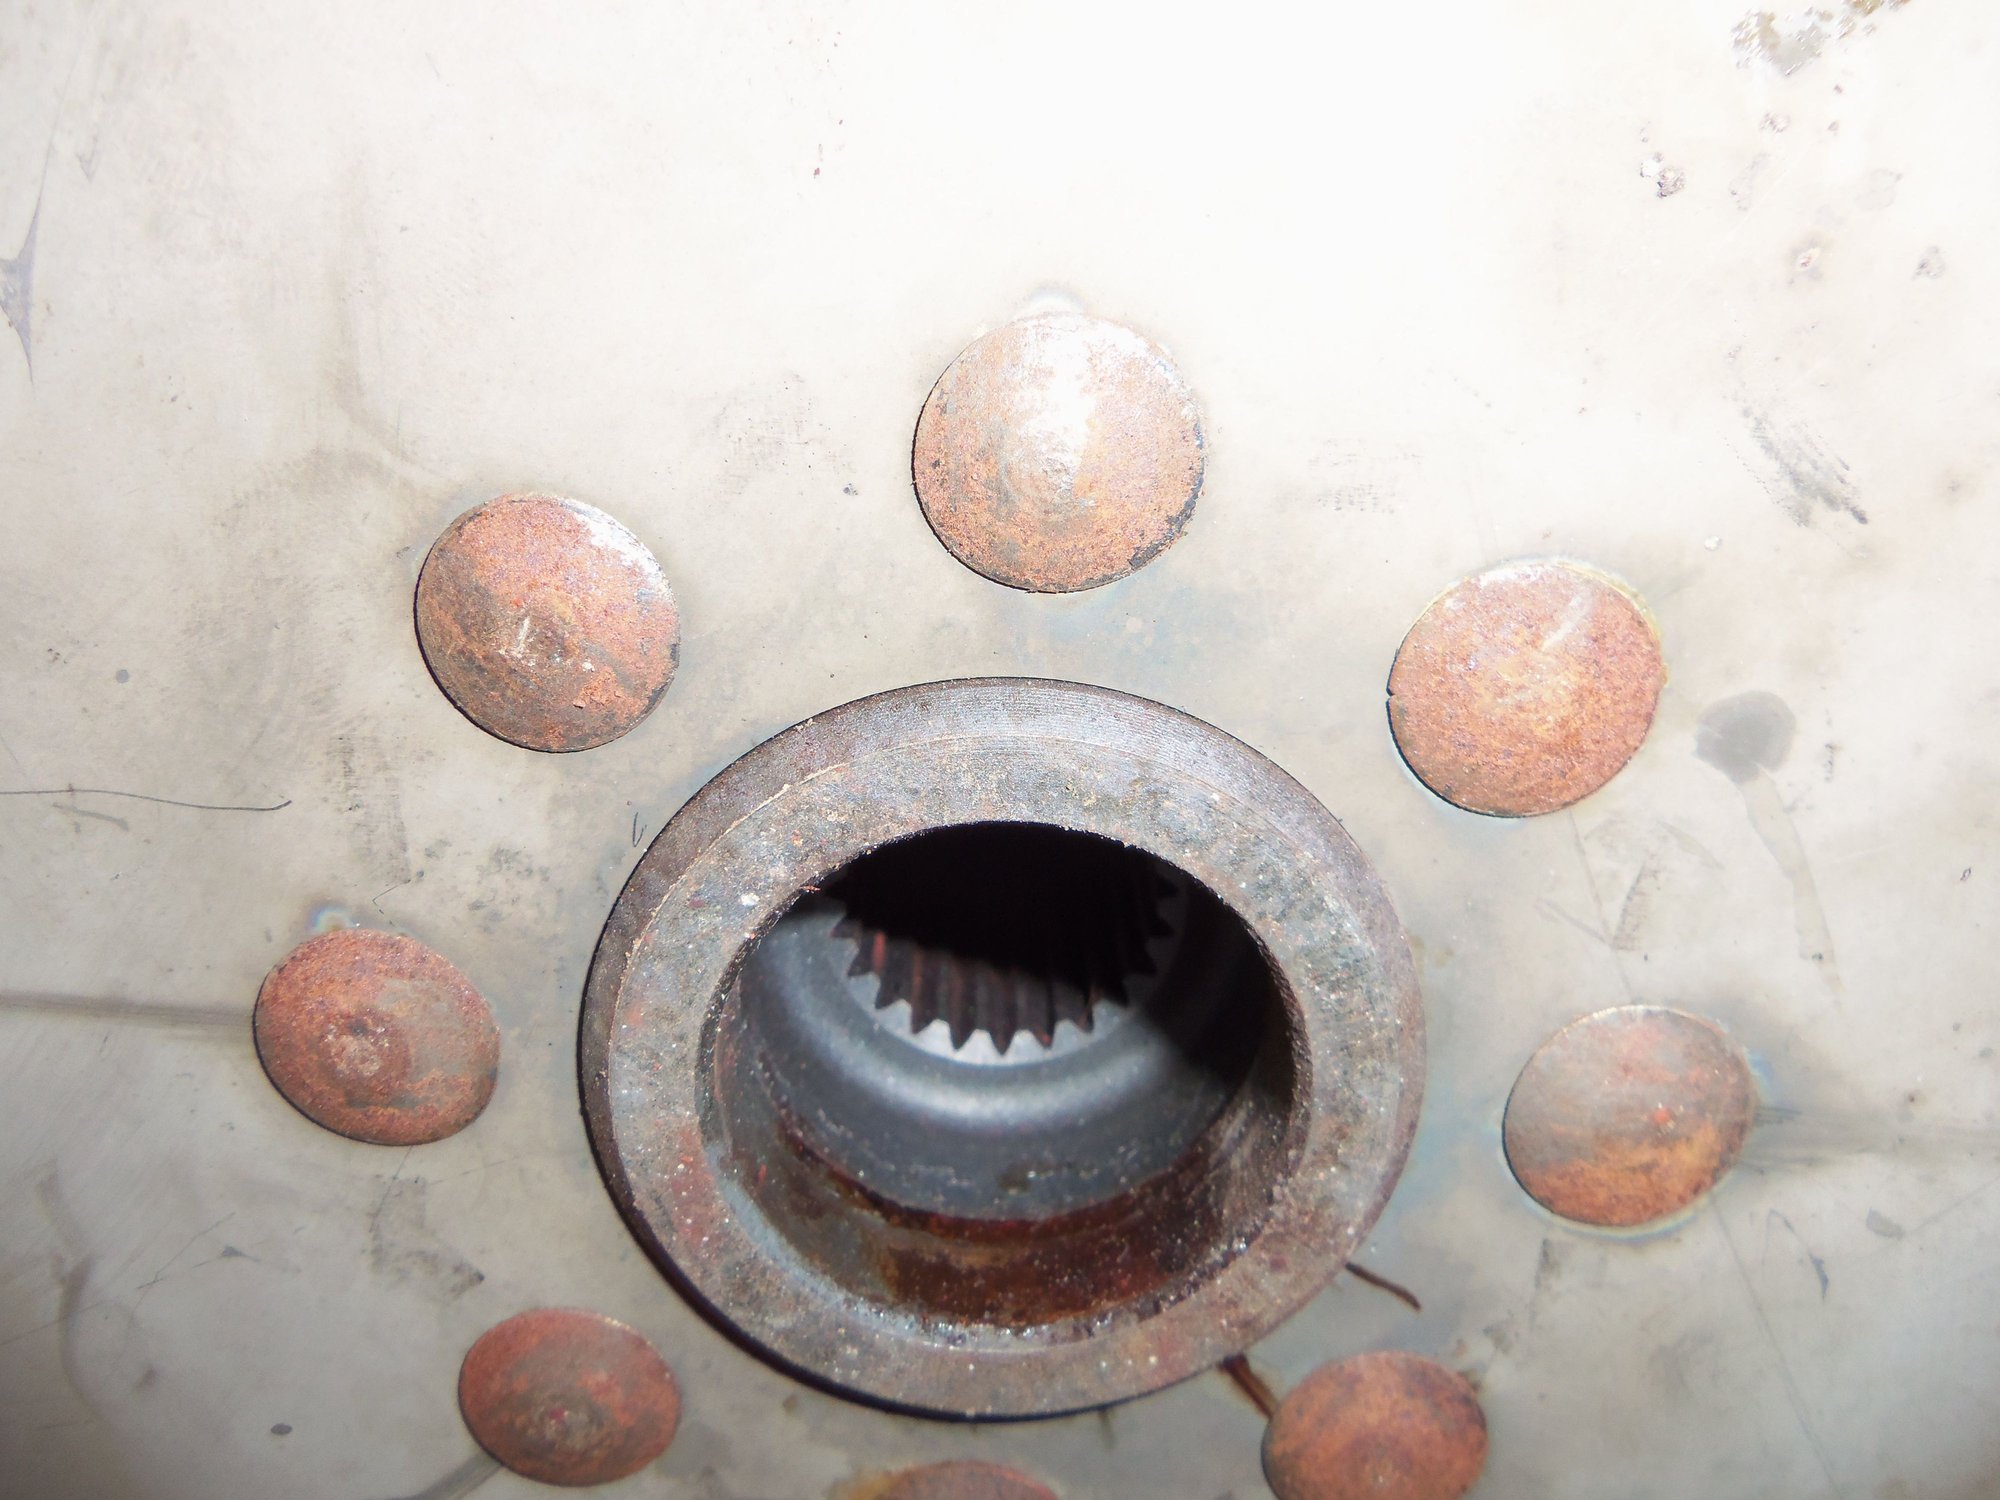
No rust in the drive plate hub bore for the nose of the torque converter.
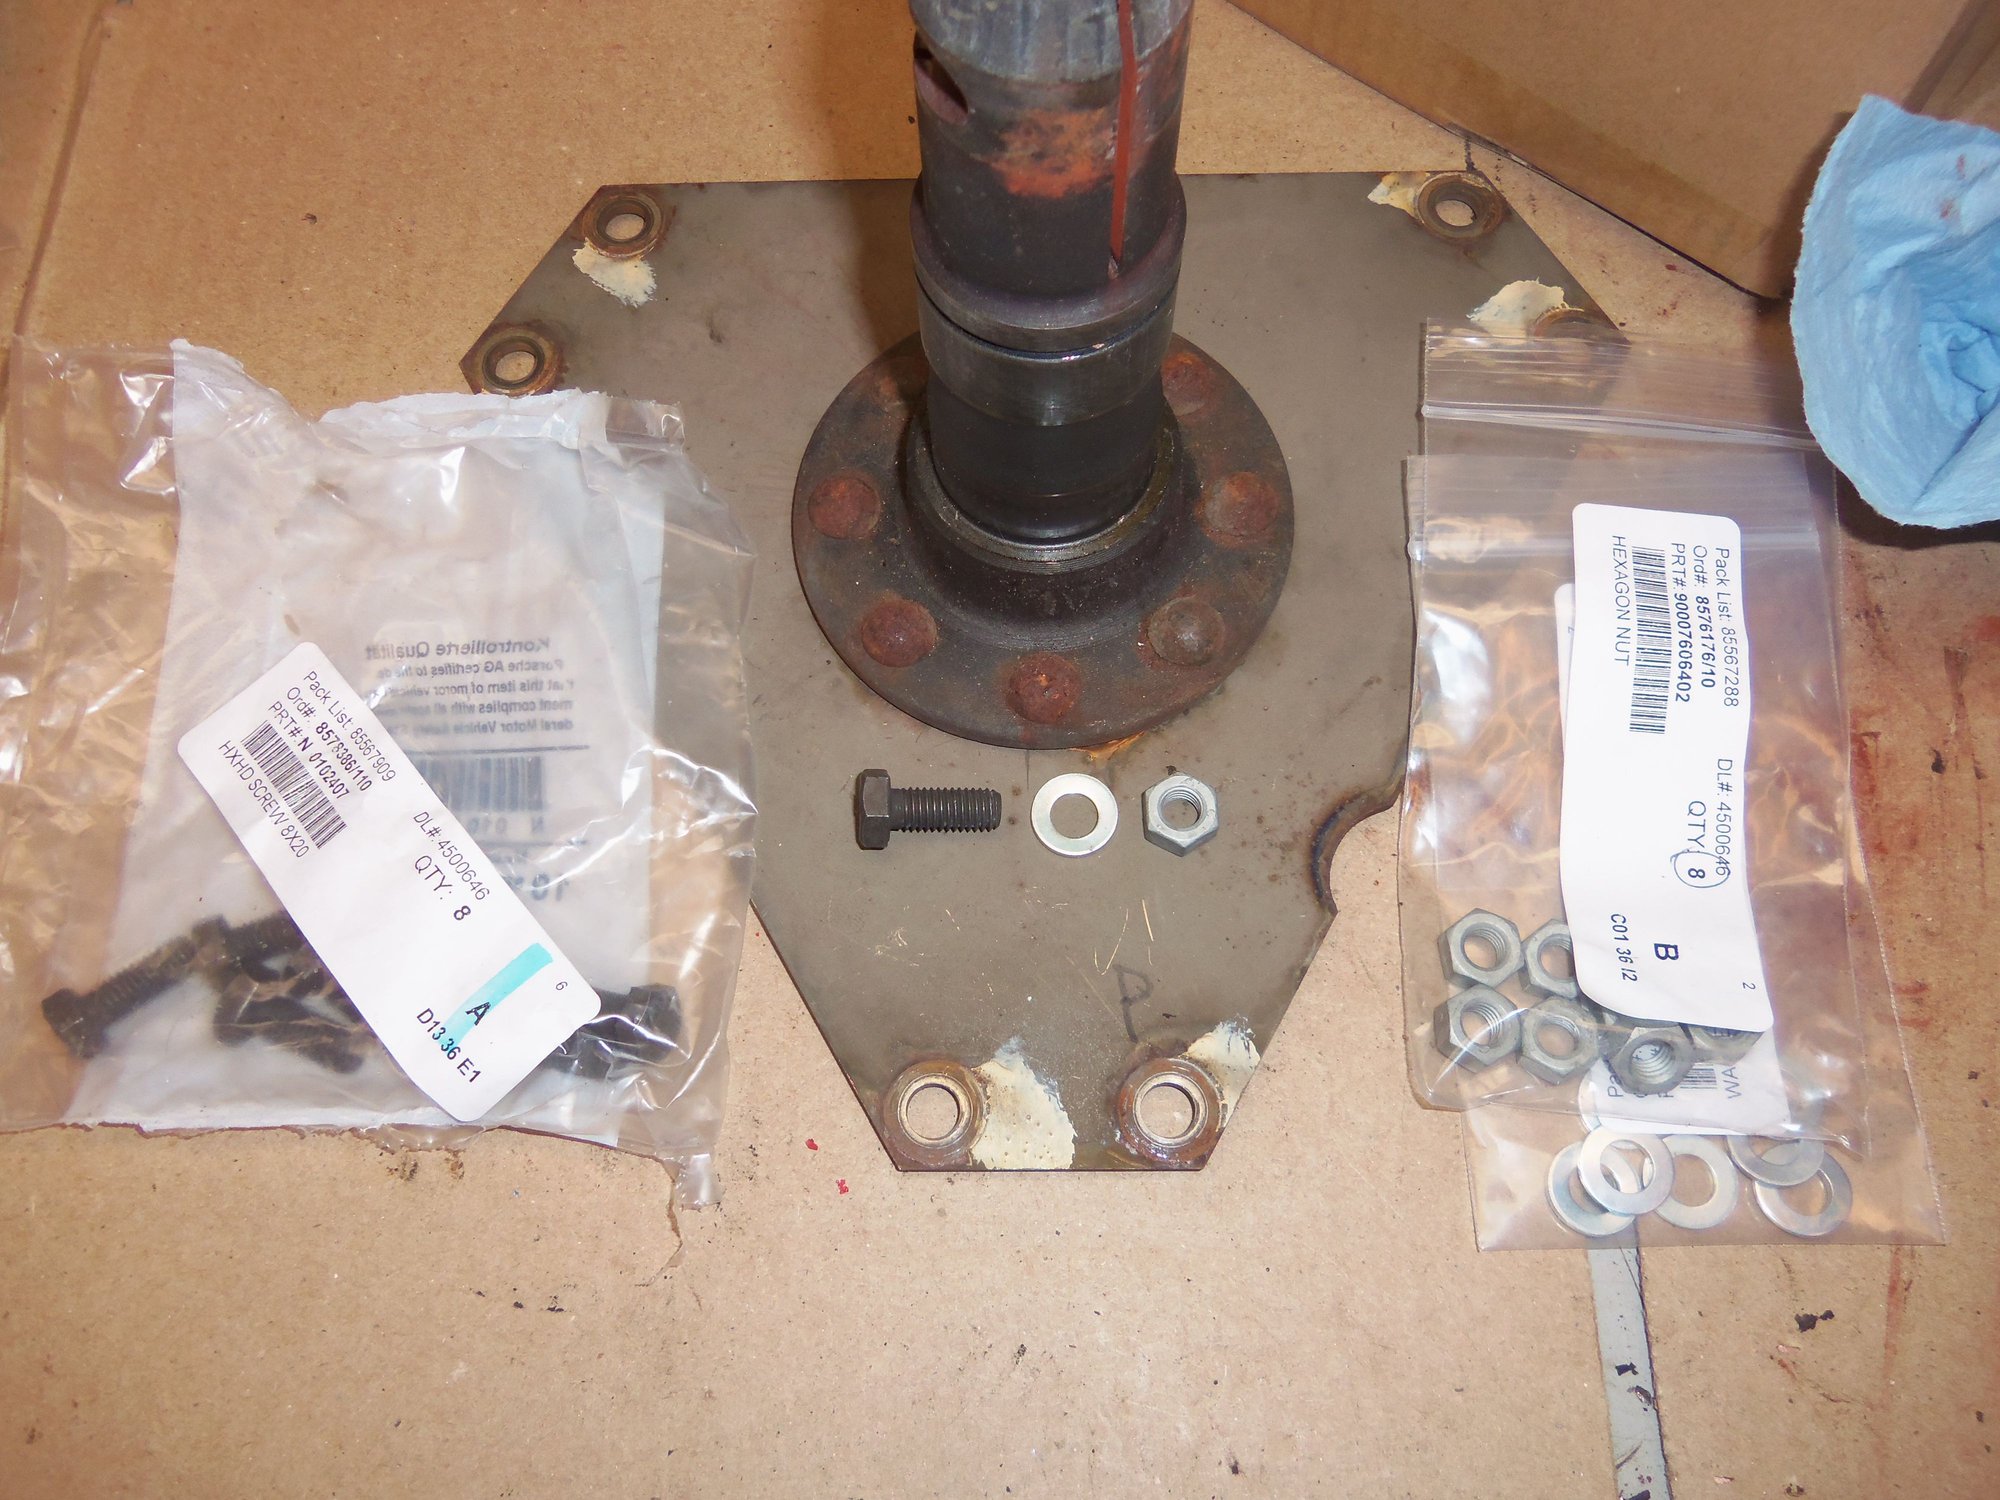
$640.00 Greg Brown 300M alloy torque tube drive shaft, plus shipping
$91.90 Torque converter bearings
$7.95 Torque converter seal
$16.00 Bolts for replacing rivets in torque converter drive plate
$6.80 Nuts for above
$6.80 Washers for above
Here is what I still have to spend:
$1.85 Transmission front pump sealing O-ring
$580.00 Set of Superbearings
Note: I had already recently replaced the pinch bolts for the front and rear drive shaft couplings. If you have not recently done this, add $24.00 for the bolts.
So, total: $1,351.30. This is MY particular spending. I did not NEED the new GB drive shaft, but I wanted it. The Superbearings are not required, but I wanted them. You can get the torque converter bearings and torque tube insert bearings much cheaper at a bearing supply house.


 01-07-2018, 12:35 PM