When you click on links to various merchants on this site and make a purchase, this can result in this site earning a commission. Affiliate programs and affiliations include, but are not limited to, the eBay Partner Network.
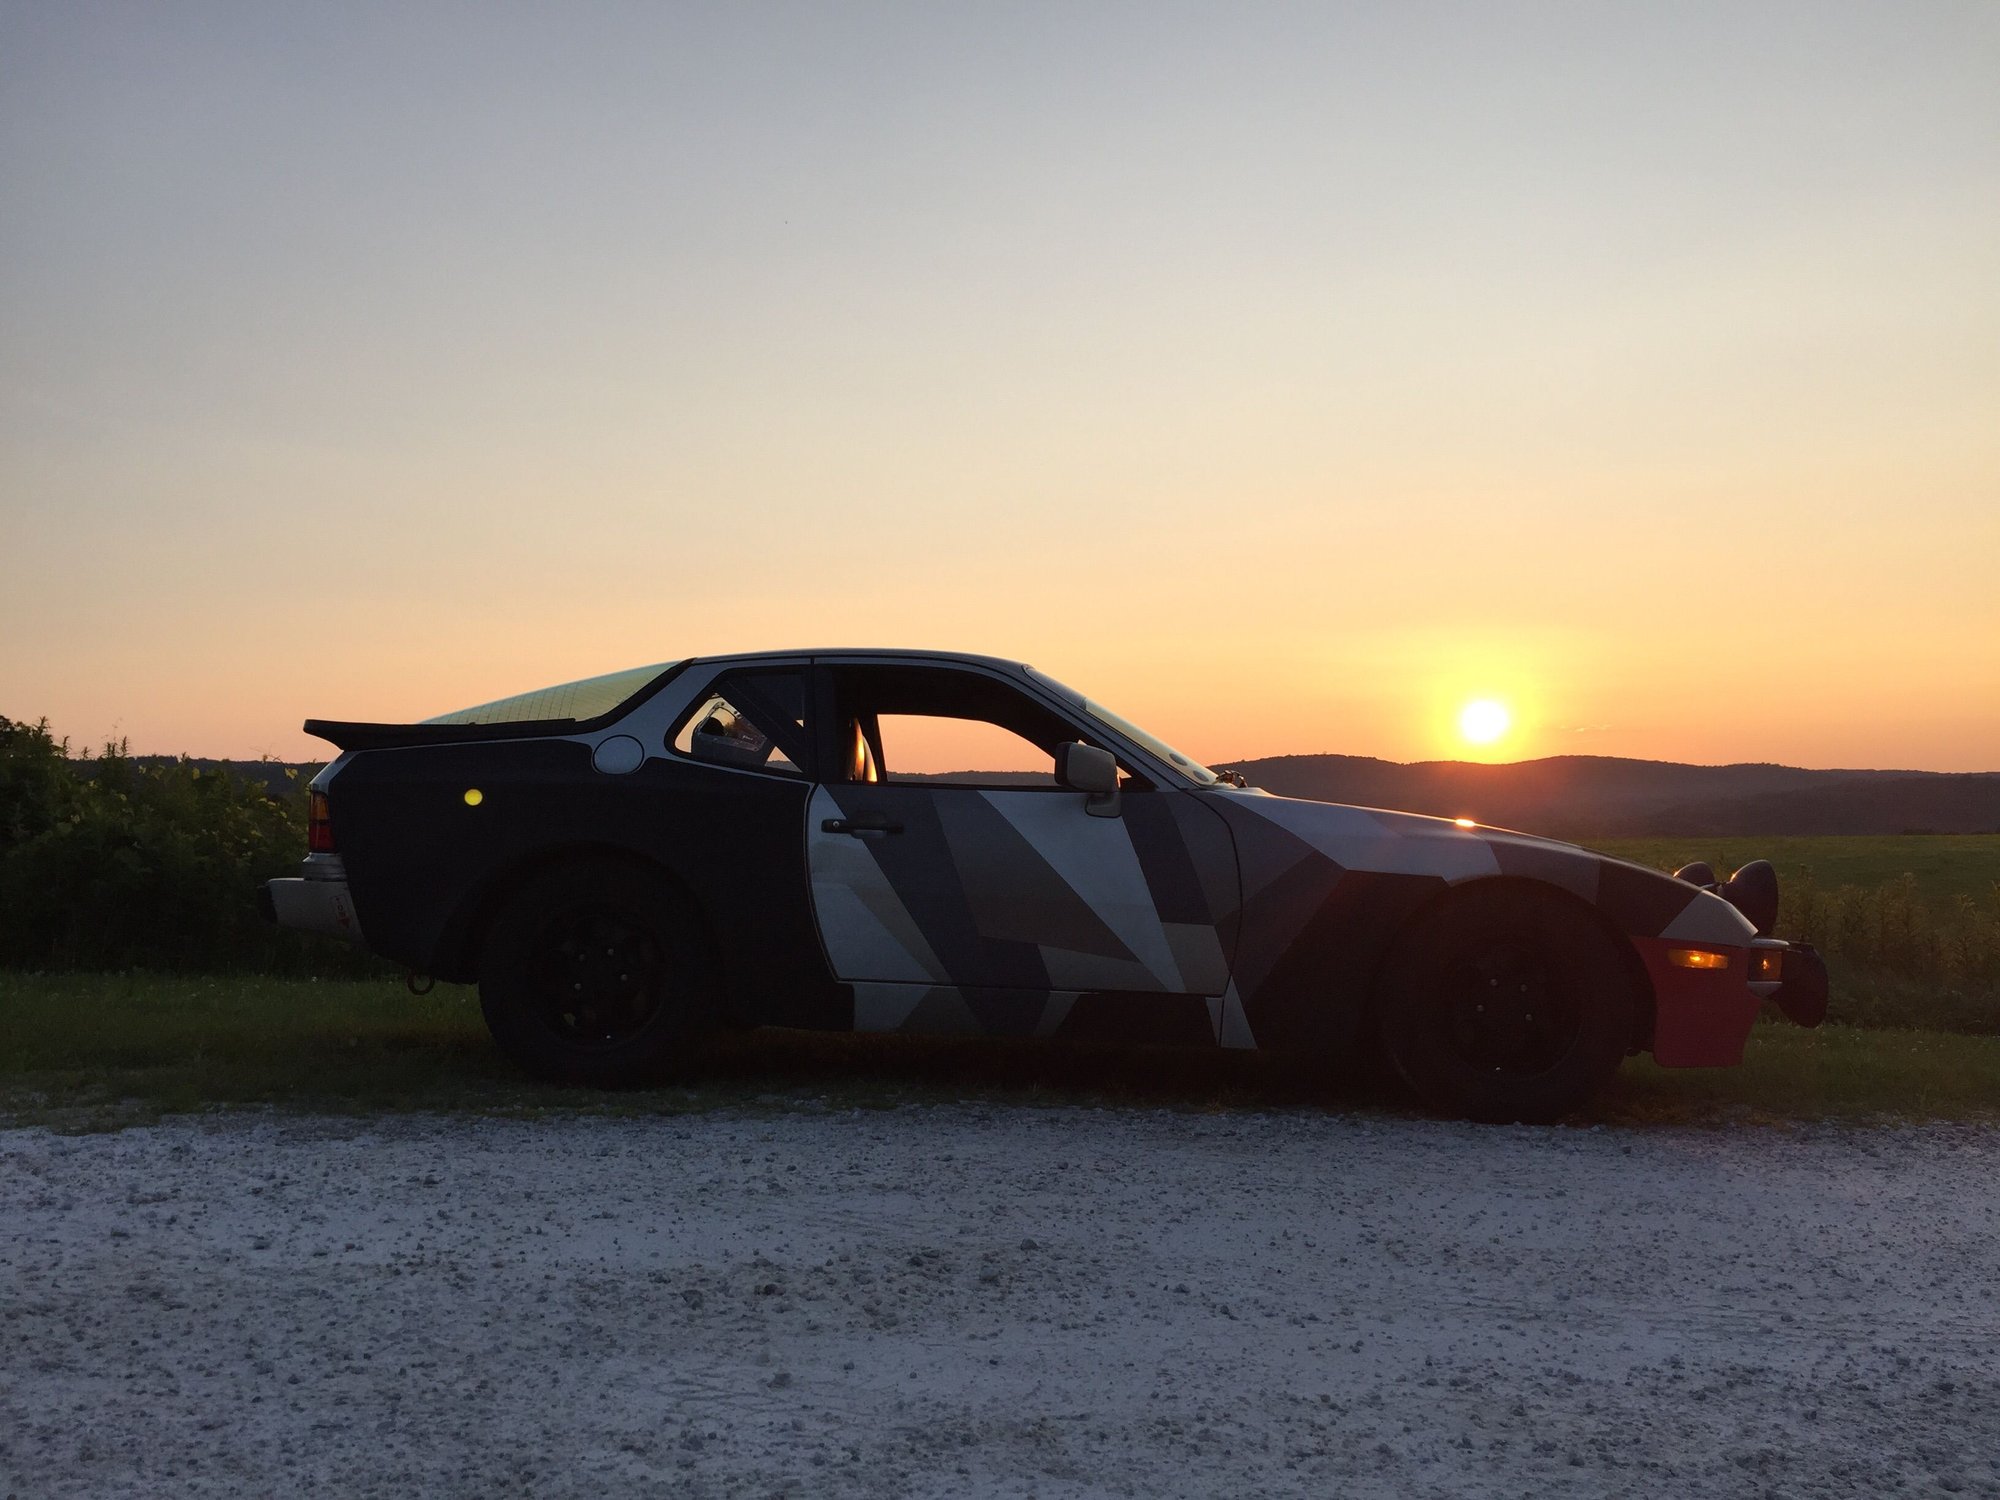
I'm rally spec building a cross country drive out of an 86 944NA. Only about a 1/4 into it, need to sort out suspension, continue stripping out interior components, and install seats/roll bar. Before all the grumbles, yes it's an automatic. For my purposes and experience cross country traveling this works to my advantage as I'm often driving 12+hour stretches through traffic congested cities, road construction, and operating camera/invitational equipment. W/ 120k on the odometer this 944 has been reliable.
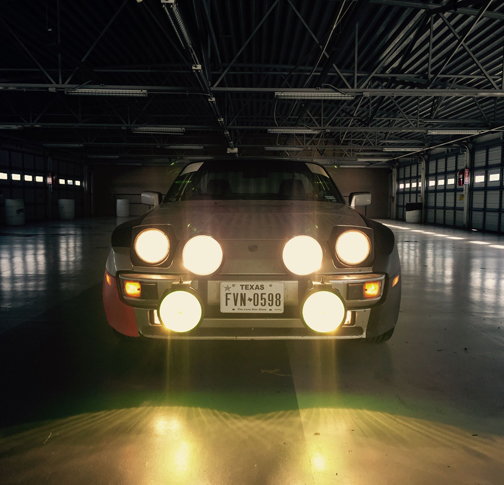
I approve, the deathray lights on the nose and beam shot are awesome. I bet the truckers love you when your beaming that into the night on an interstate I was getting flashed with just 100w euro driving lights and the 130w h4's in cibies on my last cross country blast.
On the seventh day God said "Let there be rally light!"...
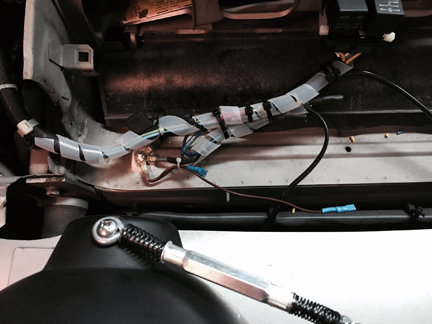
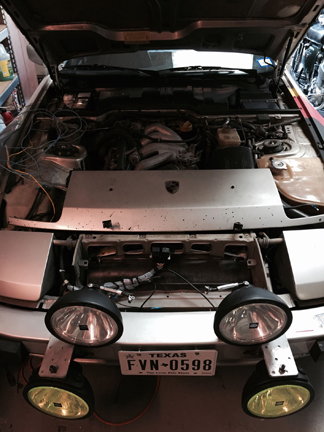
A few pics of the AUX light setup. I'd say this is a necessary safety upgrade especially for rural driving and avoiding debris on the interstate. Toggle switches are placed within reached for operation as not to blind oncoming traffic.
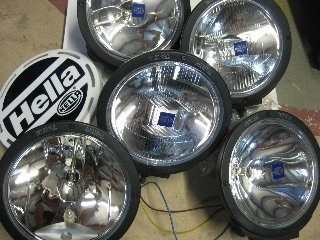
After a year of researching PIAA, Cibi, and Hella setups from light pods to bull bars I chose the Hella 4000 lights. The metal housings, quick release harness, quick adjustment *****, various lenses, and mounts worked best for my application.
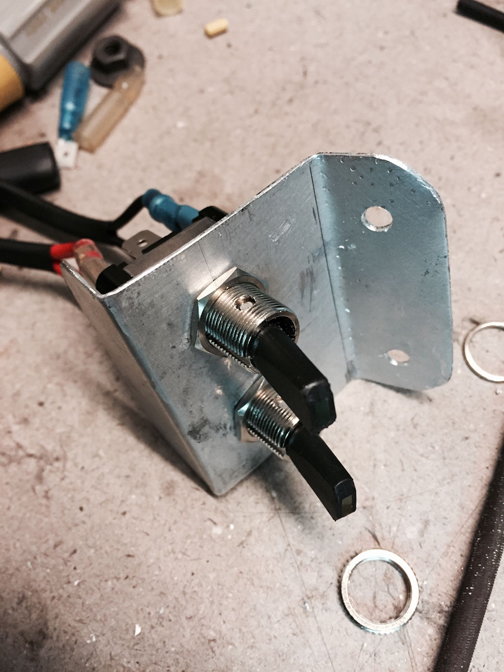
Toggle Switches. Green LED for upper and Yellow LED for lower lights.
Relayed harness with quick release connections. Customized aluminum turn-buckle stays to eliminate vibration.
Cut inner 2/3rds Rubber Bumper stops back for clearance. Fabricated lower light brackets from galvanized straps/L-brackets. Wired through bumper into header space for clean installation.
Euro Beams on top and Spots on bottom. Setup may be switched to Cornering and/or Pencil Beams when needed.
Strut spacers, blocks to move the caster mounts down/crossmember (lift the engine back up though for sump safety)...works for subaru
notched spring plates and index the t-bars to lift the back end, find longer rear shocks (perhaps borrowed from the baja bug catalog).
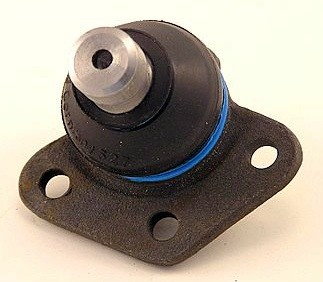
not super tough but not fragile either, t-bars suspension is hard to break, biggest concern would be the lower balljoint on the front arms, but the VW heritage provides for mono-ball joints to bolt between the arms and the spindles which should be very tough! alternatively...make a porsche twin-i beam front end
apply skidplate and big tires. avoid big jumps but enjoy the gravel and dirt. limit straps? stock CV's will be totally fine even with ~3" lift.
cut back panel between lights and make a mini-tailgate, build flat floor over rear seat buckets and isolate from the front seat area (weatherproof cargo box?)
swing out rear tire carrier? roof rack? front bumper full of lights??
this is what i think about at work
I'm enjoying your thread here V2. What do you mean about "notched spring plates "? Also are you suggesting that the VW arms will bolt on the early and late cars?
I'm enjoying your thread here V2. What do you mean about "notched spring plates "? Also are you suggesting that the VW arms will bolt on the early and late cars?
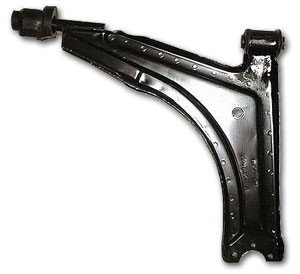
on the early 944, the front control arm is shared with the contemporary VW Jetta and other cars.
our front spindles/struts are modified Rabbit parts.
and the 944 rear suspension is more or less straight out of a SUper Beetle.
Notched spring plates are spring plates (metal piece connecting the torsion bar to the trailing arm) with a small notch cut out of them, so that they can travel further without hitting the suspension bolt near the pivot end.
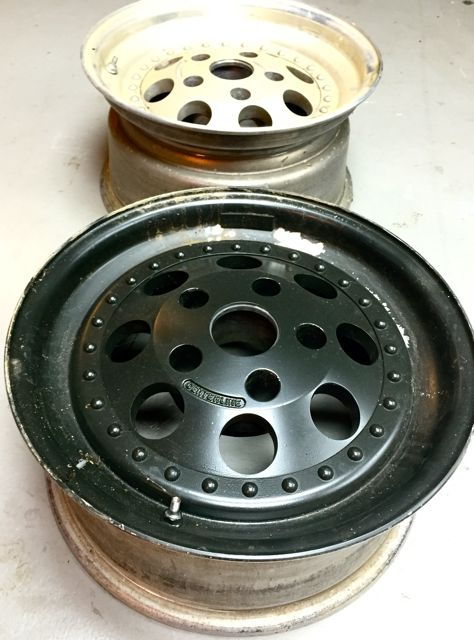
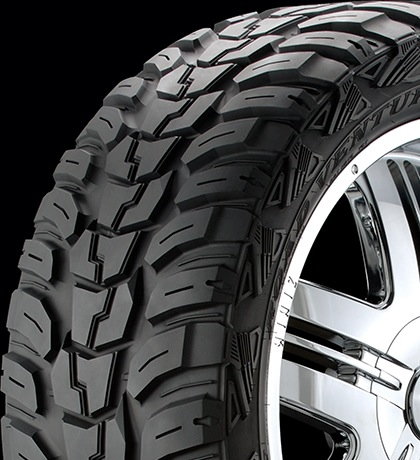
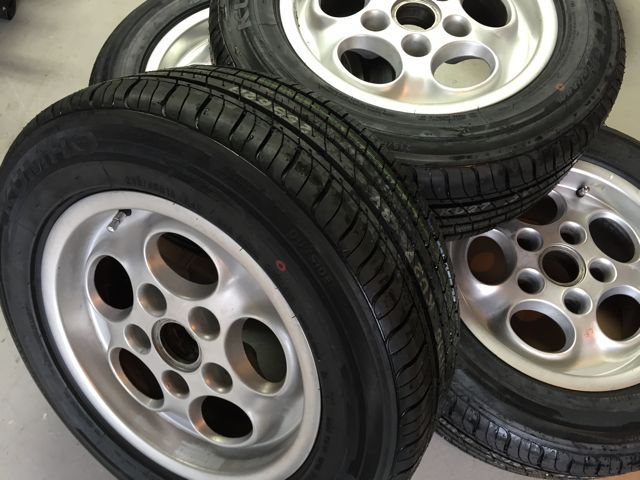
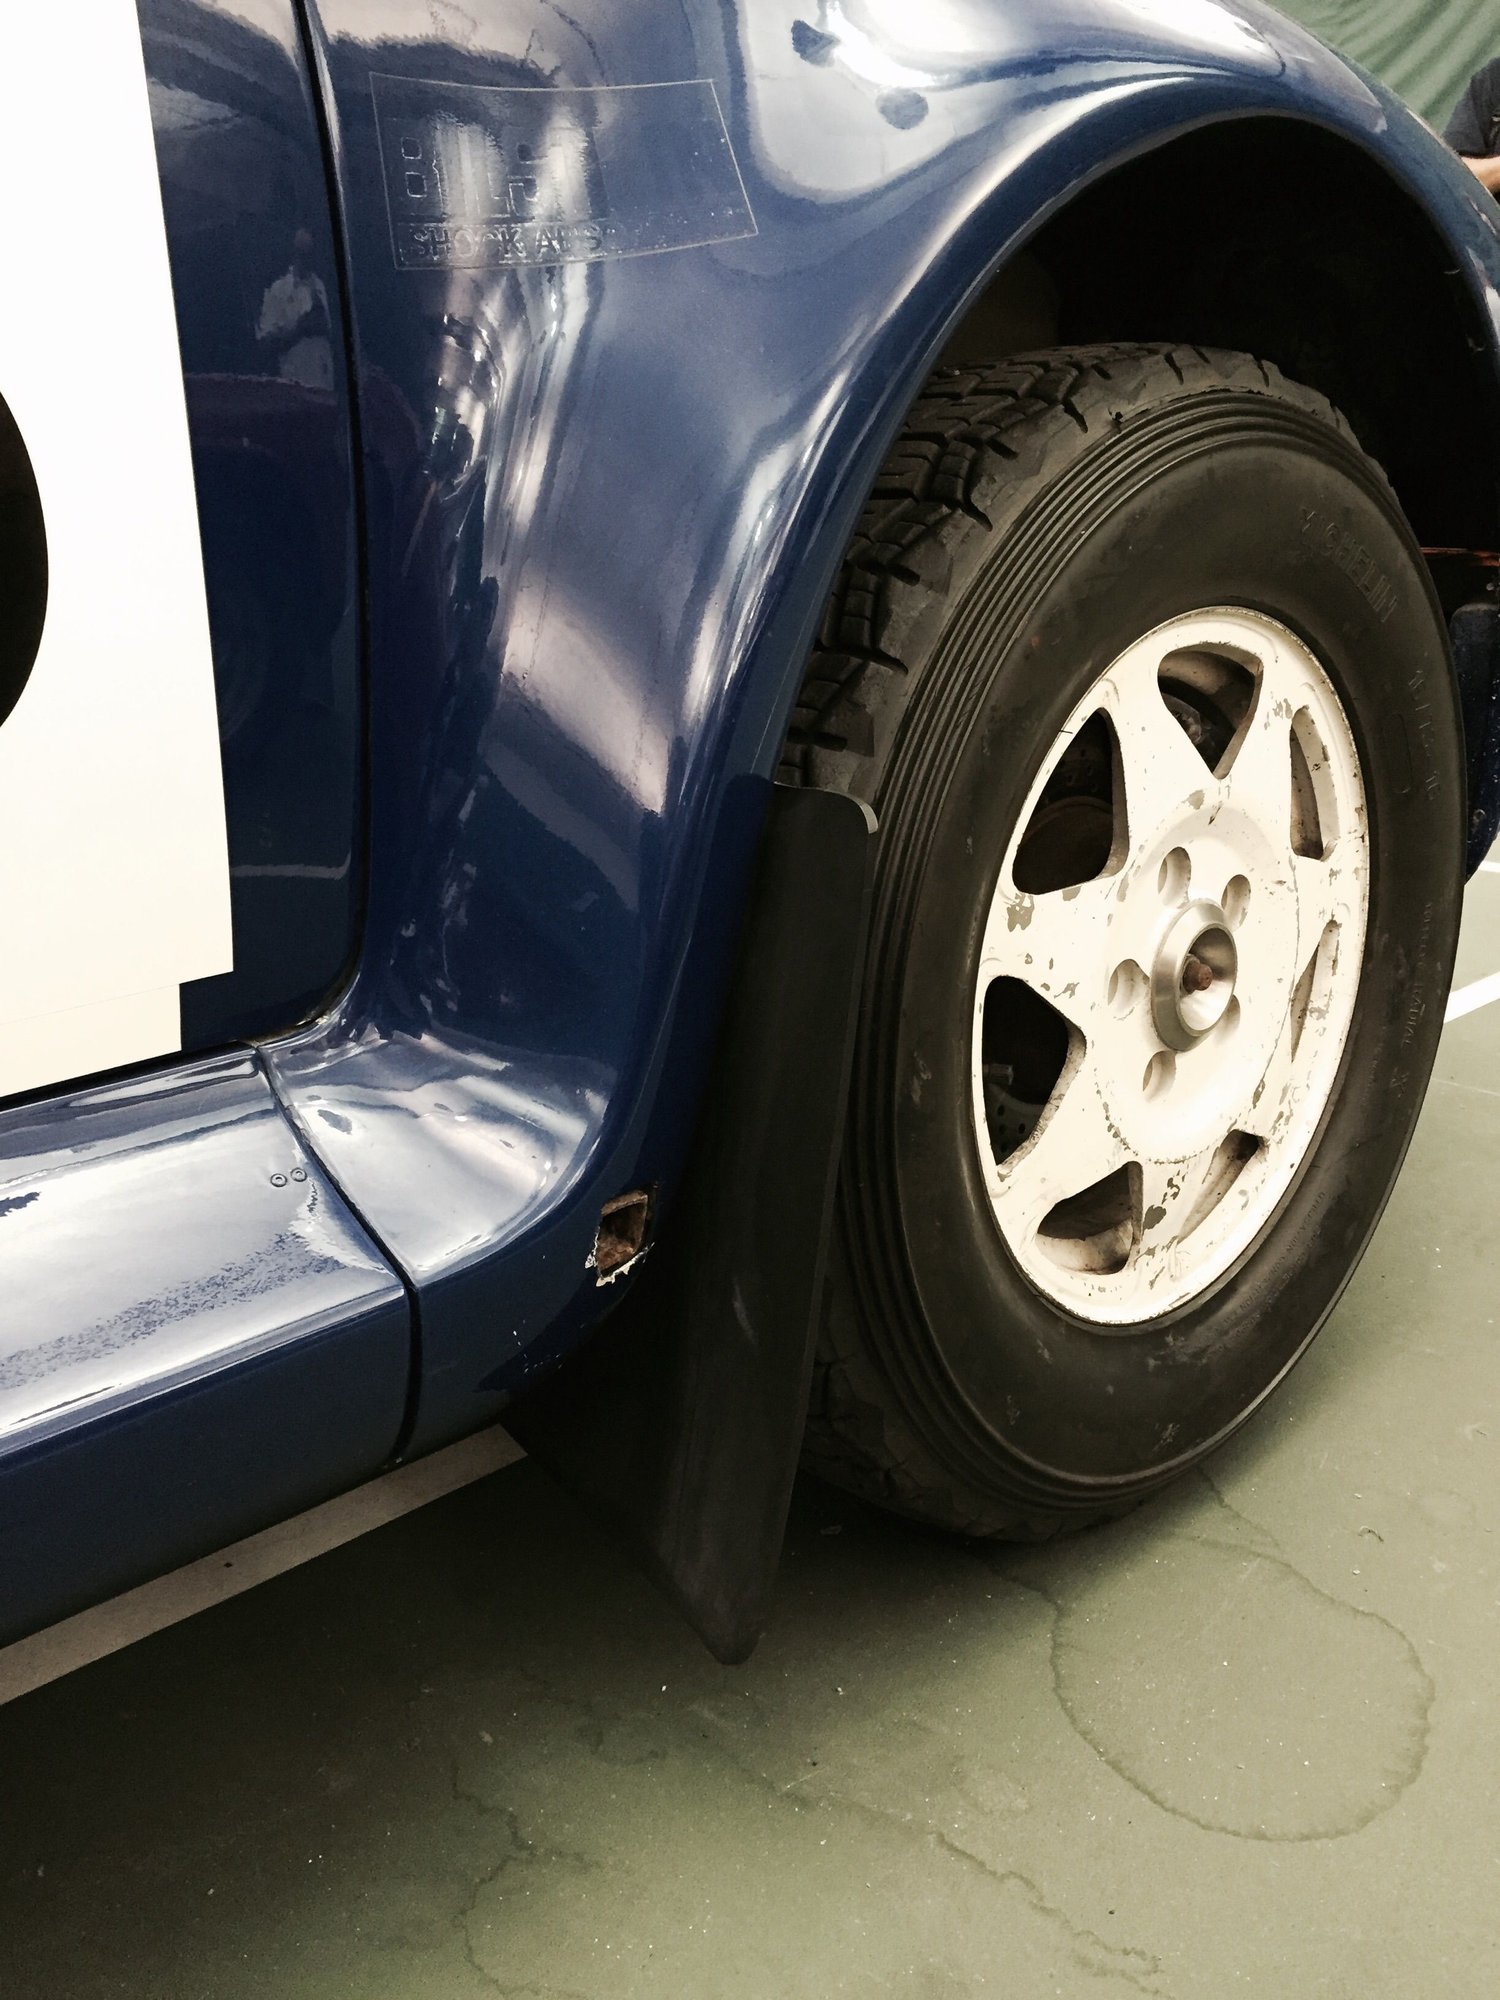
The stock suspension is fine for interstate high speed trekking and mild condition back roads but not suited for off road conditions. For my needs I'll be upgrading to adjustable coil-overs to manage ride heights for larger set of 16x9 Rear/ 16x8 Front Centerlines wrapped in Kumho Venture AT tires.
For street: Kumho 215/60 V15 All Season on Phone Dial rims.
34psi all four - Interstate
32psi Rear 30psi Front - Unpaved
30psi Rear 28psi Front - Gravel.
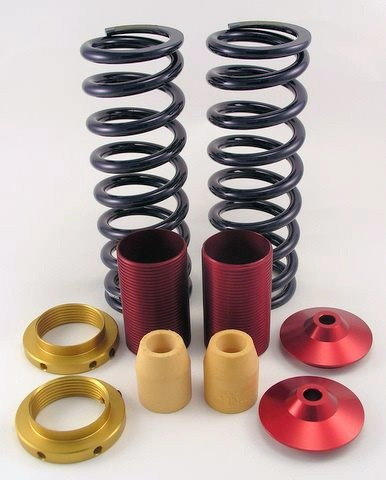
Unless I score second hand coil-overs to save some change I plan on upgrading the existing front suspension with Coil_over kit w/ Heavy Duty Bilstein struts, and Steel control arms.
For the rear I'll adjust the ride height via torsion bars and longer Shocks, but an adjustable Coil-Over conversion would be ideal. As we all know when you deviate from factory specs changing one component involves changing/upgrade all components involved!
Others will have different set ups to share and more experience on the subject as well.
Box those early control arms when you get them, it will keep them from bending so easily when you jump it. A few hours with the welder and some steel could save you some trouble. Spare ball joints are cheap, you can carry a few in your kit.
Box for sure & extra ball joints for spares! Did extensive reading on the "Boxing" of control arms, I'll have a professional welder do the task; came across too many stories of failed C-arms that were boxed subpar due to extensive heat exposure to factory welds or not reinforcing where needed.
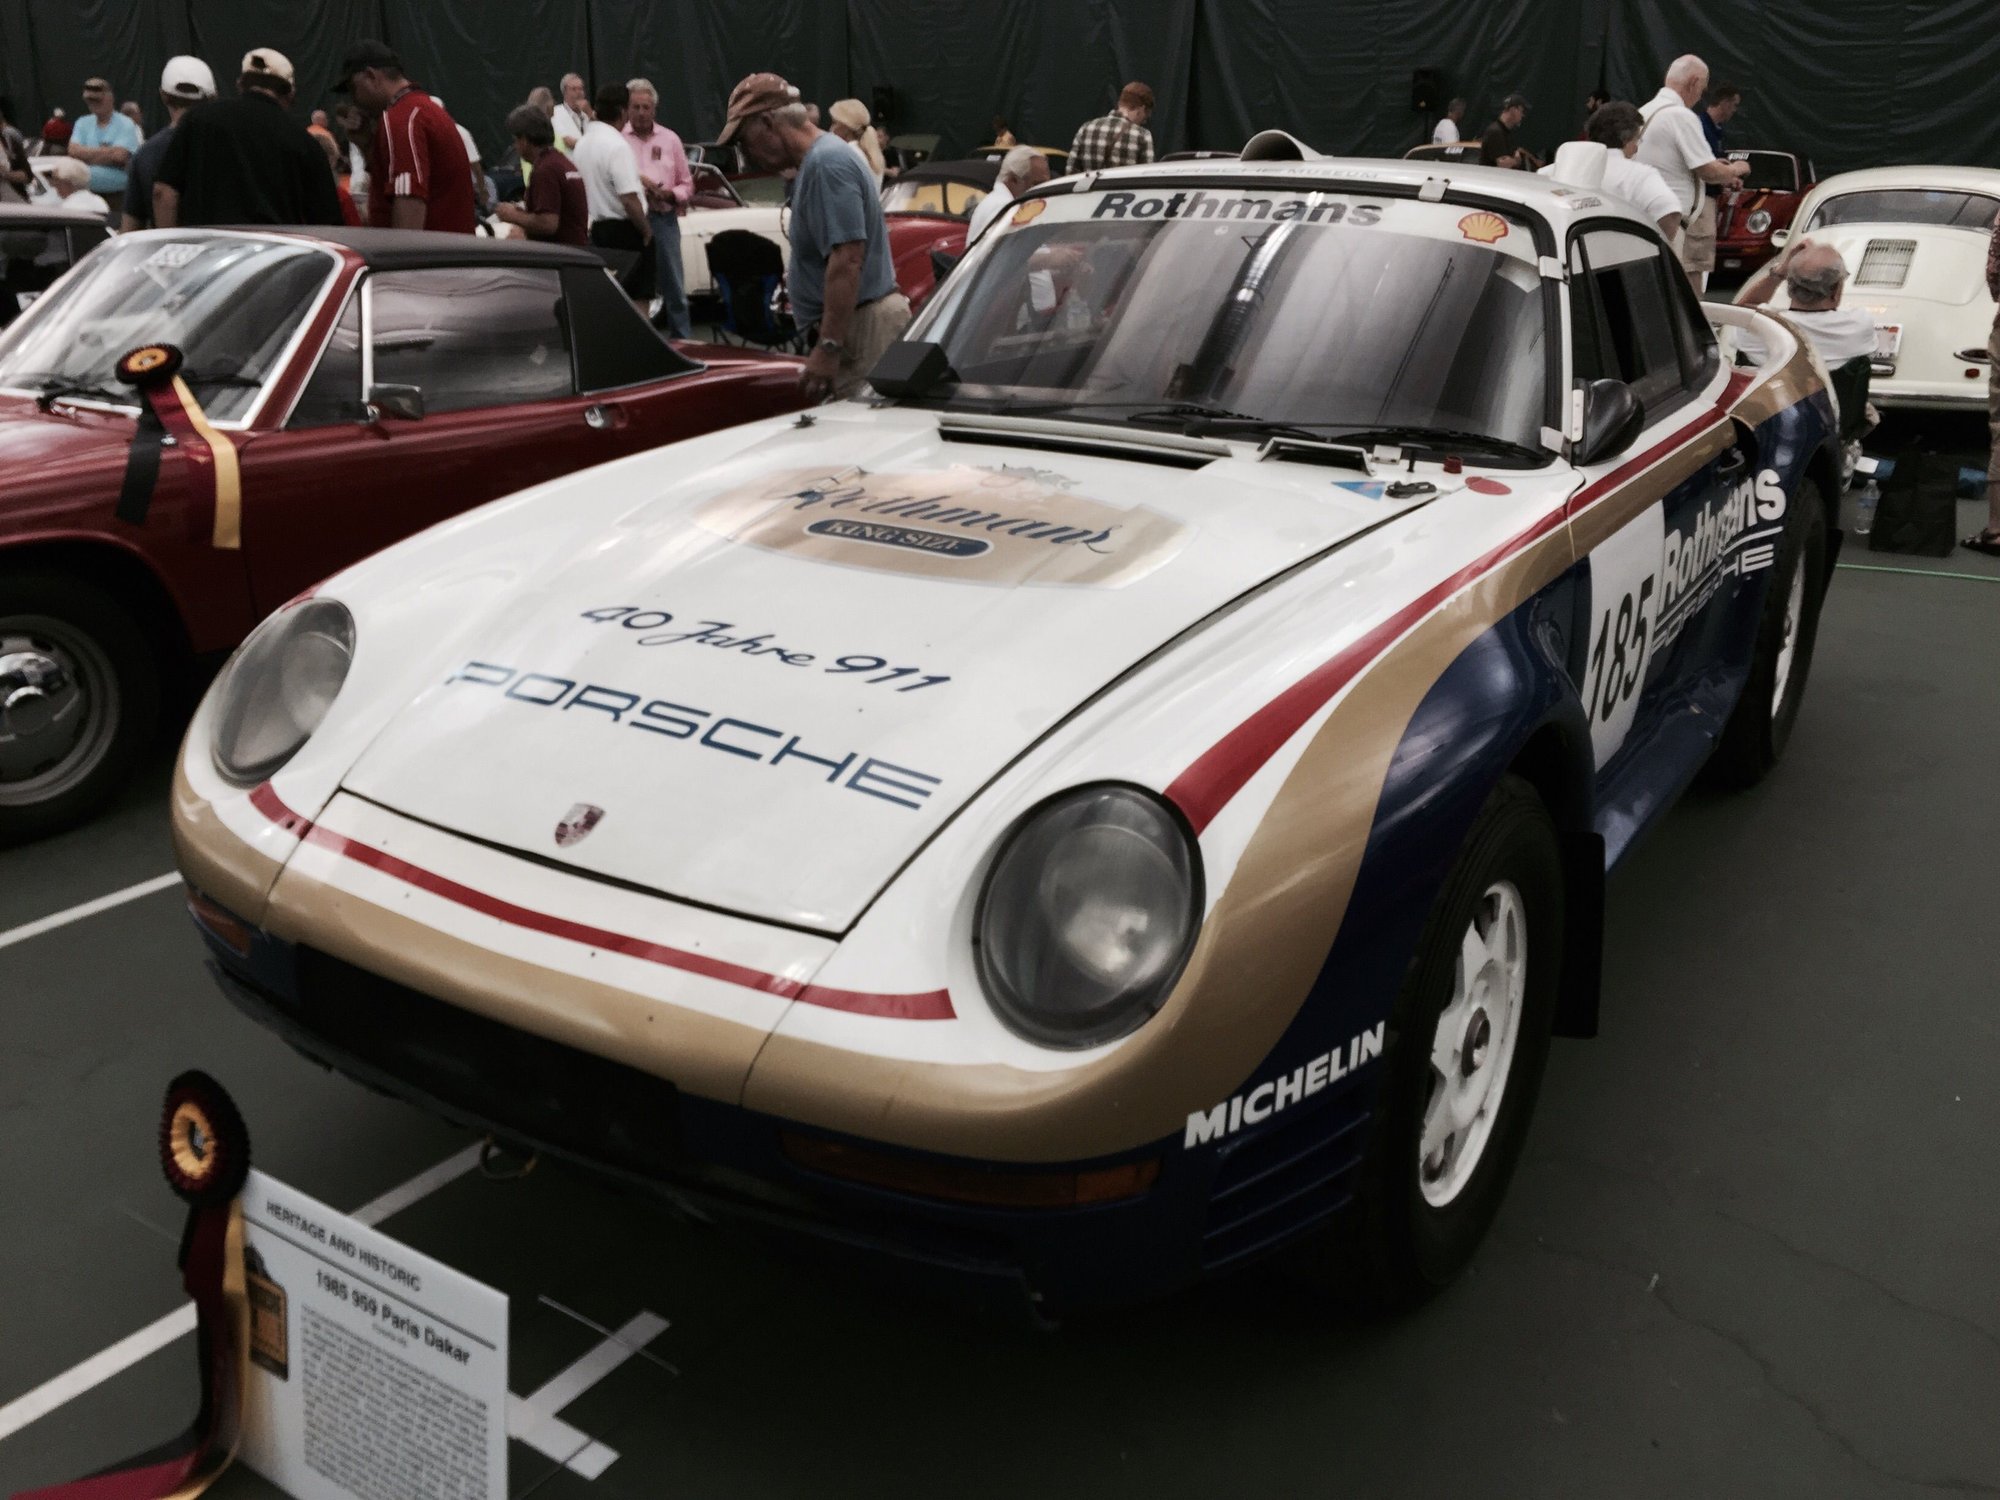
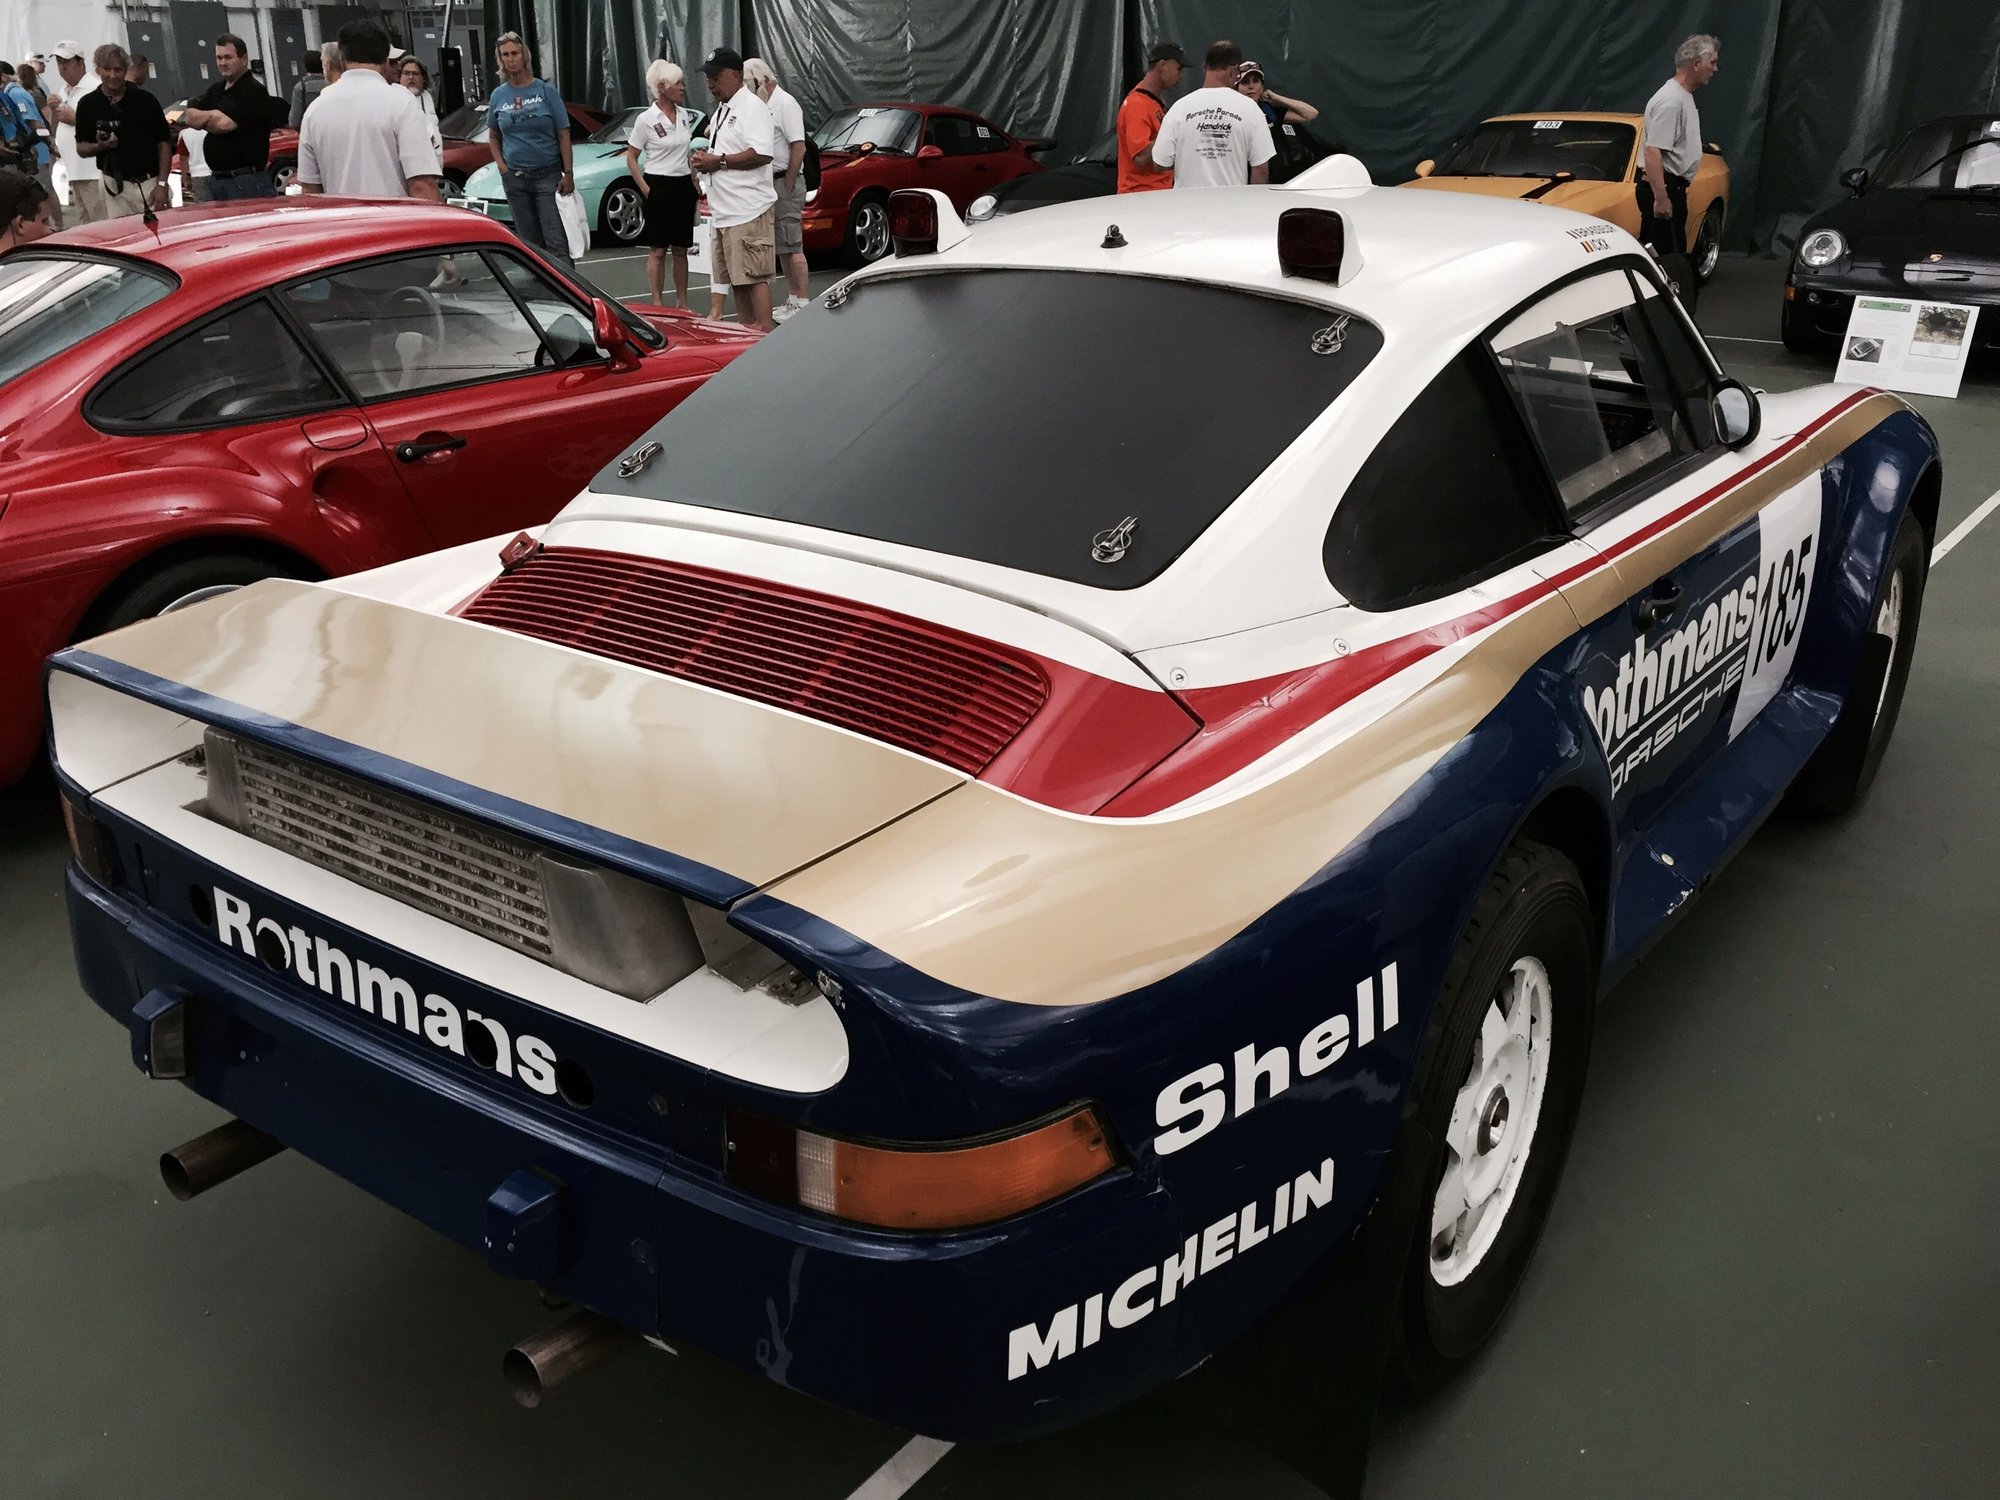
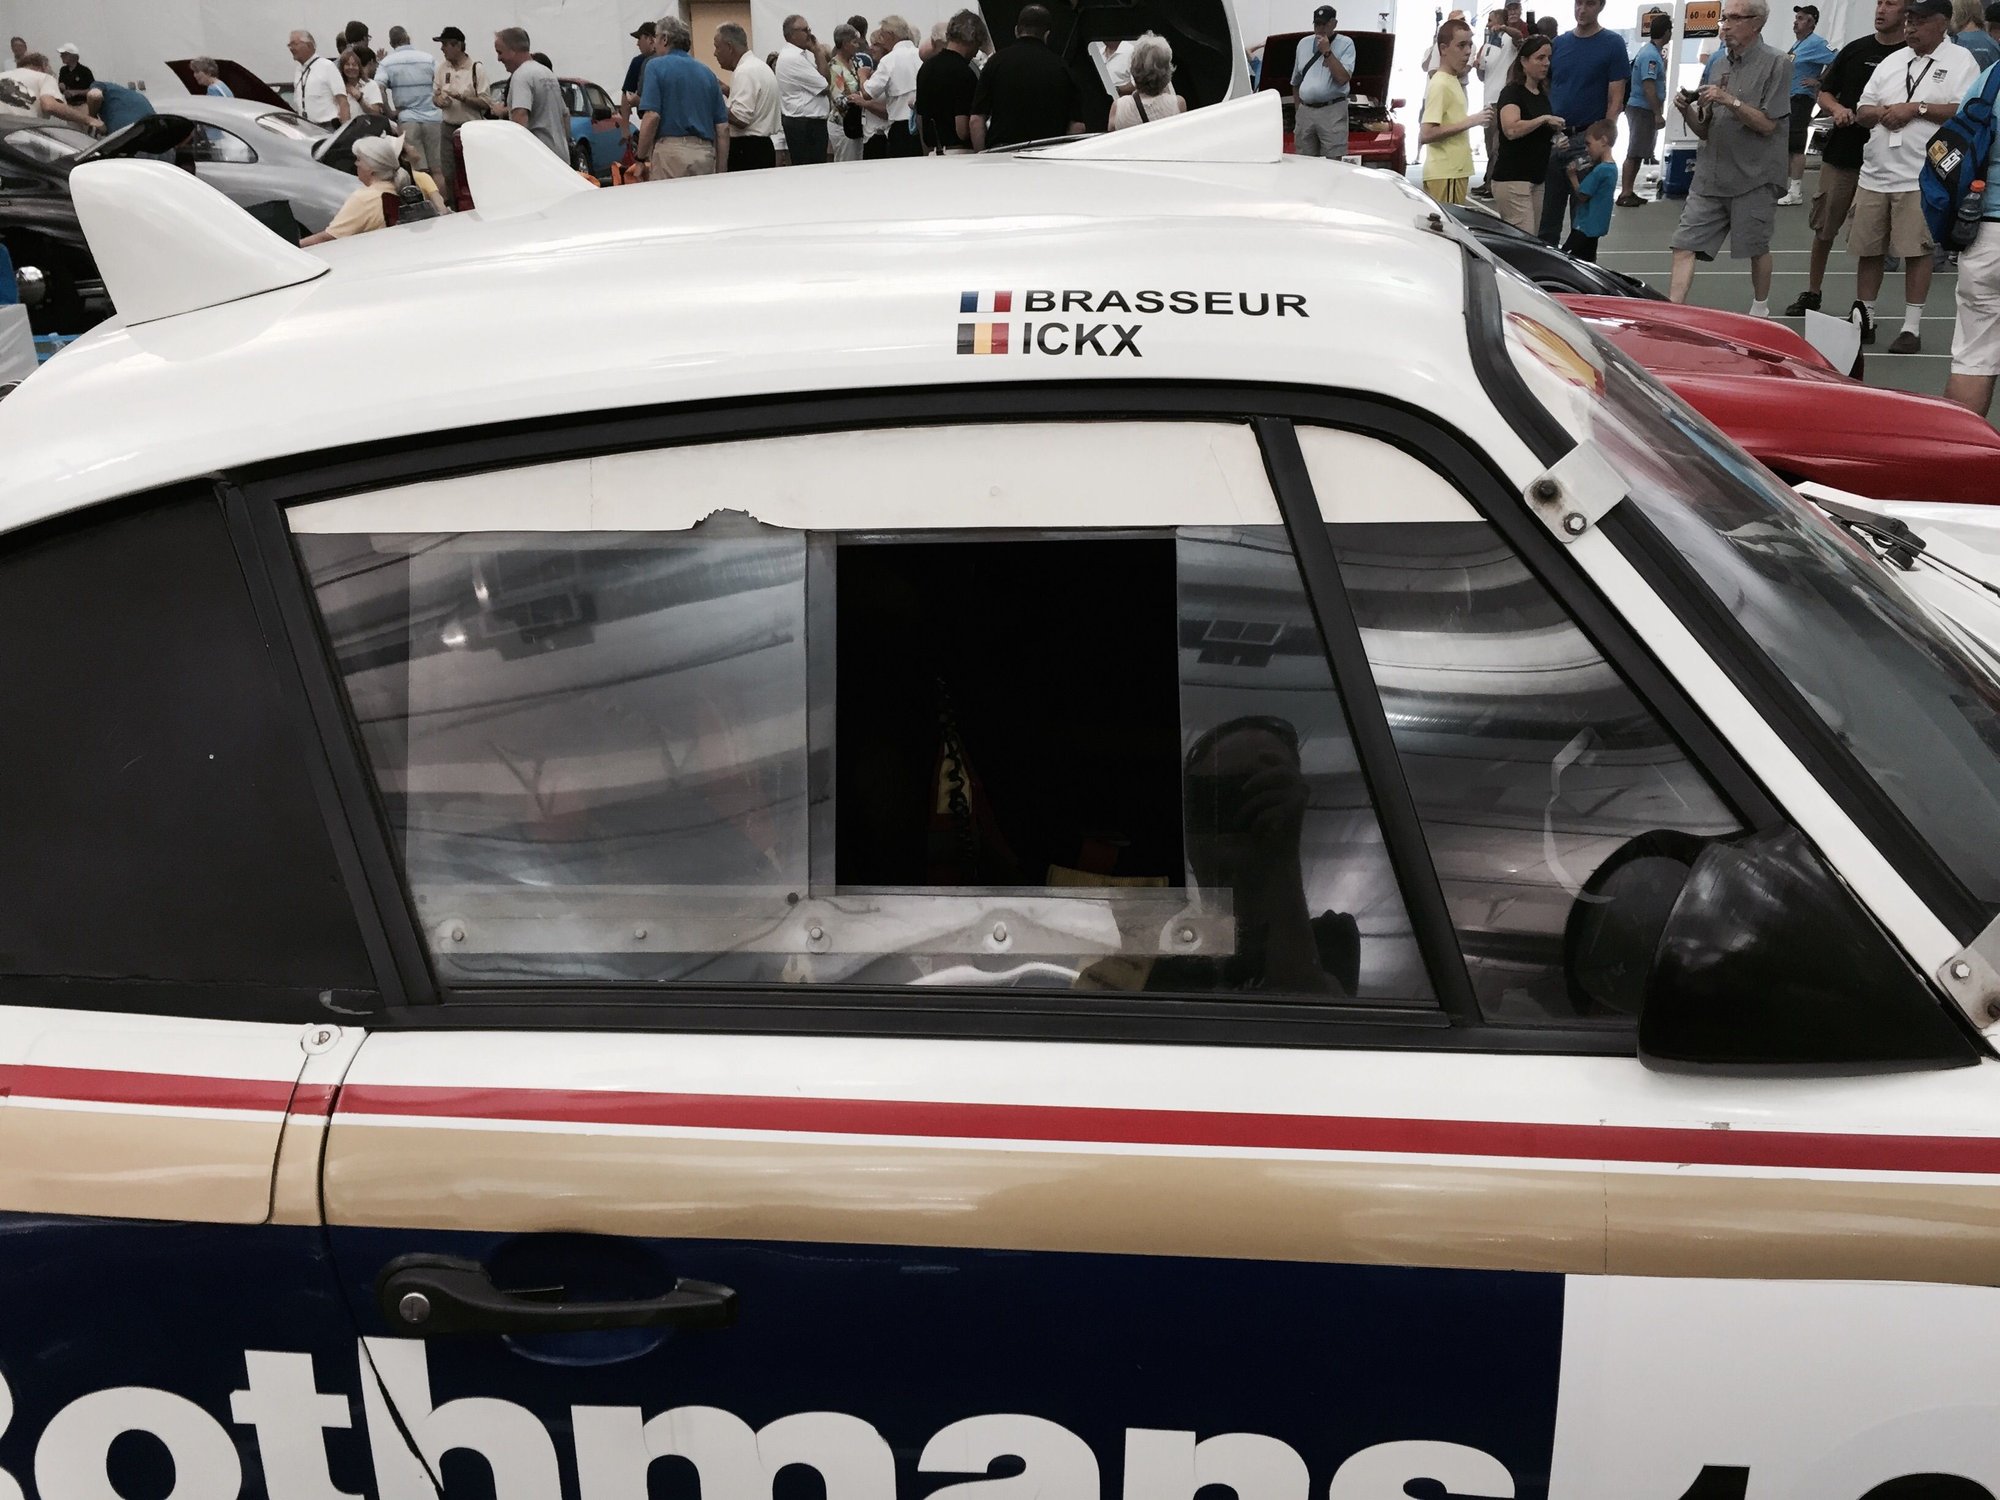
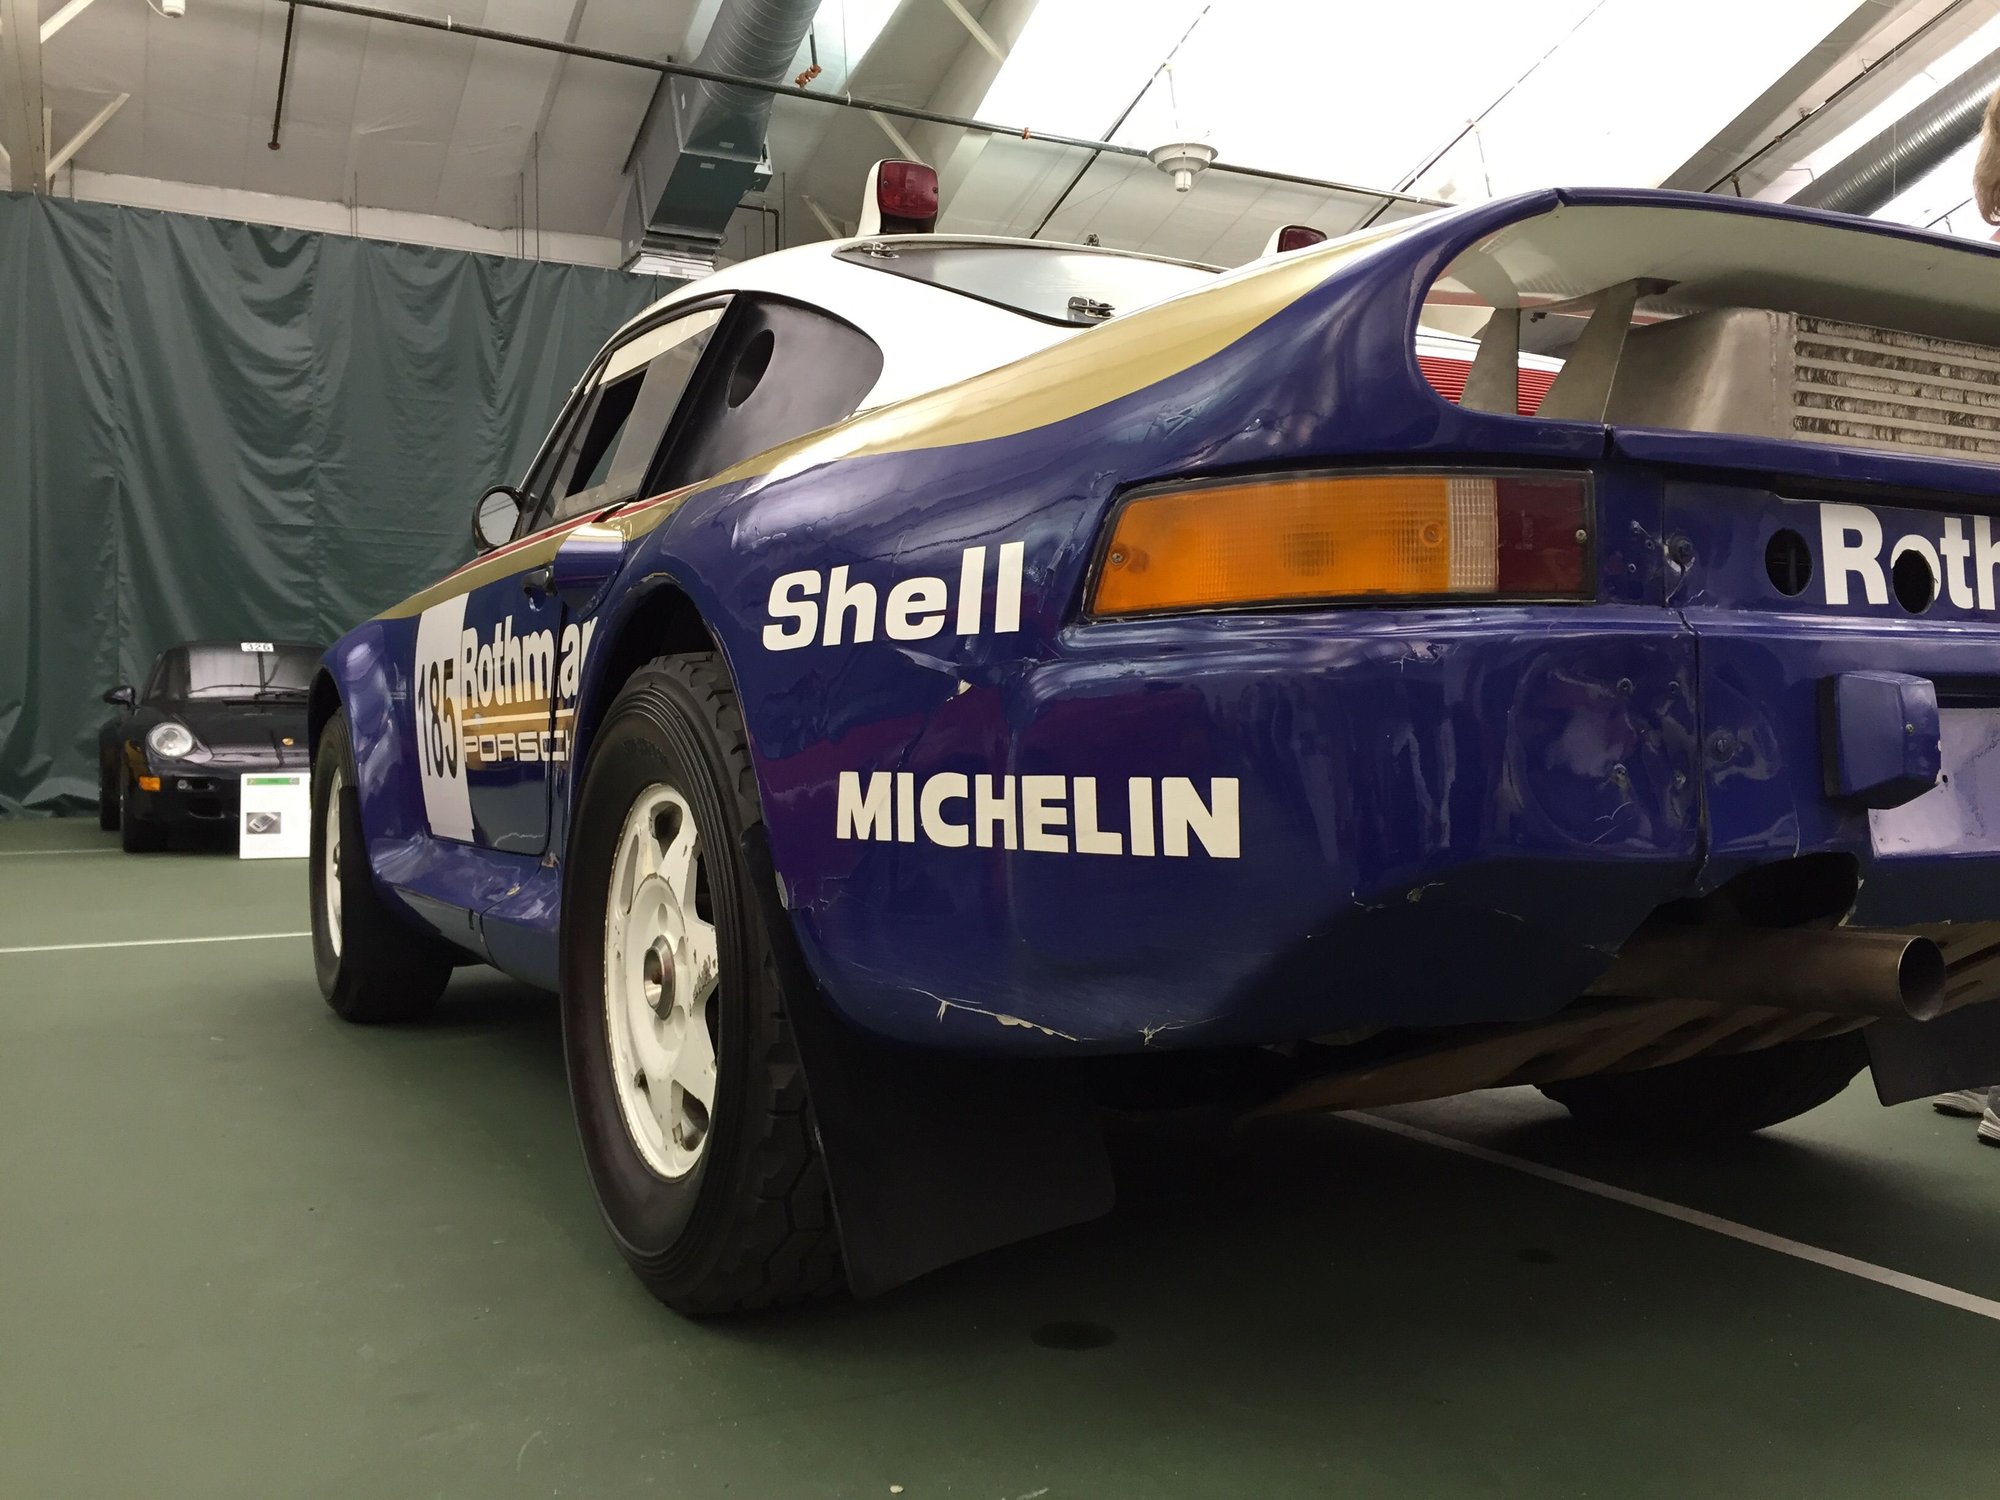
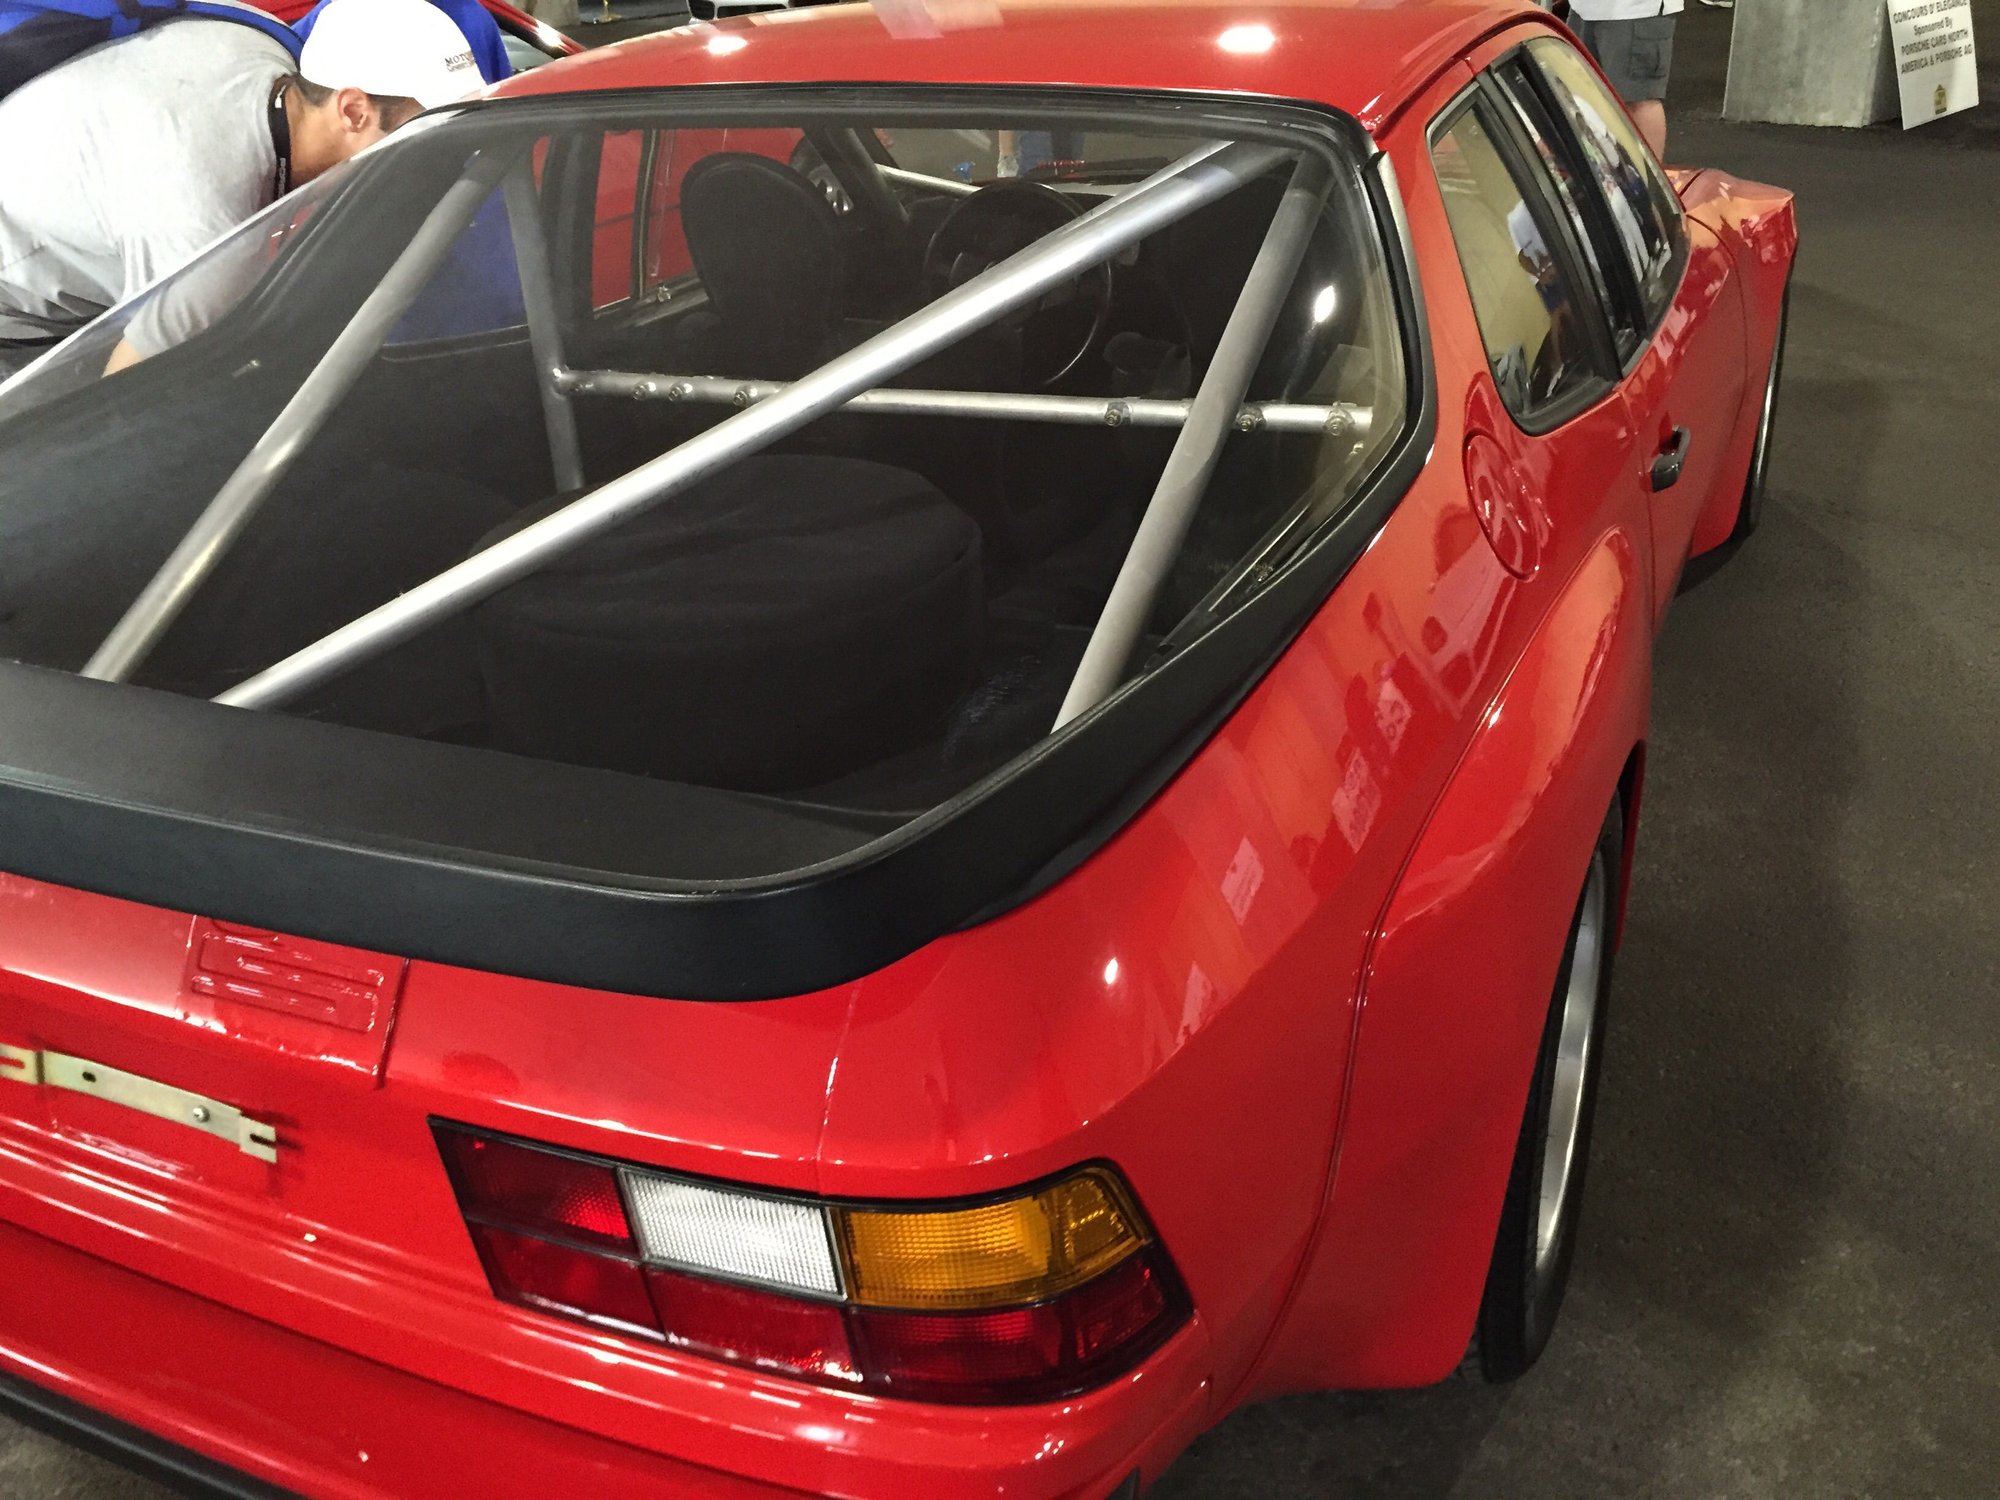
Inspiration for the group. While traveling East from Texas I stopped by the PCA 60 in French Lick, IN and spied Rothmans 959 rally build. Not a 944, but the detail shots may be useful. Observing the window slides, ventilation, skid plates, and wheel/suspension setup in the real was a treat!
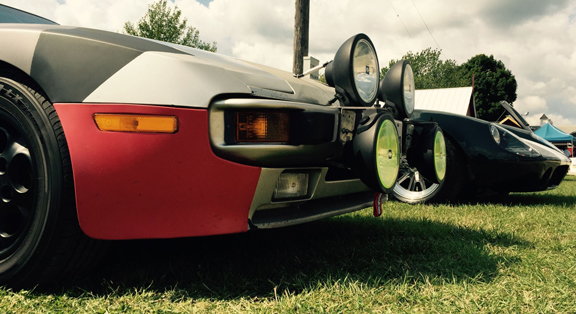
The color scheme is derived from WWI "dazzle camouflage" used on navel ships.
I needed a distracting pattern to attract attention as I'm often pulled of the side shoulder of road documenting content for my film project.
It also catches the attention of most drivers on the interstate lending awearness of my presence. Yes, it also attracts the police, but that's a good thing as I'm often driving through very shady rural and urban territories.
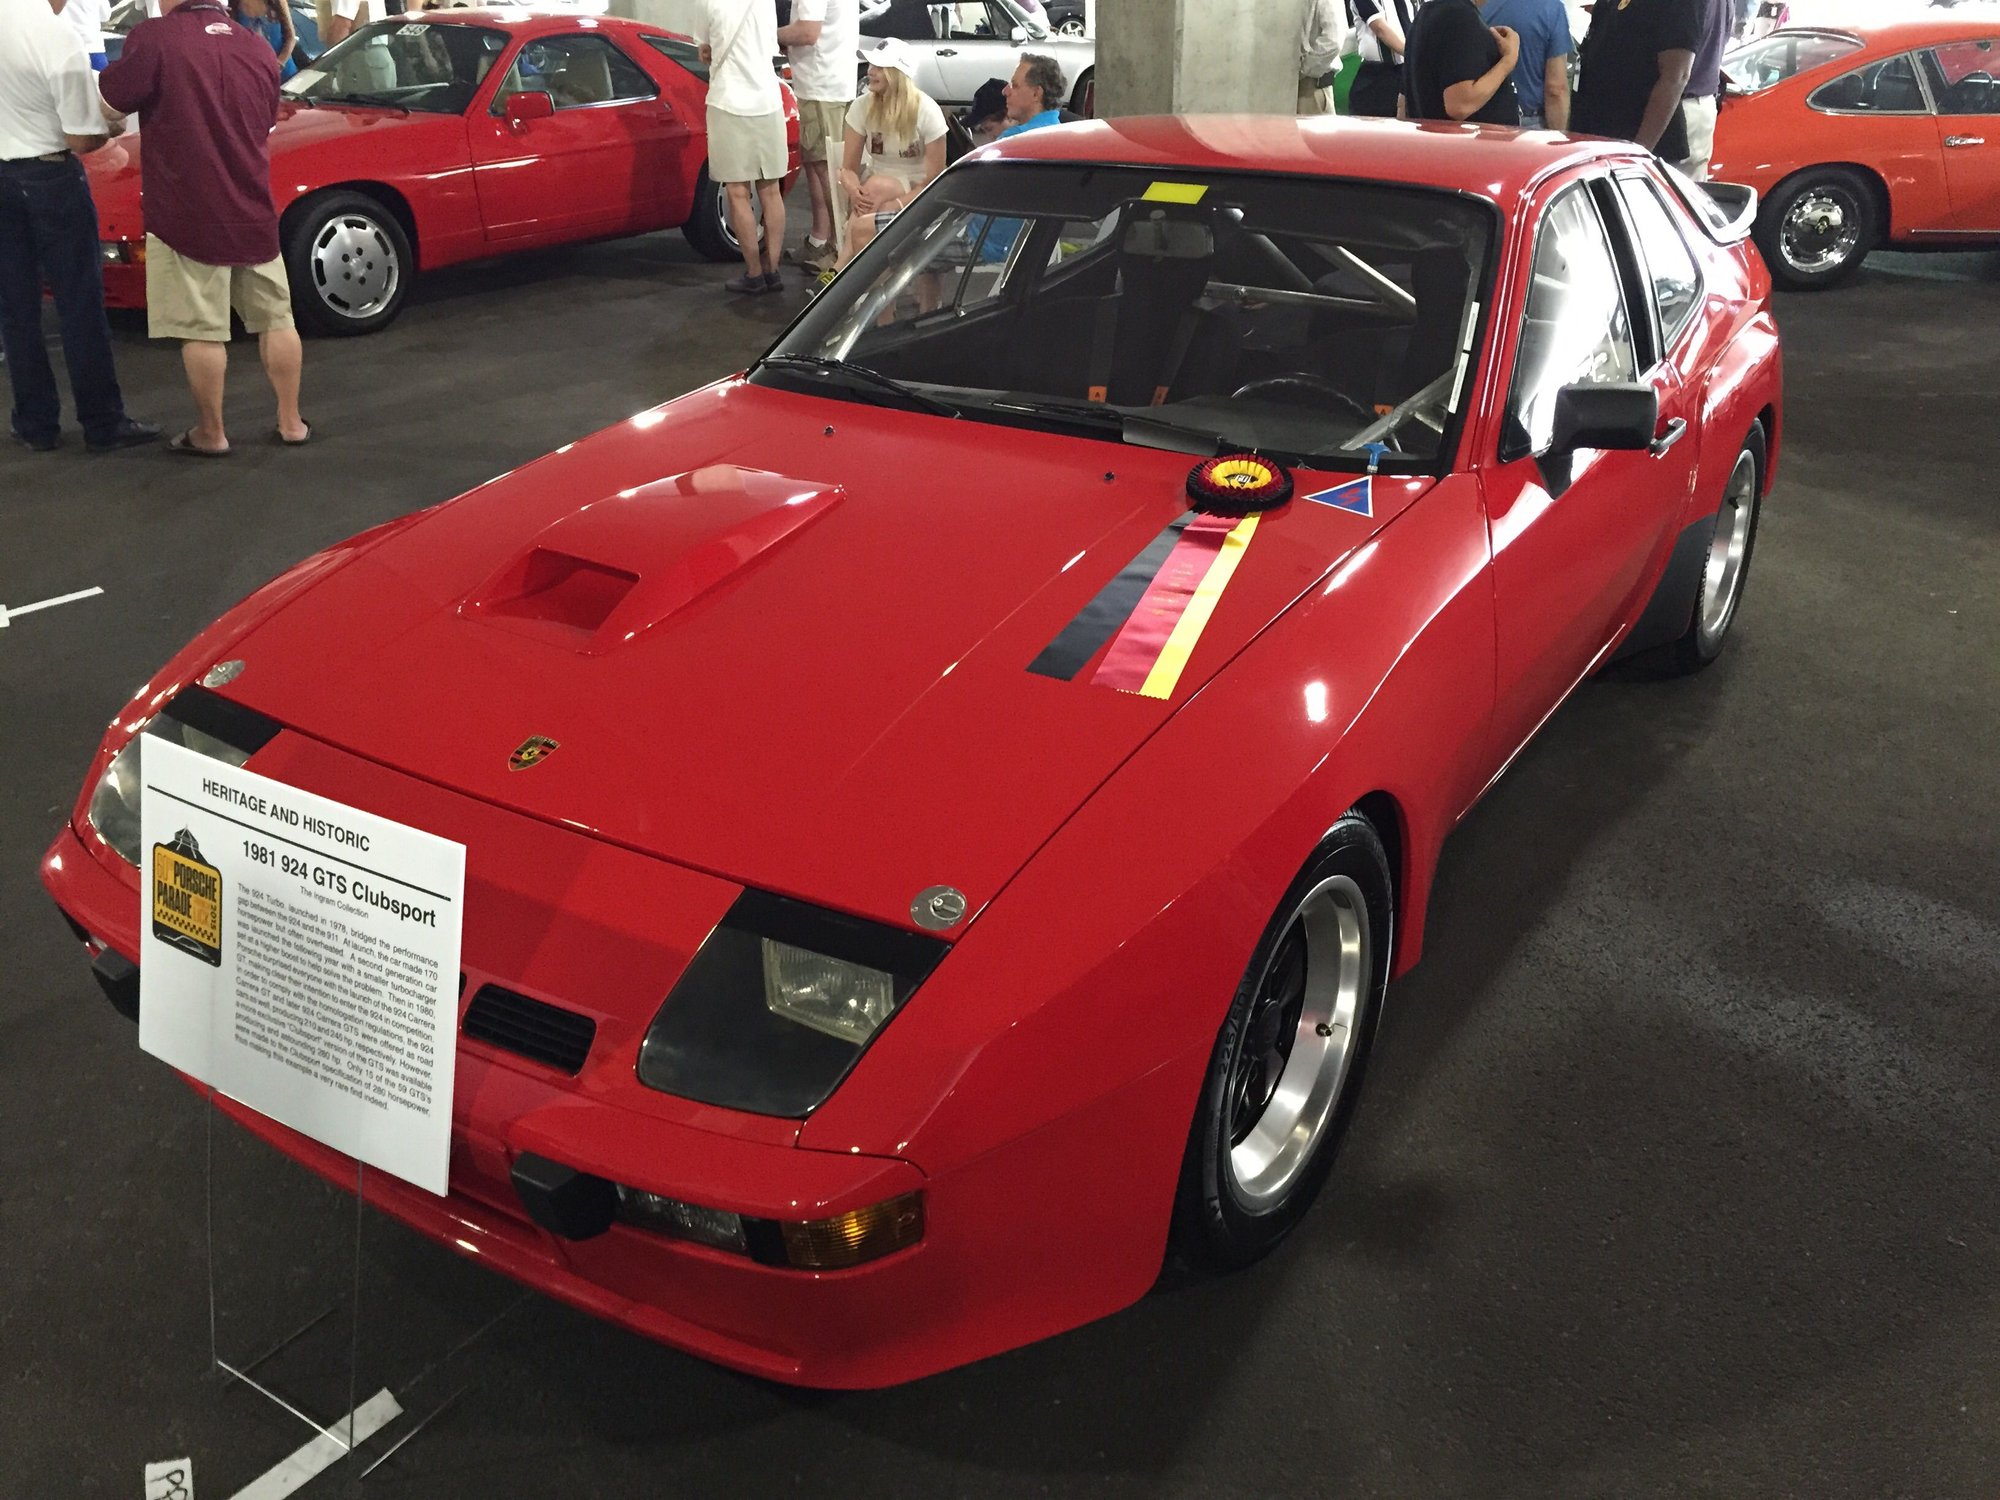
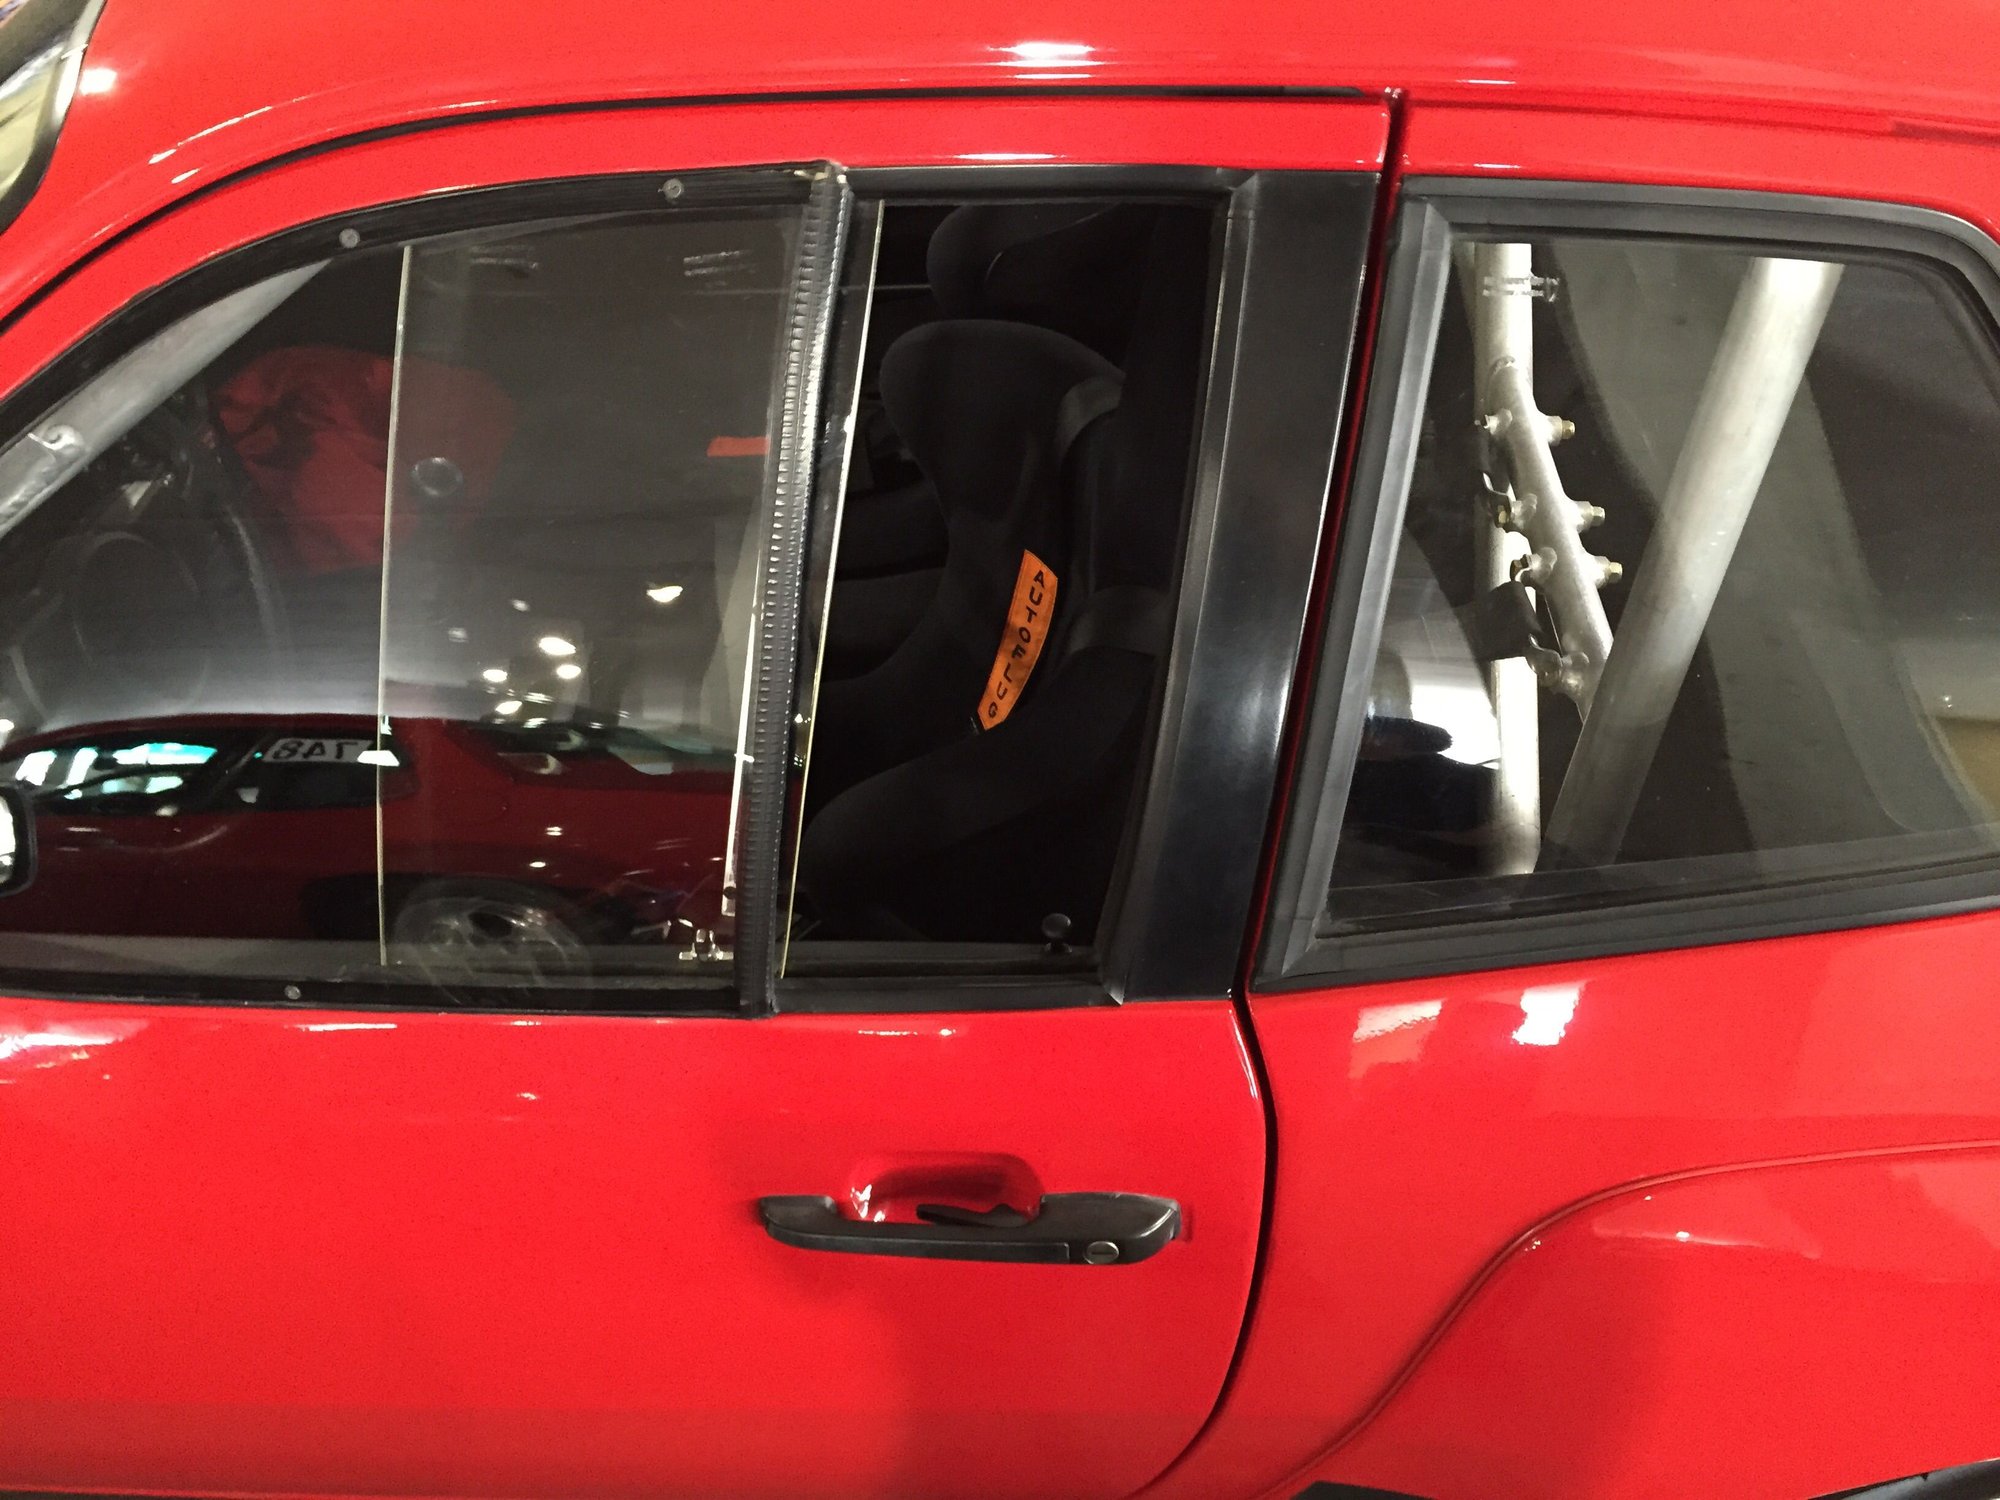
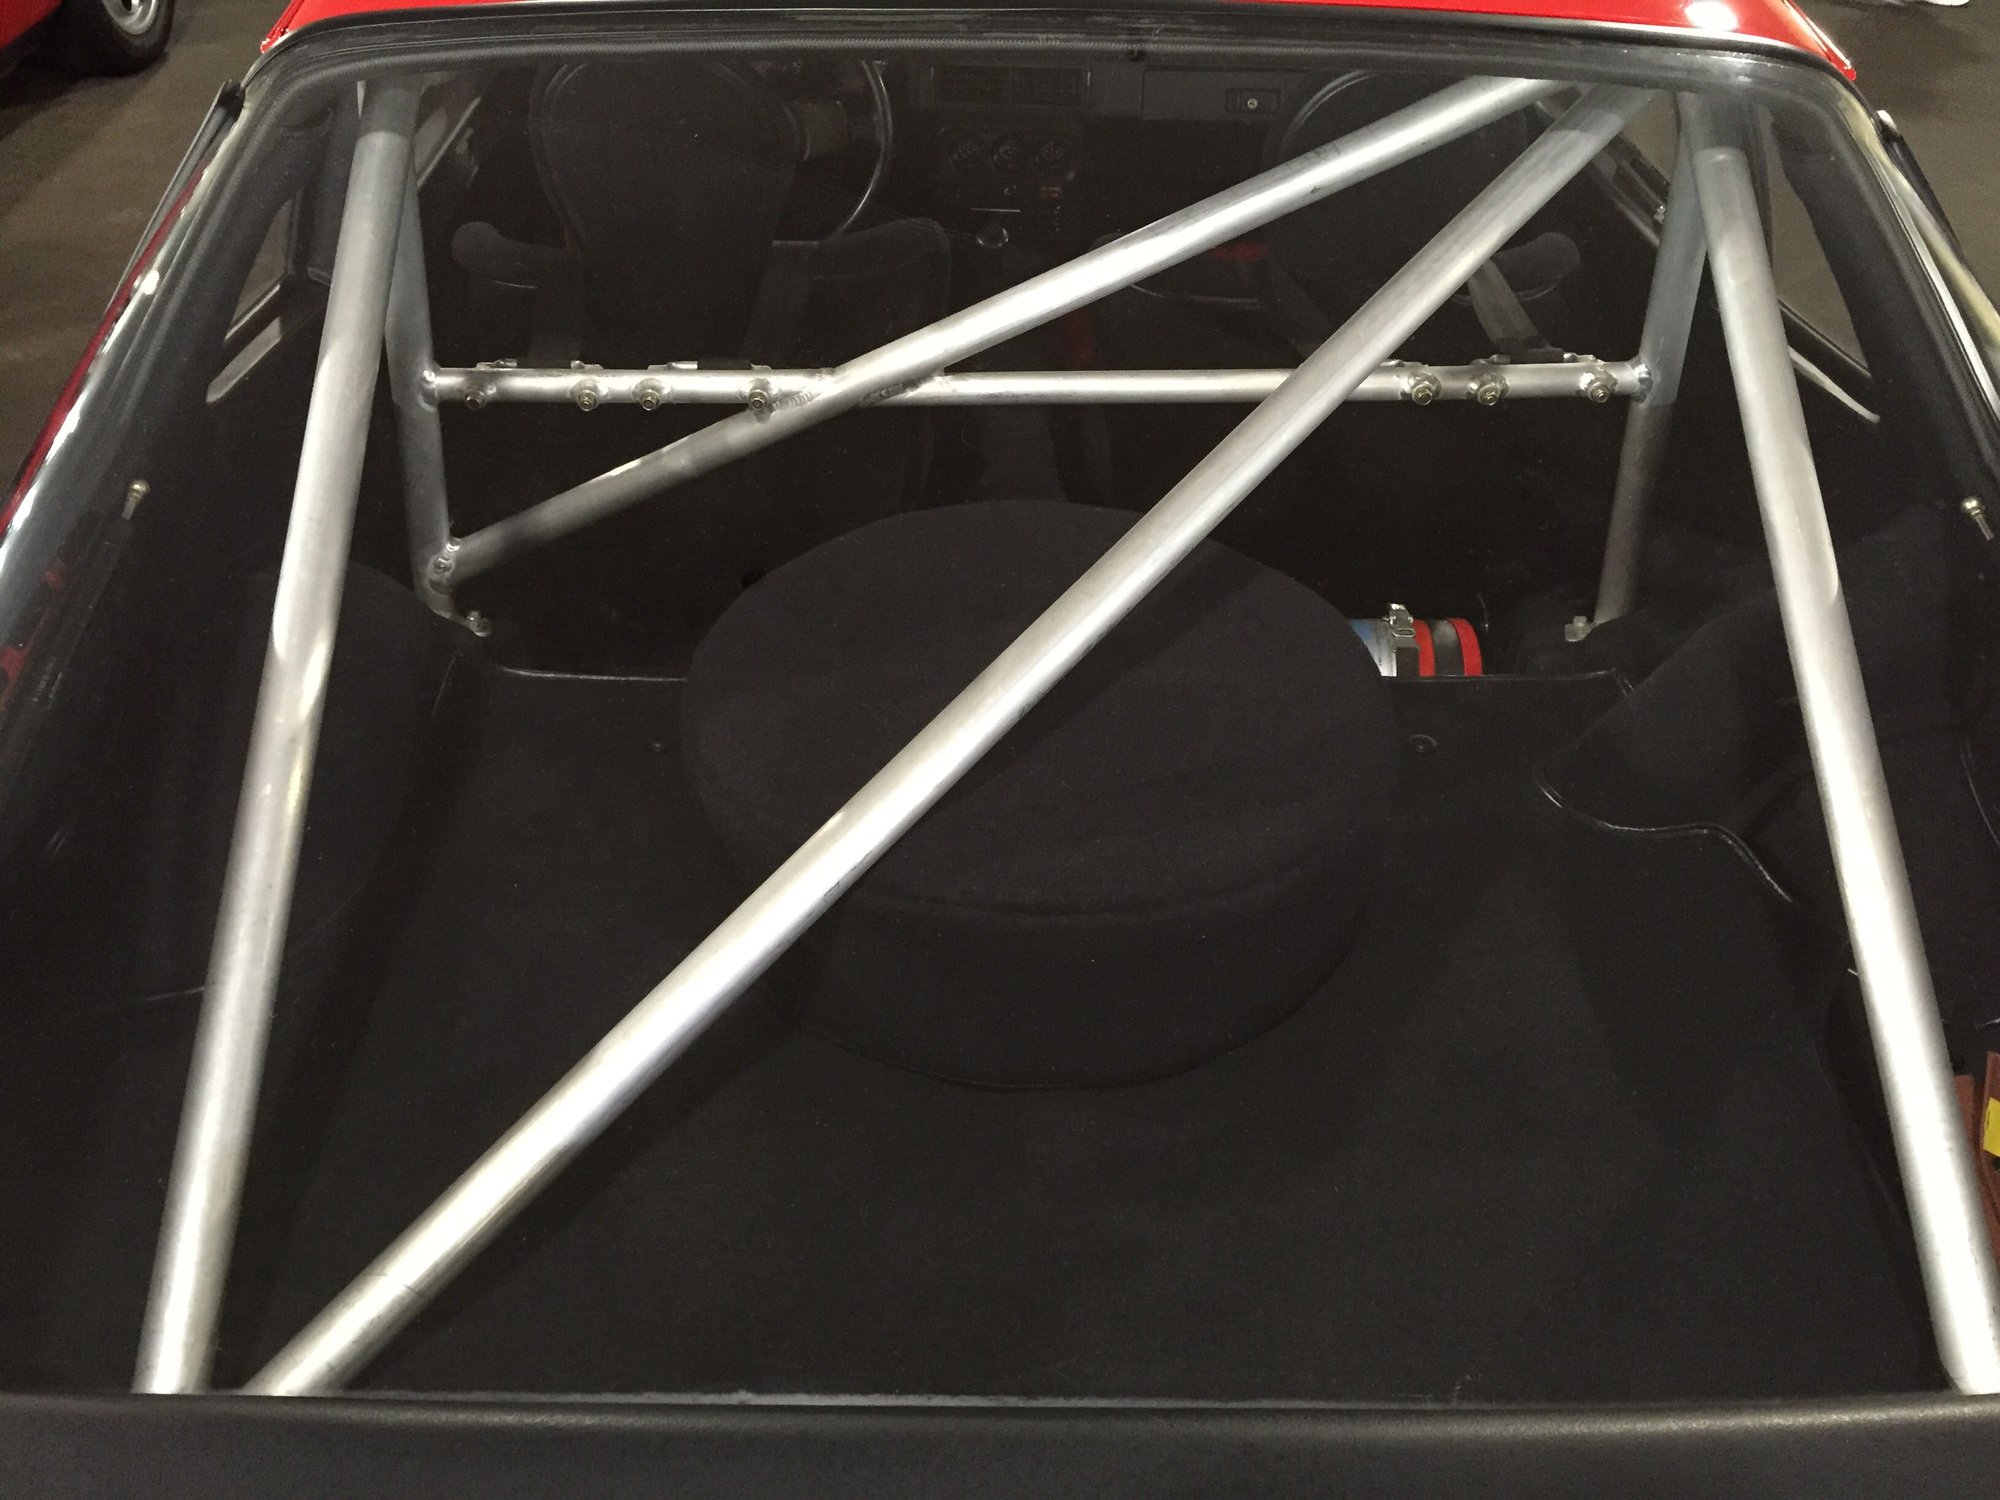
Another great factory build at PCA 60, the 924 GTS Clubsport. This was a great to see as to observe the factory slide windows; a mod I've been considering for my rally build. Also, take note of factory Roll Bar construction/design��
 10-29-2015, 12:53 PM


 I was getting flashed with just 100w euro driving lights and the 130w h4's in cibies on my last cross country blast.