DIY Bi-Xenon HID Projector Lights
 03-30-2012, 12:13 AM
#1
Intermediate
Thread Starter
After wanting to upgrade to Bi-Xenon lights for a while and being inspired by this thread on the Turbo S forum (https://rennlist.com/forums/944-turb...for-200-a.html), I decided to pull the trigger and go for it. In his thread, LS1Porch used Morimoto Mini H1 projectors from TheRetrofitSource.com, but after much reading on the forums at hidplanet.com, I learned that the FX-R projectors from the same company had a much better light output. Because they were a little larger, however, I was worried about fitment, but thought, "what the heck", and went for it. They are only about half an inch longer than the units that LS1Porch used and the width is narrow enough that it did not matter.
So, my parts list is as follows:
From TheRetrofitSource.com:
FX-R 3.0 Projectors (Replica of an Infiniti FX unit)
Matsu****a ballasts (OEM ballasts used by Nissan/Infiniti)
Osram 66240 SVS bulbs
Bullet shrouds (to cover the projector and make it look nice)
90mm rubber caps
Single H4 to dual 9006 splitter adapters (mates the car's headlight connectors to standard connections used by HID ballasts)
I would've needed a relayed wiring harness for the lights, but I already had one installed from using the Rennbay kit to run overwattage halogen lights.
From Ebay:
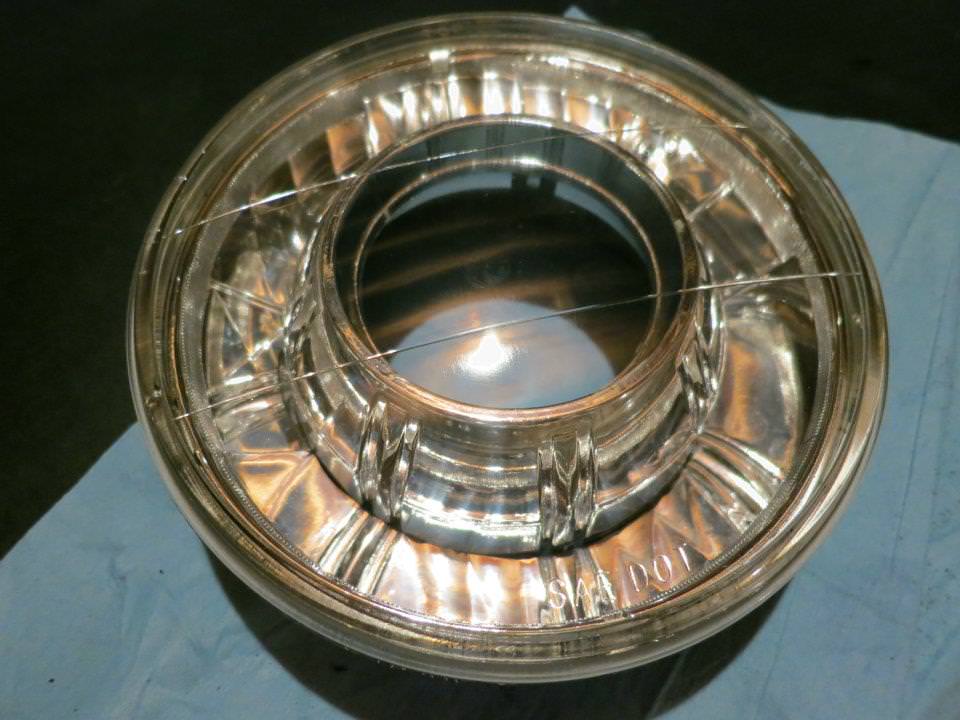
Cheap 7" round 6024 housings with clear glass. (Later learned that acrylic/lexan is a better choice for a clear lens because it distorts the beam less)
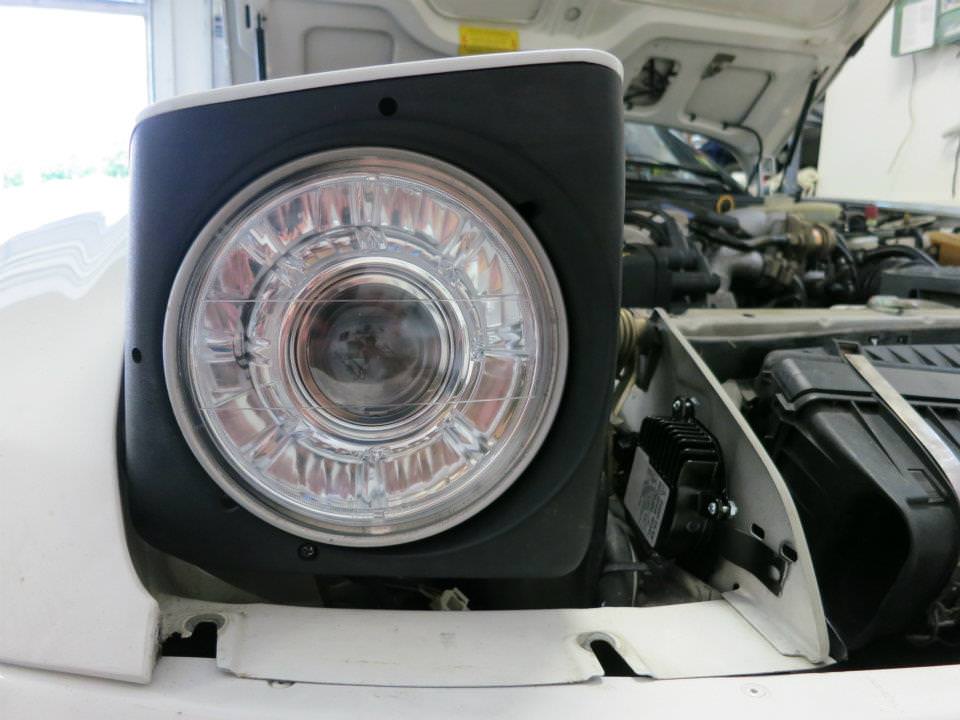
Jeep Wrangler JK lights are PERFECT for this and I've since upgraded my housings to these. See final pic in this post.
From Home Depot:
3" to 4" rubber adapter (x2)
Miscellaneous machine screws and nuts
JB Kwik
DAP 100% RTV silicon
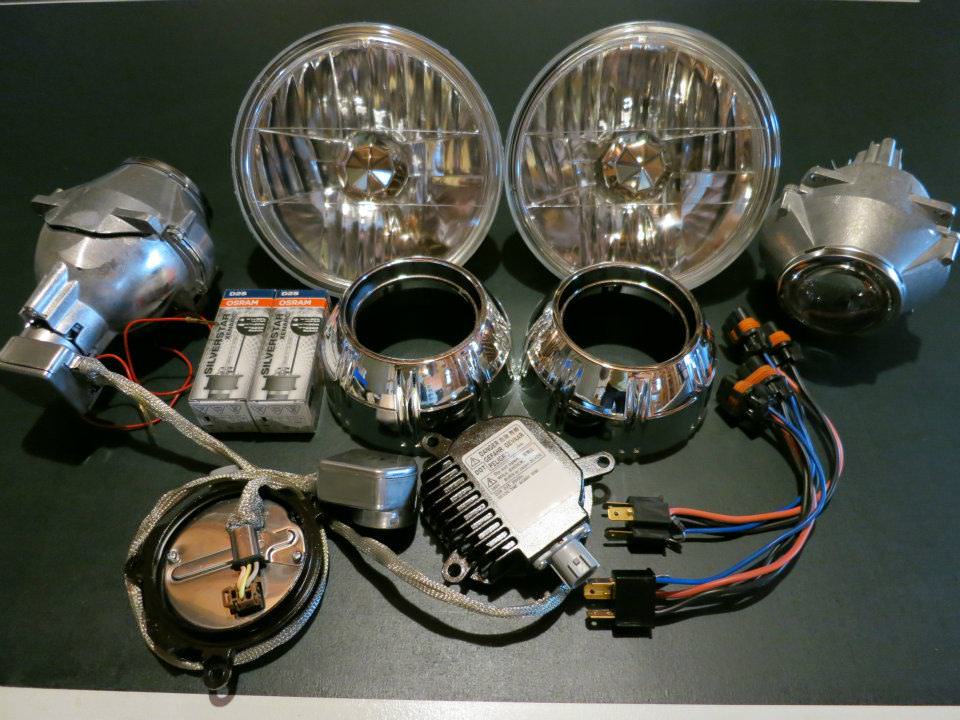
Here's all of The Retrofit Source's products laid out
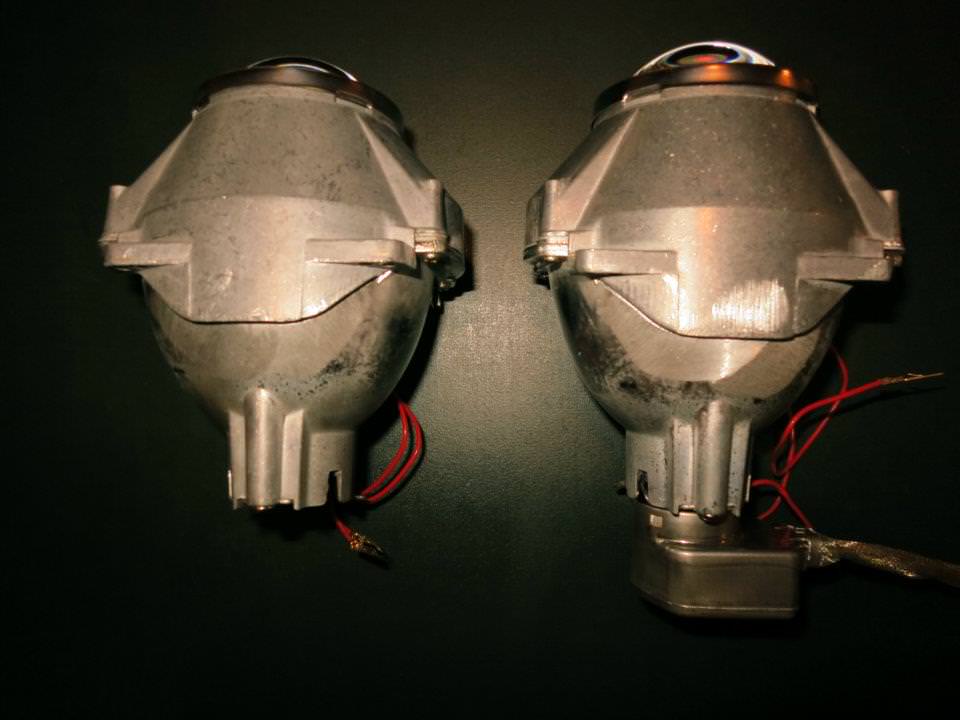
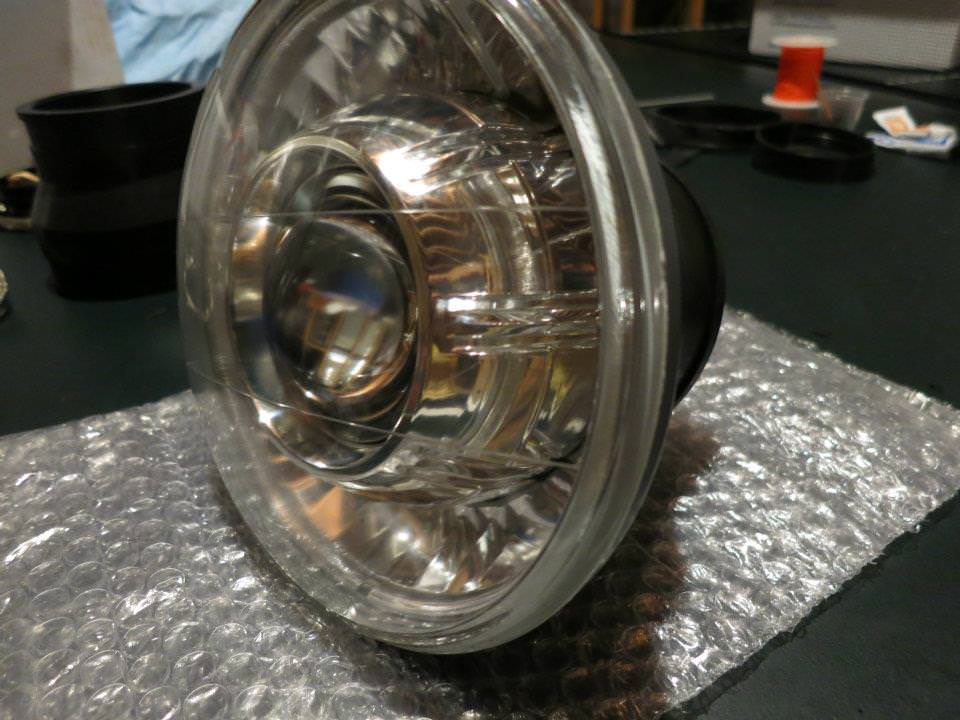
I've inserted one of the bulbs and connected the ballast's bulb connector to show how long these projectors are once everything is installed. Total length is just over 6.5 inches. This is going to be tight!
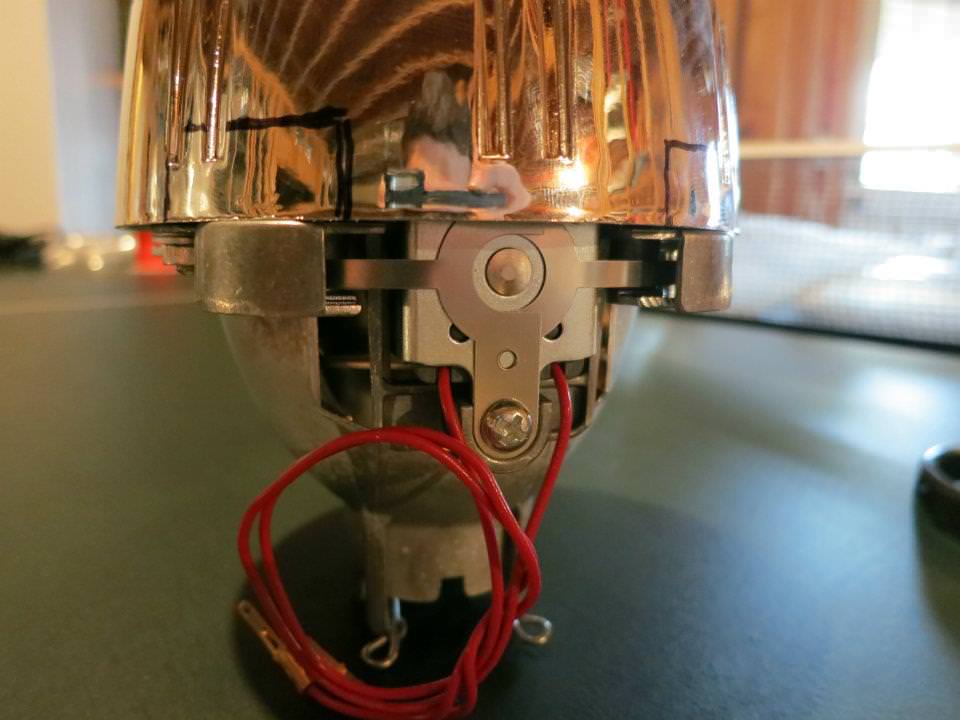
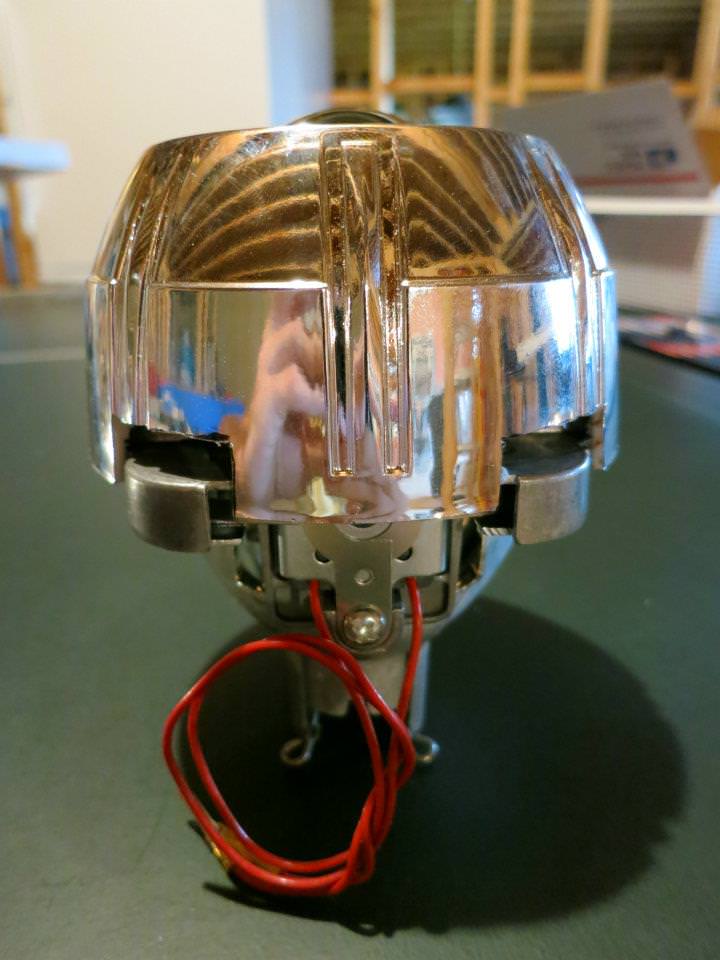
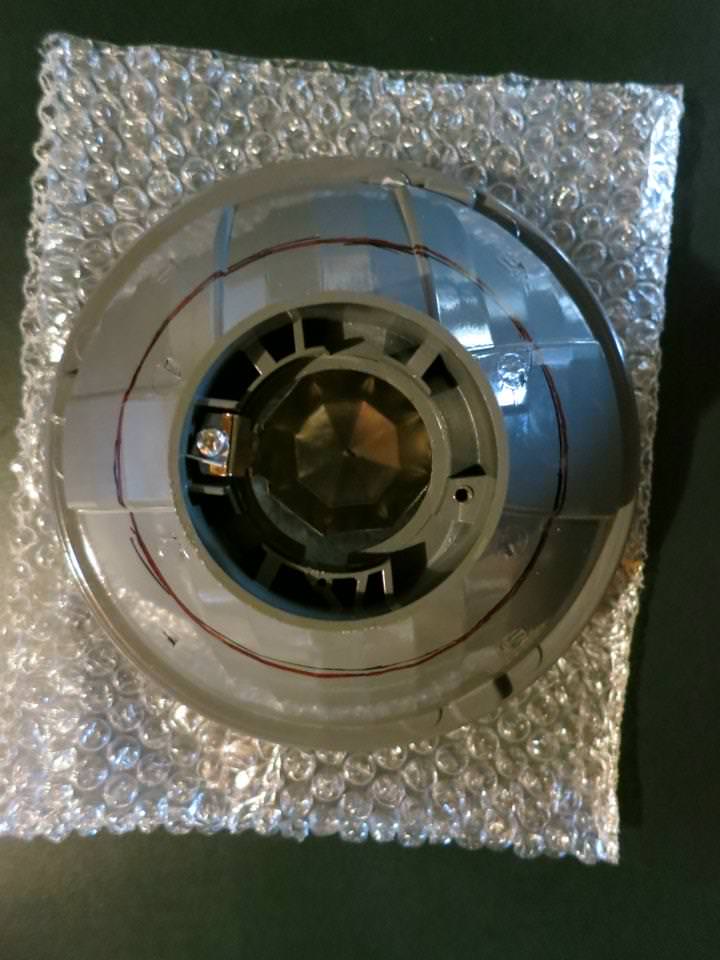
Test-fitting the shroud on the front of the projector--it's going to need a little bit of trimming to clear the bottom corners of the projector unit.
Marking with black sharpie the location of the cuts to be made
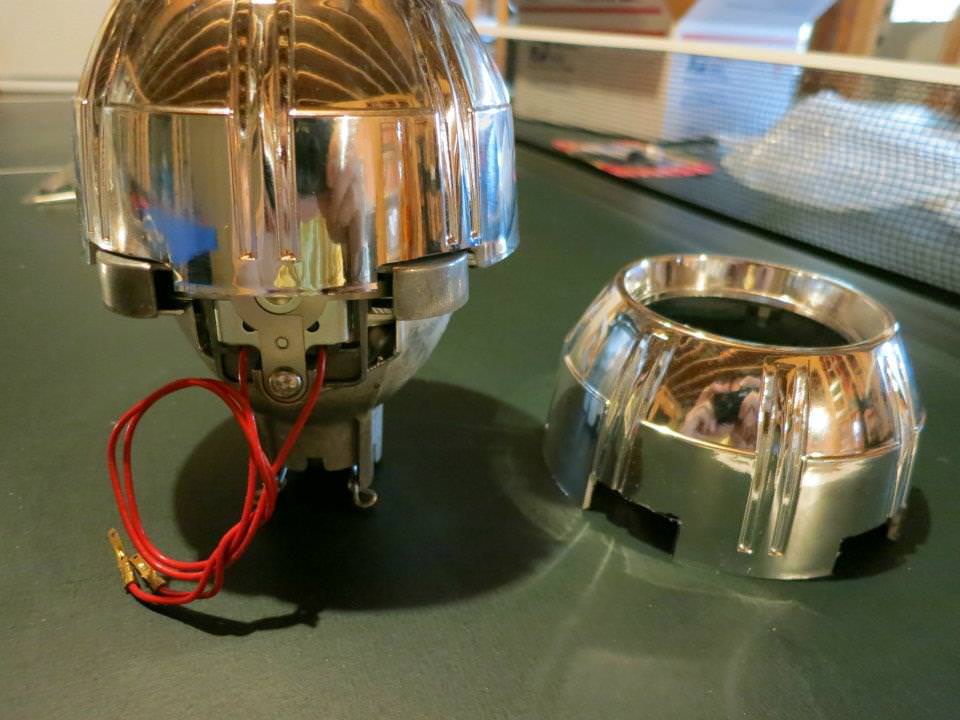
After making the cuts, found out I only needed to cut half the depth I did the first time because of how the shroud sits on the center ring around the lens.
The final cuts of both shrouds--looking good so far!
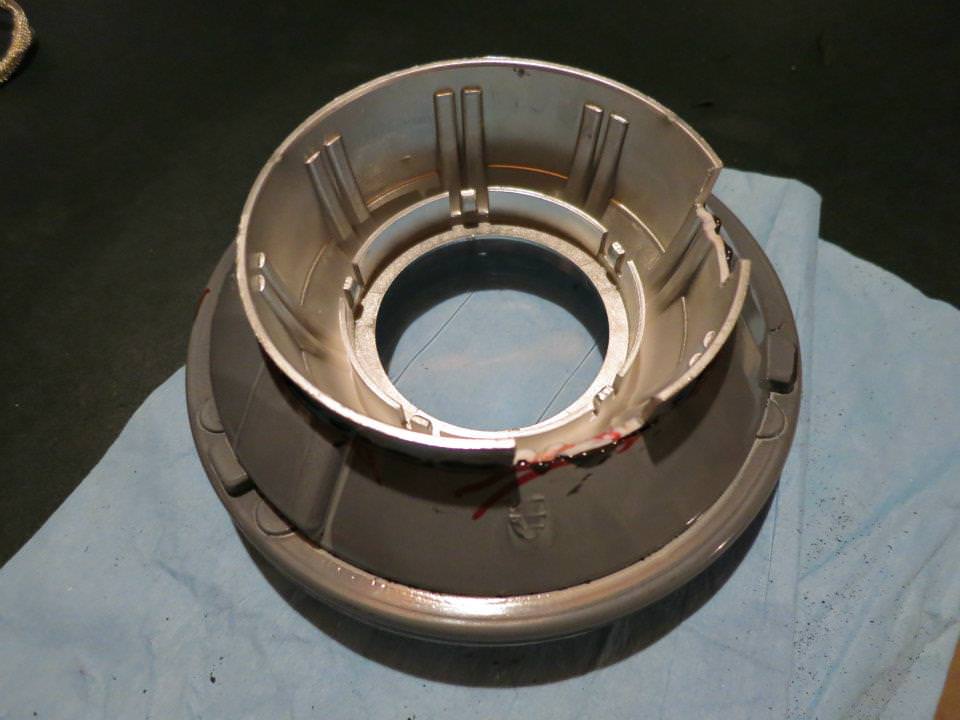
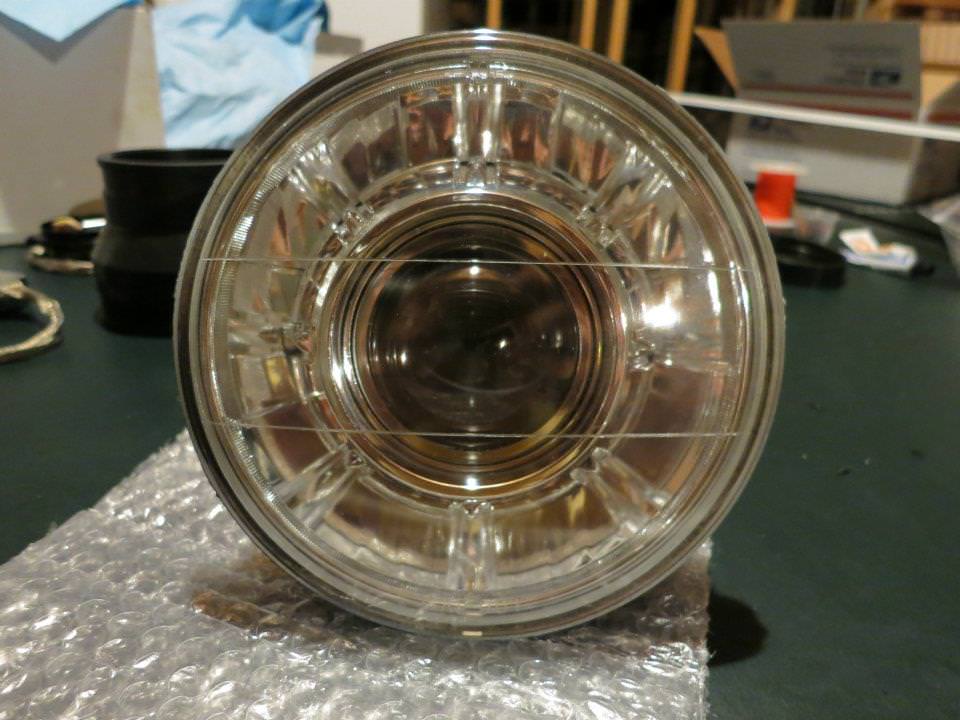
Next, I had to measure the correct amount to cut the 7" round housing. to do this, I took an adjustable hose clamp and cinched it around a forward part of the shroud.
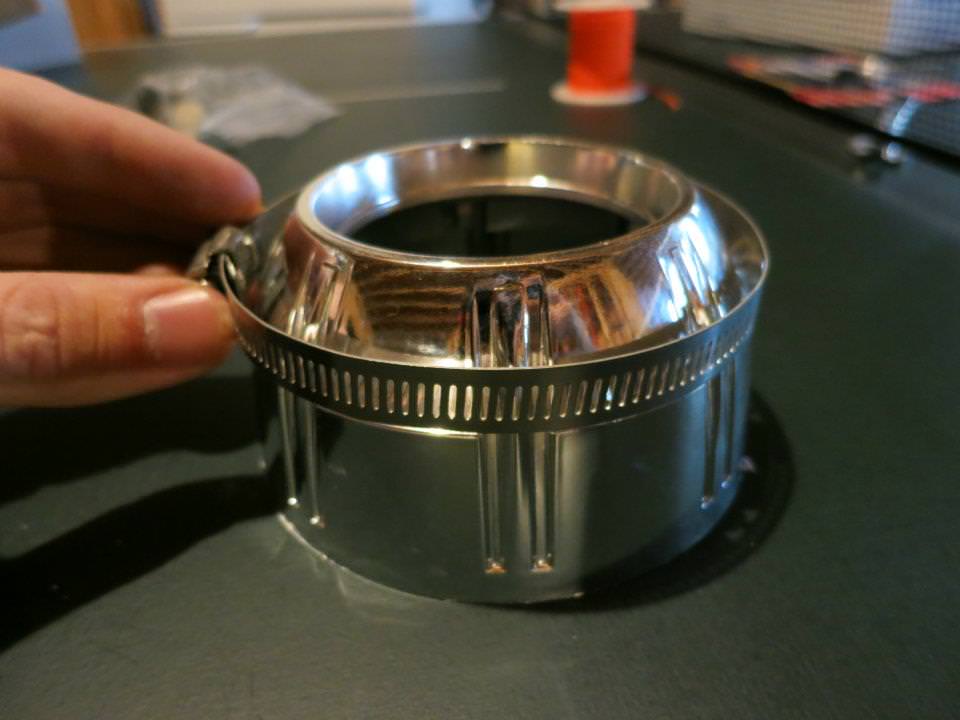
I then used this metal ring to trace a line on the back of the round housing. This would become my first cut. I intentionally made it small at first so I could increase the hole's size incrementally to get a snug fit while holding the front of the projector lens as close as possible to the front glass lens.
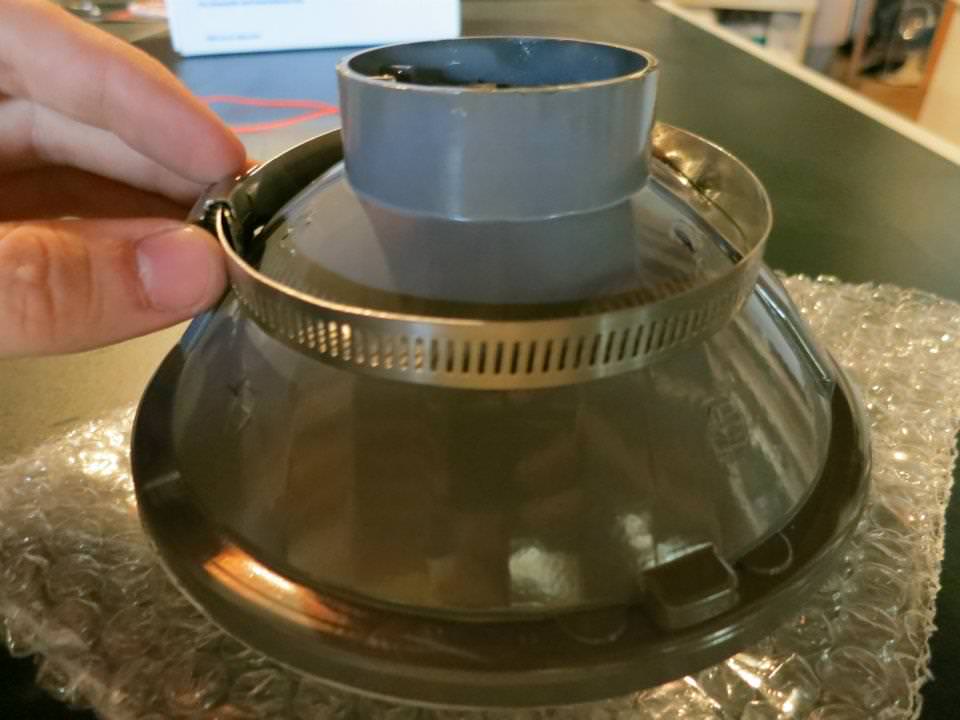
After carefully checking fitment with the projector in place, I eyeballed the straightness of everything, making sure it all was as straight forward-facing as possible. Once I was sure the shroud was as straight as possible, I used JB Kwik to bond the shroud to the housing.
I then used more JB Kwik to bond the corners of the projector to the shroud. It's important to not go overboard with this stuff! It bonds INCREDIBLY strong. I only used a small amount to secure the projector to the shroud and I could not pull it apart if I tried.
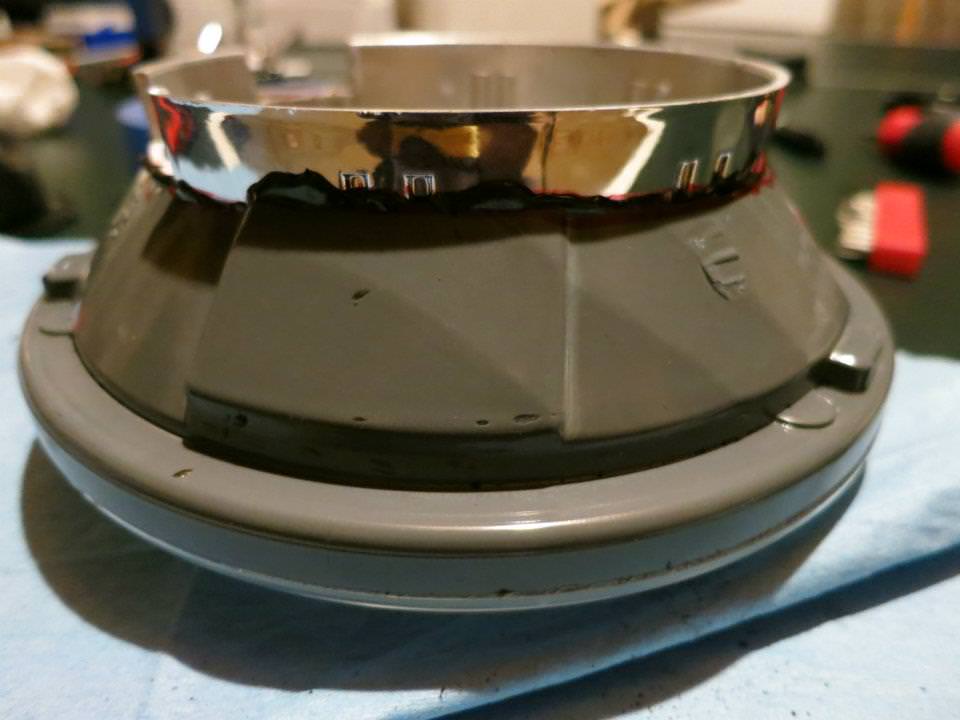
After letting the JB Kwik cure for about an hour, I took the 3"-4" rubber plumbing adapters I bought and pressure-fit them around the portion of the shroud sticking out from the housing. The seal will have to be siliconed to be water-tight, but it's a very snug fit as it is. I had to trim out some of the rubber on the inside of the adapter to get them to even fit around the shroud.
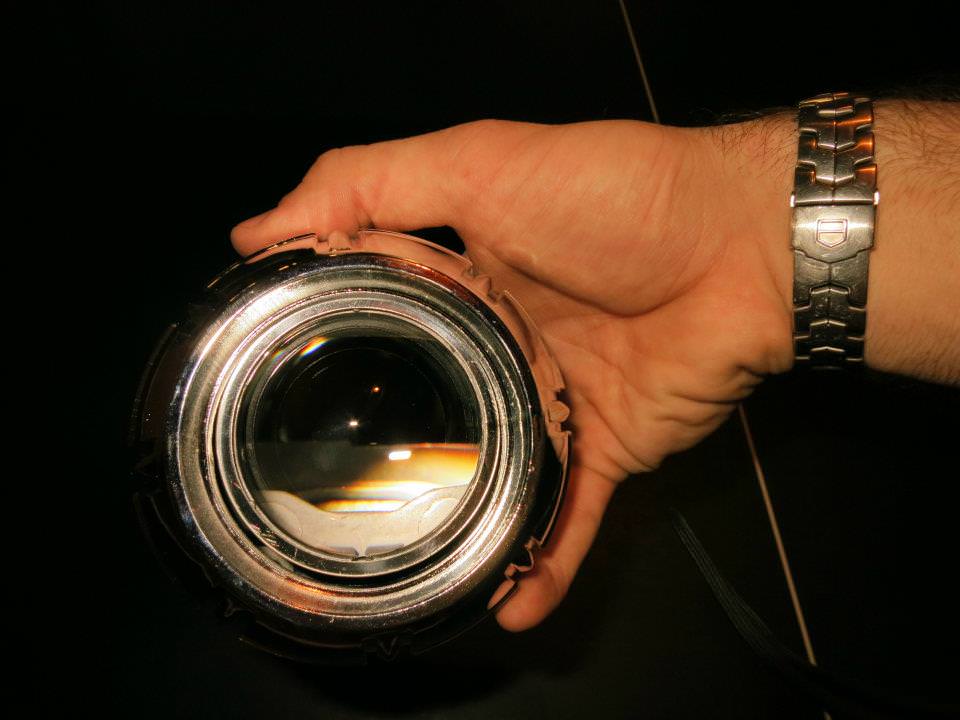
At this point, let's stop and admire how it all looks!
Next, to seal up the back side from getting any moisture in, I took the 90mm rubber caps from The Retrofit Source, trimmed off the outer lip, and siliconed them to the back of the larger rubber adapter. Make sure to cut a small hole in the rubber cap for the solenoid wires that control the high beams!
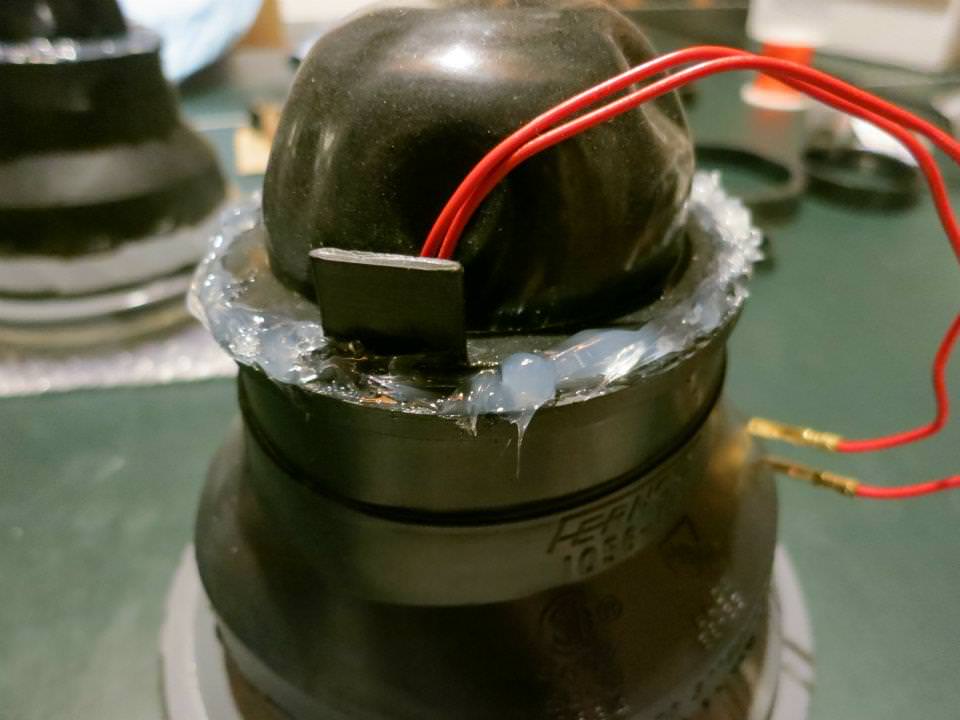
Next, I ran a bead of silicone around the front edge of the rubber adapter to make everything water-tight.

Original headlight area with old E-Code Hella halogen unit still installed

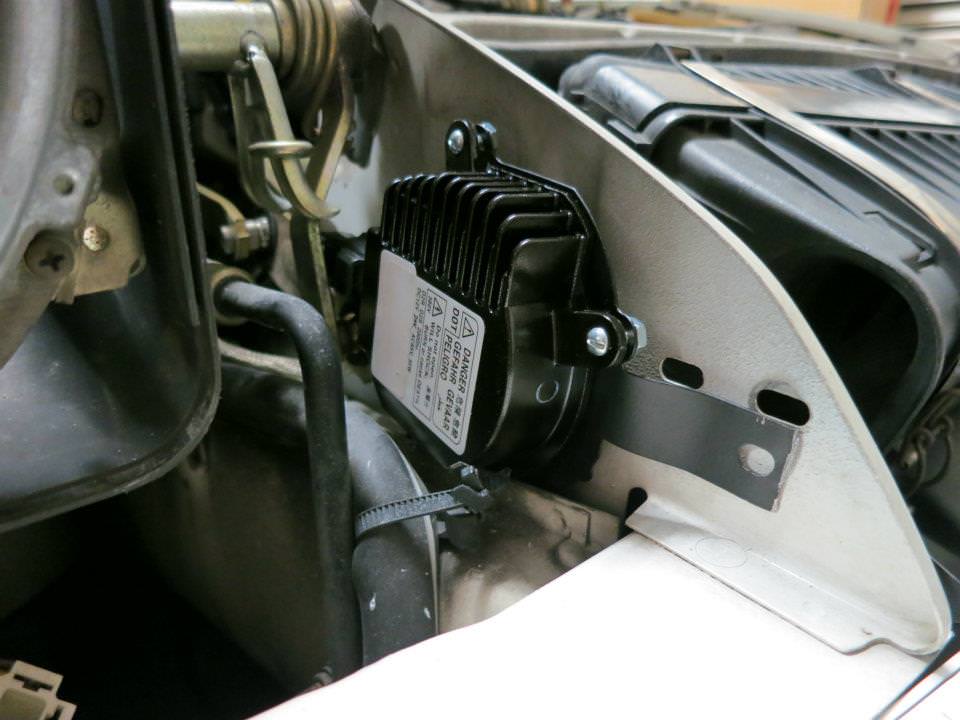
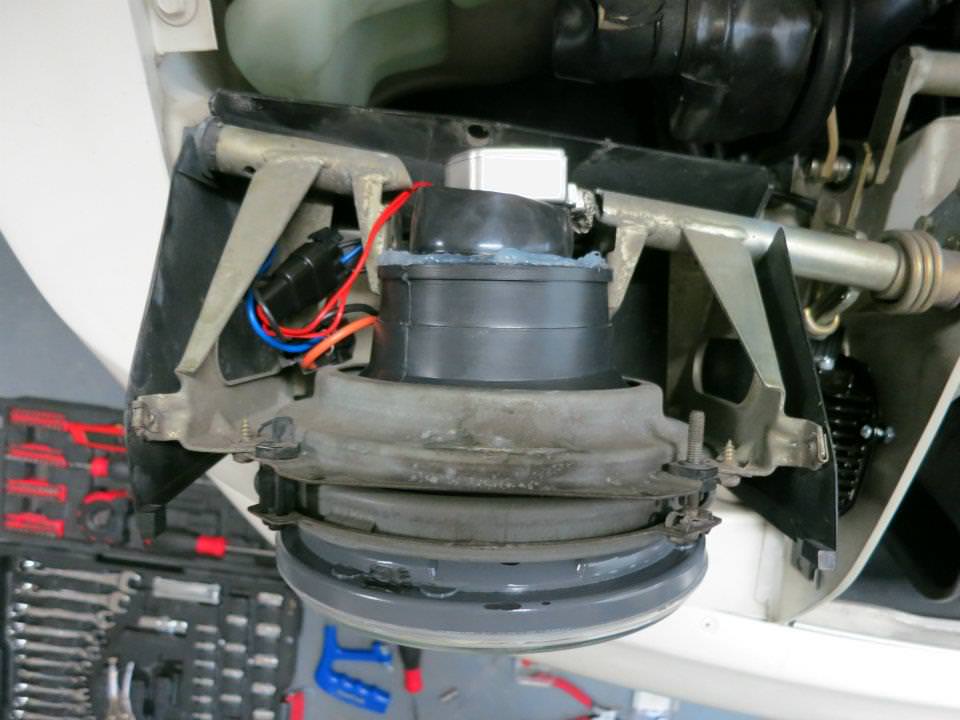
Now, with the halogen light taken out and the new wiring all put in place. Notice the black ballast on the right. That is the location I will be mounting it in, using the brackets from TRS supplied with the ballasts. There is already a small hole there with an existing screw that is used to hold the front header/badge panel on. This location behind the header panel also keeps the ballast (mostly) out of the direct line of moisture and rain. The orange positive is for the bulb and the blue positive wire is to activate the high beam solenoid.

Closer view of the ballast mounting location
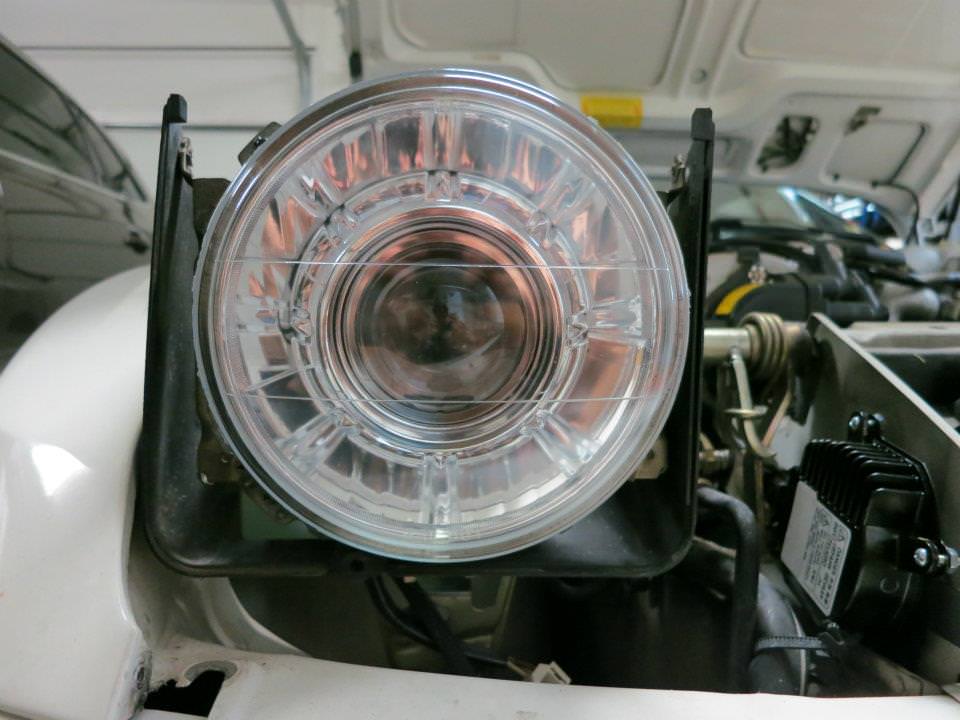
Now, with the headlight all installed. Unfortunately, I had to cut out a section of the metal bar in the rear of the housing. I tried to push and pull every which way on the headlight housing, and the thing still didn't budge, so I don't think it's completely vital. That, and no one will ever know. Also notice that the headlight does not sit flush against the original mounting plate. The projector is just too long for this to happen. Fortunately, the rubber boot in the rear of the light fits snugly against part of the back housing and holds the whole headlight in there.
To secure the retaining ring around the front of the headlight, I just used screws with the same threads as stock, but which were a half inch longer. with the black plastic surround on the front, you can't tell at all.
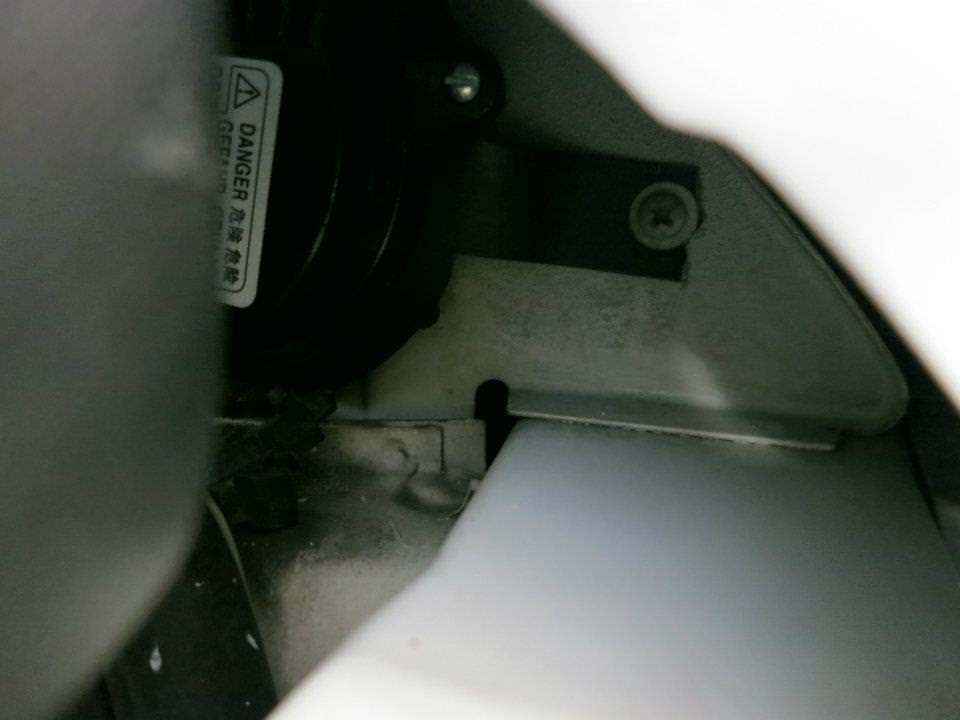
After replacing the front header panel, here's a shot in the gap between the panel and the popped-up headlight that shows how the ballast was secured using the supplied bracket.
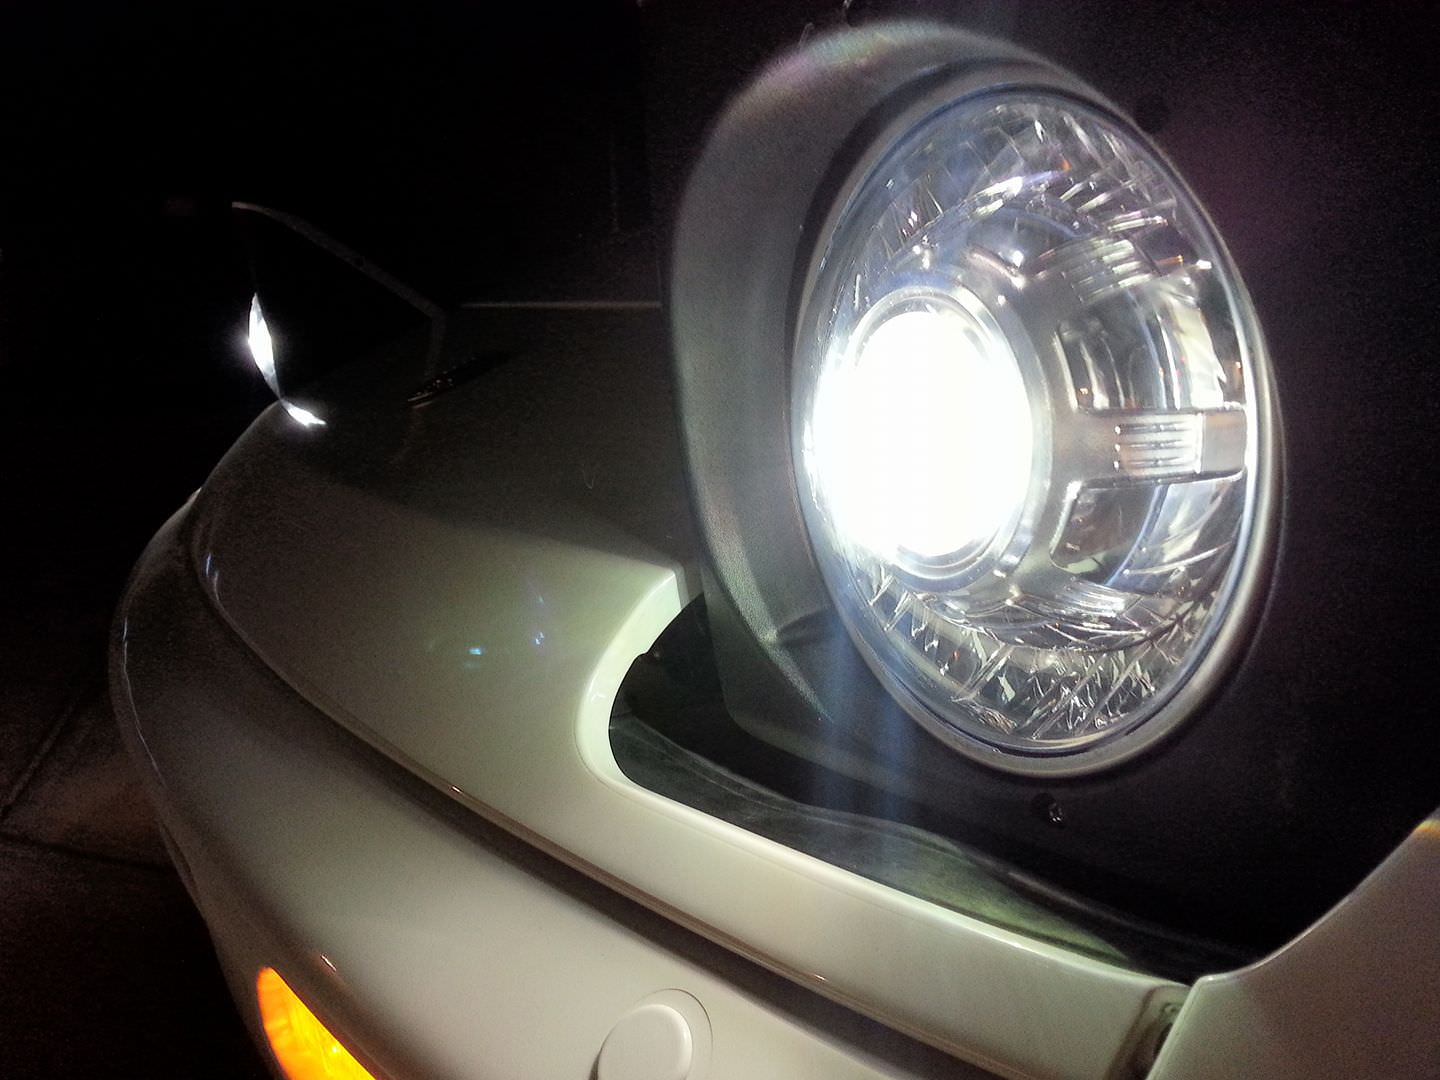
And--DONE!

After putting together all of the connections, they work perfectly!
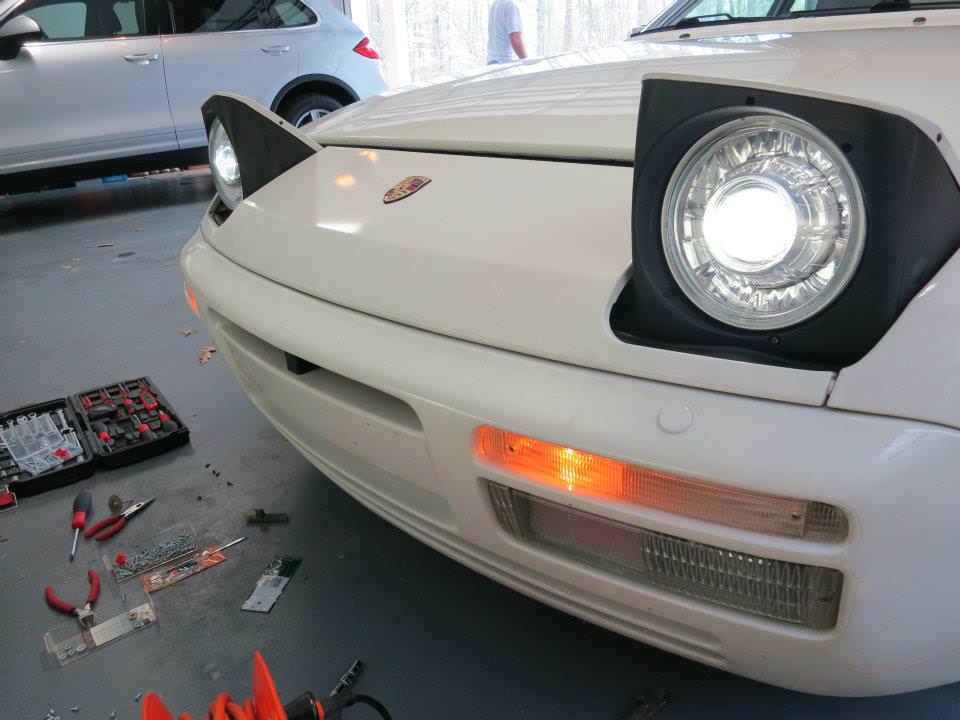
Now they just need some alignment. Fortunately, re-using the stock mounting hardware also means I can use the stock aiming screws to adjust the horizontal and vertical aiming.
So, my parts list is as follows:
From TheRetrofitSource.com:
FX-R 3.0 Projectors (Replica of an Infiniti FX unit)
Matsu****a ballasts (OEM ballasts used by Nissan/Infiniti)
Osram 66240 SVS bulbs
Bullet shrouds (to cover the projector and make it look nice)
90mm rubber caps
Single H4 to dual 9006 splitter adapters (mates the car's headlight connectors to standard connections used by HID ballasts)
I would've needed a relayed wiring harness for the lights, but I already had one installed from using the Rennbay kit to run overwattage halogen lights.
From Ebay:
Cheap 7" round 6024 housings with clear glass. (Later learned that acrylic/lexan is a better choice for a clear lens because it distorts the beam less)
Jeep Wrangler JK lights are PERFECT for this and I've since upgraded my housings to these. See final pic in this post.
From Home Depot:
3" to 4" rubber adapter (x2)
Miscellaneous machine screws and nuts
JB Kwik
DAP 100% RTV silicon
Here's all of The Retrofit Source's products laid out
I've inserted one of the bulbs and connected the ballast's bulb connector to show how long these projectors are once everything is installed. Total length is just over 6.5 inches. This is going to be tight!
Test-fitting the shroud on the front of the projector--it's going to need a little bit of trimming to clear the bottom corners of the projector unit.
Marking with black sharpie the location of the cuts to be made
After making the cuts, found out I only needed to cut half the depth I did the first time because of how the shroud sits on the center ring around the lens.
The final cuts of both shrouds--looking good so far!
Next, I had to measure the correct amount to cut the 7" round housing. to do this, I took an adjustable hose clamp and cinched it around a forward part of the shroud.
I then used this metal ring to trace a line on the back of the round housing. This would become my first cut. I intentionally made it small at first so I could increase the hole's size incrementally to get a snug fit while holding the front of the projector lens as close as possible to the front glass lens.
After carefully checking fitment with the projector in place, I eyeballed the straightness of everything, making sure it all was as straight forward-facing as possible. Once I was sure the shroud was as straight as possible, I used JB Kwik to bond the shroud to the housing.
I then used more JB Kwik to bond the corners of the projector to the shroud. It's important to not go overboard with this stuff! It bonds INCREDIBLY strong. I only used a small amount to secure the projector to the shroud and I could not pull it apart if I tried.
After letting the JB Kwik cure for about an hour, I took the 3"-4" rubber plumbing adapters I bought and pressure-fit them around the portion of the shroud sticking out from the housing. The seal will have to be siliconed to be water-tight, but it's a very snug fit as it is. I had to trim out some of the rubber on the inside of the adapter to get them to even fit around the shroud.
At this point, let's stop and admire how it all looks!
Next, to seal up the back side from getting any moisture in, I took the 90mm rubber caps from The Retrofit Source, trimmed off the outer lip, and siliconed them to the back of the larger rubber adapter. Make sure to cut a small hole in the rubber cap for the solenoid wires that control the high beams!
Next, I ran a bead of silicone around the front edge of the rubber adapter to make everything water-tight.
Original headlight area with old E-Code Hella halogen unit still installed
Now, with the halogen light taken out and the new wiring all put in place. Notice the black ballast on the right. That is the location I will be mounting it in, using the brackets from TRS supplied with the ballasts. There is already a small hole there with an existing screw that is used to hold the front header/badge panel on. This location behind the header panel also keeps the ballast (mostly) out of the direct line of moisture and rain. The orange positive is for the bulb and the blue positive wire is to activate the high beam solenoid.
Closer view of the ballast mounting location
Now, with the headlight all installed. Unfortunately, I had to cut out a section of the metal bar in the rear of the housing.
I tried to push and pull every which way on the headlight housing, and the thing still didn't budge, so I don't think it's completely vital. That, and no one will ever know. Also notice that the headlight does not sit flush against the original mounting plate. The projector is just too long for this to happen. Fortunately, the rubber boot in the rear of the light fits snugly against part of the back housing and holds the whole headlight in there.To secure the retaining ring around the front of the headlight, I just used screws with the same threads as stock, but which were a half inch longer. with the black plastic surround on the front, you can't tell at all.
After replacing the front header panel, here's a shot in the gap between the panel and the popped-up headlight that shows how the ballast was secured using the supplied bracket.
And--DONE!
After putting together all of the connections, they work perfectly!
Now they just need some alignment. Fortunately, re-using the stock mounting hardware also means I can use the stock aiming screws to adjust the horizontal and vertical aiming.
Last edited by kbull; 05-10-2018 at 11:58 PM. Reason: Image hosting for the pictures was dead, so I re-uploaded them.

 03-30-2012, 12:53 AM
#4
Today I got
My Custom Title
Rennlist Member
My Custom Title
Rennlist Member
Great work! I would like to do this myself but it looks very time consuming and complicated... :O
03-30-2012, 01:07 AM
#5
Intermediate
Thread Starter
Thanks guys! This setup cost me $460, but I used more expensive OEM components for lots of it. 90% of the level of performance I've gotten can be had for about $200 if aftermarket components are used.
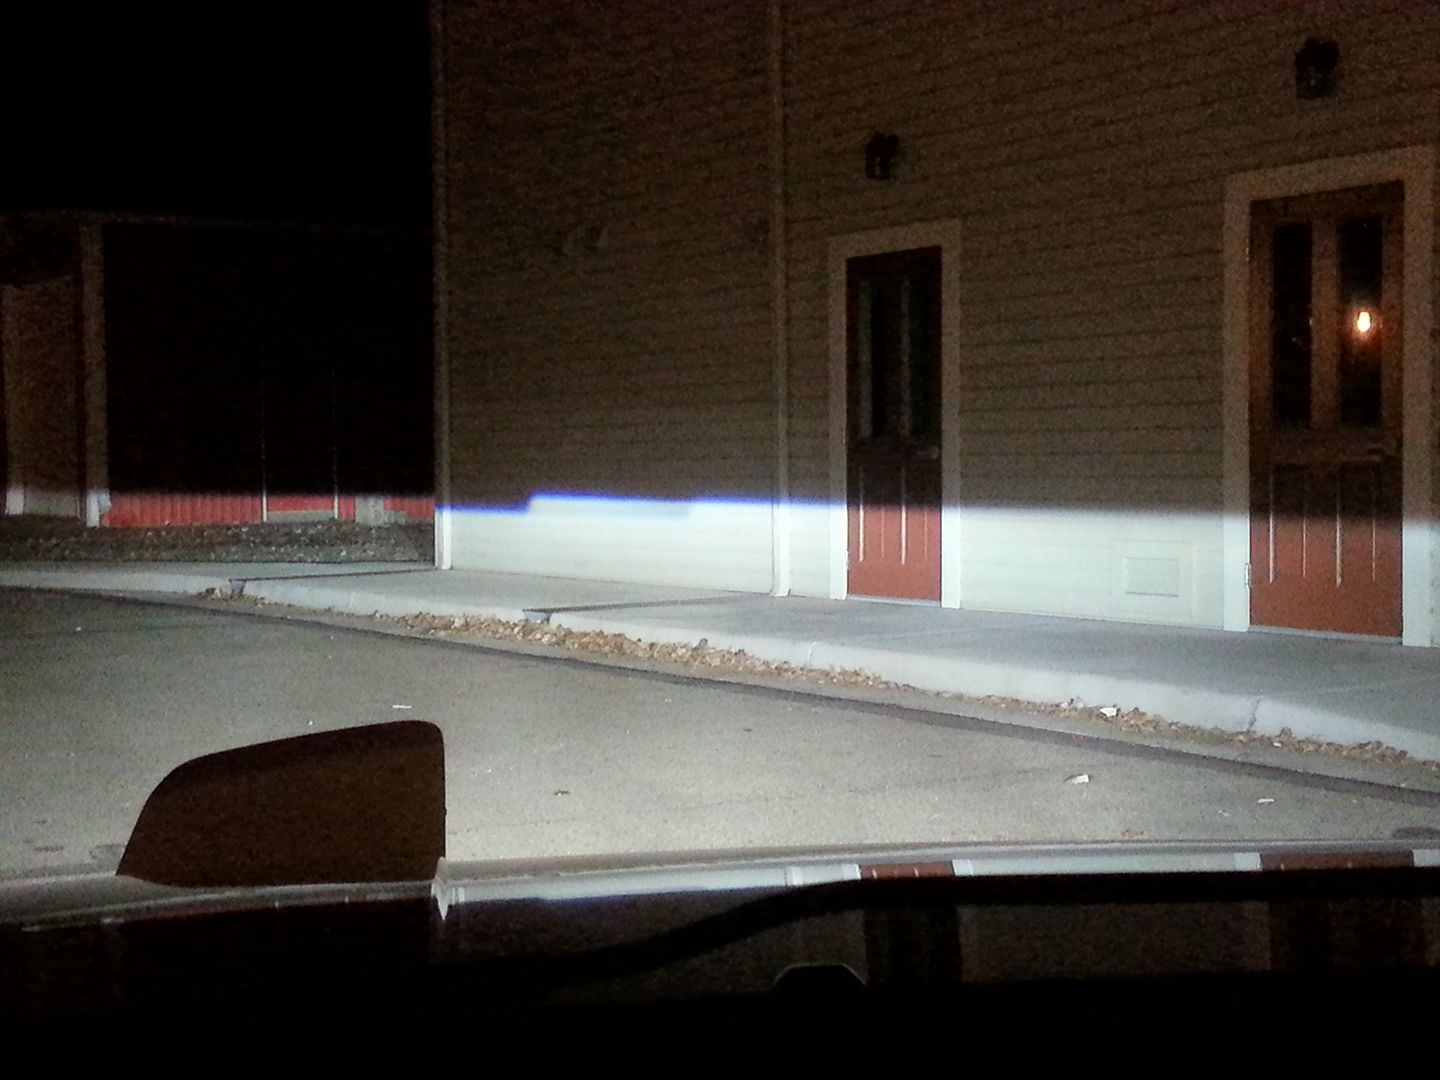
And I must say, I'm blown away by the output brightness, sharp cutoff, and beam width. My goal was to match the level of modern factory-equipped Bi-Xenon systems, but I think I've surpassed the performance of most of them. I promise some output pics tomorrow!
And I must say, I'm blown away by the output brightness, sharp cutoff, and beam width. My goal was to match the level of modern factory-equipped Bi-Xenon systems, but I think I've surpassed the performance of most of them. I promise some output pics tomorrow!
03-30-2012, 01:11 AM
#6
Intermediate
Thread Starter
Butters, my total labor time was about 6 hours to assemble and install, and another 2 hours for fine-tuning and fitting under the stock enclosures. I could've gone faster, but I wanted to take it slow and get it right the first time. I also could've gone faster if I had chosen a slightly smaller, yet lower performing, projector unit. Plus, these things always take longer when you first do them.
03-30-2012, 01:39 AM
#7
Rainman
Rennlist Member
Rennlist Member
thats pretty sweet--- can we get nighttime pics?
ive considered something similar to this, but would use junkyard projector lights (late 90s+ jap cars had them frequently)
ive considered something similar to this, but would use junkyard projector lights (late 90s+ jap cars had them frequently)
Trending Topics
03-30-2012, 01:43 AM
#8
Today I got
My Custom Title
Rennlist Member
My Custom Title
Rennlist Member
Butters, my total labor time was about 6 hours to assemble and install, and another 2 hours for fine-tuning and fitting under the stock enclosures. I could've gone faster, but I wanted to take it slow and get it right the first time. I also could've gone faster if I had chosen a slightly smaller, yet lower performing, projector unit. Plus, these things always take longer when you first do them.
03-30-2012, 02:19 AM
#9
Team Owner
Join Date: Oct 2009
Location: one thousand, five hundred miles north of Ft. Lauderdale for the summer.
Posts: 28,705
Received 212 Likes
on
153 Posts
fantastic.
don't know if it's legal (frankly, with work of that level of quality, who cares).....
spectacular, nevertheless.
don't know if it's legal (frankly, with work of that level of quality, who cares).....
spectacular, nevertheless.
03-30-2012, 09:44 AM
#12
nice retro. however some pieces of advice, for the next person that wants to do this. BEFORE you jbweld permanently. make sure you turn on the lights while installed into the housing and make sure when the beam is aligned both horizontally AND vertically (front on the lens has a "TOP") that the beam is as close to level as possible out to 25ft AND that your beam center is as close as possible to 2" drop from center height of the housing. otherwise u'll have a light pointing at the ground, into space, across lanes, or at the shoulder. there is adjustment on the car, but that's for FINE adjustments.
therefore, it's best o have either a jig ready or do the alignment with the housing installed on the car already. i prefer to use four 3" screws/nuts so that alignment can be fine tuned before jbwelding it shut.
therefore, it's best o have either a jig ready or do the alignment with the housing installed on the car already. i prefer to use four 3" screws/nuts so that alignment can be fine tuned before jbwelding it shut.
03-30-2012, 10:57 AM
#14
WRONGLY ACCUSED!
Rennlist Member
Rennlist Member
Join Date: Nov 2011
Location: Connecticut Valley Region
Posts: 14,706
Received 3,846 Likes
on
1,760 Posts
Great job. Now all you need to do is mount one in your rear brake light for the a$$hole in the SUV who always creeps up bumper to bumper at night blinding us all with their high beams.
 03-30-2012, 11:16 AM
#15

they look great
i am happy to see i am not the only one cutting up head light brackets theses days