
DIY Replacing Brake Rotors & Pads w/ Pics
 04-11-2009, 04:33 AM
#1
Rennlist Member
Thread Starter
My 1990 S2 just turned 160K miles and the front rotors were thinning out pretty badly, so I decided to replace them with a set of aftermarket Zimmermanns I bought from an eBay seller in Germany.
A minor detail about aftermarket rotors I don't like is that the hats and edges don't come with a rustproof coating like the OE ones from the dealer do, so it's not long before they show some superficial rust.
One option is to paint them with a heat resistant coating such as Duplicolor thermal paint. On street driven cars the rotors last a long time, so you can additionally "bake" them in the oven to maximize the thermal paint's effectiveness over time.
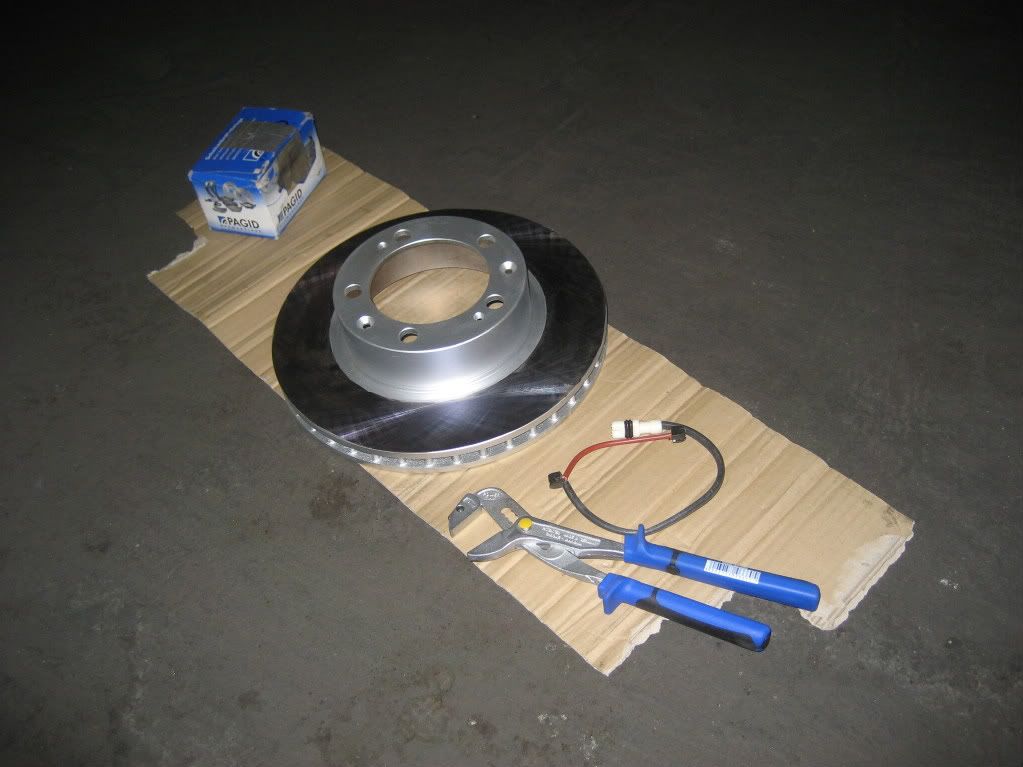
Here you can see the finished product and the PAGID blacks ready to be installed:
The first step is to loosen the wheel lug nuts and raise the side of the car that's getting new rotors. Although it's not strictly necessary, it helps with the installation to be able to move the wheel hubs around and also to bleed the calipers and clutch slave cylinder more easily
When jacking the car it's important to take proper safety measures, both protecting the undercarriage (I use hockey pucks on the jackstand tops and floorjack saddle) and ensuring that the car is firmly supported on the jackstands using the jacking points indicated in the owner's manual. Never work with the car supported by the floorjack or the emergency jack. This can dangerous.

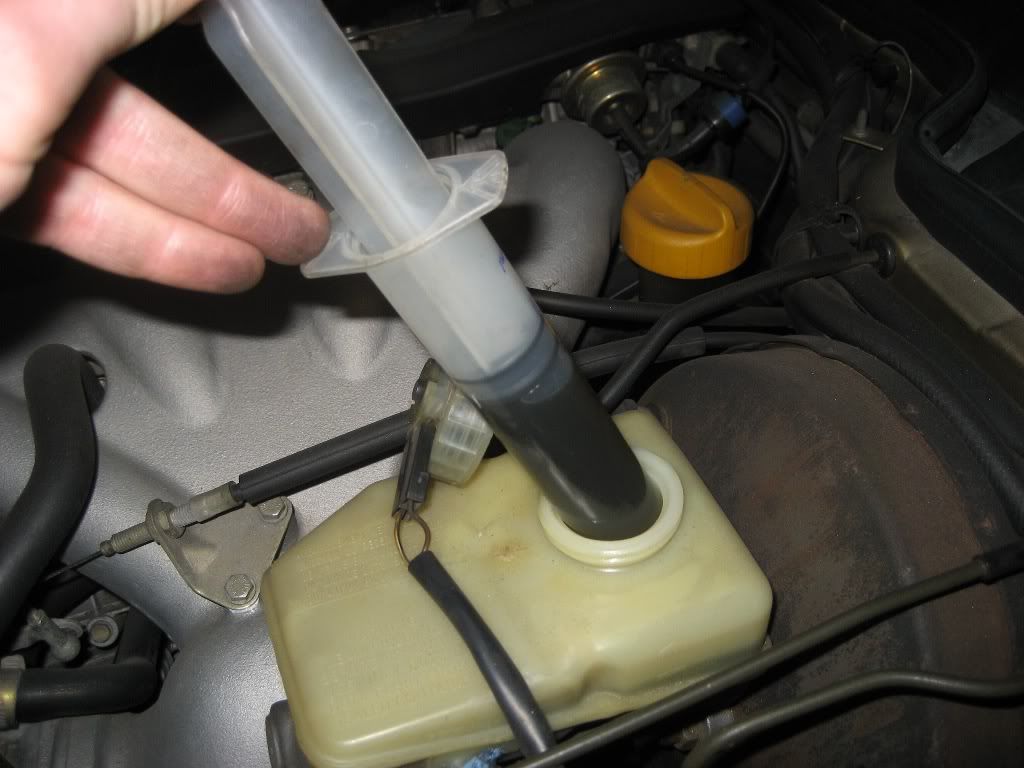
Once the car is on jackstands, it's a good idea to partially empty the brake fluid reservoir because once we start compressing the pistons in the brake calipers to get the pads out, the brake system hydraulics will tend to make the reservoir overflow. I use a large syringe for this:
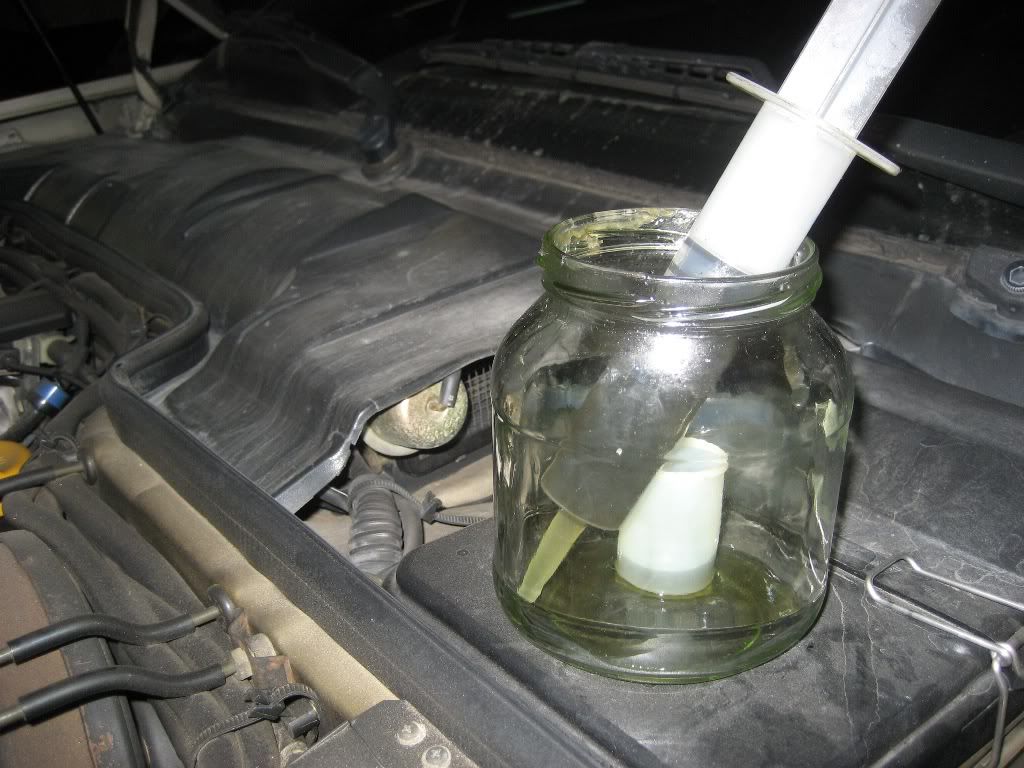
Here you can tell by the dark brake fluid that it needed replacing, so I put it in a glass jar to dispose of properly afterwards. After replacing the rotors and pads I added fresh brake fluid and fully bled the system.
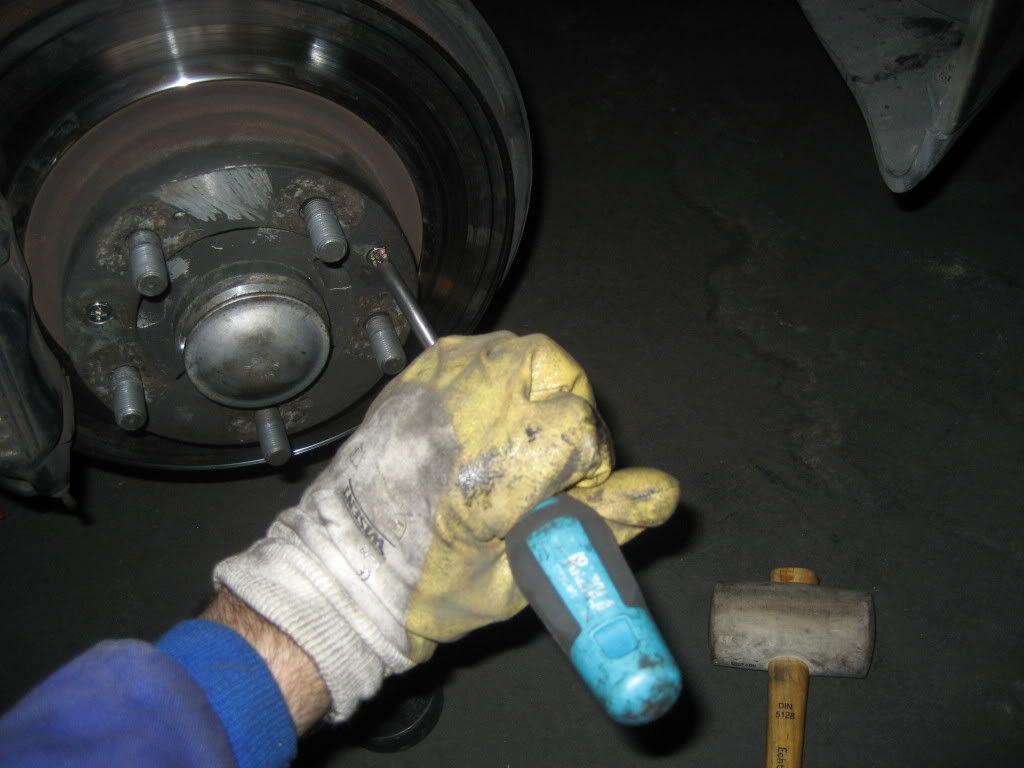
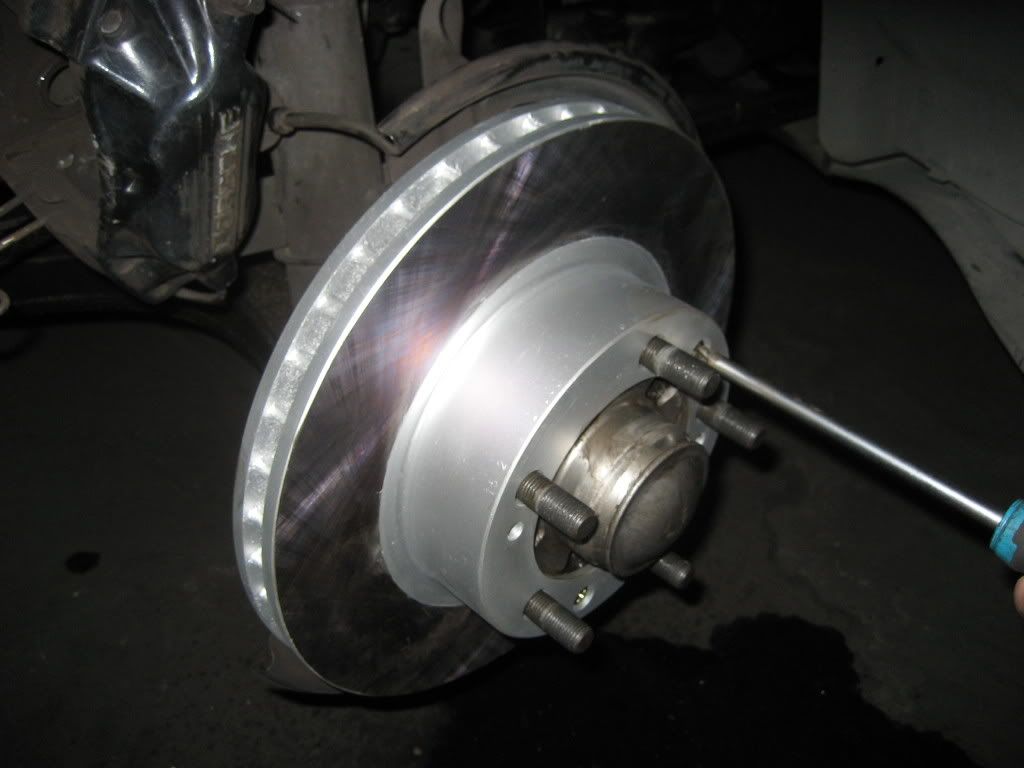
To access the rotor, you remove the respective wheel and locate the 2 phillips head screws that attach the rotor to the hub. In order to remove them, you will need a large phillips head screwdriver and it's a good idea to give them a good whack with a hammer and the screwdriver before attempting to unscrew them. Be very, very careful not to round out the screw or you will have a nasty problem on your hands. Don't ask!
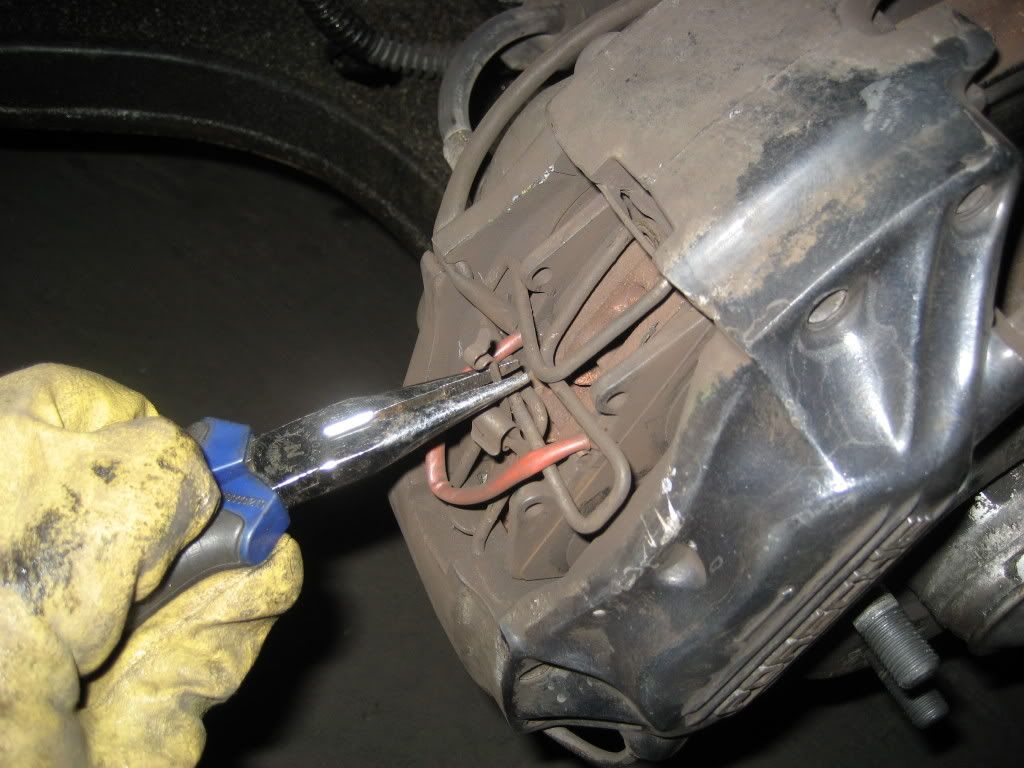
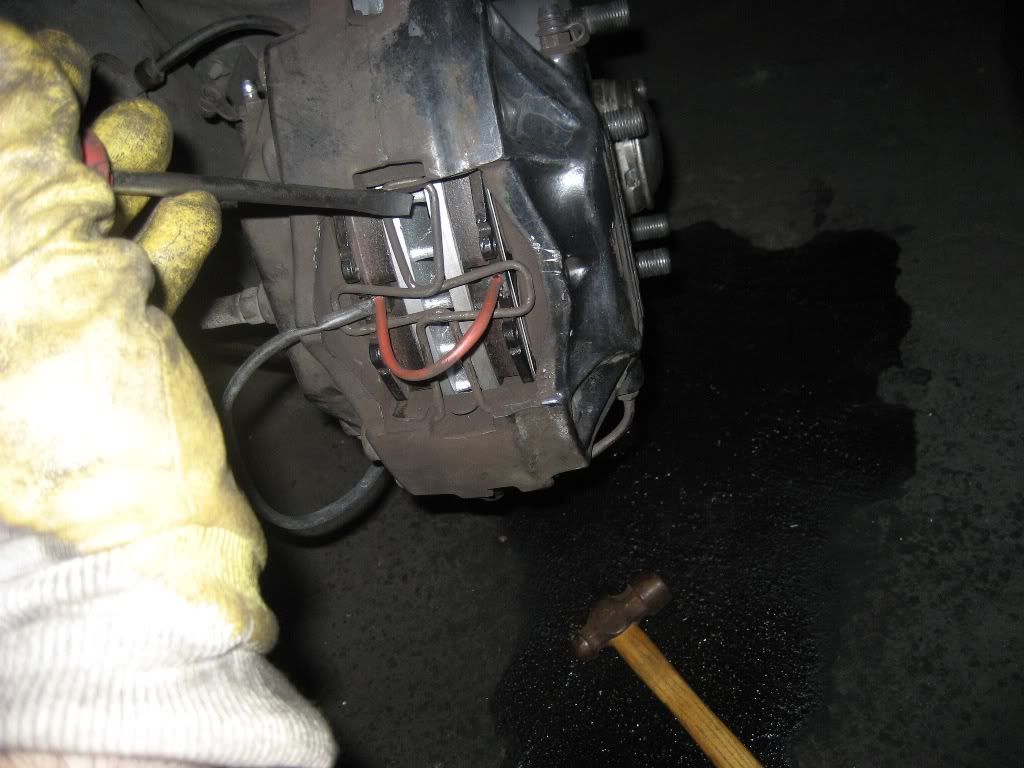
To replace the rotor, you will need to loosen the brake caliper but first you must remove the brake pads. On the 944 S2, each caliper has a brake pad wear sensors in each pad connected by a red wire that is held to the caliper locking pin with a small clip. Remove the clip with needlenose pliers and set it aside to reuse later.
A minor detail about aftermarket rotors I don't like is that the hats and edges don't come with a rustproof coating like the OE ones from the dealer do, so it's not long before they show some superficial rust.
One option is to paint them with a heat resistant coating such as Duplicolor thermal paint. On street driven cars the rotors last a long time, so you can additionally "bake" them in the oven to maximize the thermal paint's effectiveness over time.
Here you can see the finished product and the PAGID blacks ready to be installed:
The first step is to loosen the wheel lug nuts and raise the side of the car that's getting new rotors. Although it's not strictly necessary, it helps with the installation to be able to move the wheel hubs around and also to bleed the calipers and clutch slave cylinder more easily
When jacking the car it's important to take proper safety measures, both protecting the undercarriage (I use hockey pucks on the jackstand tops and floorjack saddle) and ensuring that the car is firmly supported on the jackstands using the jacking points indicated in the owner's manual. Never work with the car supported by the floorjack or the emergency jack. This can dangerous.
Once the car is on jackstands, it's a good idea to partially empty the brake fluid reservoir because once we start compressing the pistons in the brake calipers to get the pads out, the brake system hydraulics will tend to make the reservoir overflow. I use a large syringe for this:
Here you can tell by the dark brake fluid that it needed replacing, so I put it in a glass jar to dispose of properly afterwards. After replacing the rotors and pads I added fresh brake fluid and fully bled the system.
To access the rotor, you remove the respective wheel and locate the 2 phillips head screws that attach the rotor to the hub. In order to remove them, you will need a large phillips head screwdriver and it's a good idea to give them a good whack with a hammer and the screwdriver before attempting to unscrew them. Be very, very careful not to round out the screw or you will have a nasty problem on your hands. Don't ask!
To replace the rotor, you will need to loosen the brake caliper but first you must remove the brake pads. On the 944 S2, each caliper has a brake pad wear sensors in each pad connected by a red wire that is held to the caliper locking pin with a small clip. Remove the clip with needlenose pliers and set it aside to reuse later.
 04-11-2009, 04:49 AM
#2
Rennlist Member
Thread Starter
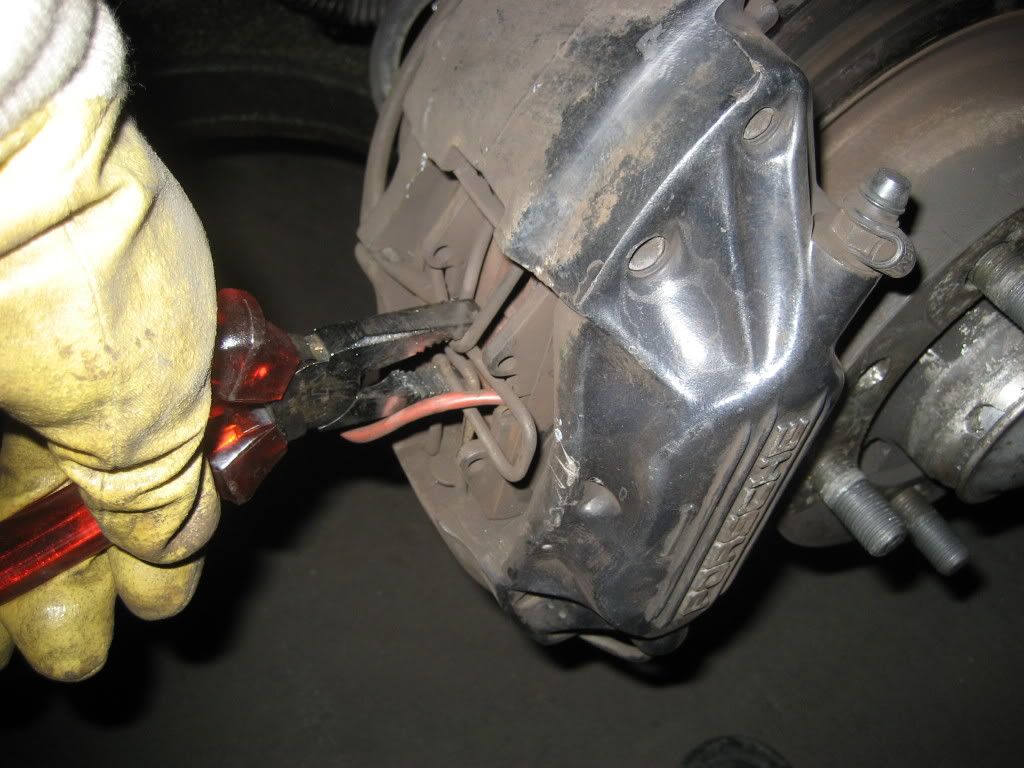
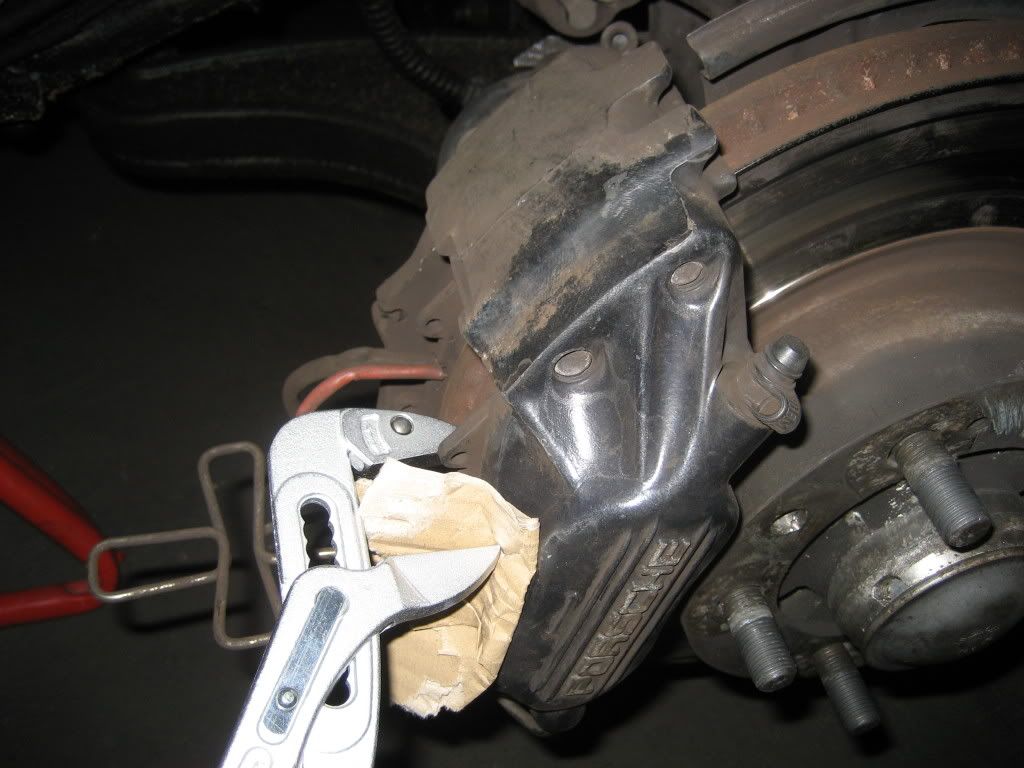
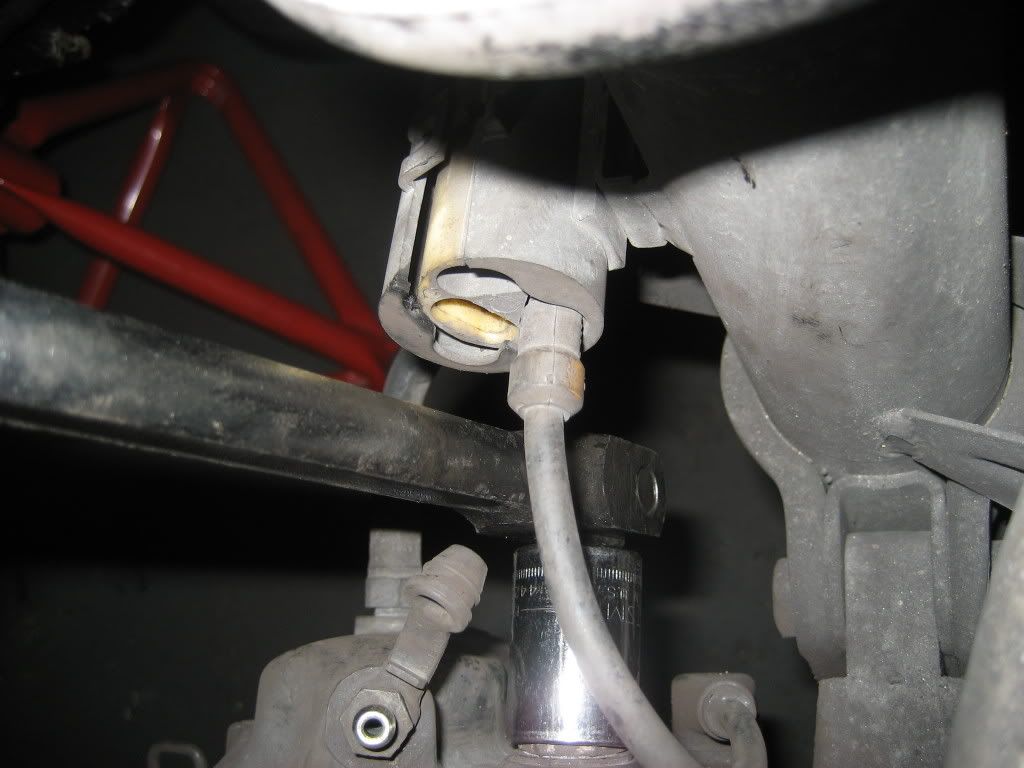
Use regular pliers to loosen the caliper locking pin:
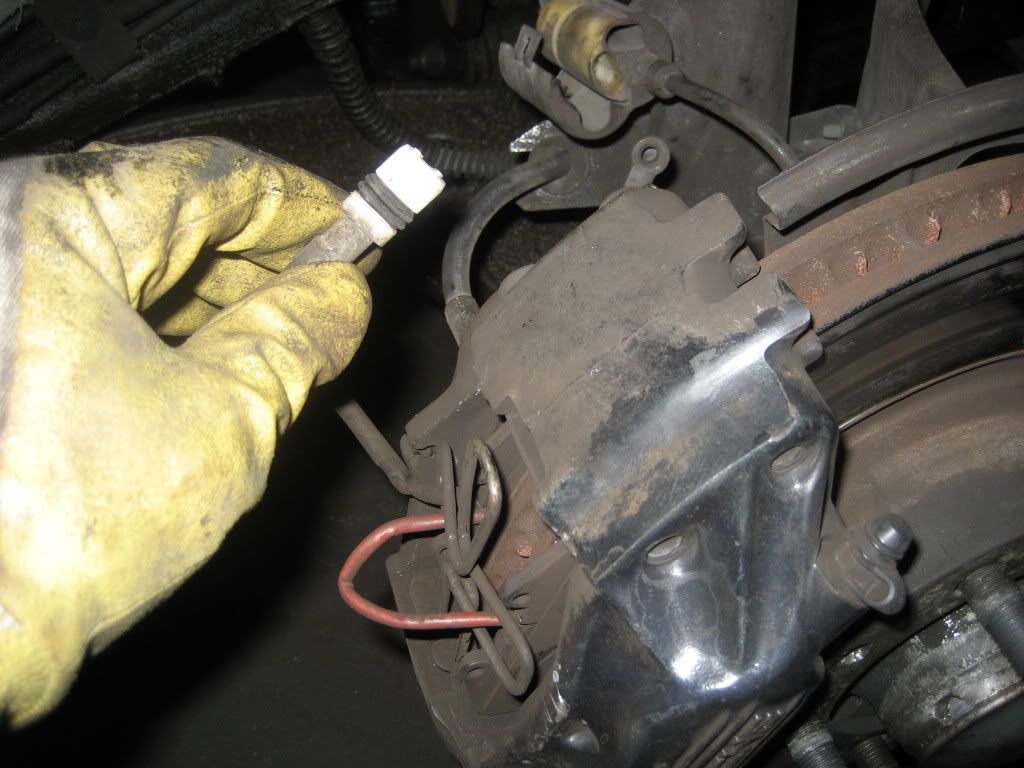
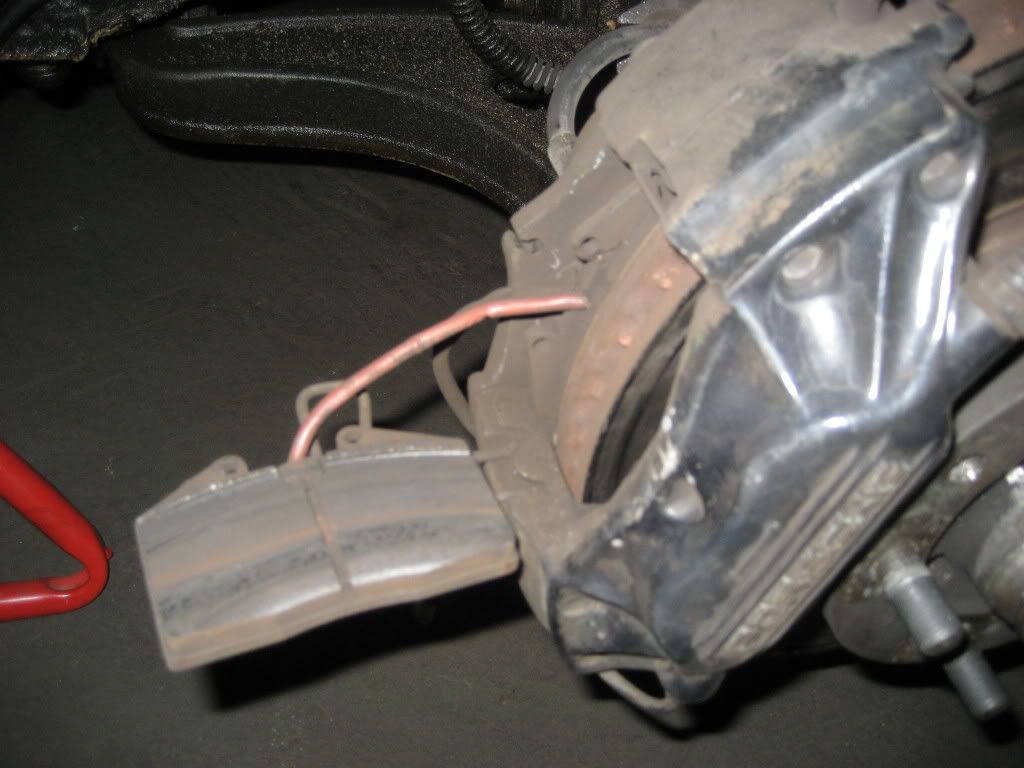
Then disconnect the brake pad wear sensor:
Now it's time to push the pistons back into the brake caliper using channel lock pliers and a piece of cardboard to protect the caliper surface. I find that channel locks with smooth "jaws" work best here:
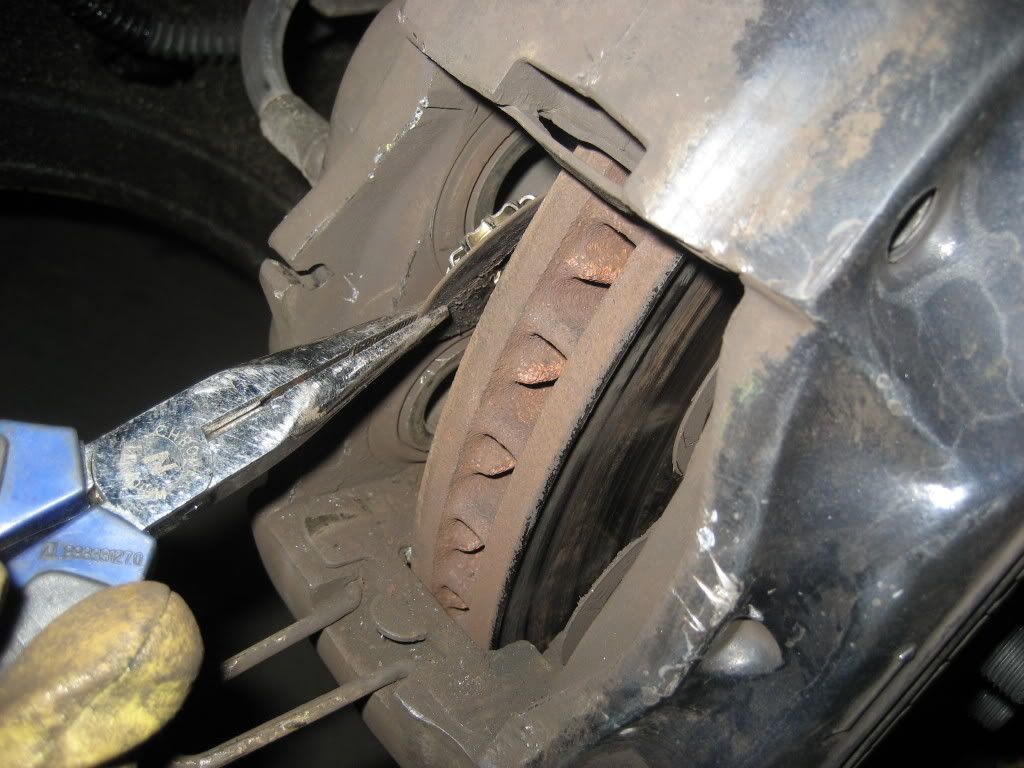
With the pistons recessed in the calipers, the pads are loose but still must be separated from the brake dampeners in order for them to come out. Use a thin flathead screwdriver to separate the dampeners from the pads.
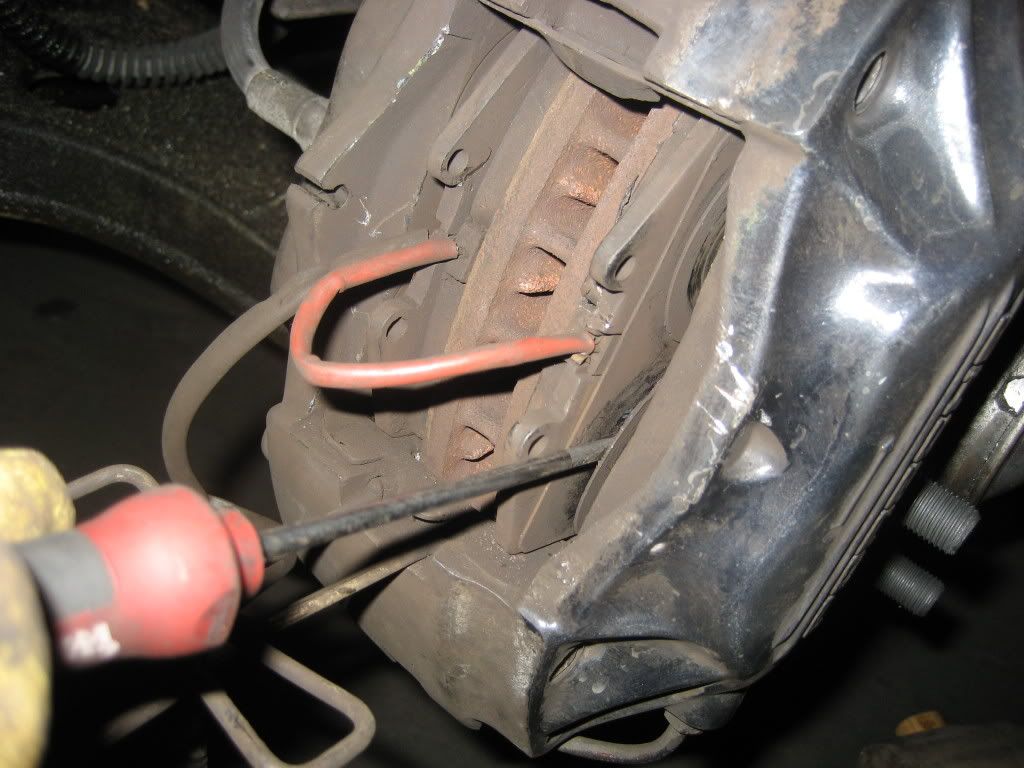
The pads will the slide out easily:
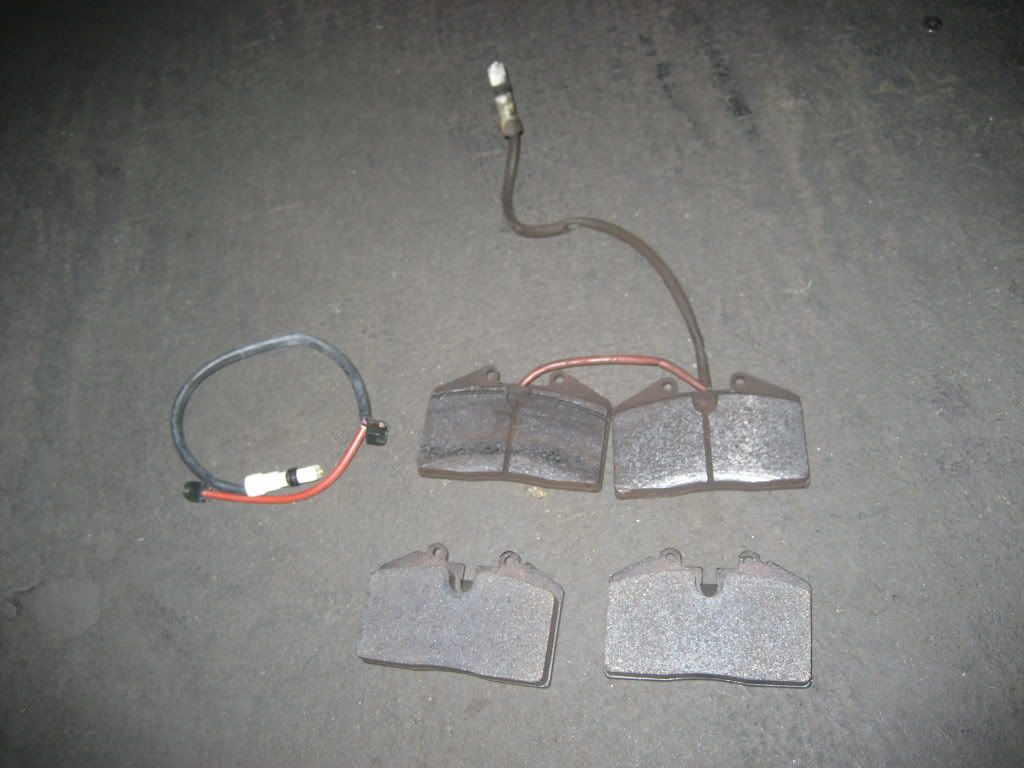
Here you can see the old pads and the new ones. The old pads still had some wear left, but the discs were too thinned out. Since you must always use fresh pads when replacing rotors, I could not reuse the pads.
The brake dampeners can now be removed with needlenose pliers. There are 4 per caliper. On the M030 928S4 brakes the front calipers use adhesive dampening plates with solid metal pucks that fit into the pistons.
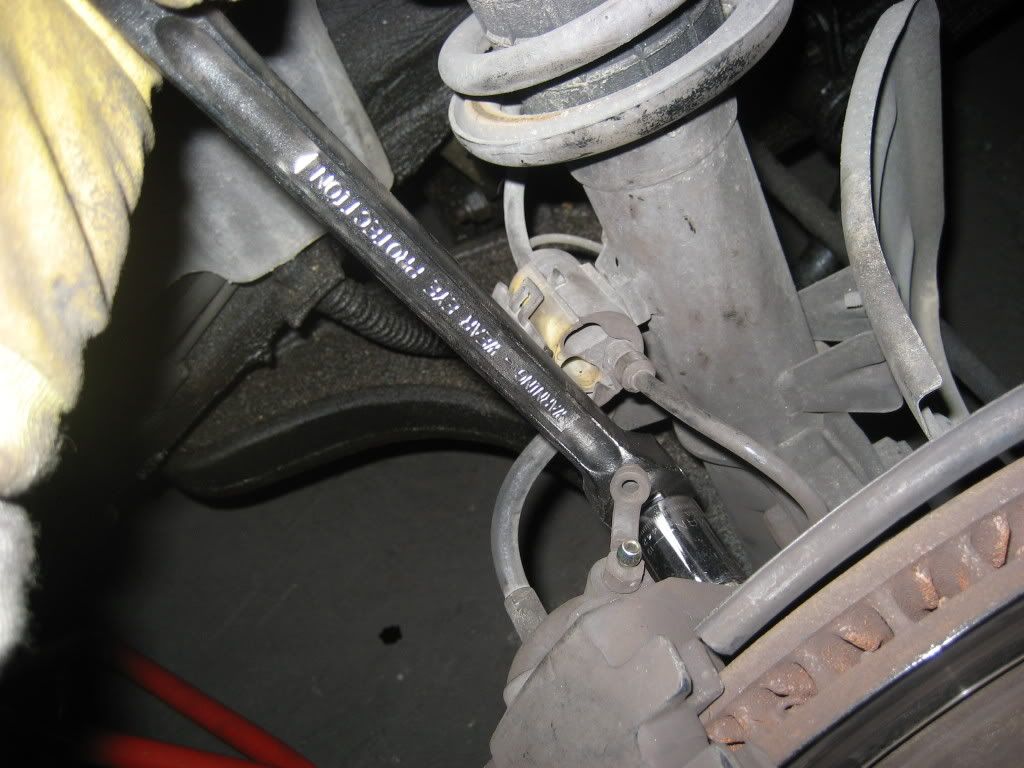
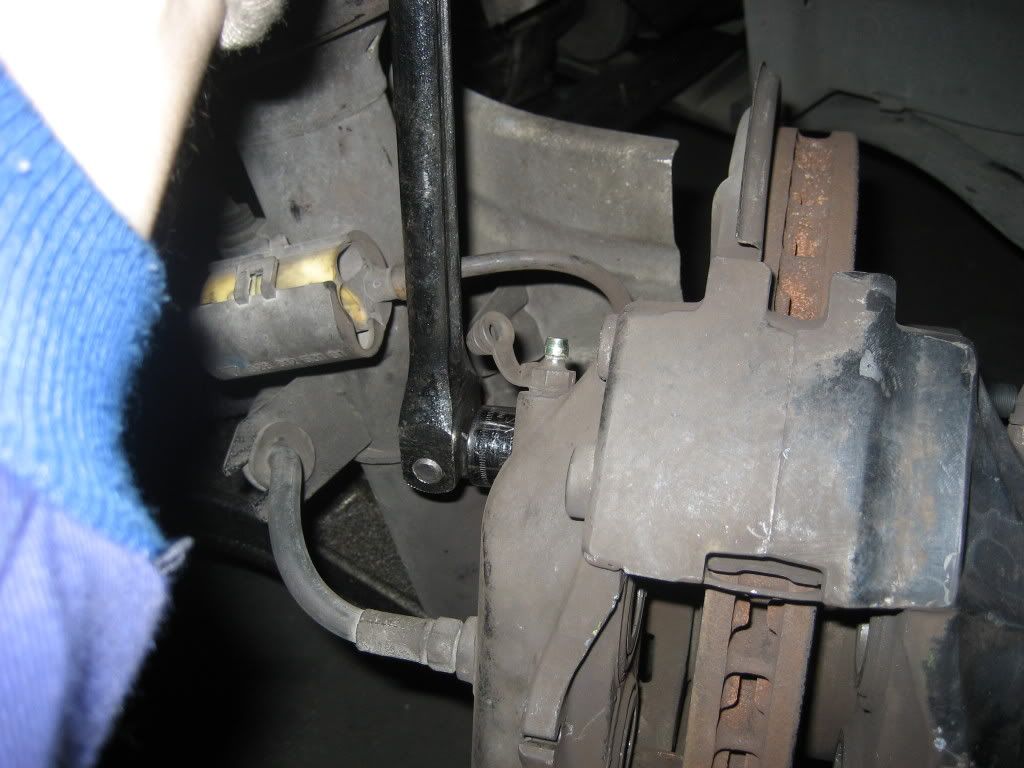
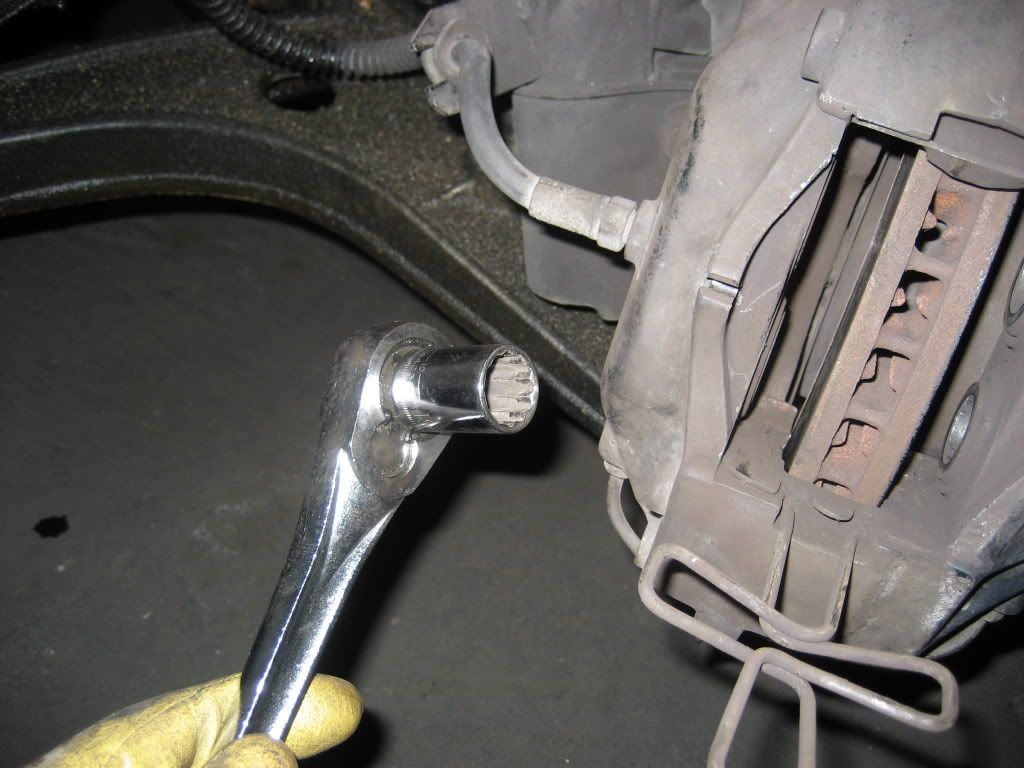
Once the pads, sensor and dampeners are out, loosen the 2 caliper bolts with a breaker bar and socket:
Then disconnect the brake pad wear sensor:
Now it's time to push the pistons back into the brake caliper using channel lock pliers and a piece of cardboard to protect the caliper surface. I find that channel locks with smooth "jaws" work best here:
With the pistons recessed in the calipers, the pads are loose but still must be separated from the brake dampeners in order for them to come out. Use a thin flathead screwdriver to separate the dampeners from the pads.
The pads will the slide out easily:
Here you can see the old pads and the new ones. The old pads still had some wear left, but the discs were too thinned out. Since you must always use fresh pads when replacing rotors, I could not reuse the pads.
The brake dampeners can now be removed with needlenose pliers. There are 4 per caliper. On the M030 928S4 brakes the front calipers use adhesive dampening plates with solid metal pucks that fit into the pistons.
Once the pads, sensor and dampeners are out, loosen the 2 caliper bolts with a breaker bar and socket:
04-11-2009, 05:11 AM
#3
Rennlist Member
Thread Starter
After the bolts are loosened, remove them using a ratchet:
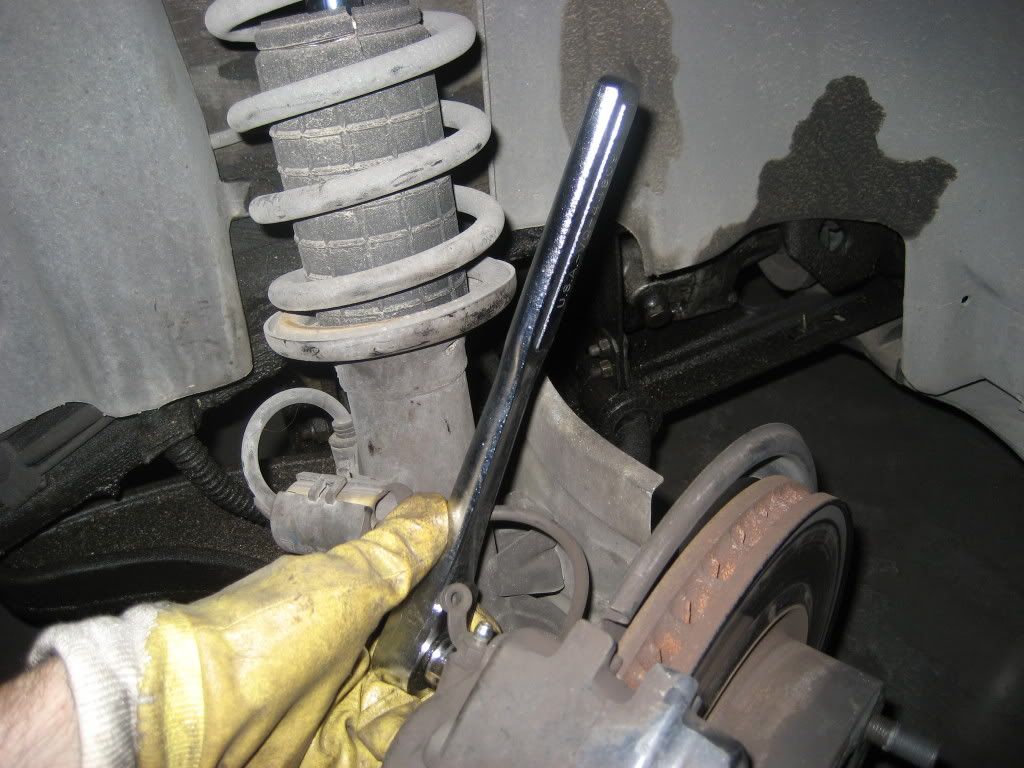
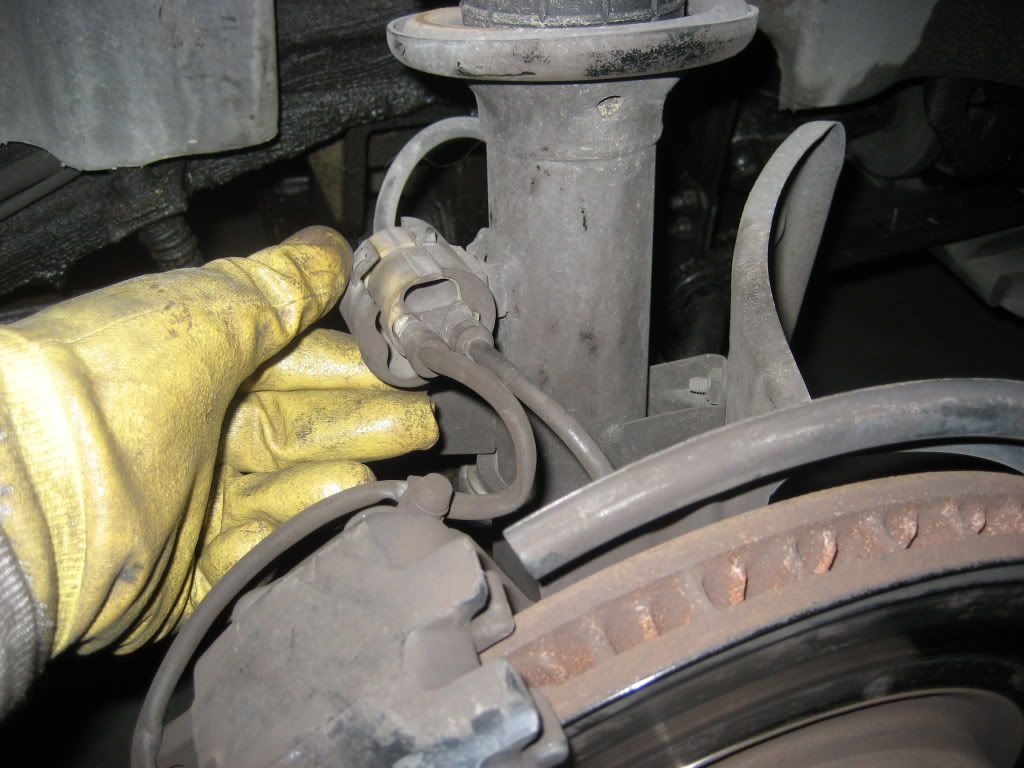
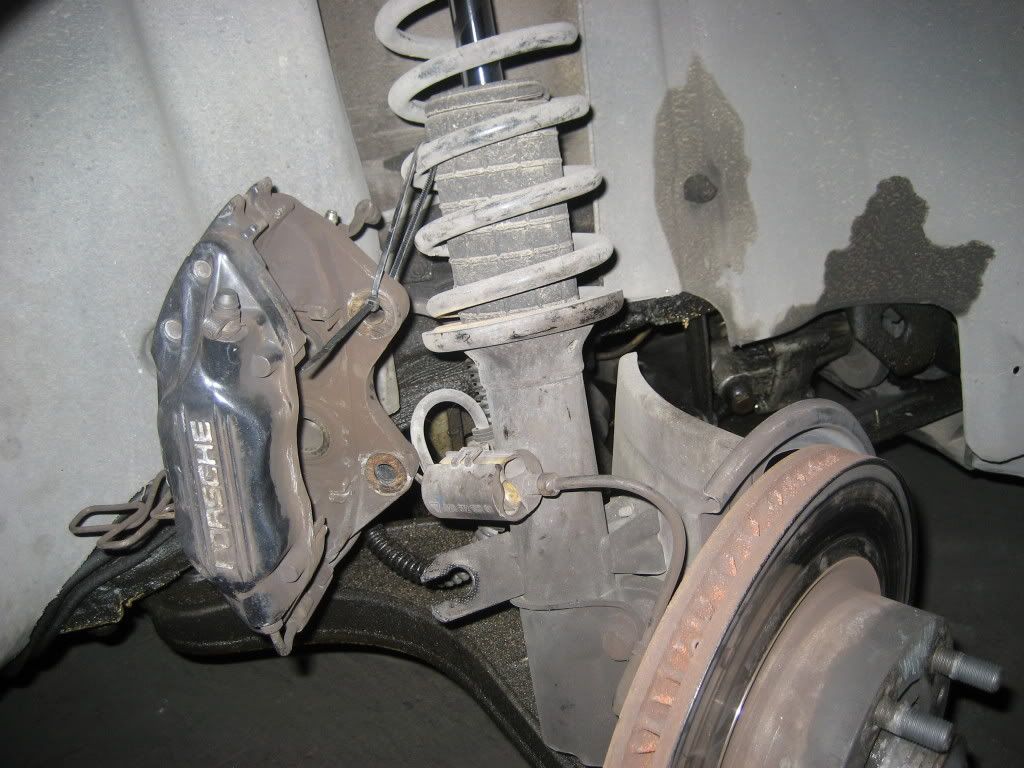
Once the brake caliper is off the hub it should be hung from the suspension or similar so as not to damage the brake line. I used a wire tie and hung it rom the front spring:
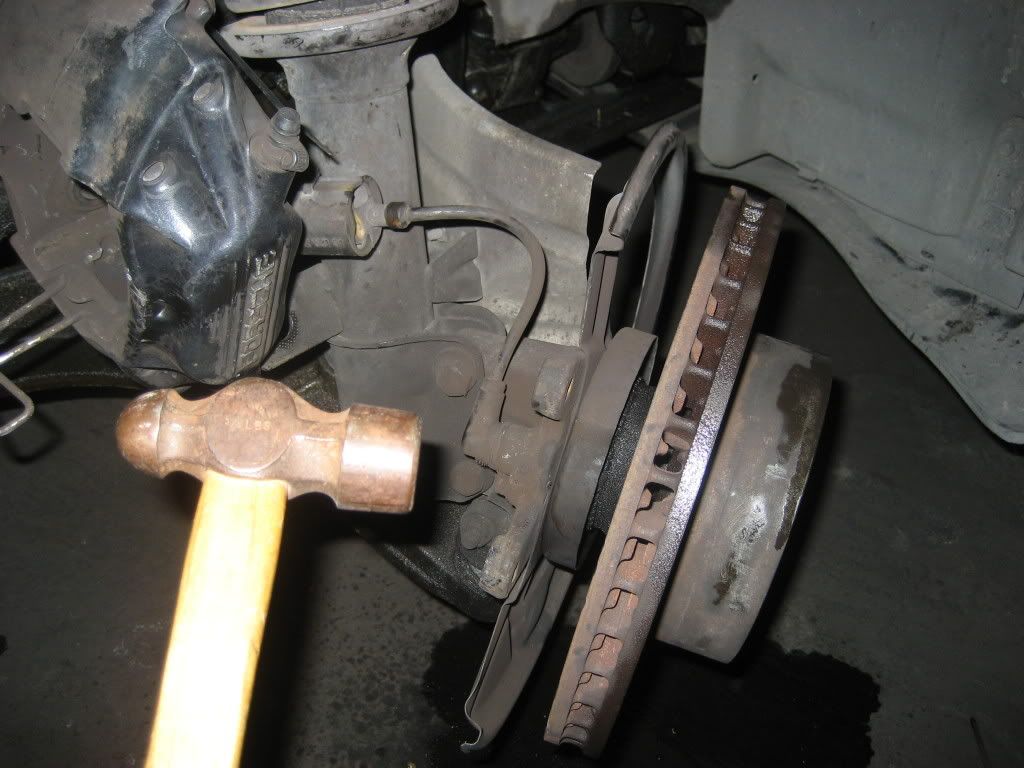
Now the rotor can come off. Sometimes it can be "frozen" onto the hub so it helps to have a hammer handy to give it a pounding. The FSM recommends threading two 8mm screws through the provided holes in the old rotor to press it off the hub, but since I wasn't reusing these, the hammer did the trick for me on one rotor that was particularly stubborn:
Next, coat the hub mating surface lightly with grease and fit the new rotor taking care to position it squarely on the hub so that the 2 countersunk phillips head screws can be threaded into the matching holes. Make sure that the rotor turns normally on the hub without hiting the brake dust shield.
Reposition the caliper, thread the bolts and use a torque wrench to tighten them to 85 Nm.

With the caliper back on, rotate the disc to make sure it doesn't rub against anything. If it does, the rotor isn't properly centered on the hub and you must repeat the process.
Now replace the adhesive brake dampeners in the recessed pistons using needlenose pliers. The old dampeners can be reused putting some glue on the backs, but you should really use new ones Fit the new brake pad sensors into the pads and replace everything in reverse order.
Shut the locking pin with a mallet and screwdriver:
And here's the end result:

Lastly, the brake fluid and clutch hydraulics should be bled, either with the tradtional method by pumping the brake pedal while someone opens the bleeding nozzles on each caliper, and adds fluid to the reservoir, or using a power bleeder as seen here:

In summary, although you need some basic tools for this, I think replacing pads and rotors is within the reach of the home mechanic. I know when I first did this several years ago I could've used a DIY with some pics, so here it is for the archives sake.
NOTE: On earlier 944 cars the hub must be removed in order to replace the front rotors. This isn't much more complicated but it does involve adjusting the front wheel bearings afterwards.
Once the brake caliper is off the hub it should be hung from the suspension or similar so as not to damage the brake line. I used a wire tie and hung it rom the front spring:
Now the rotor can come off. Sometimes it can be "frozen" onto the hub so it helps to have a hammer handy to give it a pounding. The FSM recommends threading two 8mm screws through the provided holes in the old rotor to press it off the hub, but since I wasn't reusing these, the hammer did the trick for me on one rotor that was particularly stubborn:
Next, coat the hub mating surface lightly with grease and fit the new rotor taking care to position it squarely on the hub so that the 2 countersunk phillips head screws can be threaded into the matching holes. Make sure that the rotor turns normally on the hub without hiting the brake dust shield.
Reposition the caliper, thread the bolts and use a torque wrench to tighten them to 85 Nm.
With the caliper back on, rotate the disc to make sure it doesn't rub against anything. If it does, the rotor isn't properly centered on the hub and you must repeat the process.
Now replace the adhesive brake dampeners in the recessed pistons using needlenose pliers. The old dampeners can be reused putting some glue on the backs, but you should really use new ones Fit the new brake pad sensors into the pads and replace everything in reverse order.
Shut the locking pin with a mallet and screwdriver:
And here's the end result:
Lastly, the brake fluid and clutch hydraulics should be bled, either with the tradtional method by pumping the brake pedal while someone opens the bleeding nozzles on each caliper, and adds fluid to the reservoir, or using a power bleeder as seen here:
In summary, although you need some basic tools for this, I think replacing pads and rotors is within the reach of the home mechanic. I know when I first did this several years ago I could've used a DIY with some pics, so here it is for the archives sake.
NOTE: On earlier 944 cars the hub must be removed in order to replace the front rotors. This isn't much more complicated but it does involve adjusting the front wheel bearings afterwards.
04-11-2009, 09:52 AM
#4
Drifting
Join Date: May 2008
Location: New Paltz, NY
Posts: 2,364
Likes: 0
Received 0 Likes
on
0 Posts
are you kidding. The reason there isnt a do it yourself is because a brake job is like changing your oil, you dont need a DIY.
wheel off, pull a clip, change pads, change rotors wheel on.
wheel off, pull a clip, change pads, change rotors wheel on.
04-11-2009, 09:56 AM
#6
Unbannable
Rennlist Member
Rennlist Member
")
Trending Topics
04-11-2009, 10:46 AM
#8
Geaux Tigers!
Rennlist Member
Rennlist Member

Thanks Louis. One question, why is it mandated that you change pads with rotors? Never heard that before.
On a last note, Louis you once posted a picture of your turbo with some pink flowers reflected in it. Can you post/email me that picture, please? It was my old computer's background forever and I really would like to have a copy again.
On a last note, Louis you once posted a picture of your turbo with some pink flowers reflected in it. Can you post/email me that picture, please? It was my old computer's background forever and I really would like to have a copy again.
04-11-2009, 11:02 AM
#9
Drifting
yeah VERY nice
what is the chance of you taking the first post and copy/pasting it into the "Technical" forum? without the replies that users are going to make etc.
good work, very detailed, love the pictures! any reason why you didn't go with drilled/slotted rotors? doesn't matter?
what is the chance of you taking the first post and copy/pasting it into the "Technical" forum? without the replies that users are going to make etc.
good work, very detailed, love the pictures! any reason why you didn't go with drilled/slotted rotors? doesn't matter?
04-11-2009, 11:14 AM
#10
Drifting
pads and rotors don't wear out at the same time (on both sides)
pads need to settle on the rotor
if you have old pads on new rotor - your pads are worn to your old rotor, so they will fade/wear out on the new rotor really fast
if you have old rotors and put new pads - rotors don't wear the same either, just like pads, rotors sometimes tend and do sometimes get slightly warped - so your new pad is going to wear out really quickly as well
so if you don't know when your pads/rotors have been done, and they look like they should be replaced - do them both at the same time
also saves you time/trouble of doing pretty much the same job twice
Last edited by roman944; 04-11-2009 at 12:19 PM.
 04-11-2009, 03:46 PM
#12
Geaux Tigers!
Rennlist Member
Rennlist Member
if you have old/in need of replacement rotors and pads - do it at the same time
pads and rotors don't wear out at the same time (on both sides)
pads need to settle on the rotor
if you have old pads on new rotor - your pads are worn to your old rotor, so they will fade/wear out on the new rotor really fast
if you have old rotors and put new pads - rotors don't wear the same either, just like pads, rotors sometimes tend and do sometimes get slightly warped - so your new pad is going to wear out really quickly as well
so if you don't know when your pads/rotors have been done, and they look like they should be replaced - do them both at the same time
also saves you time/trouble of doing pretty much the same job twice
Makes sense. Thanks.
04-11-2009, 09:50 PM
#14
Drifting
 04-12-2009, 01:20 PM
#15
Rennlist Member
Join Date: Jul 2001
Location: Brisbane, Australia (Formerly: Sunnyvale, CA)
Posts: 2,120
Likes: 0
Received 4 Likes
on
4 Posts
Very nice write-up + photos, Luis. This will definitely save me some time when I have to change my rear pads soon. Great quality addition to the archives.