**UPDATE (with pics) on page 2** Marcquito's Dash Swap
 08-02-2008, 01:19 AM
#76
No, not Mosquito!
Rennlist Member
Rennlist Member
Thread Starter
Time for another update!
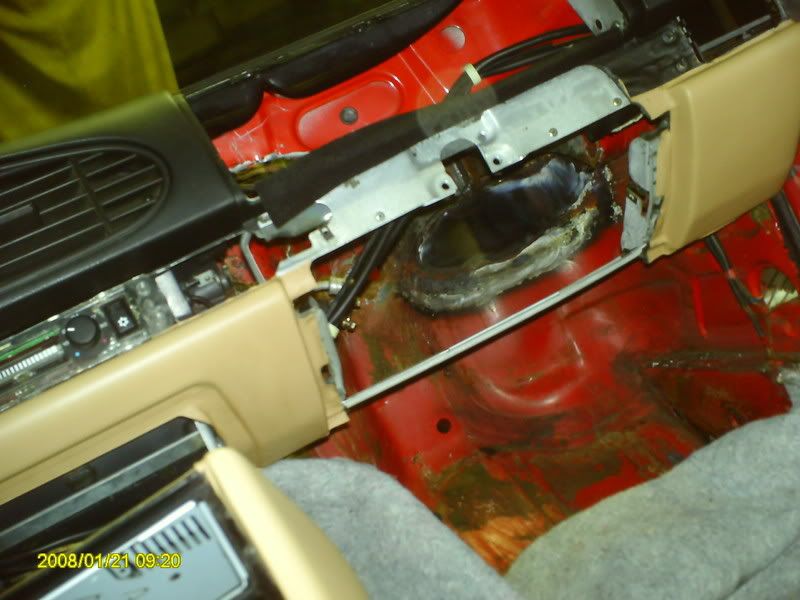
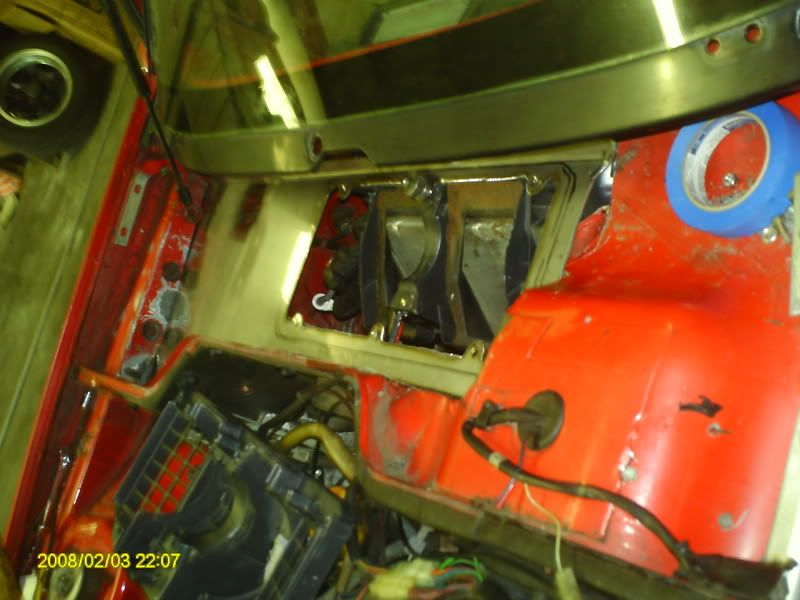
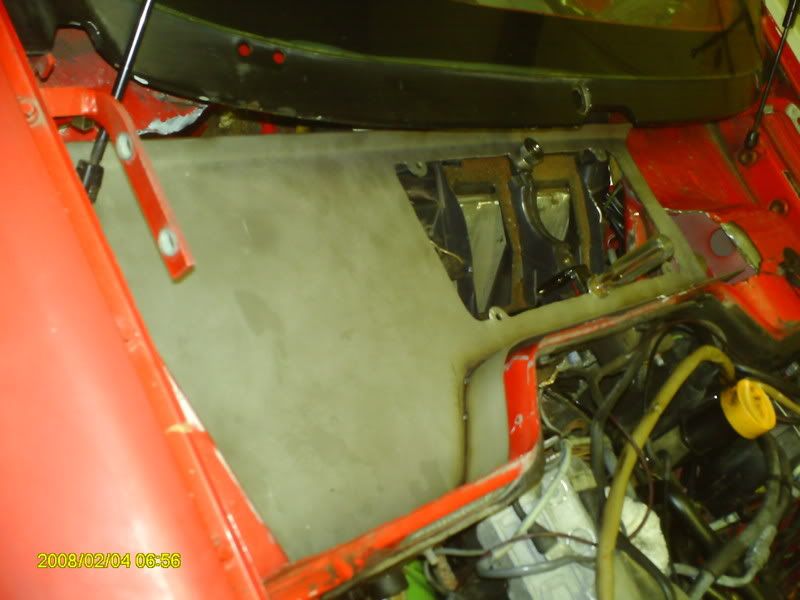
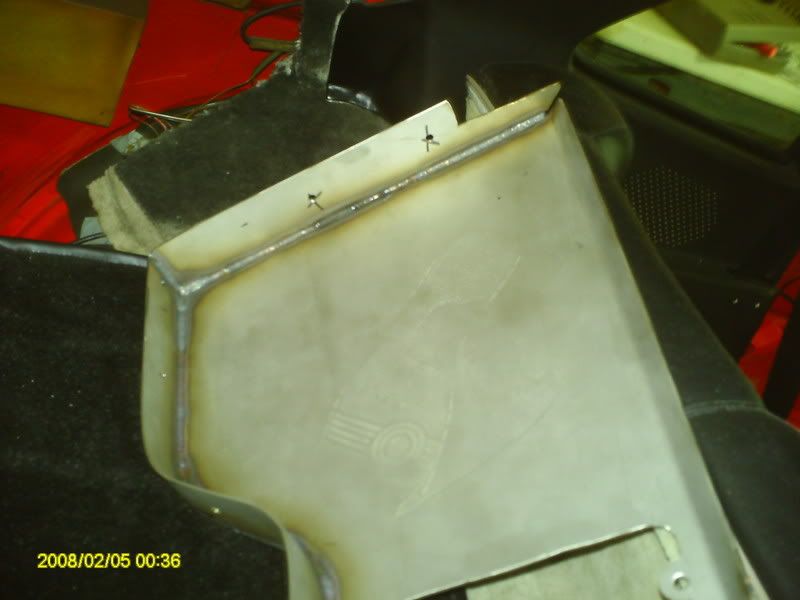
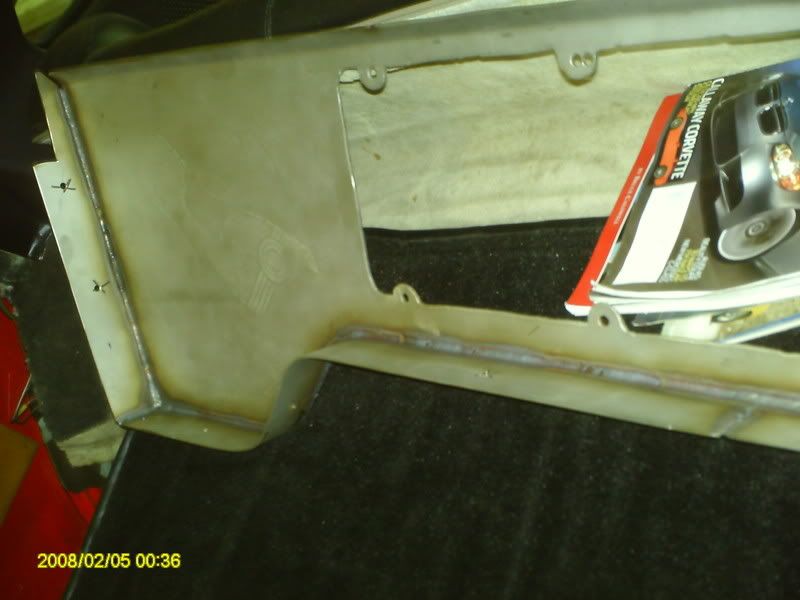
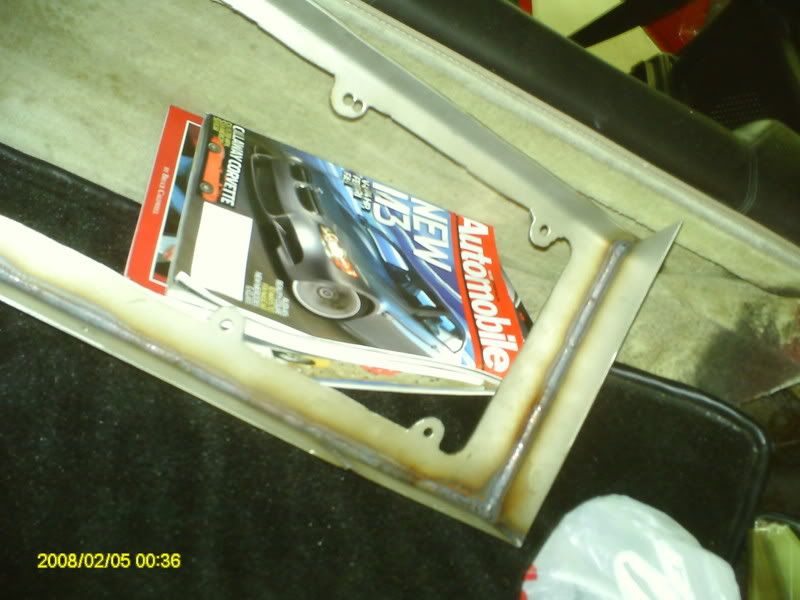
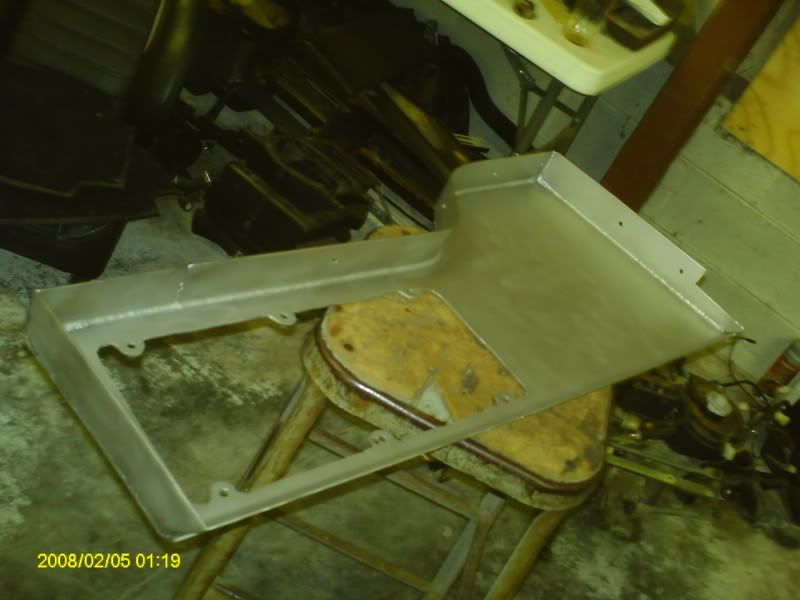
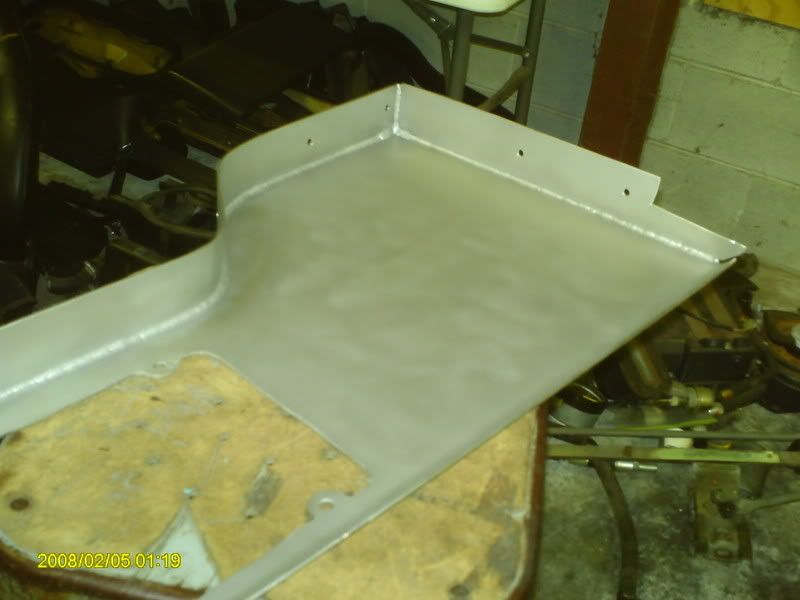
This update includes pics of the new piece my dad and I have fabricated which replaces all the sheet metal in the rotten hole area + a battery tray delete. The battery will be relocated to the rear driver's side of the car in a custom battery box.
It's shaping up nicely. The firewall work has been HELL, but it sure is rewarding! This thread of pics below shows the current state of the car:
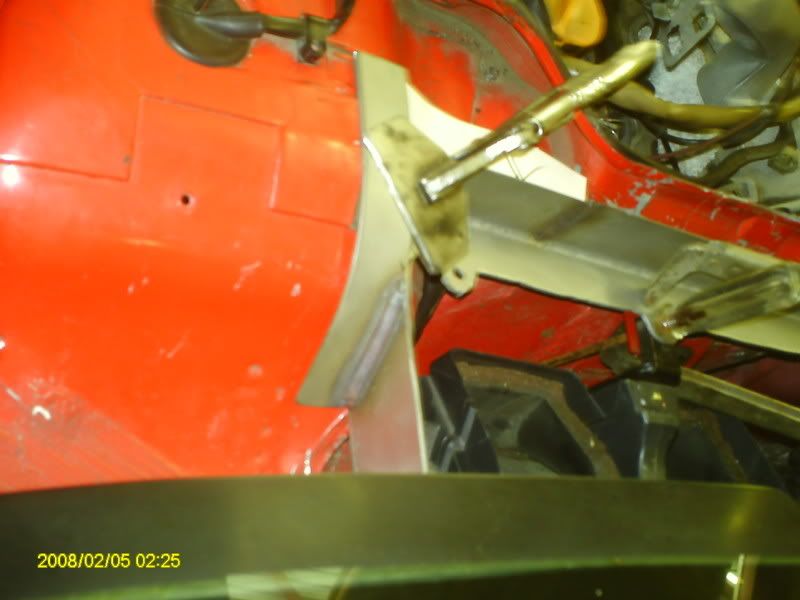
As you can see in the pic below, the rotten hole in the car has been welded shut from the other side. More beautifying of this side will be done which includes a fresh coat of guards red.
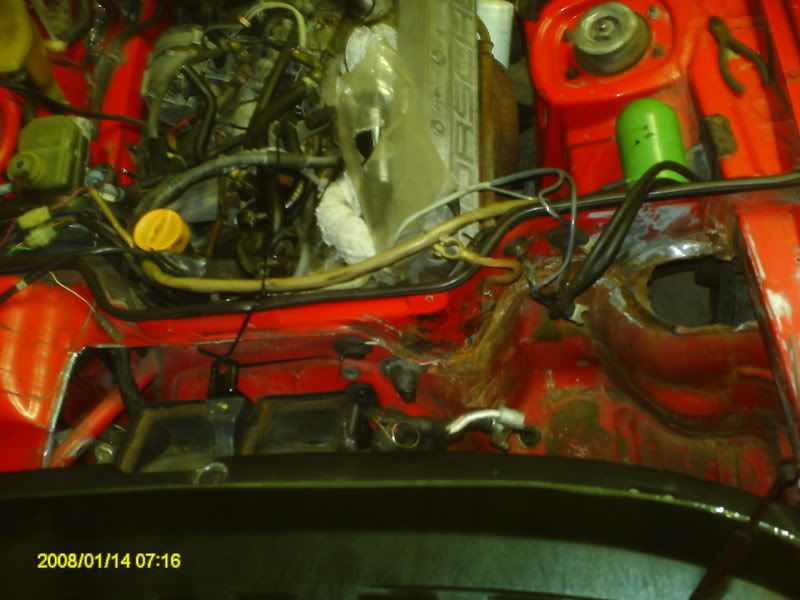
Here's the massive hole that needs to be filled.
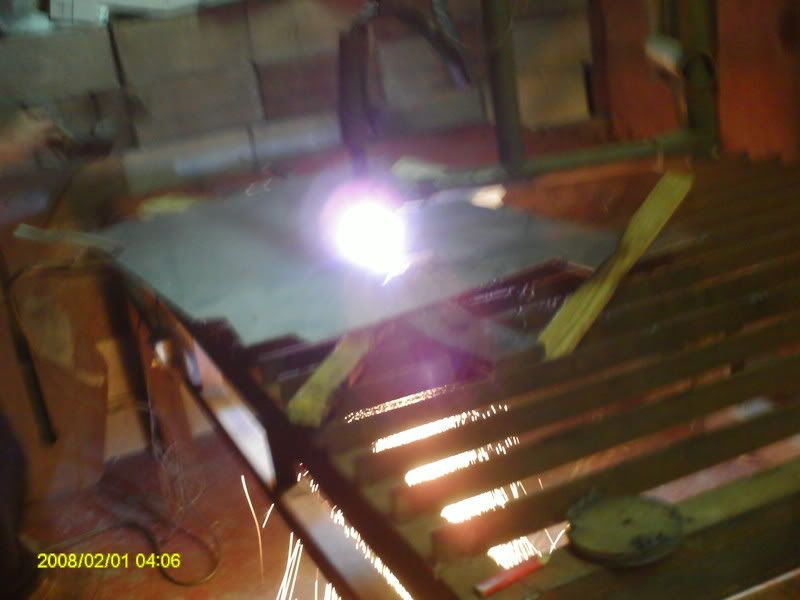
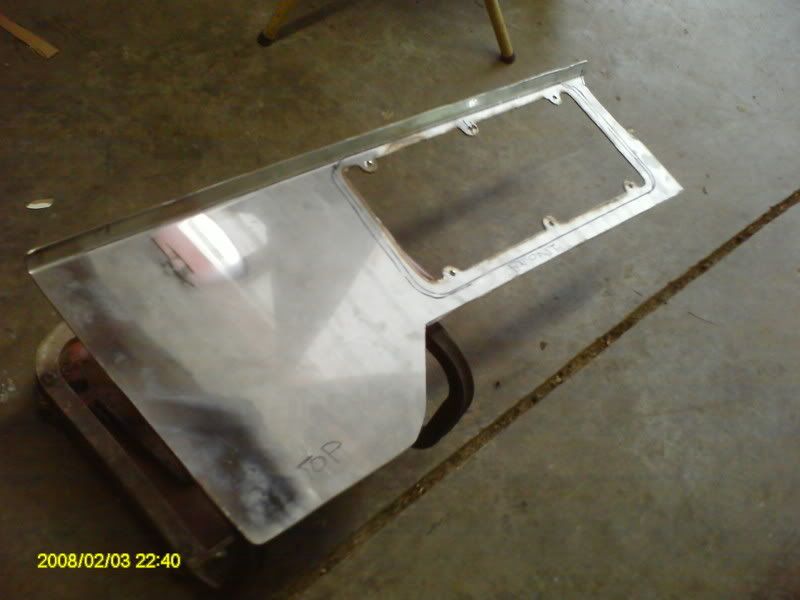
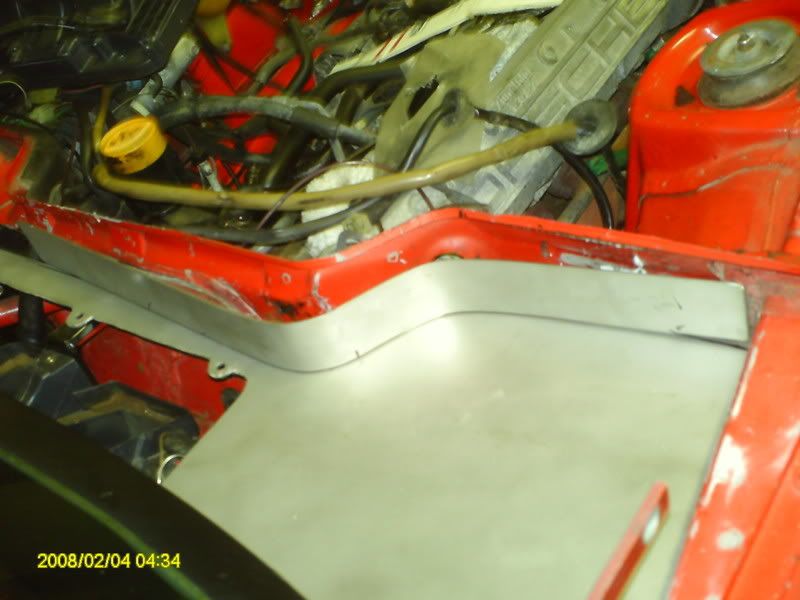
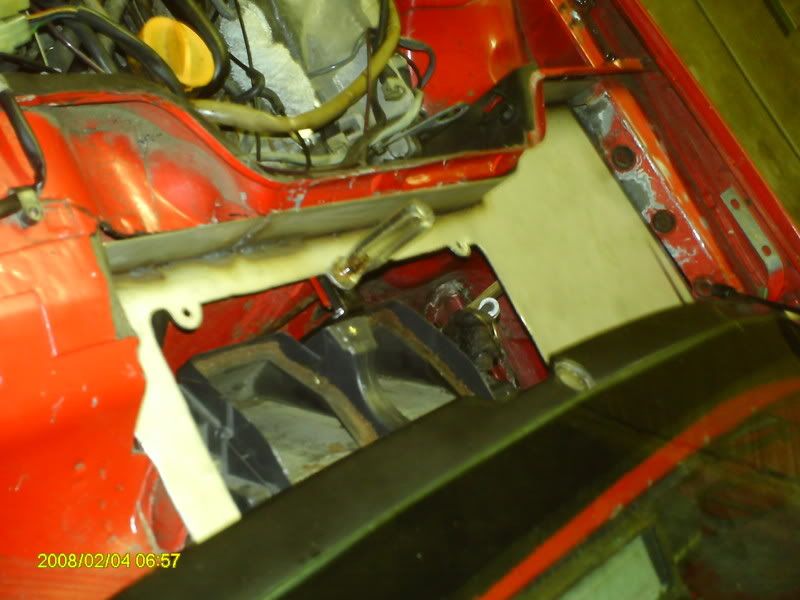
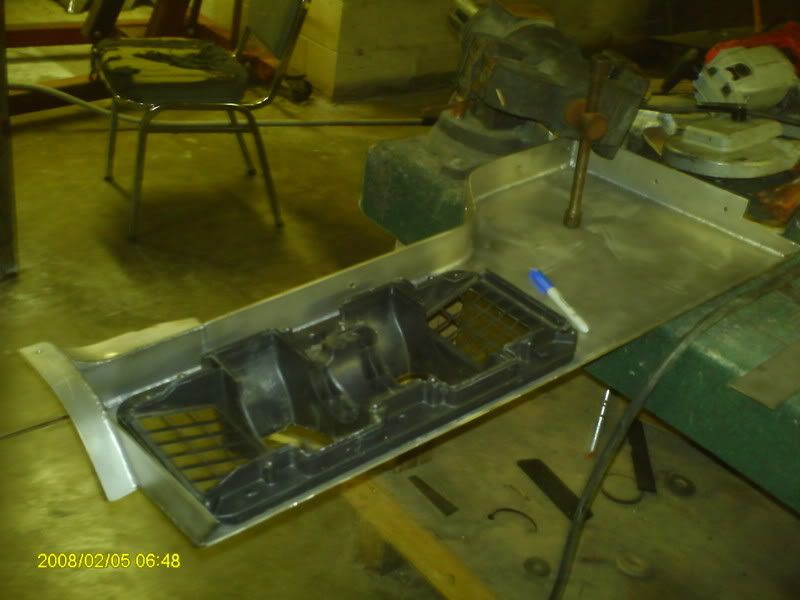
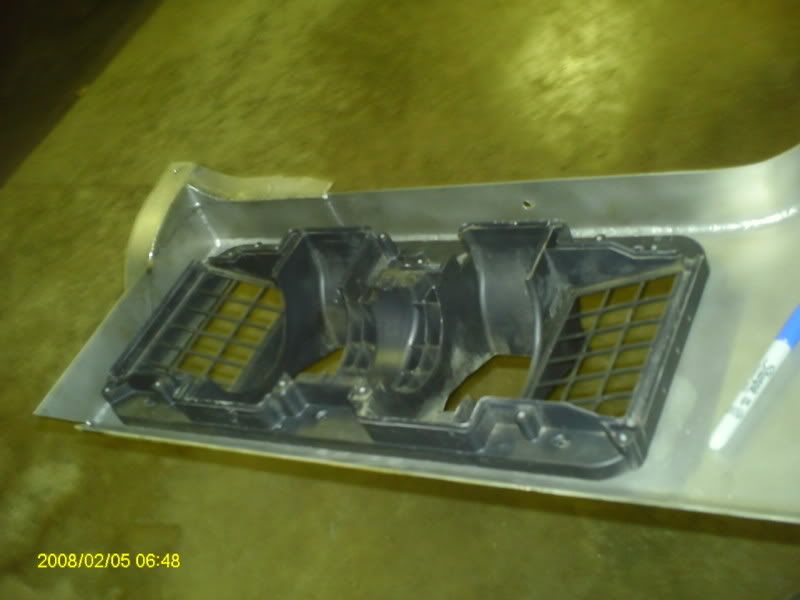
Plasma torch and a big sheet of stainless. This is what will replace the sheet metal under the bonnet that the a/c blower motor sits upon.
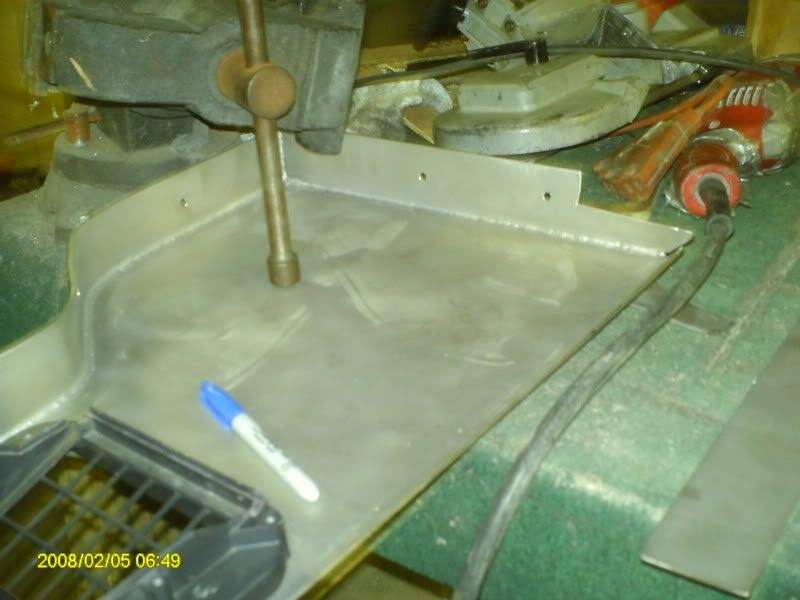
Torched and sanded to fit.
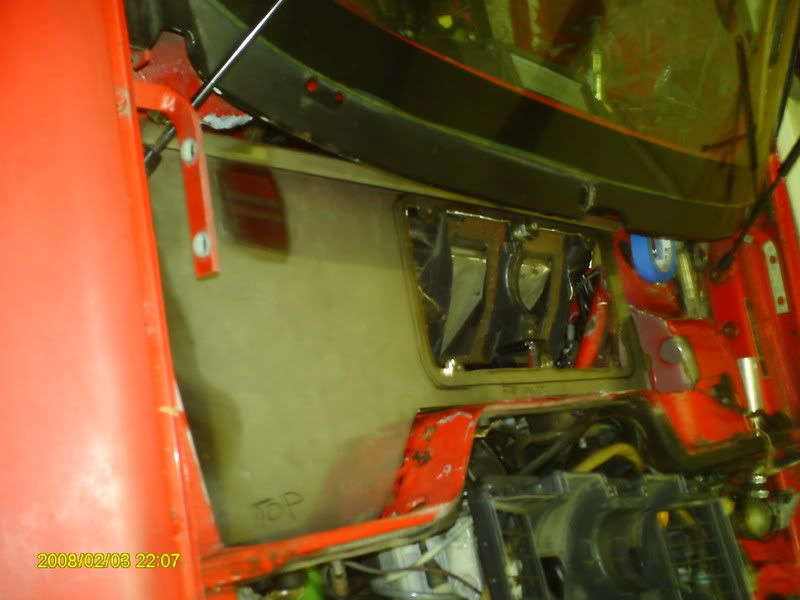
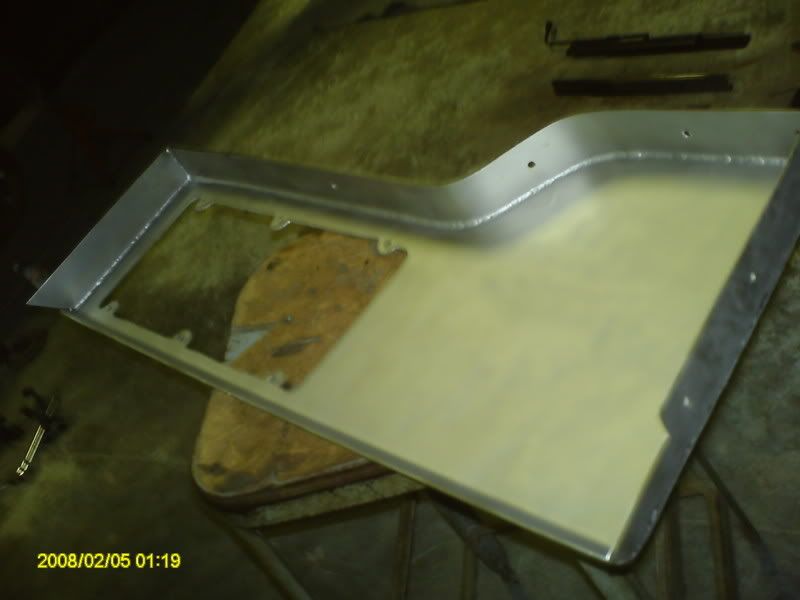
A few more shots of the stainless piece. Before and after sandblasting.
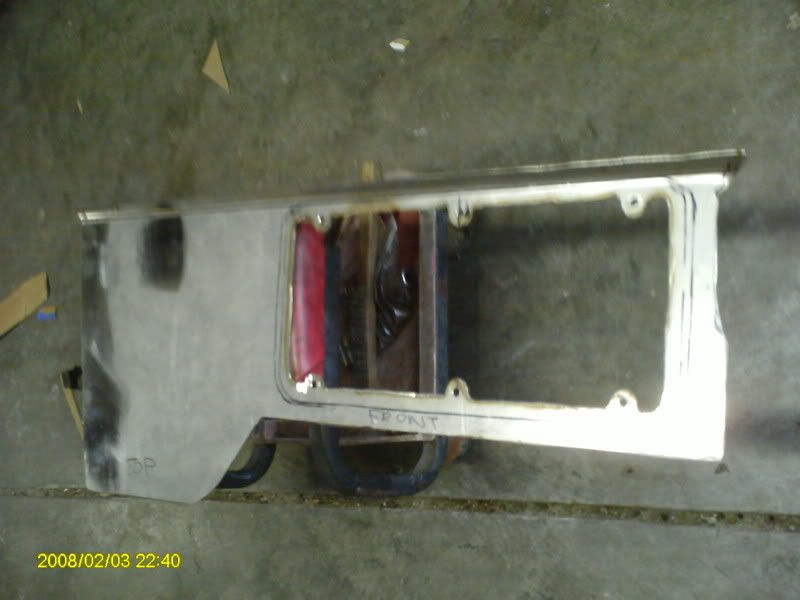
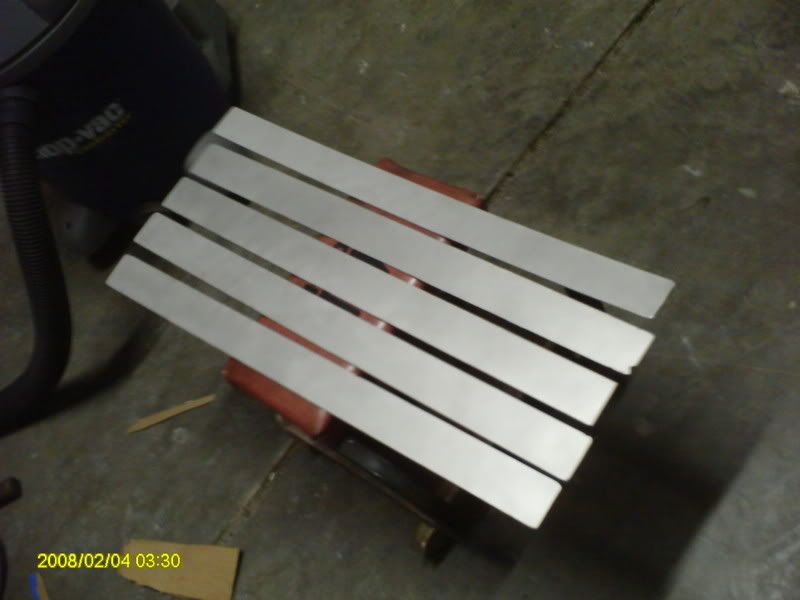
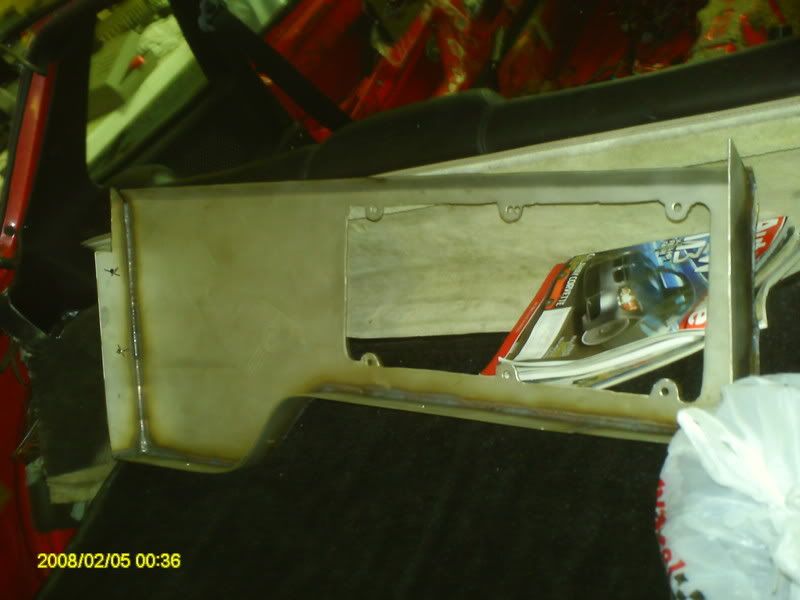
Five sheets of 27x2 stainless for the trim.
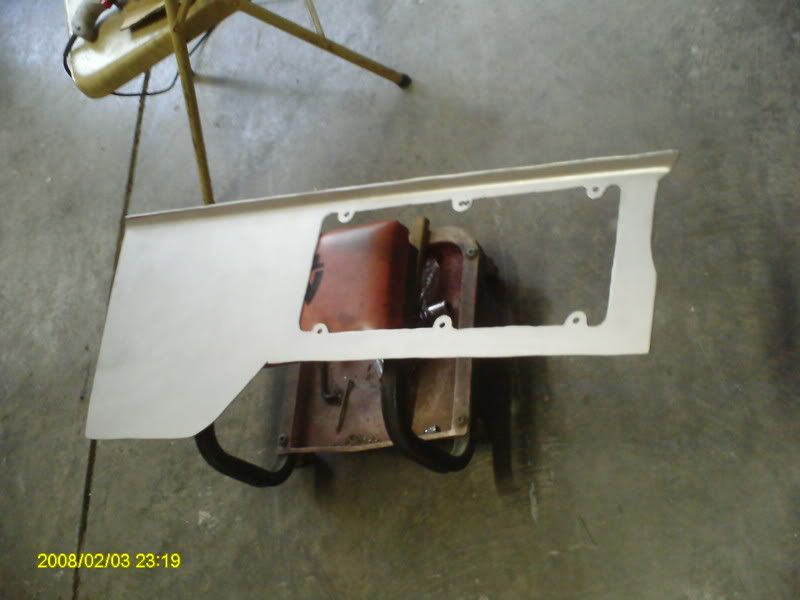
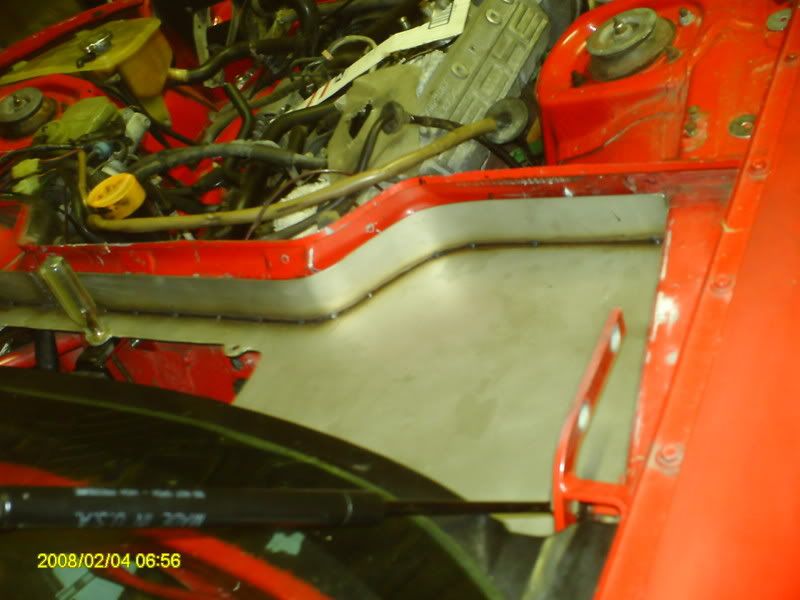
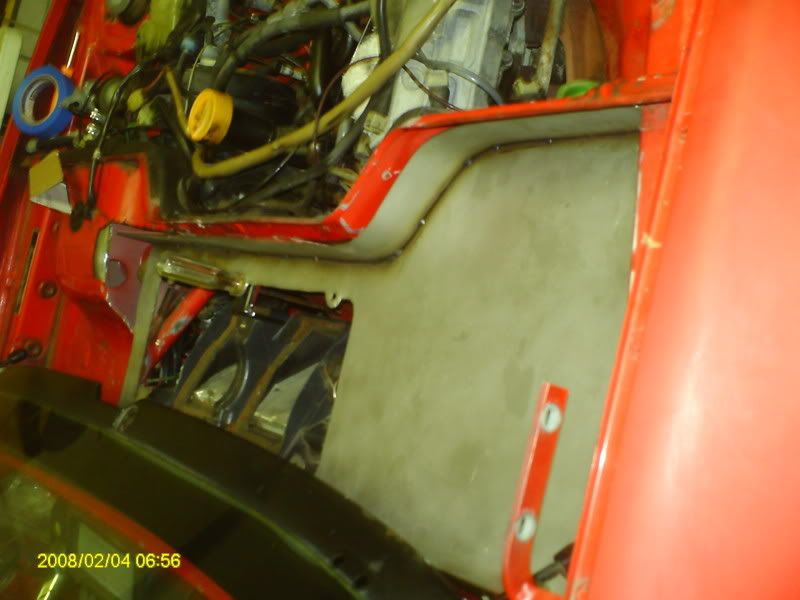
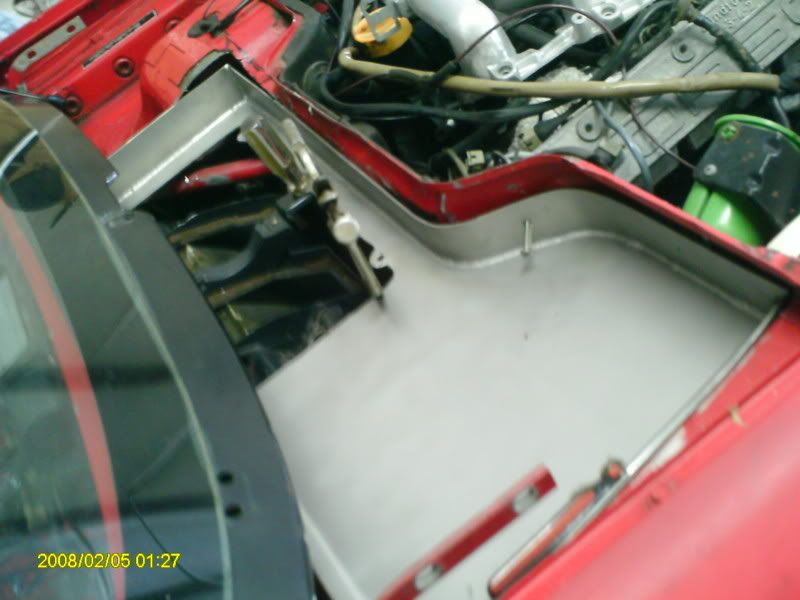
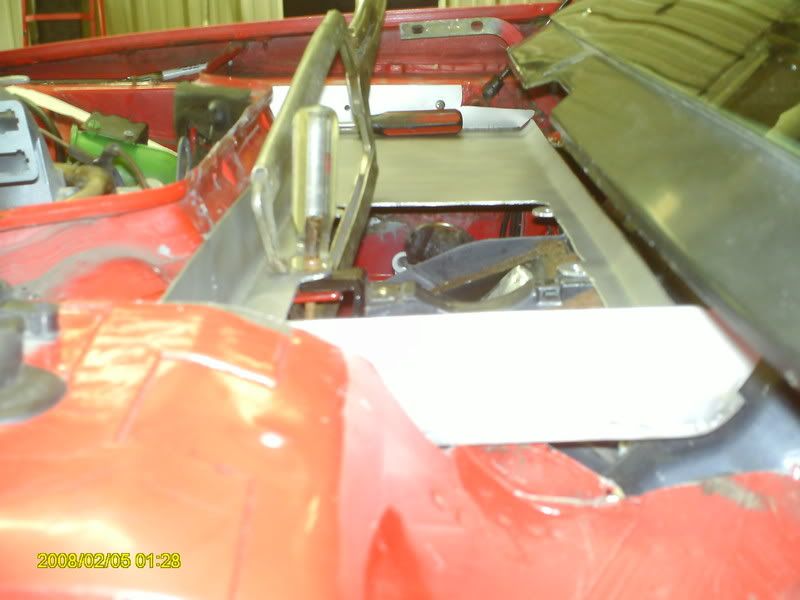
Some shots of the first piece tack welded on and placed in the car for fitment!!

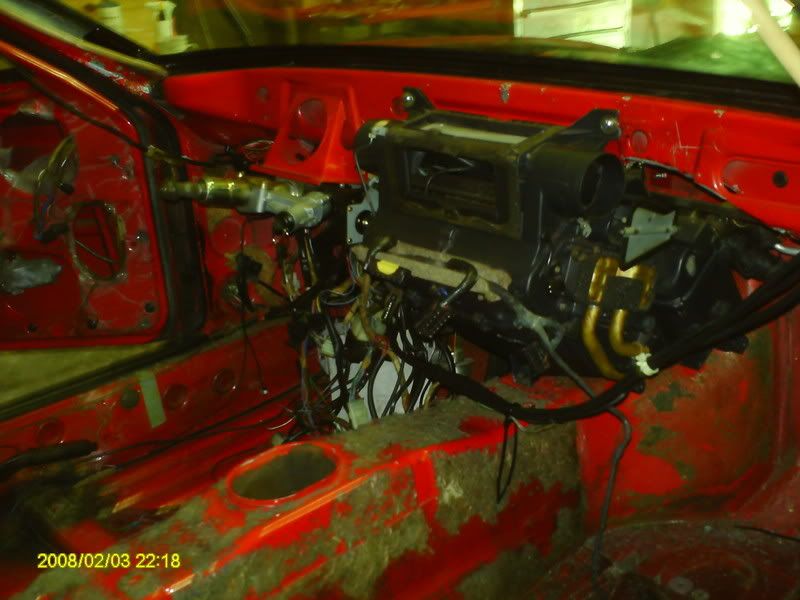
Oh yeah, and here's my steering column. It came from a '90 model with the key cylinder housing plus key cylinder with NO key included. I had to buy a new key cylinder with a new set of keys from Porsche. Here's a pic of it installed. Cool, huh?
The end for now. More tomorrow!
This update includes pics of the new piece my dad and I have fabricated which replaces all the sheet metal in the rotten hole area + a battery tray delete. The battery will be relocated to the rear driver's side of the car in a custom battery box.
It's shaping up nicely. The firewall work has been HELL, but it sure is rewarding! This thread of pics below shows the current state of the car:
As you can see in the pic below, the rotten hole in the car has been welded shut from the other side. More beautifying of this side will be done which includes a fresh coat of guards red.
Here's the massive hole that needs to be filled.
Plasma torch and a big sheet of stainless. This is what will replace the sheet metal under the bonnet that the a/c blower motor sits upon.
Torched and sanded to fit.
A few more shots of the stainless piece. Before and after sandblasting.
Five sheets of 27x2 stainless for the trim.
Some shots of the first piece tack welded on and placed in the car for fitment!!
Oh yeah, and here's my steering column. It came from a '90 model with the key cylinder housing plus key cylinder with NO key included. I had to buy a new key cylinder with a new set of keys from Porsche. Here's a pic of it installed. Cool, huh?
The end for now. More tomorrow!
Last edited by Marcquito; 10-12-2009 at 09:37 AM.
 08-02-2008, 11:30 AM
#79
No, not Mosquito!
Rennlist Member
Rennlist Member
Thread Starter
08-02-2008, 12:30 PM
#80
Racer
Join Date: Mar 2007
Location: Europe. ROUMANIA
Posts: 386
Likes: 0
Received 0 Likes
on
0 Posts
man u one bad *** guy ...LOOKS like factory to me. marcquito.. i will pay for sizes of the metal sheet around the hvac.. looks really good.mine is undergoing a stripdown.don`t have the time..but going strong..
looks really good.mine is undergoing a stripdown.don`t have the time..but going strong..
08-02-2008, 12:41 PM
#81
No, not Mosquito!
Rennlist Member
Rennlist Member
Thread Starter
Do you just want a template? If so, I can just mail you a wooden replica or I can send you a drawing on the dimensions. If you wanted sheet metal actually cut to fit I could do that for you as well, but you'd have to tell me what kind of metal you'd want.
 08-02-2008, 06:47 PM
#83
Racer
Join Date: Mar 2007
Location: Europe. ROUMANIA
Posts: 386
Likes: 0
Received 0 Likes
on
0 Posts
maybe a sketch of the metal cuts that u did from the battery to hvac unit a drawing it will do just fine.man looks great .wish i `ll be handy as u
manny thanks .great guy

manny thanks .great guy
08-03-2008, 12:29 AM
#85
No, not Mosquito!
Rennlist Member
Rennlist Member
Thread Starter
Anyway, again here are some pics of the work today. Today was a day of nothing but making pieces and welding. I started around lunch and didn't quit until around 10. I guess I'm a slow-***. When I look at these pictures it doesn't look like I did much in 10 hours. Haha.
The following pictures were taken in sequence, so I suppose they can tell the story rather than I. Mostly these were taken to show off the welds and keep records in case a future buyer is interested in this work.
Hopefully this thing will be finished tomorrow or the day after.
Behold the magic:
 08-03-2008, 12:35 AM
#86
No, not Mosquito!
Rennlist Member
Rennlist Member
Thread Starter
Before I send you any drawings, I believe I remember you saying you had a donor car? If so, you have a HUGE gain over me. I fabricated most everything because I didn't have a late-junk car to take parts from. If you can, I suggest you strip out the late car and cut out everything behind the dash and under the hood as ONE PIECE. If you don't understand what I mean I'll try to explain myself further. But anyway, if you can cut most of that out it will help you much more and give you a factory piece rather than spending days making a custom part. If you do decide to do this, here's some words of advice: Use a sawzall with an ultra new sharp blade and a torch. Use the torch on LOW to burn off all of the stupid rubber-like weather-seam glue water tight crap and scrape it with some sort of scraper until you see bare metal. Sandblast or wire brush the whole thing until it shines then get to work. Don't try to mess with it until it's naked. Besides, it's fun to torch ****, I think.
Good luck!
08-03-2008, 02:24 AM
#88
Is the spot where the battery is going to sit too shallow when compared to the depth of the original sheetmetal?
My recollection of that area is that there was a well that the fusebox sat in on the driver's side (maybe not the case on the early cars) and also a well that the battery sat in on the passenger side.
Unless you plan to relocate the battery you may not be able to fit one in there at all.
My recollection of that area is that there was a well that the fusebox sat in on the driver's side (maybe not the case on the early cars) and also a well that the battery sat in on the passenger side.
Unless you plan to relocate the battery you may not be able to fit one in there at all.

