When you click on links to various merchants on this site and make a purchase, this can result in this site earning a commission. Affiliate programs and affiliations include, but are not limited to, the eBay Partner Network.
With the seats out, I called in a friend to do some touch up on the wear marks on the bolsters.
This guy is a craftsman / artist.
In addition, if you remember the driver's side seat belt was not even attached, and the other side was using the wrong style bolt.
So I pulled out all of the seat belts, sourced the proper bolts and washers from CRE, and then chased the treads with a tap.
I did the same on the mounting capture nuts for the seats
Now everything fits nicely
The next item on the list is rear hatch delamination, and by that I mean the glass separating from the aluminum hatch frame.
In my case, the entire forward top of the glass had come loose from the frame and was a suspected source of leaks.
In addition, the aluminum frame is attached to the roof with 4 bolts and two backing plates.
In my case they positioned the backing plates between the hatch hinges and the roof, instead of inside the car
This caused the hatch to stand out from the car so the top of the frame was not even touching the weatherstrip in places
Much has been written about how to attempt to fix this, but many have experienced the glass separating from the frame within a year of simply trying to recalk the glass to the frame.
The other recommendation is to try to find an original piece of glass that has not previously separated from the frame.
Scott at CRE had one and offered to install it as part of the deal. Sold!
It appears that the struts that lift the glass contribute to this happening by putting pressure on the glass to move away from the frame.
Some have recommended switching to a weaker Jeep strut, so I ordered a pair of those.
Finally, upon looking at the existing rear hatch weather seal, it sure appeared to be much thicker than the original, so I ordered a replacement for that
Here is what a proper one should look like
While I am waiting for those parts, my attention now moves to the power steering pump.
I really enjoyed reading through your thread and I really respect the effort you're putting into restoring the car. Your car is beautiful and it deserves an owner such yourself, that's taking the time to fix the car right.
I would have been sold on the car just looking at the pictures. I would have thought that no matter what, I can fix that car. I've brought a few of these cars back from the dead and just seeing that car would have been a no brainer for me, given the color combo and some of the options it has. I'll look forward to seeing more updates and hearing what comes next!
The wood pieces in the rear are probably factory and are attached the hatch carpeting. He may have attached them the way he did because they tend to come apart from the carpet over time. The car I think is in a lot better shape than you are giving it credit for. The fasteners for the fuel setup look original and are not worn as if someone had been in there already and overall the car looks far from being the typical abused 944 even if a few things needed attention and fixing.
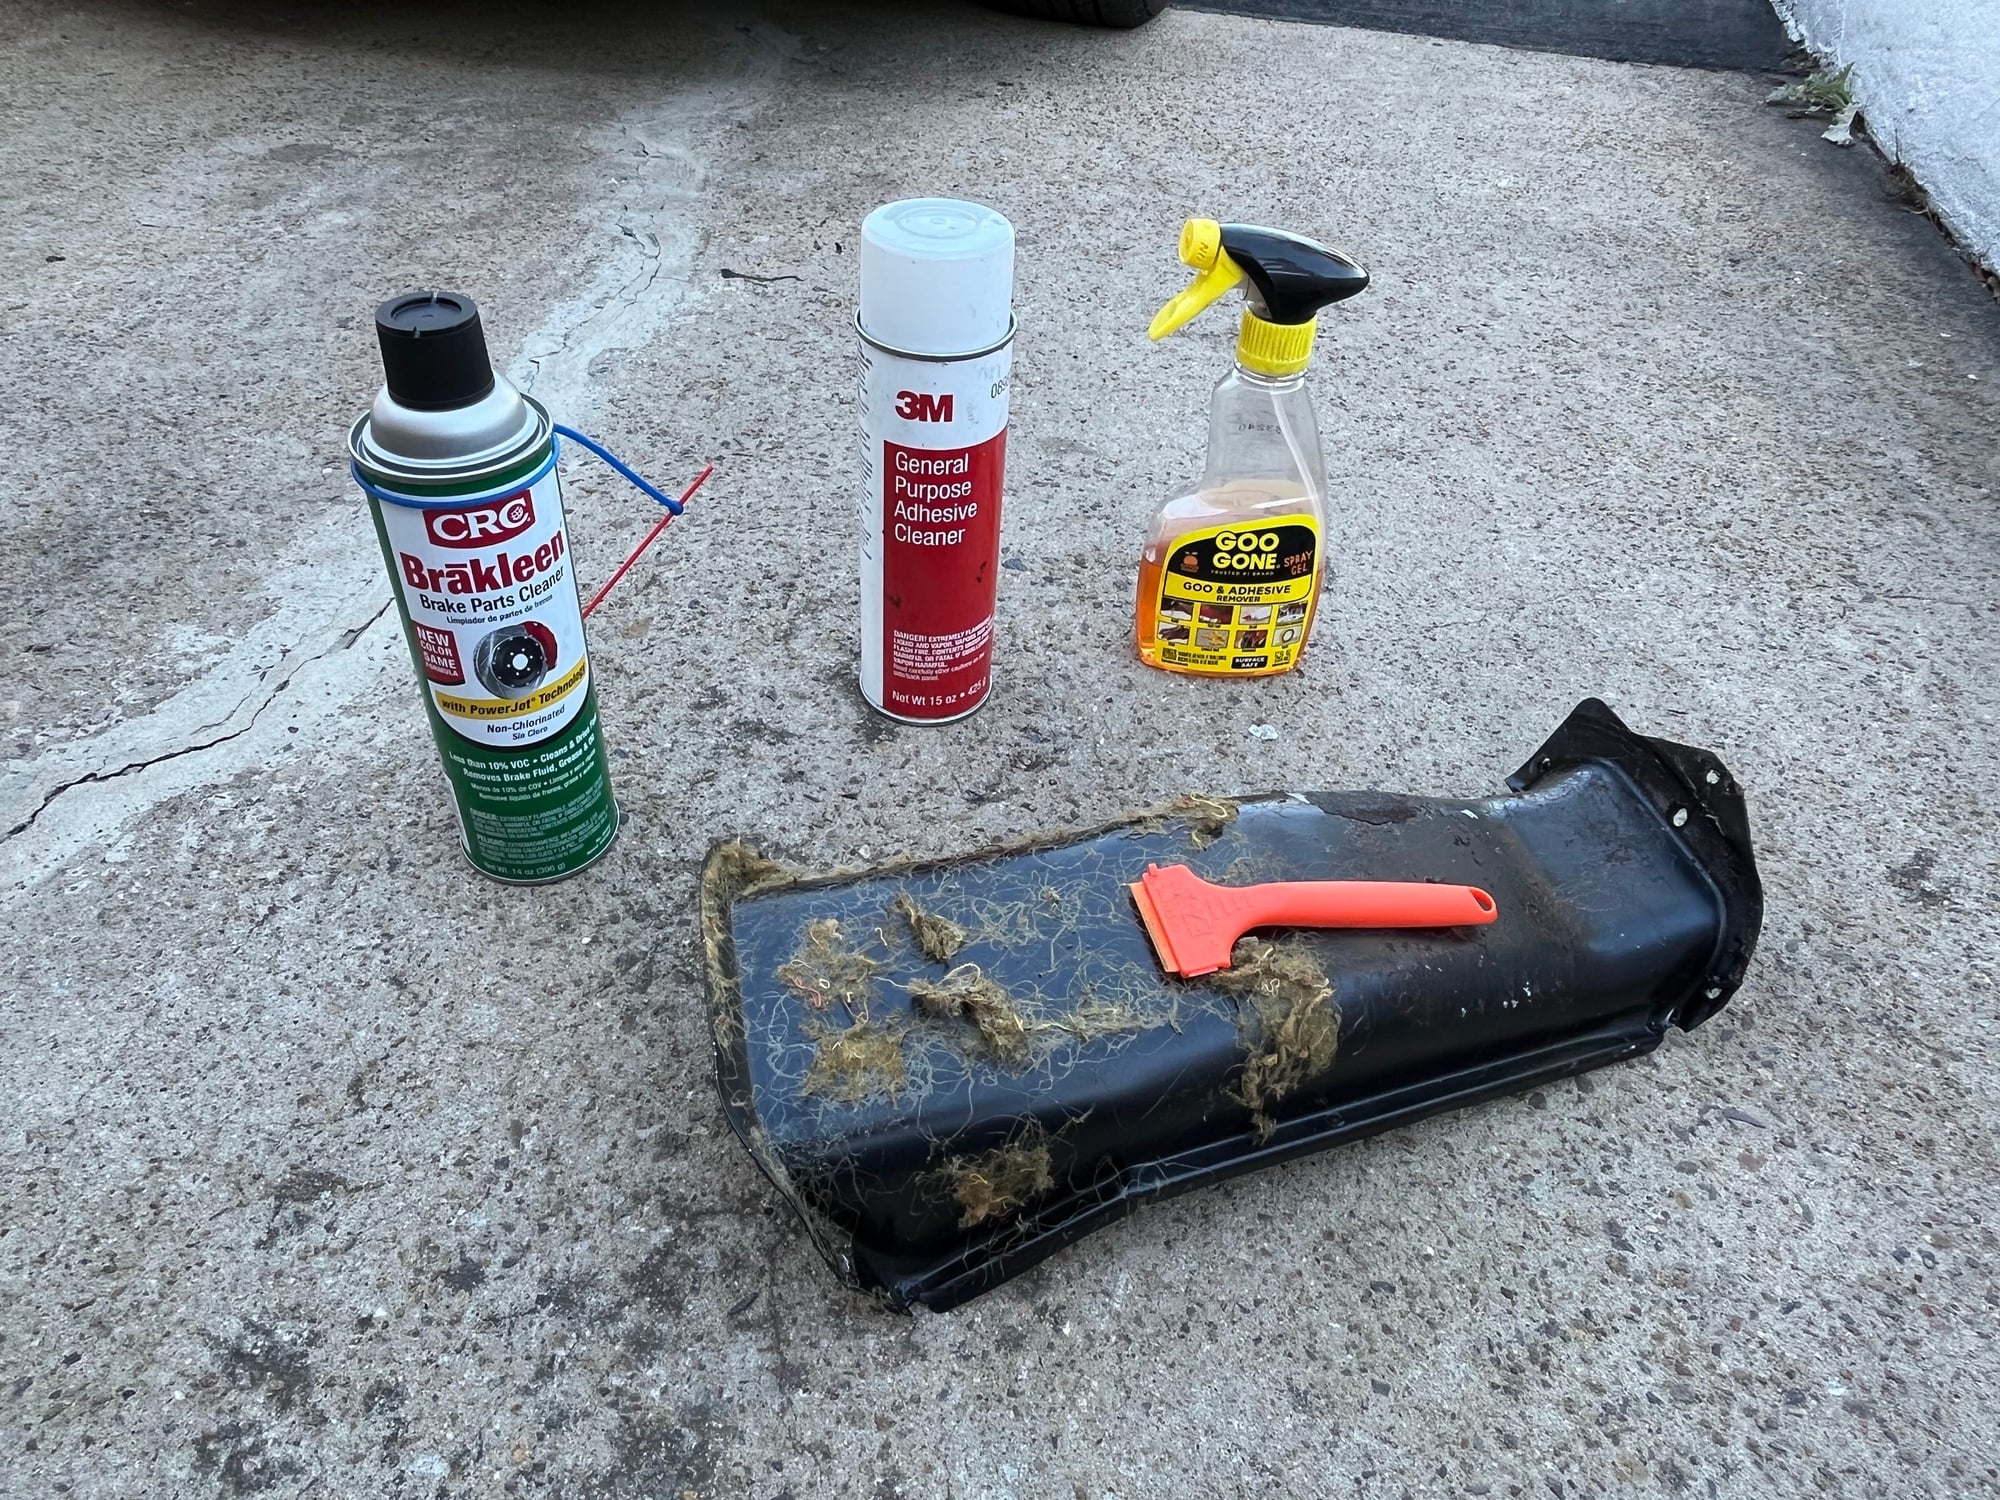
I took a detour today when I was putting the cover back on the gas tank fill and vent lines
I am not a fan of all the glue that people have used in the past to put down insulation and carpet so I did a test on the cover to see which product
would remove the hairy insulation and the glue
They each had some effect but the brake cleaner, which is actually acetone, was the clear winner
Interestingly, it worked on the newer glue but didn't on the older, and what I am guessing was the factory, glue
Speaking of factory, the calk they used to seal the cover on is amazing stuff
I had some 3M strip calk on hand
After filling in the gaps where the factory stuff got peeled off when removing the cover, I positioned it and then used a wooden block to tap it down
I was warned the power steering pump could be an issue, and sure enough, when I got the car it squawked like a wounded chicken.
Tim removed the power steering pump belt
I actually enjoyed driving the car without the power steering for a bit
However he also noticed the supply line to the pump was kinked and replaced it with a new one
There was the possibility that the pump was getting starved of fluid, in this case Automatic Transmission Fluid
I reinstalled the belt
filled the empty reservoir
Then jacked up the car and turned the steering wheel back and forth, lock to lock, a number of times
I then lowered the car and did the same thing
Then came the moment of truth - a test drive around the neighborhood
Lo and behold, it was quiet as a mouse.
More miles needed to confirm but so far so good
As I was driving around testing the power steering pump, I pushed in the clutch pedal and to my horror it stayed all the way to the floor
Fortunately I was going slow and close to home.
After I made it up my long driveway and came to a stop, I was able to grab the pedal and pull it back out.
Interestingly it stayed out and the clutch seemed to work fine as I continued driving around the block.
But then it did it again. This time it came back off the floor about halfway up.
Hmm.
I had a few other issues that needed an expert's opinion so back goes the car to Tim at CRE
Tim's initial diagnosis was it sounded like air in the clutch lines. The fluid in the reservoir that feeds the clutch hydraulic system
was a bit low, but I hadn't noticed any leakage on the ground under the car, nor did Tim see any fluid inside the car from the clutch master cylinder.
Up on the lift it goes and sure enough, the slave cylinder by the clutch was leaking
Tim is a fun guy to be around
Here is a new one ready to be installed
With that taken care of Tim's attention then went to my sunroof
The sunroof was a dilemma because there is an up and down switch on the console which raises and lowers the aft part of the sunroof.
Everything on my car worked fine to raise the sunroof, but when the sunroof was closing the electric motor would not stop in time.
There are limit switches by this electric motor which control when the motor stops.
On my early year car, all of this is located inside the driver's side rear quarter panel
Here Dave shows off this contraption
If you look at the end of the part in Dave's hand you can see a small red cube
This is the limit switch
What you can't see in the picture is a cable that is encased by the silver tube
You may be able to see the cable here
On this cable is a plastic piece that trips the limit switch
Yes, mine was broken
Ever the educator, for which I am super thankful, Tim explains how it all works and how different years had different designs
At this point, I had to leave the shop.
More to come
This is great info for those of us new to 944s as I now know how the sunroof limit switches work. Keep the posts and education coming.
Mine has a new clutch in it as of today.
Thanks for the encouragement!
I know someone out there is probably having similar issues.
The thing about the limit switches is there are different designs for different years
Did you end up replacing the clutch master as well as the slave? If one is bad, the other will likely fail soon, better to replace at the same time and only have to bleed the system once.


 10-30-2023, 12:16 AM