When you click on links to various merchants on this site and make a purchase, this can result in this site earning a commission. Affiliate programs and affiliations include, but are not limited to, the eBay Partner Network.
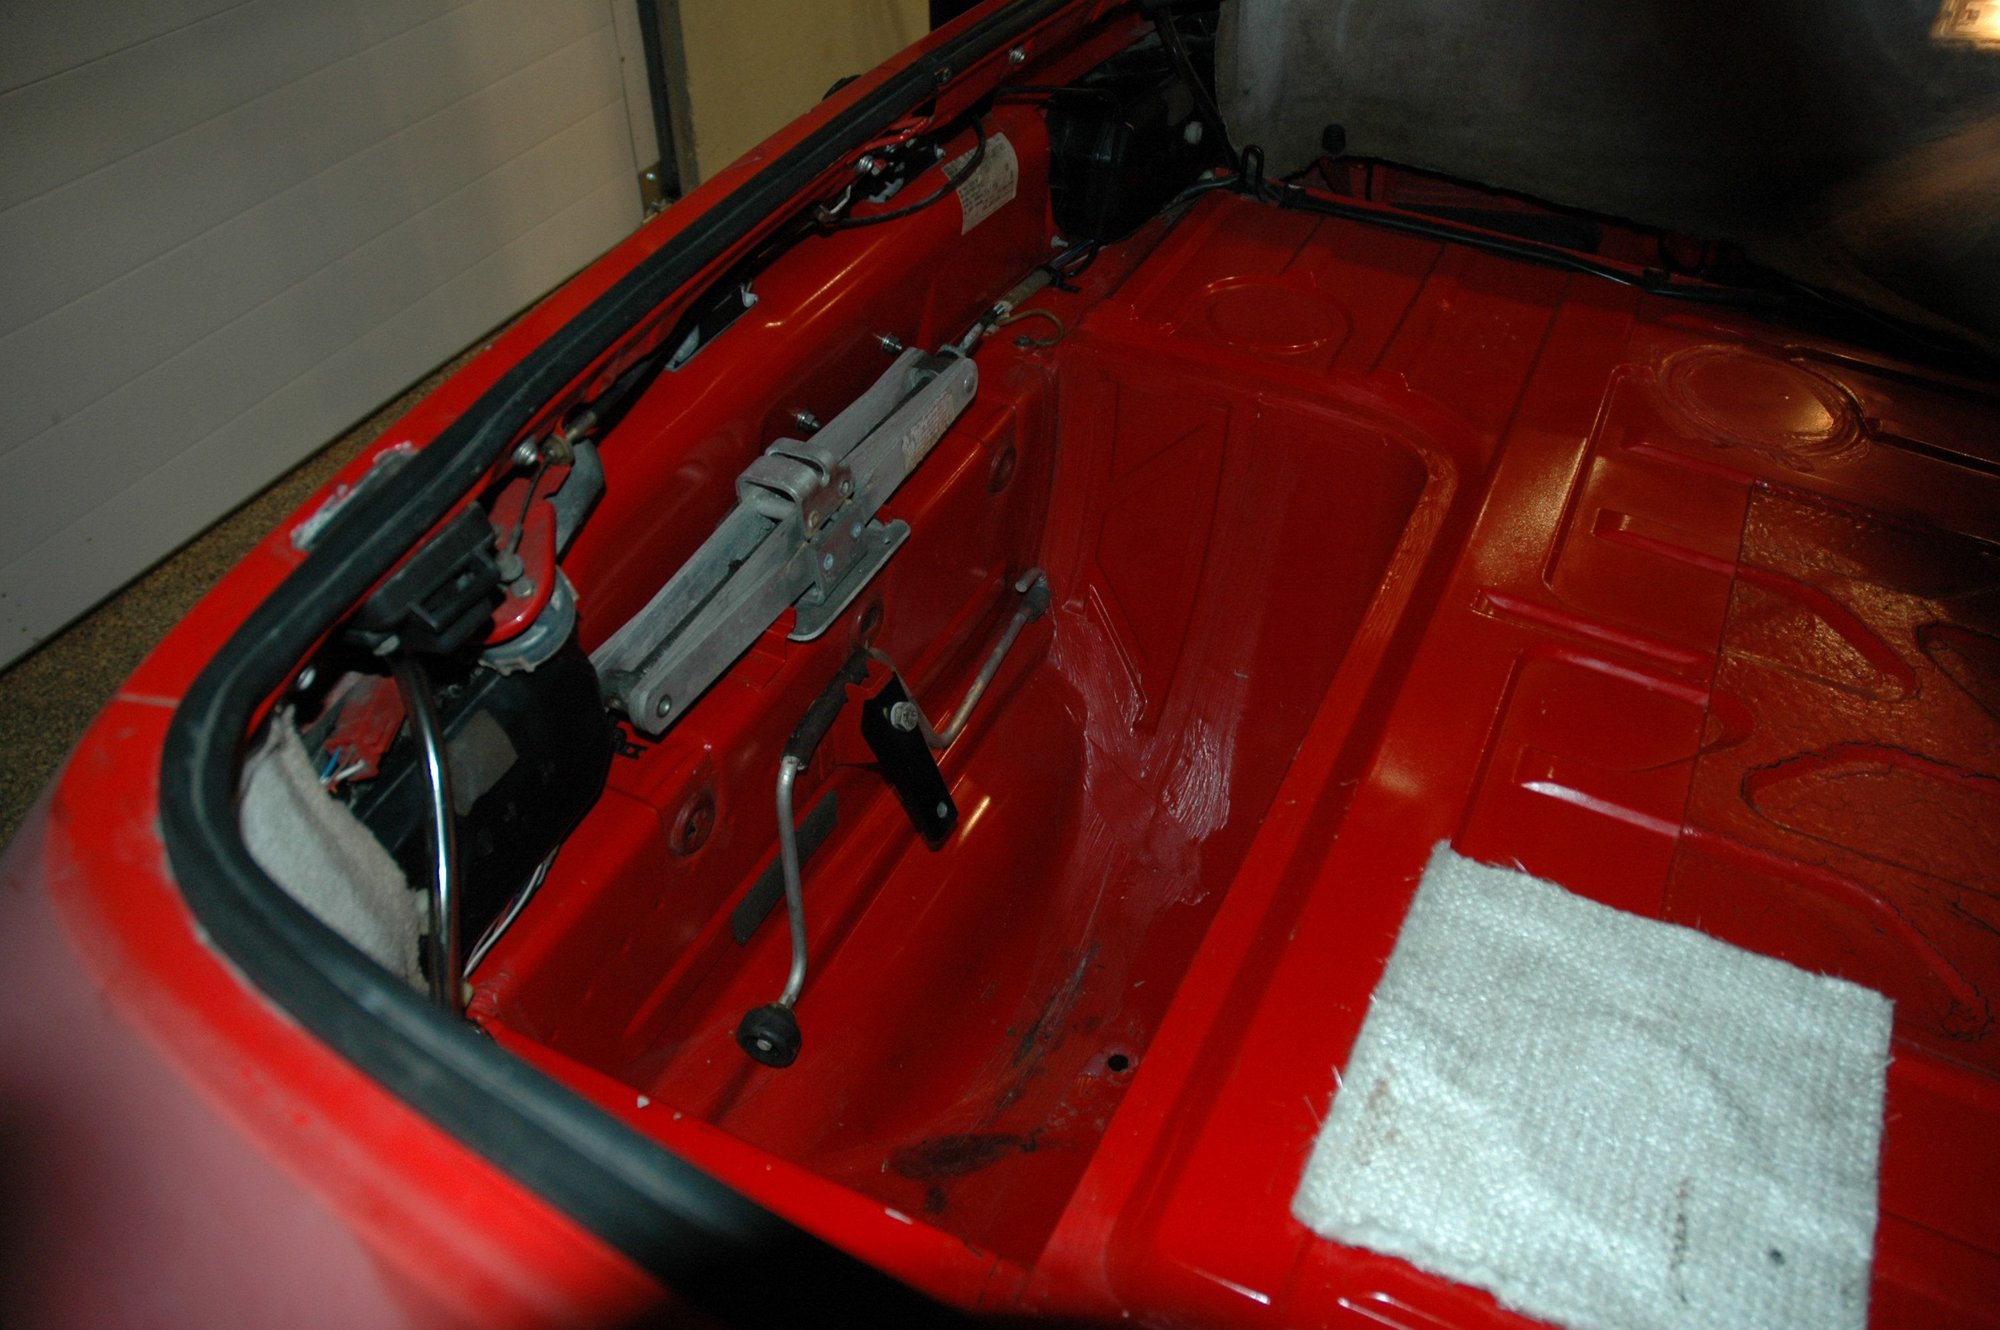
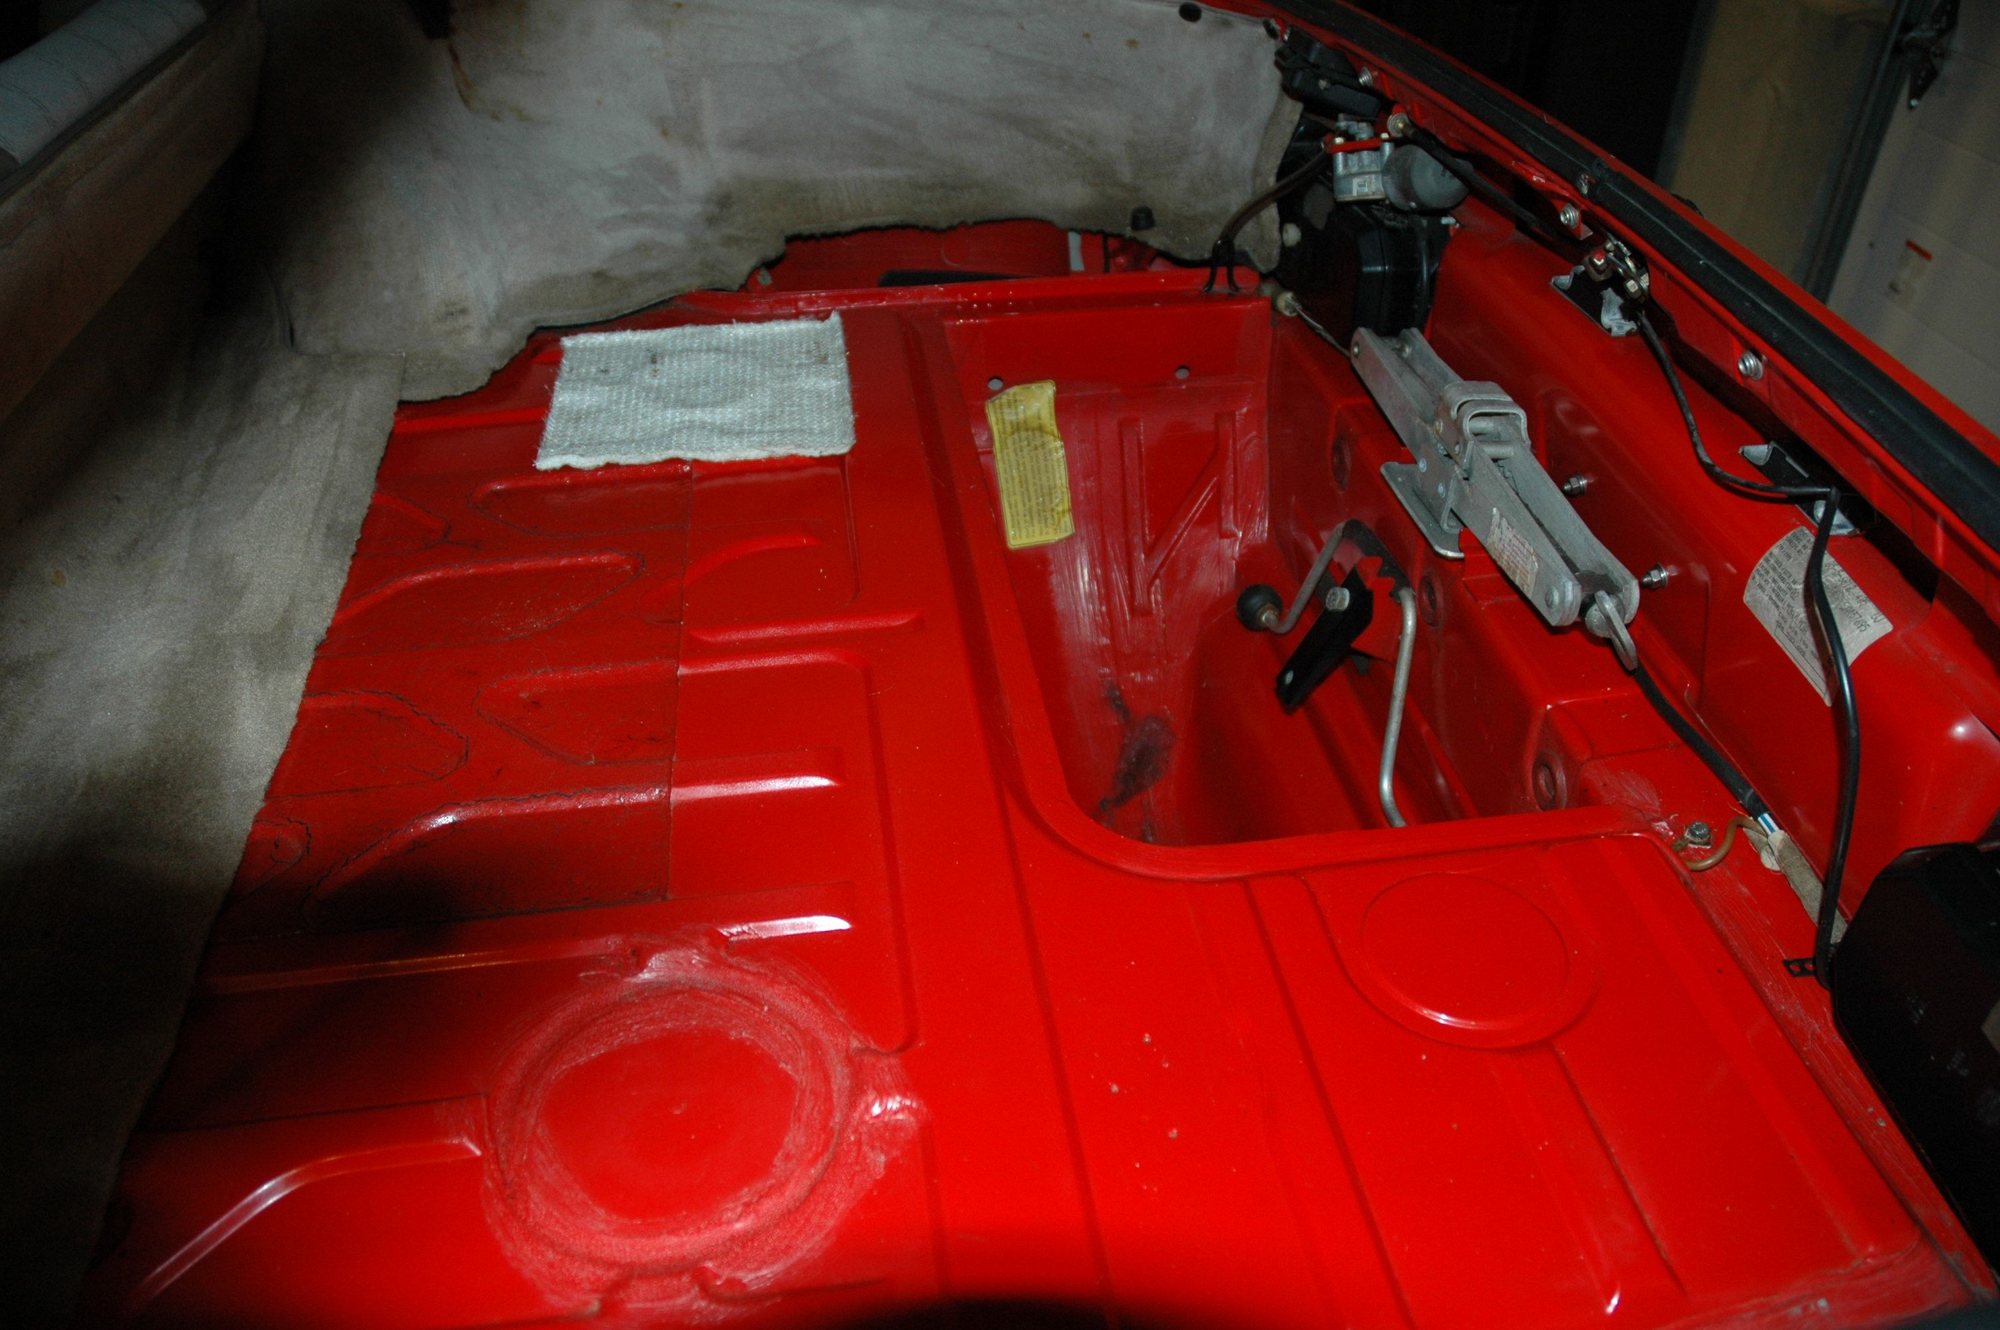
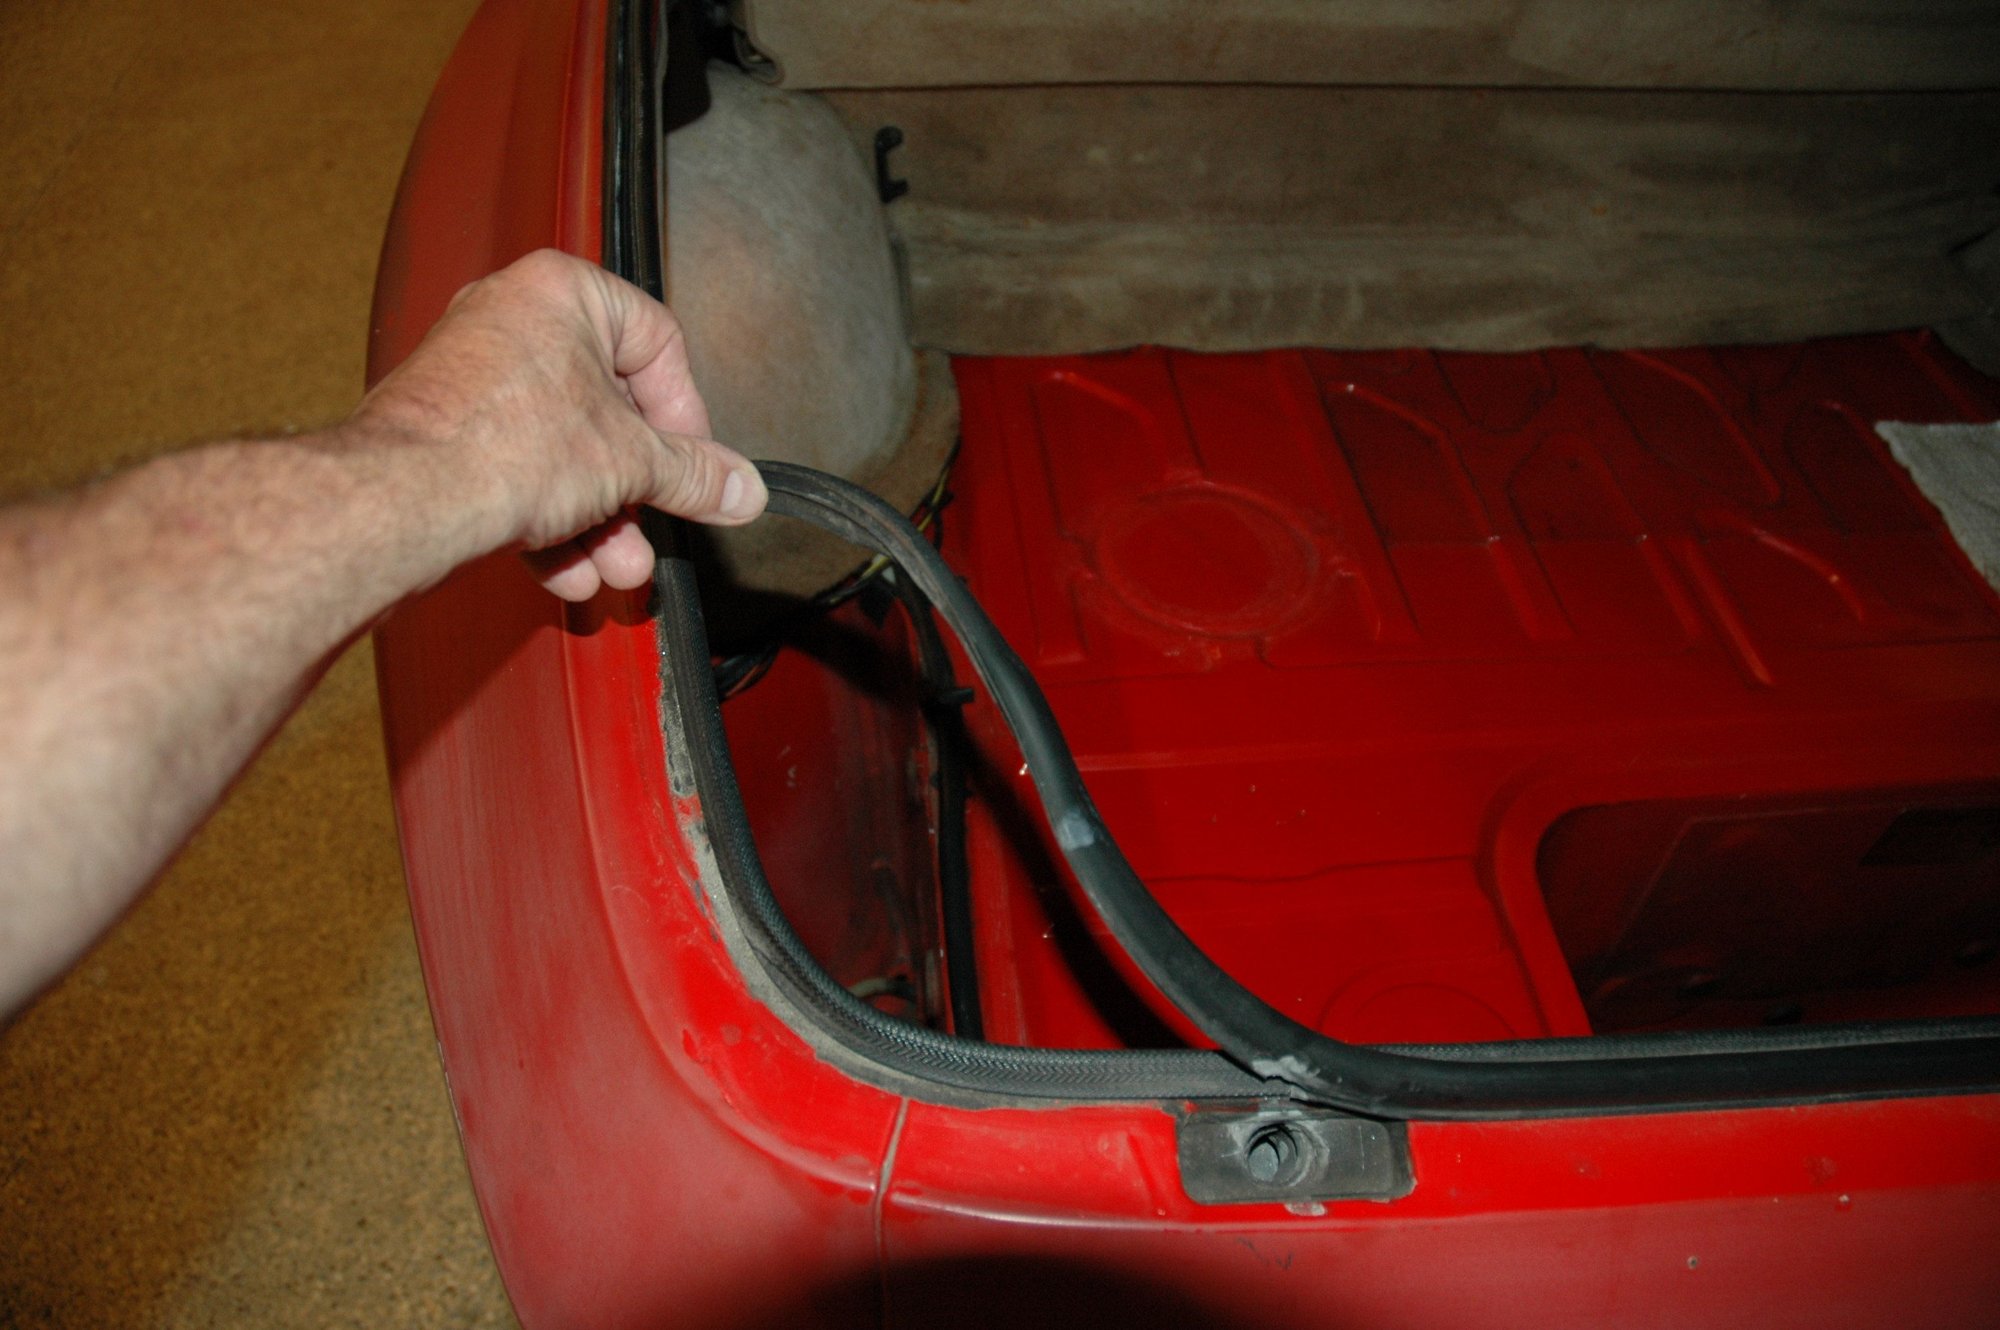
Another small update: I never cleaned the rear hatch/deck area since buying the car so I took advantage of the nice weather outside (on Sunday). It wasn't horrible, just a lot of dirt & grime accumulation over the past ?? years... The area came out better than expected - much like many aspects of this car!
Sorry about the shadow; I took the pic this evening in the garage.
I wanted to share the latest project on the Flamingo: Cruise control...
The unit wouldn't engage so I did what most of us do in this type of situation; Read the tutorial in Clarks Garage! I took the liberty of taking a series of pics for those who haven't tackled this job yet (it's actually my first attempt at repairing a cruise control system); hope these help somebody!
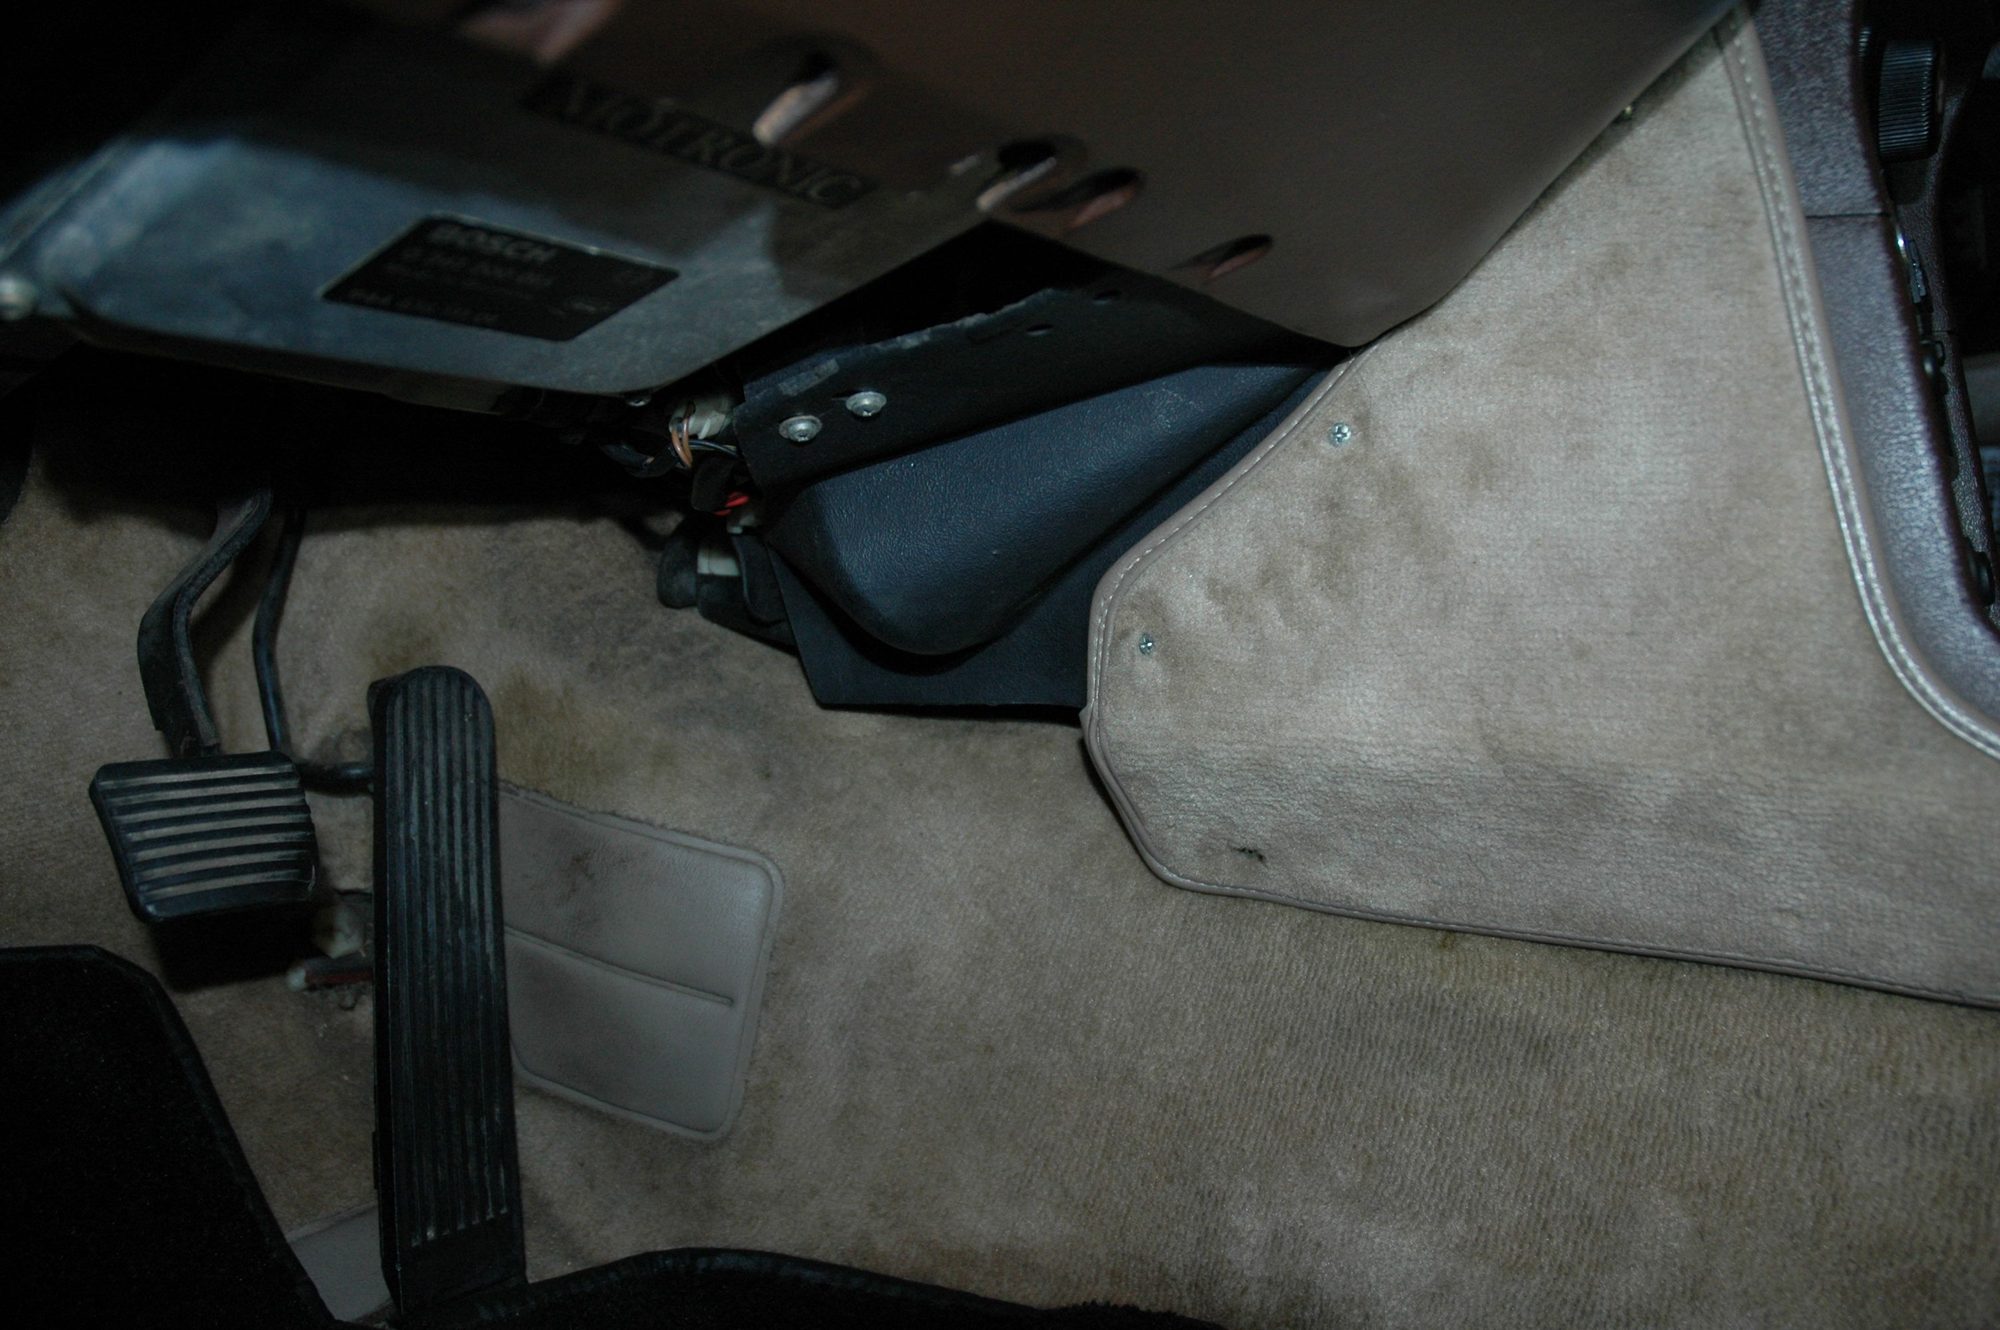
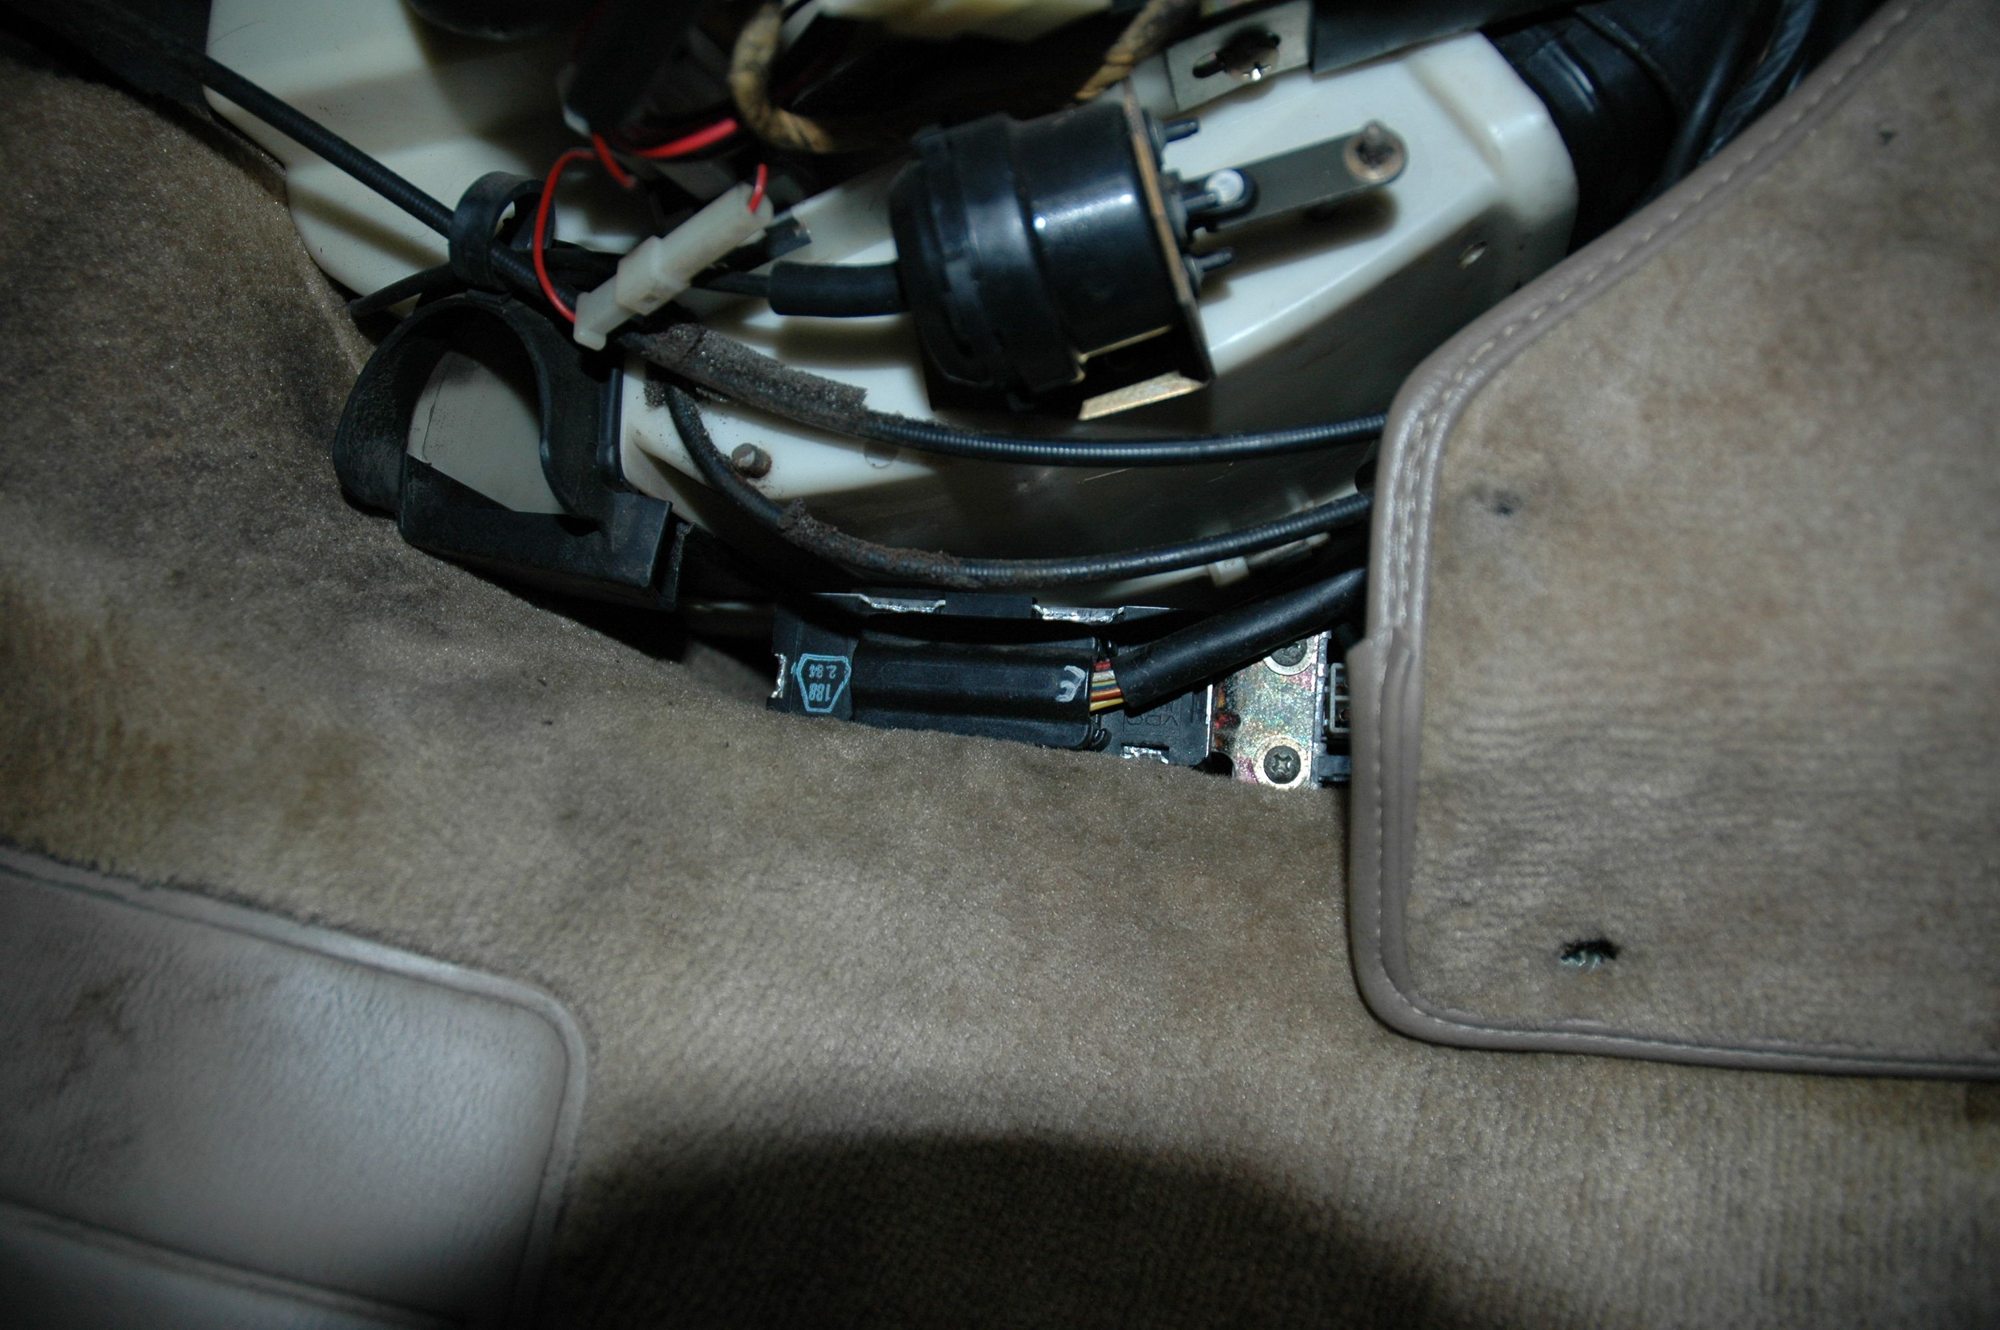
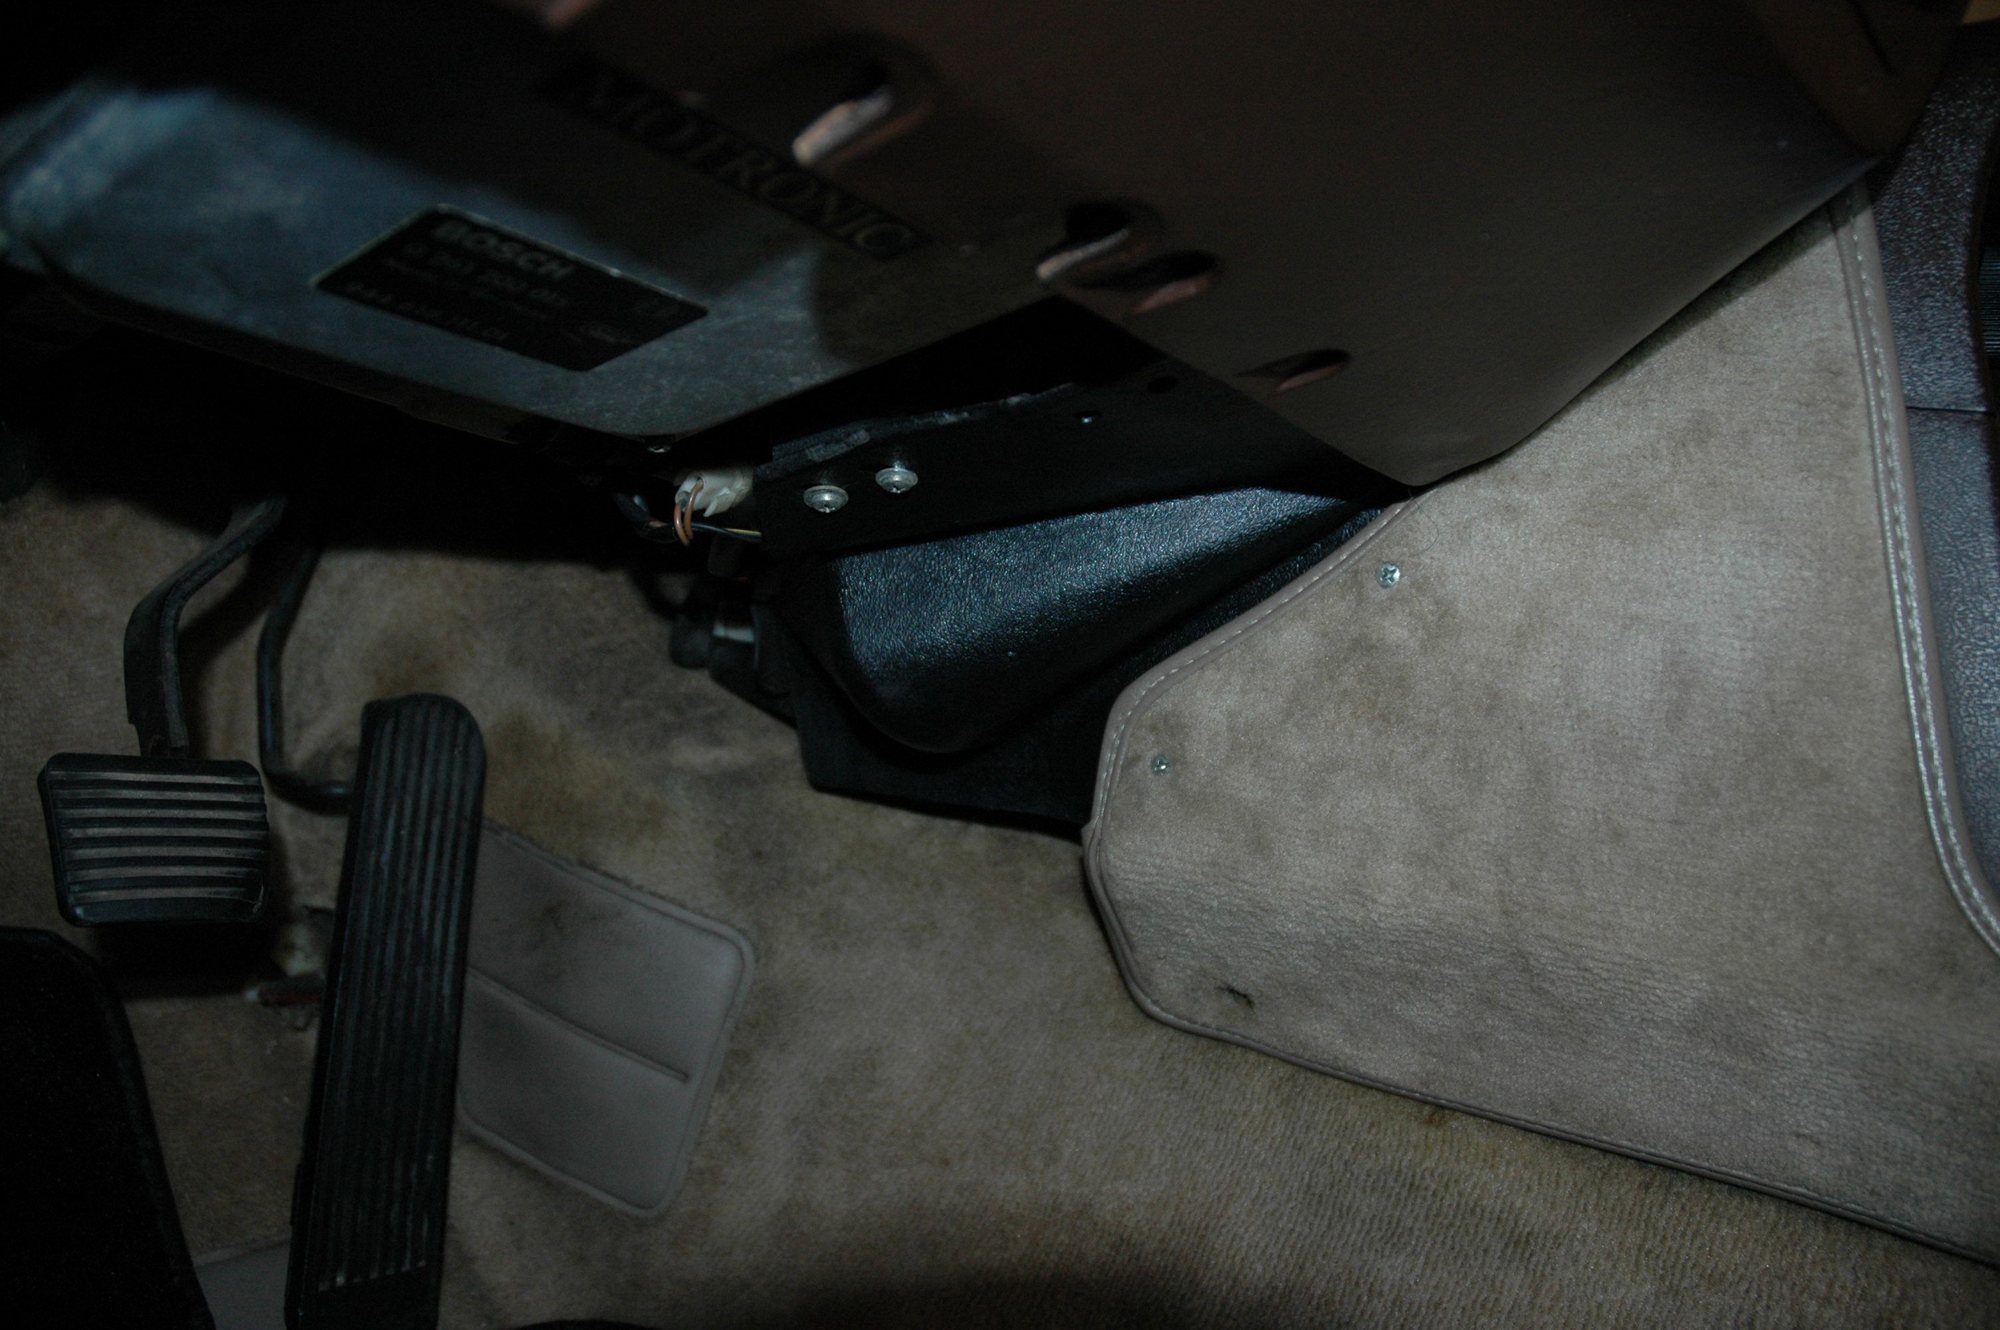
The CPU (also known as the CC Amplifier) is located inside the center console on early cars, just behind the black cardboard cover, as shown here:
Simply remove the cover (four screws), disconnect the electrical connector and remove the two mounting screws:
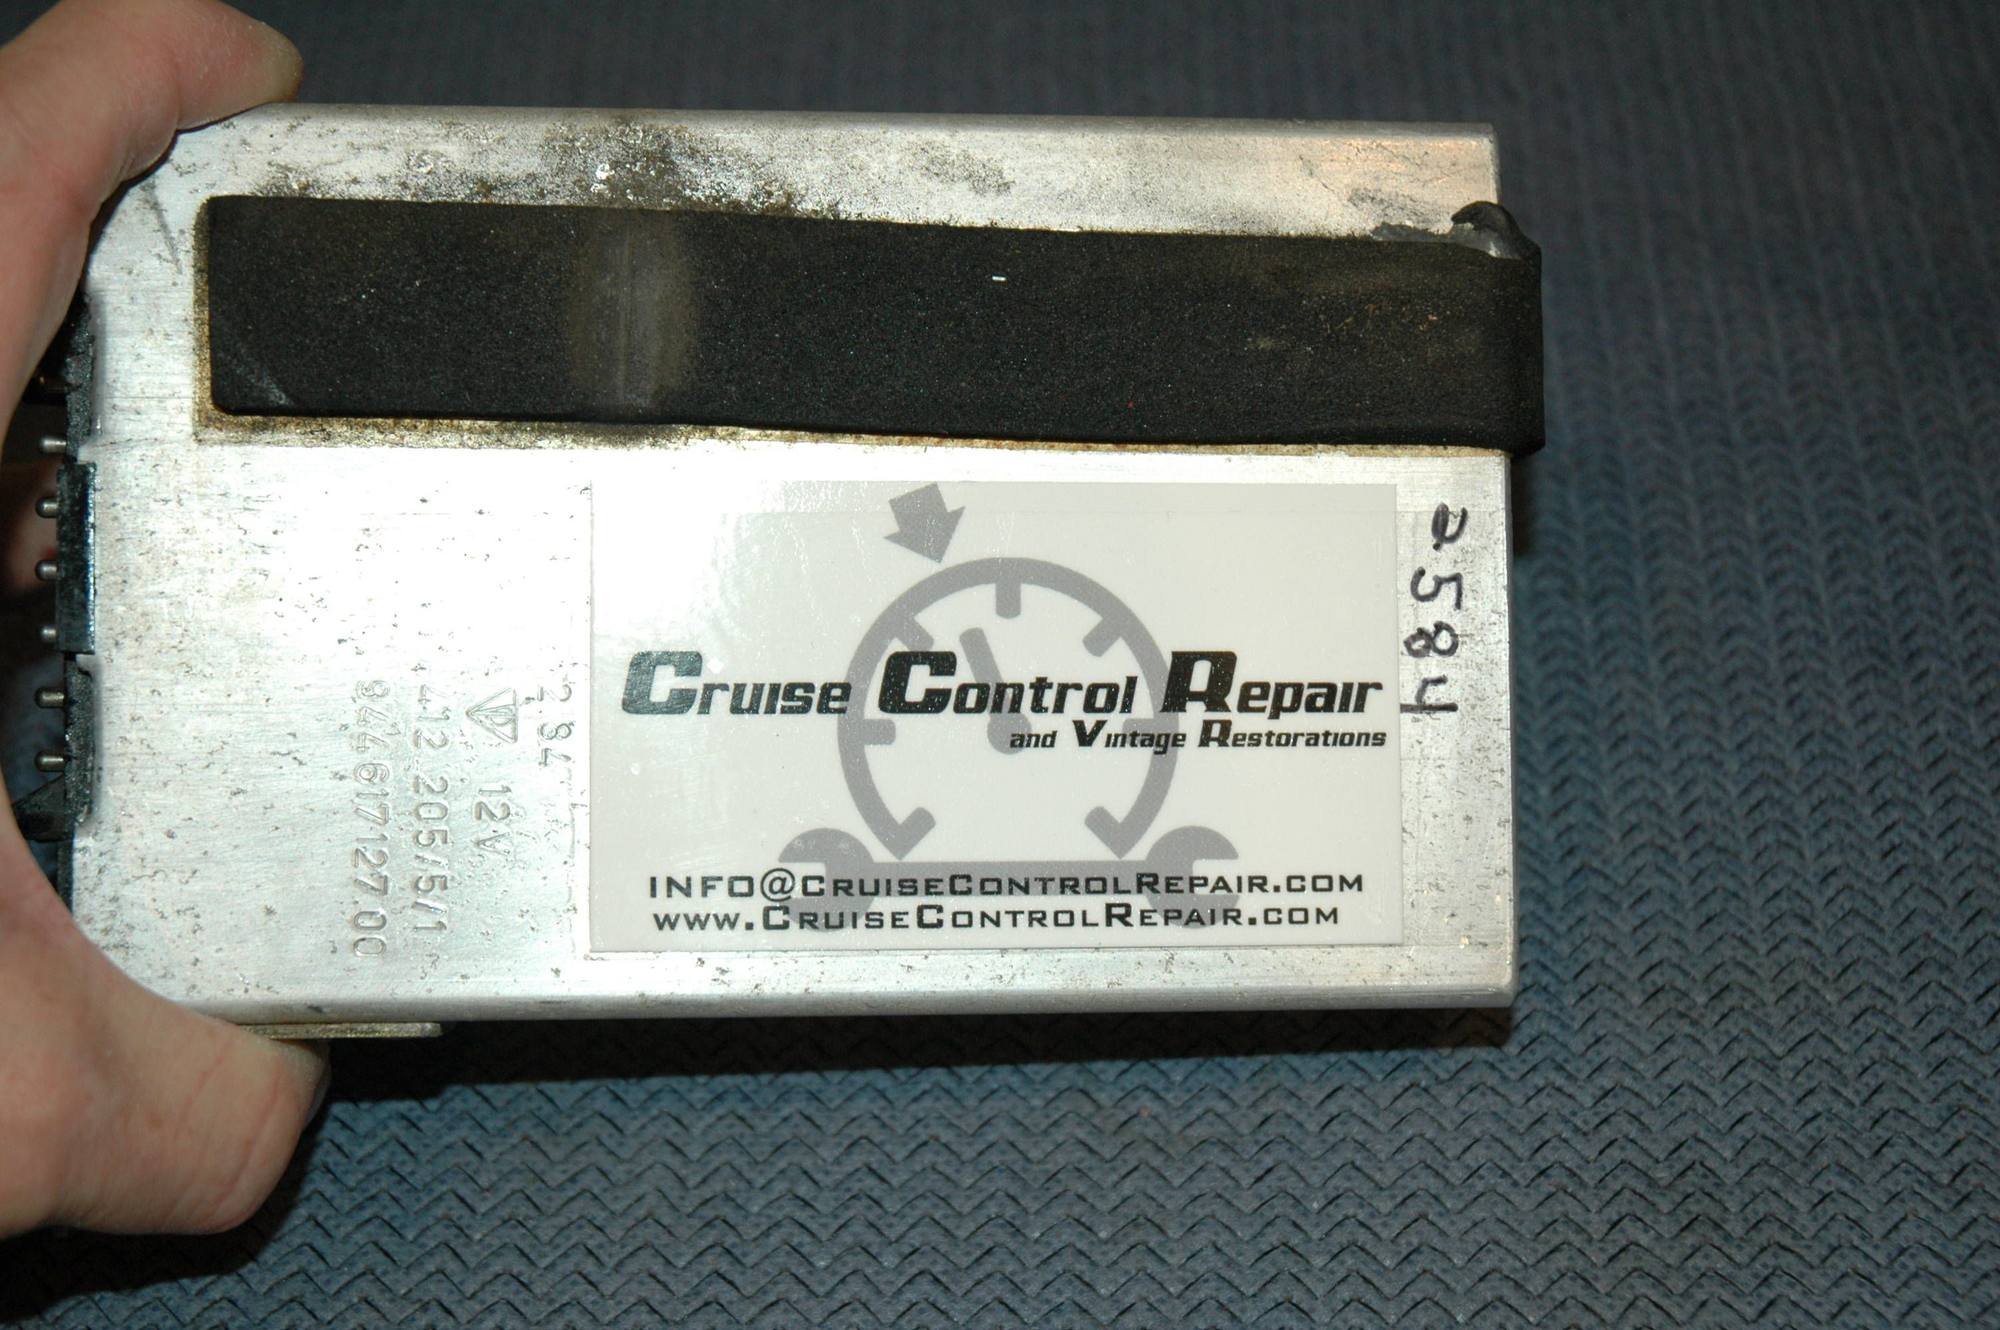
The CPU just slides out... I did peak inside and looked for any cold solder joints or obvious burn marks but couldn't find anything glaring at me. I then decided to send the unit off to Cruise Control Repair & Vintage Restorations so they could fully test and repair the CPU, if needed. Their turnaround was excellent (less then two weeks).
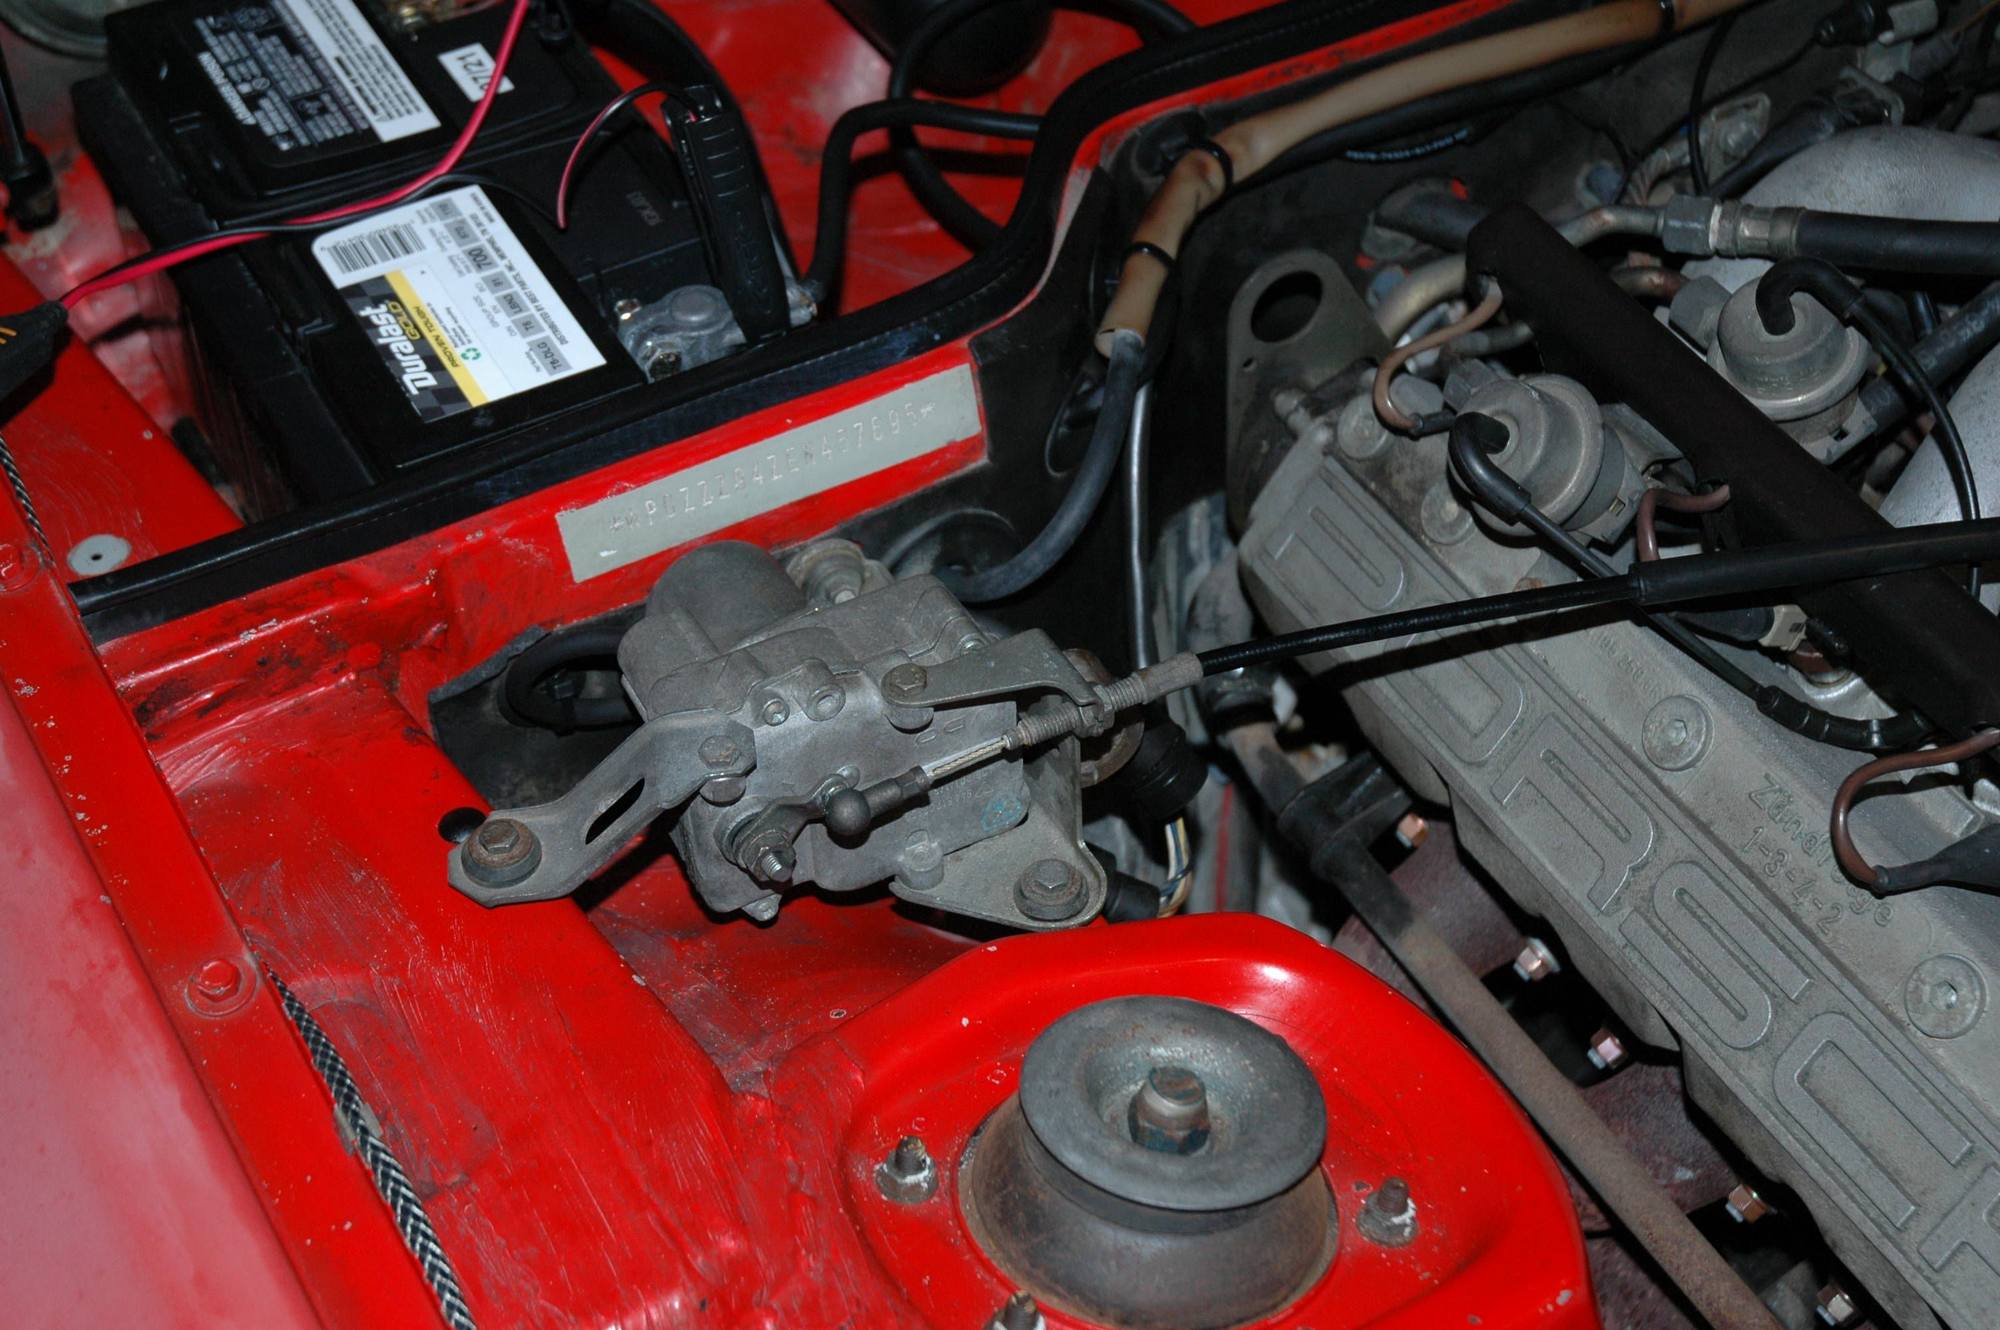
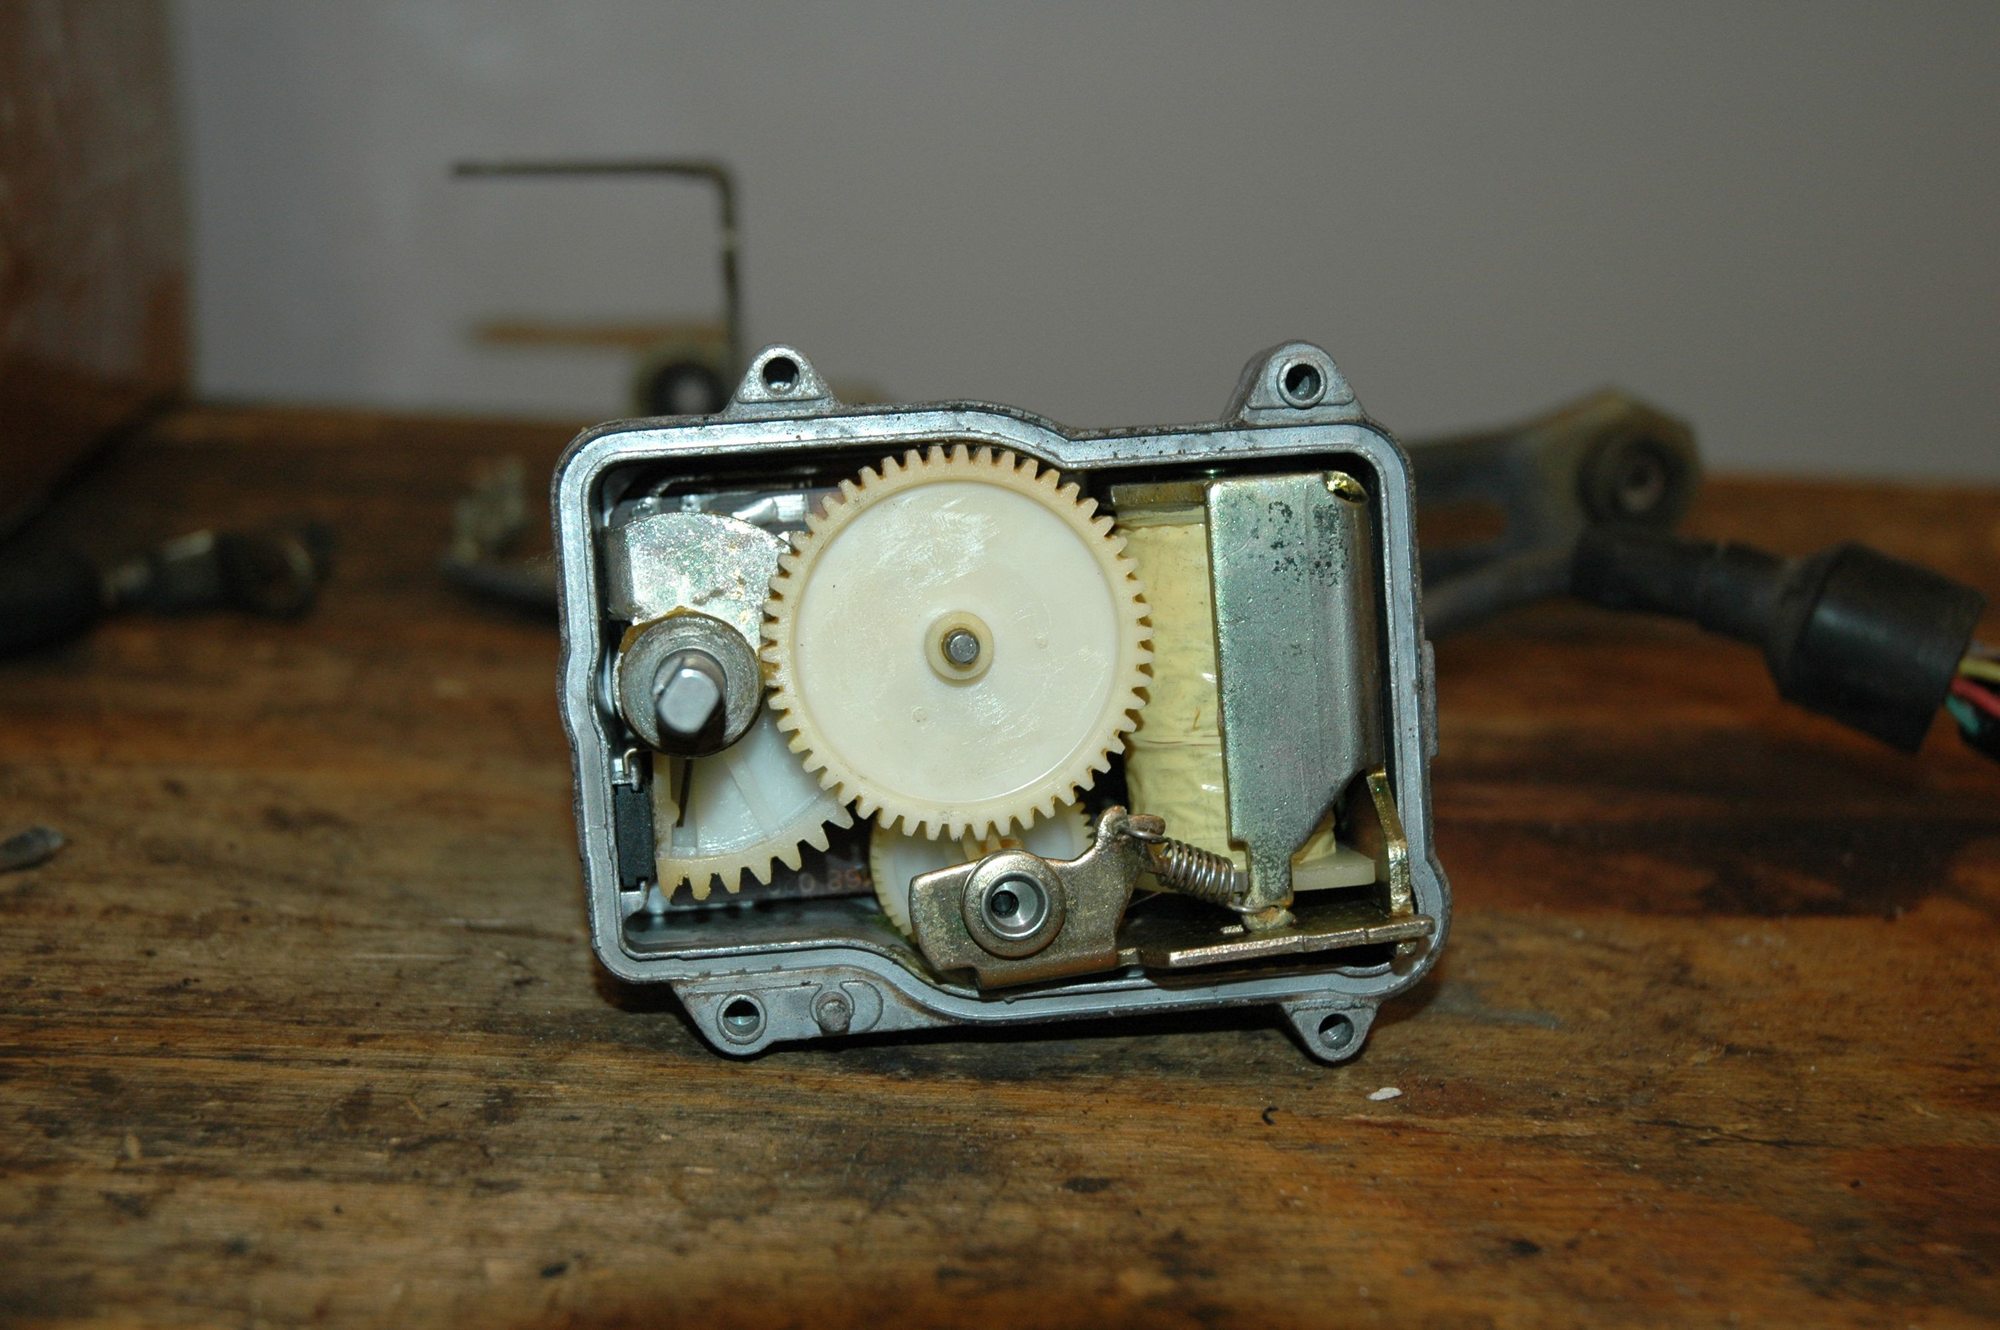
In the meantime, I removed the servo motor unit and followed Clarks procedure. Here's where the unit is located:
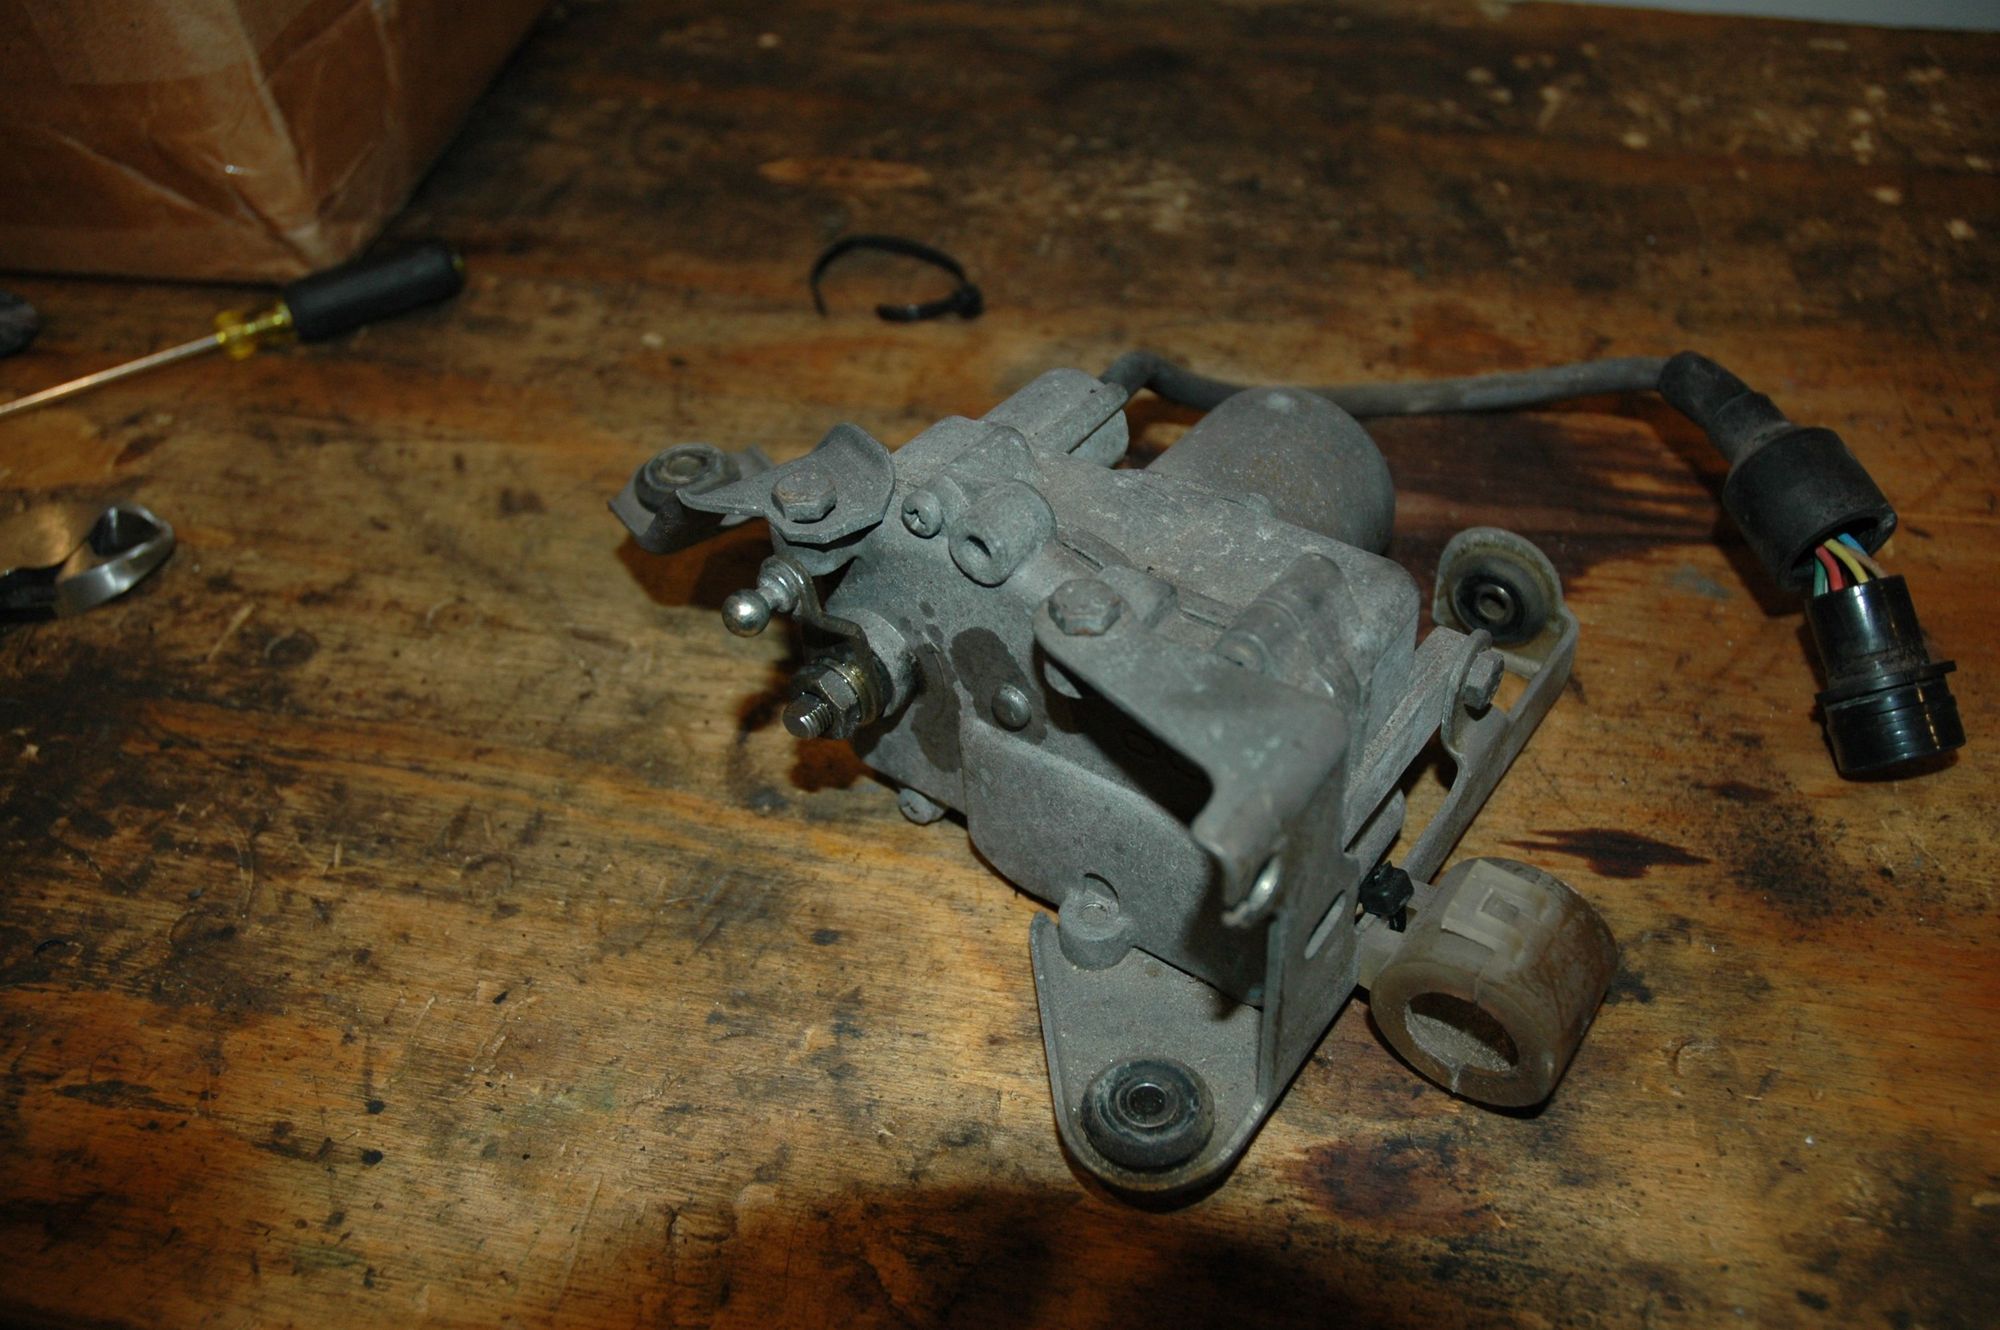
Removed the the unit, followed by the cover:
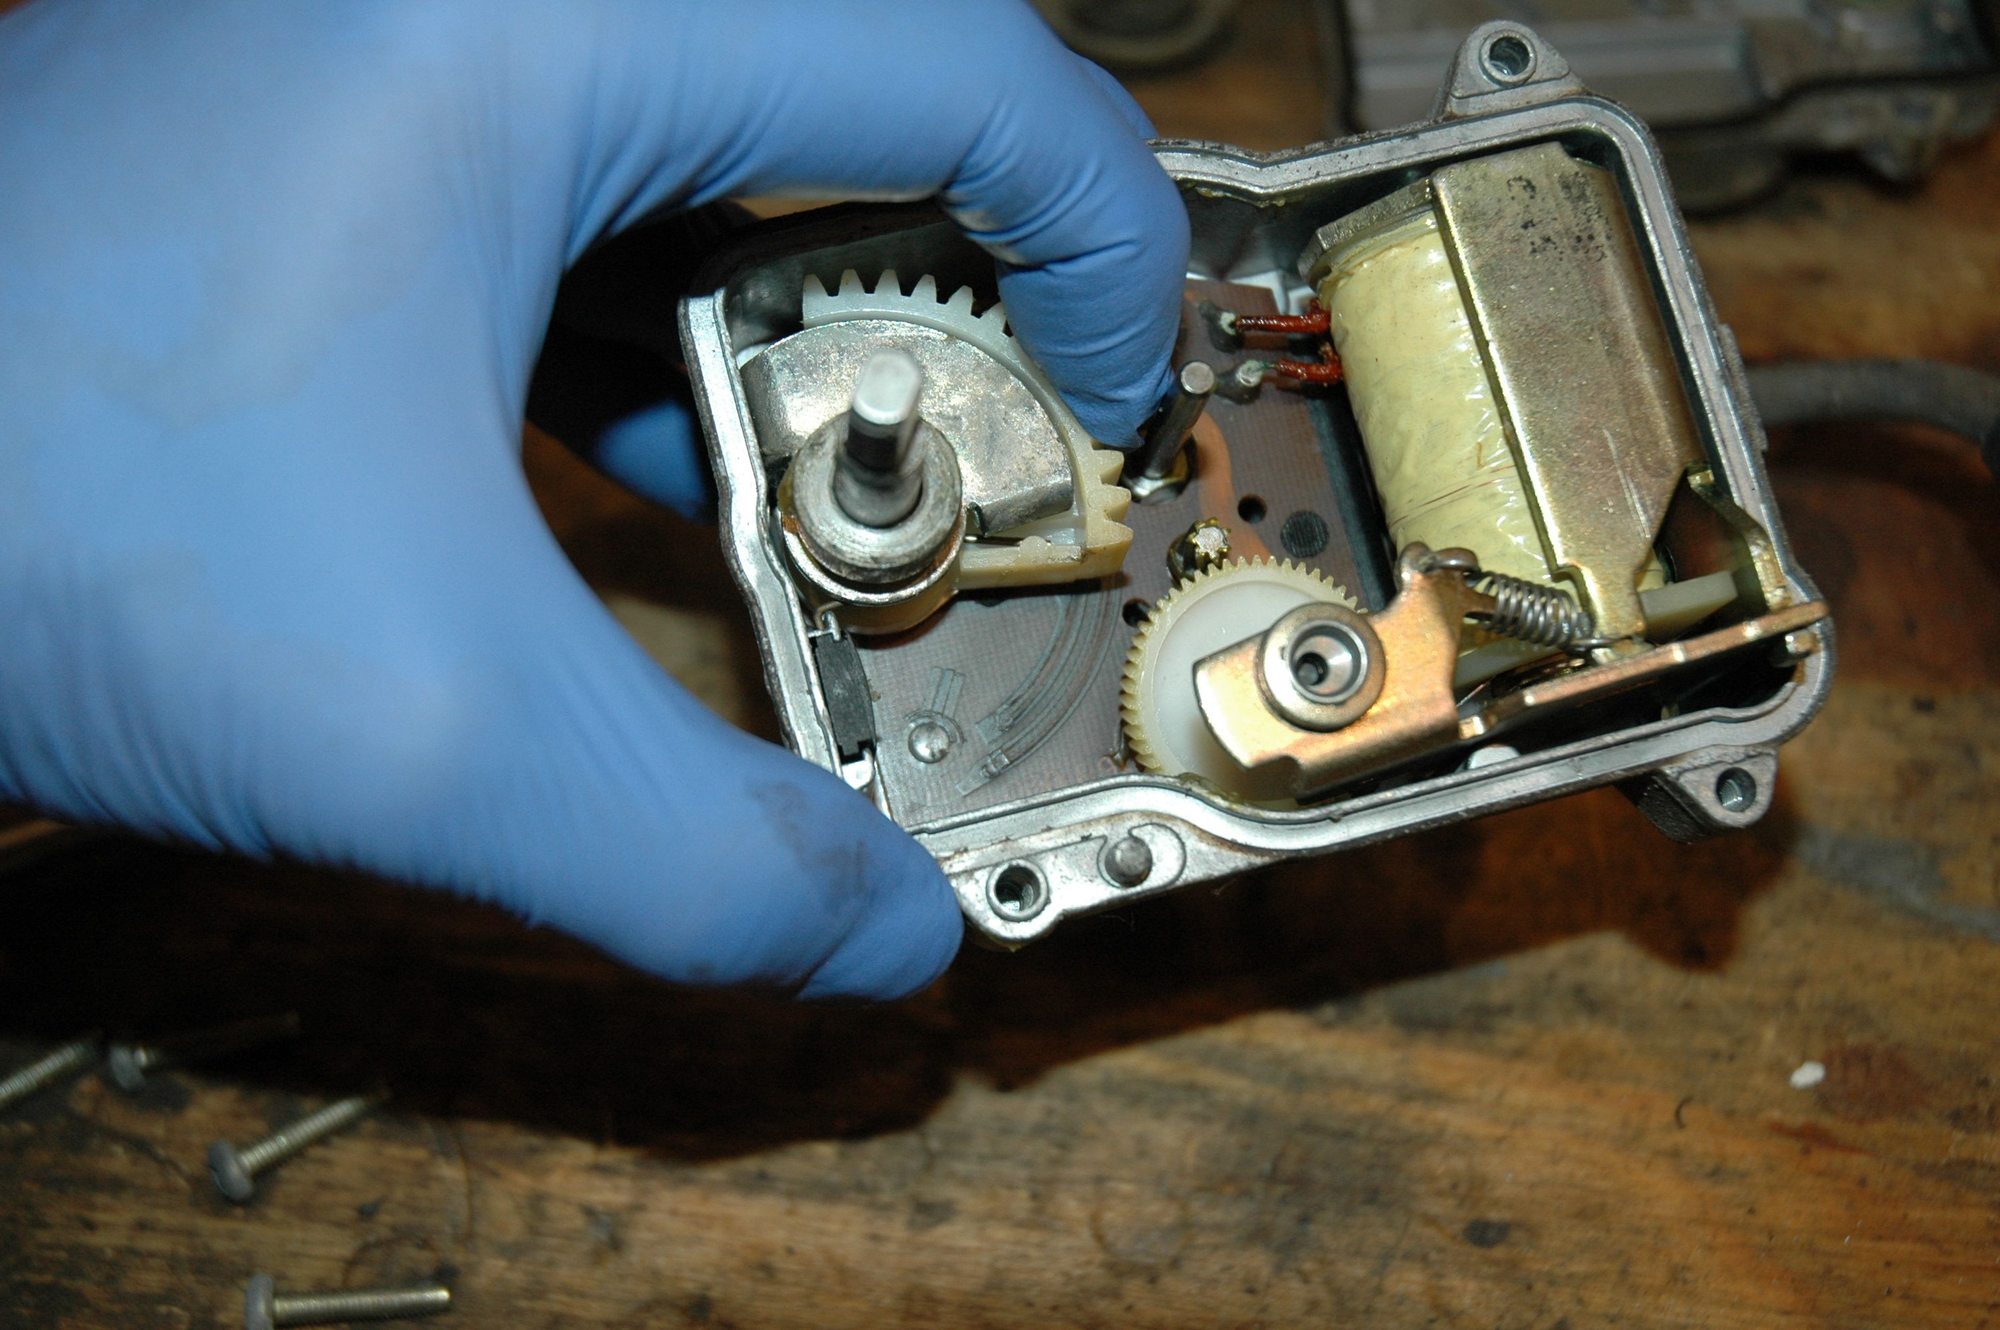
Gently pull out the large gear to see the traces:
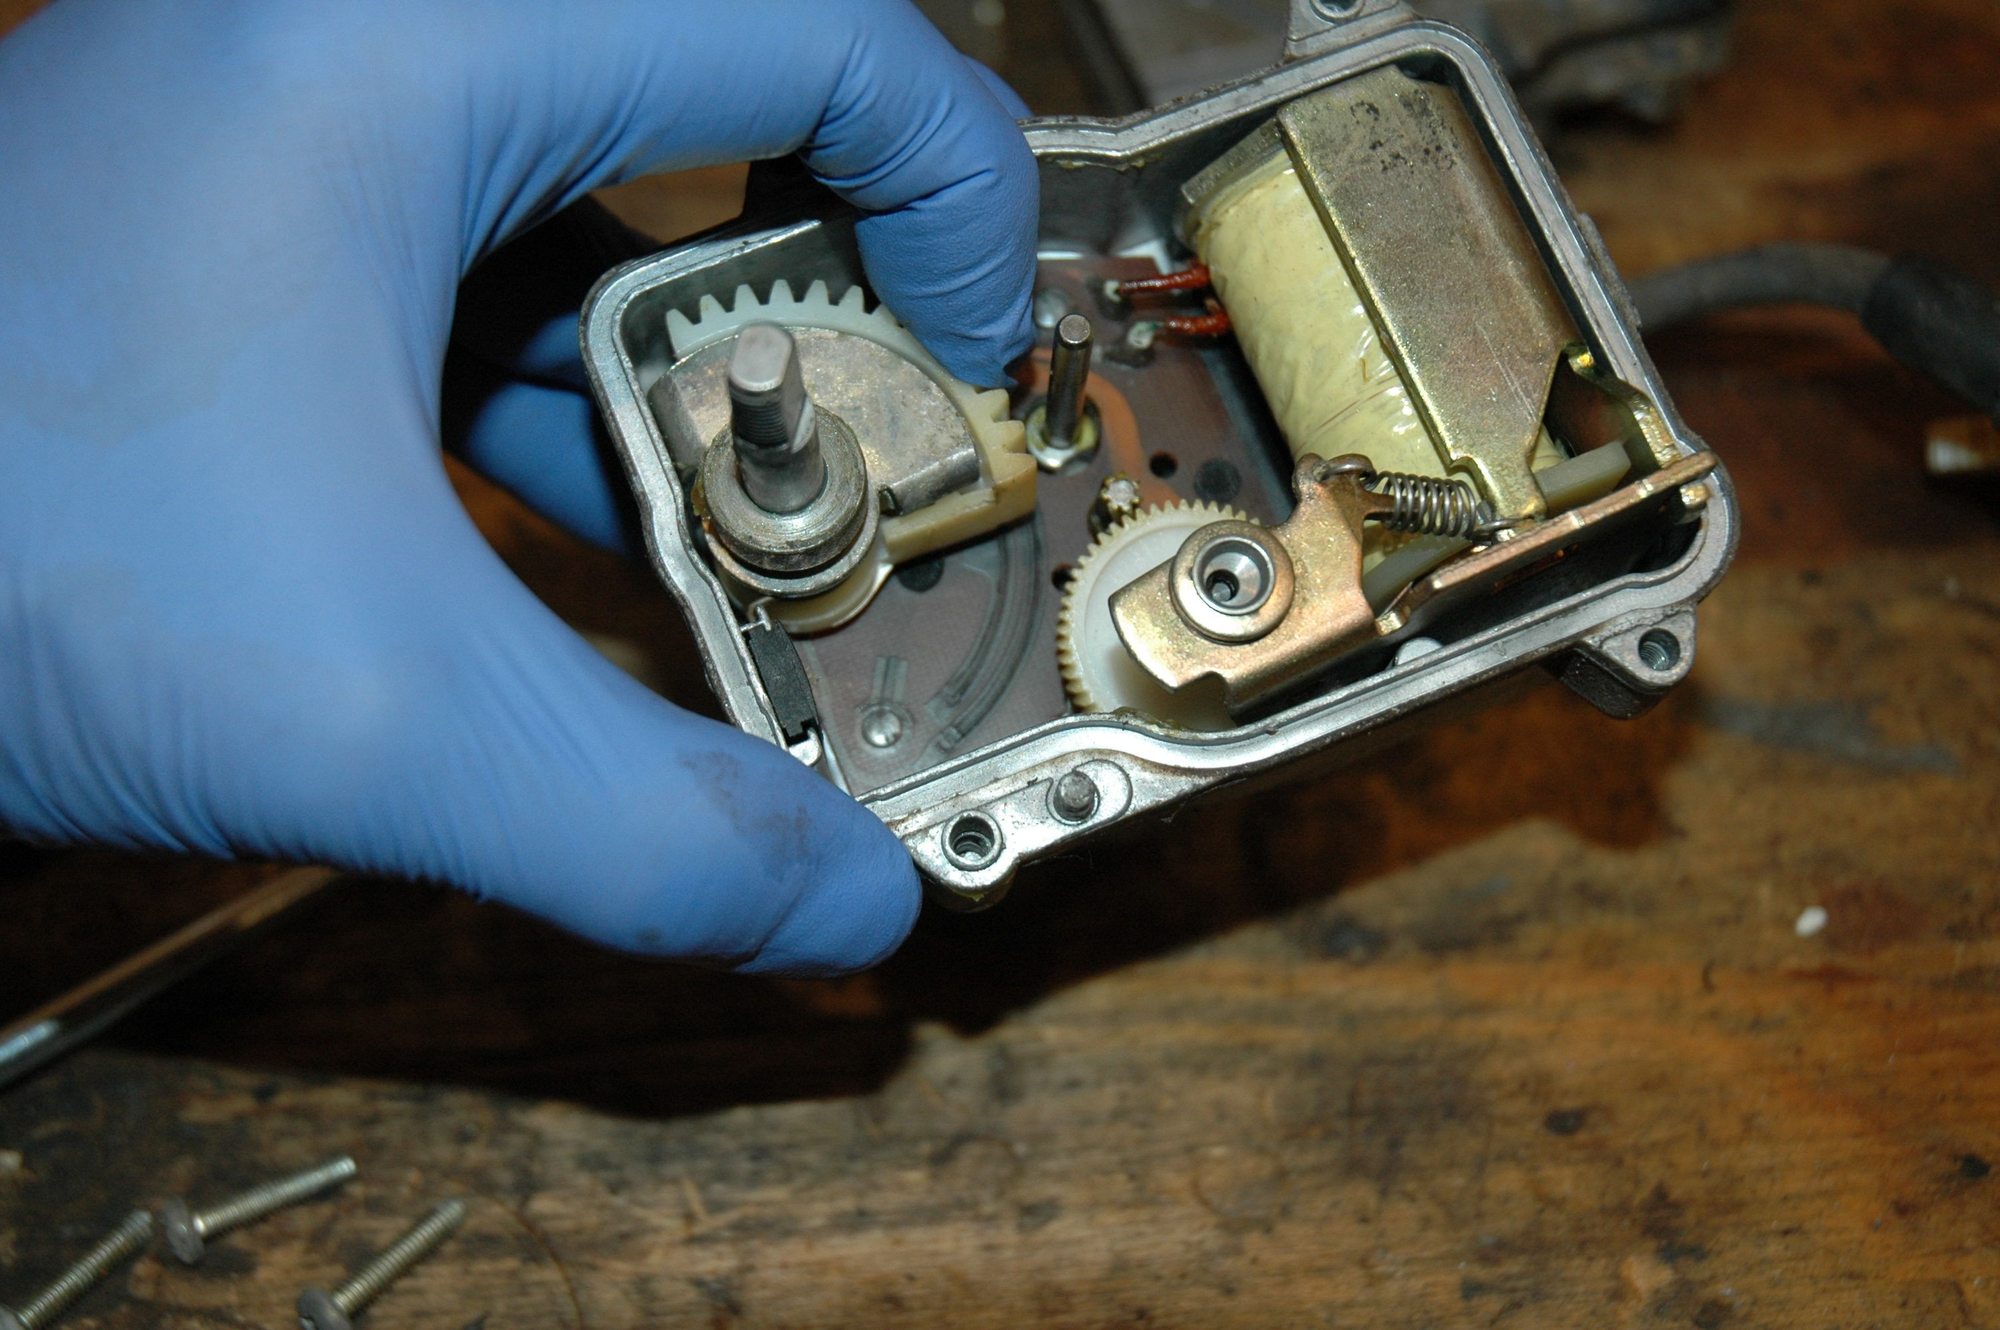
I first used a pencil erase (gently) on the traces, followed by electrical contact cleaner:
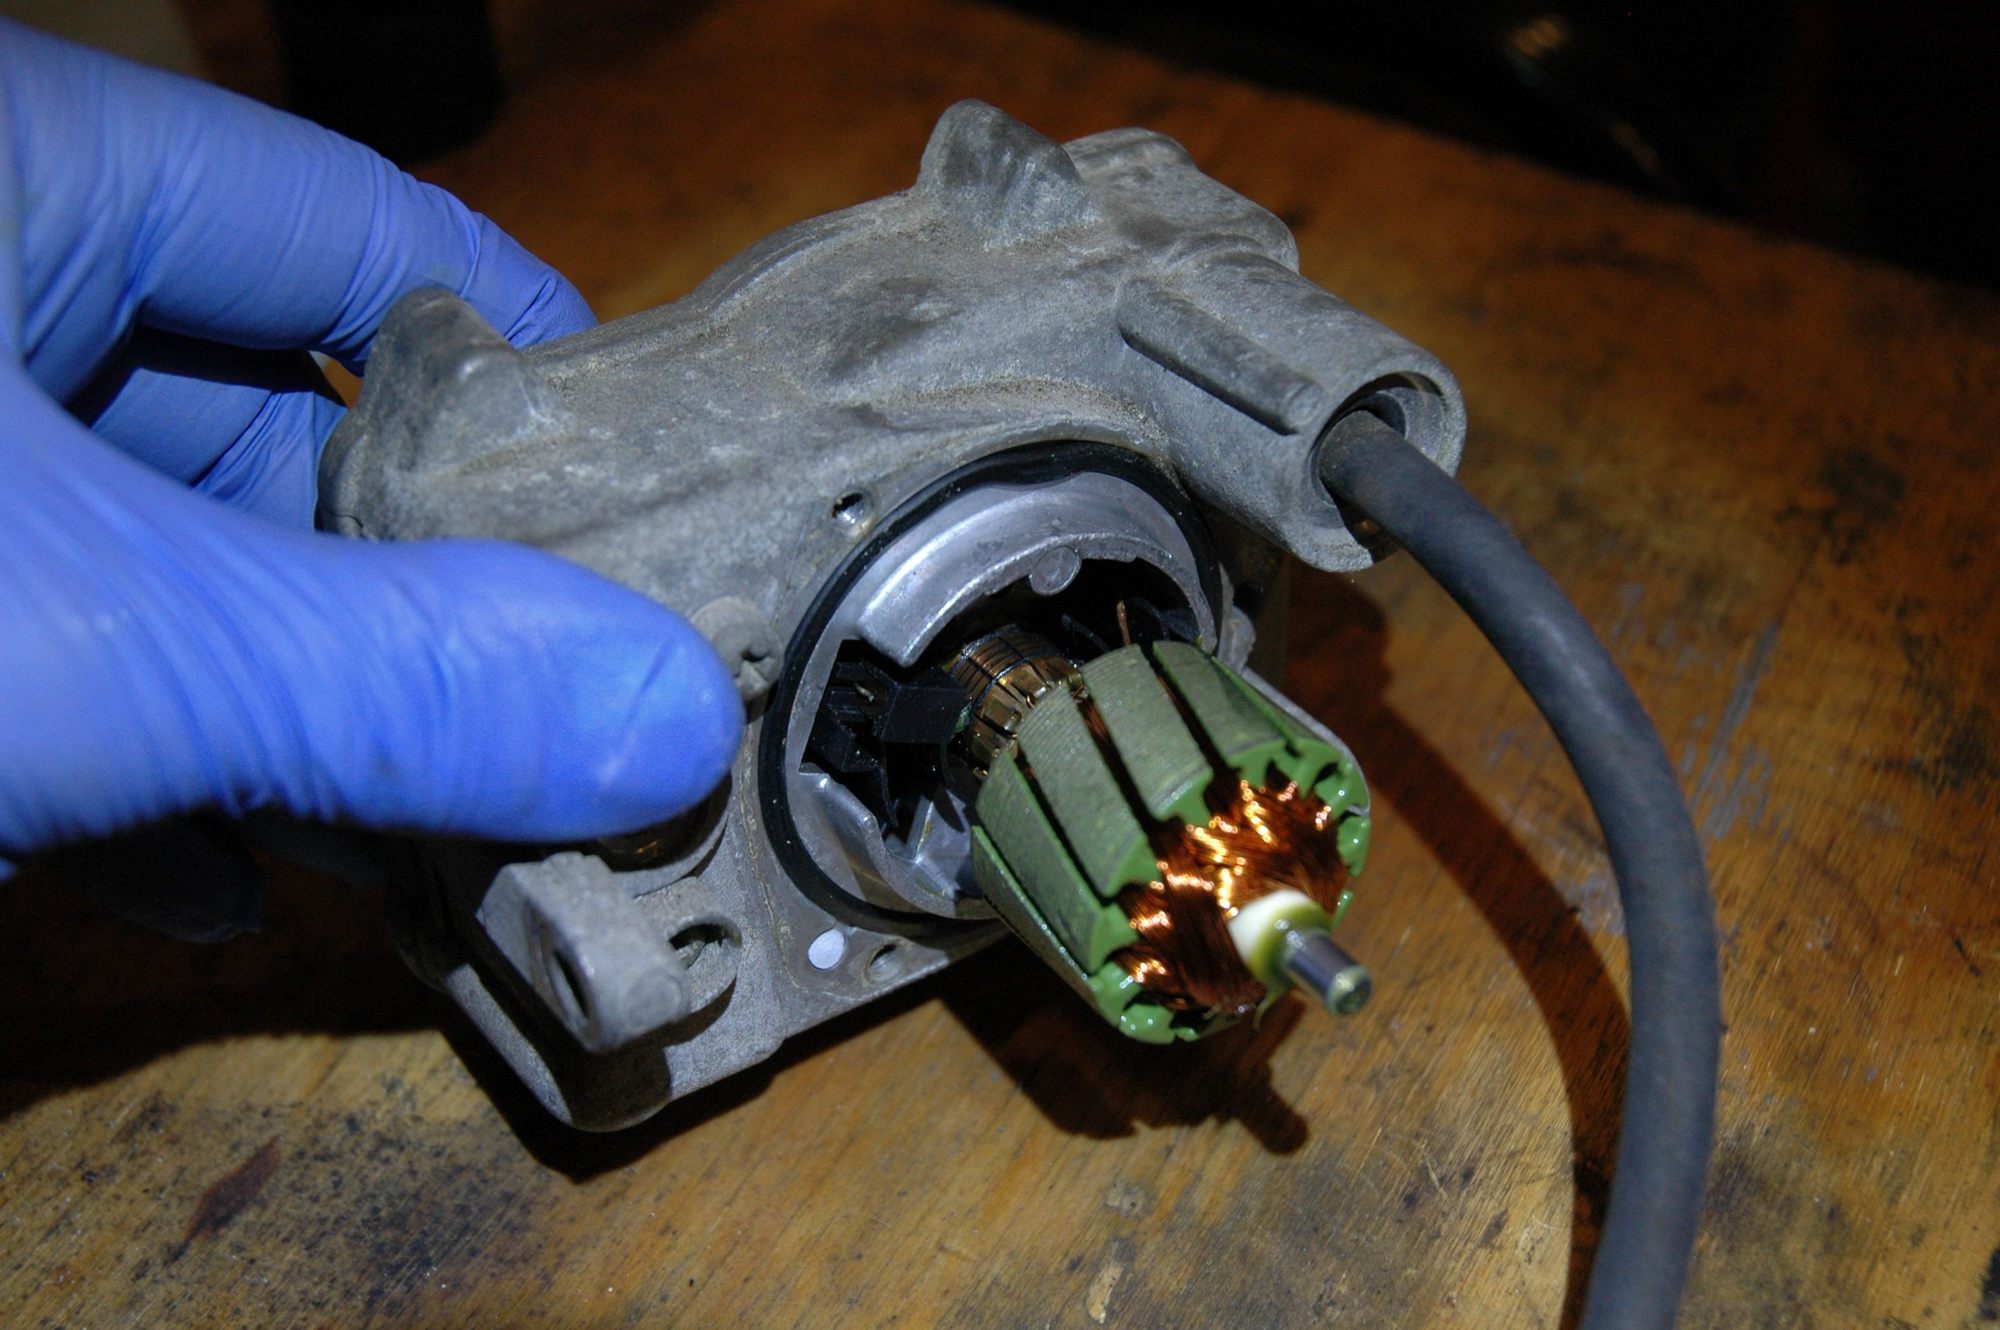
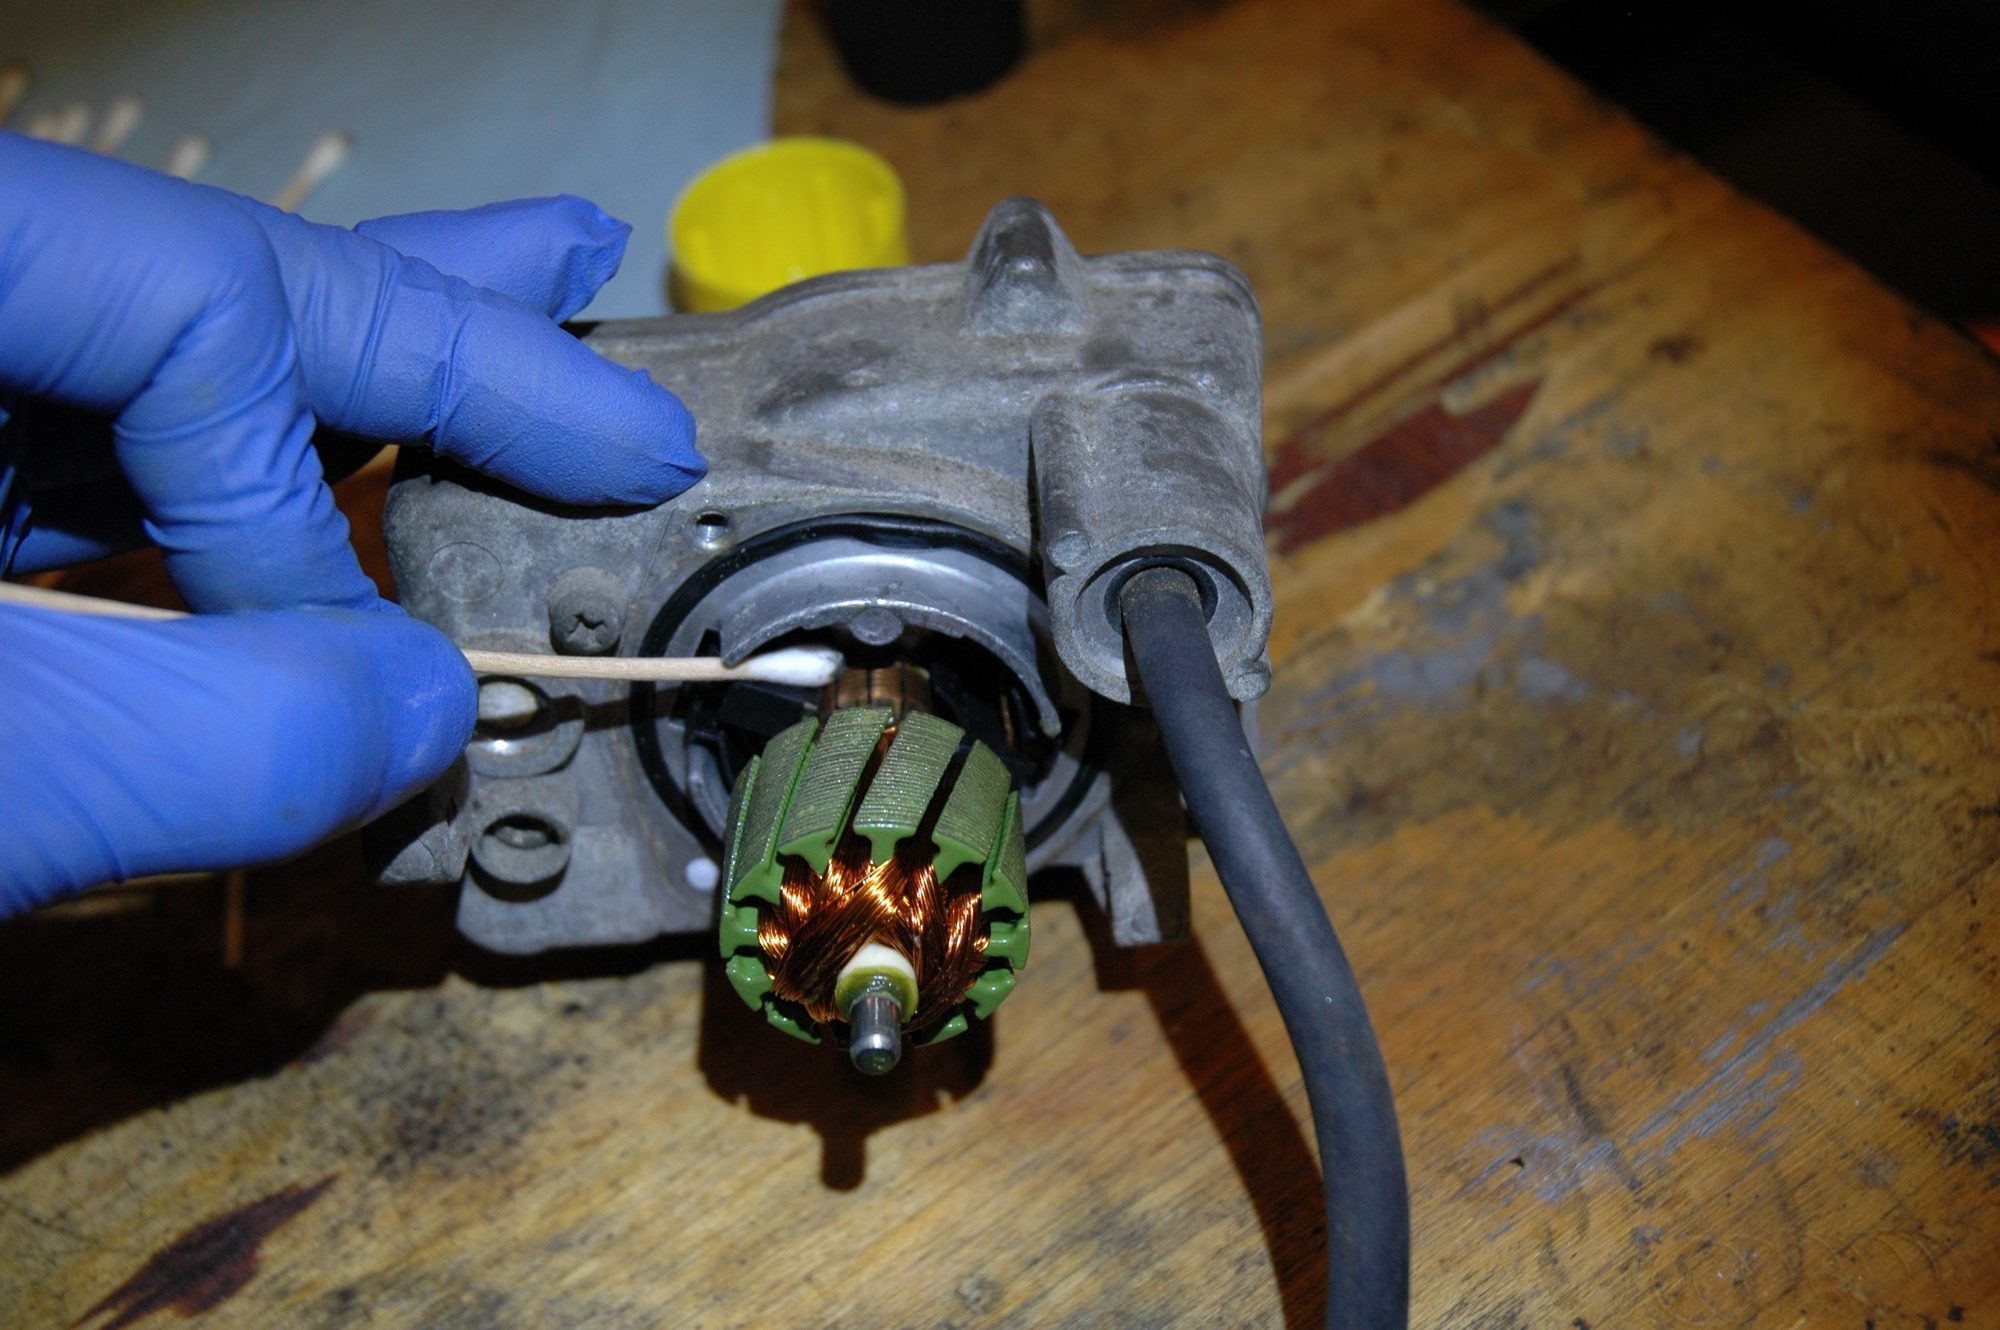
Once this side was reassembled, I then removed the armature cover to inspect the brush assembly & commutator surface. The contact surface was a bit dirty:
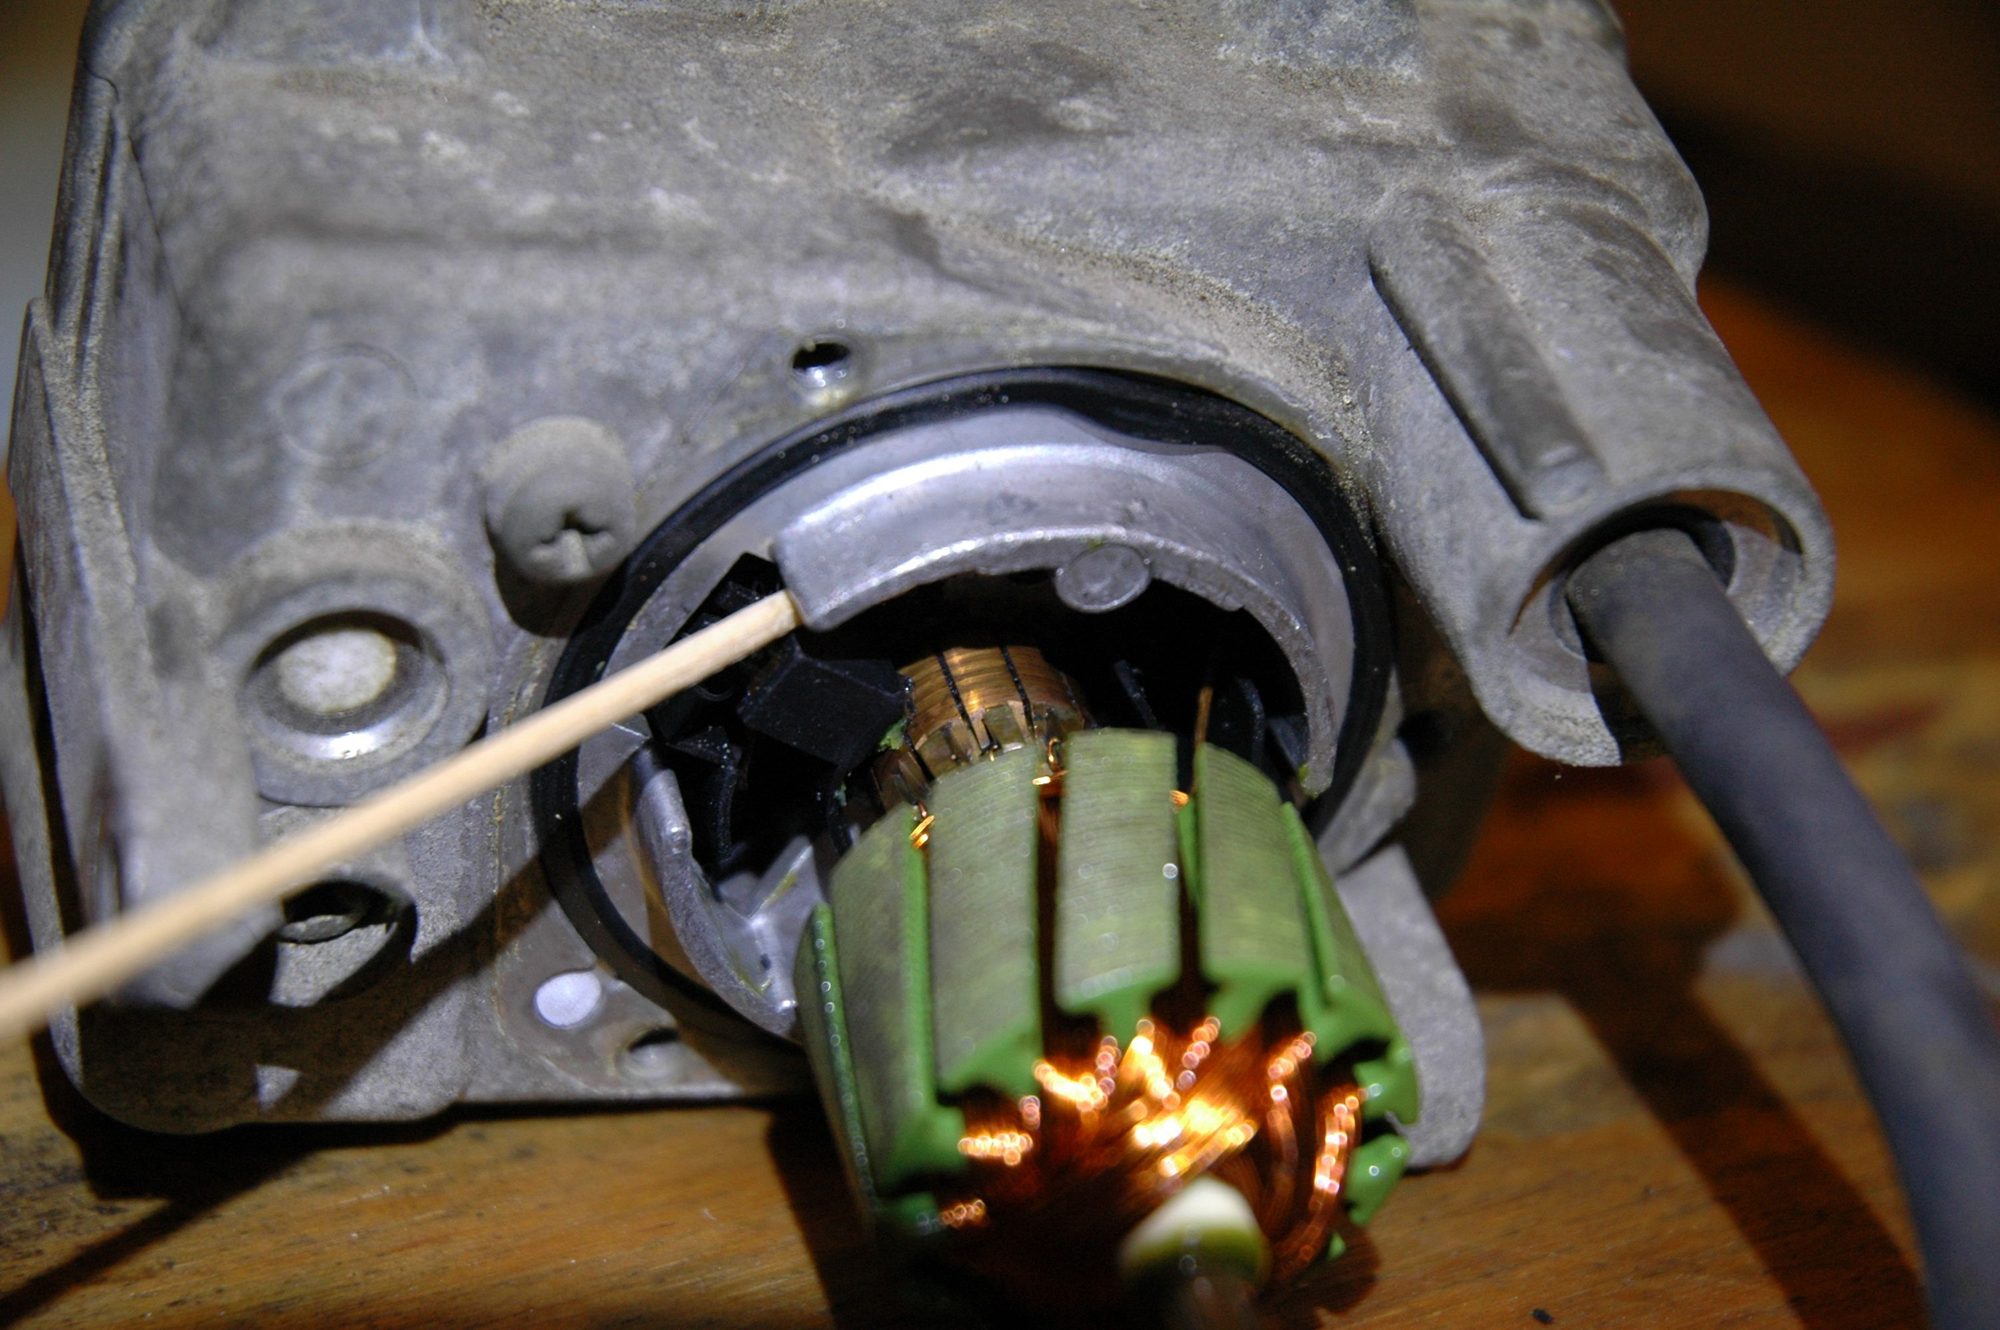
Using a commercial-grade cotton swab, I gently applied electric contact cleaner to the commutator:
Much improved contact surface!
Everything was reinstalled this evening; I couldn't resist applying some Adams VRT on the cover... This stuff is simply amazing!
It's been miserable outside tonight so I haven't tested the system yet - I hope to try it out this weekend and will post my findings. Thanks for hanging out with me throughout this journey.
wow, that's totally cool about the cruise control rebuilding service! I think I'll send them mine (assuming yours tests out)! Did you put any lube on those plastic gears?
On the E60 BMW M5, one of the failure modes on the car is due to problems with the electronic throttle actuators. The grease used on the plastic gears gets old fast (due to being in the V of the engine), gets hard, and then the car freaks out because the throttle isn't working as expected by the ECU.
Anyway, one of the things recommended that sounds like a slick idea is the use of anti-seize on those plastic gears, instead of a traditional grease, for much longer service life. The CC servo likely doesn't see the temperature extremes that the parts do on the BMW, but maybe this idea would apply here, as well, if one goes in far enough in the unit to effect this repair.
Thanks for the tip!
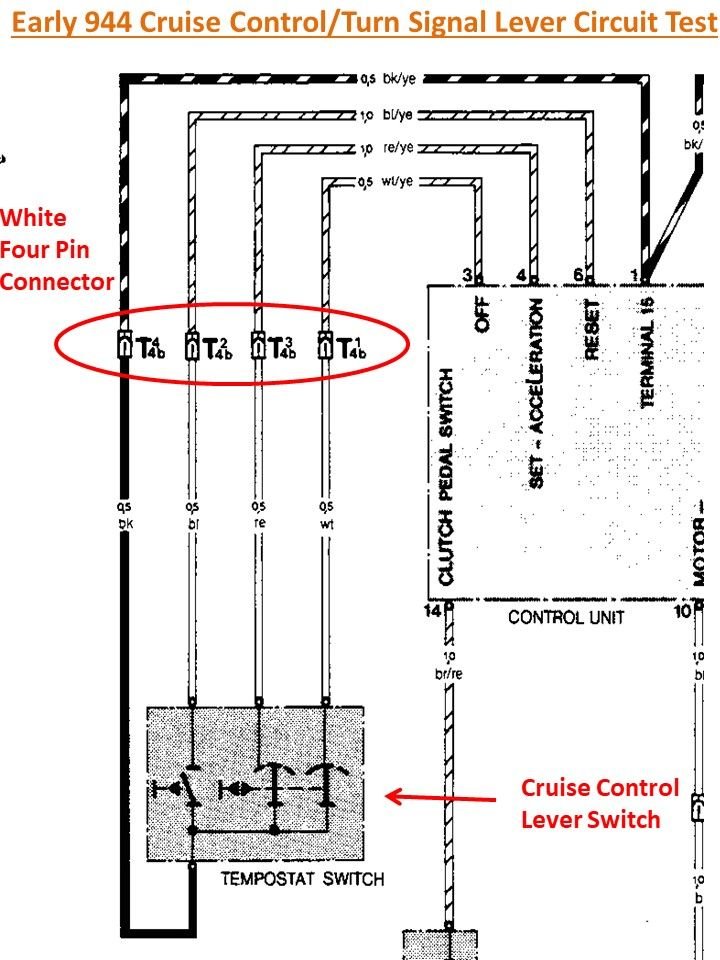
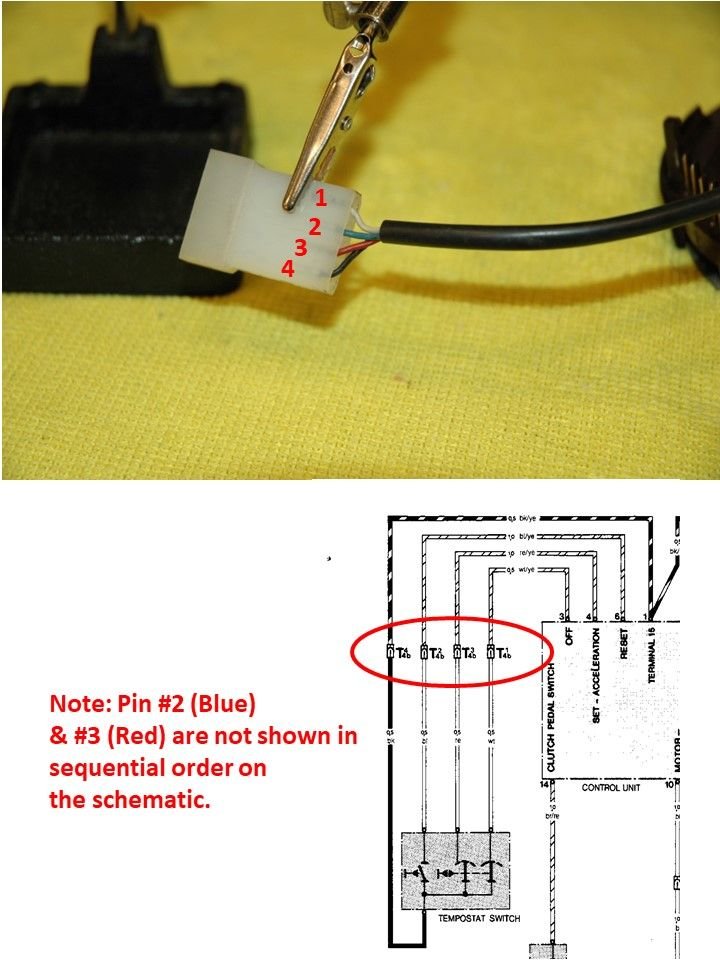
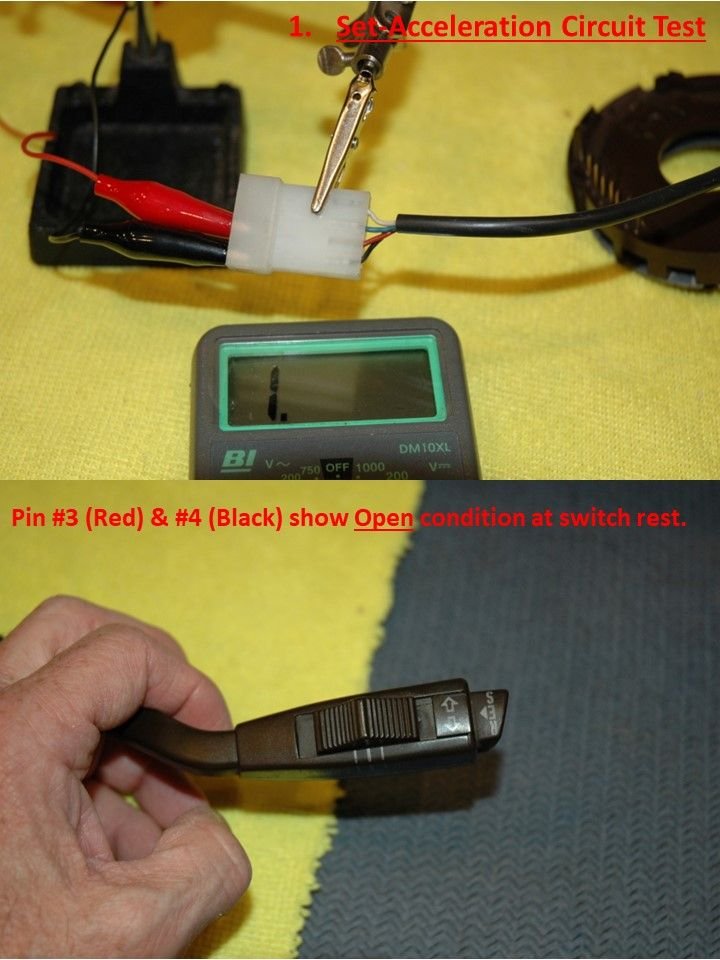
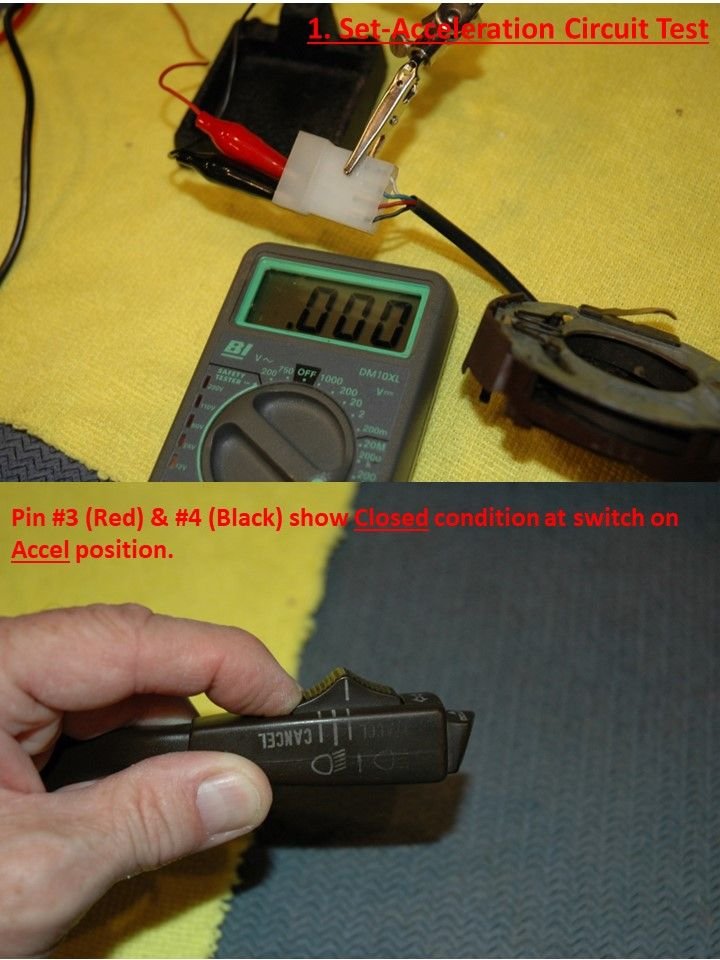
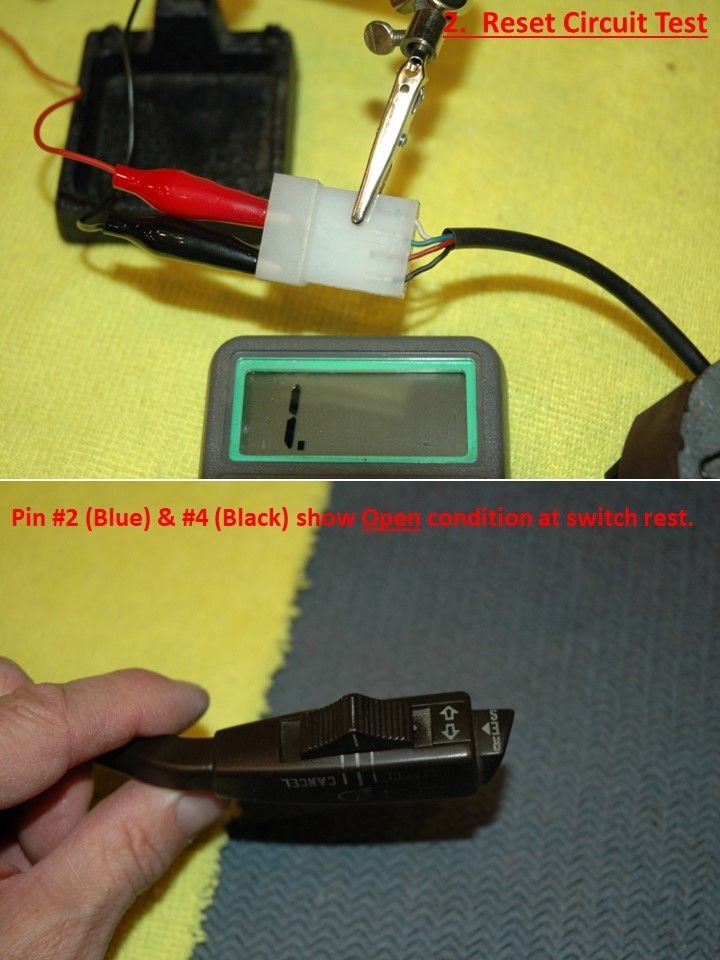
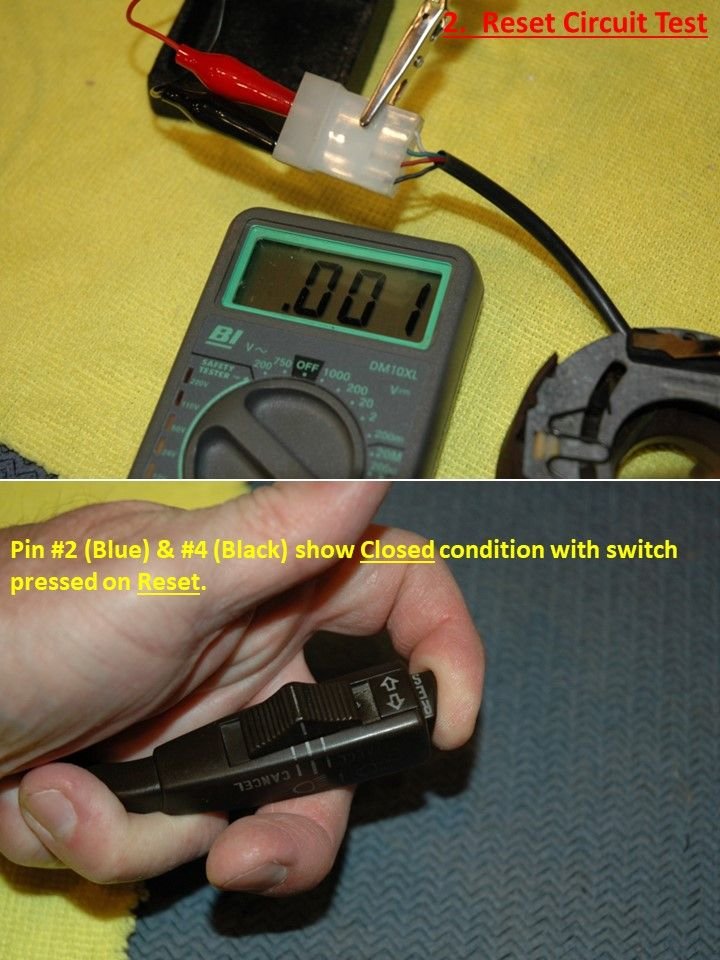
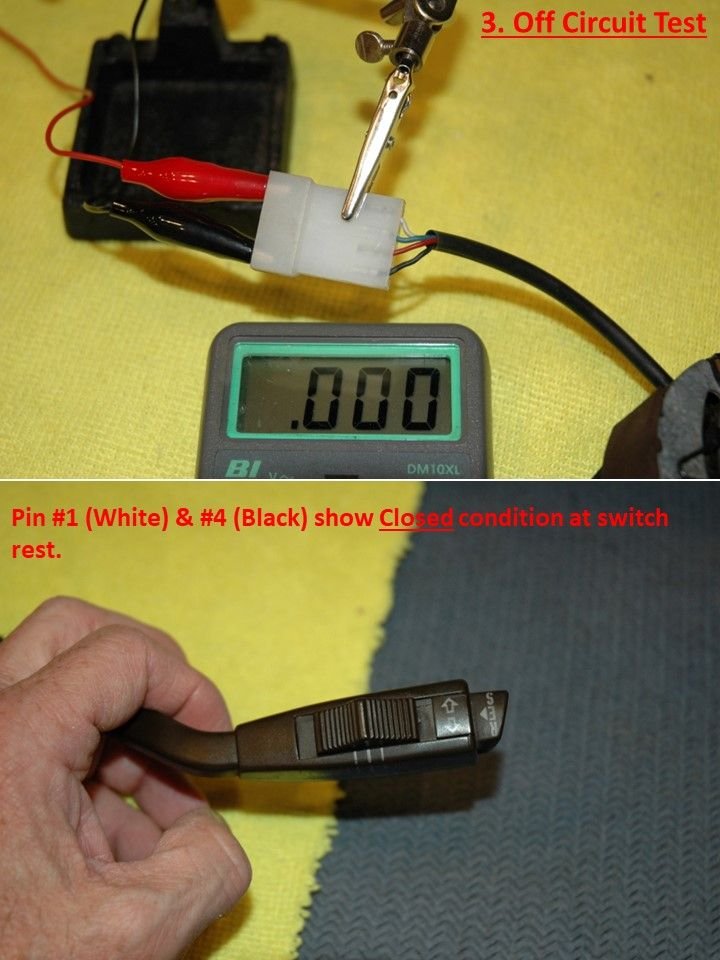
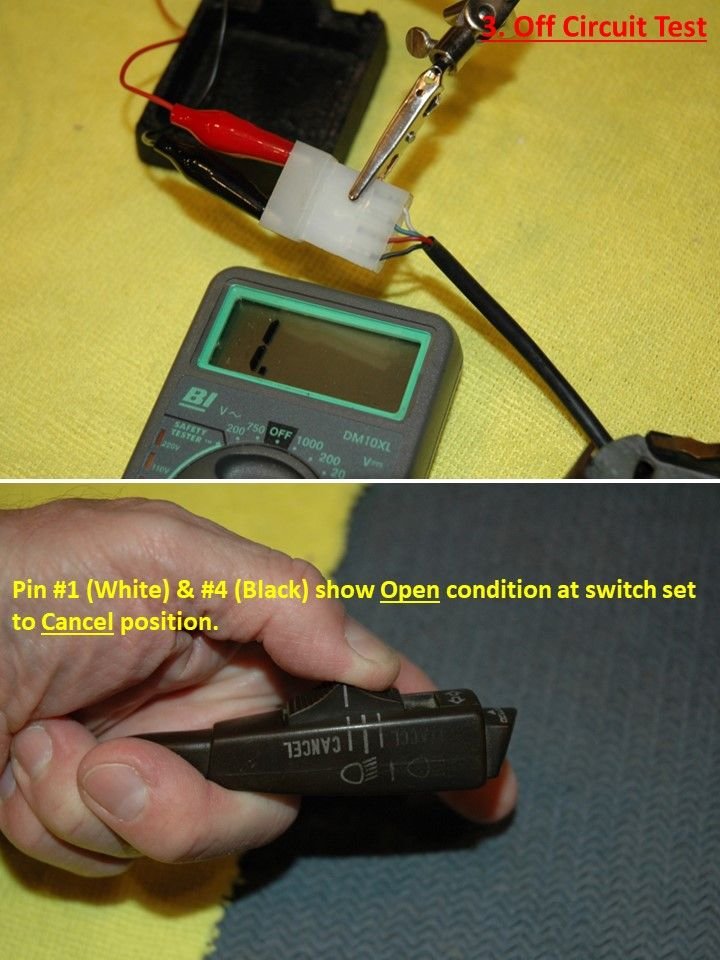
I did take the car out during my lunch hour and was unsuccessful in engaging the system. I think the next step is to determine whether there's proper voltage running - I need to conduct some further research on pin testing results.
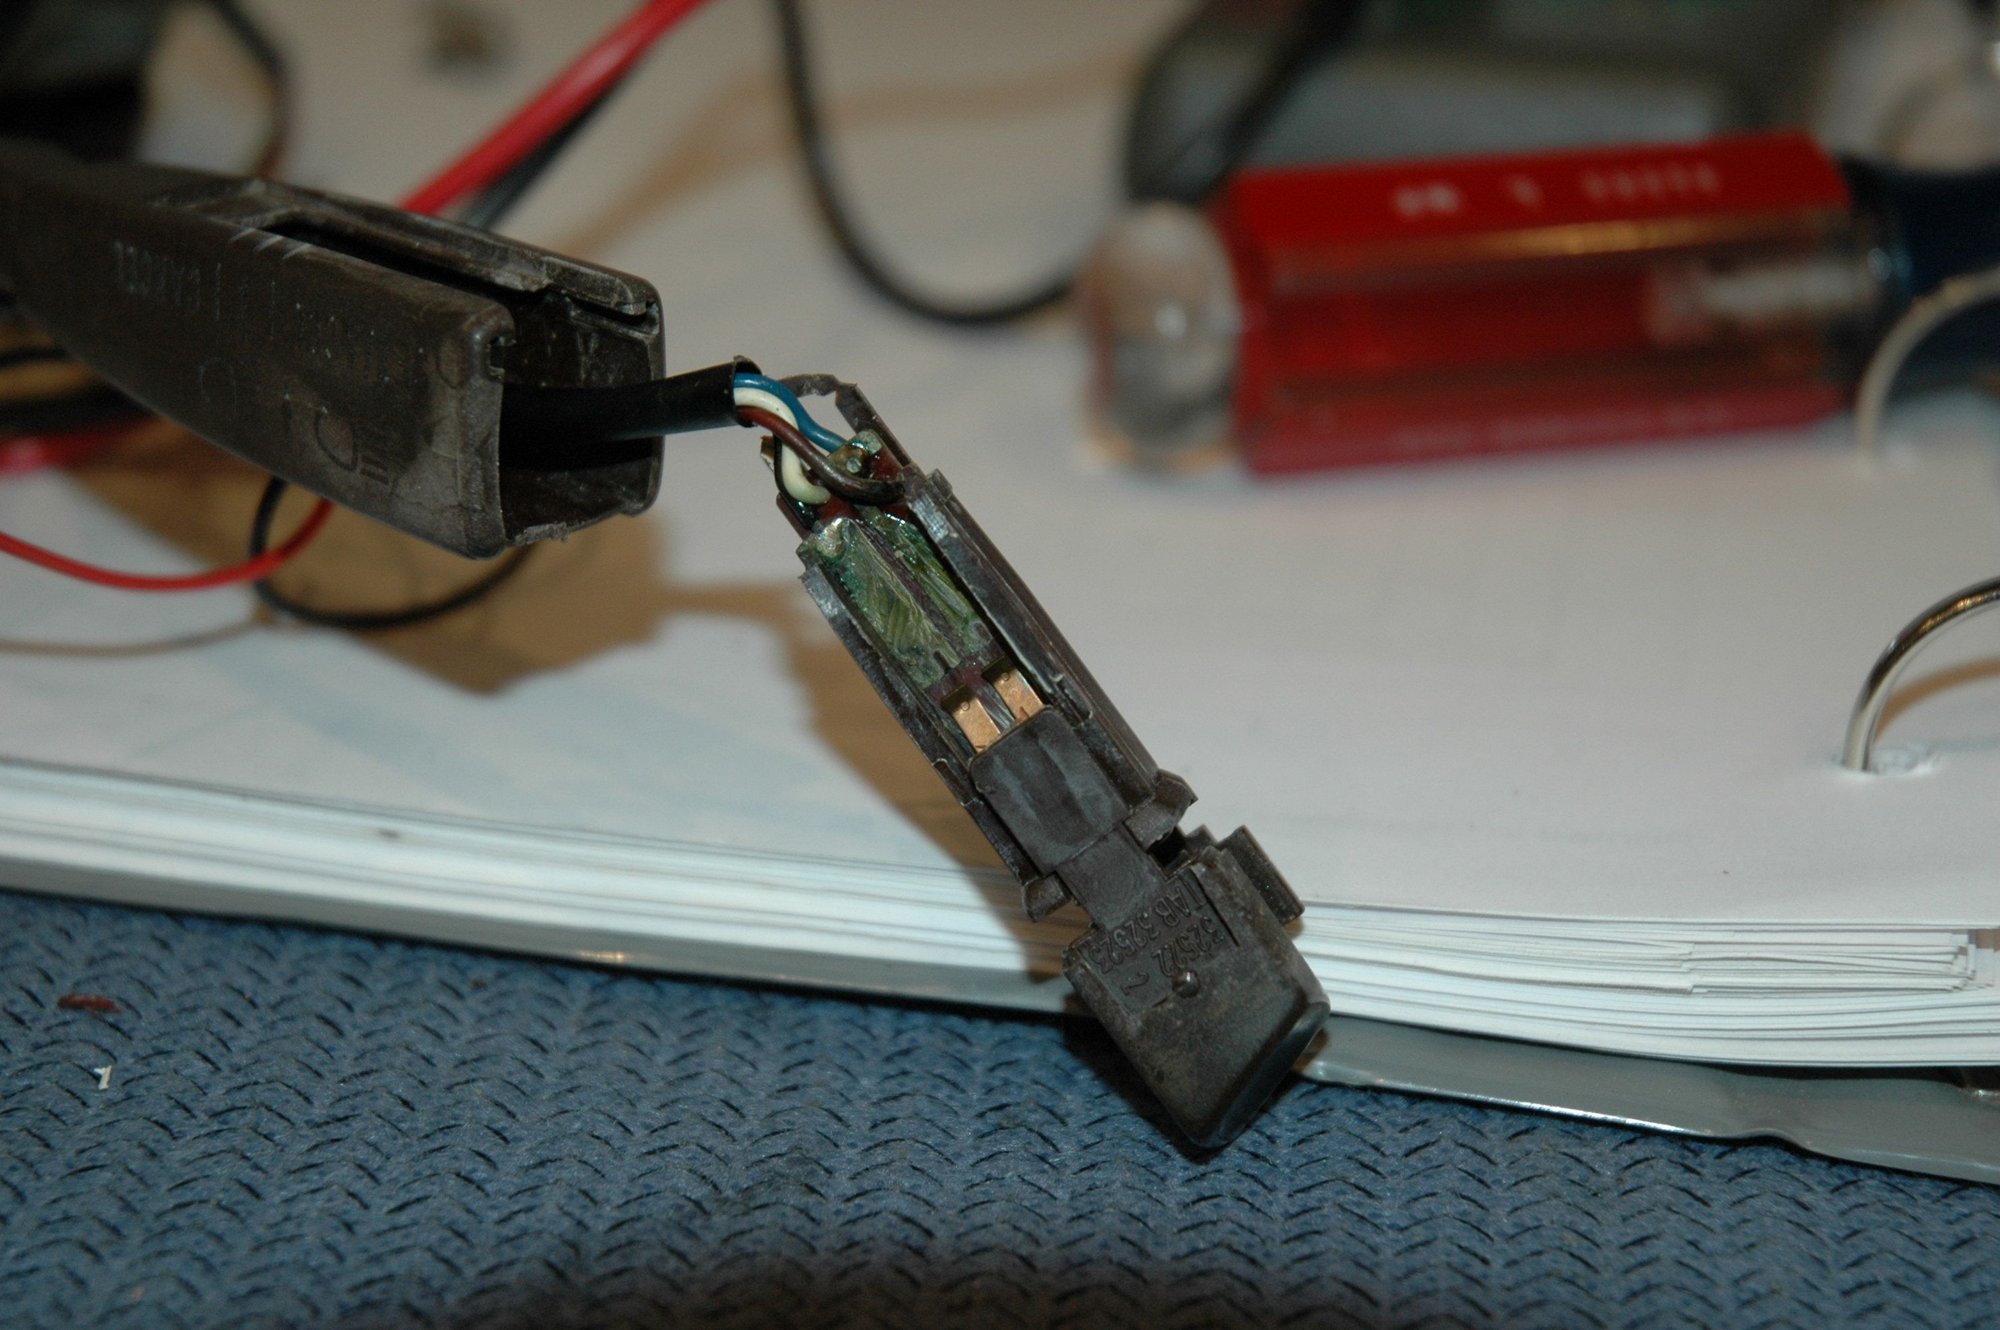
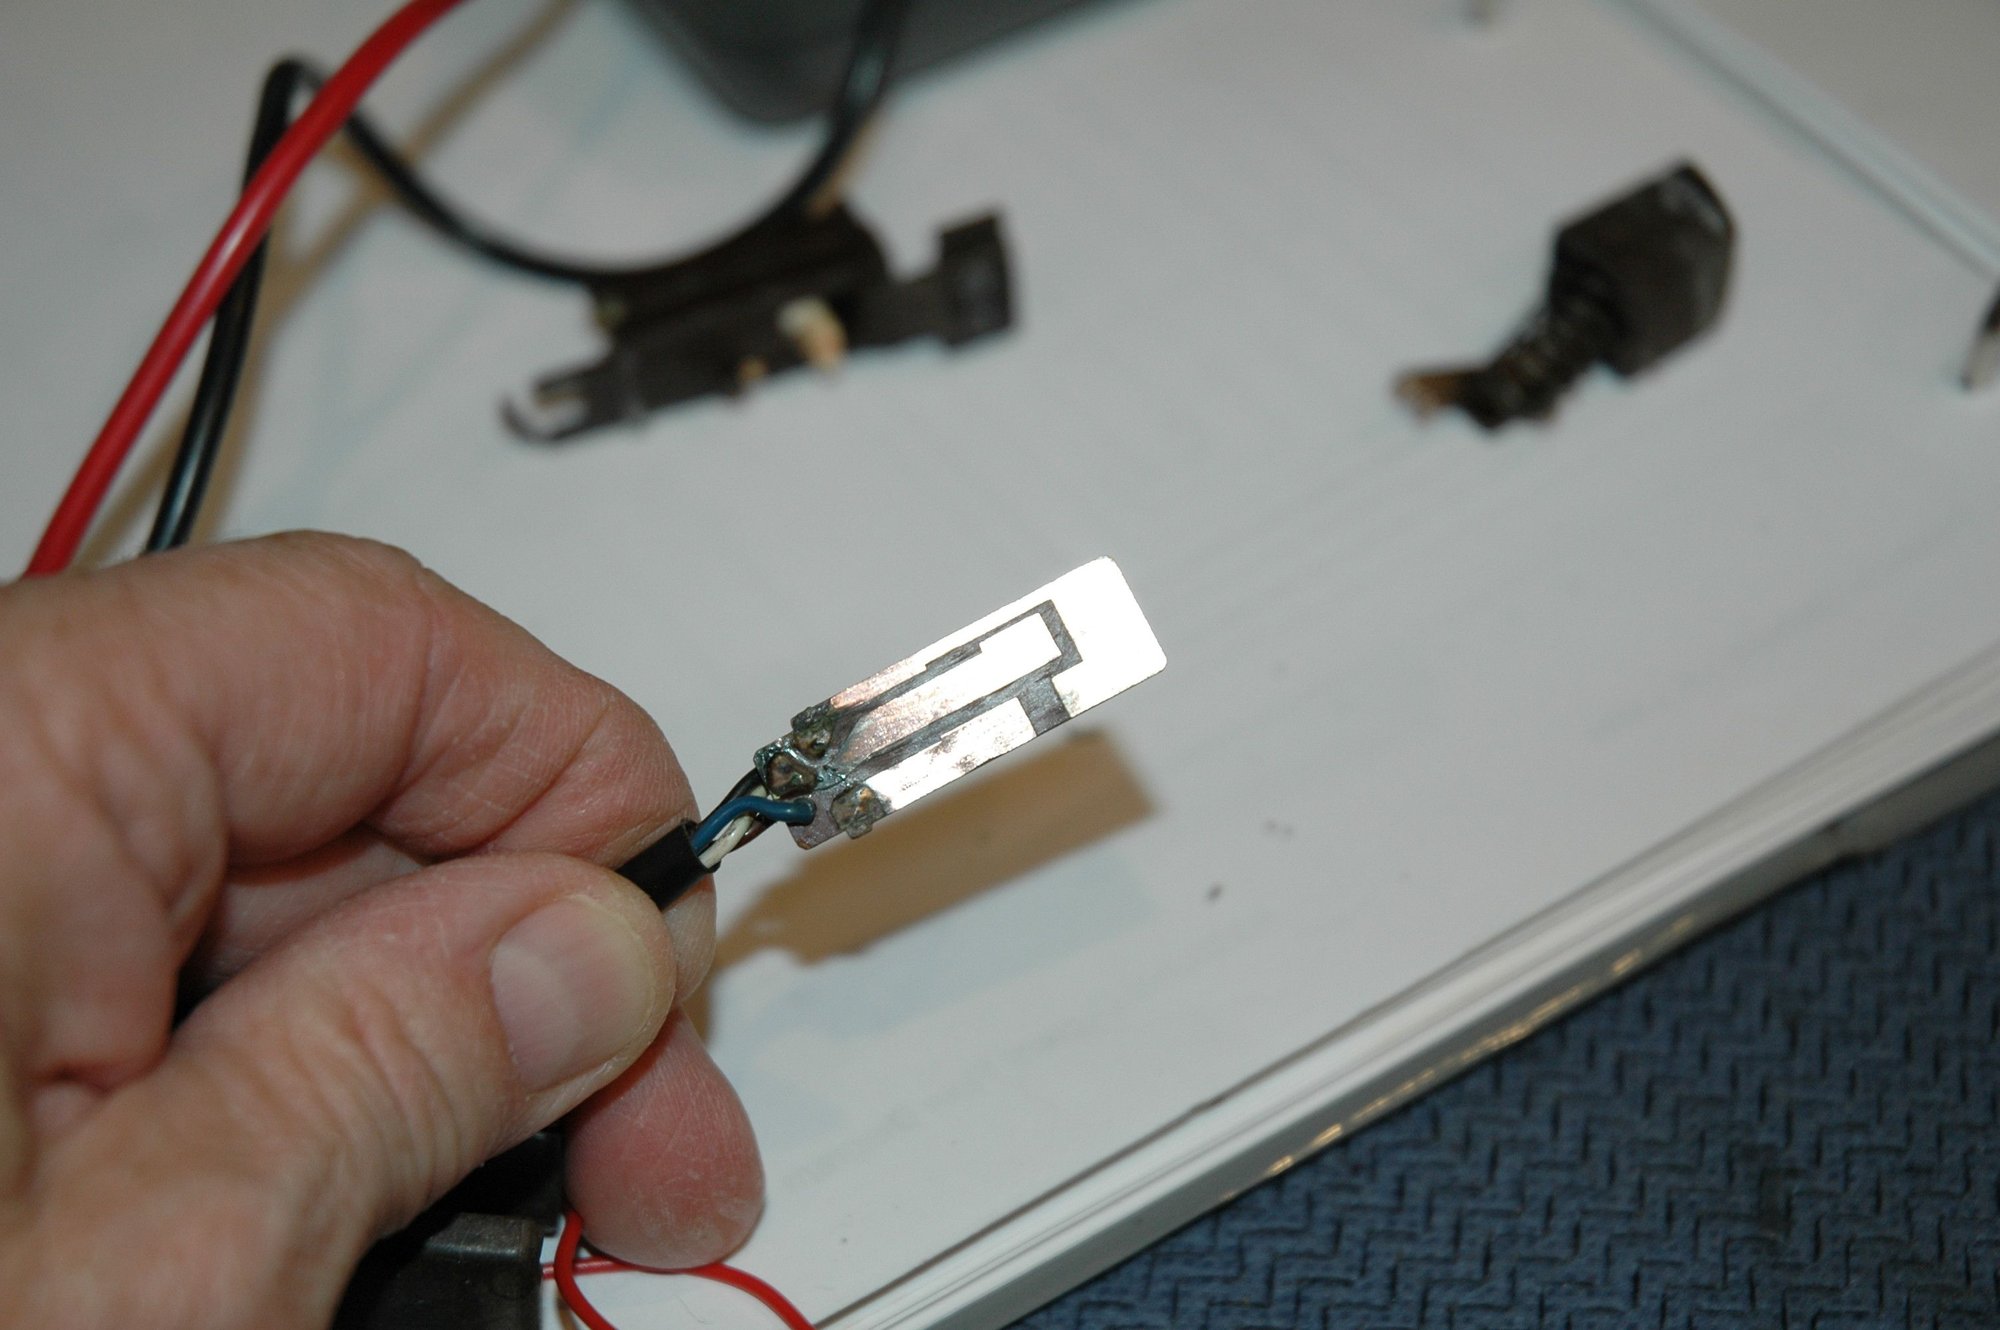
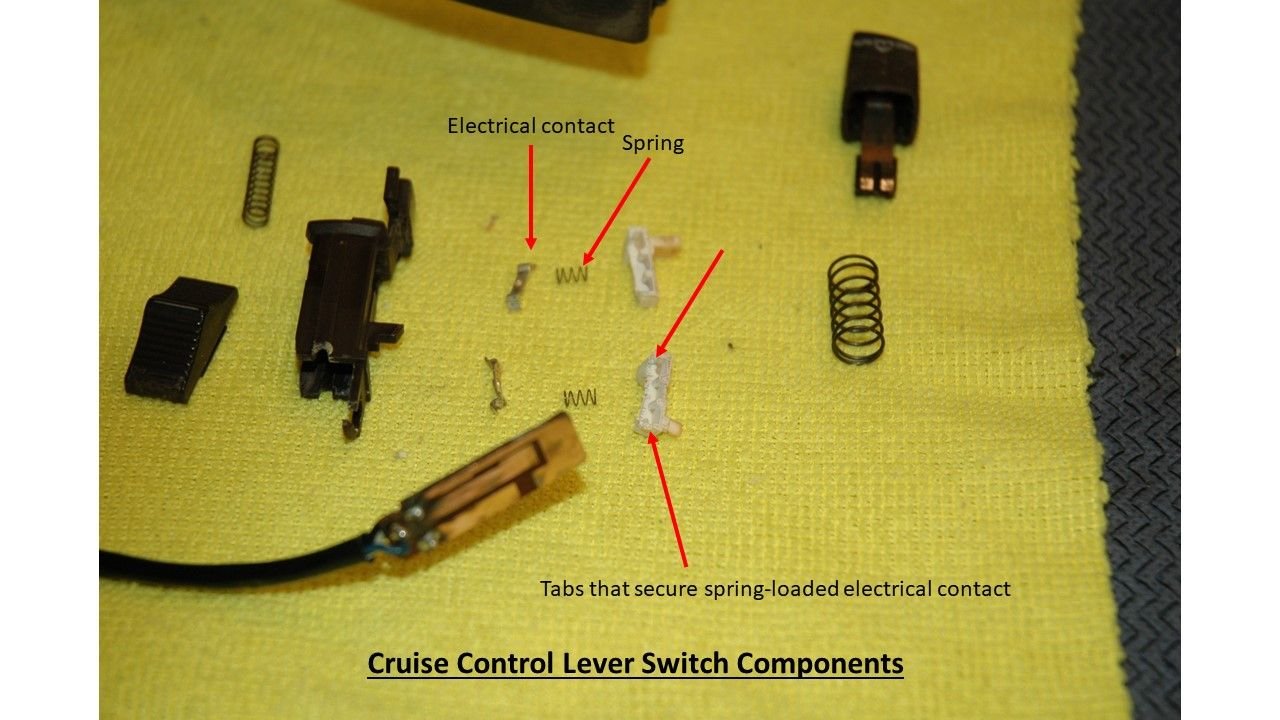
So, of course, the system didn't activate (or do anything) while driving the minimum 25mph. I disconnected the lever switch and performed a few continuity checks - all tests came up with an open circuit. This is what I discovered once the switch was disassembled:
All the contacts were heavily corroded. More cotton swabs, electrical contact cleaner, as well as a soft plastic wire brush on my Dremel tool:
I found a damaged contact tab (maybe from me during disassembly...?) which may render this lever switch useless. I'll post those pics soon...
I'm assuming the switch comes out with a couple of screws once the steering wheel is off. The WSM seems to be mute on the subject. My resume button is intermittent and I have a NOS one to install.
Actually, no. You have to use a jeweler's screwdriver to slide the switch off the lever. Be very careful as there are contacts on both sides of the plate.
Just looked, there are three holes for screws. Also, just looked and one of the plastic hooks on the back fell out of the bag. It's broken off. Is it important?
And, yes, you will have to remove the entire turn signal/ headlight stalk/lever assembly in order to disconnect four connectors, including the inline Molex-style connector for the cruise control. That entails removing the three small, but long, flat-head screws, and two small Phillips screws that hold the plastic clamshell cover together.
 07-24-2023, 10:40 PM