When you click on links to various merchants on this site and make a purchase, this can result in this site earning a commission. Affiliate programs and affiliations include, but are not limited to, the eBay Partner Network.
A pretty silly question I'm sure.. but.. what is a proper way to clean or make flat again an exhaust flange surface?
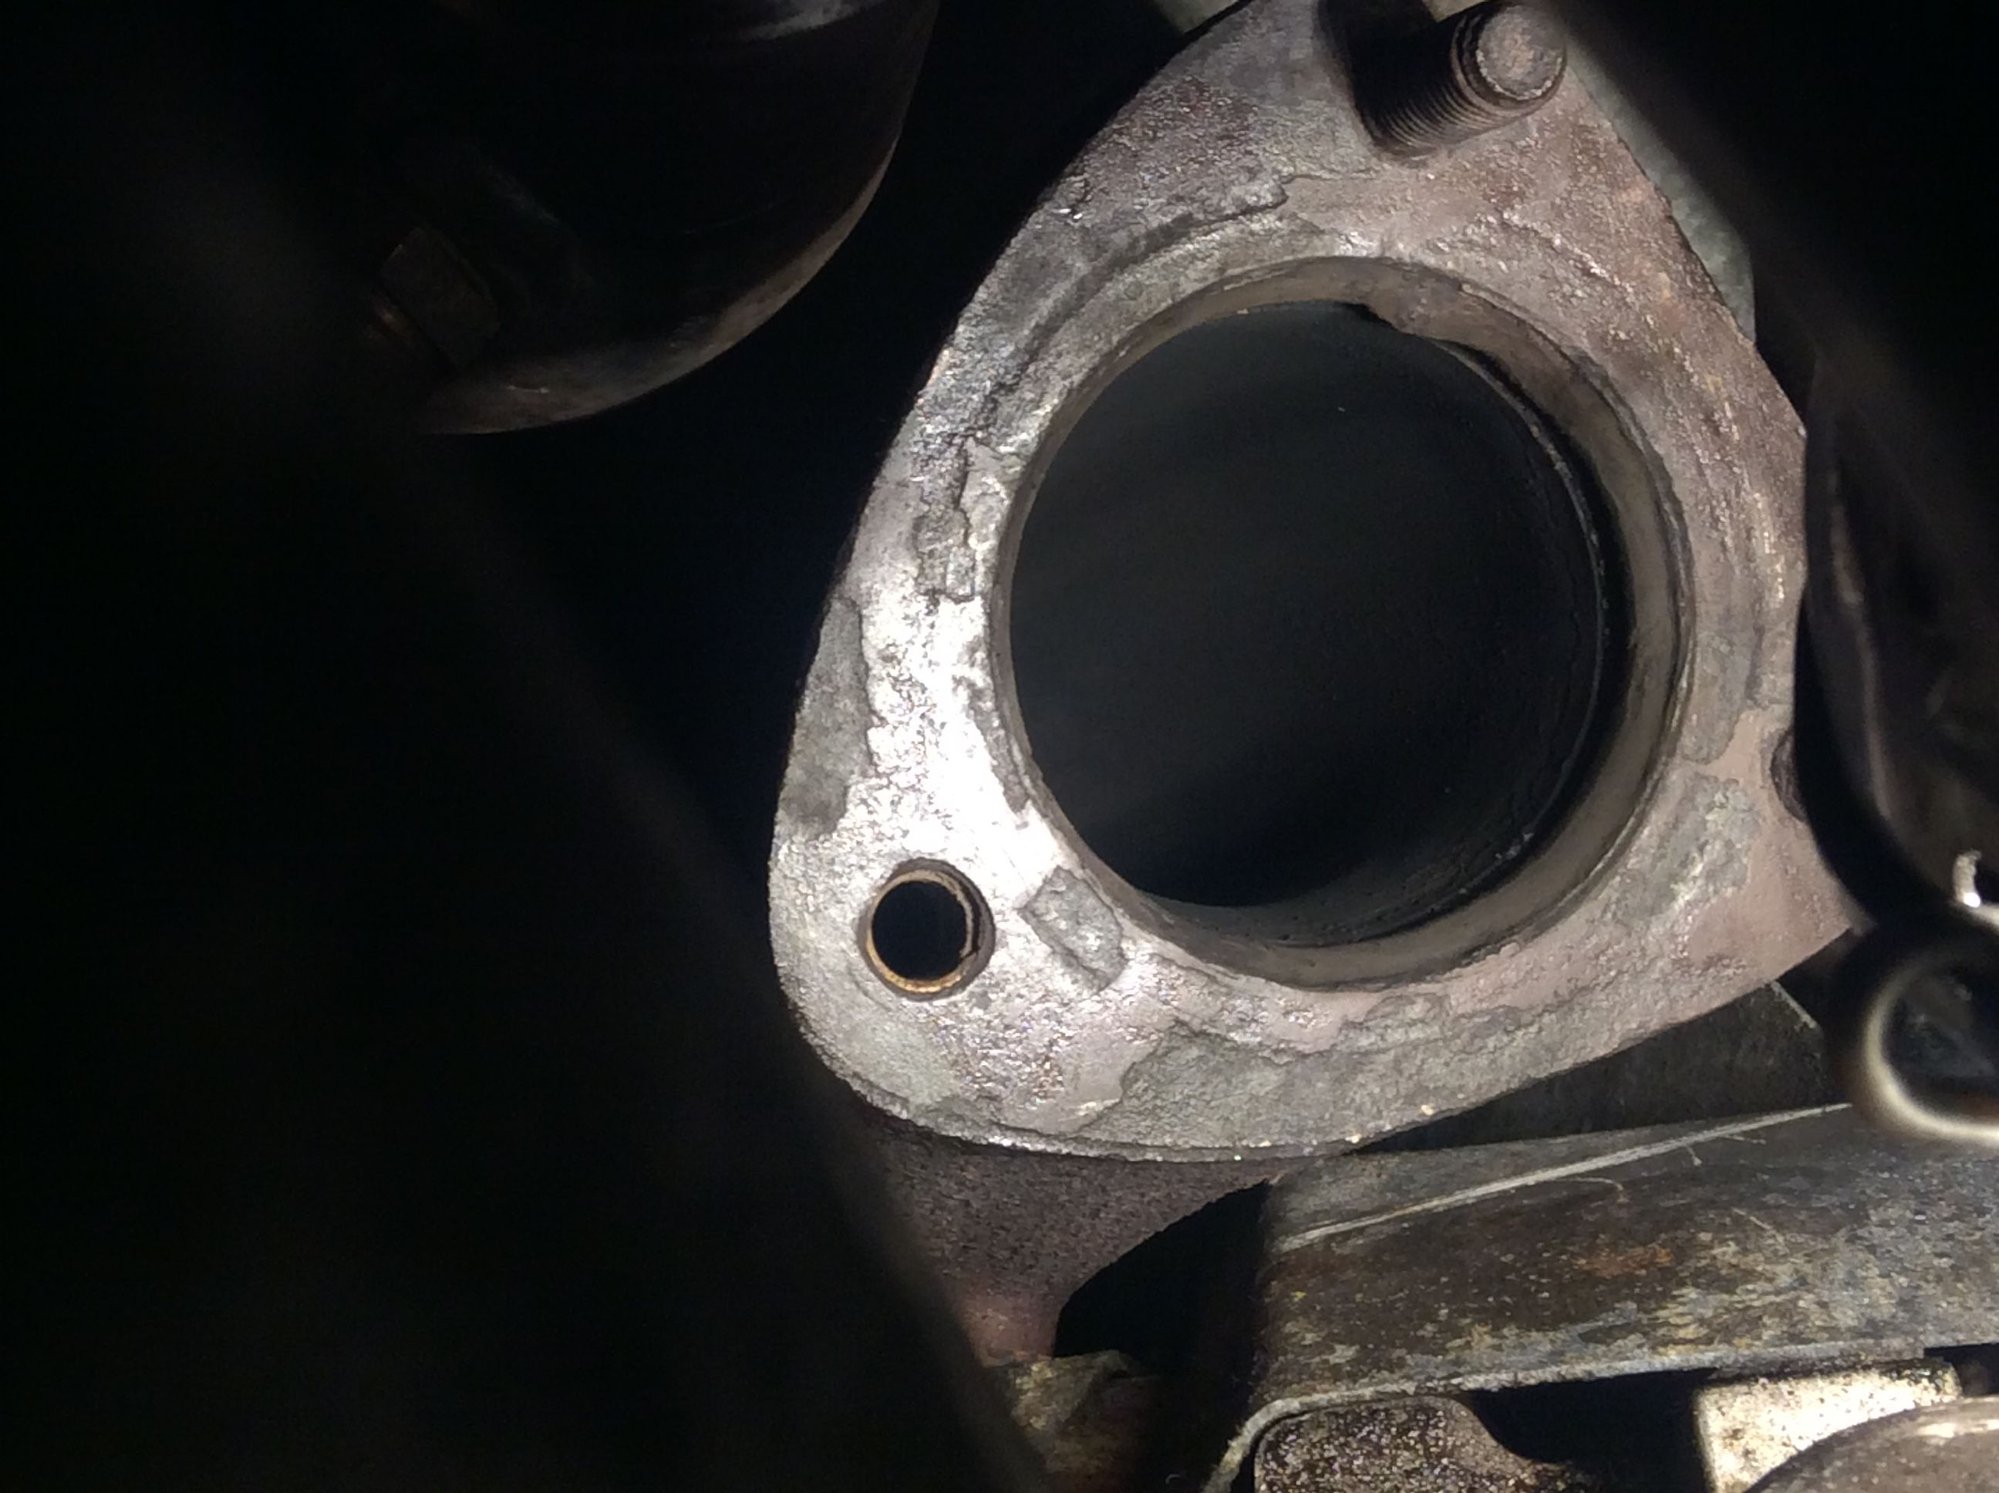
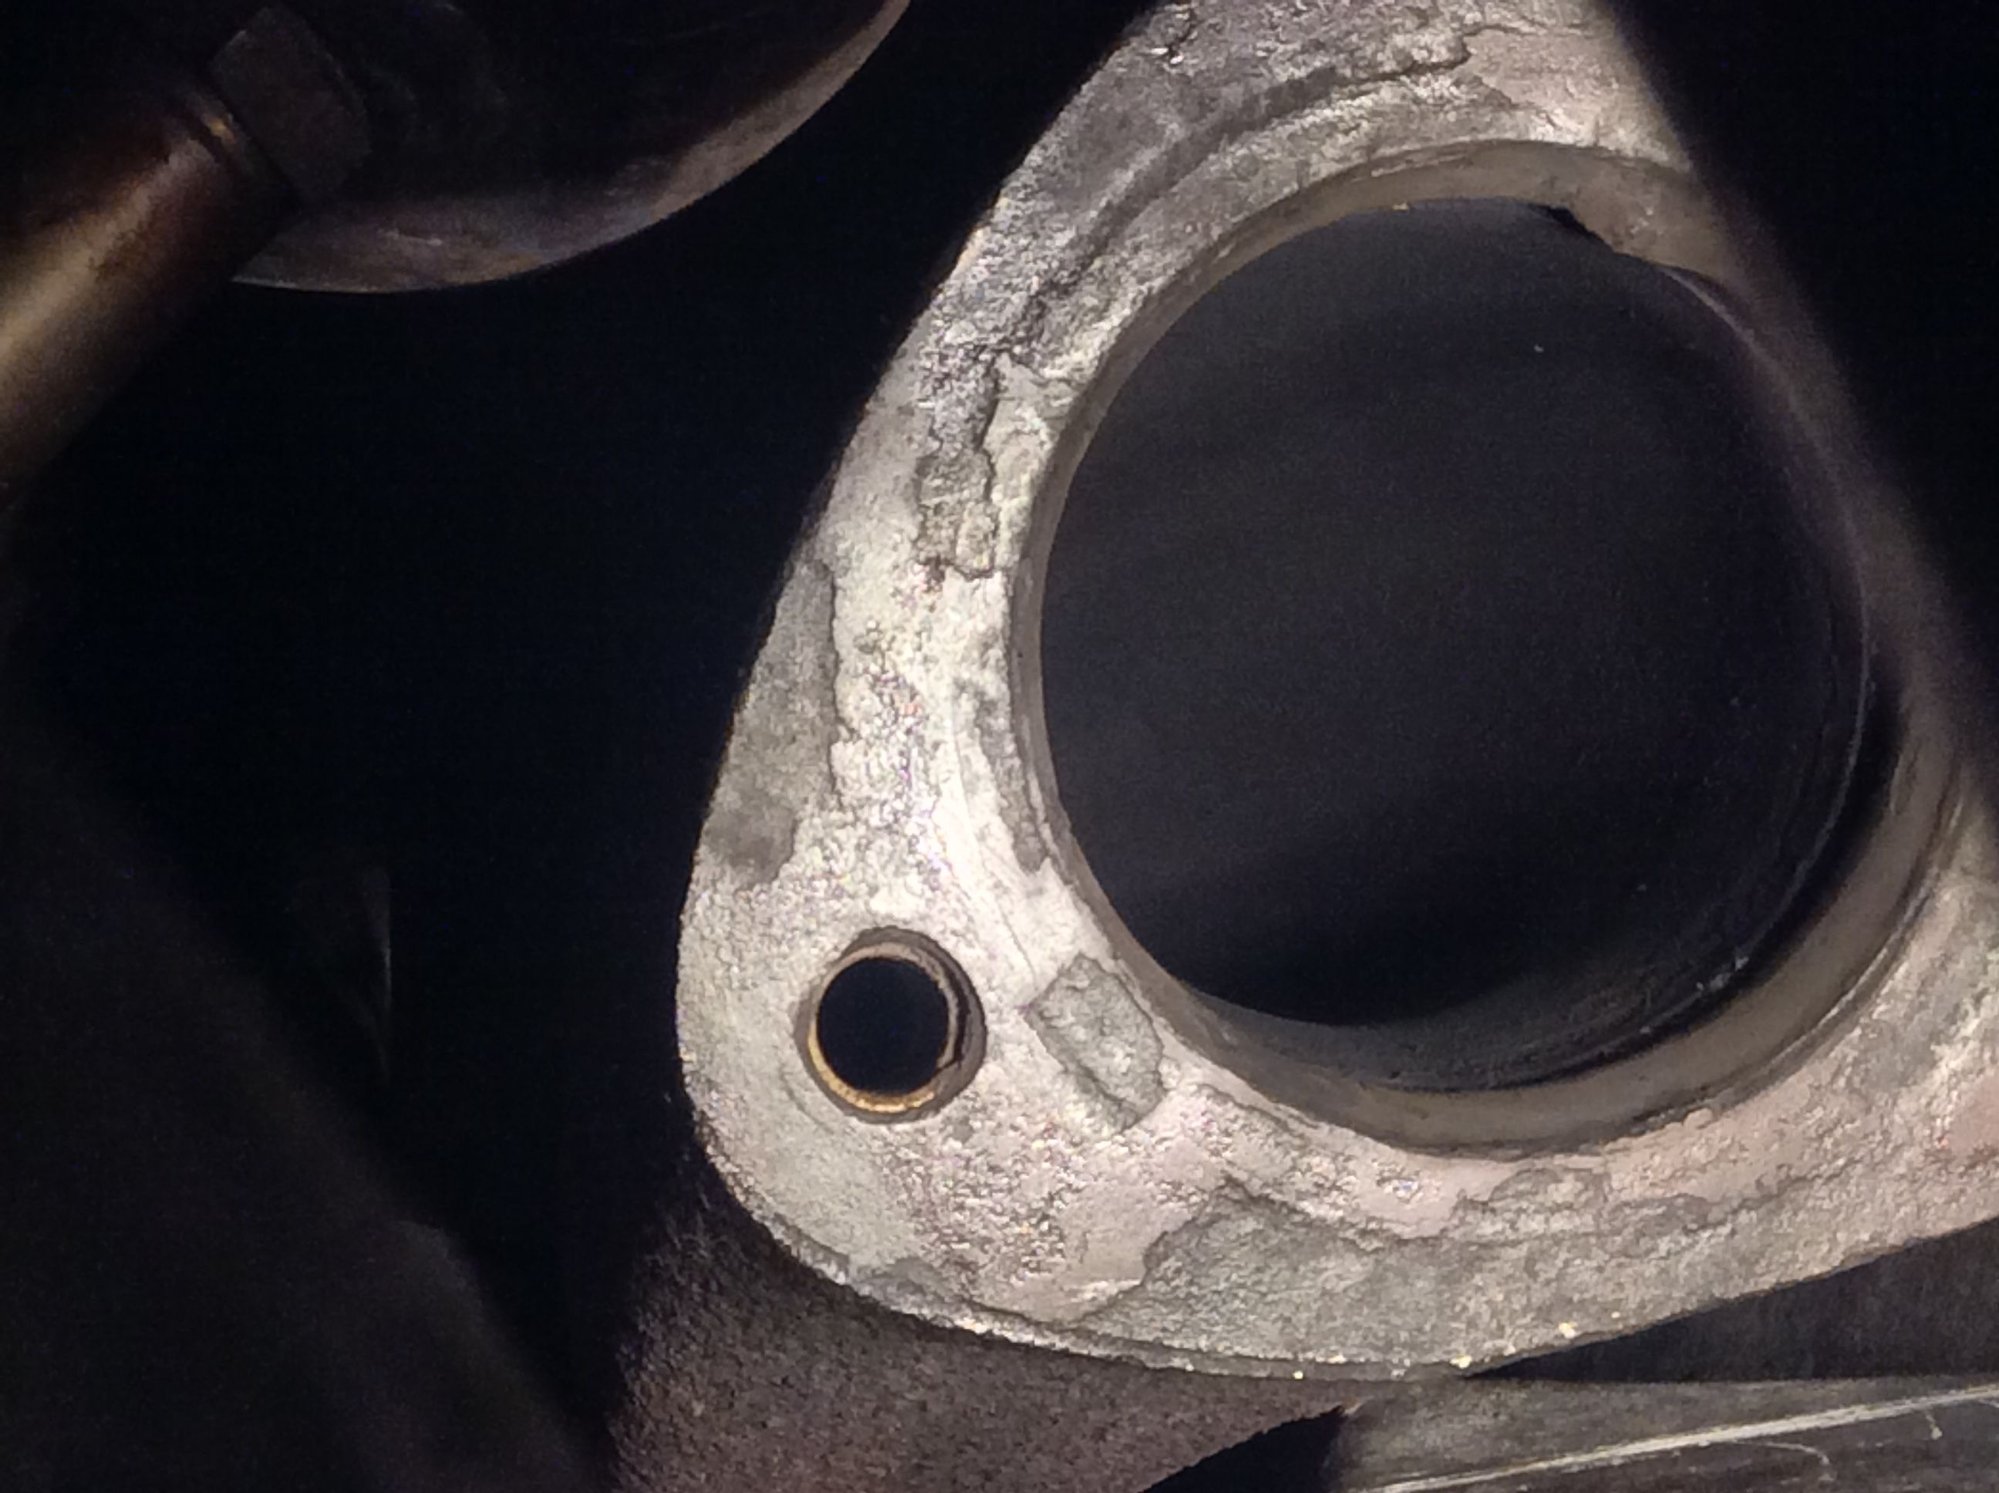
The downpipe to exhaust connection is open and I've noticed that the flange surface on the downpipe side is bumpy with an indented imprint from the exhaust ring--a little valley at places--and built-up material elsewhere.
This side is still in the car up behind the crossover pipe.. I can get to it with my left hand enough to rub some sandpaper and a small stone, neither of which did much. Is there something else I can try to make smooth again?
If you think there's room to get an ~4 inch disc in there, I have one that has diamonds embedded. It's small so not always so useful but it removes material like a champ. I've used it to true up the back of handplane blades and it's faster (and flatter) than anything else I've tried.
I haven't used it in a couple of years but I'm pretty sure I could dig it out or get another one easily.
Hmm... sounds great, but it's very tight there: by "hand" I mean I can squeeze two fingers holding a tiny stone. Your disc means mounted on a tool, right? I'll see if I can get my little rotary in there then maybe look for a small disc with diamonds like yours
I guess I'm more afraid of making an uneven surface with any power tool action. I should have "flattened" the downpipe end when I had if off with the turbo during AOS job few years back
Hmm.. the reason I'm all into this connection is I noticed despite using new steel rings last time, there looks like some soot was leaking out near one of the three fastening points. And, I previously had to drill out a broken stud in one hole, replacing with a helicoil so that I now have two nuts-on-studs and one bolt.
Could tightening all three (two nuts and one bolt) to the same torque value cause a non-parallel mounting? The apparent leak would be near one of the nuts-on-studs--an area where, ironically, seems the smoothest (the rough areas of the flange surface are more near the other two holes)
This time around, with steel ring or copper gasket, should I torque the two nuts differently than the bolt?
I don't think you're having an issue due to two studs and a bolt. However, the general rule of thumb for assembling your exhaust is to get everything together loosely and then start tightening all of the connections a little at a time until they're at full spec. or tight enough. So it's possible if you tighten up your downpipe first and then move down the exhaust tightening as you go you might be causing some binding and deflection / leak at a connection.
However, as I think about this more, I don't think you want to replace a ringed connection with a cooper gasket connection. There's a reason Porsche used a ring in that location and I suspect it's due to heat.
yes on the slow snug up. every thing should be relaxed as all surfaces mate. its kinda best to do it in a warmish room as the exhaust does grow with heat.
set your manifold head flanges on a sheet of glass. both sides should be flat with the glass. if one side is off, use a sheet of sandpaper on the glass to deck both sides at the same time. not rough stuff but 320 or so for steel or 400-600 for aluminum. make a couple passes and see where the high spots are. don't go to crazy and keep the flange flush.(common to see high spots at the bolt holes from overtightening trying to fix leaks)
Last edited by thomasmryan; 01-17-2020 at 09:03 PM.
Reason: spelling
No warm room; the car is outside under a tarp garage. I get the fit everything loose bit, but at some point, you have to start tightening and my understanding is it's best to start from the top (ie. engine) and move towards the muffler tip?
I'll try cleaning up the flange a bit more with 320 paper and use the ring thanks
Hello Dan, I think mj951 and thomas ryan are correct. When I removed my crossover and turbo (with downpipe attached) to do oil pan gasket, rod bearings, AOS, etc. i initially had trouble lining up the exhaust. I ultimately needed to lift the engine higher with the engine support brace, tighten down the downpipe while the remainder of the fasteners were on but not tightened. What I found is that after I moved from the downpipe to the other side of the crossover, the exhaust did line up and seal properly but not without a bit of a struggle. In my case, the flanges were fine and clean. I believe the exhaust is under some stress when in place, maybe from the heat cycles over time. Good luck.
I was away from the forum and not able to respond; it looks like you've got some solid information on how you may want to proceed. If you're at all interested, the disc I was talking about was from this application:
They are manufactured to meet crazy tolerances so I can guarantee that it would be a good flat surface.
Those discs stop being effective for the application and are discarded, but still have a tremendous amount of grinding capability for other materials. They are made to be mounted in a much, much larger instrument (bigger than your car) but can be taken out and used by hand. That's what I'm proposing. Here's a better image of what a typical example looks like:
Unfortunately, the super cool grinding disk Zirconocene was kind enough to equip me with won't fit in the area as installed; I'll have to wait till next time the downpipe is off to properly clean the flange.
In the meantime, here are closeups of what I'm dealing with
I haven't tried any sandpaper, but I've been at it with a little stone and a mini file even; can't seem to get any of it off.
Any other idea before I close it up? I'm itching to drive!
I'm bummed that the disk didn't fit but I hope you'll find other uses for it.
As I originally got those things to true up the back of chisels and hand plane blades, I thought I'd send along the other thing that woodworkers to for that kind of work: float glass is quite flat and is often used as the support for sandpaper. You can often find thick, but small other-dimension pieces that may fit better where you need to work. Using spray adhesive you can work your way up the sandpaper grits (provided that something like an 80 grit does anything in the first place). The higher you go in grits the more of the scratches will be removed from the more aggressive grits.
Alternatively, and I may be way off base here, but if it's a smooth surface you're after what about sealing the surface with some sort of high temperature compatible Bondo then sanding that down? At the very least that might serve to compensate for what's going on there and provide a good sealing surface.
Dan, those flanges look distinctly different. On mine, they were clean, flat and had a distinct groove into which the hollow o-ring was installed and crushed to fill the gap. I’m not sure why yours looks like it does but I would almost remove and replace those parts if it doesn’t seal properly.
 01-16-2020, 05:38 PM