When you click on links to various merchants on this site and make a purchase, this can result in this site earning a commission. Affiliate programs and affiliations include, but are not limited to, the eBay Partner Network.
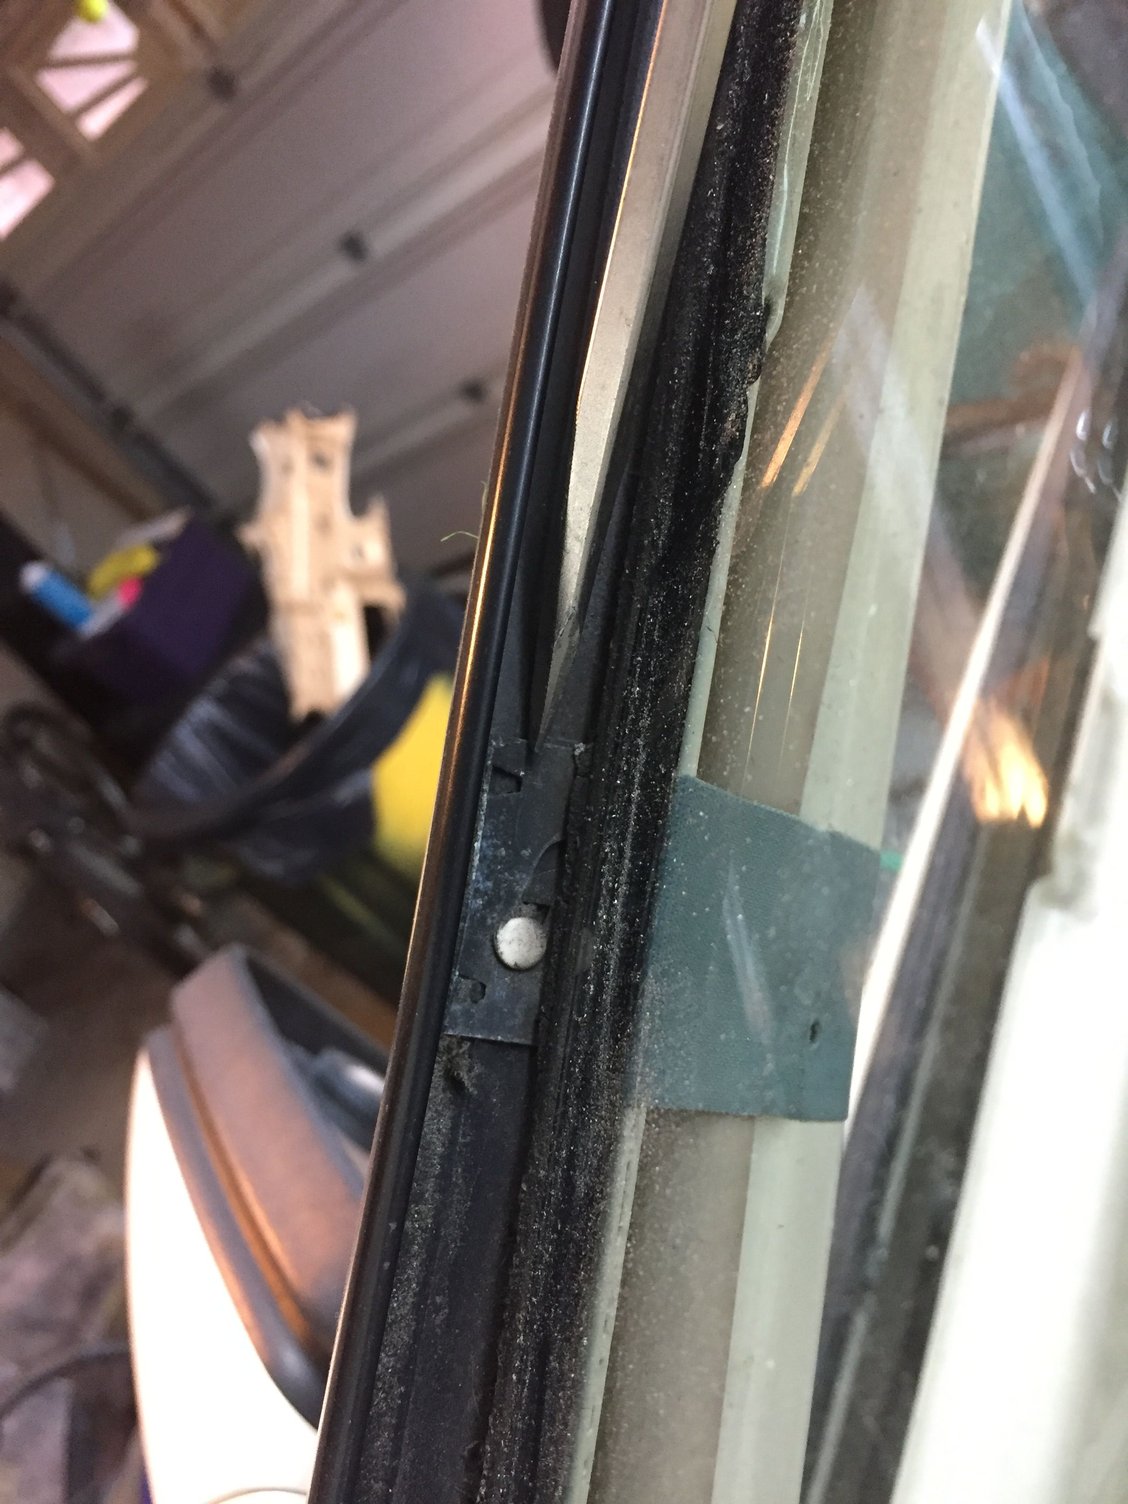
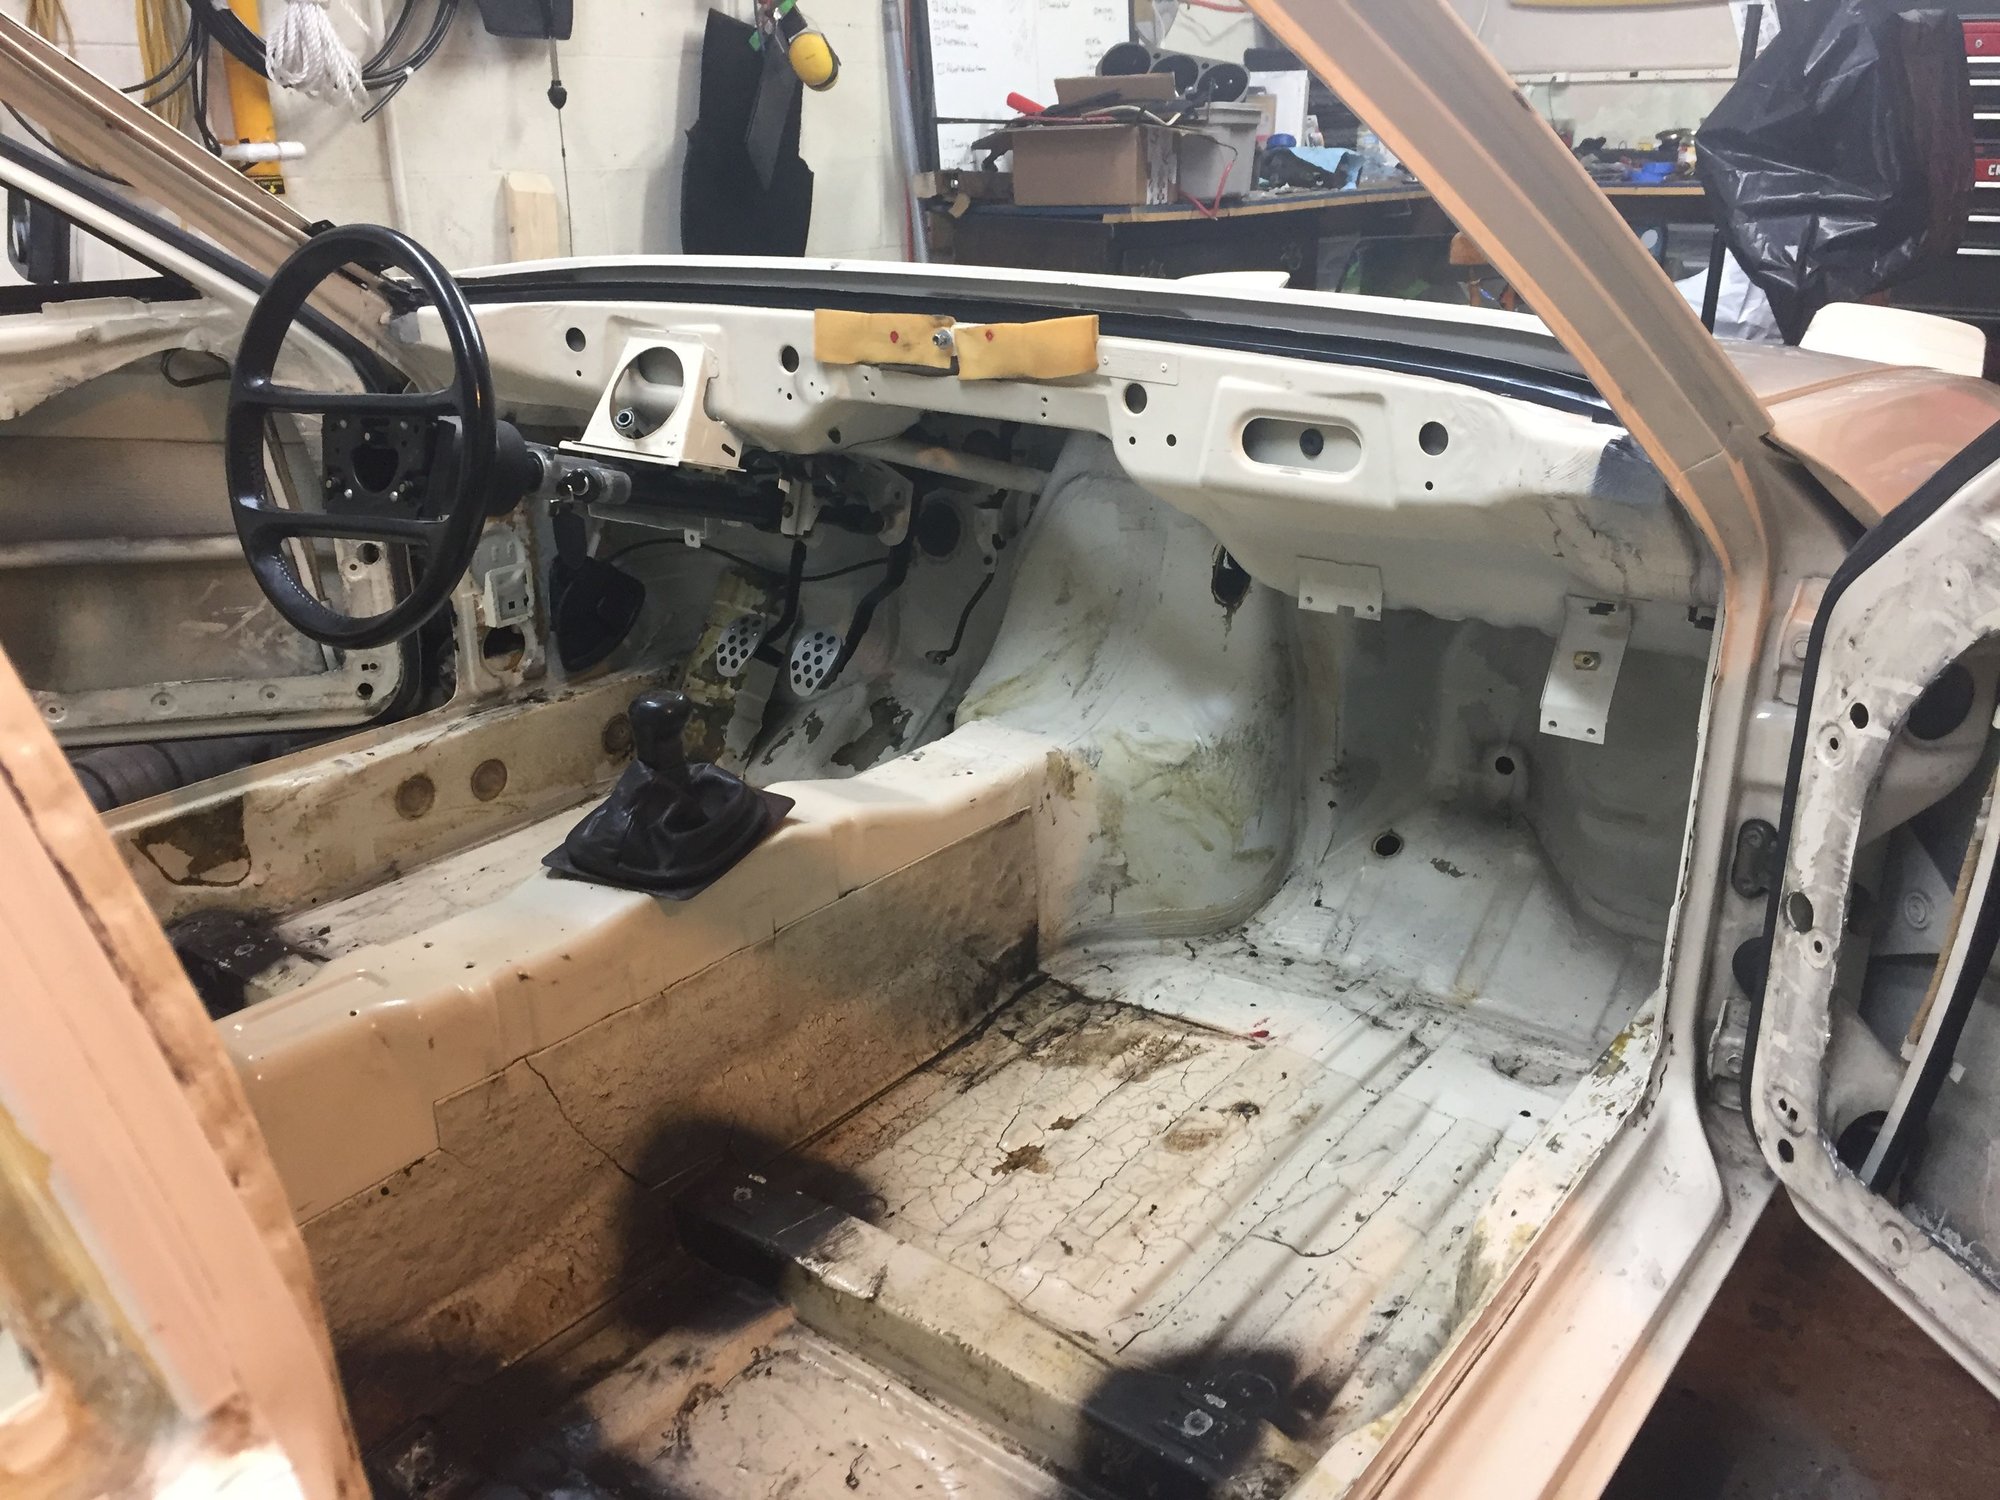
Removed the windshield yesterday. Not a super fun project. The hard part is removing the trim. First you pull out the rubber seals between the aluminum trim and the glass. That was easy. But that revels the challenge. There are a bunch of spring clips that have to be slid to one side to release their grip on the trim. I used a screwdriver and gentle tapping to get them to move. The top clip on both sides was rusted. So I ended up destroying those ($8 to $10 each). One trick I found was to dig out the windshield glue from around the clip before trying to move it.
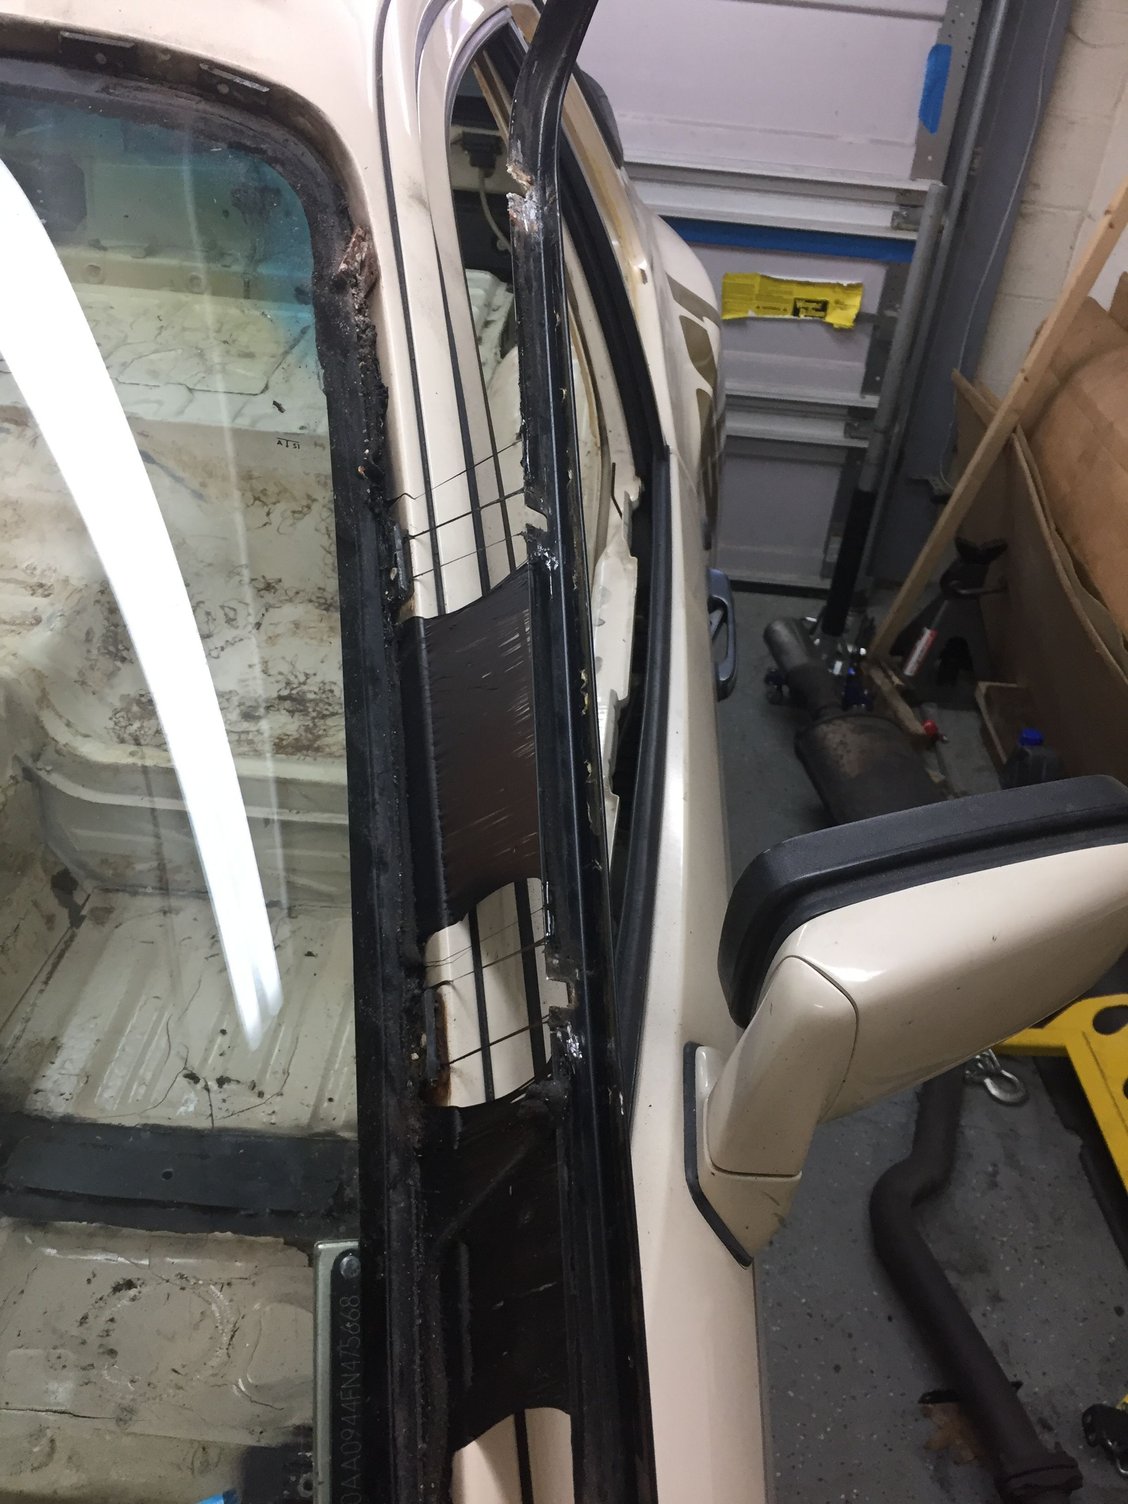
Once the clips are out, the trim can be pulled off, carefully. The driver's side had a ton of windshield glue that made it more challenging.
Getting at the clips on the top piece of trim was virtually impossible. Fortunately, using an interior trim tool and working gently from one end to the other, I was able to remove it without loosening the clips.
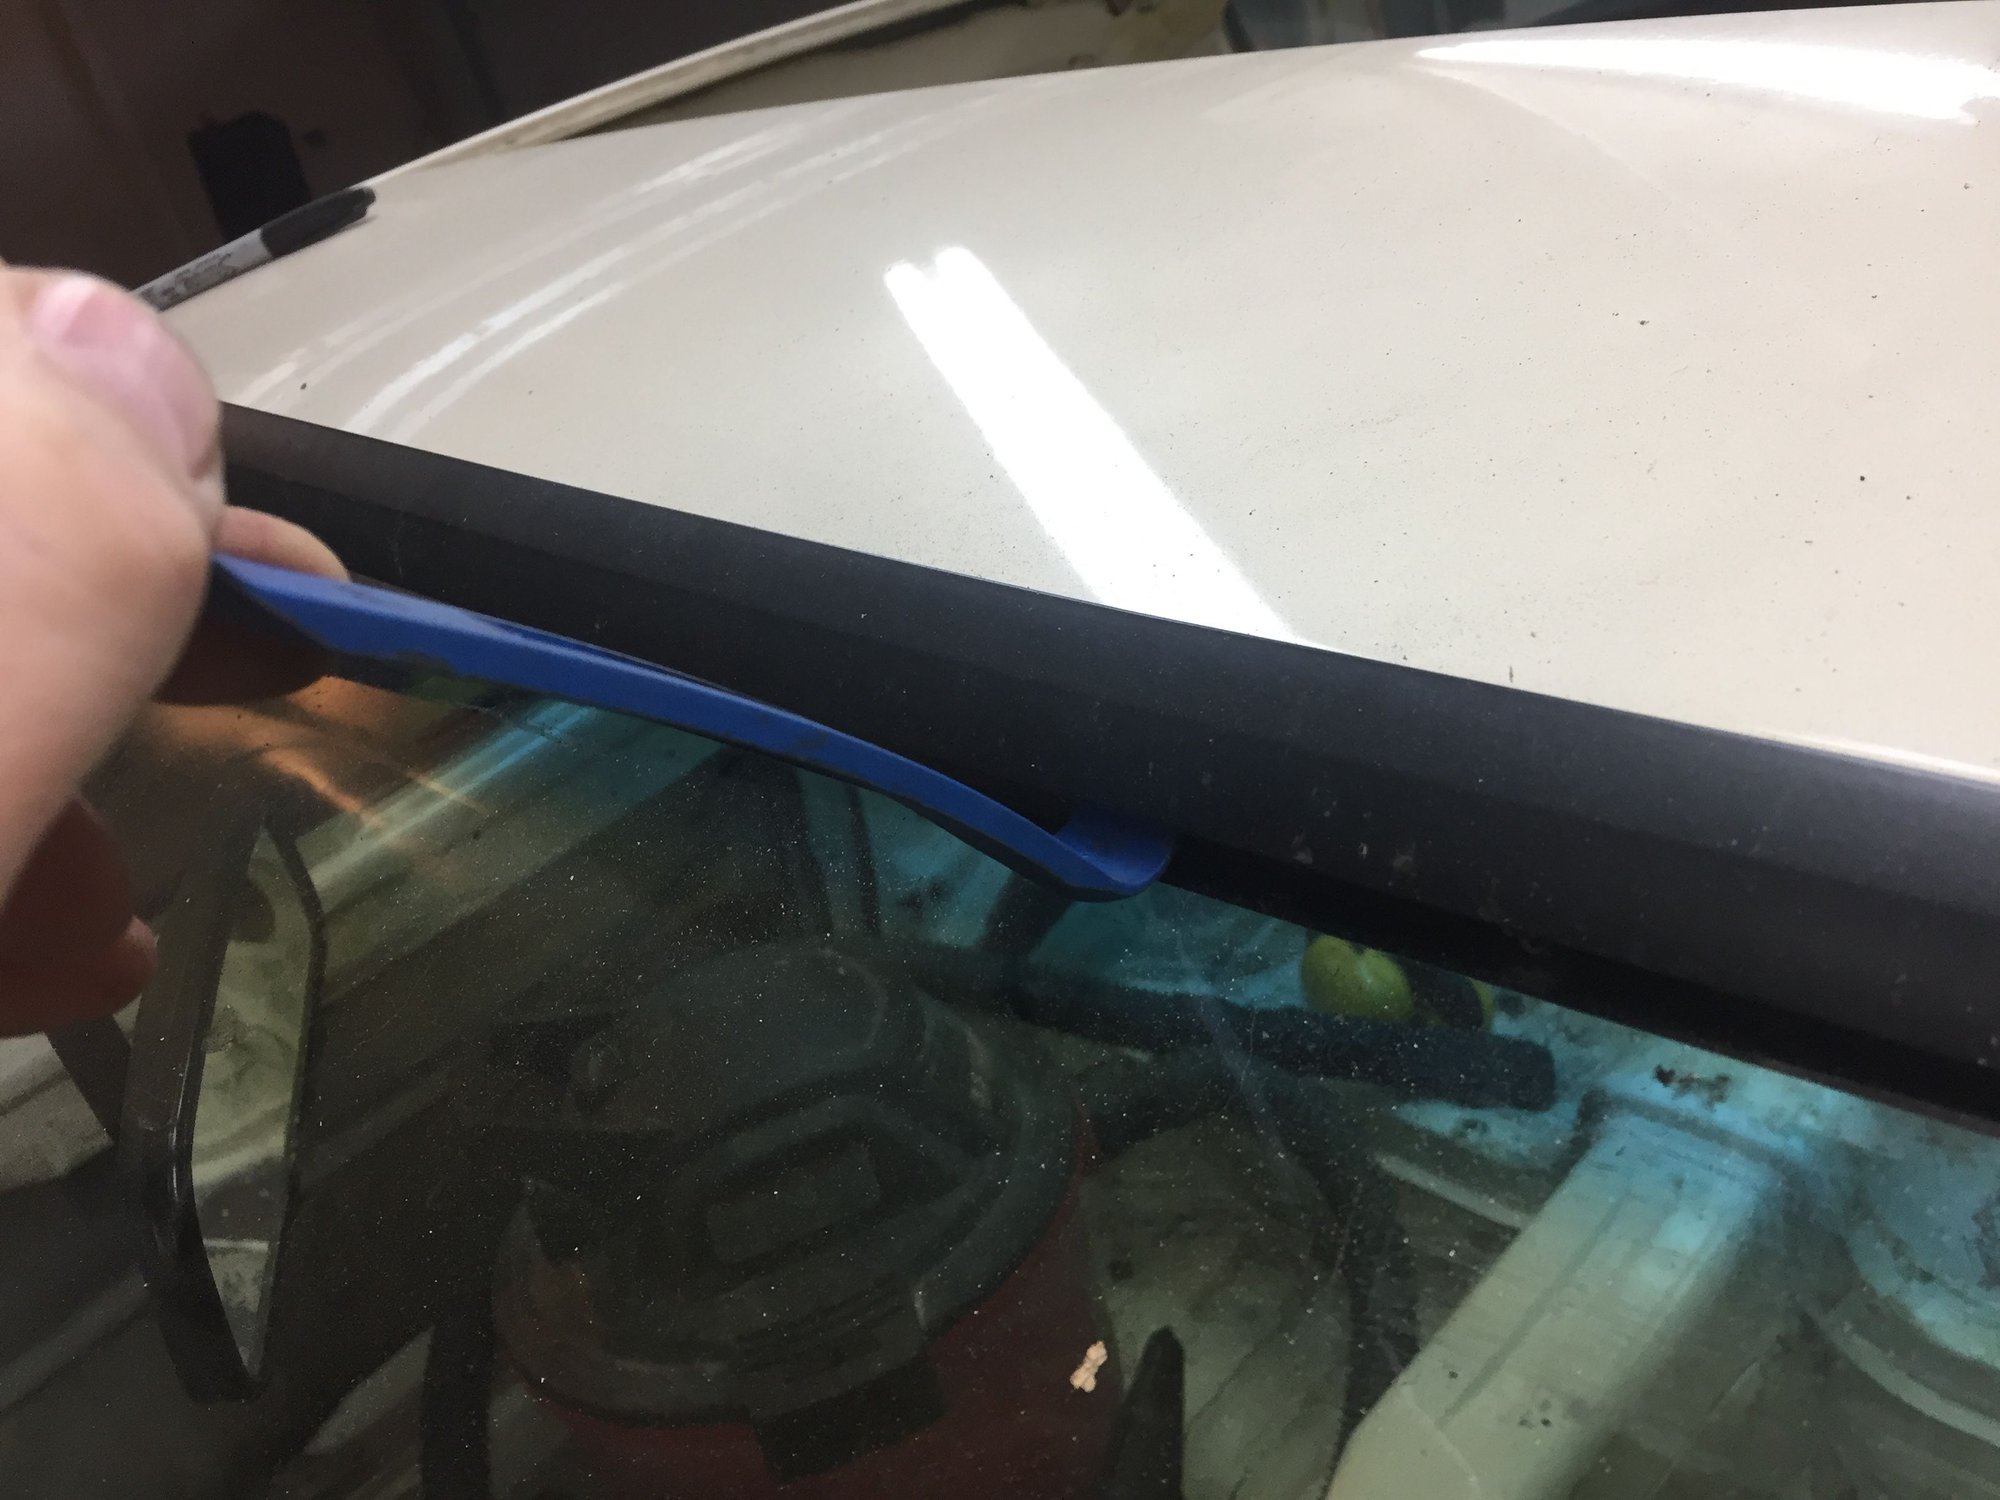
Next was to use my new Harbor Freight windshield removal tool (a wire between two handles) to cut the glue so I could lift off the glass.
The glass was pressed so tight to the frame that in trying to feed the wire through, I cracked the windshield.
Then when I completed running the wire around the windshield, I found that the windshield glue hadn't completely released its grip. And in trying to lift off the now cracked windshield, I cracked it again.
Lessons learned: take your time, don't force it, or better yet, hire someone else to remove the windshield.
I will have the new windshield installed by a pro. Fortunately, it appears new windshields are not horribly expensive.
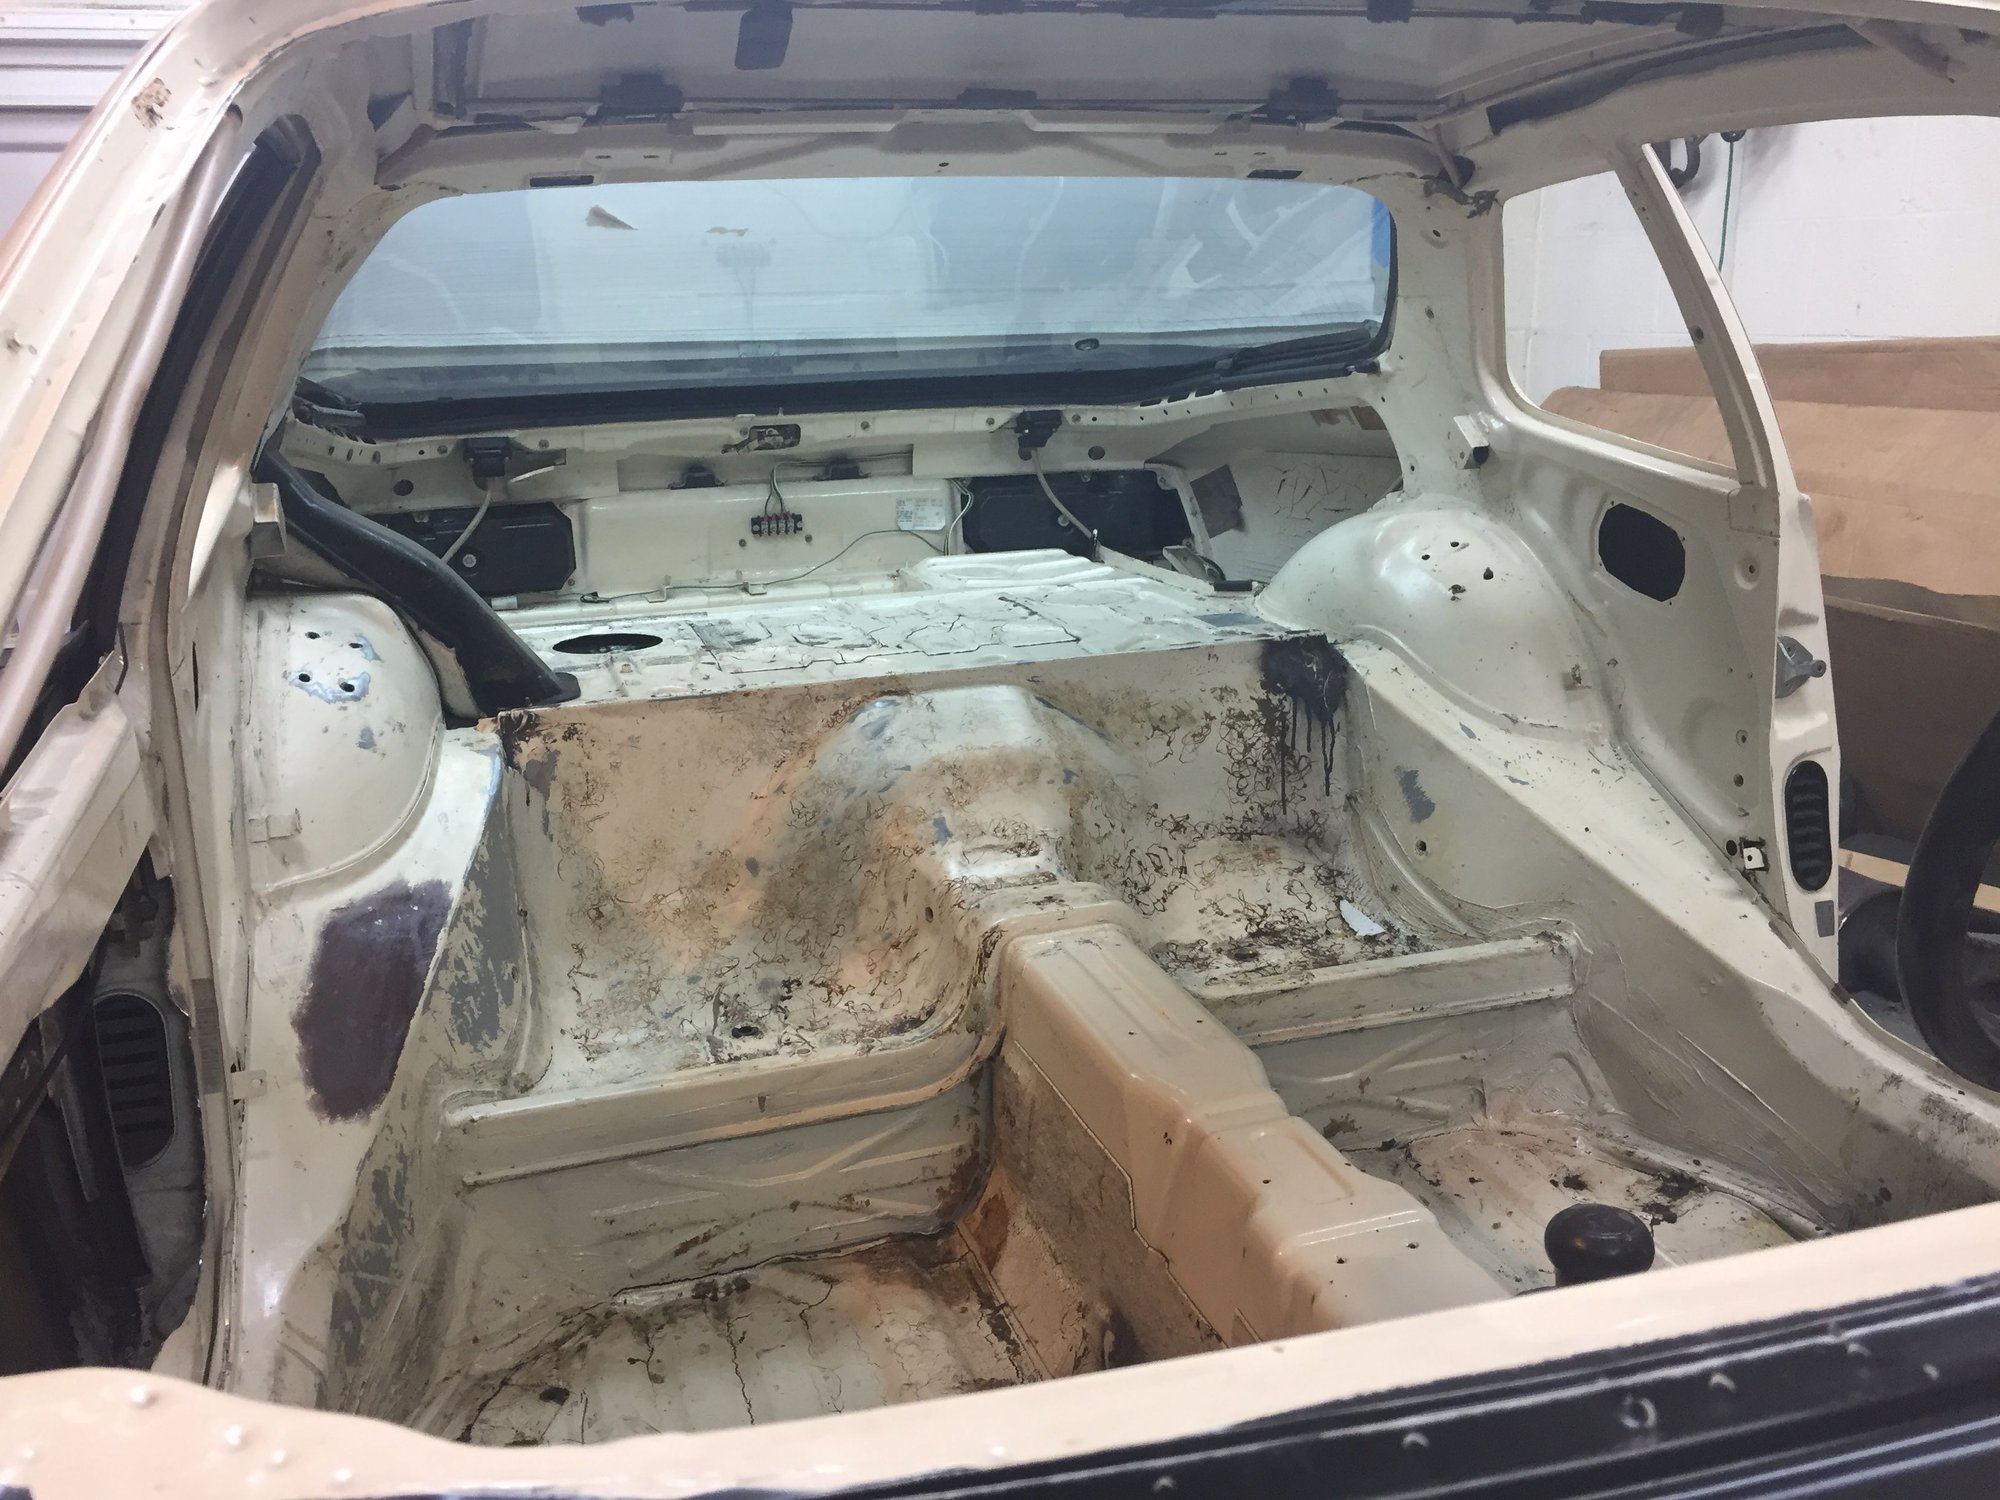
Next is to remove all the leftover adhesive. That will not be a fun job, either. However, I did discover while trying to clean that crap off my hands, that WD-40 dissolves it.
Well, life got in the way again and not much progress has been made. But the little I have completed brings me to a milestone. The car is now ready for the cage install. Cage kit will be shipped to my installer this week and I plan to take the car to him this weekend, before life takes me away from the project again for a few weeks.
Also got good news from Mike at Lindsey Racing. They have finished all the work and they were just about ready to ship it all to me. But I stopped him. Since life is eating up more time than I had allotted for, I'm going to have Mike assemble the short block and bolt on the head before shipping it. So, I've got a few parts to pack up so he can do that job. He has done so much already that going the rest of the way wasn't that much more. That will save me a lot of time.
I had to spend a few weeks in Florida helping out while my Mom recovered from surgery. (I head home this weekend) So I brought the nose, rear and dash wiring harnesses with me. I stripped out everything I don't need, documented every remaining wire and put together a plan to put it all back together. I am going to eliminate the stock fuse and relay blocks and reposition those components to be more easily accessible.
I will try to reuse the nose and rear harnesses. But the dash and power distribution will all be replaced with Mil-Spec wire (M22759/16). The wire has been ordered along with some new toggle switches.
There were some delays with the cage kit but it, and the car, are in the hands of the installer now. And today, I heard from Mike Lindsey. He hopes to finish his part of the engine assemble tomorrow. Then it will come back to me for the easy stuff.
With all of this coming together, there should be more, and more frequent, updates in the coming weeks.
Speedy recovery wishes to your mom! Sounds like you�re making good progress. I�m curious about your history with this car. Did you buy it as a track car or was it a street car that evolved into a track car? As I reassemble my 951, I�m enjoying being respectful and diligent about its original nature (plus some mods), but most of the time, what I really want to do is strip it down and make a beast of a track car.
Speedy recovery wishes to your mom! Sounds like you’re making good progress. I’m curious about your history with this car. Did you buy it as a track car or was it a street car that evolved into a track car? As I reassemble my 951, I’m enjoying being respectful and diligent about its original nature (plus some mods), but most of the time, what I really want to do is strip it down and make a beast of a track car.
Thanks for the well wishes. She is an amazing lady, almost 96 and still going strong.
I bought the car specifically for the track. It was still street legal but already mostly prepared and had spent most of its life on the track. The rear interior had been stripped, suspension upgraded, a bolt in roll bar added and seats and harnesses. So I'm just taking it the rest of the way. I have had some "moments of pause" usually when I am about to do something that is pretty much irreversible, like cutting into the doors. I have to keep reminding myself that it will never go back to the way it was and that there are plenty more 944's out there if I want something more original.
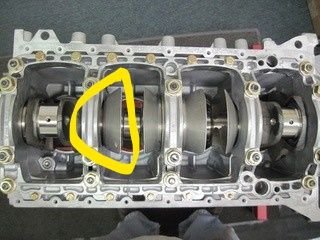
And here is a shot of the engine that Mike took while assembling it.
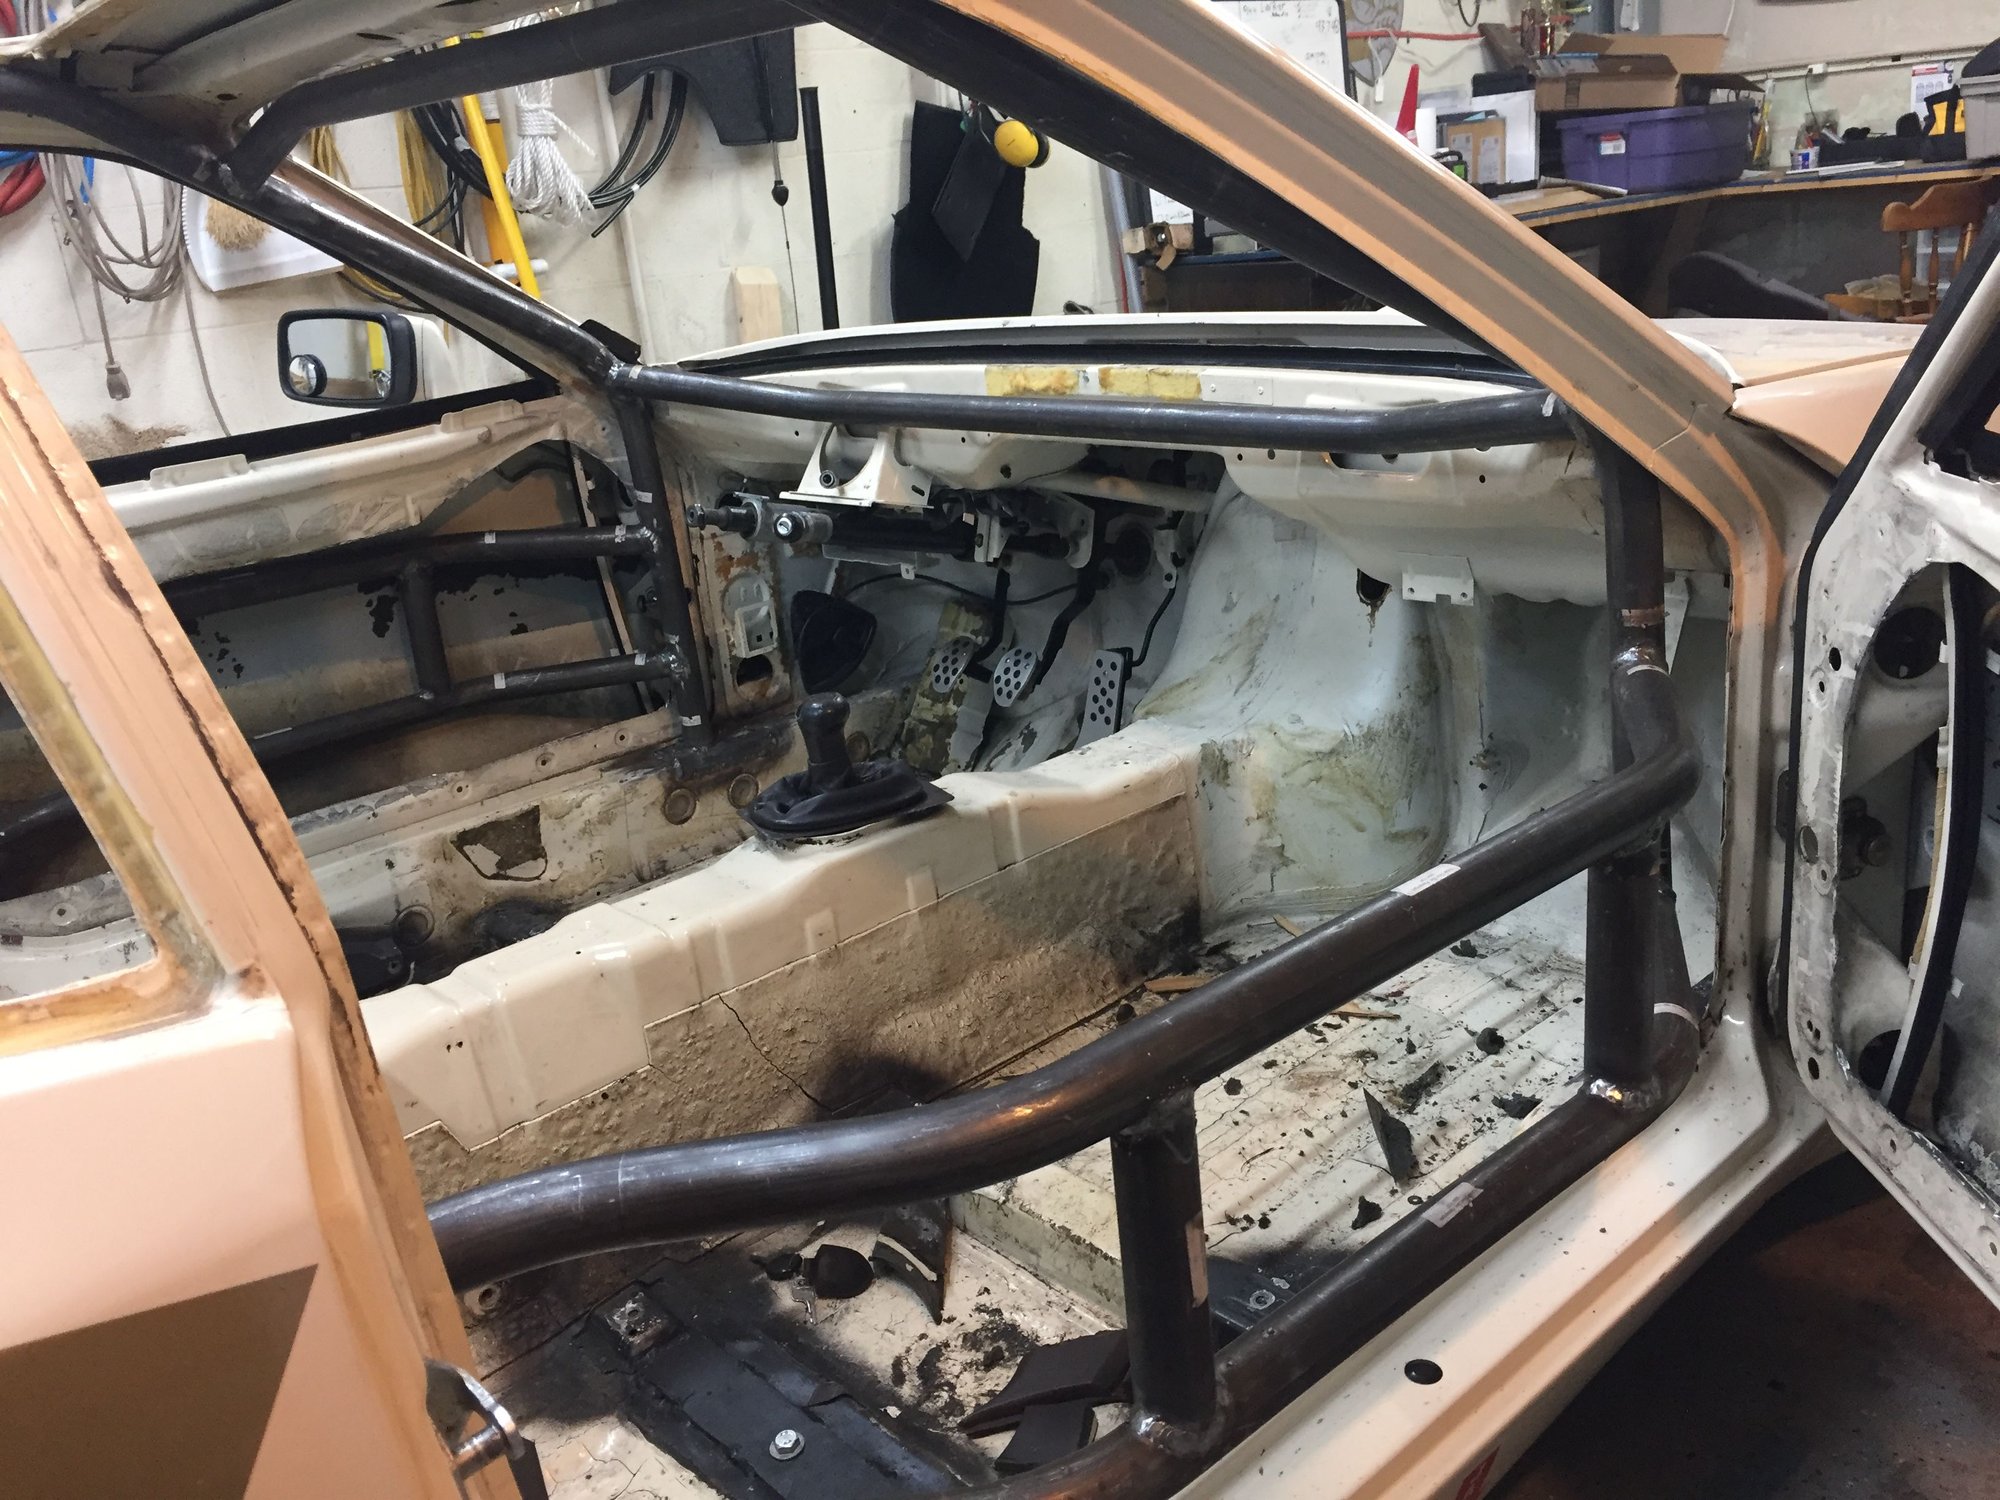
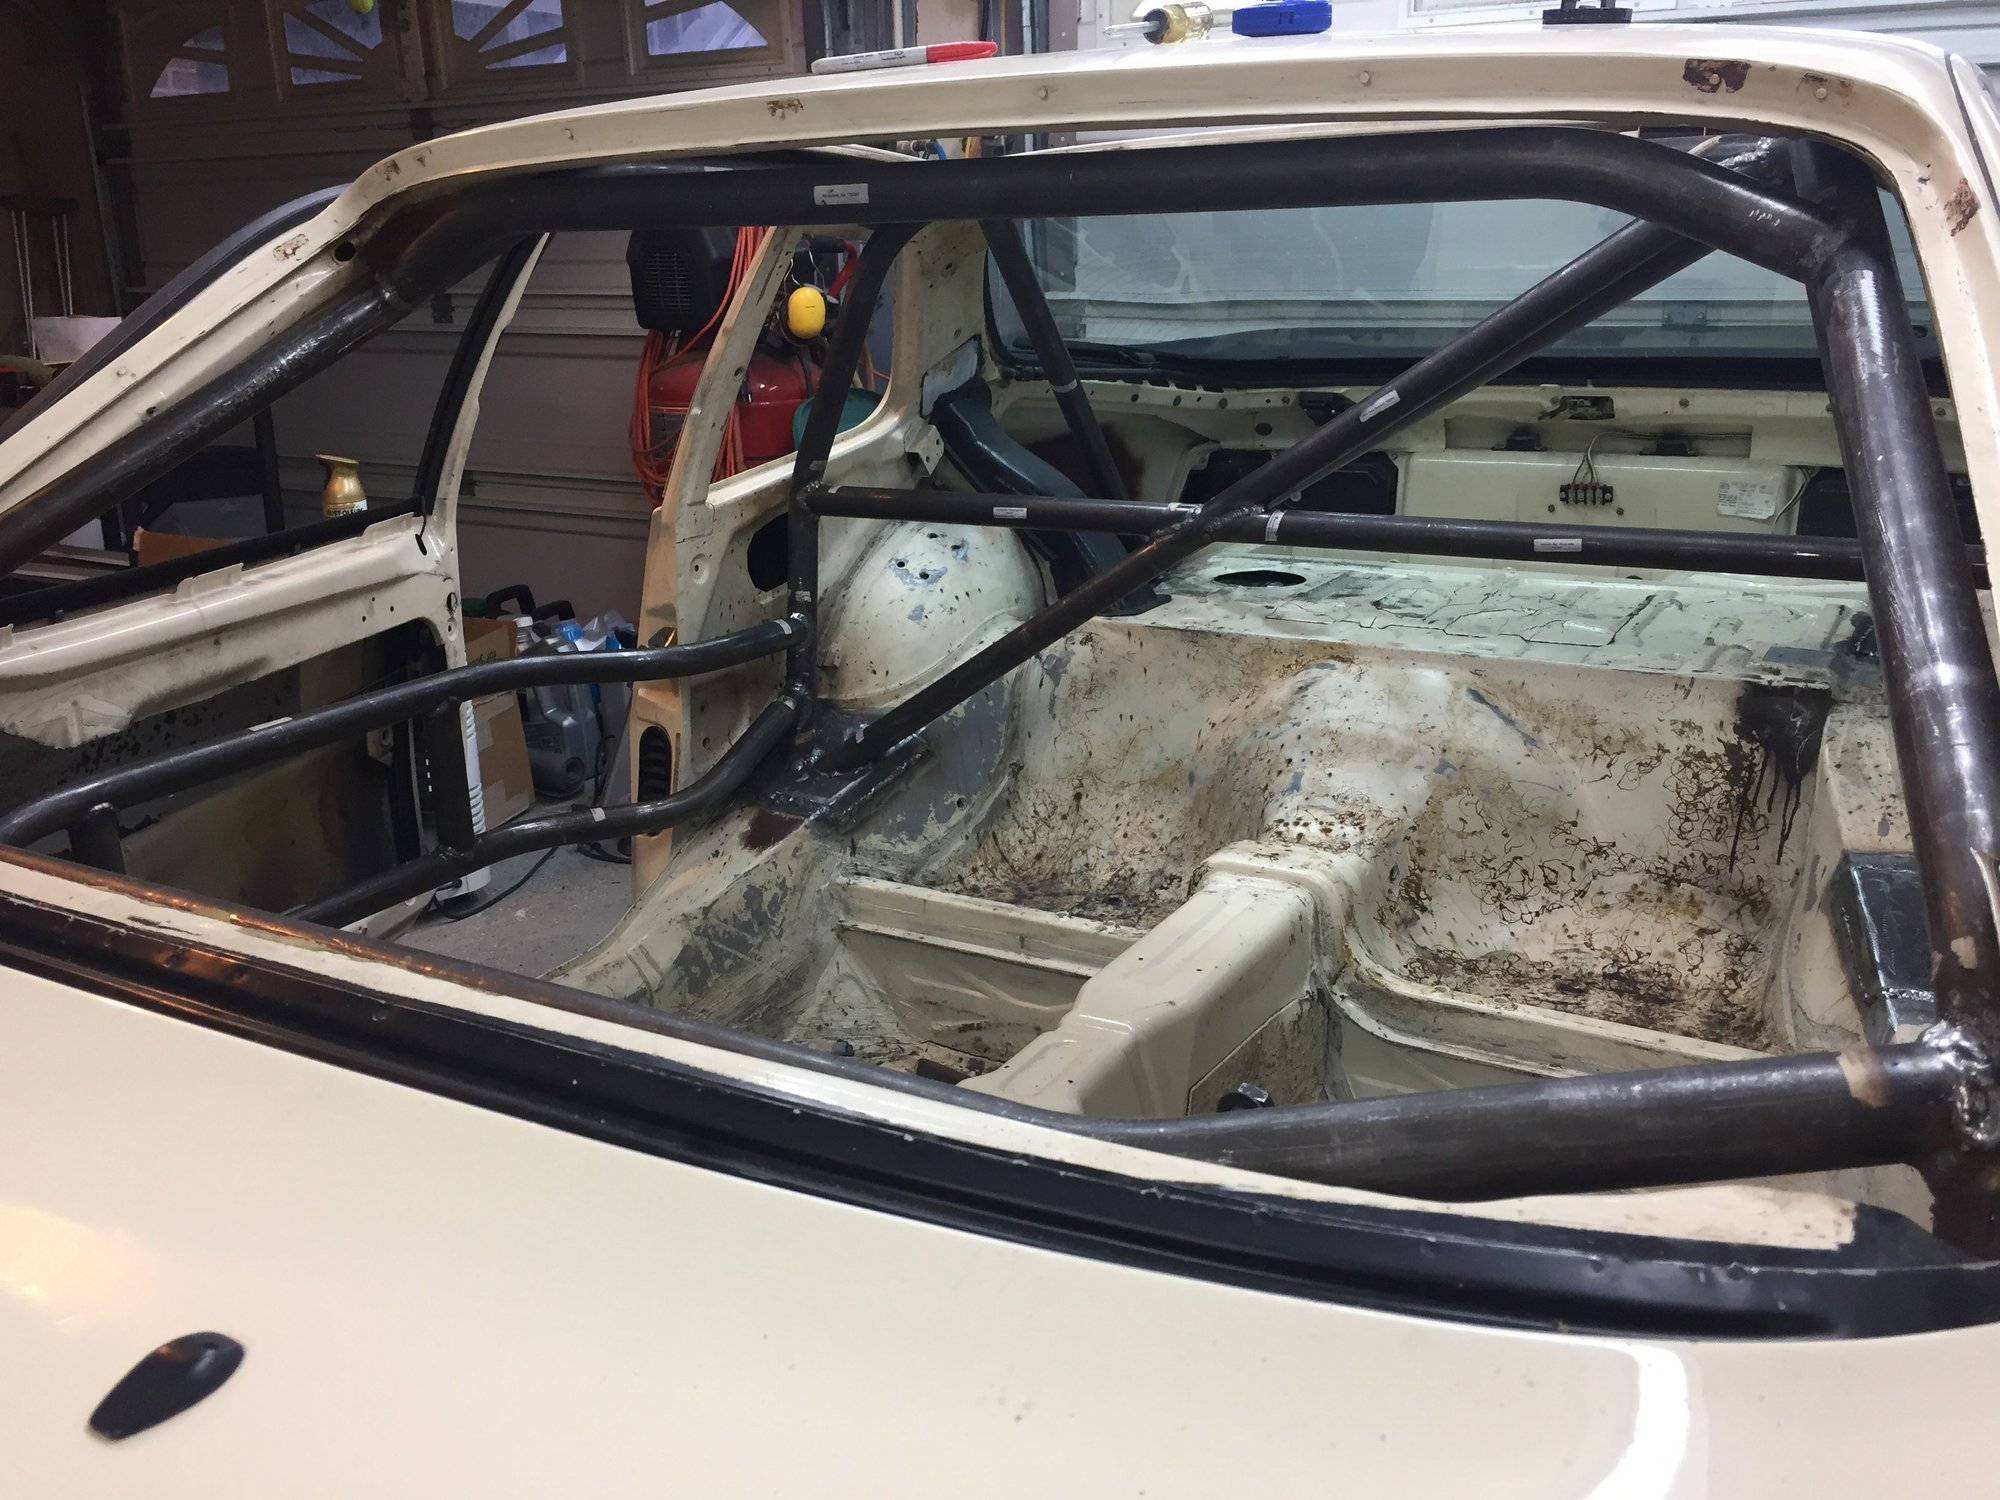
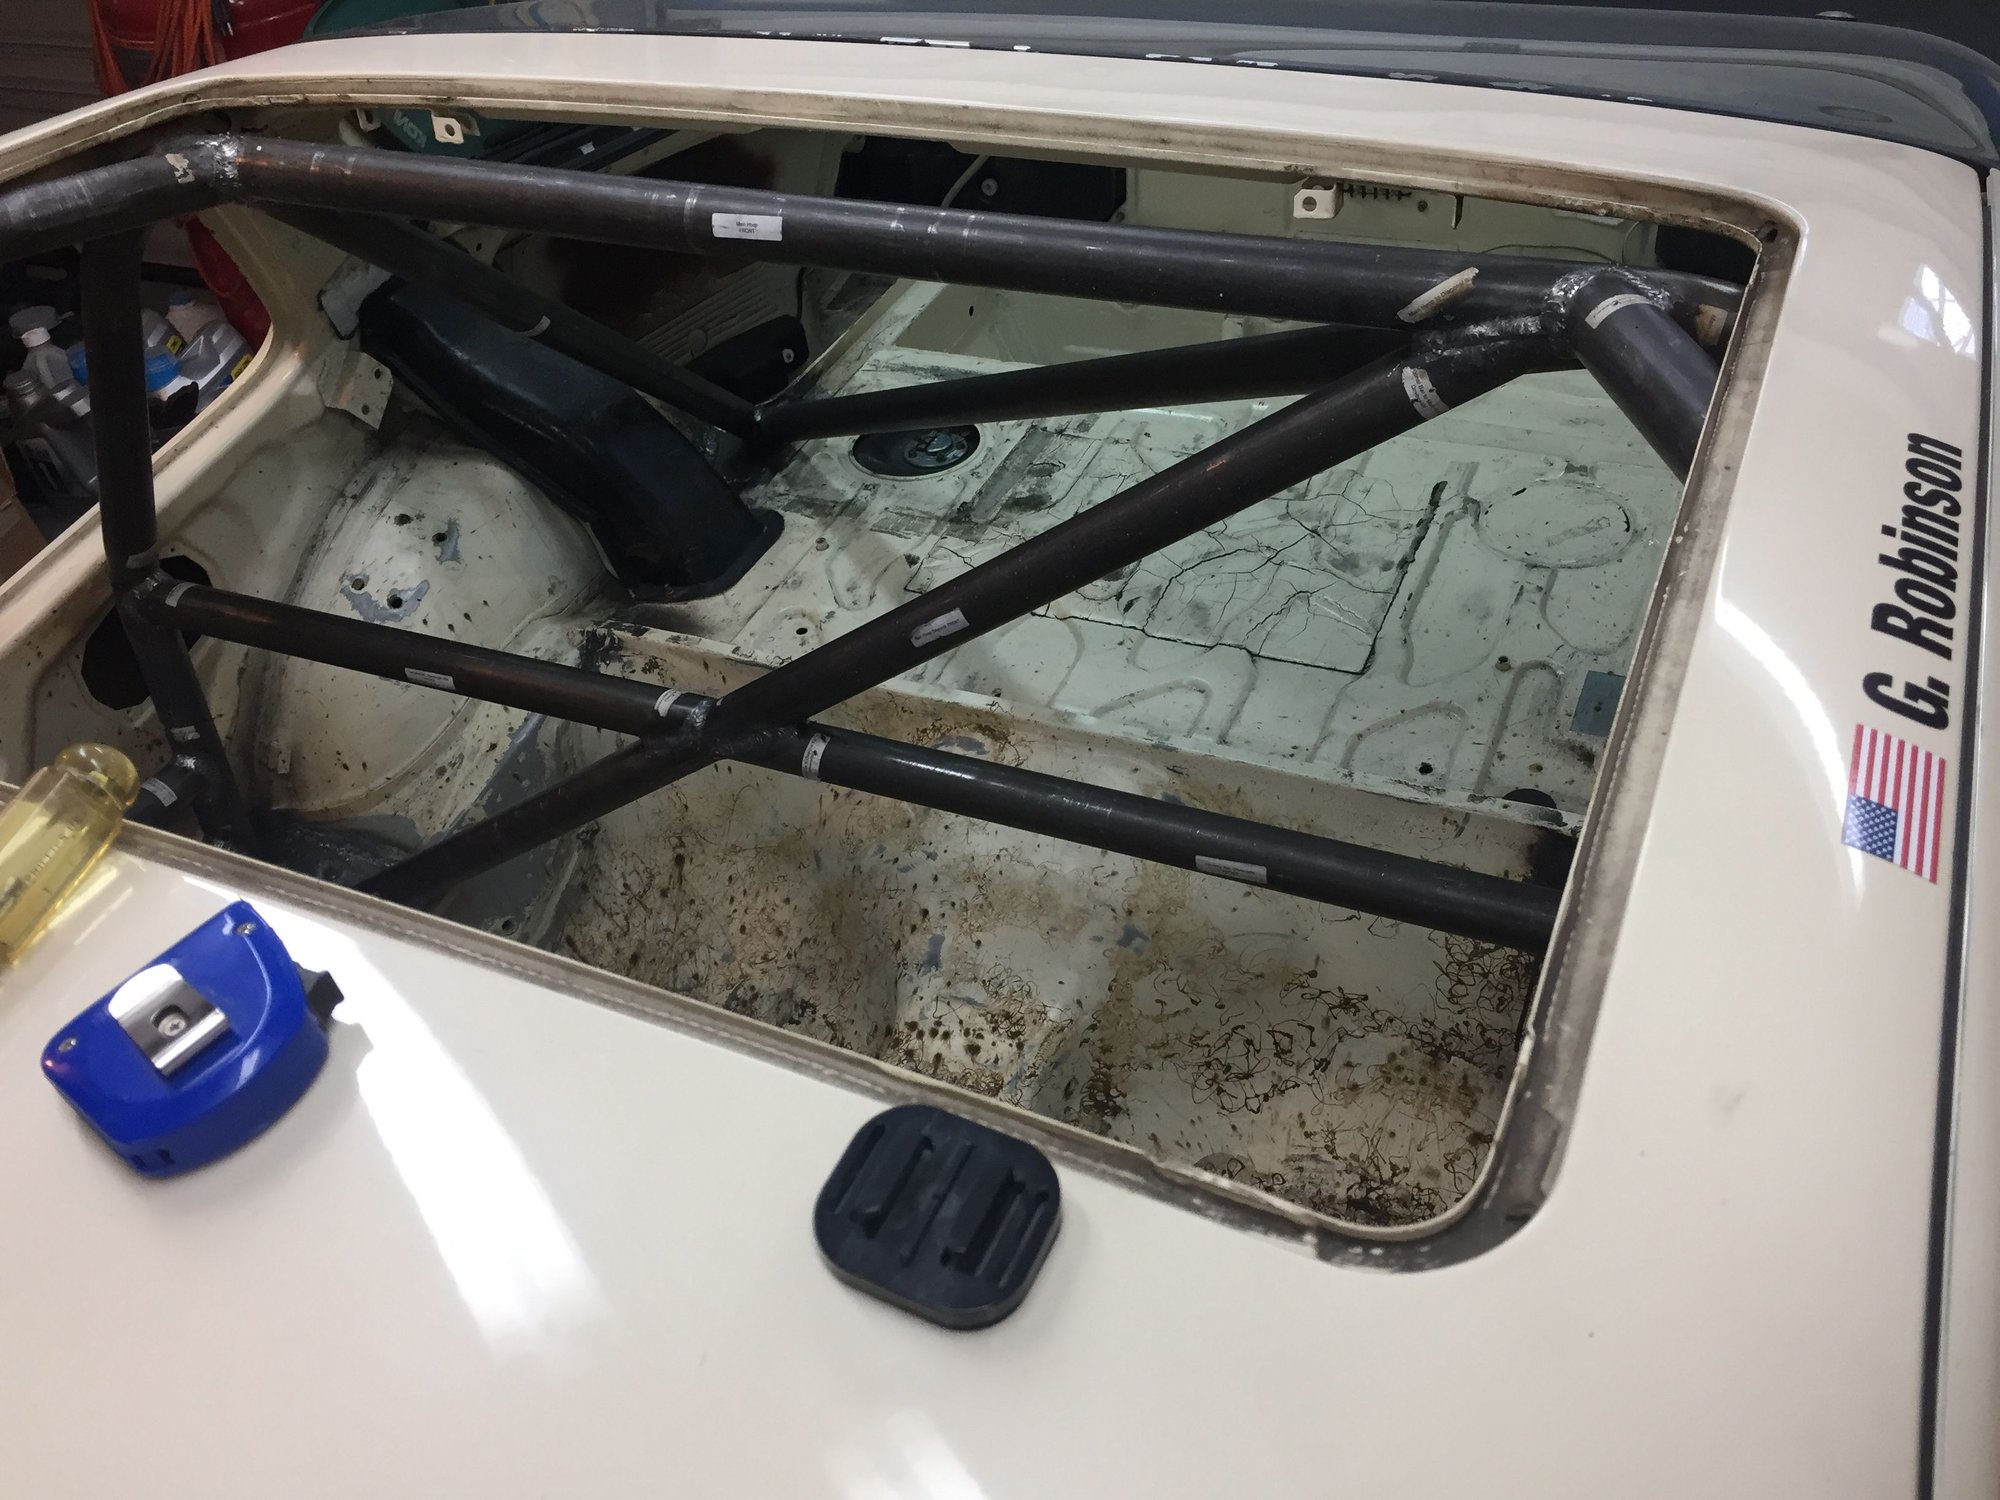
Cage install is almost complete. The Hanksville kit is so tight to the frame that there was little room for variations between their mock-up car and my car. Some trimming of the cage kit was needed along with "reshaping" of parts of my car to get it to fit. Unfortunately, that is driving the install costs up, but it will be a good fitting cage.
I've got some engine parts out for a fresh application of yellow zinc and others getting powder coated. (Because good looking motors make more horsepower. )
I've booked a couple DE's so I have committed to being finished, including engine break in, before May 2nd when I run Pitt Race with Auto Interests, then its off for a 3 day Potomac PCA event at WGI 2 weeks later.
I've got a lot to do before then.
Real deadlines move �getting sh** done� out of the abstract into reality. I was dragging my feet getting my engine out reseal done until two of our family cars broke down. Finished it in a long weekend and now I�m driving it. No regrets! And of course, good looking motors make the most power!
Got the car back last Thursday. Since then, I've been welding up the cracks in the seat mount, the holes left from the old bolt in roll bar and the holes in the firewall that were used for heat and AC. Starting to put primer on the cage, now.
Eight weeks to go.
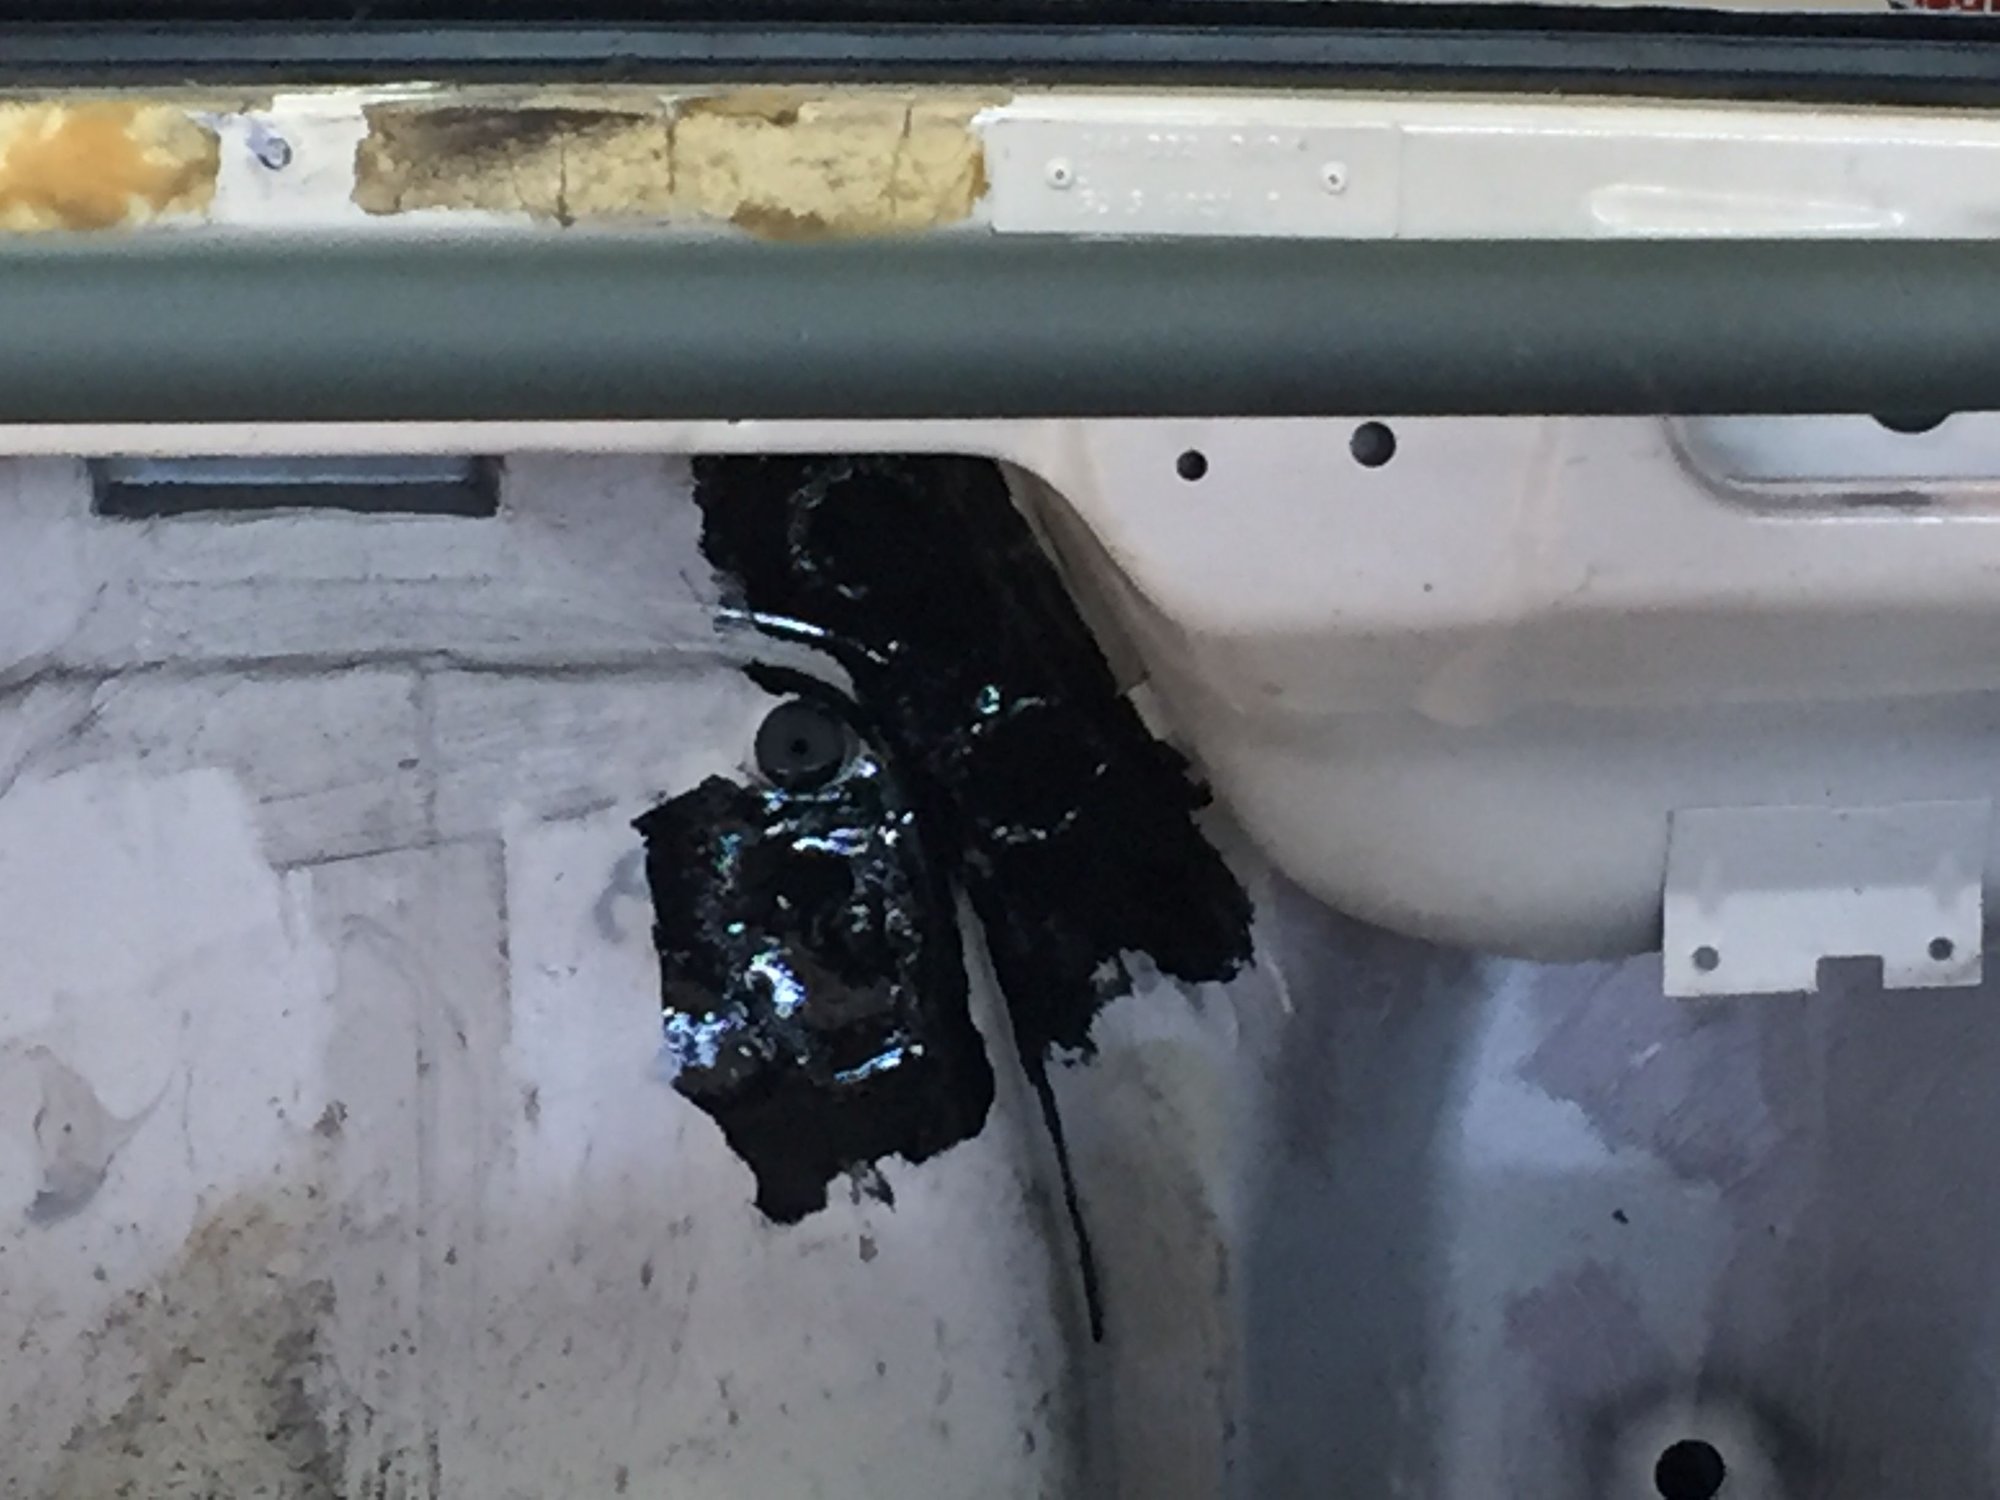
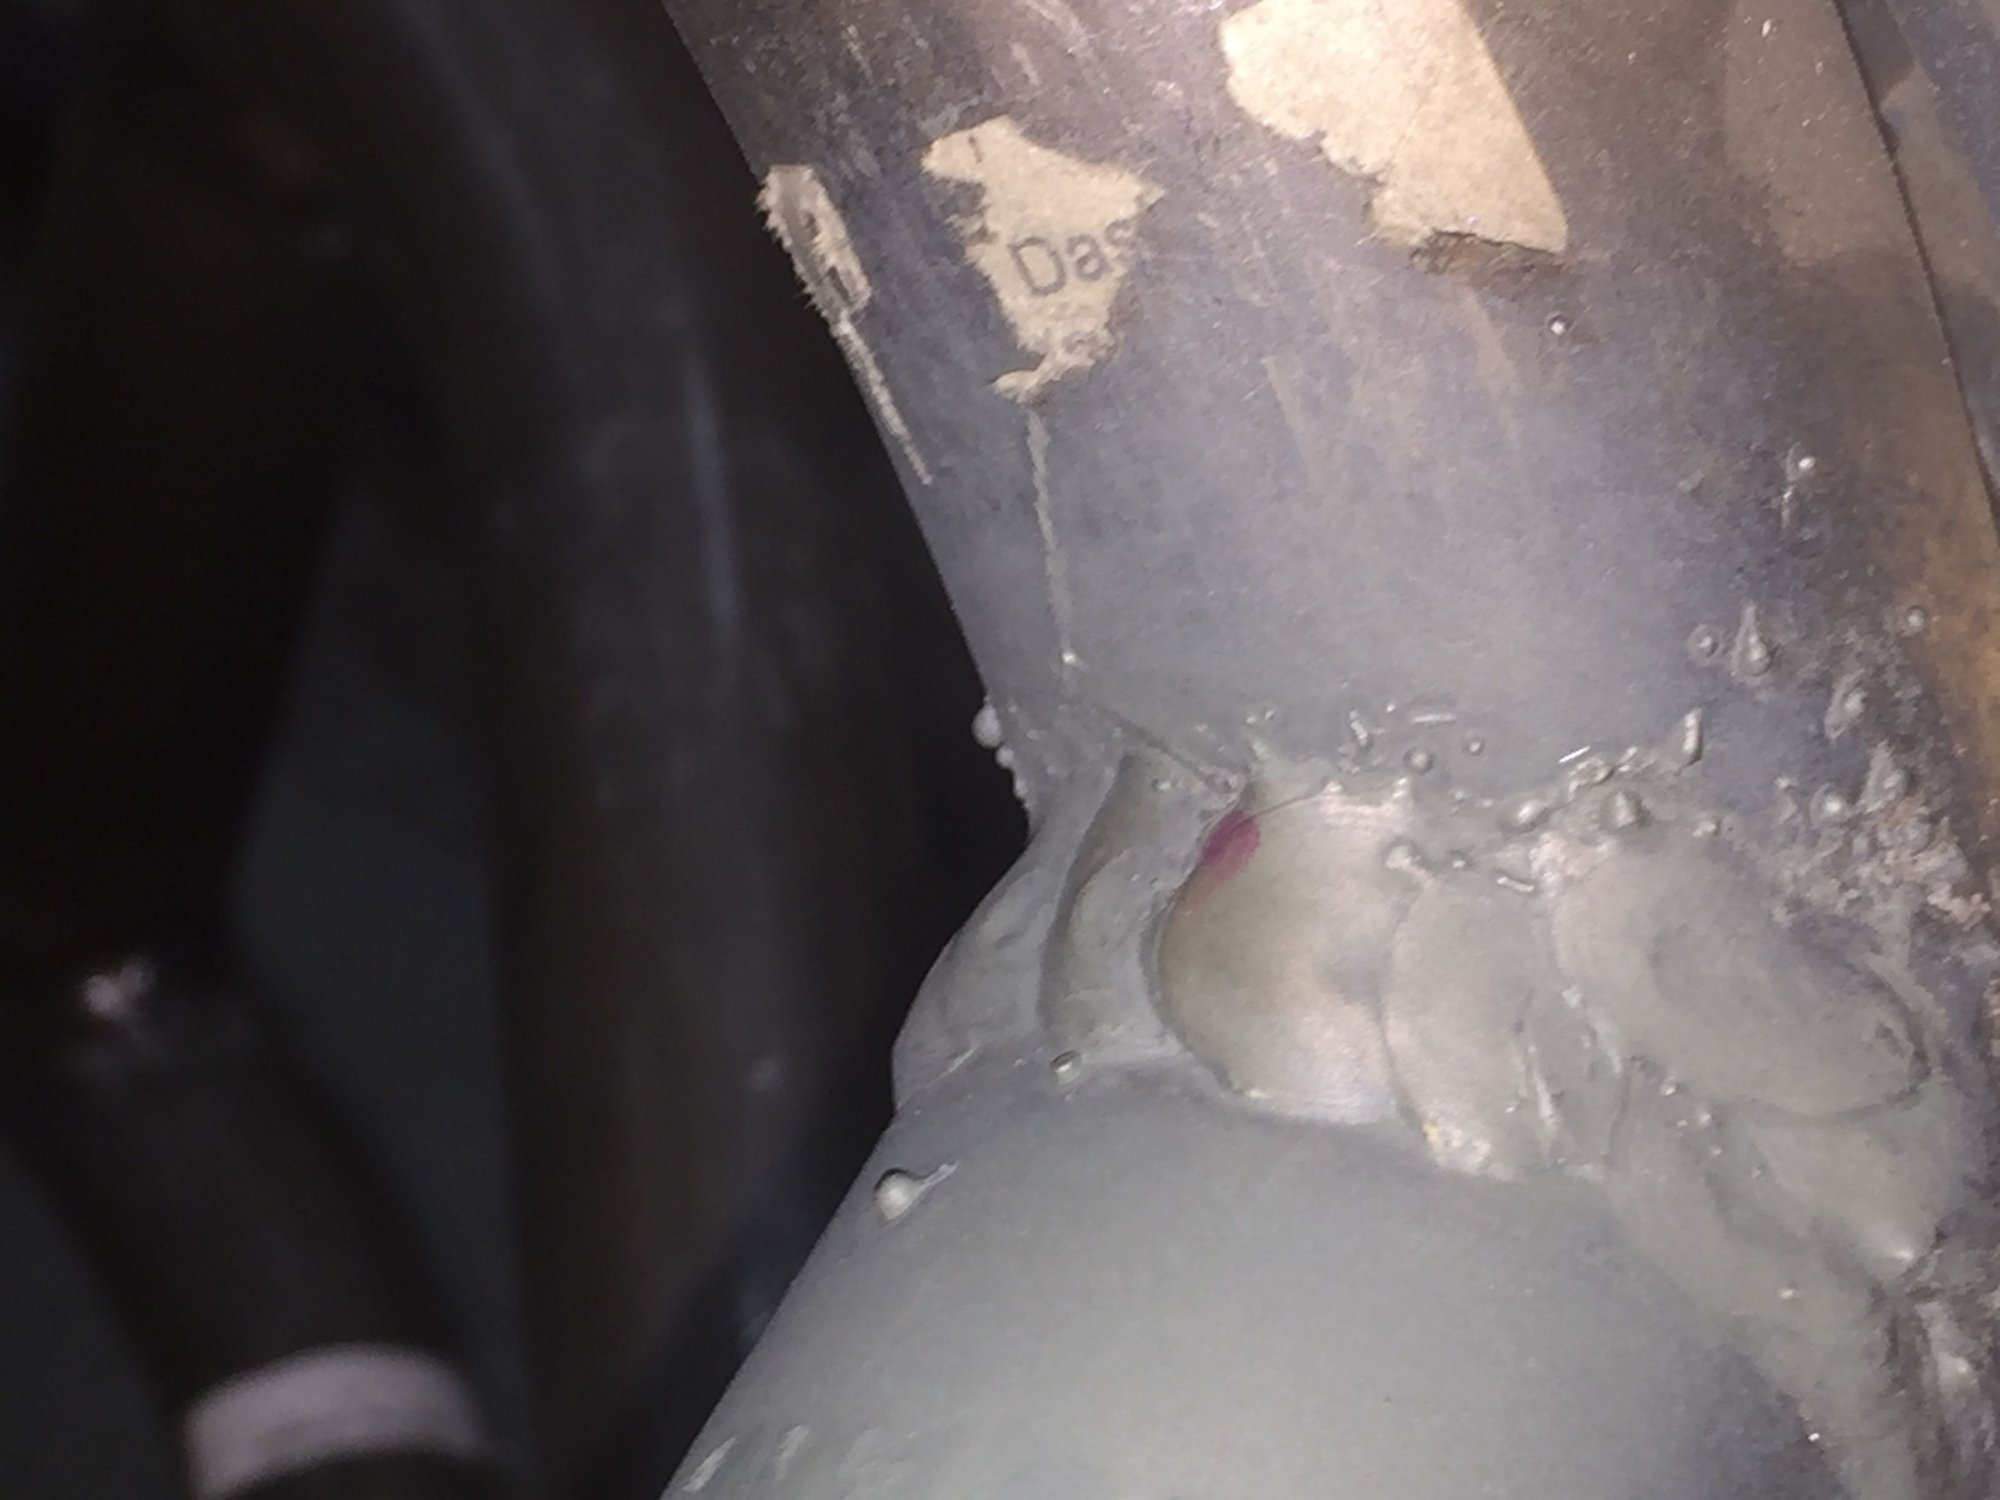
I see what you are looking at now. Lower right of the picture. His beads overlapped there. Because it is so tight, he started from the bottom and worked his way up on the side facing the driver then had to shift to the side that is right up against the A pillar and firewall and work his way back. where the second bead met the first bead there is some overlap and it looks like a single bead sitting on top of the bar. When it is really a second bead on top of the fist bead.

 12-26-2019 | 09:38 AM


 )
)