When you click on links to various merchants on this site and make a purchase, this can result in this site earning a commission. Affiliate programs and affiliations include, but are not limited to, the eBay Partner Network.
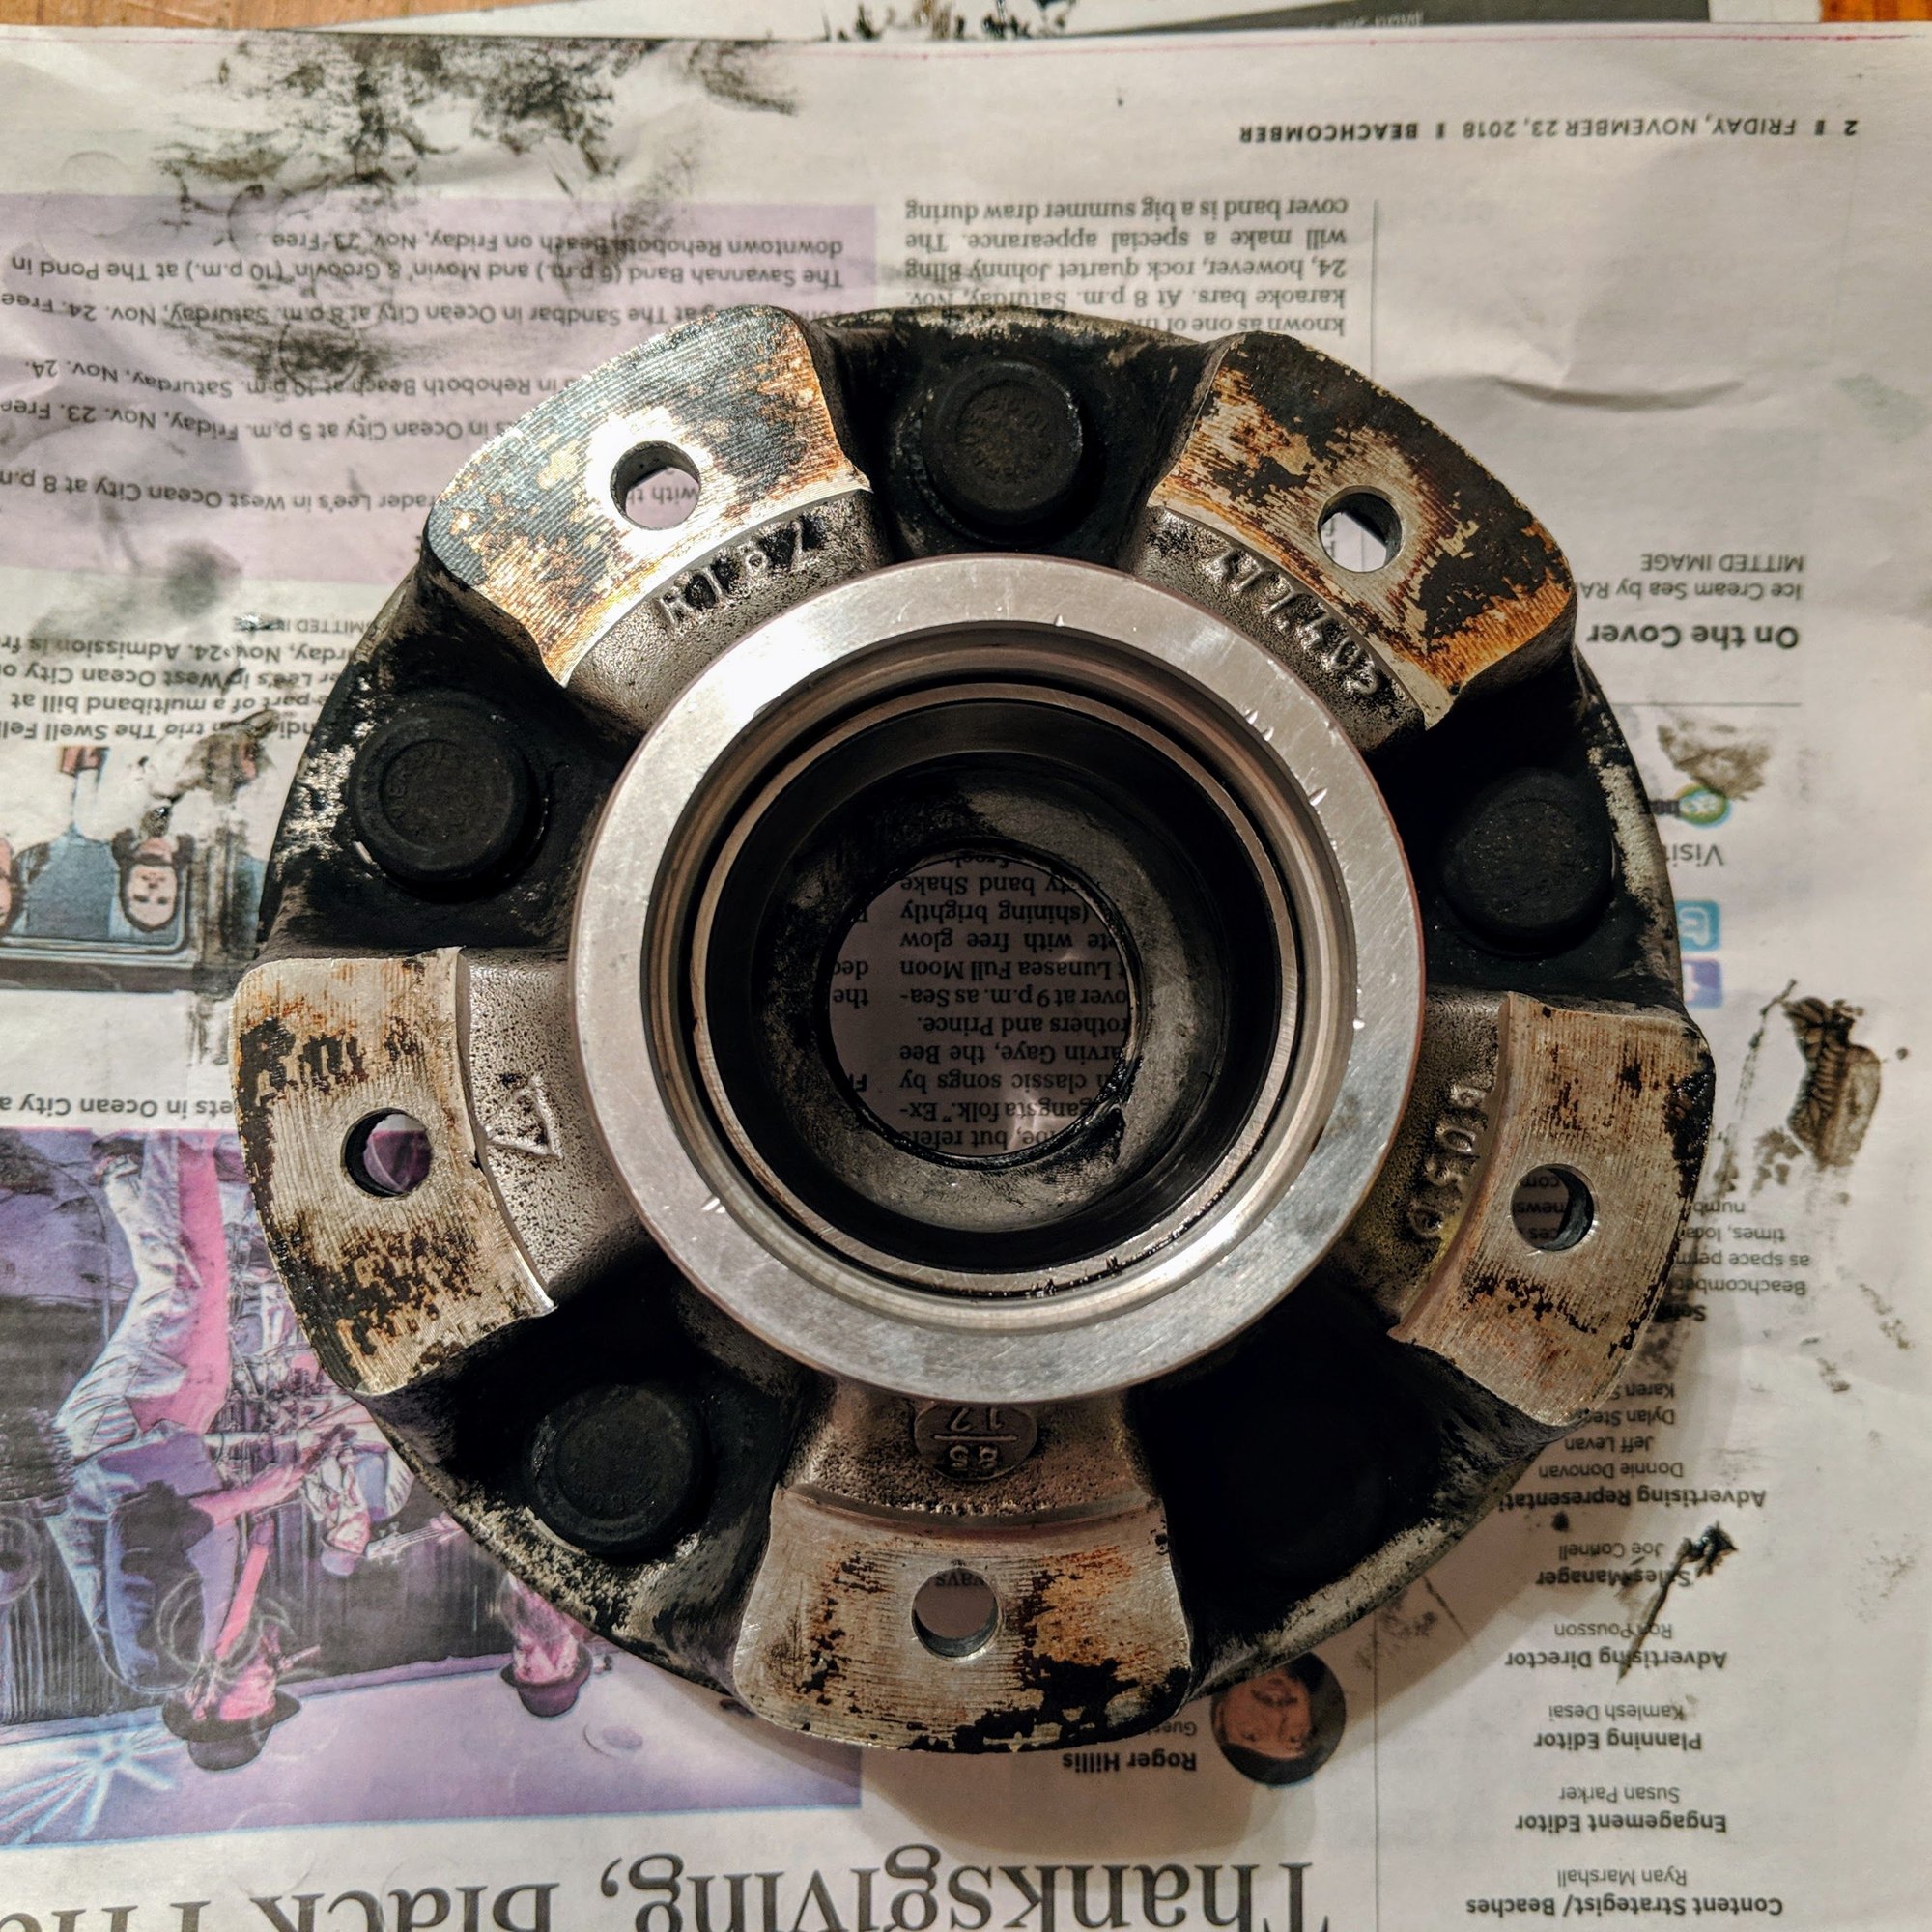
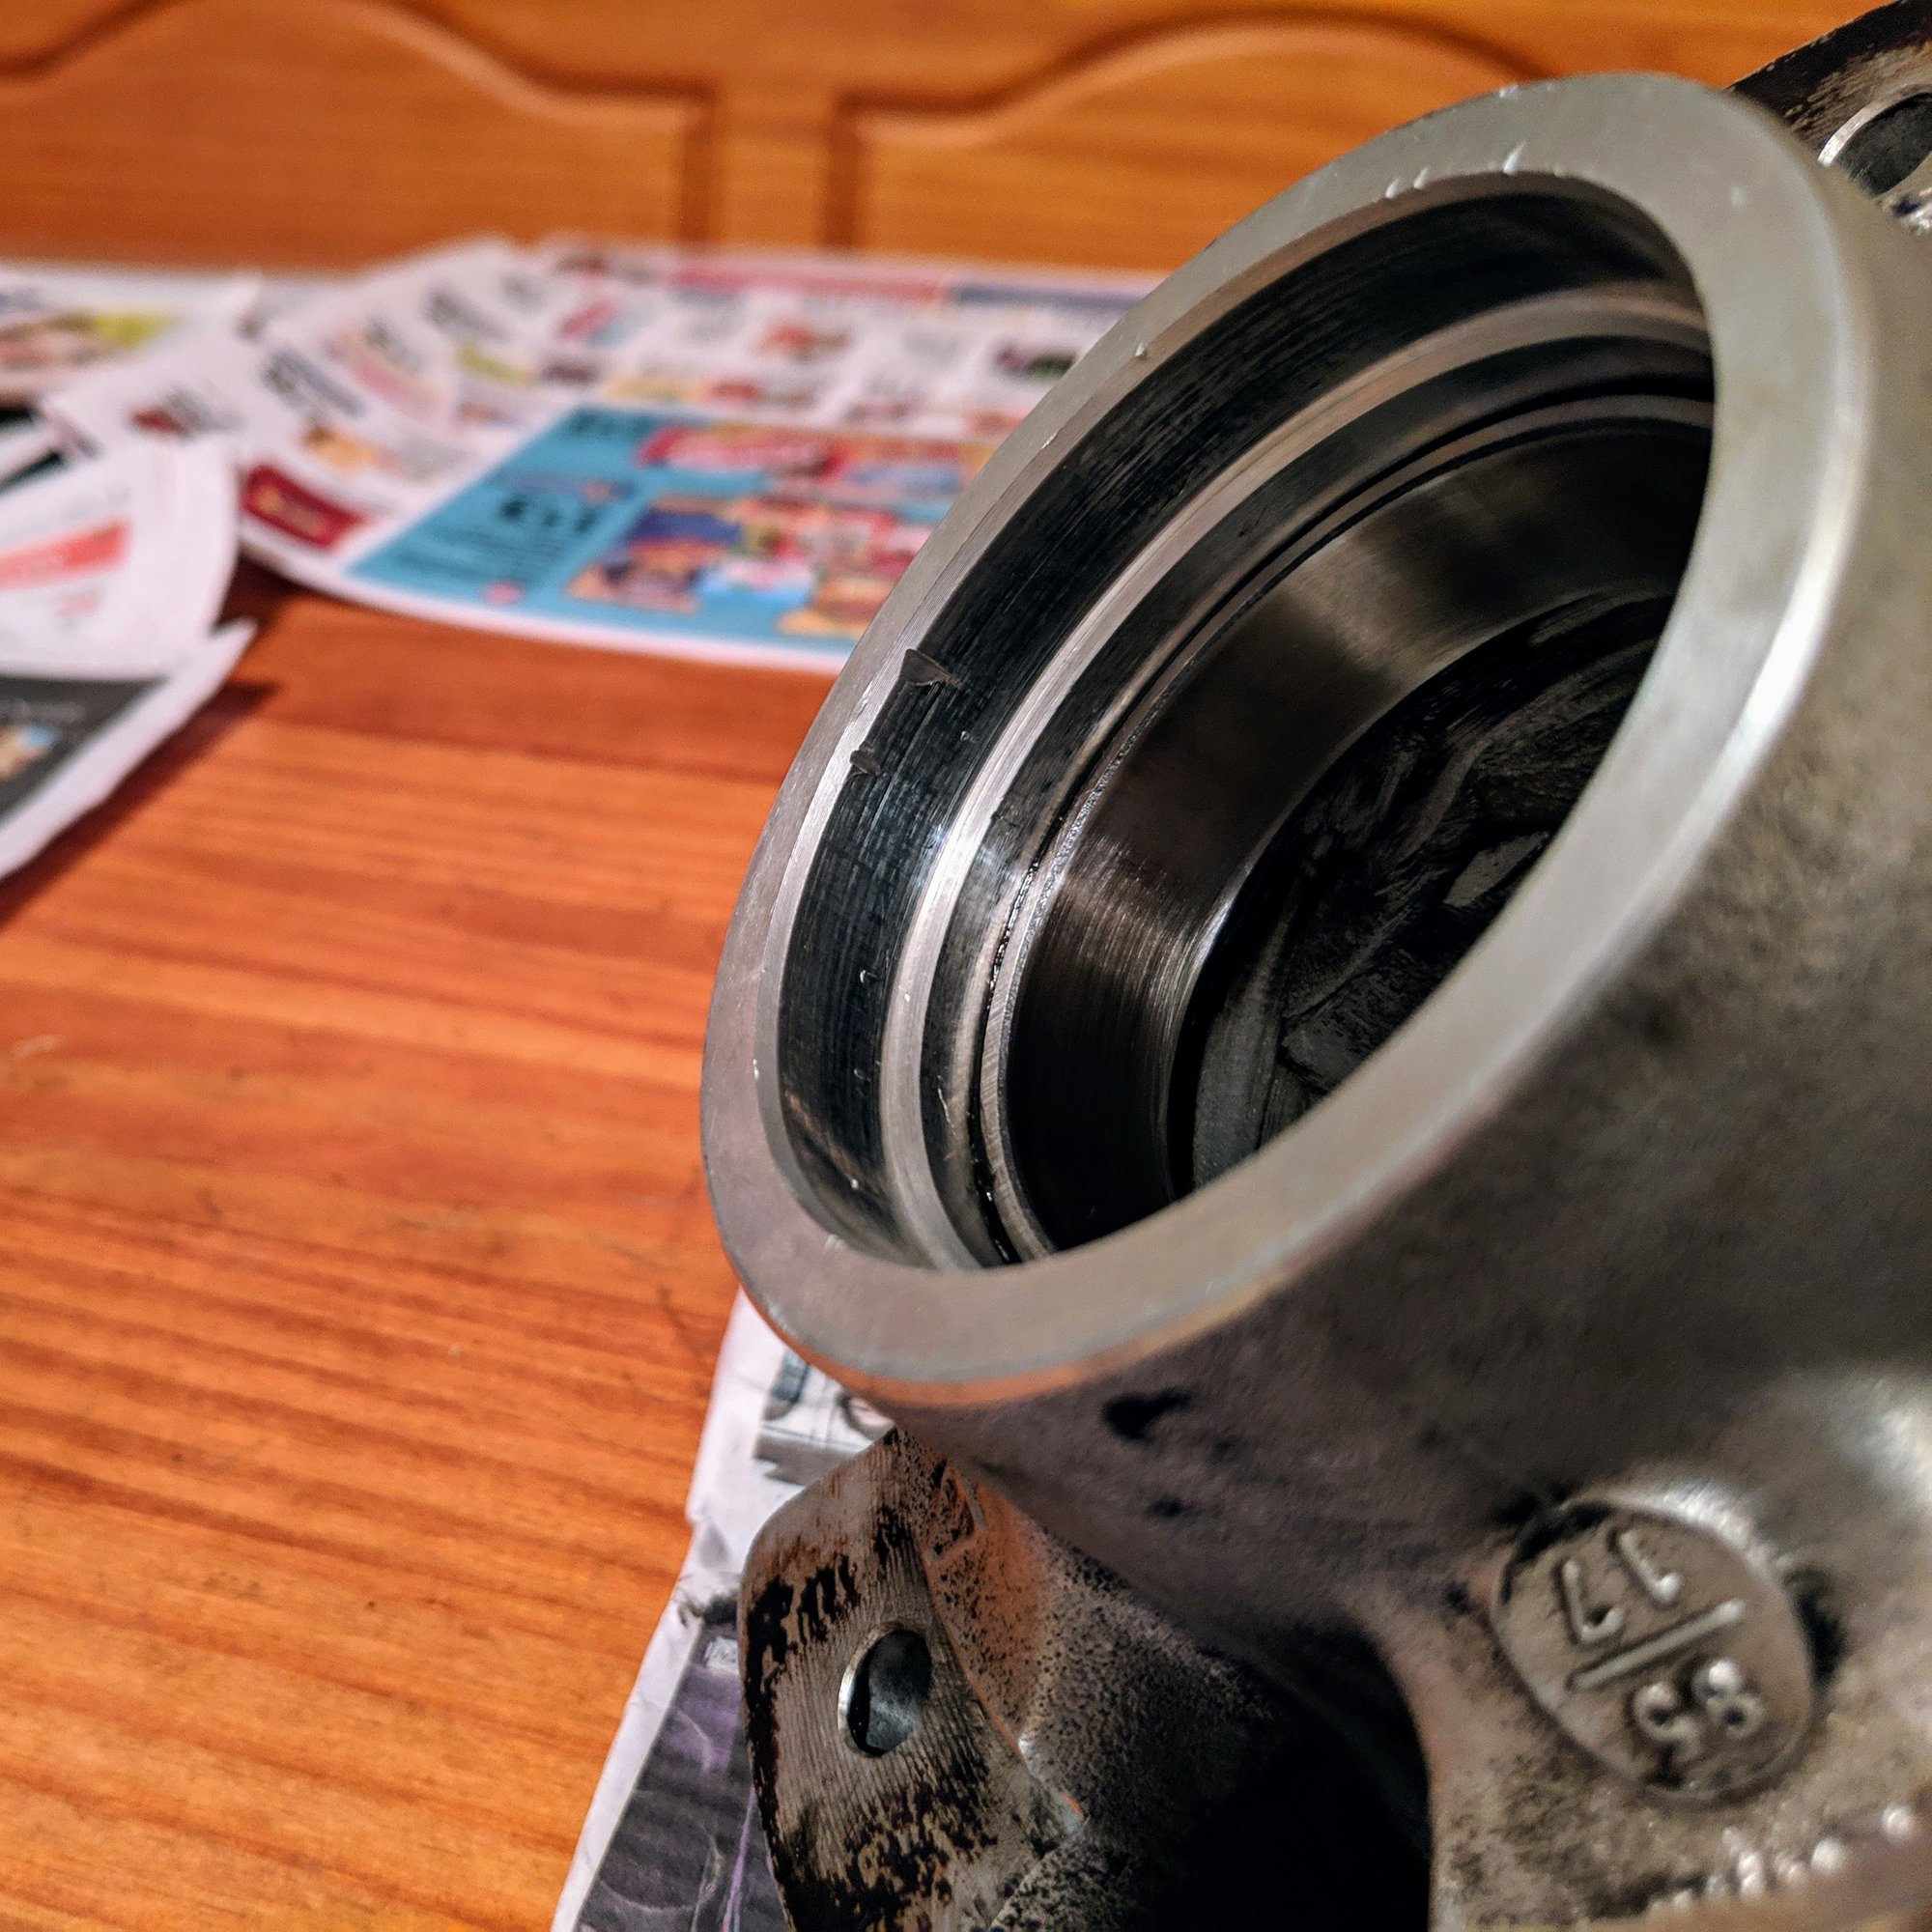
I'm in the process of replacing the front brake assembly (Rotors, brake pads, and wheel bearings) and have been following a couple of step by step tutorials on YT (Irina, Van). All was going smooth up until the inner wheel bearing seal. I decided to try Irina's method (I don't have a torch); using a large screwdriver and a thin block of wood to protect the Al, but ended up nicking the hub...
I'm sure this wouldn't pass QA for a race car but the car I'm servicing is my daily driver and need to be back on the road Monday.
There is one nick that slightly protrudes (inside lining). Should I carefully sand it down to prevent it from potentially damaging the seal, as it's being seated, or leave it alone?
To make sure I don't mimic this on the other hub, is there a safer method to remove the wheel bearing seal?
Wouldn't think twice about running it. The bearings don't ride on that face, only the seal does. Maybe put some Yamabond or etc on the seal in that location if you're worried about it. It's just to keep dirt out of there.
Loosen the allen head pinch bolt and remove the threaded split nut, the load spreading washer behind it and the outer bearing.
Reinstall the threaded split nut, just flush with the spindle thread.
If the car is early, your rotor will still be attached to the hub, if it's late, you can keep the rotor attached with the fluted phillips screw.
Having the rotor on is not necessary but may help in giving you a larger item to hold onto.
Holding the rotor or the rotor-less hub tightly, lean your weight inward to make sure hub is seated on the inner bearing.
Then yank outwards in a quick motion.
The inner wheel bearing will hook onto the outer threaded split nut, leaving the inner bearing and grease seal hanging on the spindle as the inertia of the weighted hub/rotor is yanked off.
BTW - it's always wise to warm the hub with a heat gun before driving out the races.
The aluminum is way less dense a metal than the races so as long as you focus a heat gun around the outside perimeter, the aluminum will expand more than the race, making romoval way easier.
Same when installing.
Have your hub super clean, turn on heat gun and prop it up with a block or equivalent to that the heated air blows through the hub. (you can heat whole hub now).
Make sure hub is heated thoroughly, then install races.
It is a good practice to have placed your races in a freezer an hour or so before starting reassembly.
If you place them in a ziplock bag, the abrupt temp change to normal atmosphere will lessen the chances that condensation beads of water (sweat) will appear before your drive/press them in.
I do this because I apply a thin film of LocTite "Sleeve Retainer" (green) to my races before pressing them in and the "sweat" can dilute/affect the LocTite.
@odonnell@951and944S Thanks for the quick reply fellas! Removing the second wheel bearing seal went much smoother!
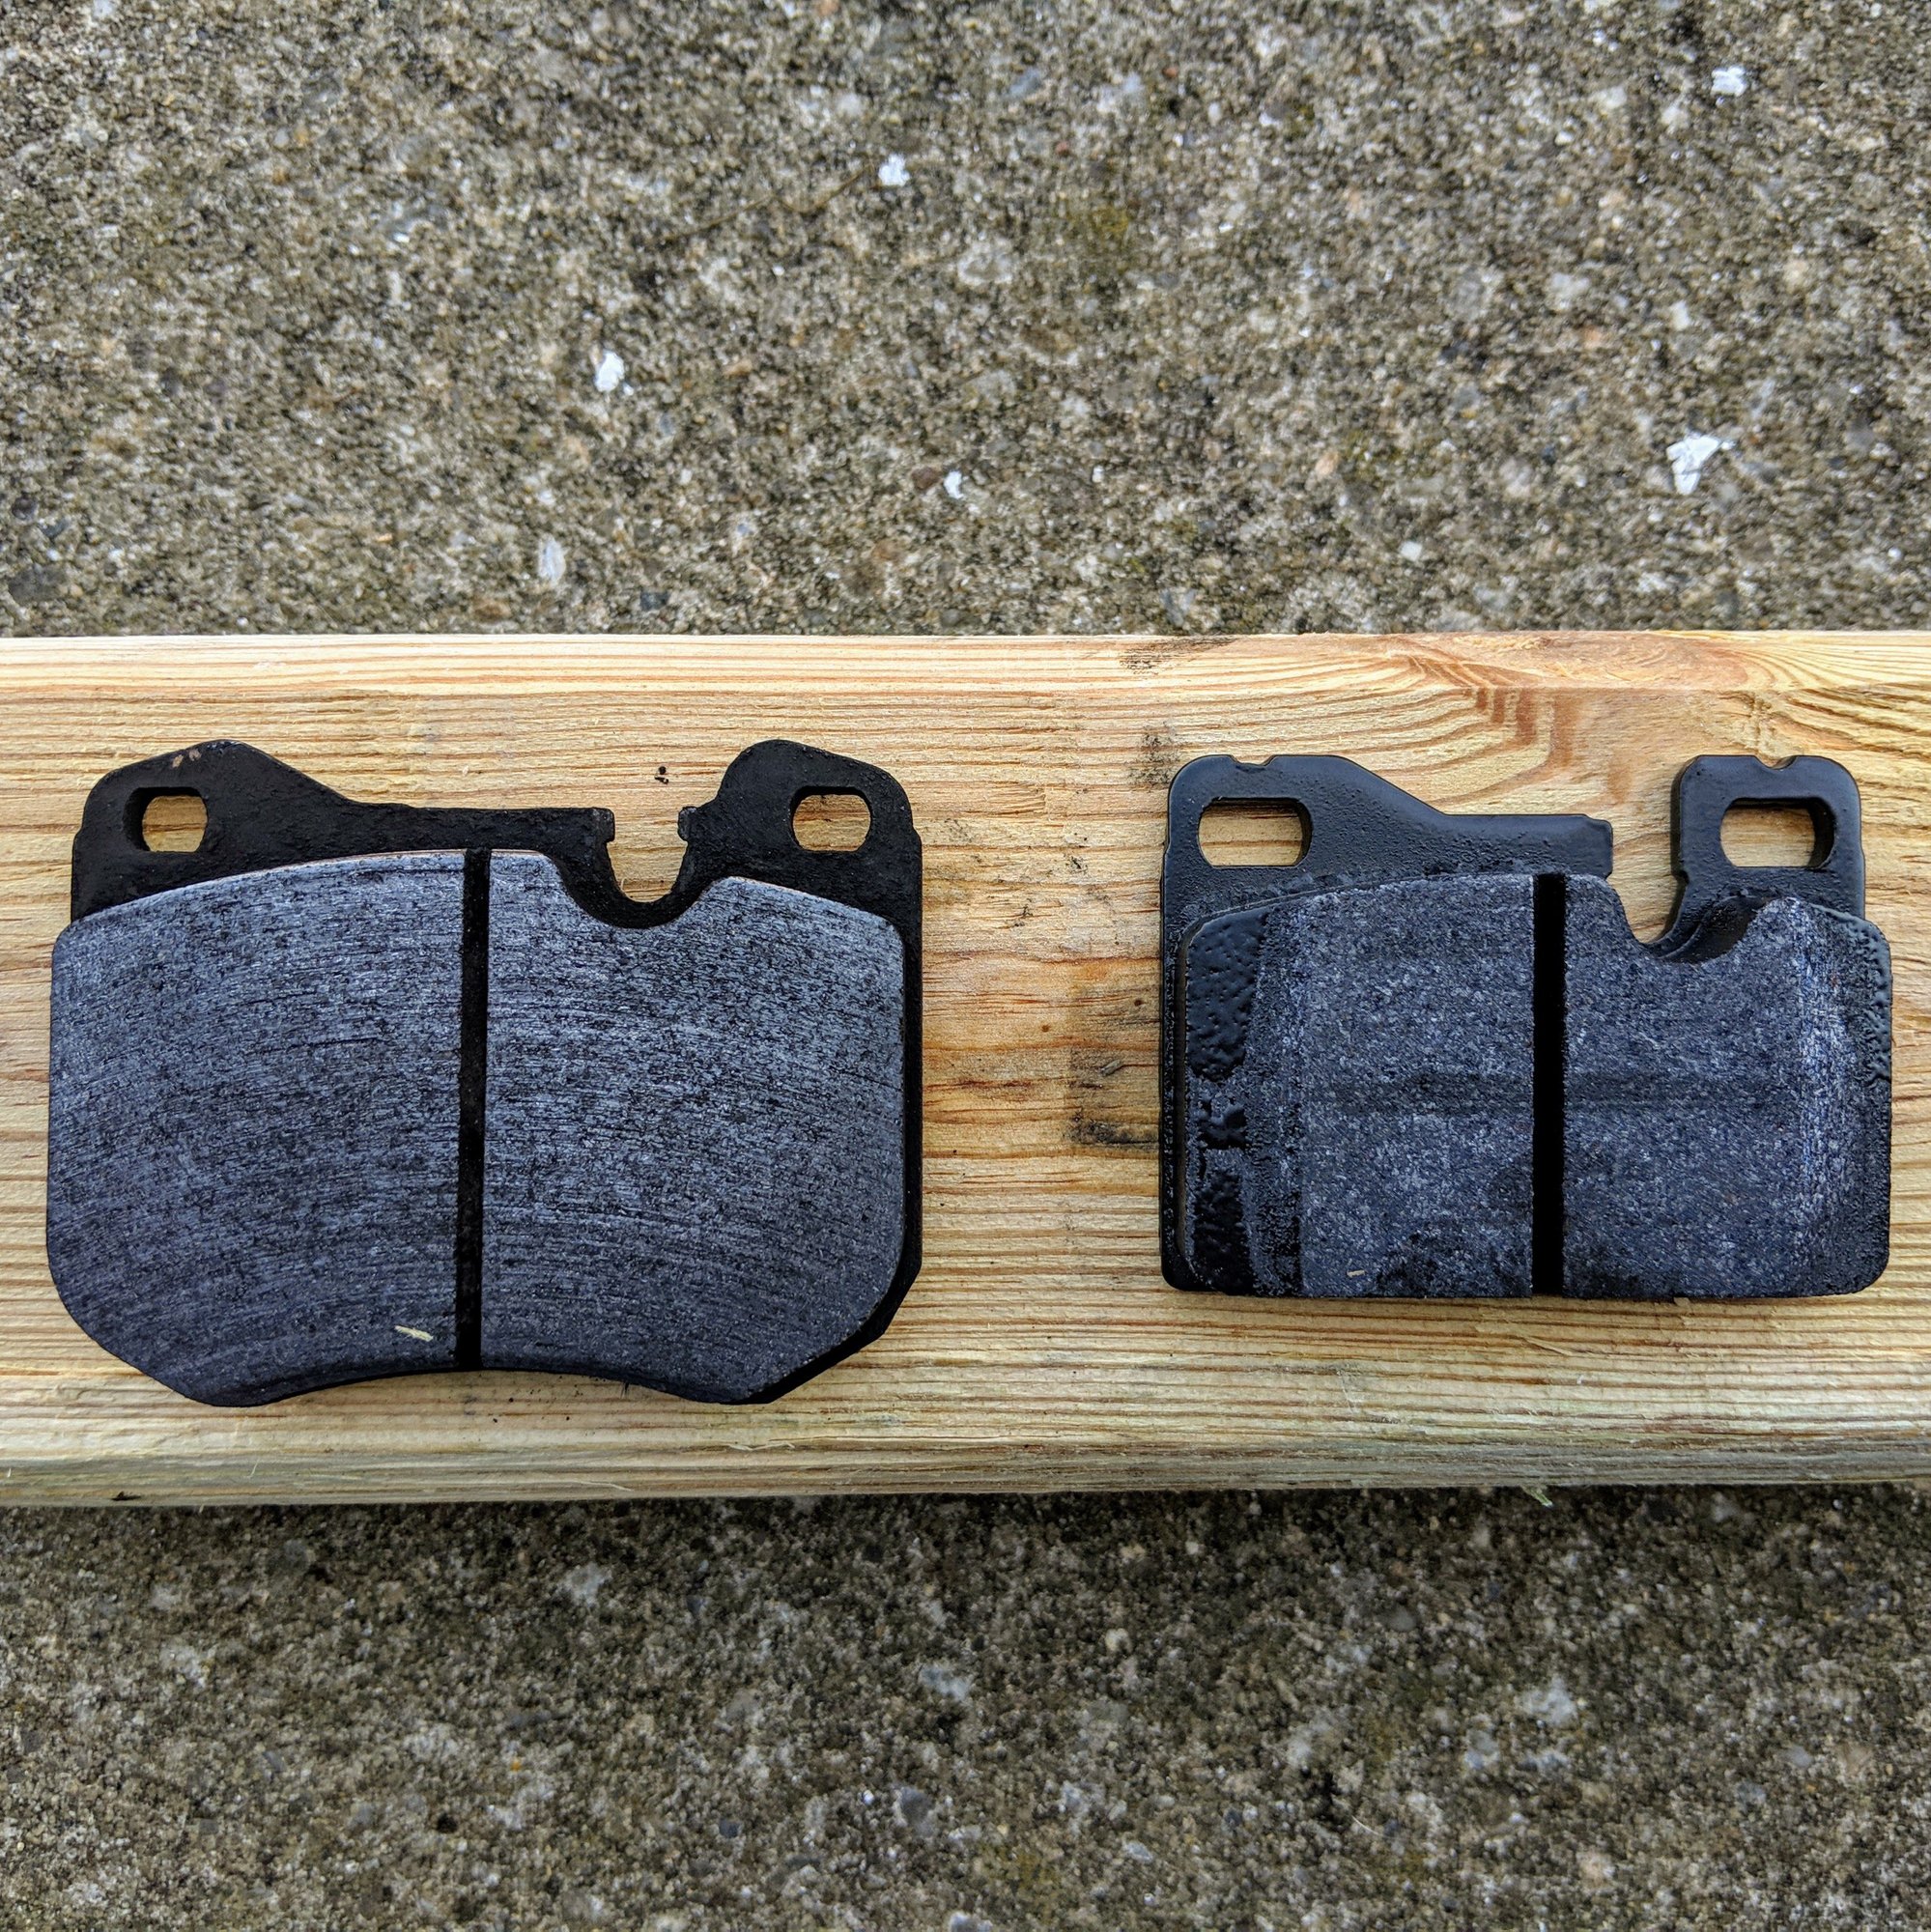
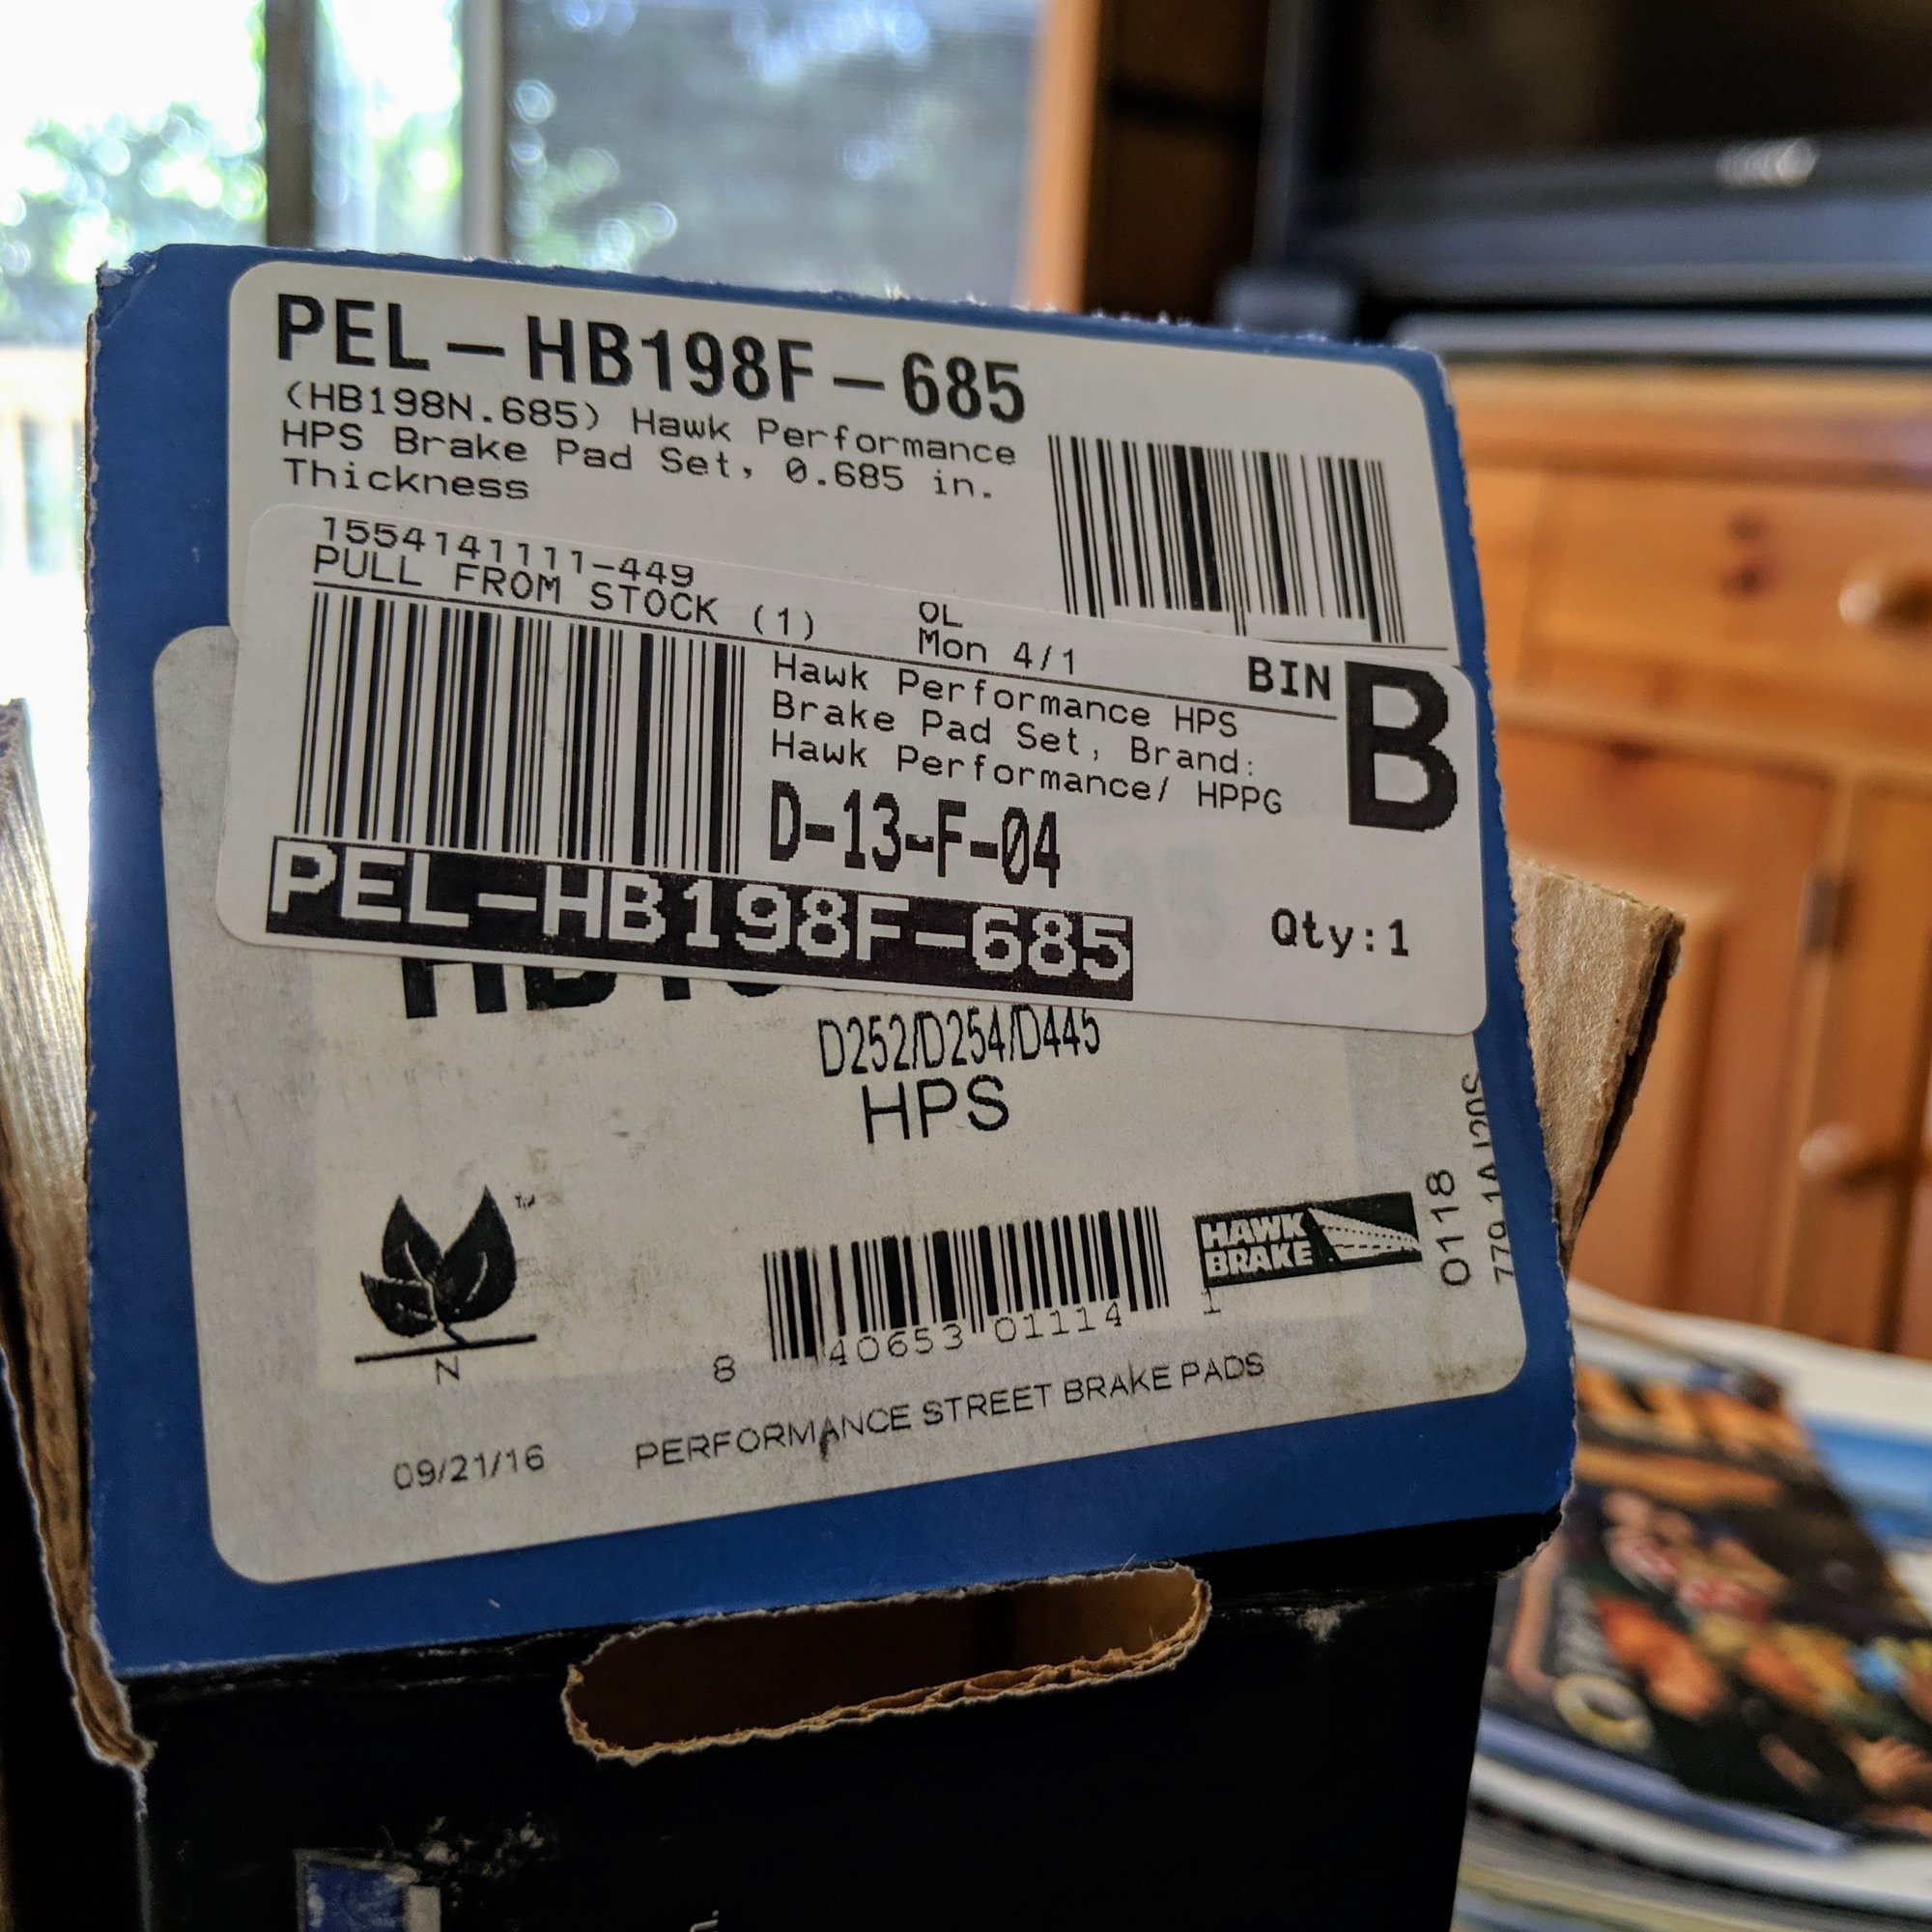
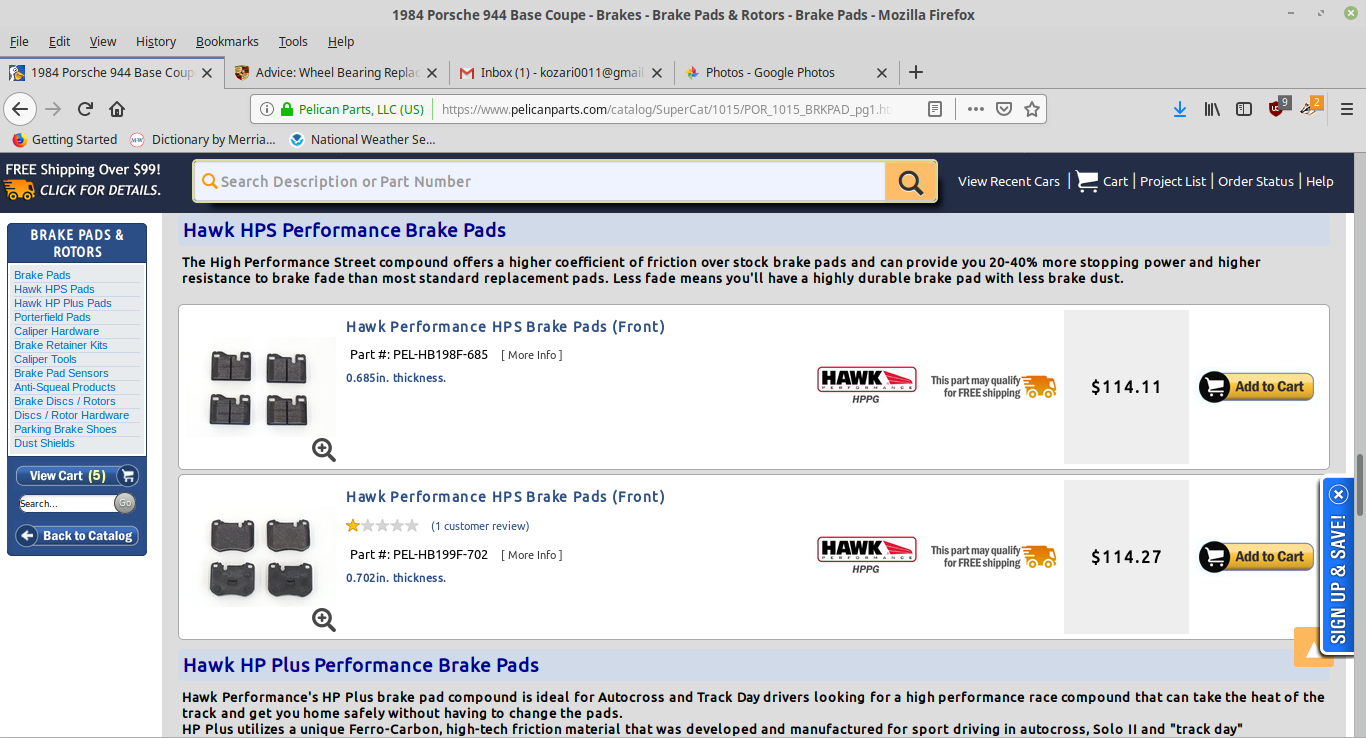
Slightly O.T: As I'm waiting for my wheel hubs to heat up, I started to look at the rotor and pads I purchased. I'm a bit concerned with my pads...
The pads are Hawk Performance HPS; purchased from Pelican Parts. They are significantly smaller than the previous pads that were installed...Are these the right pads???
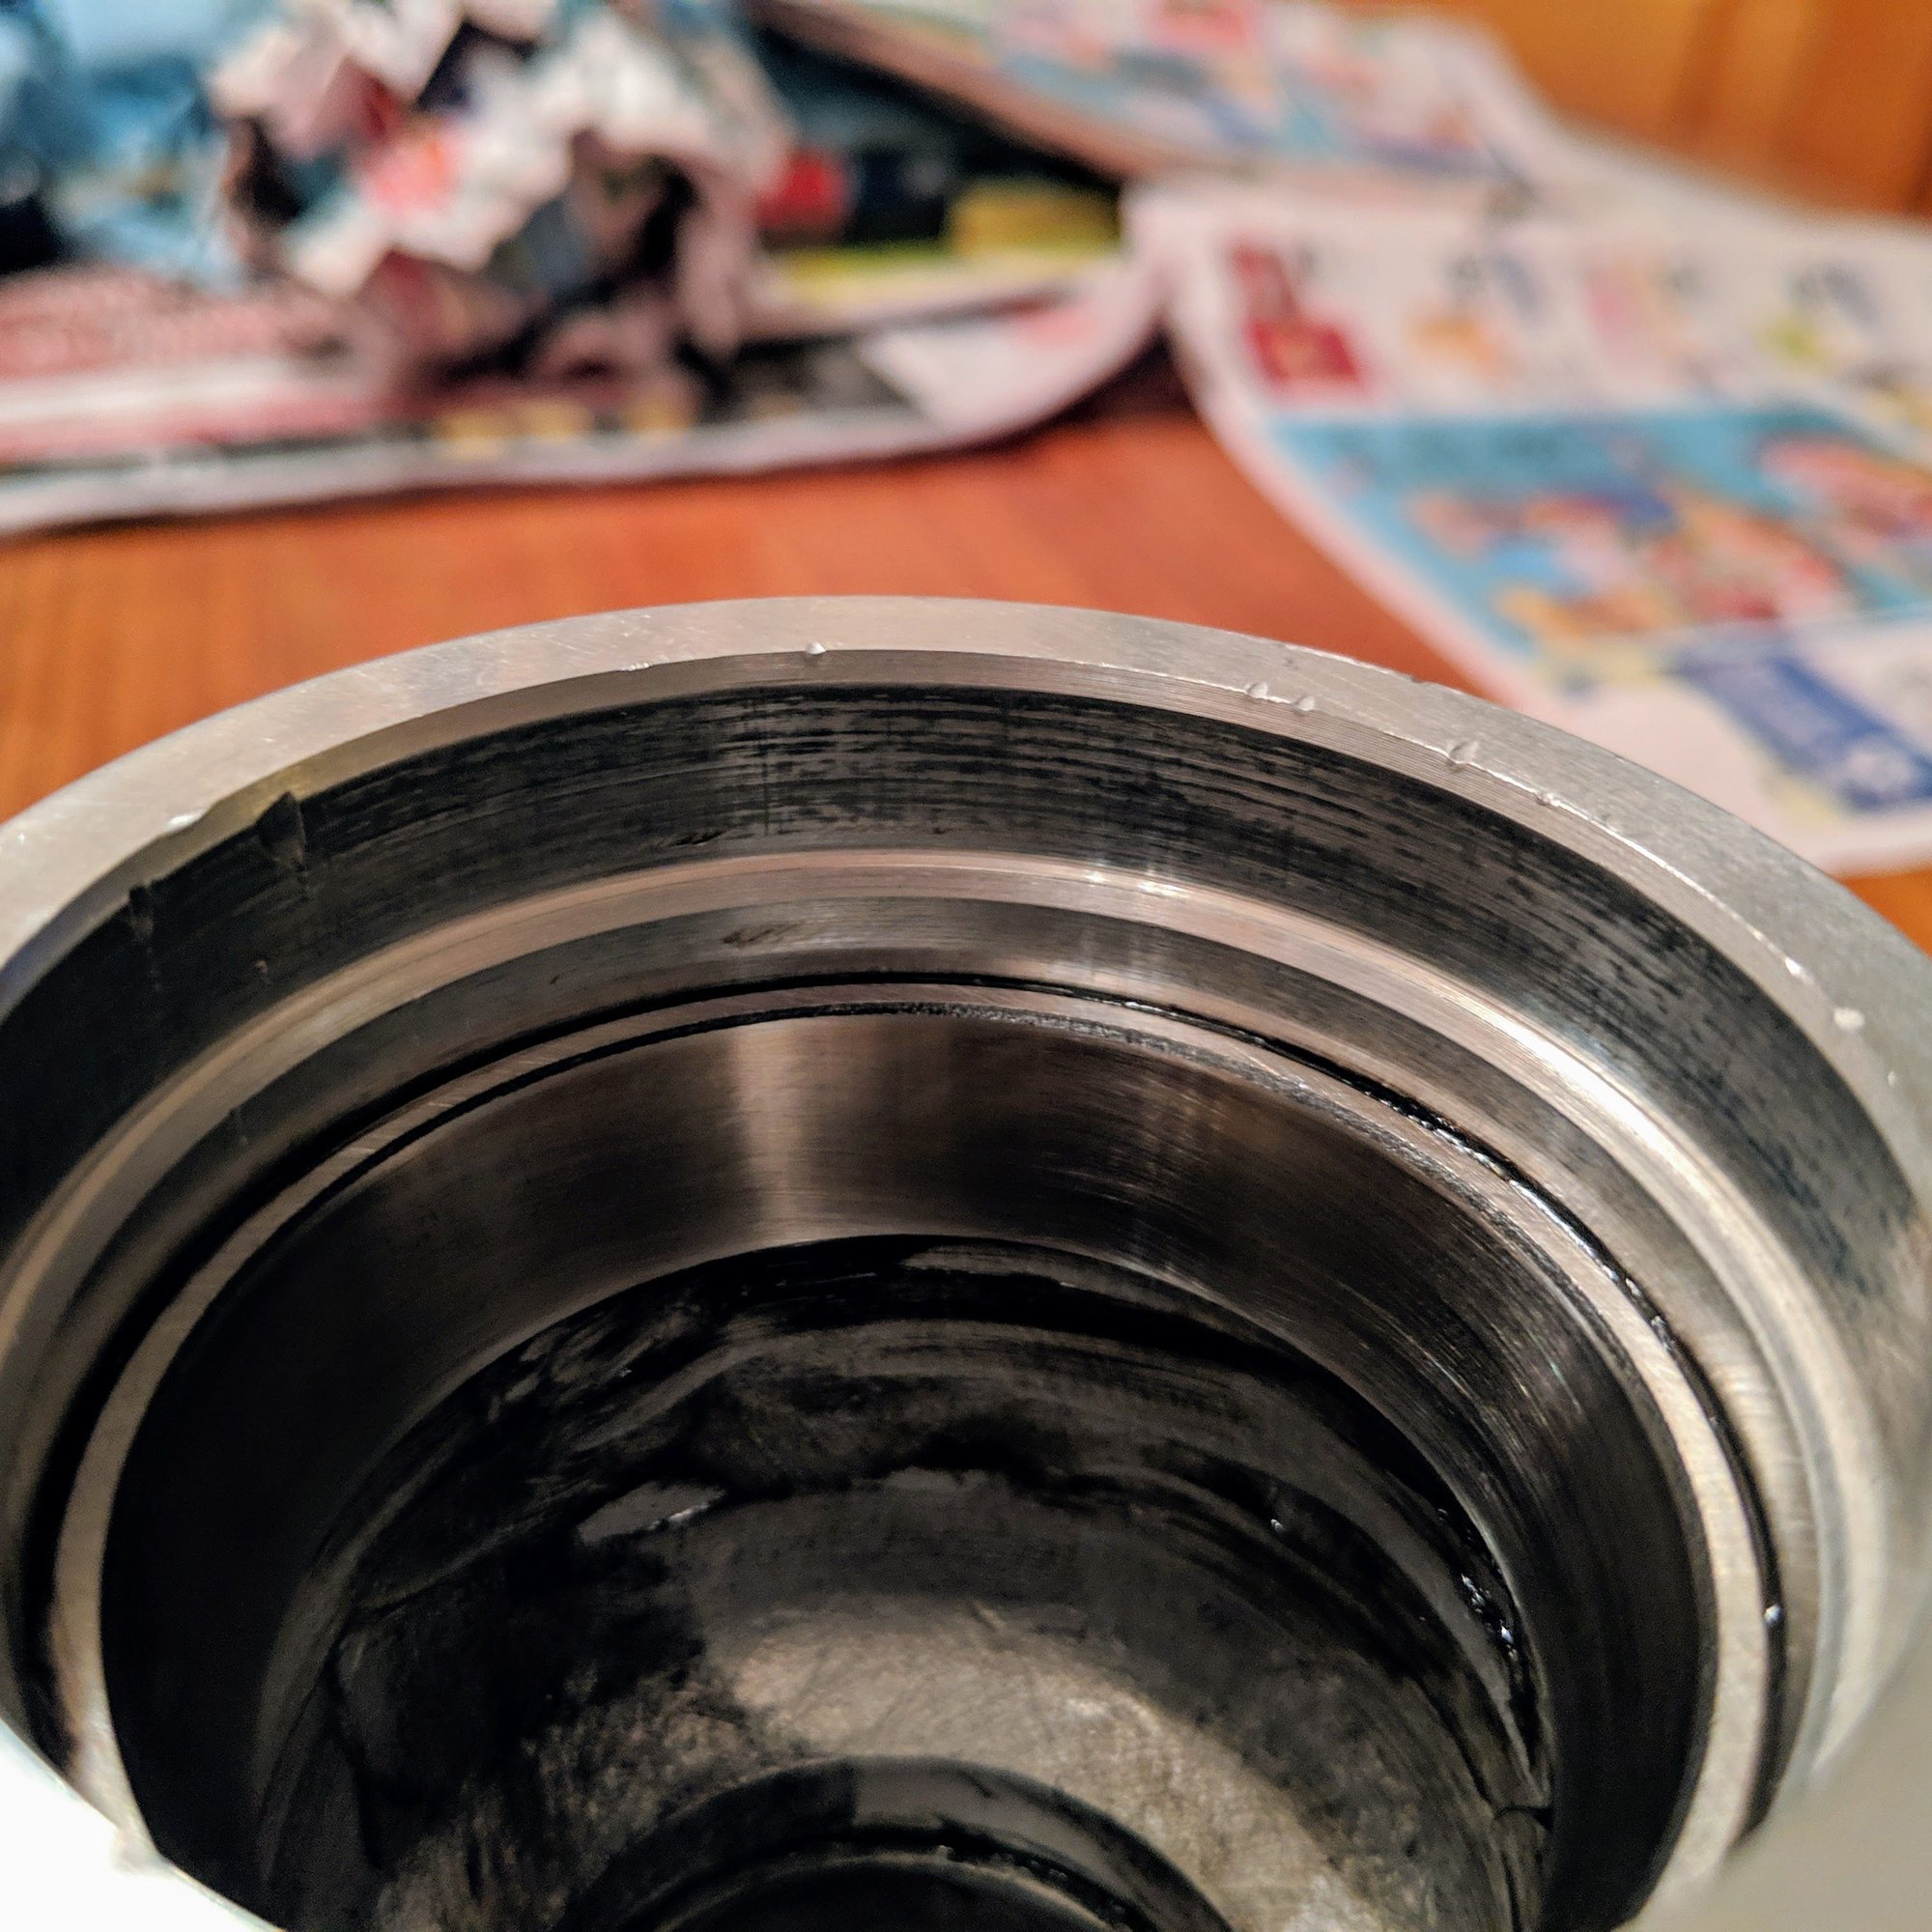
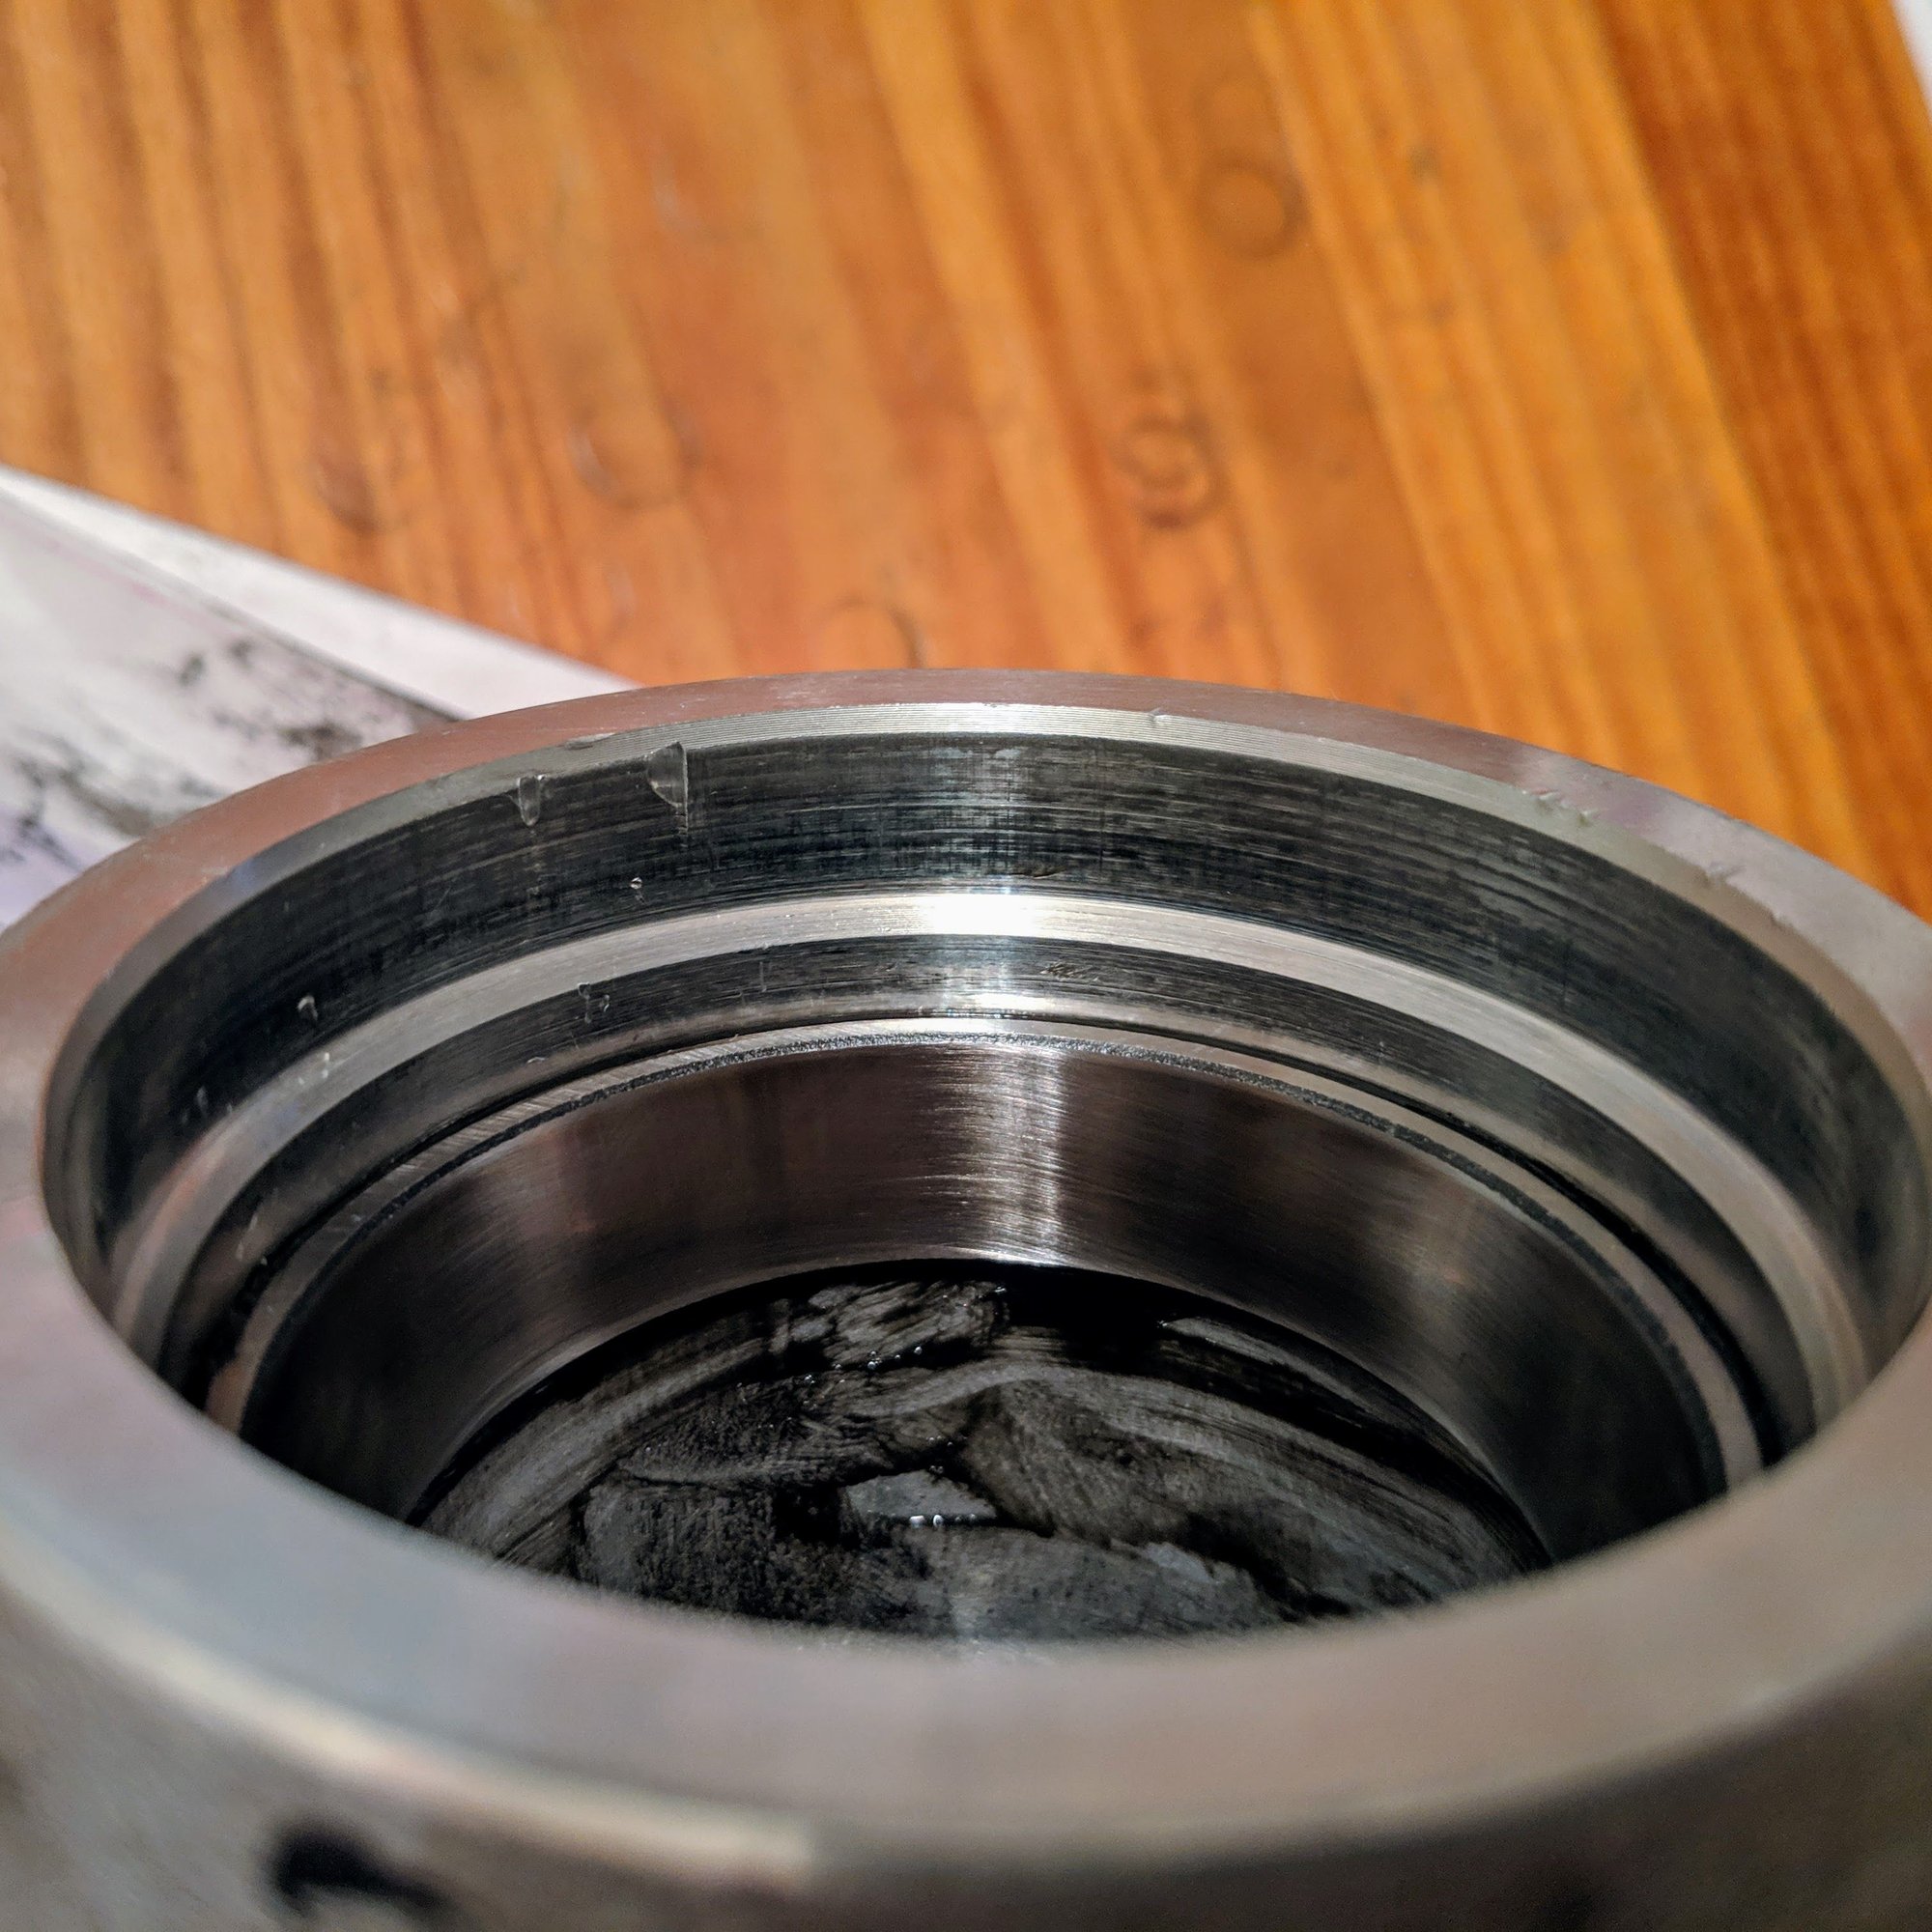
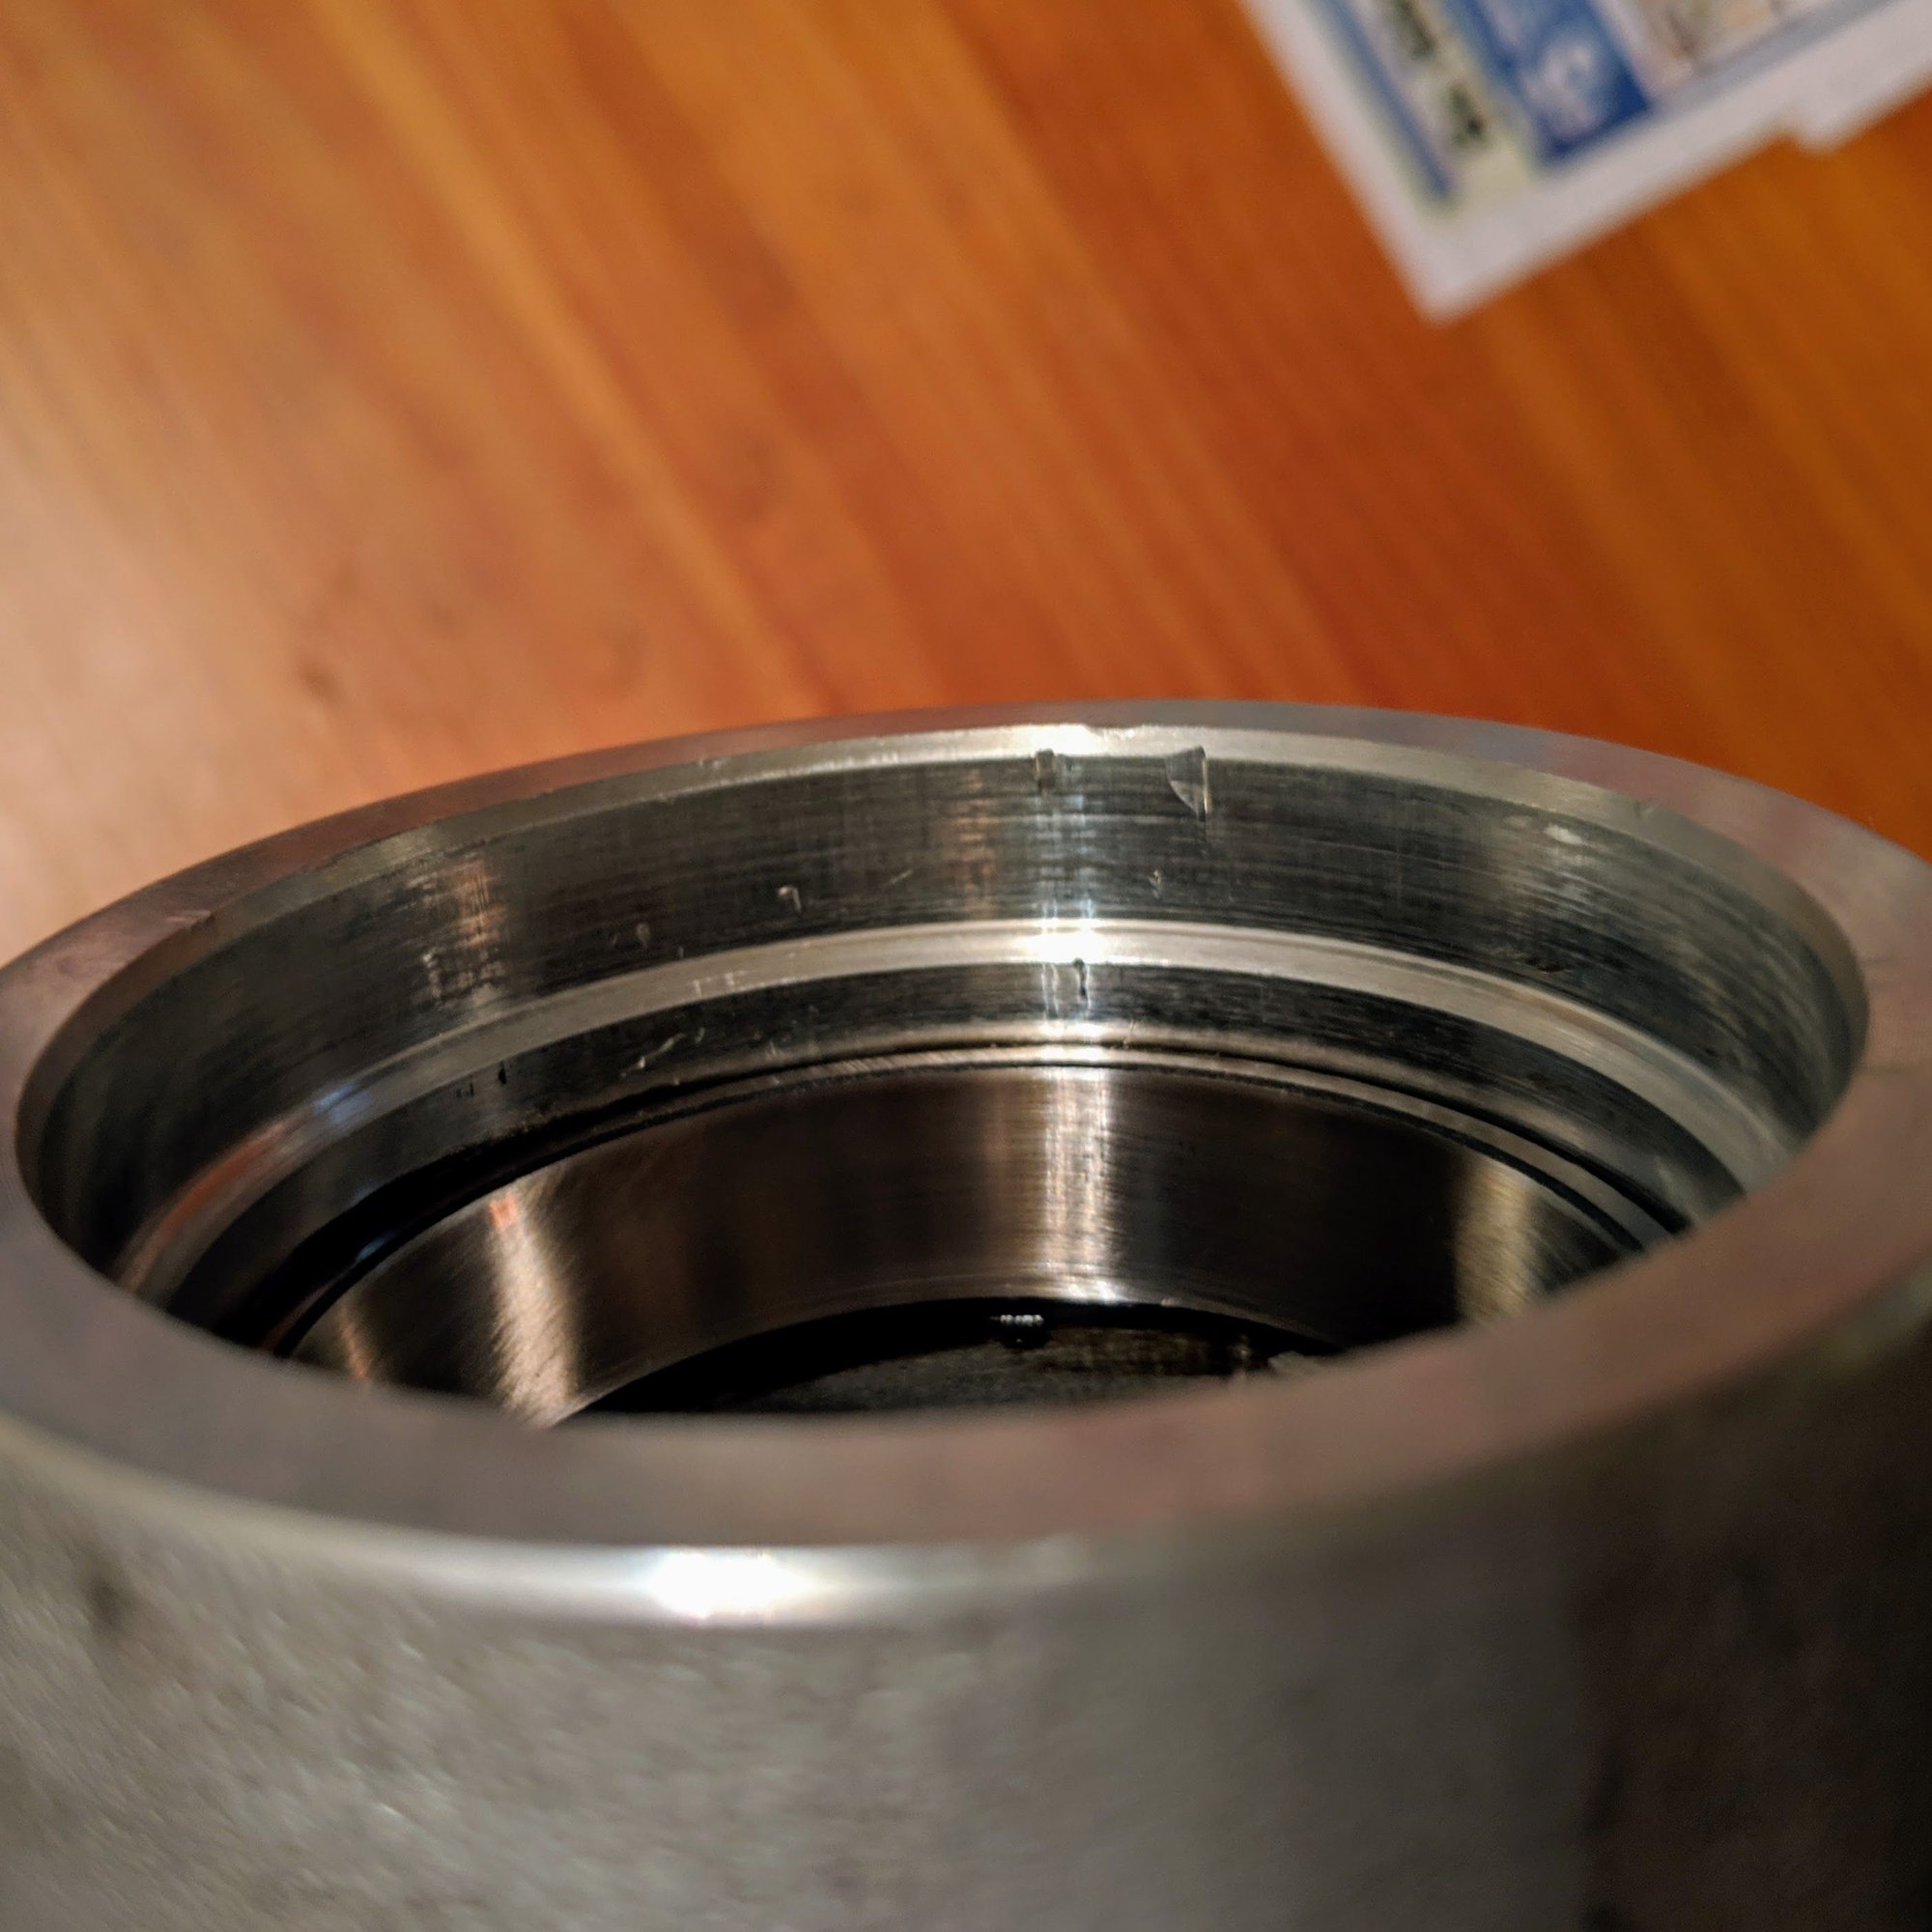
After carefully cleaning the wheel hub, I let it heat up in the oven for 30 minutes at 300 deg. The races were placed in the freezer over night...
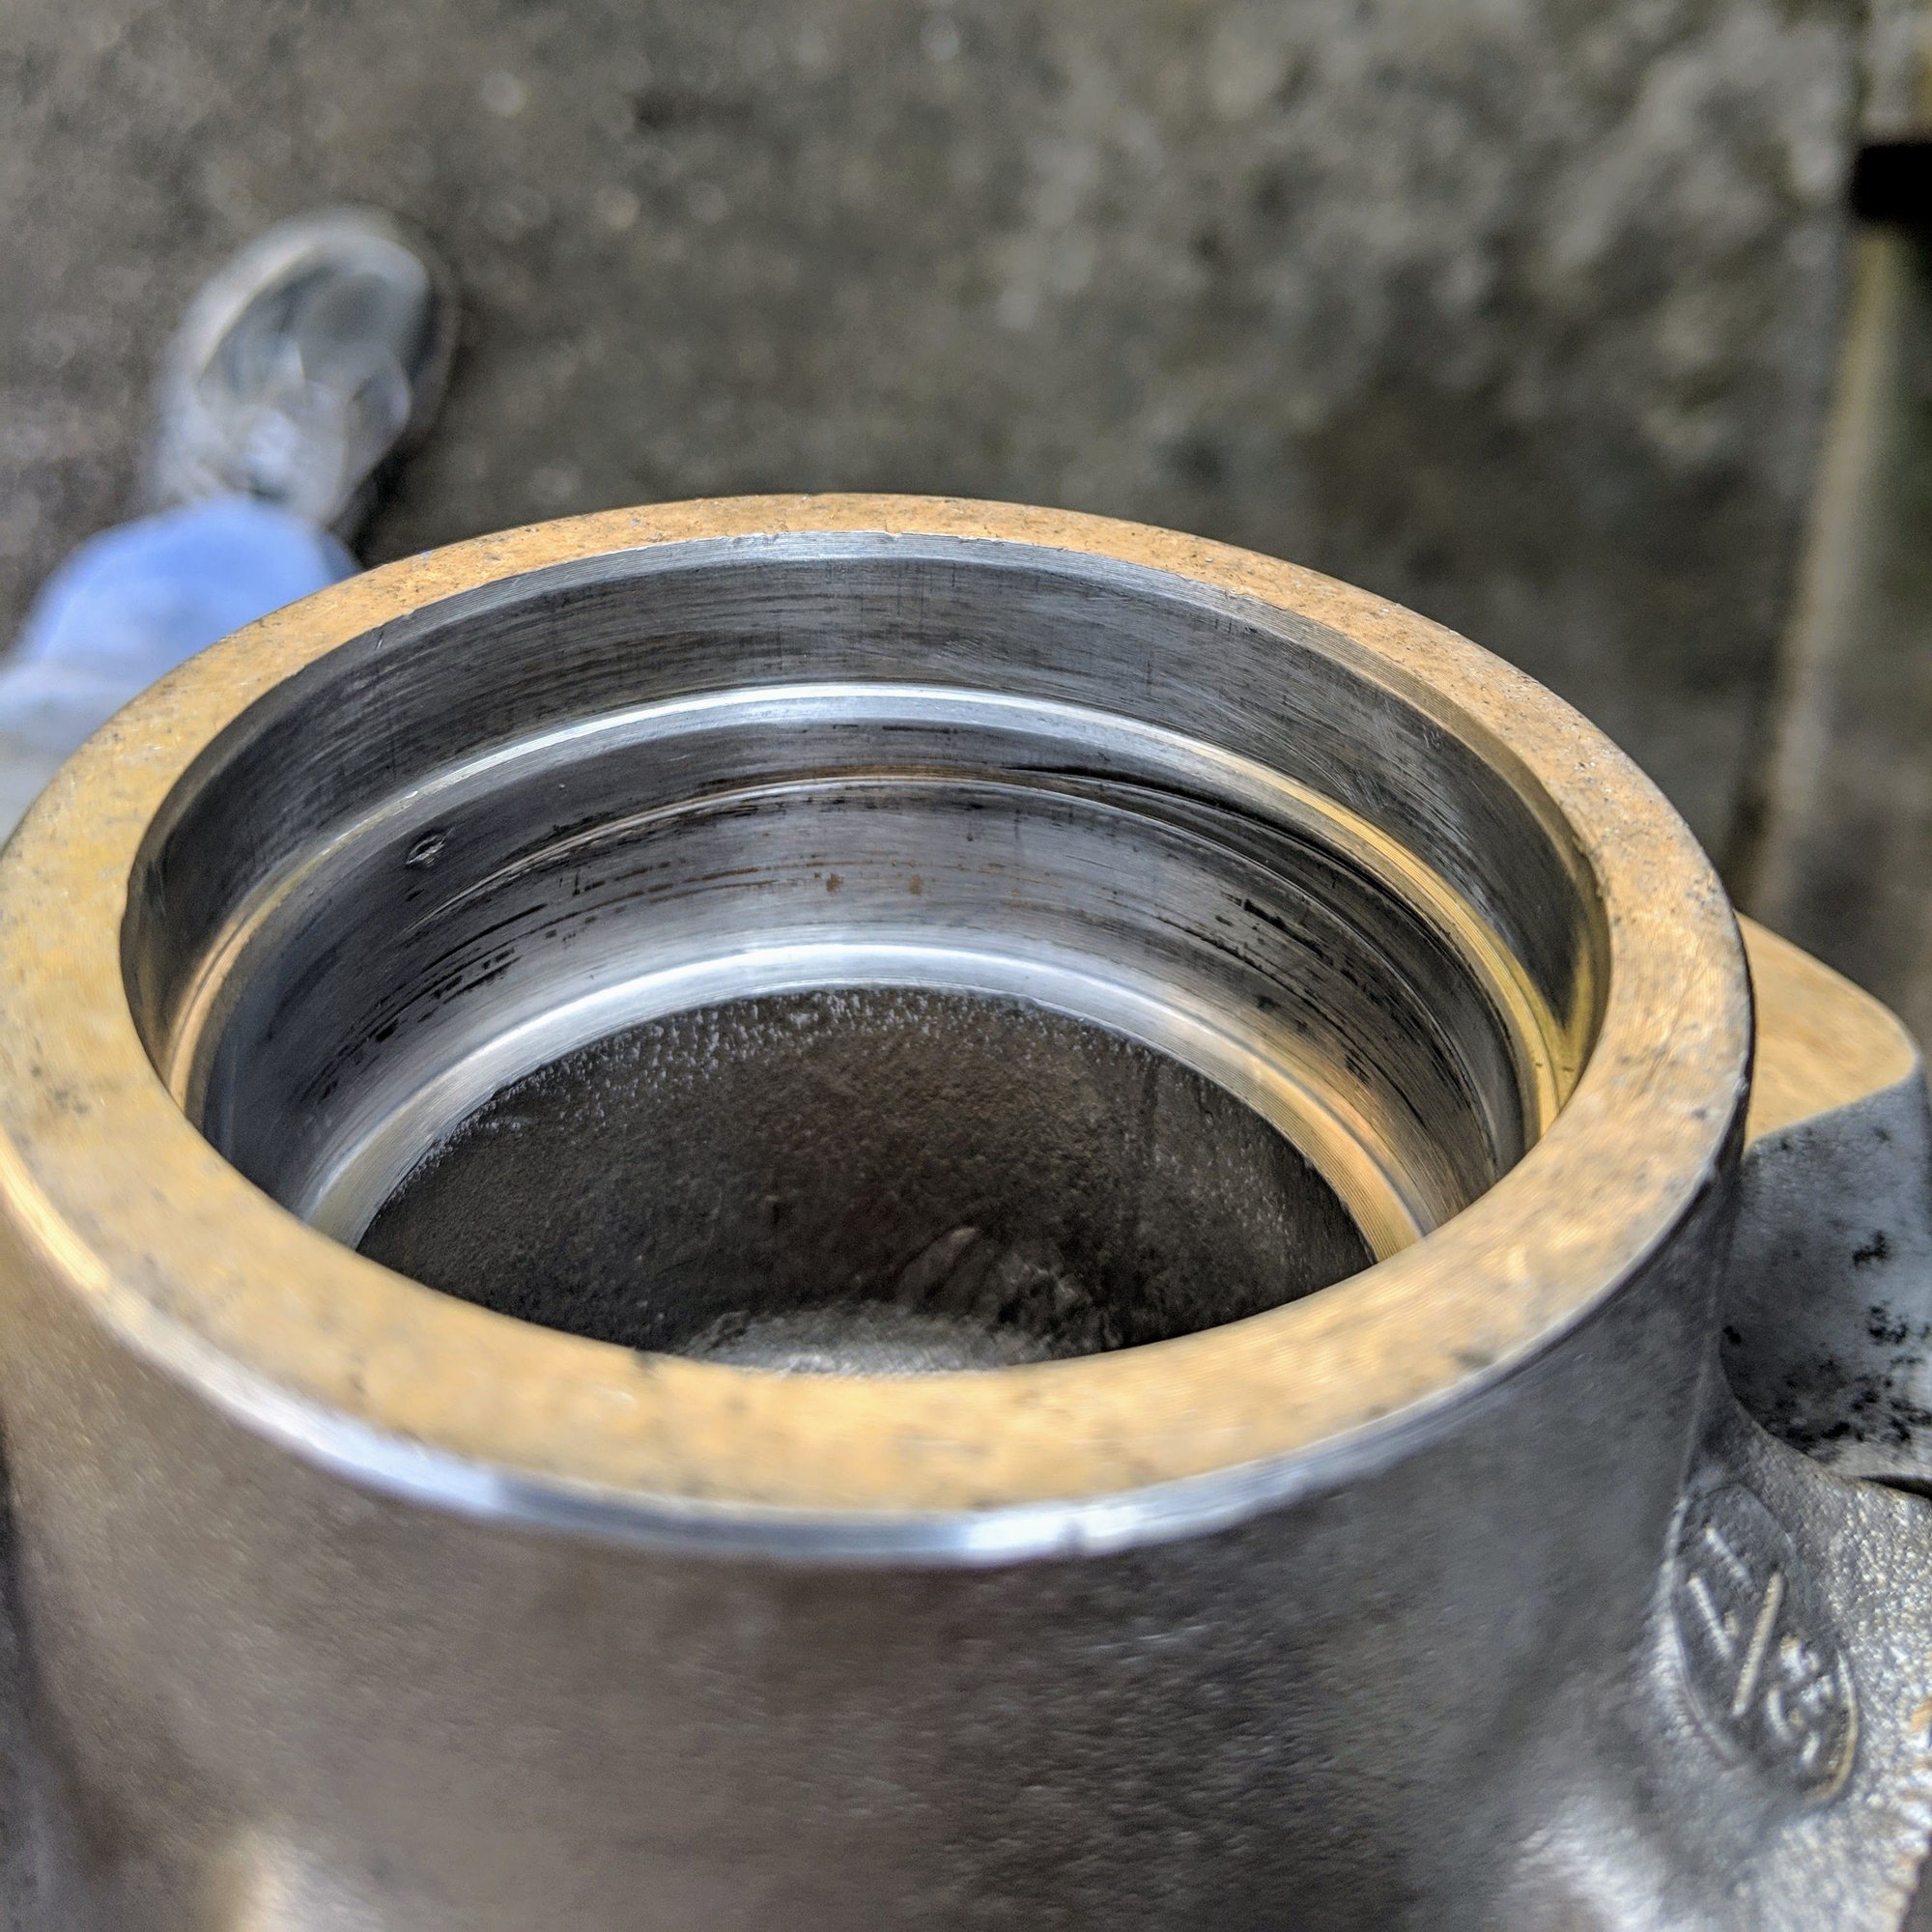
Using a wheel bearing driving kit, I attempted to seat the races but only one side was moving. I decided to punch out the race and noticed the inner lining where to race will sit is now scored...
(I'm really nicking these up)
Is this wheel hub still usable? Should I sand down the score/groove?
...Using a wheel bearing driving kit, I attempted to seat the races but only one side was moving....
Theres no need to use any tool, place the outer race in place and lightly tap with a small hammer and punch following a criss-cross pattern until its fully seated.
As to the scoring, if you sand it out you risk the race spinning after installation, so I�d leave it alone.
bake or broil? lol. I usually go 250F or so but use an infrared pyrometer.
if you have a bench grinder, take your old bearing race and grind just enough off the outer edge until it drops freely into a room temp hub. use this as your driver as it will help keep the race square.
 04-05-2019, 11:22 PM