When you click on links to various merchants on this site and make a purchase, this can result in this site earning a commission. Affiliate programs and affiliations include, but are not limited to, the eBay Partner Network.
The rubber is separating/separated from the metal on the transmission mounts of my '87 924S, I have found several threads on rebuilding the late model mounts using urethane, but nothing for early mounts. I am likely going to give this a try, I had thought my problem was the clutch, so pulled it and found it was OK, but the tranny mounts are not. https://rennlist.com/forums/924-931-...1987-924s.html
Would like to know if anyone else has done this. At about $500 CDN for 2 new mounts I figure it is worth a try. Worst case scenario, I will have to change my DIY mounts for the real thing at some point, which can be done with the transmission in the car.
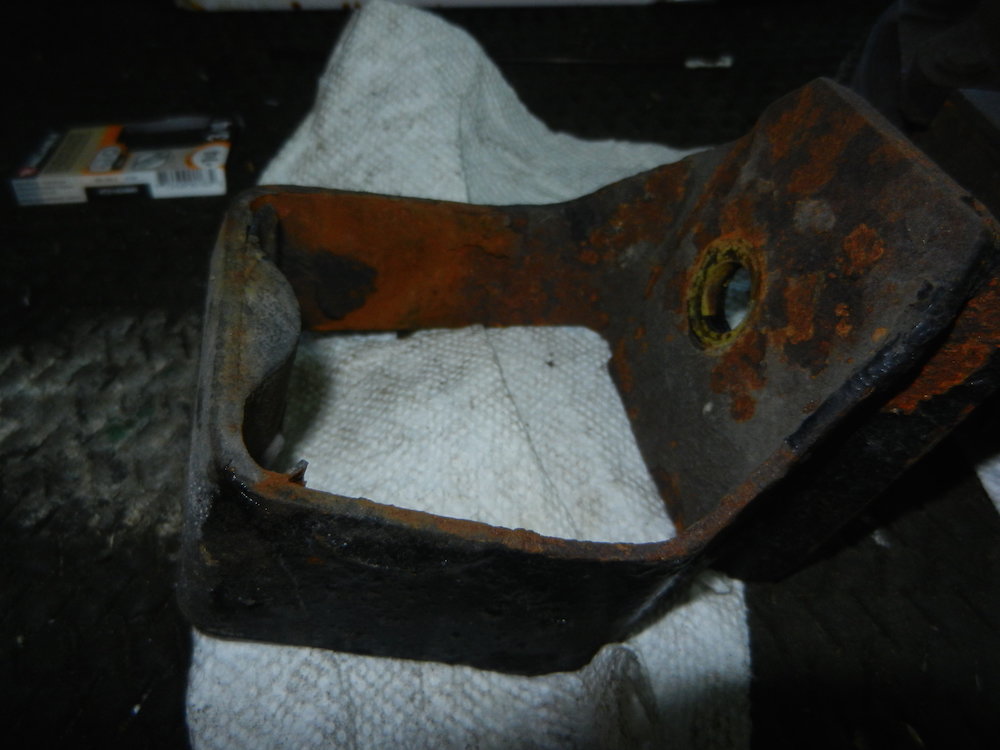
My original plan was to keep the original rubber in the mounts and just fill the empty part to solidify the mounts. On the left side mount the rubber pulled out and there was rust all the way around and the central aluminum block was also corrode so that the rubber separated there too.
I just got rid or the rubber and made a bracket to hold the aluminum block in place. Both the interior of the mount and the exterior of the aluminum were sanded down to give decent surface for the urethane to stick to.
The right hand mount was better so I removed some rubber where it was starting to separate and again cleaned up the surfaces.
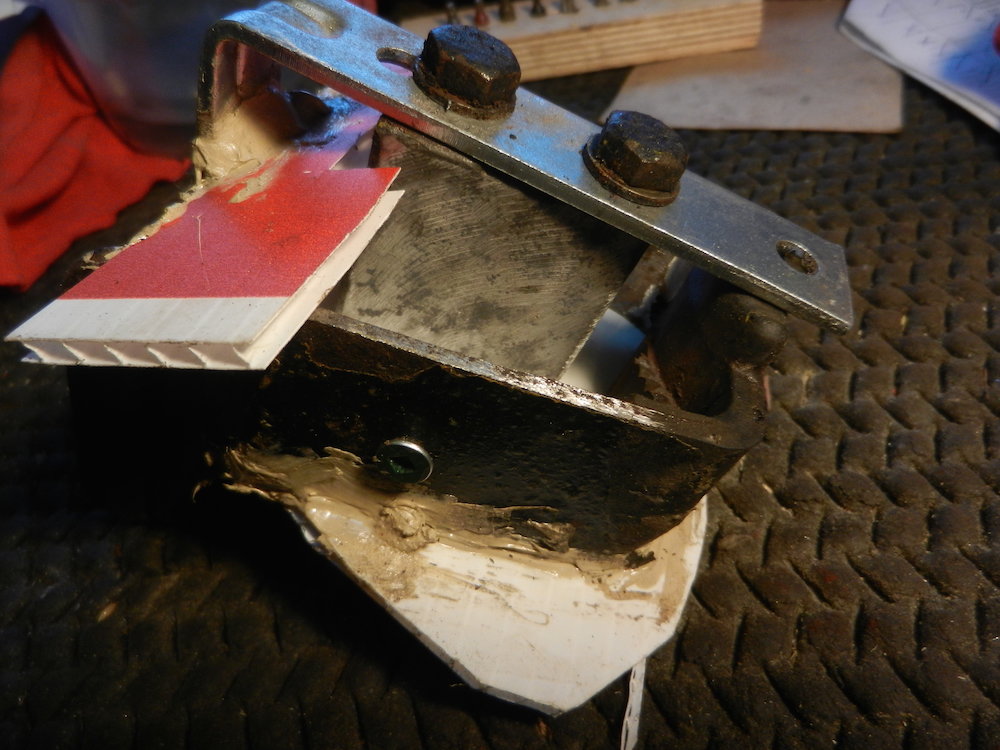
I then added pieces of plastic to seal the bottom and the angled part of the top to contain the urethane pour. The corrugated plastic was not a good idea as liquid can get into the corrugations and leak out. I spent too much time fiddling around with sealing it.
Here are the mounts ready for the pour.
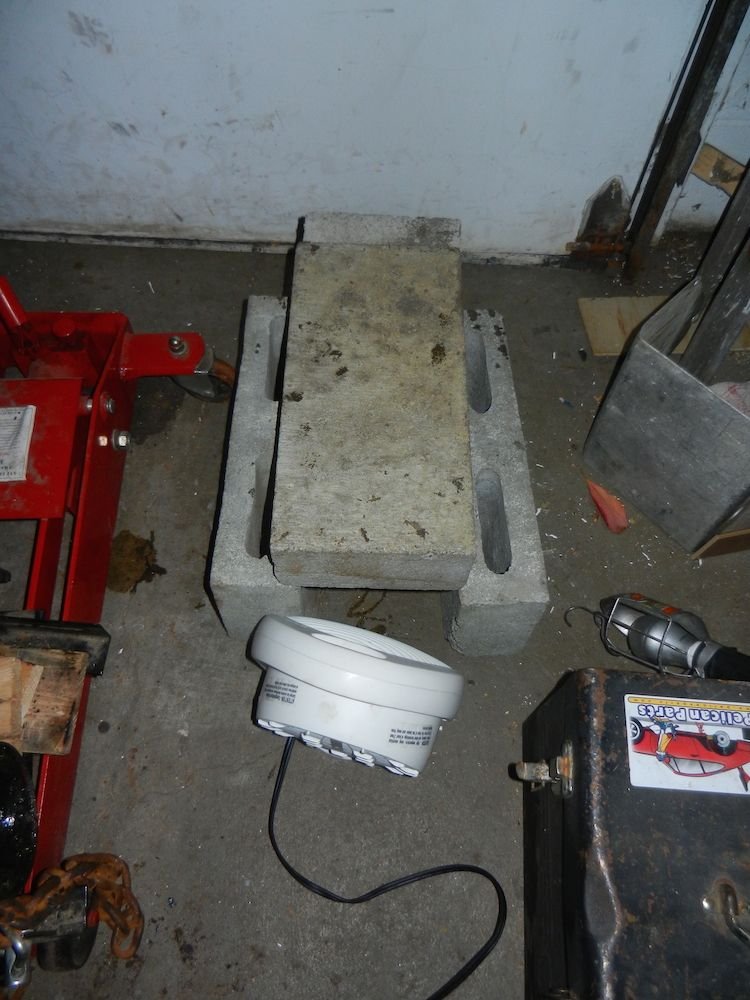
My next problem was that my garage is unheated and the urethane needs about 23 degrees C (73 F) to cure. After much thought I made an "oven" from cement blocks with an electric heater blowing in one end. It gave me exactly the right temperature after a bit of fiddling with the positioning of the heater.
The mounts are currently in the oven about half way through the 48 hour curing period.
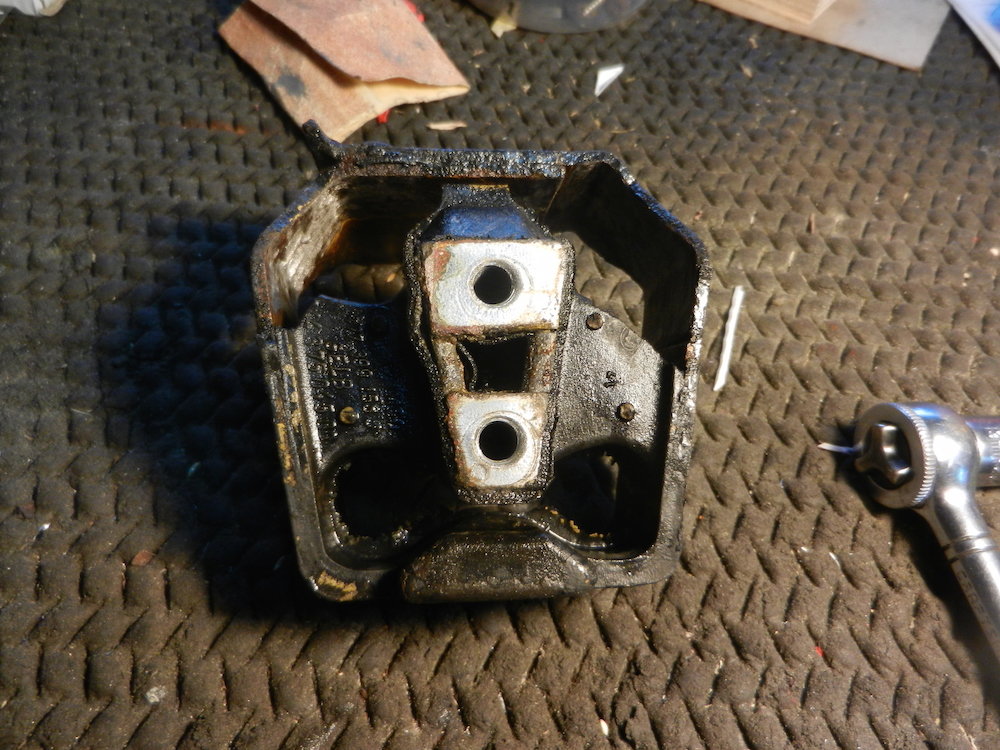
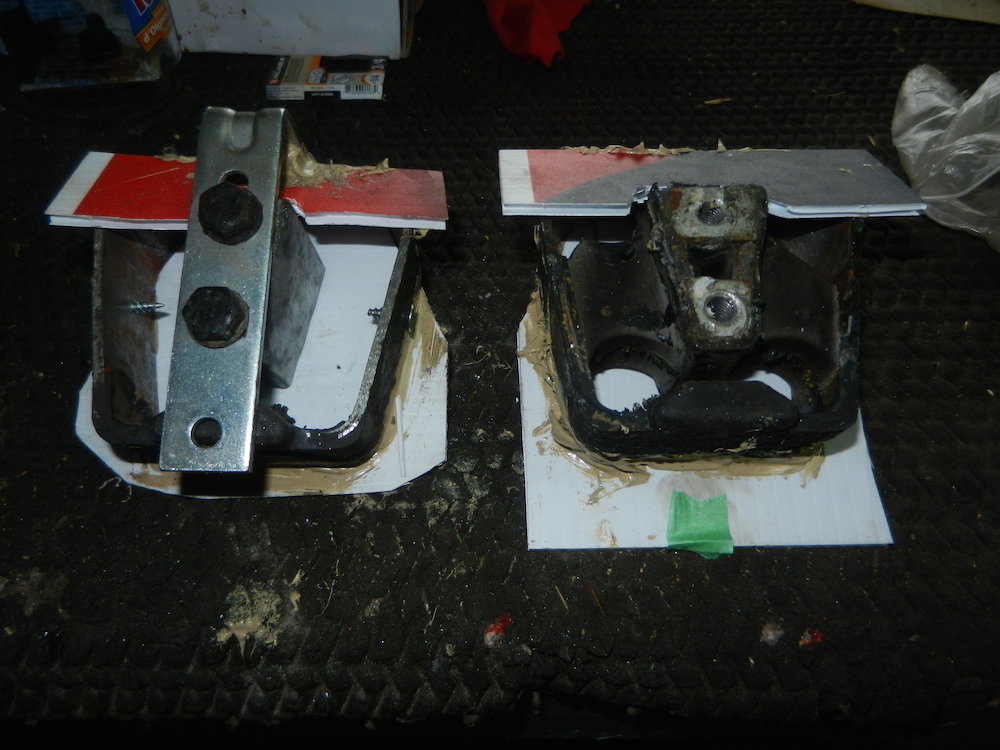
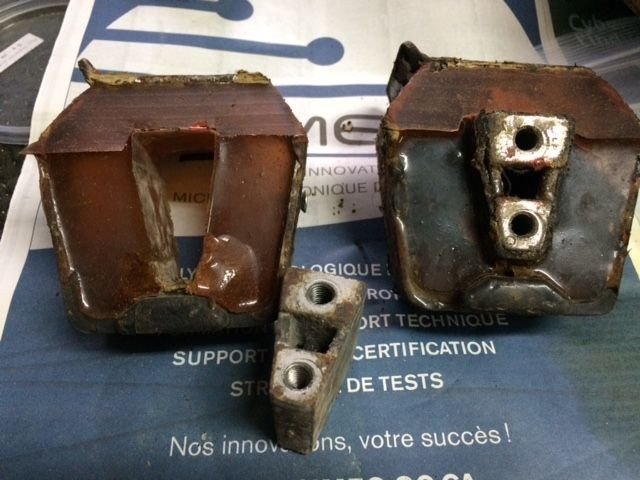
My drive train started shaking again... so I removed the rebuilt mounts and this is what I found...
While the one on the right is OK the central part of the one on the left did not bond to urethane and so the transmission was banging around. I don't know if the failure was because of the urethane I used or improper preparation. I have since installed used OEM mounts.
On the piece that came out (apologies if this is completely ignorant, I only have experience with my S2), could you cross drill those in some way that wouldn't interfere with the mounting bolts, to form a physical "bond" with the poured urethane? I know you've already ordered OEM replacements but perhaps people that go this route in the future could take advantage of your insight.
It seems to me that if you made a hole into that central, trapezoidal area where the urethane could flow into (ideally from both sides), you'd avoid having to rely solely on the chemical adhesion of the urethane to the metal.
yeah, maybe a screw sticking out each side (unsure if coarse or fine thread would be better for surface area/strength here?) would give better "attachment".
I'm just about to do this so I'm glad this thread popped up!
I'll definitely try and figure out a way to add some screws or pins or something to help hold it in place. I was also thinking of drilling holes through the poly in the corners of the mount after it cures to give it room to flex similar to how the factory rubber is shaped.
Also, what hardness was the poly that was used? I was planning on using 80 durometer from McMaster but they also offer 60. I think 60 would be closer to the durometer of the rubber and I was hoping to gain a little more stiffness.
No affiliation with them, but they have all kinds of hardnesses available, should you want to go even harder than what McMaster offers. I, personally, went softer with a 50A as I figured that would be stiffer than the air which I was "replacing".
Last edited by Zirconocene; 06-06-2019 at 02:10 PM.
Reason: added link
HMMM..Sounds like it might be time for a CNC machine and an STL file and just go solid all the way around. I do like the idea of the urethane though. Any engineering types out there who can do an STL file for each mount? Or something better, perhaps?
I'm just about to do this so I'm glad this thread popped up!
I'll definitely try and figure out a way to add some screws or pins or something to help hold it in place. I was also thinking of drilling holes through the poly in the corners of the mount after it cures to give it room to flex similar to how the factory rubber is shaped.
Also, what hardness was the poly that was used? I was planning on using 80 durometer from McMaster but they also offer 60. I think 60 would be closer to the durometer of the rubber and I was hoping to gain a little more stiffness.
I used 80. The challenge is the adherence to the metal, especially the aluminum in the center element where the urethane seemed to have no interest in sticking. Is there a product that aids adherence? Are other brands of urethane superior? Lots of ideas have been put forward here, I am curious as to how others attack this challenge.
 10-25-2018, 10:20 AM